All posts in "hobby"
Wound and Void Shield Counters for Legions Imperialis
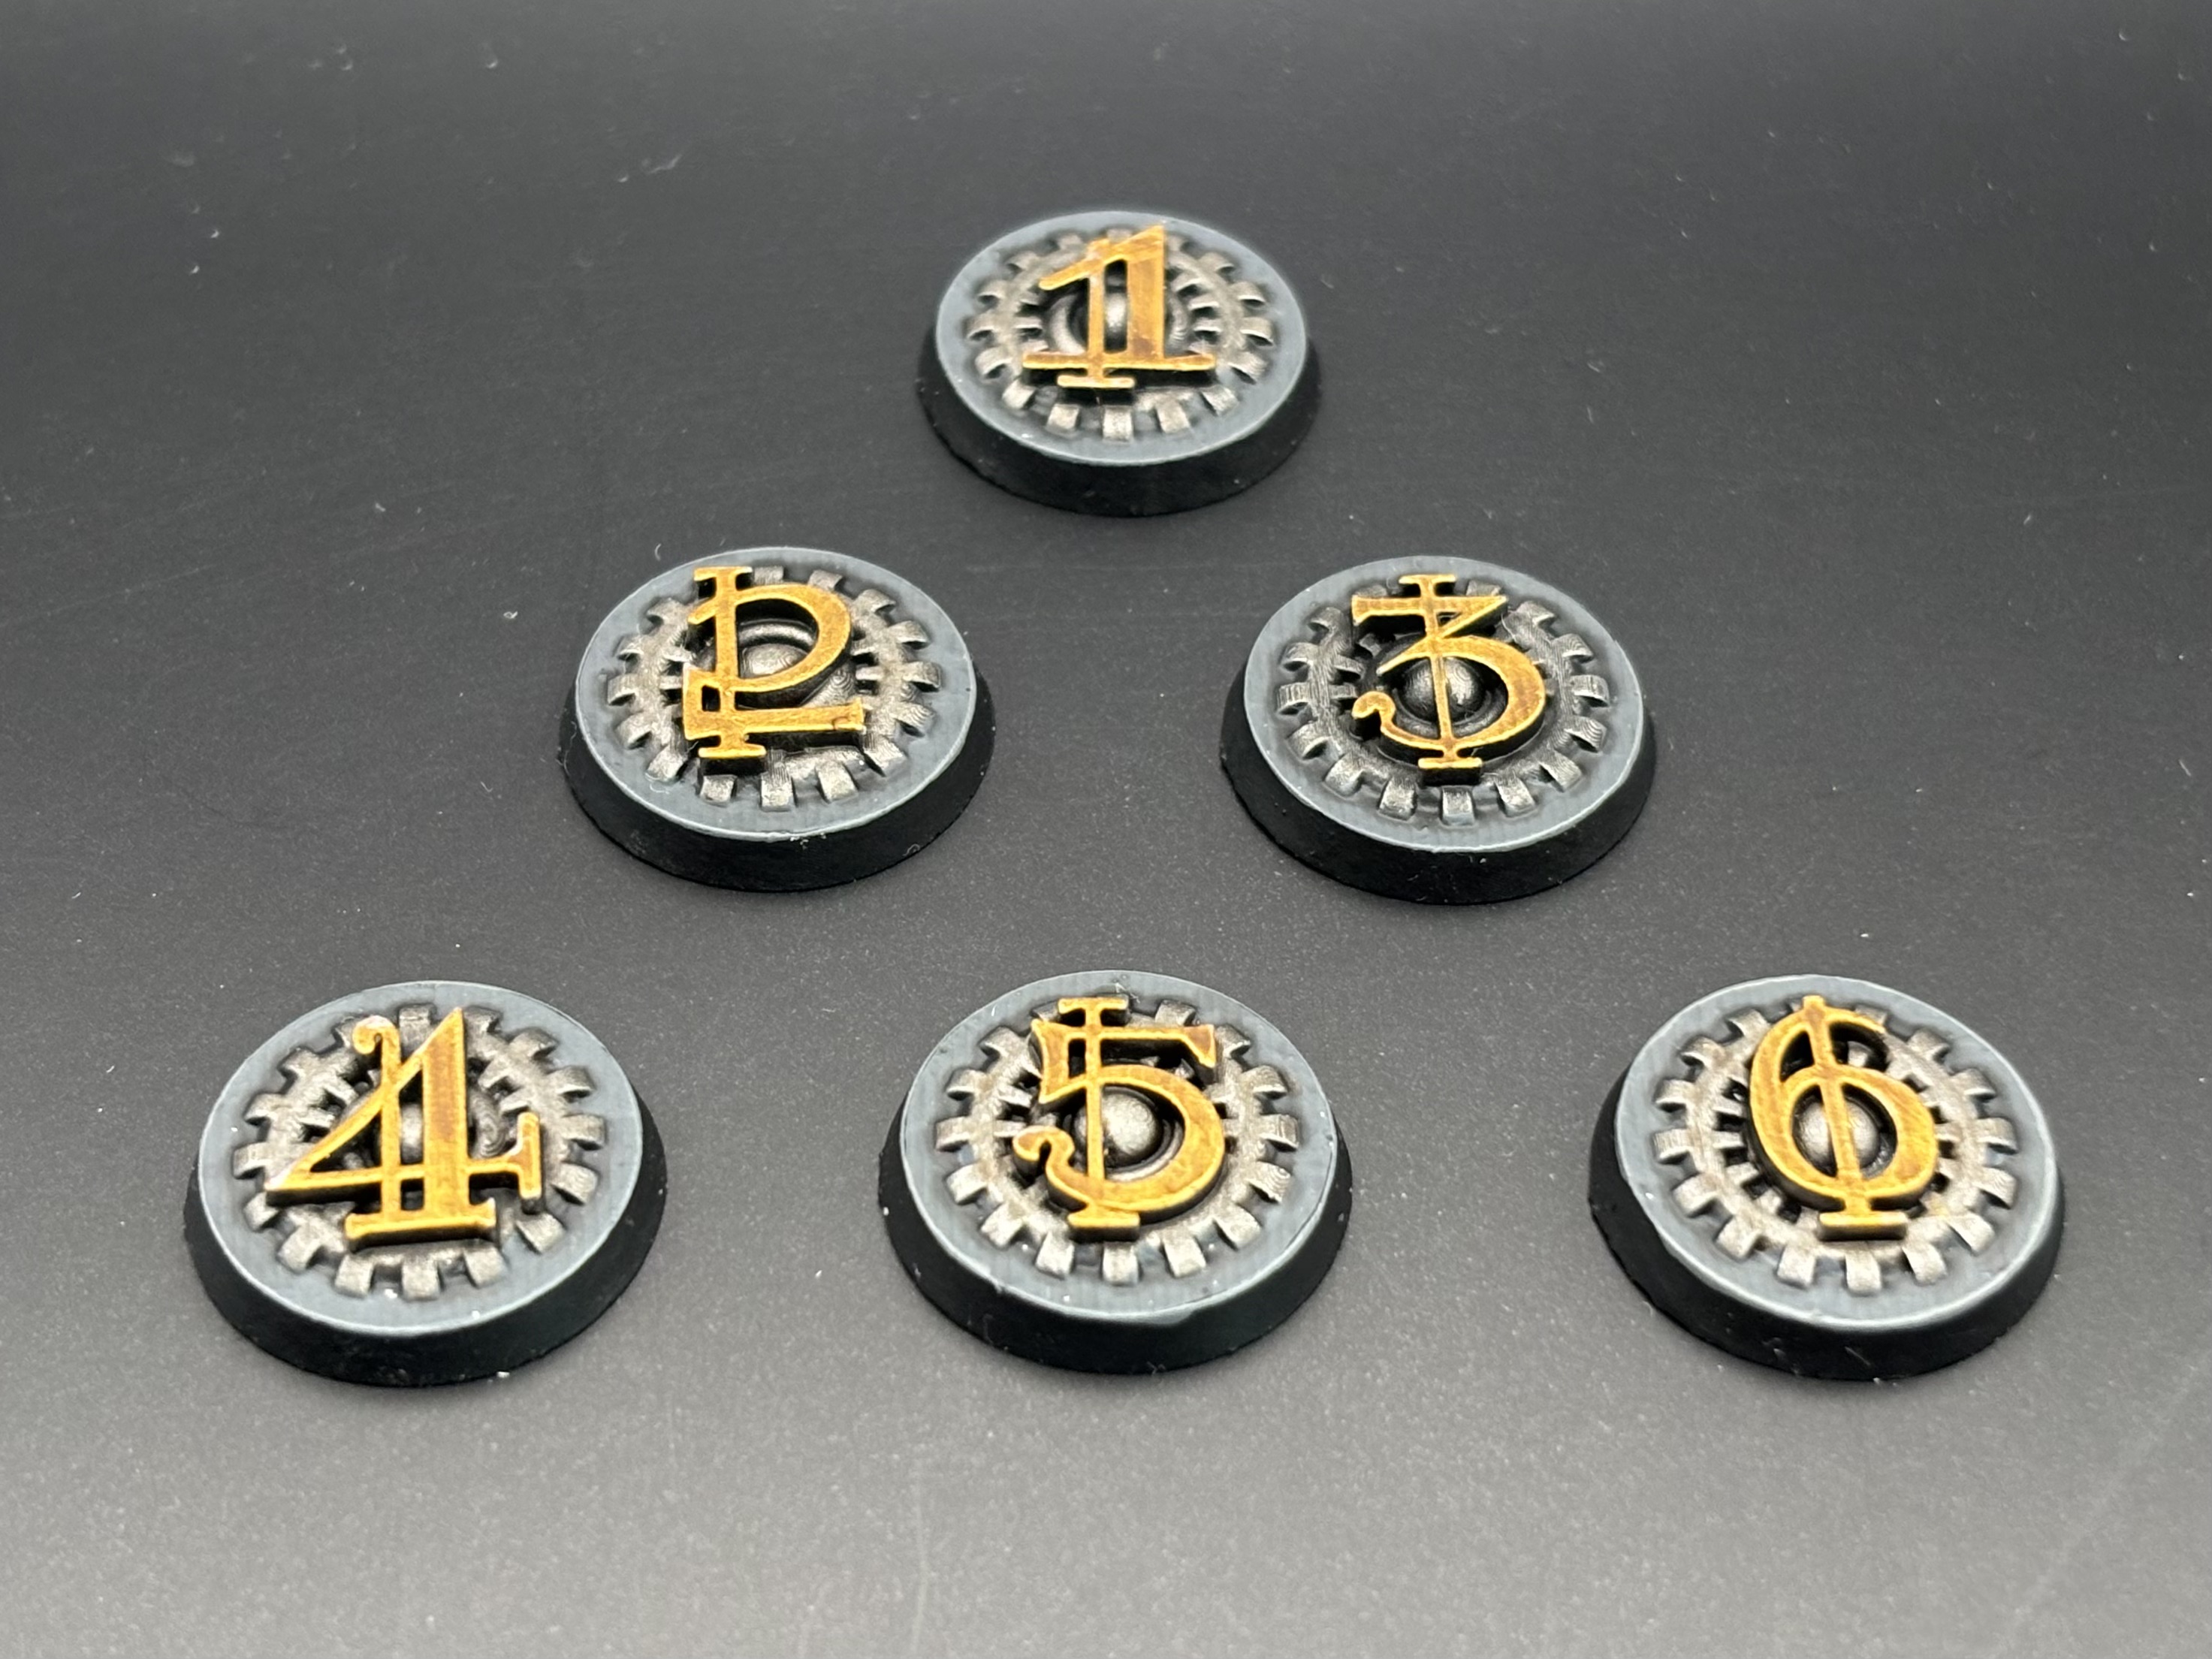
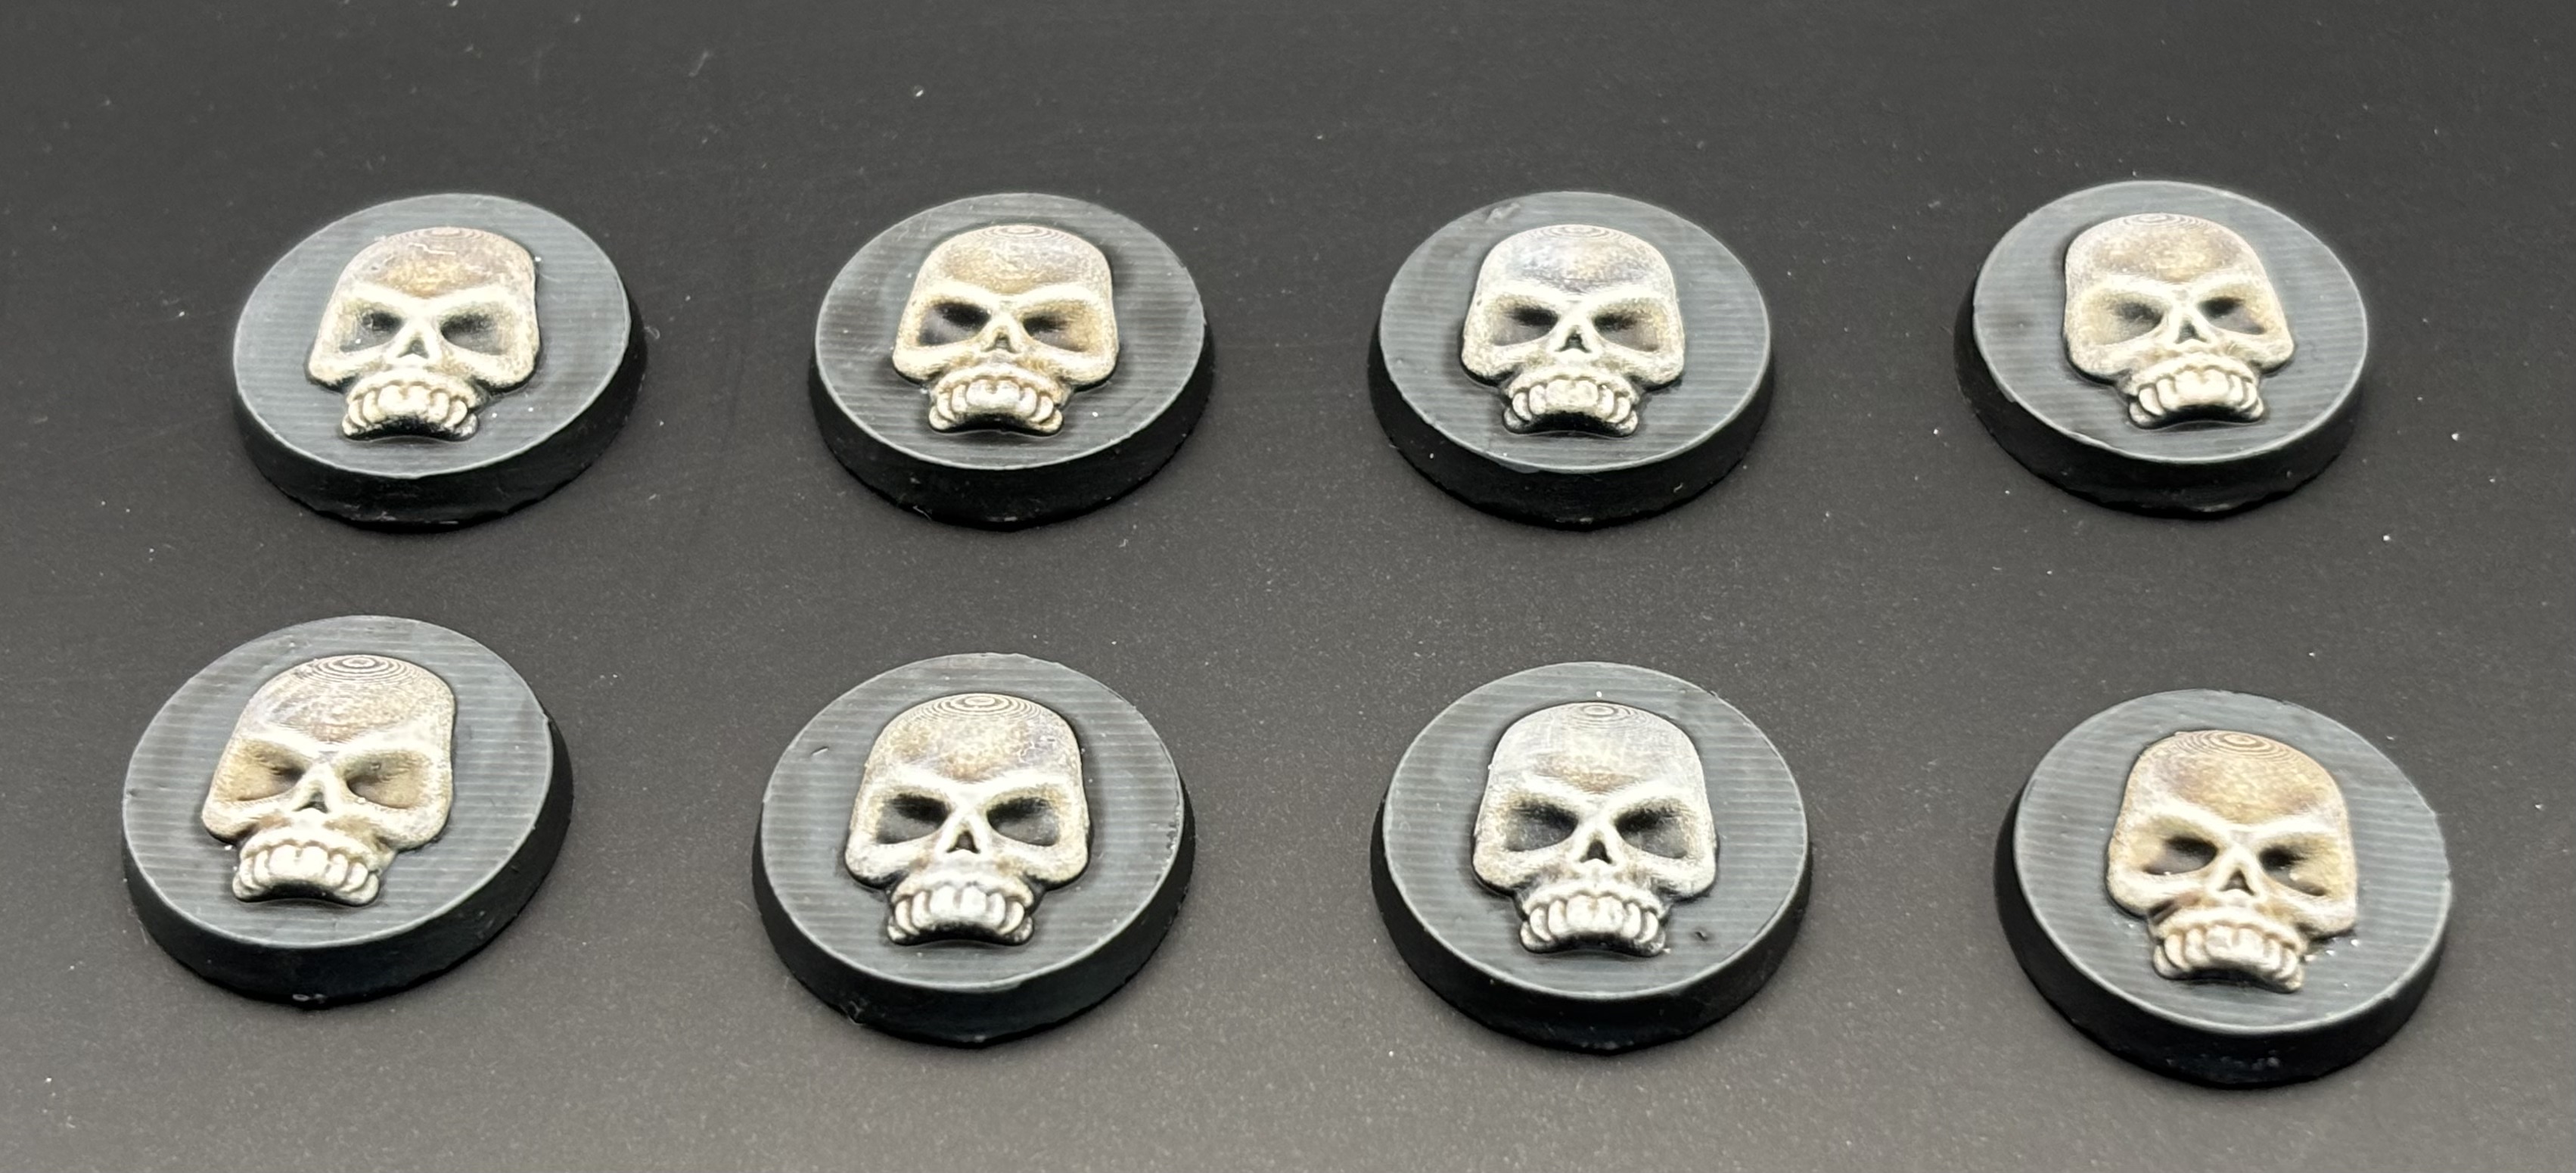
During A Sector Ablaze I realized that I was getting frustrated by a lack of suitable counters for void shields and wounds. It’s very easy to just put a dice down to indicate the remaining void shields or wounds on a model, but then how do you distinguish between them if the model has both? Having an unambiguous symbol reduces the mental load of playing the game.
So I created these, using my laughably poor 3D design skills, using bits and pieces taken from Cults and printed them on my Anycubic Photo resin printer. They have turned out quite nicely, although it took a few iterations to get the design how I wanted it. They painted up quite well, too.
Top-down pictures below the fold.
Cleaning brushes with Dettol

Dettol is well known as a very effective stripper of acrylic paint. Its active ingredient is chloroxylenol, which breaks down the acyrlic medium and allows paint to be removed from miniatures.
I've just discovered that it's also quite an effective brush cleaner as well. Late last year I bought some Winsor and Newton kolinsky sable brushes, and to my great shame they have quickly become clogged with paint (I am not especially diligent in cleaning my brushes after use). Yesterday afternoon, as an experiment I put one of these brushes into some Dettol along with some other miniatures.
This morning I took it out of the Dettol, rinsed it out and gave the bristles a quick rub with some handwash (any liquid detergent would also work). The bristles are pretty much back to normal, with no paint clogged up at the ferrule.
So if your brushes are looking a little tired, and you don't want to fork out for new brushes or brush cleaner, then Dettol may be the ideal alternative.
How to make dragonscale with green stuff
Jodrell's Guide to Perfect Decals
By process of trial and error (mostly error) I have worked out what I think is the best way to add decals to your miniatures. For anyone who's built a model kit or wargaming miniature and been really pleased with the paint job, only to have it ruined by crappily finished decals, here's my guide to doing them right, enhanced by my laughably amateurish diagrams.
Citadel Finecast, First Impressions

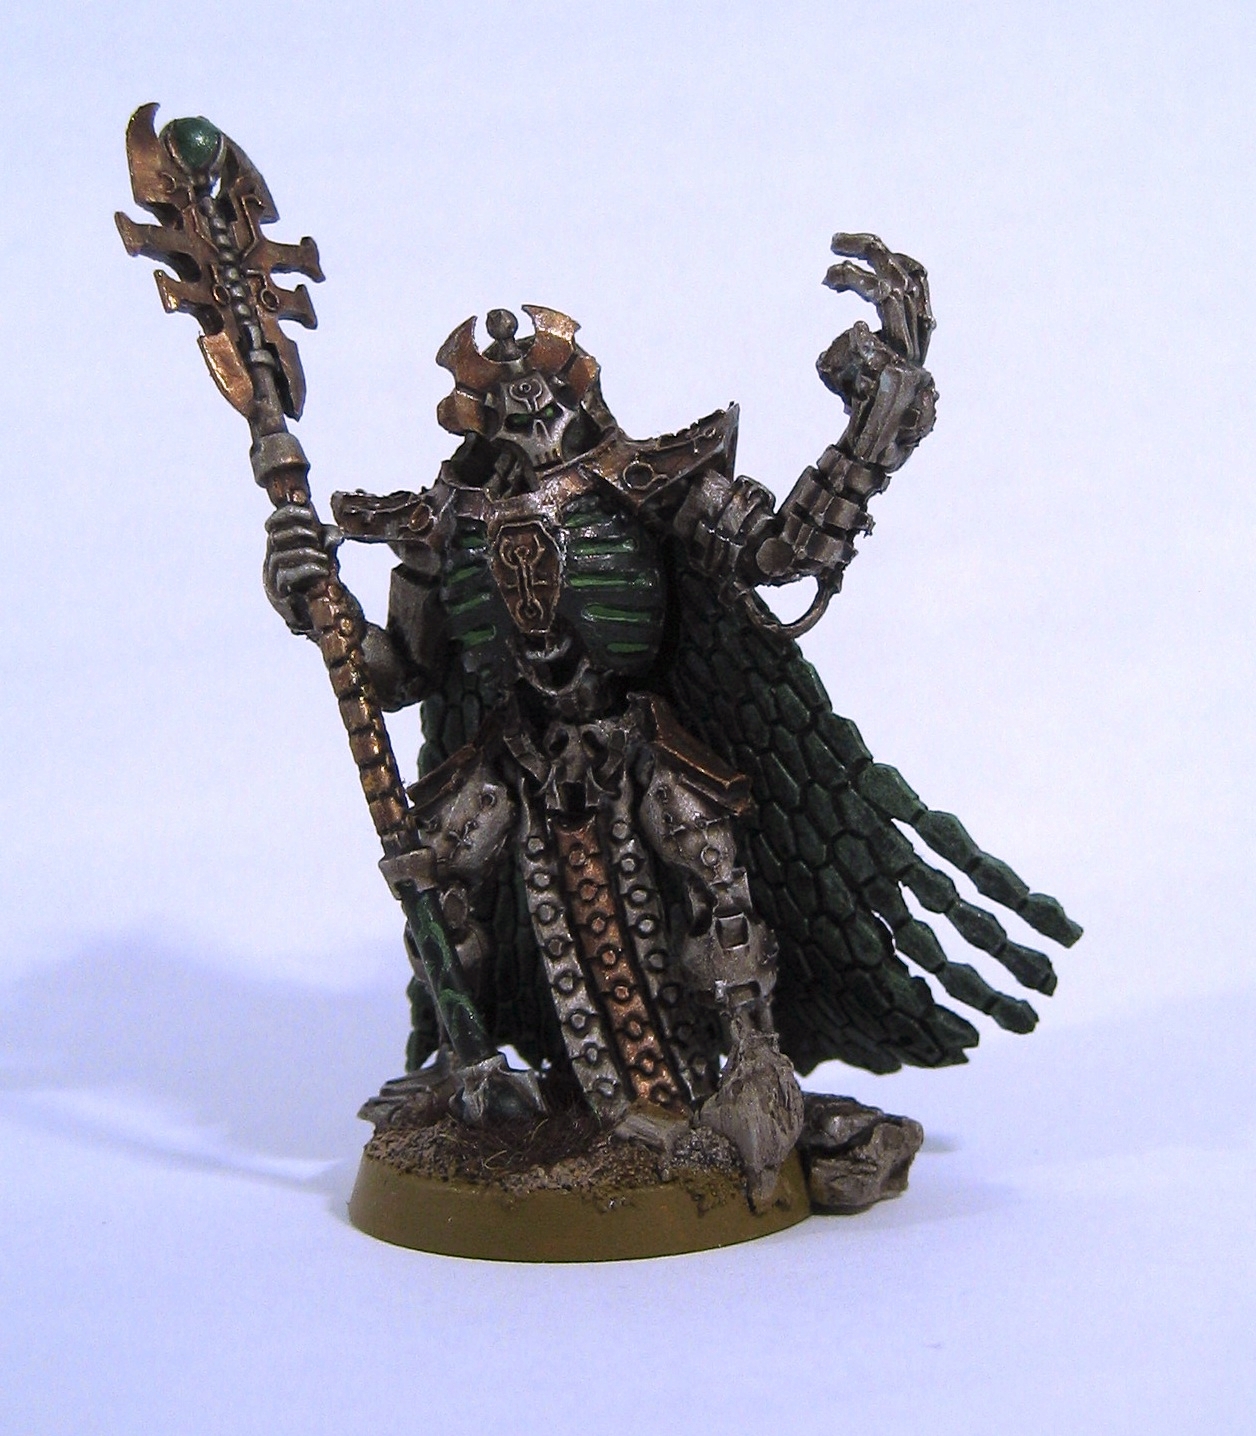
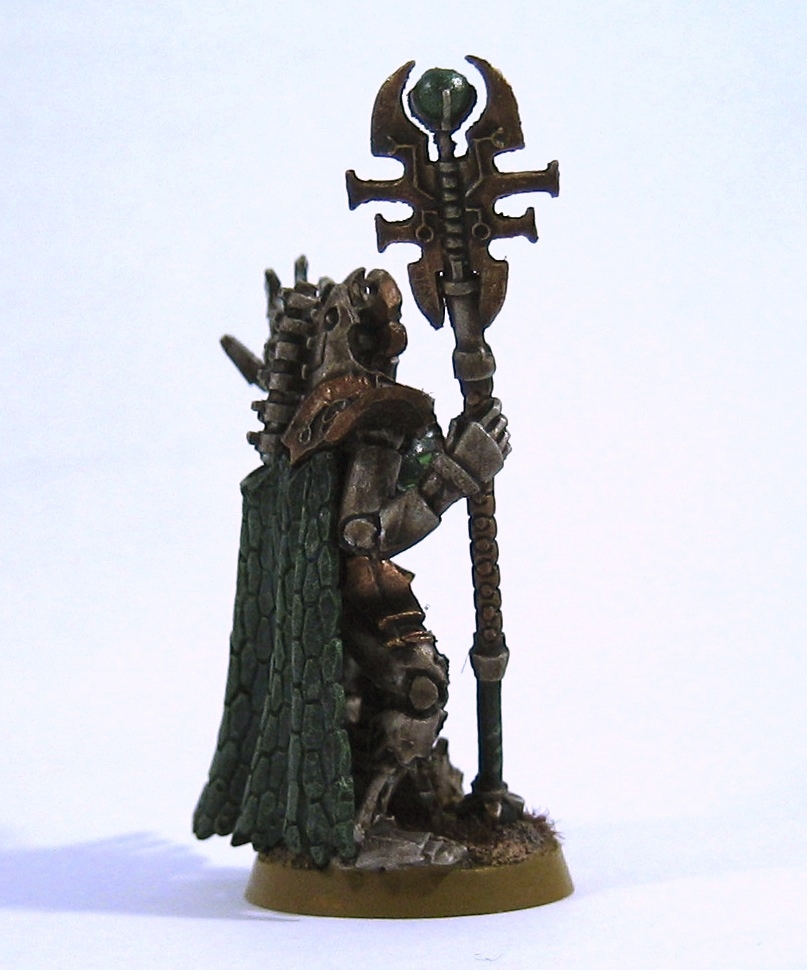
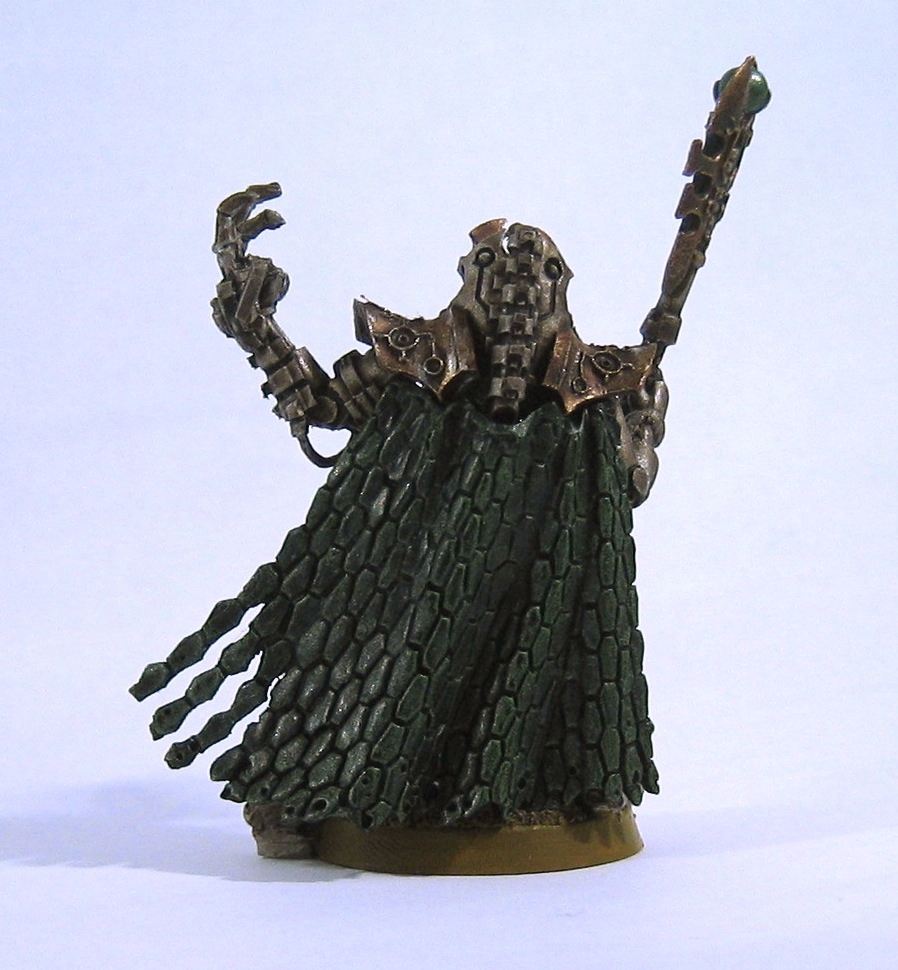
Here's the first FineCast miniature that I've assembled and painted. I recently took my step-daughter and her friend to one of my local GW stores for one of their "hobby tutorial" sessions (which was actually great fun) and we each bought a miniature to paint after. The kids both got Huron Blackheart and I got this, Imhotek the Stormlord.
Overall, I'm not especially impressed with Finecast: of the three miniatures, mine was the only one that didn't have major gaps left by bubbles in the mould. Imhotek's staff was quite badly warped (although that's easy enough to fix), but the absurd number of injection sprues meant that getting the model off the frame was pretty risky, and I ended up breaking off his thumb, which I promptly lost, and had to replace with a piece of sprue. His foot also broke off and I had to reinforce it by adding some cork pieces to the base (which actually turned out quite well).
I was probably foolish in believing what I'd been told about being able to paint directly onto the resin: when the kids tried this with their miniatures, the paint refused to adhere and I had to give them a quick blast from a spray can to prime them.
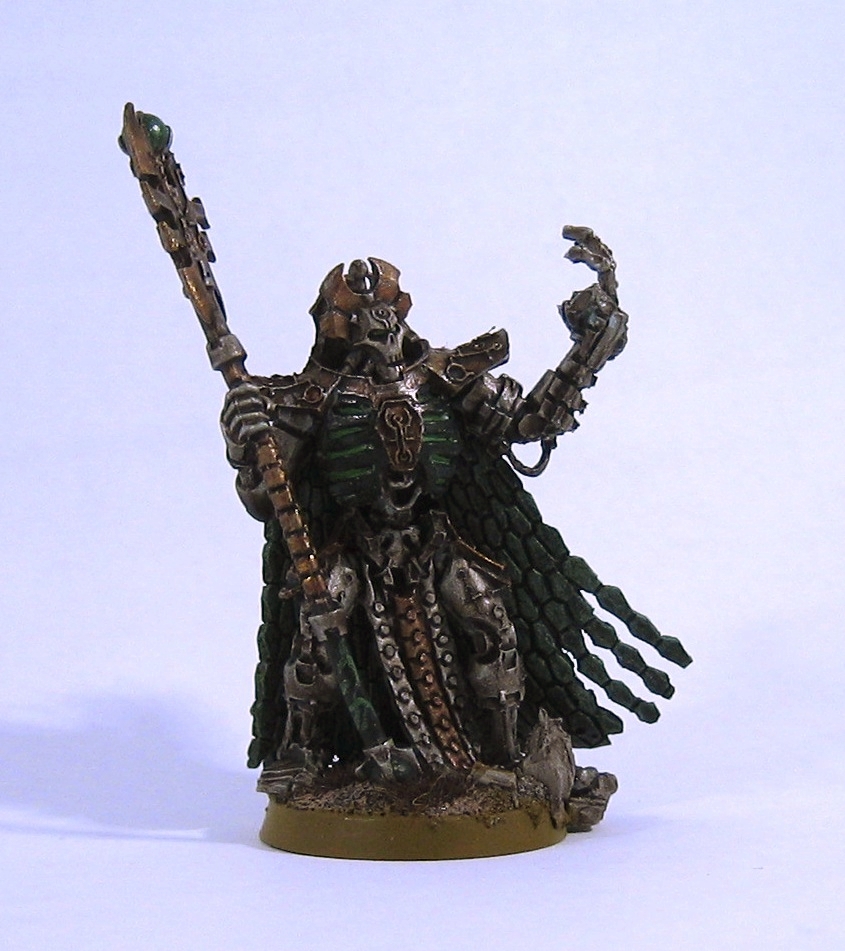
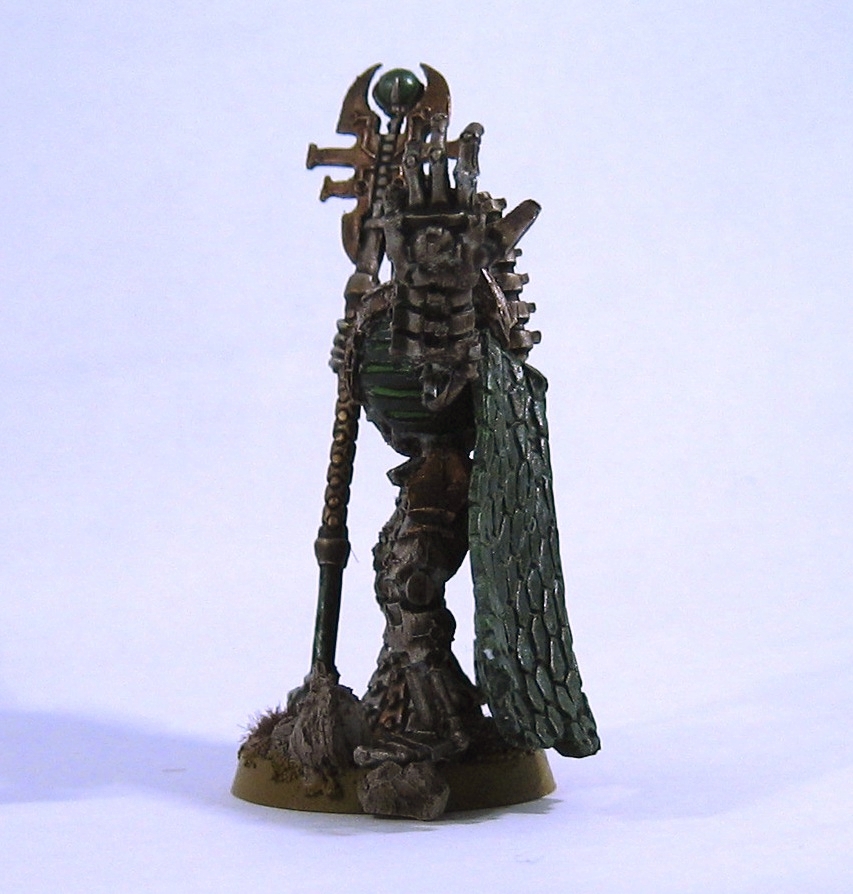
Here's a few more pictures of the finished Overlord. I think I am going to avoid Finecast miniatures whenever possible, and stick to metal miniatures if I can: thankfully a lot of the stuff that's now Finecast only is still available on eBay.
I'm still pretty impressed by the new Necron stuff. I bought a box of Immortals/Deathmarks and these plastic minis are pretty fantastic.
Quick tip: future-proof your bases
I wanted to share a quick tip which might make your life easier in the future: I have decided to rebase all my 40K scale Necrons, as I wasn't happy with the appearance of the basing material I was using (a very coarse saw dust). I quickly realised that this would be a particularly tough challenge for my plastic Necron warriors.
I was a scale model maker before I was a war gamer, so for as long as I can remember, I've always used polystyrene cement (specifically Revell's professional liquid poly) for assembling plastic miniatures. As I understand it, a lot of miniature hobbyists use superglue instead, but using polystyrene cement welds the plastic parts together, meaning that you can shave and file the join down until it's invisible.
So naturally, when assembling my Necron warriors, I used liquid poly to glue them to their base. I've now realised that if I'd used superglue instead, it would have made the job of rebasing much easier.
So: always superglue plastic miniatures to their bases, even if their bases are also plastic! Here endeth the lesson.
I can't do faces :-(

Even a tutorial from Mike McVey couldn't help me :-( Oh well, back to titans.
Taking Better Photos
But last year I moved my painting station into my newly refurbished basement, so now all I had was a 35 watt halogen bulb to take pictures by. Hence the darkness of some of my recent photos.
To rectify this, I spent some money on eBay and Amazon and bought a couple of 100 watt daylight bulbs (for about £3) and a fold-up photo tent (about a tenner). I'm pretty pleased with the results: here are some photos of my infamous warmonger titan. These have come straight off the camera, with no post-processing at all:
: Warmonger Titan of the Legio Pantera (Black Panthers Legion)")
: Warmonger Titan of the Legio Pantera (Black Panthers Legion)")
: Warmonger Titan of the Legio Pantera (Black Panthers Legion)")
: Warmonger Titan of the Legio Pantera (Black Panthers Legion)")
Here's the set-up:

My first wet palette

Wet palettes always seemed like a good idea, but I never managed to get around to trying one out, until today. My palette is very simple: the packaging from a packet of tomatoes, some kitchen roll and greaseproof paper. So far it's worked out very well. You should try it yourself!
Hobbyist fail, Dettol win!
The experiment was a success (I can get the amount of time required to paint an individual miniature down to about 45 minutes), but also a failure (note the "last year" at the beginning of this post!). However, I have now finished my first squad of Necron warriors, and a Necron Lord:


It's not all good news, unfortunately. I built three Necron destroyers, but managed to screw up the spray coat of silver: either I didn't shake the can enough, or the air was too wet, but whatever the reason, the destroyers came up covered in a thick blobby coat of silver, and looked awful.

So based on recommendations from my friend Mark, I performed an experiment: I gave one of the models a week-long dip in Dettol (a British household detergent):

After a wash and scrub with an old toothbrush, the final result was an - almost - stripped model:

There is still a silvery coating on top of the bare plastic, but the lumpy crud has gone, and it should be good for another coat, and painting.
Forge World Weathering Powders

Salute Zero Nine
This saturday I wandered out to ExCel in London for the 2009 Salute show. This was the first wargames show I've been to for probably 15 years and I really enjoyed it - I expect I will be back next year!
My thoughts on the show: nice to see so many small exhibitors, it wasn't dominated by the big guys. Disappointed not to see more BattleTech. Also disappointed that GW didn't do a better job of their stalls: would have been nice to have seen their Rhino!
The photos are here, and also check out TGN for pics from other attendees.
Casting a Titan foot using Green Stuff
I've been trying to get my hands on an old-style Mark II Warlord Titan for quite a while. This miniature, made for only a couple of years from 1995, is the "transitional form" that links the old-school "beetleback" warlord titans from Adeptus Titanicus to the current Mk. III "Lucius" pattern Warlord titan, and I've always really liked the design.
I was finally able to get hold of one from eBay, and for a pretty good price. Unfortunately, the reason was that one of the titan's feet was missing. Ever the optimist, I decided to turn this problem into an opportunity, and have a go at making a duplicte of the foot using Green Stuff (aka kneadatite, basically two-part epoxy putty optimised for miniature modelling).
The first step was to take the foot piece that I did have and glue it very lightly to a piece of plasticard. I used a very small amount of superglue, as I wanted to be able to separate the foot from the card:

Then I made up a large chunk of Green Stuff — more than I probably needed, but that's better than not having enough — and covered up the foot. It's important to push down firmly when applying the Green Stuff, as you don't want creases, voids or bubbles. I applied the Green Stuff a small piece at a time, slowly building it up so that it covered the entire foot:

I waited a couple of days to give the Green Stuff plenty of time to cure. Then I removed the plasticard backing to expose the original, embedded in the Green Stuff mould:

The conventional wisdom is that you should use a "mould releasing agent" to prevent the Green Stuff from sticking to the original, but I'm a physicist, and I had a more elegant solution: heat. When heated, different materials undergo thermal expansion at different rates, so all I did was run it under the hot tap: the Green Stuff and the lead original expanded at different rates, and the foot just popped out:

The next step is to make up another load of Green Stuff, from which the casting would be made. Since I'm using the same material as the mould, I can't use my heat trick to remove the casted piece from the mould, I had to use a release agent this time: once I'd made up the Green Stuff and rolled it into a ball, I dipped it into some olive oil, and pressed it down into the mould:

After leaving it for a few hours to cure, I was able to remove the cast from the mould very easily:

I waited overnight for the Green Stuff to harden, and after giving it a good clean to remove the oil, I then used my trusty razor saw to remove the foot from the rest of the Green Stuff, and hey presto:

All it needs now is some cleaning up and trimming, and it's ready for painting.
Razor Saws

Dear Lazyweb, I am thinking about picking up a razor saw, to help me dismantle the carcass of the Imperator titan that I mentioned in my last post. The titan came (poorly) assembled and I want to break it up into its component parts without causing too much damage.
That basically means that the thickness of the blade is key: if it's too thick, then the blade will excavate too much plastic and it'll deform the two resulting pieces. Looking on Google, it seems that the most common blade thickness is 0.2mm (about 1/150th of an inch for you septics): is it possible to get razor saws that are thinner than that? And do you know what thickness the blade of Games Workshop's razor saw (pictured) is?