All posts in "epic40k"
A new NetEpic Army Book for Necrons

I've long been a fan of Kotrin's alternative NetEpic army book for Necrons, which I have always used when playing with my Epic necrons. The "official" Necron rules for NetEpic are bundled together with another set of rules for "Space Slann", and are a bit of an afterthought.
A few years ago, after GW and Forgeworld had produced a number of new models, I wrote some rules for them that were compatible with Kotrin's rules. However, since then, Kotrin appears to have disappeared, and his website has been broken for several years.
After I'd finished getting the new NetEpic website up and running I decided to bite the bullet, and I have now finished a new version of the Necron Army Book, based on Kotrin's original version (which I had to convert from PDF to Word in order to edit: cue hours of reformatting and rejigging). The new version includes the rules I wrote for the new models and I'll keep it updated as GW/FW release new models for my favourite robot zombies!
You can download the new book by clicking on the following link:
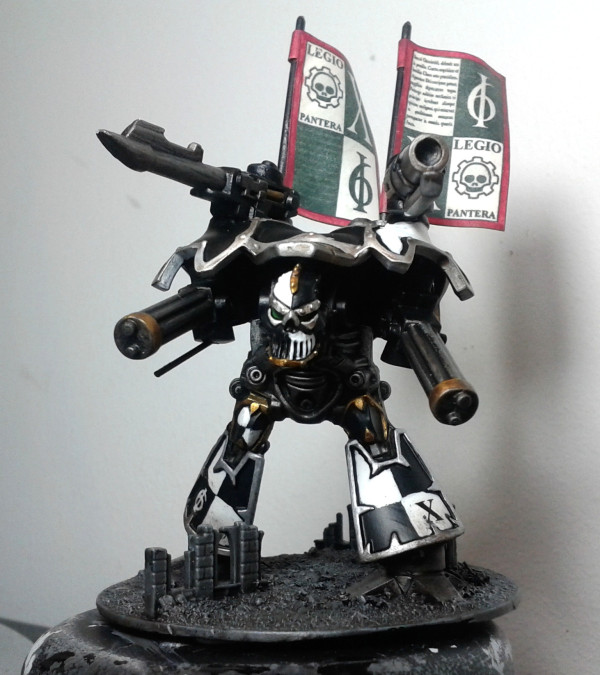
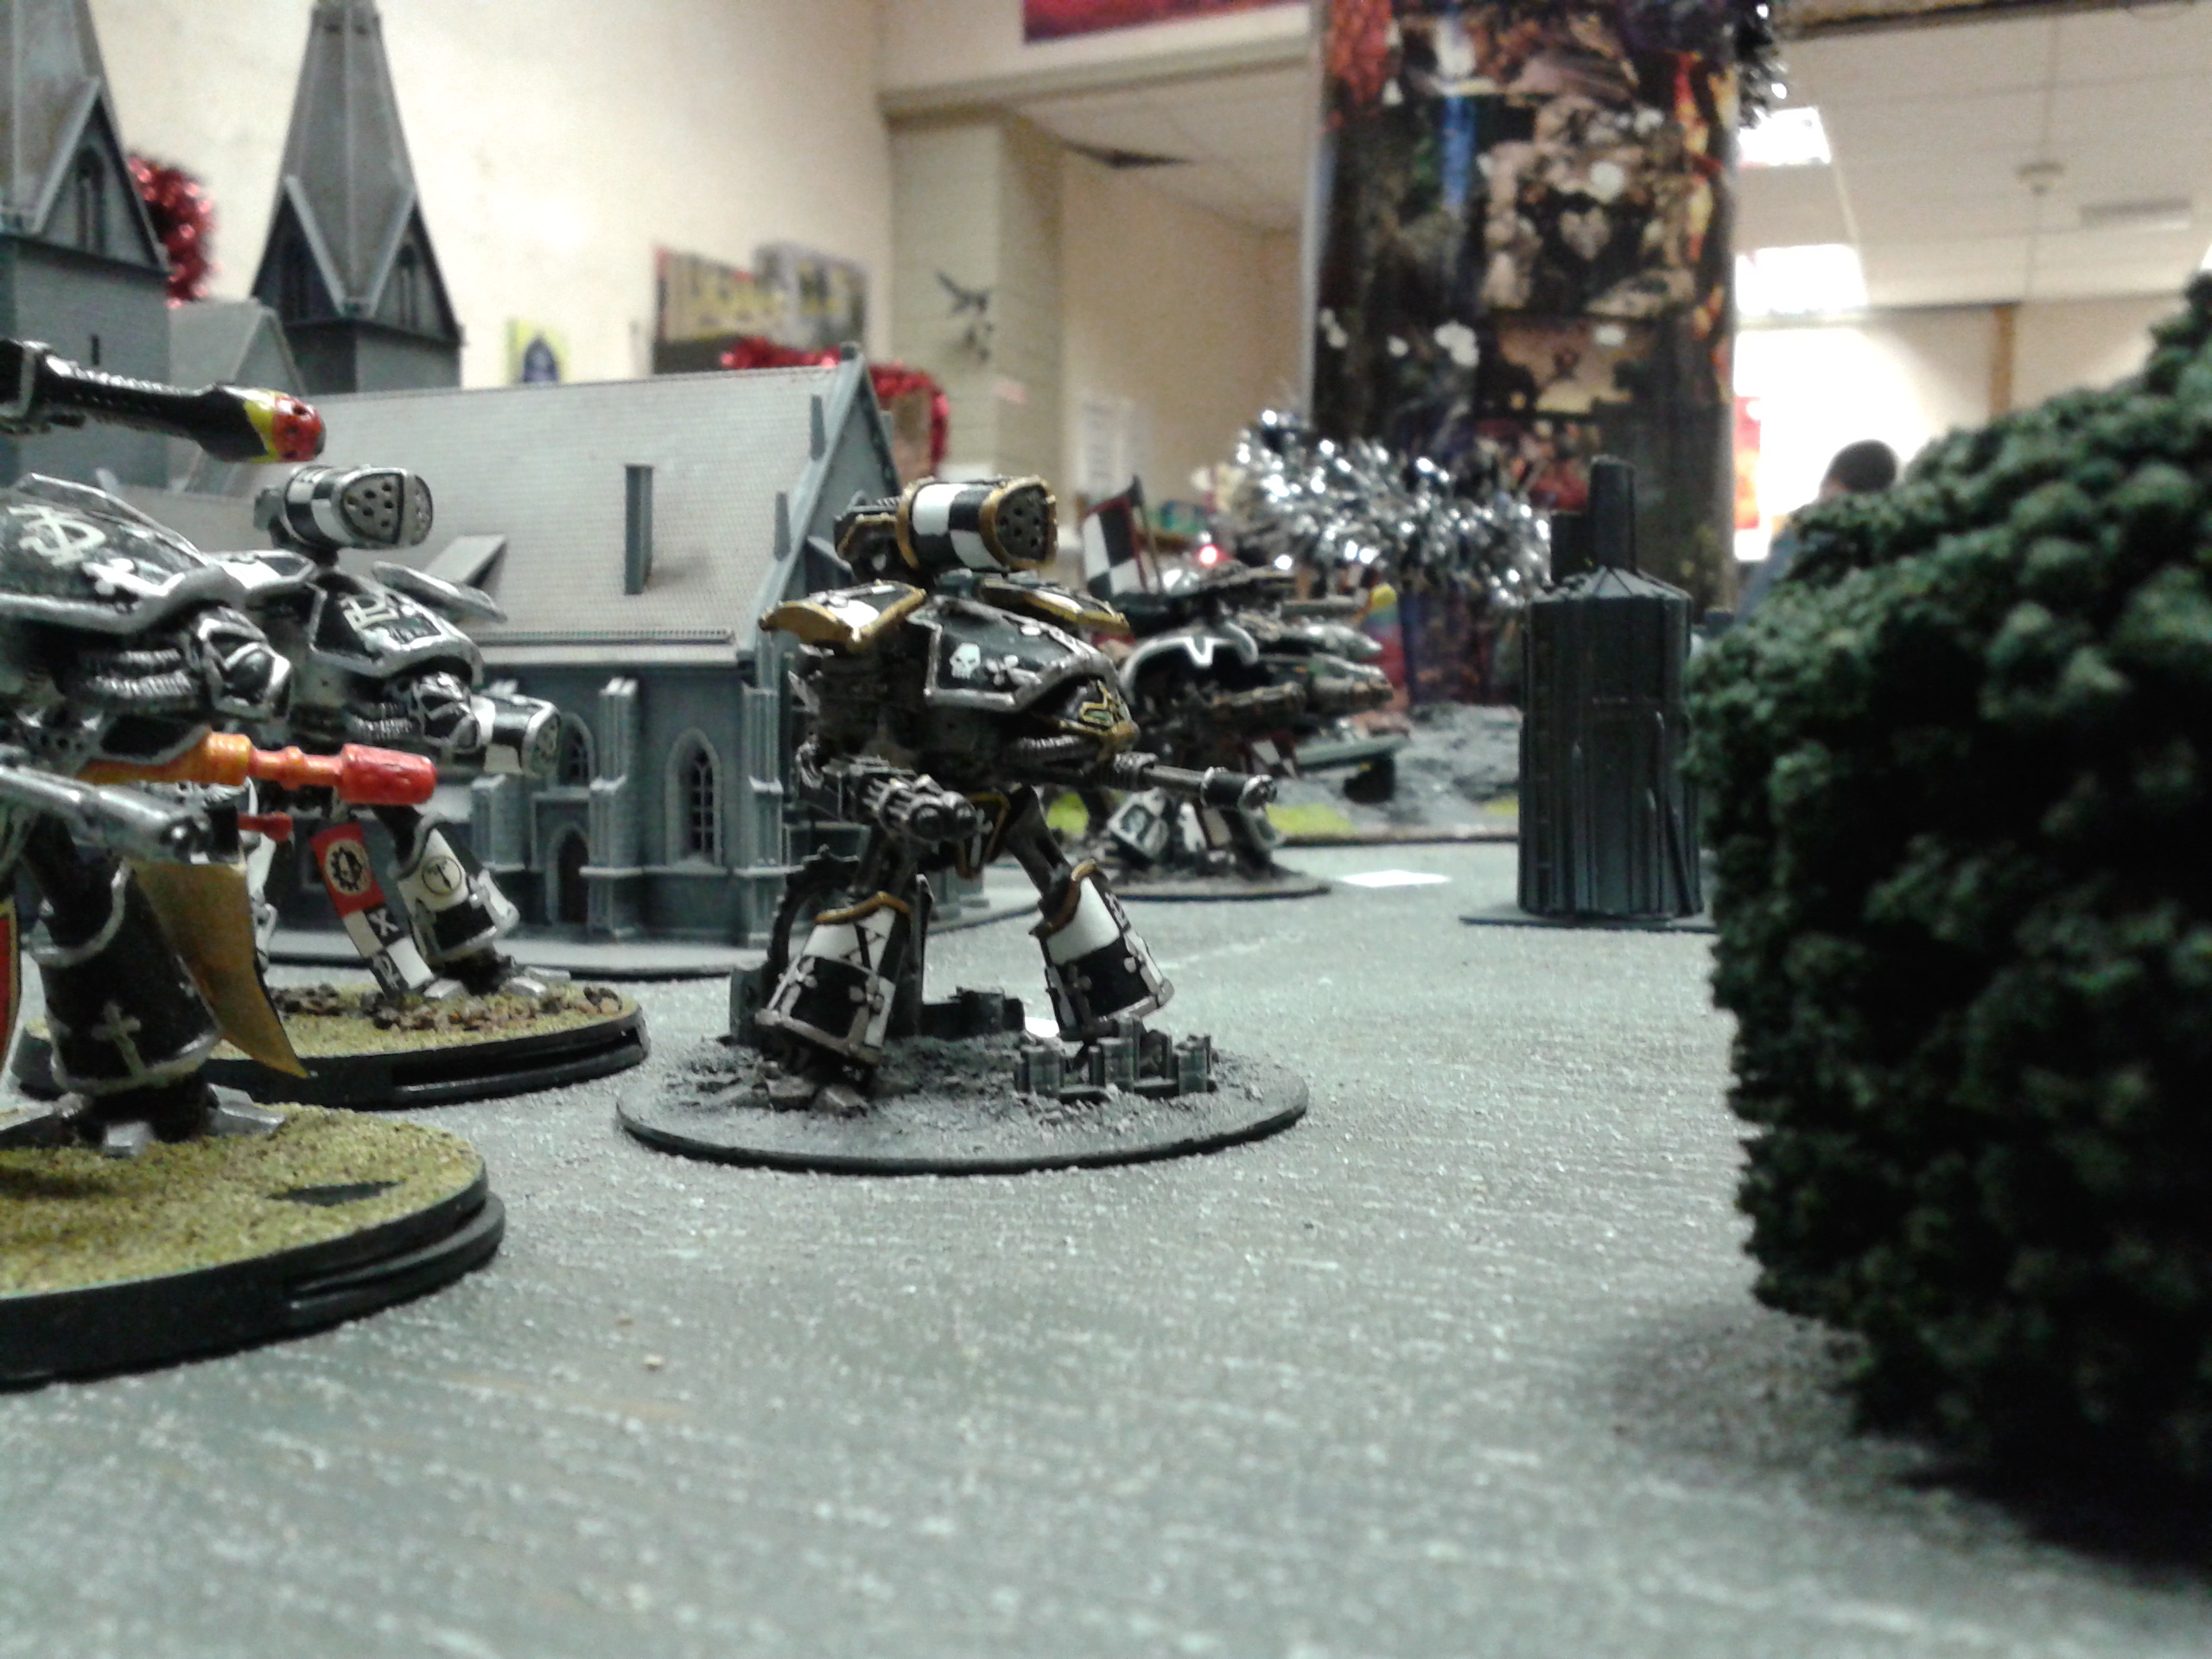
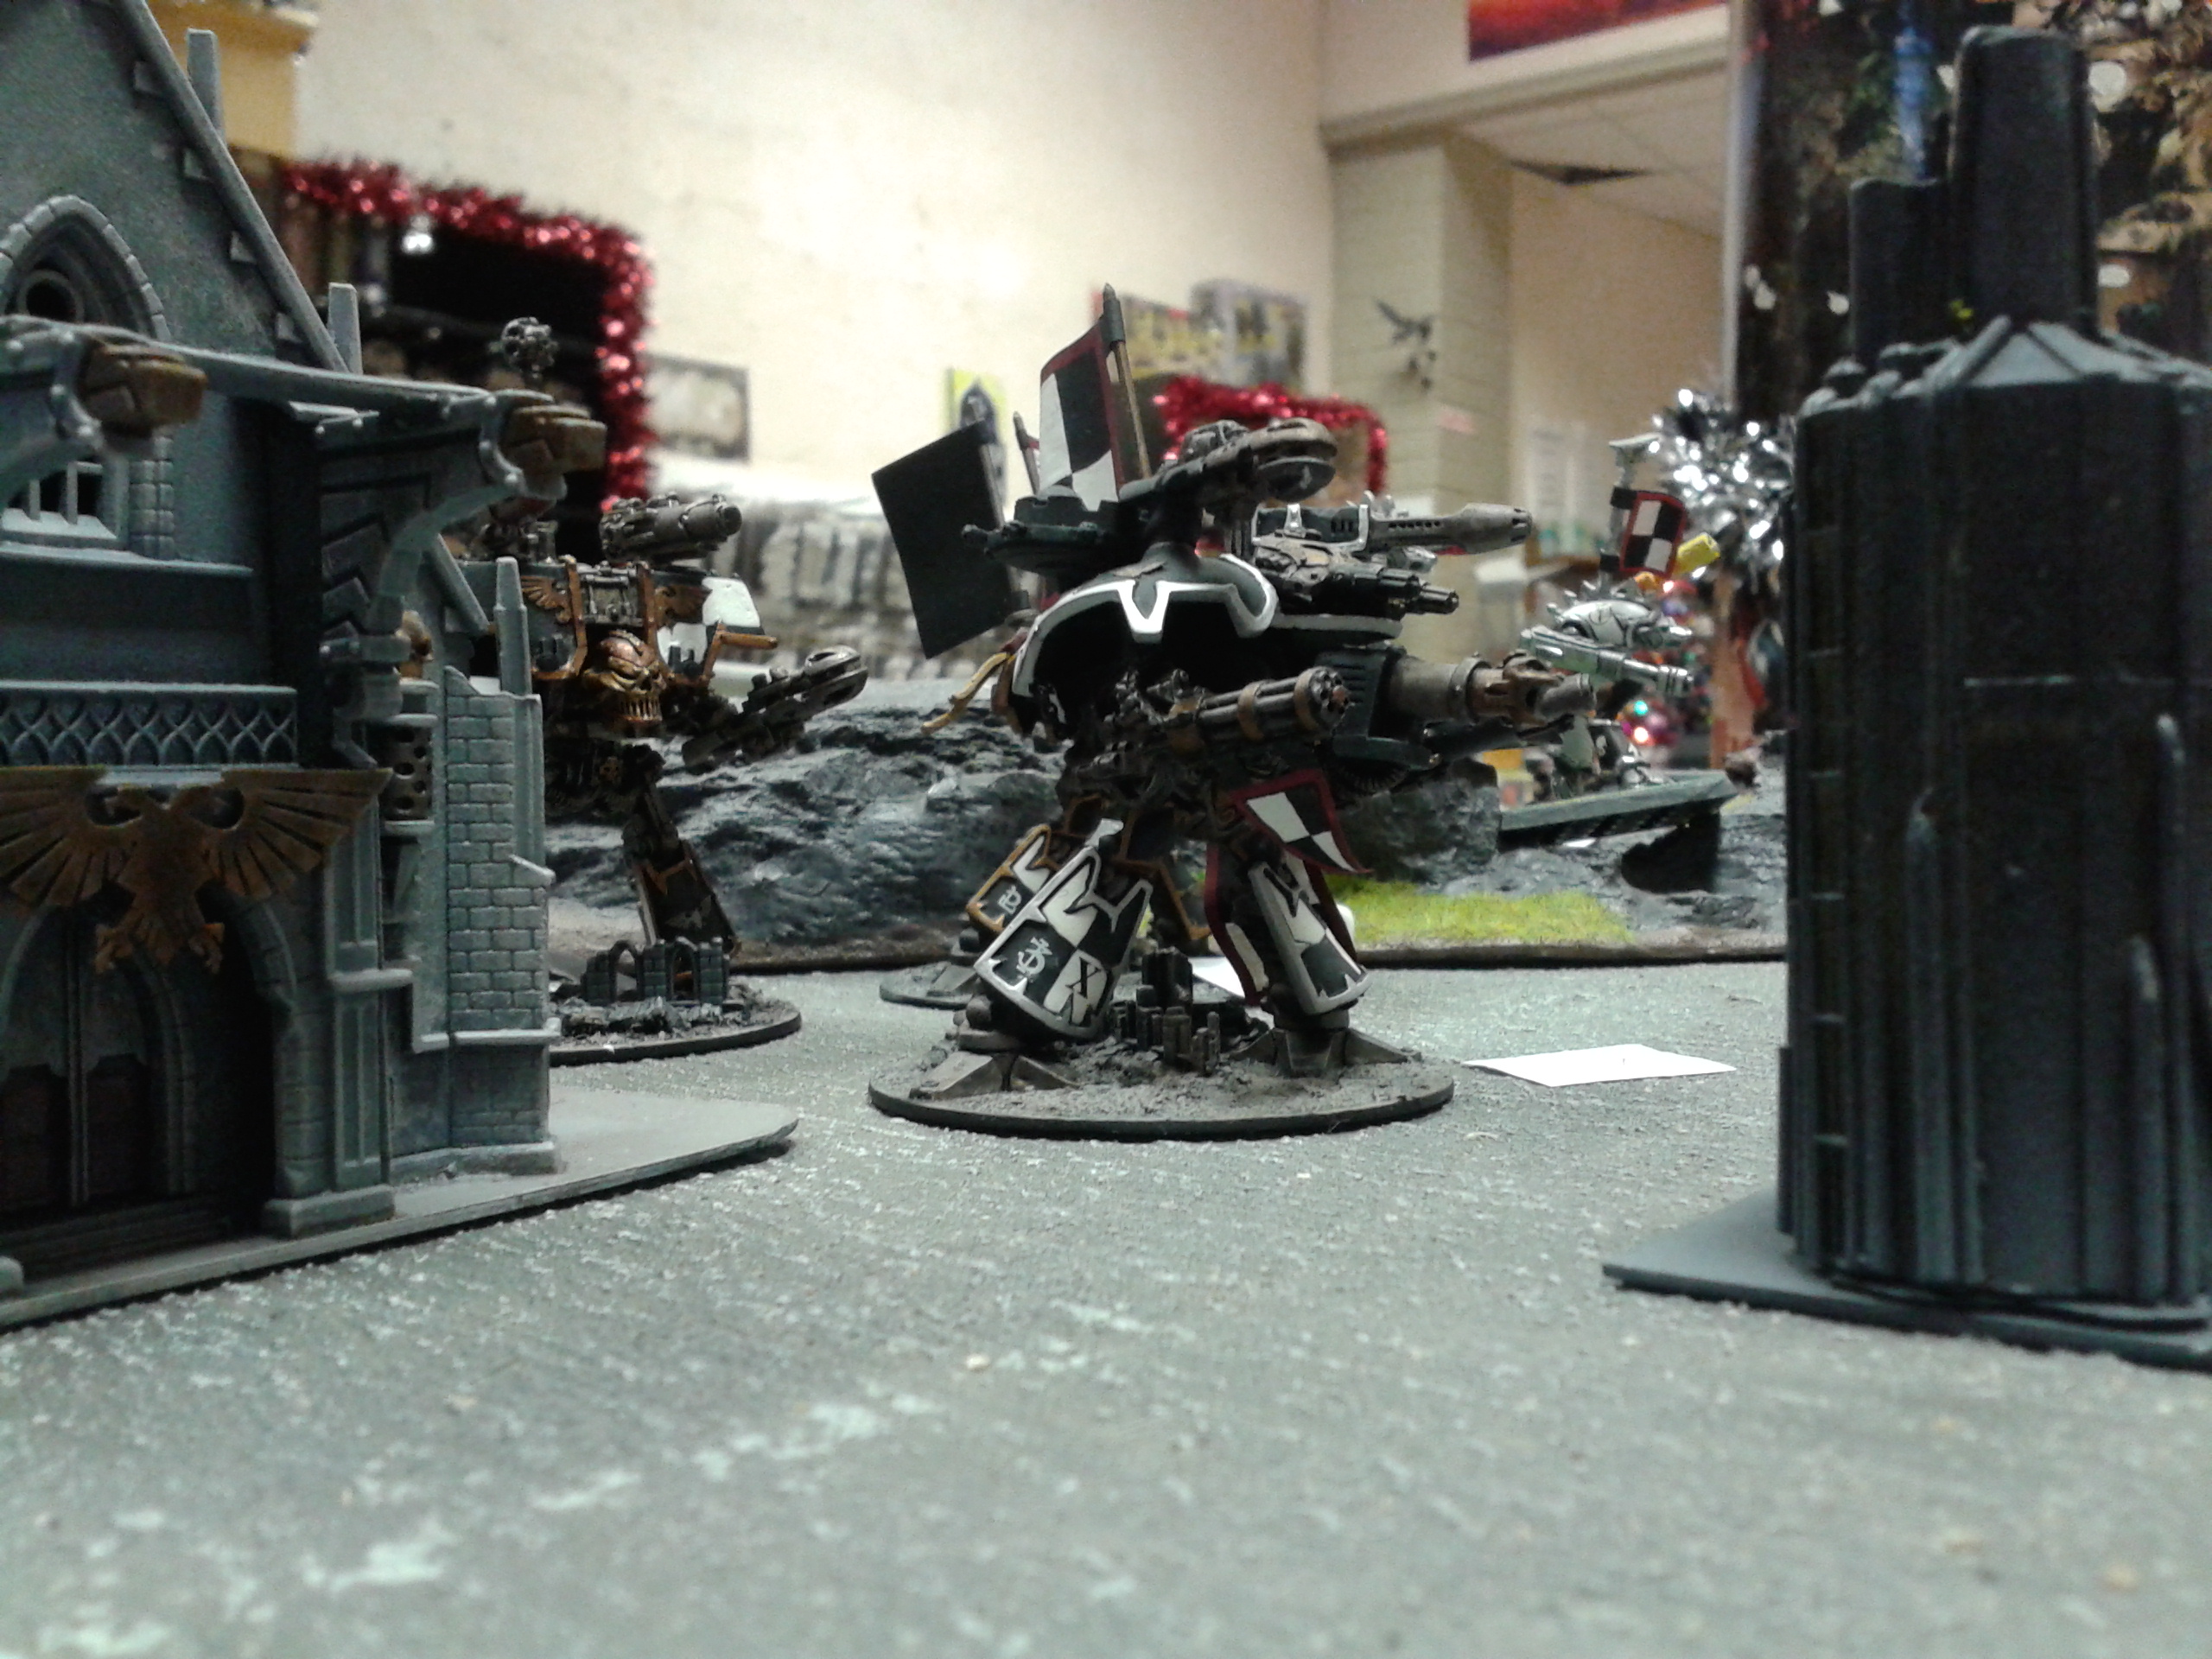
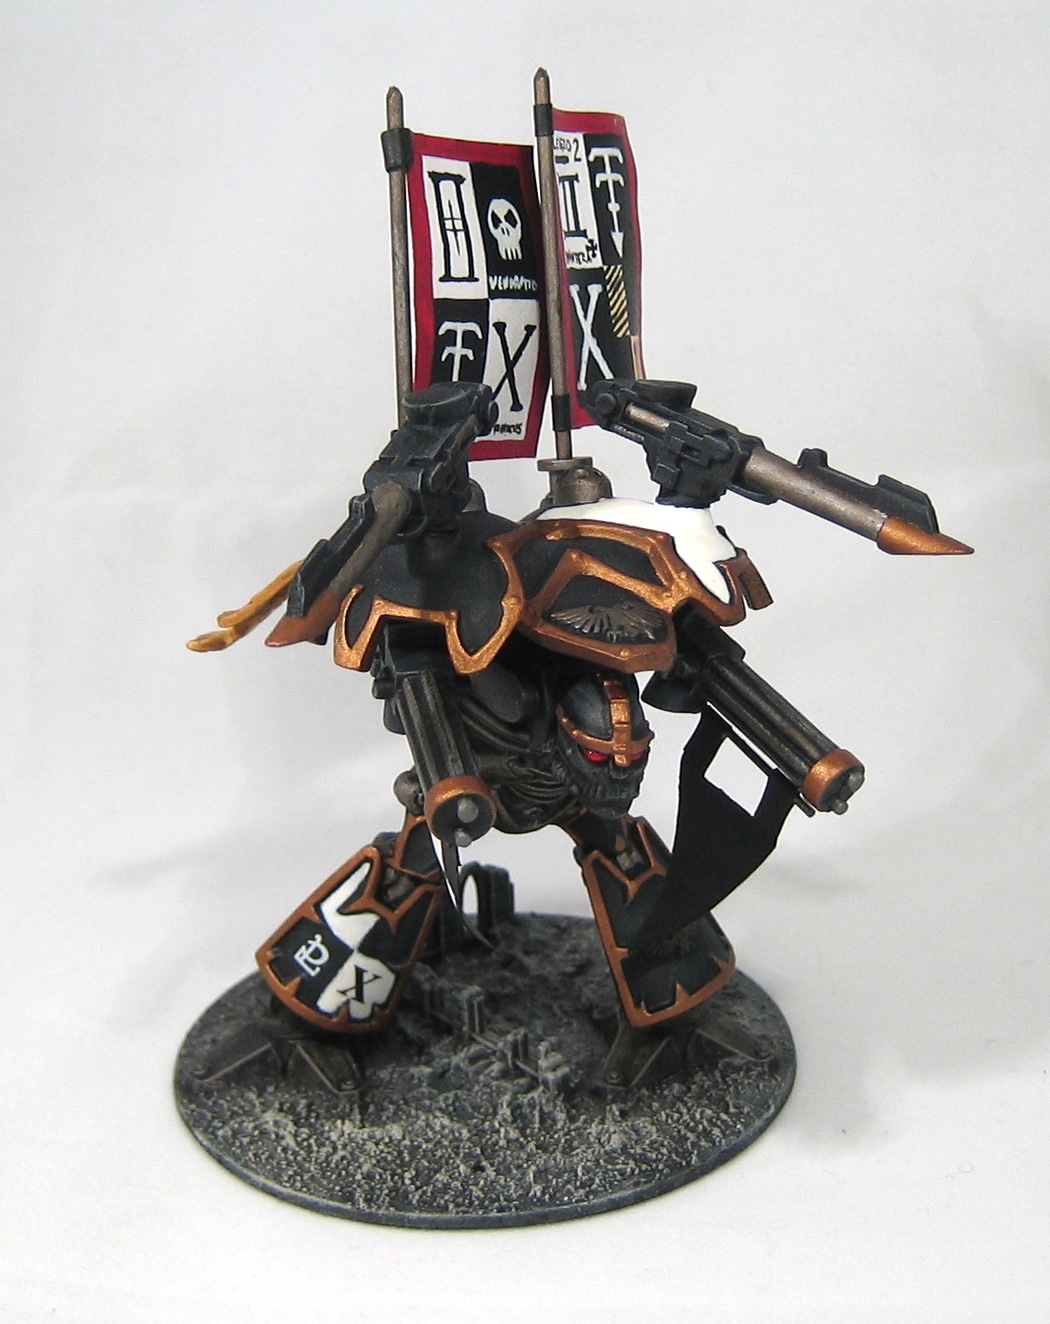
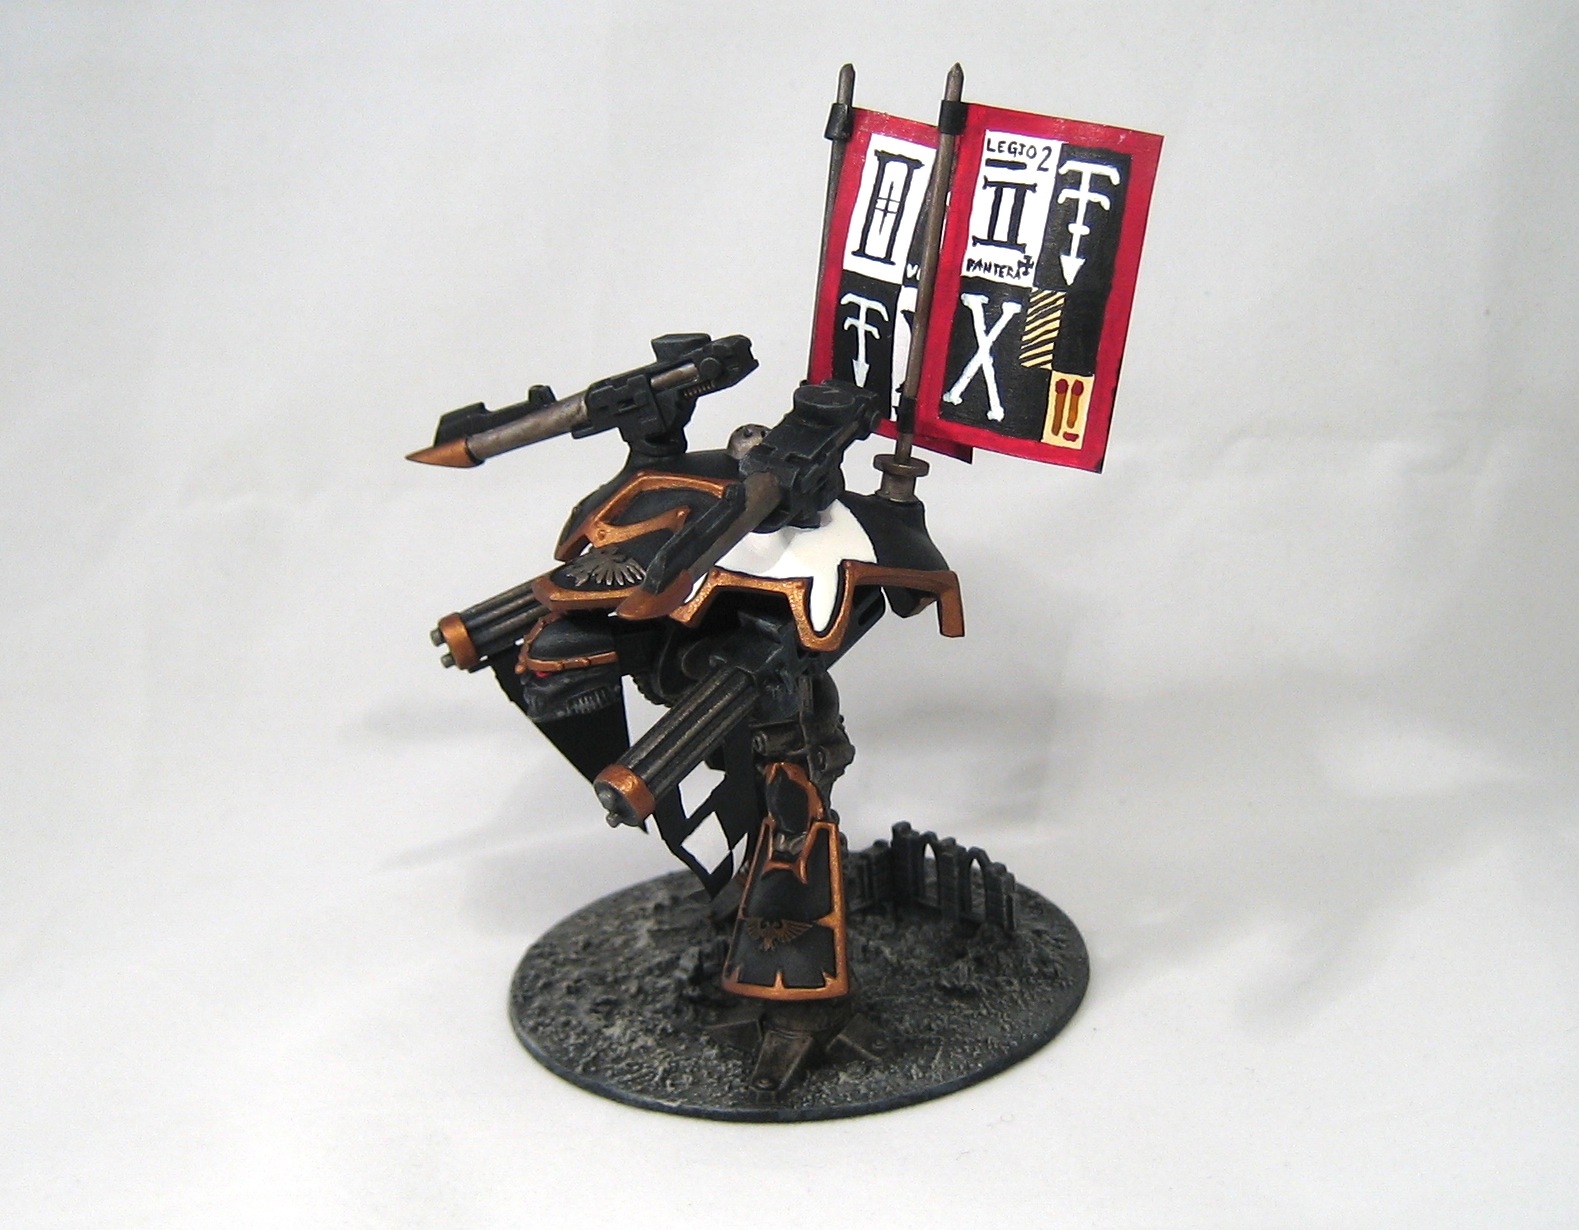
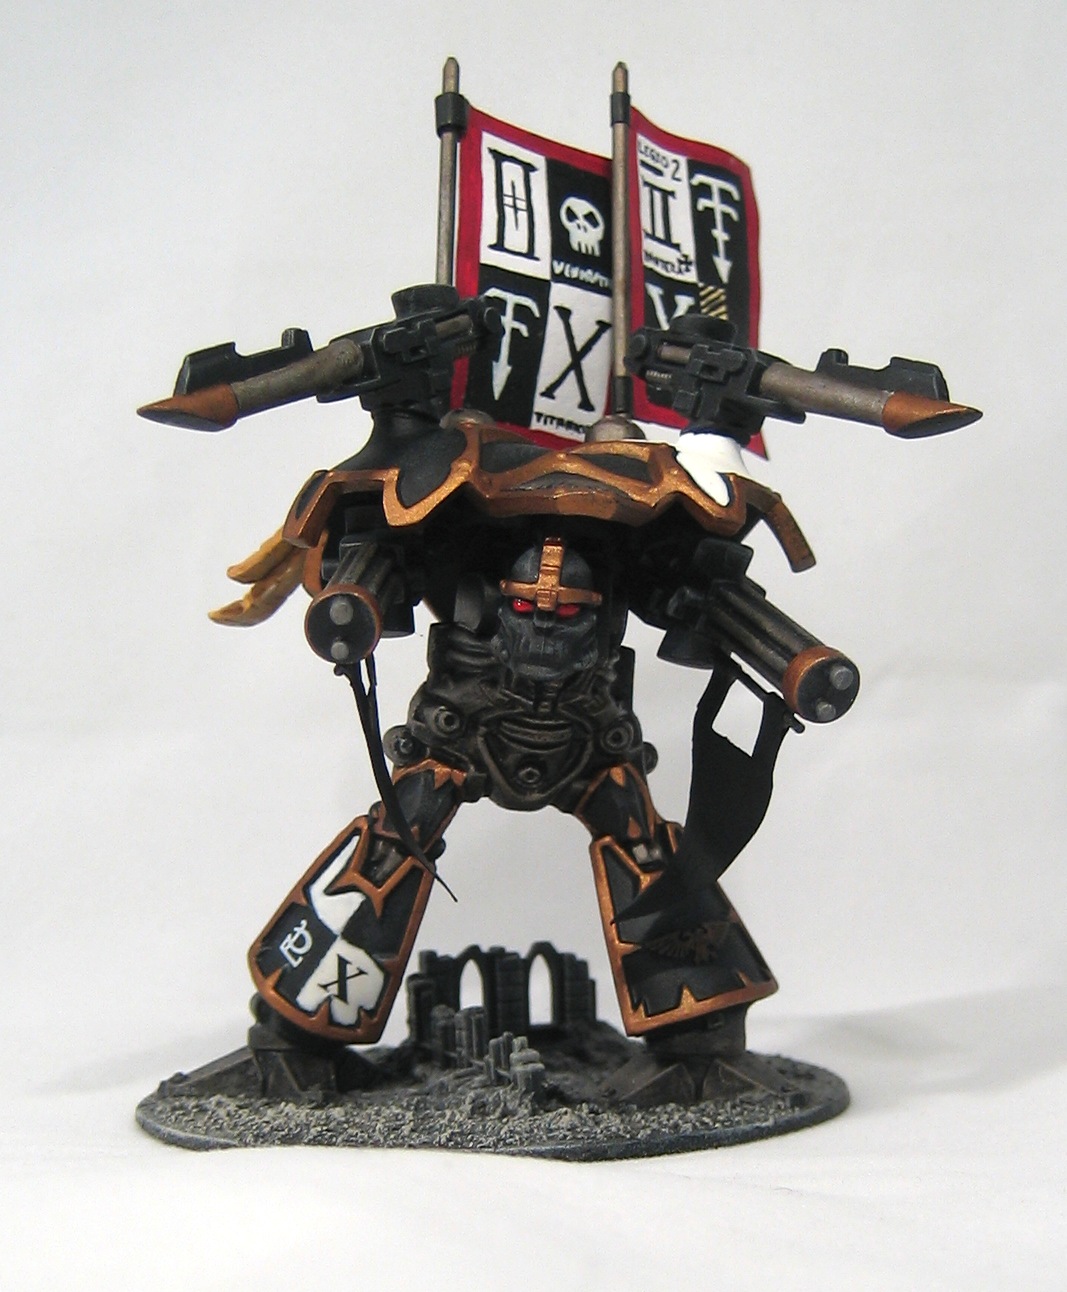
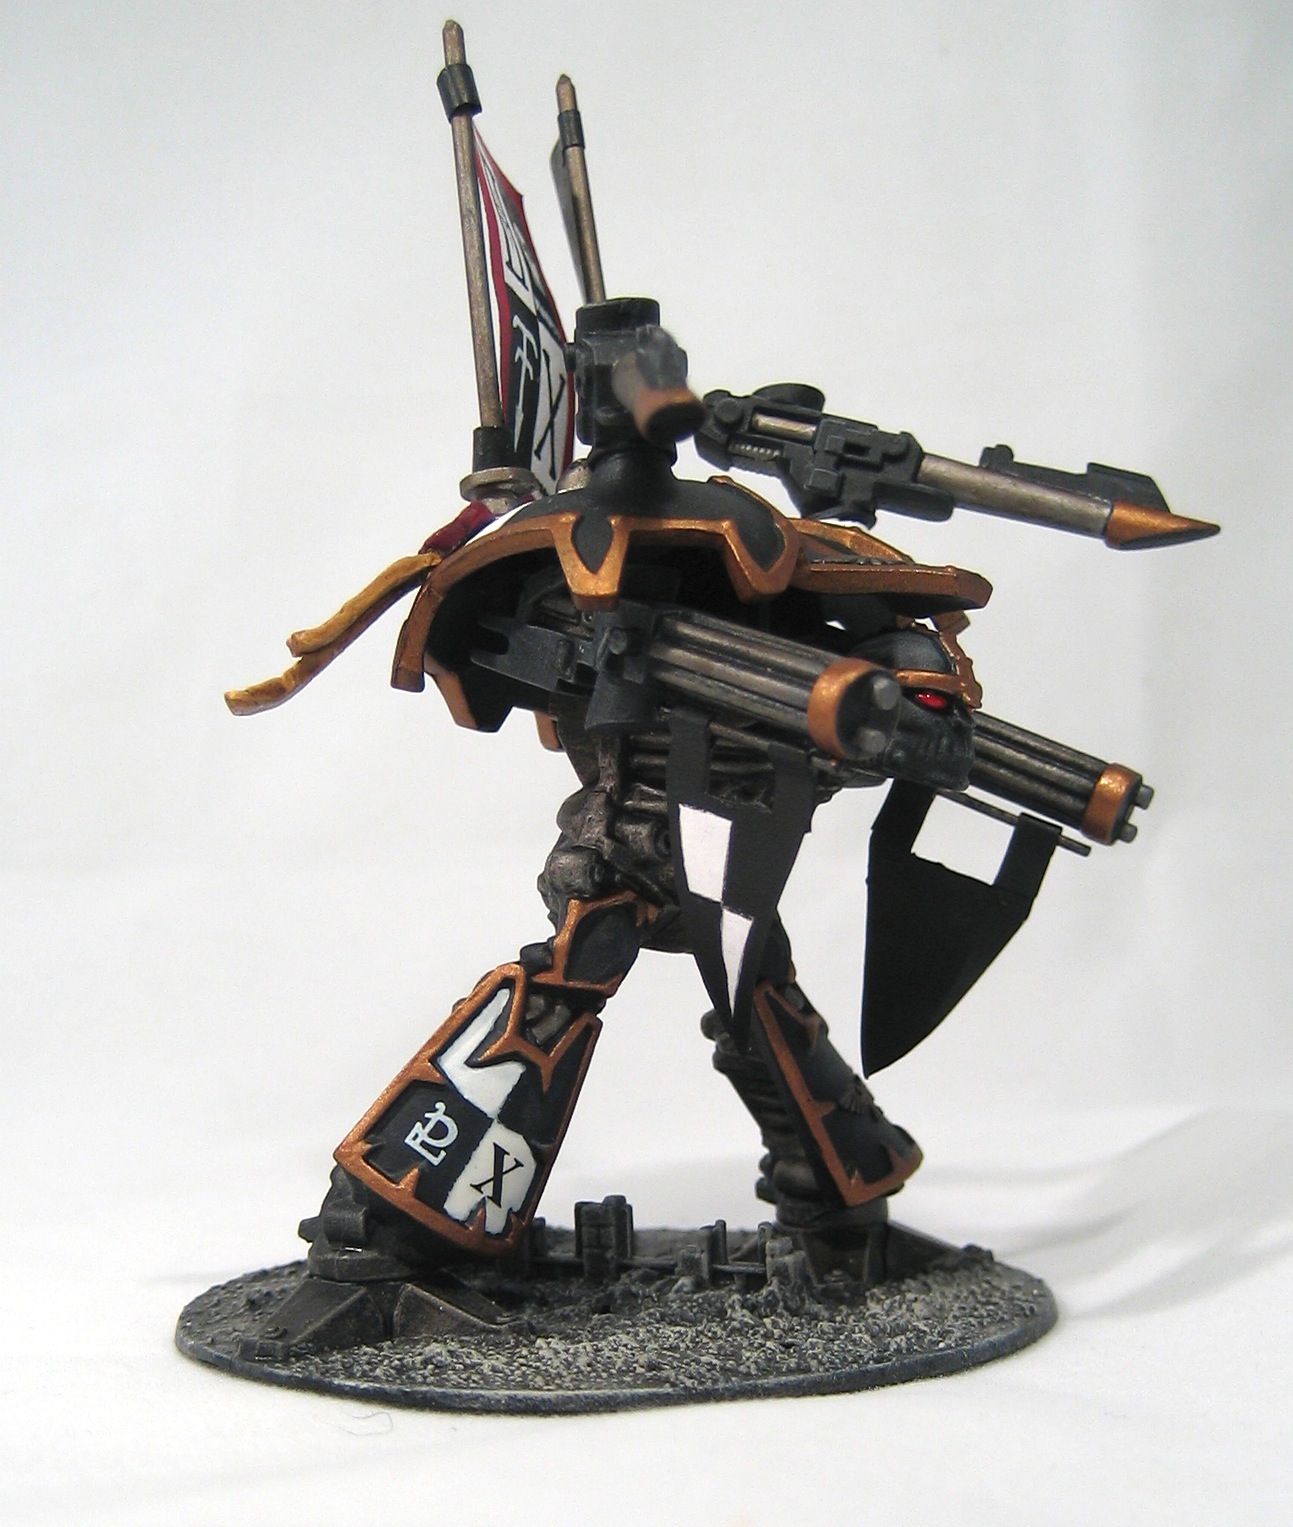
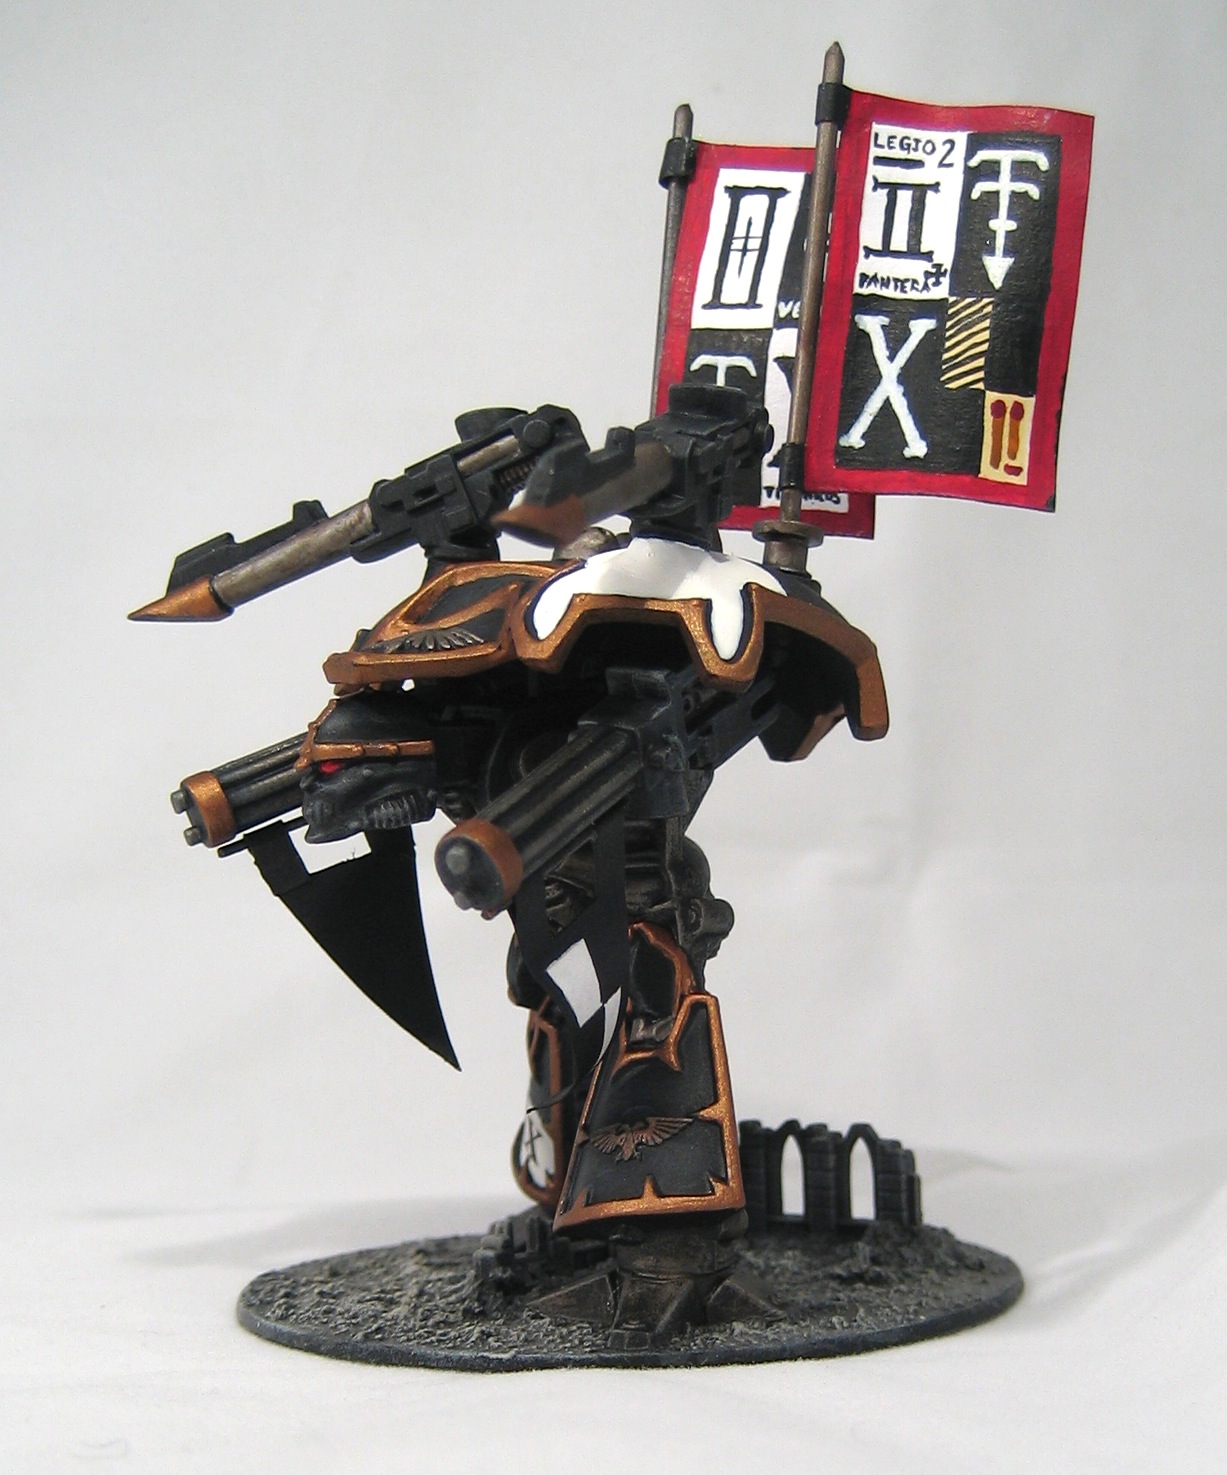
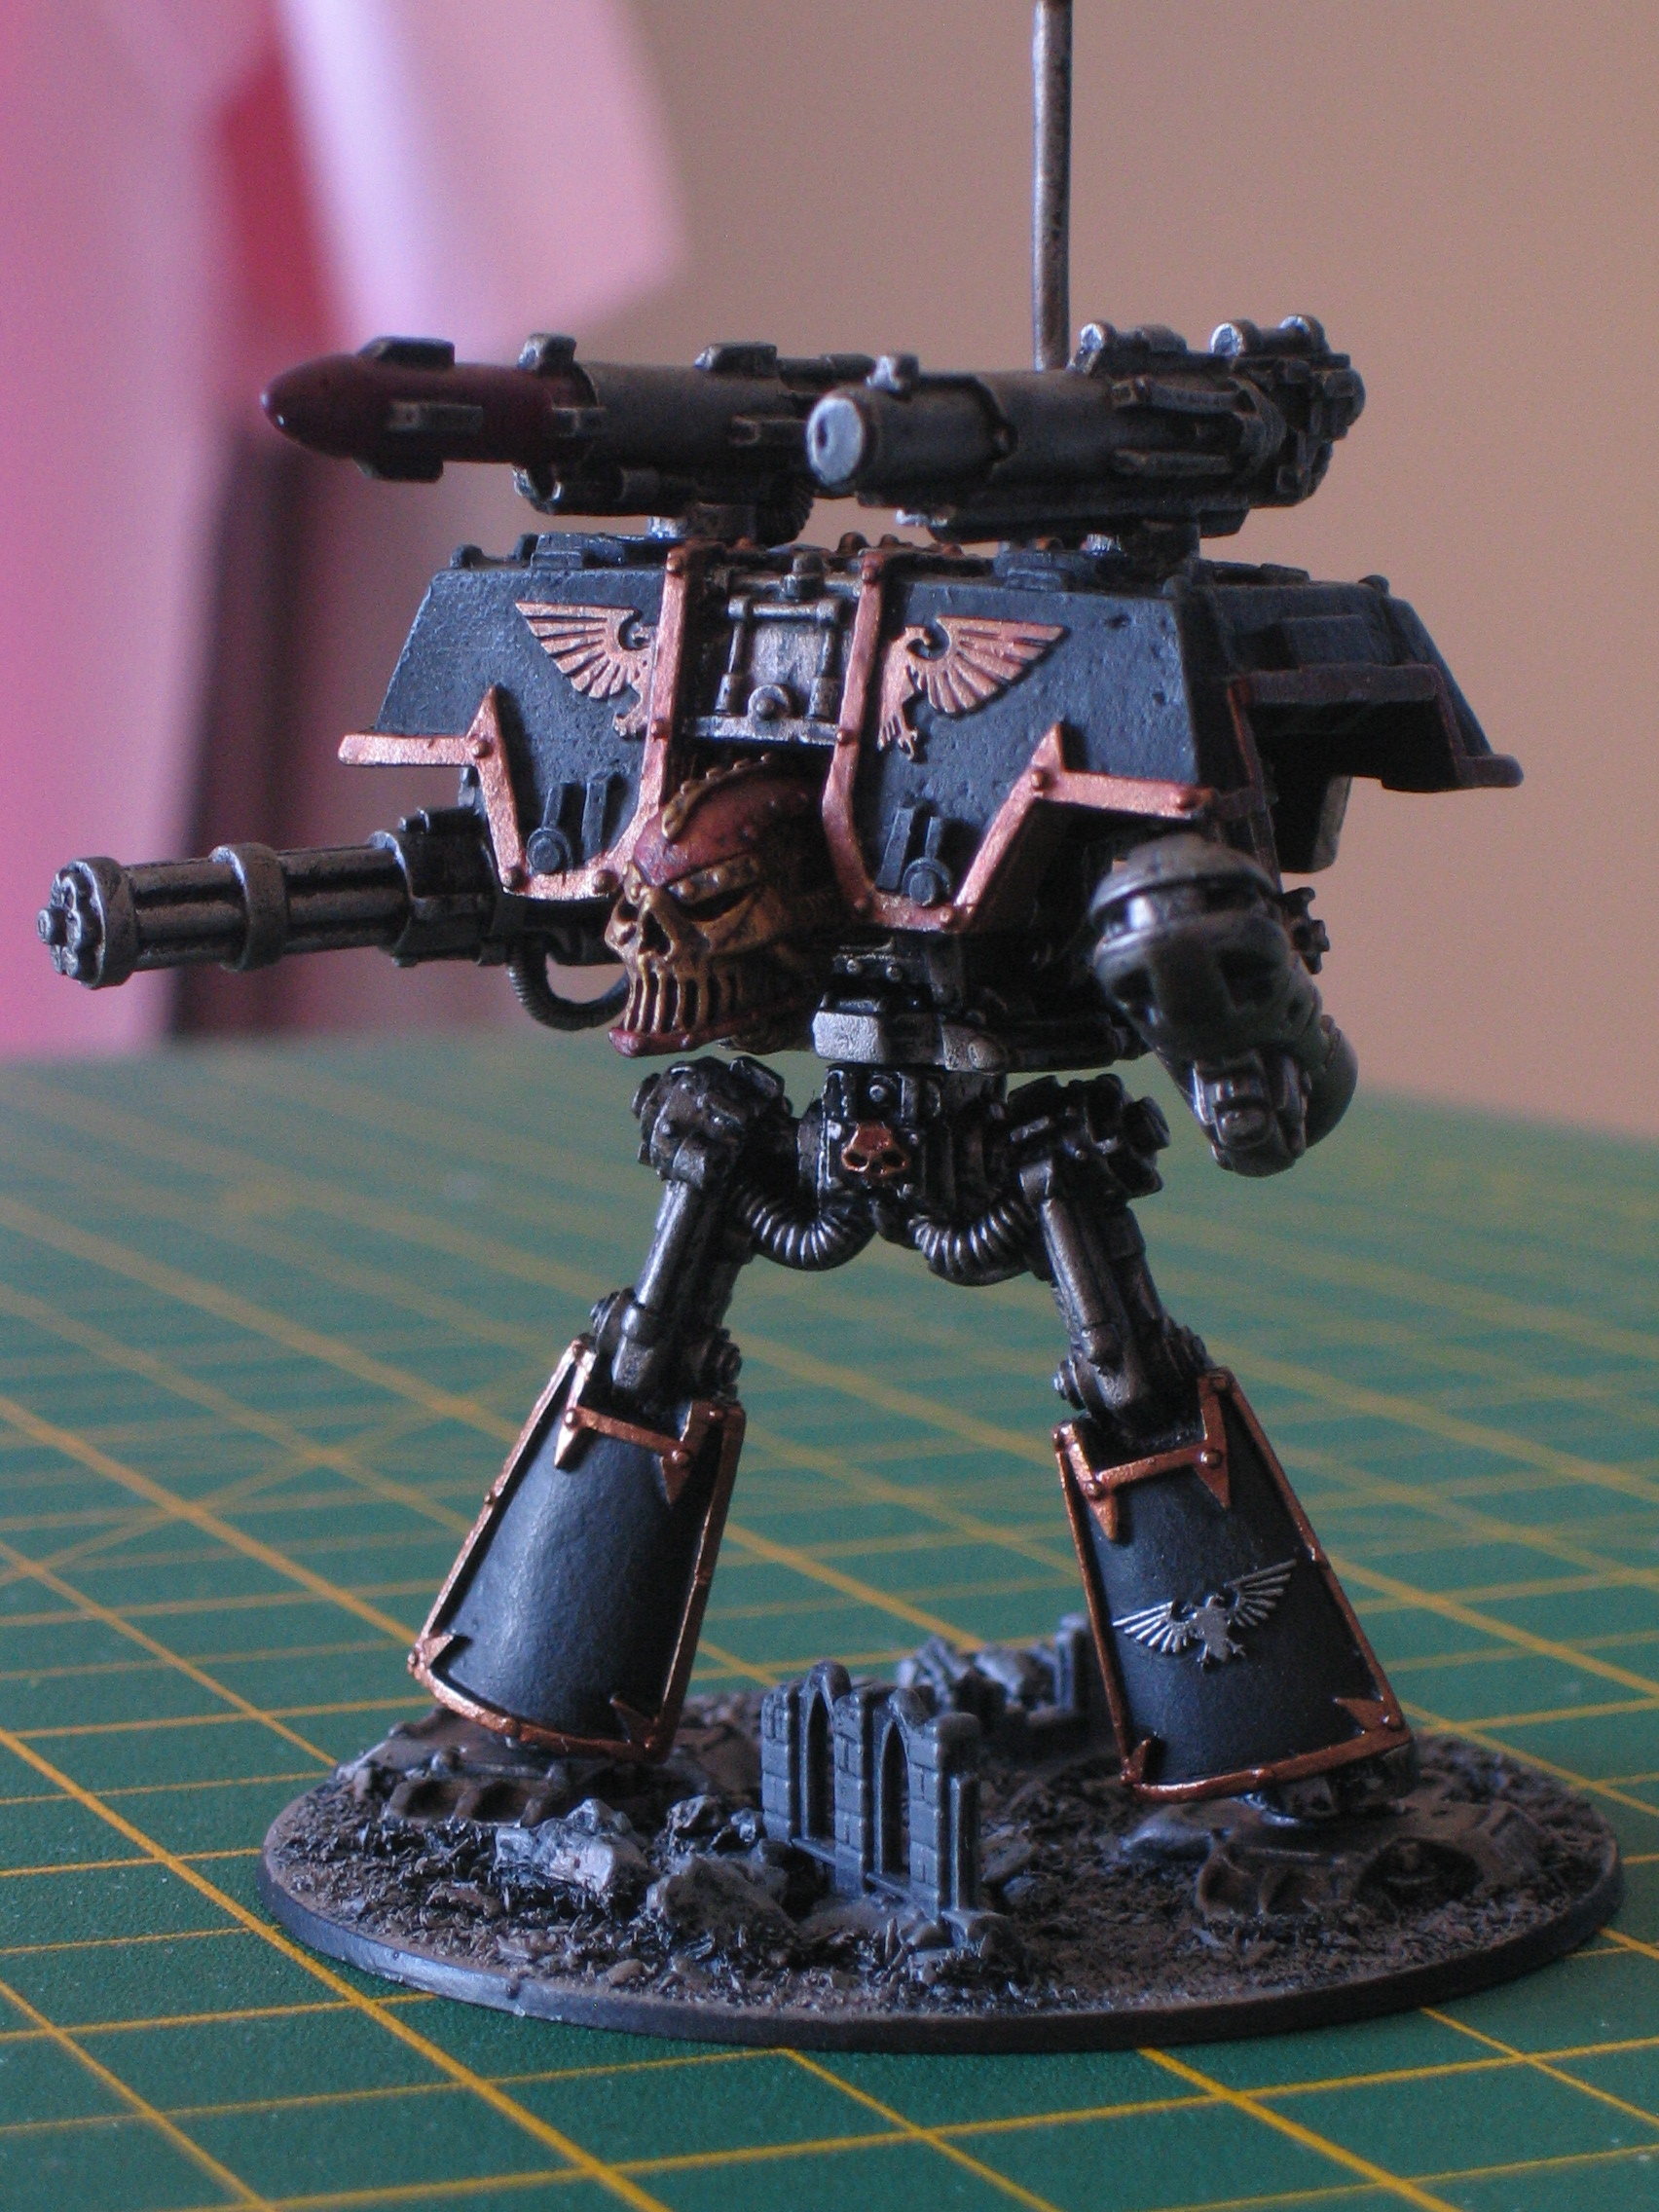
Legio Pantera Custodian Titan
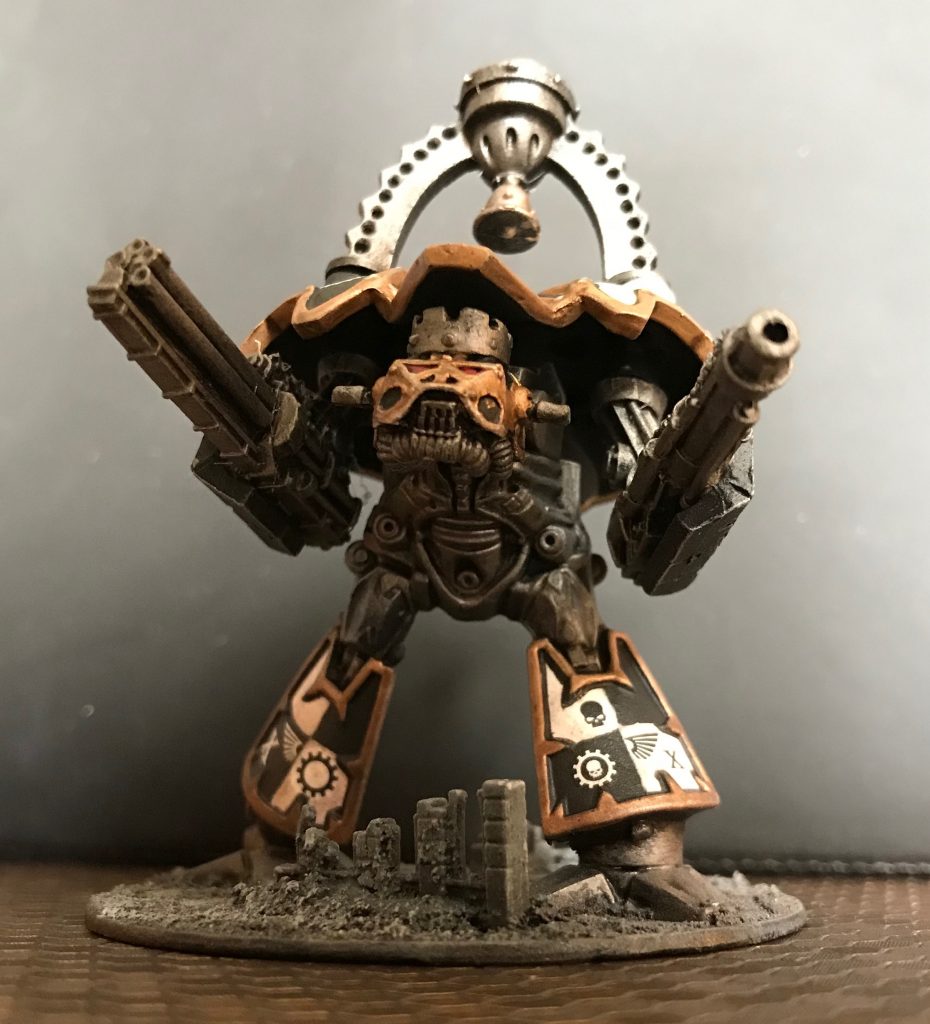
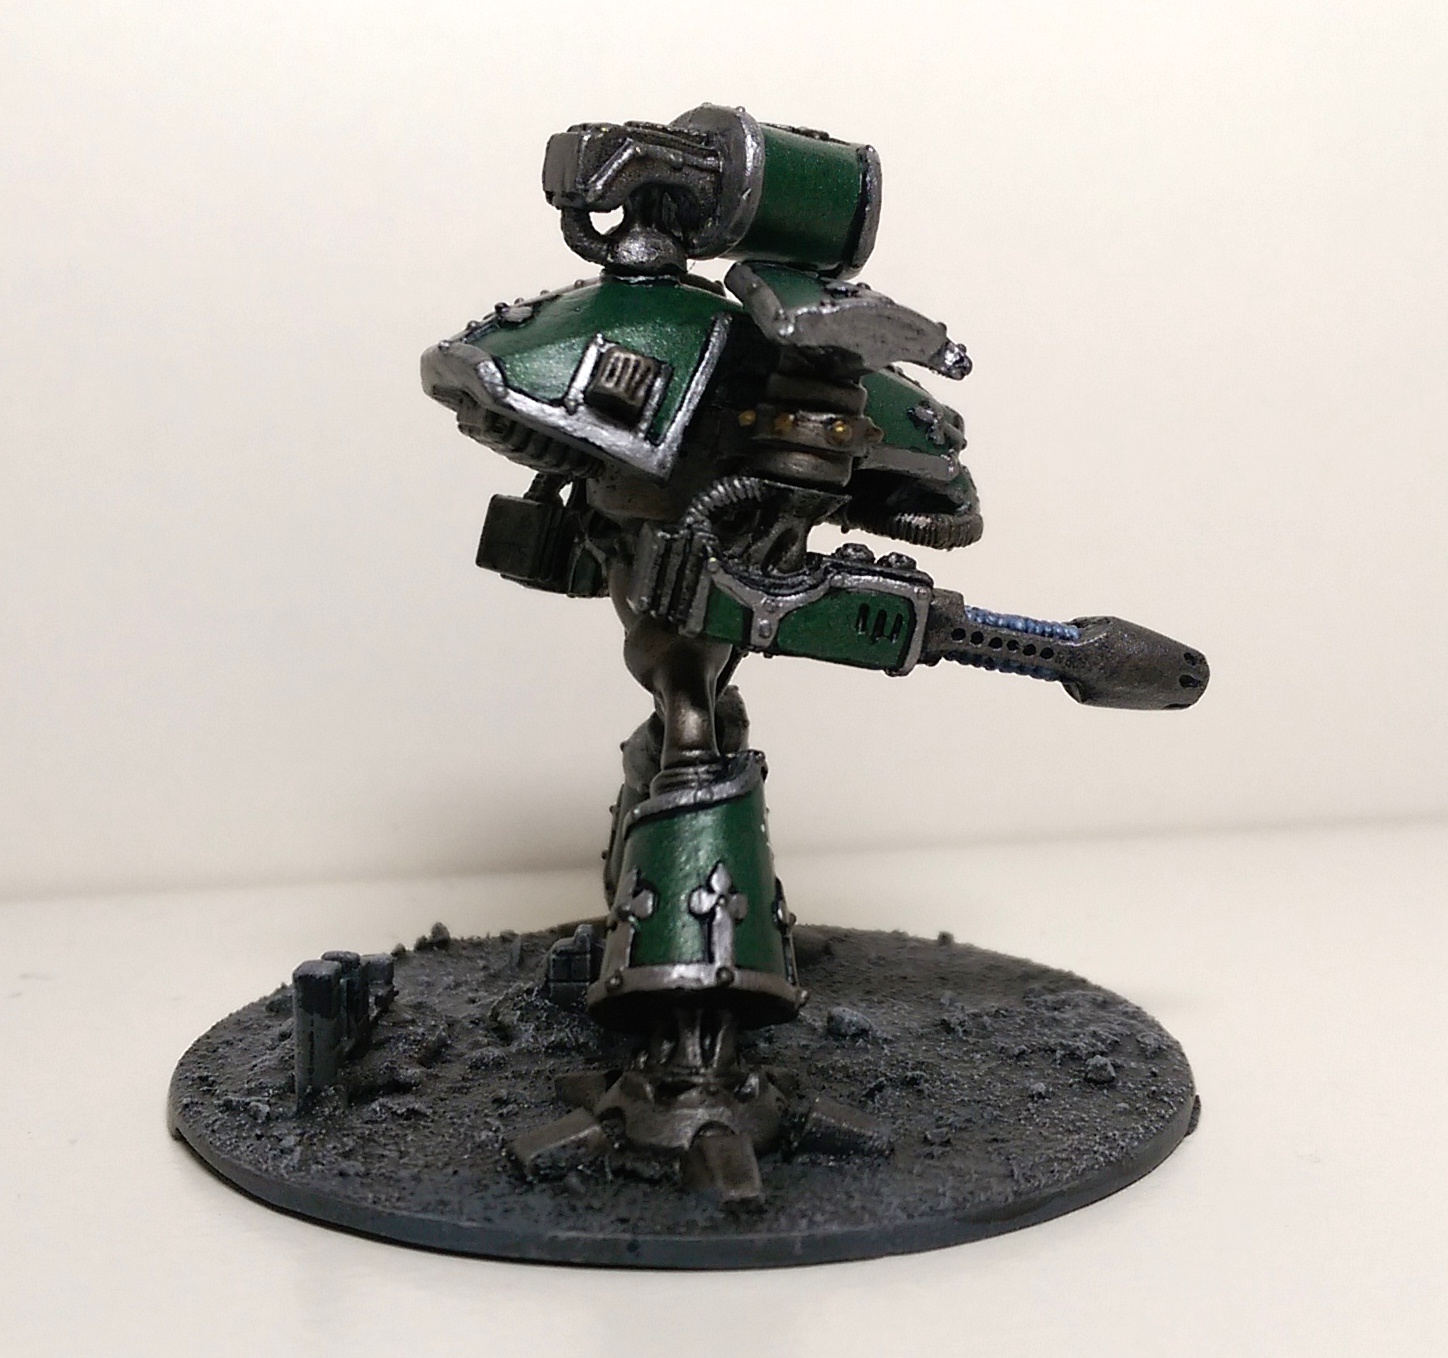
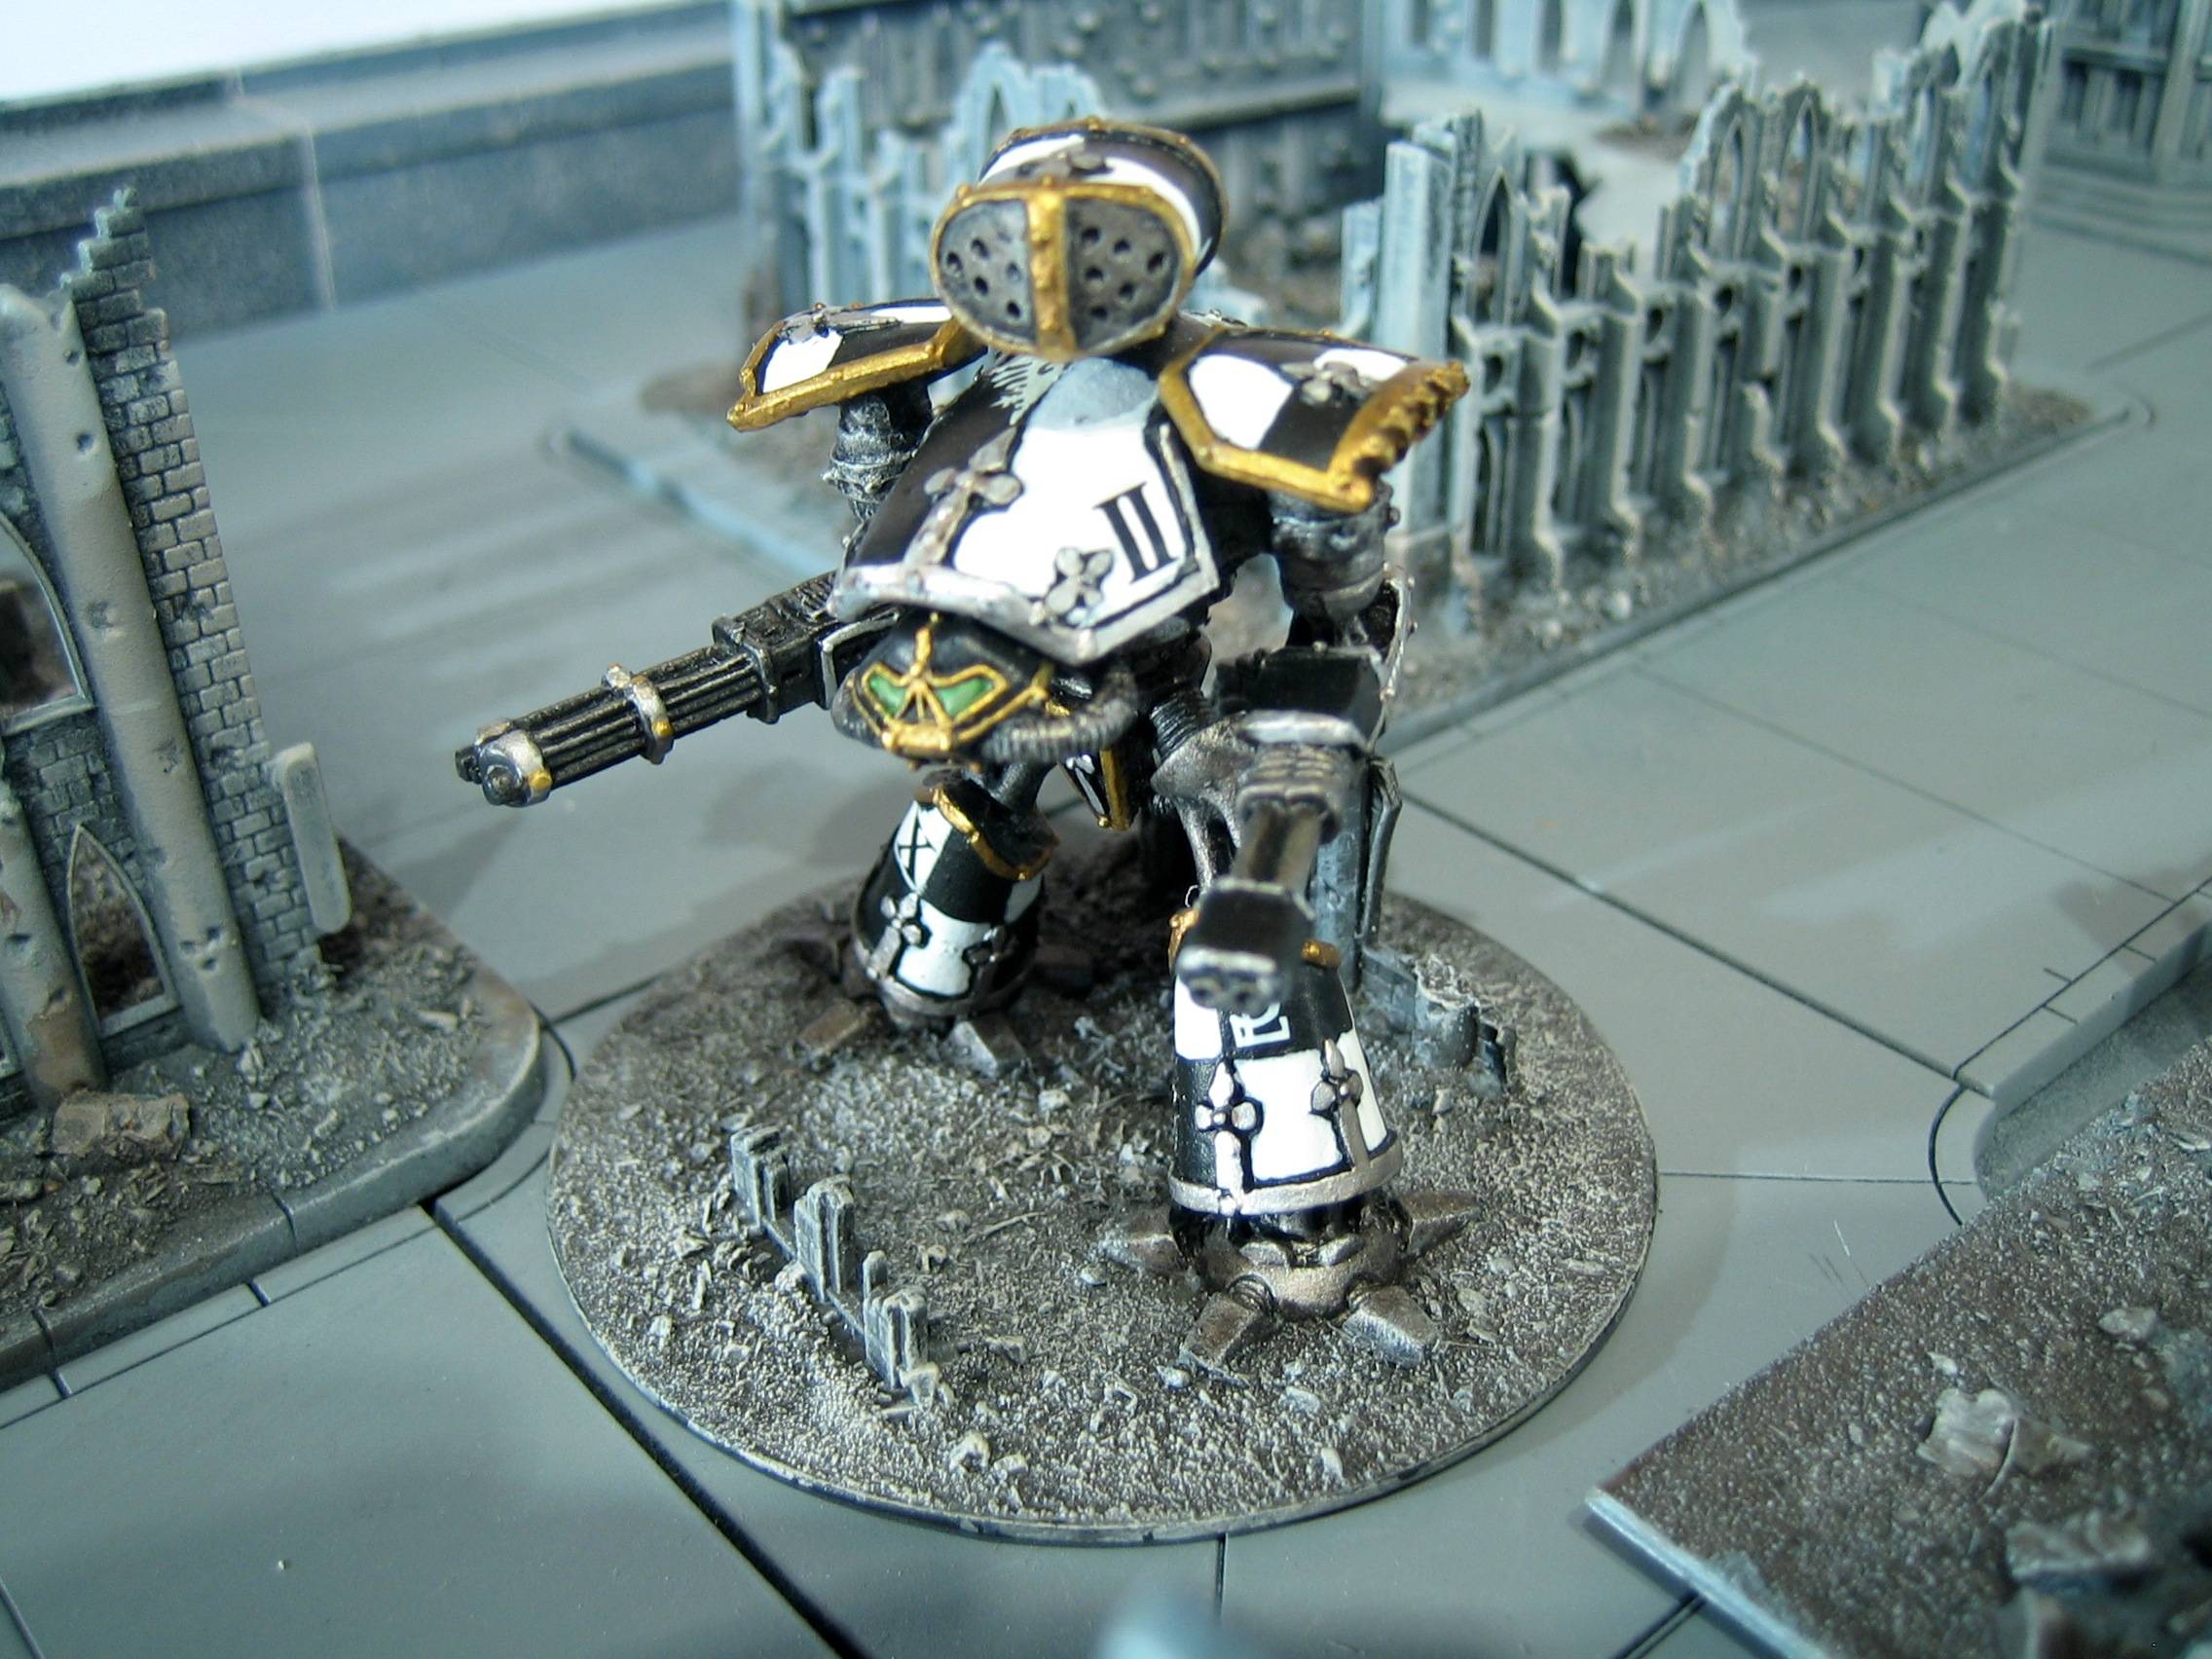
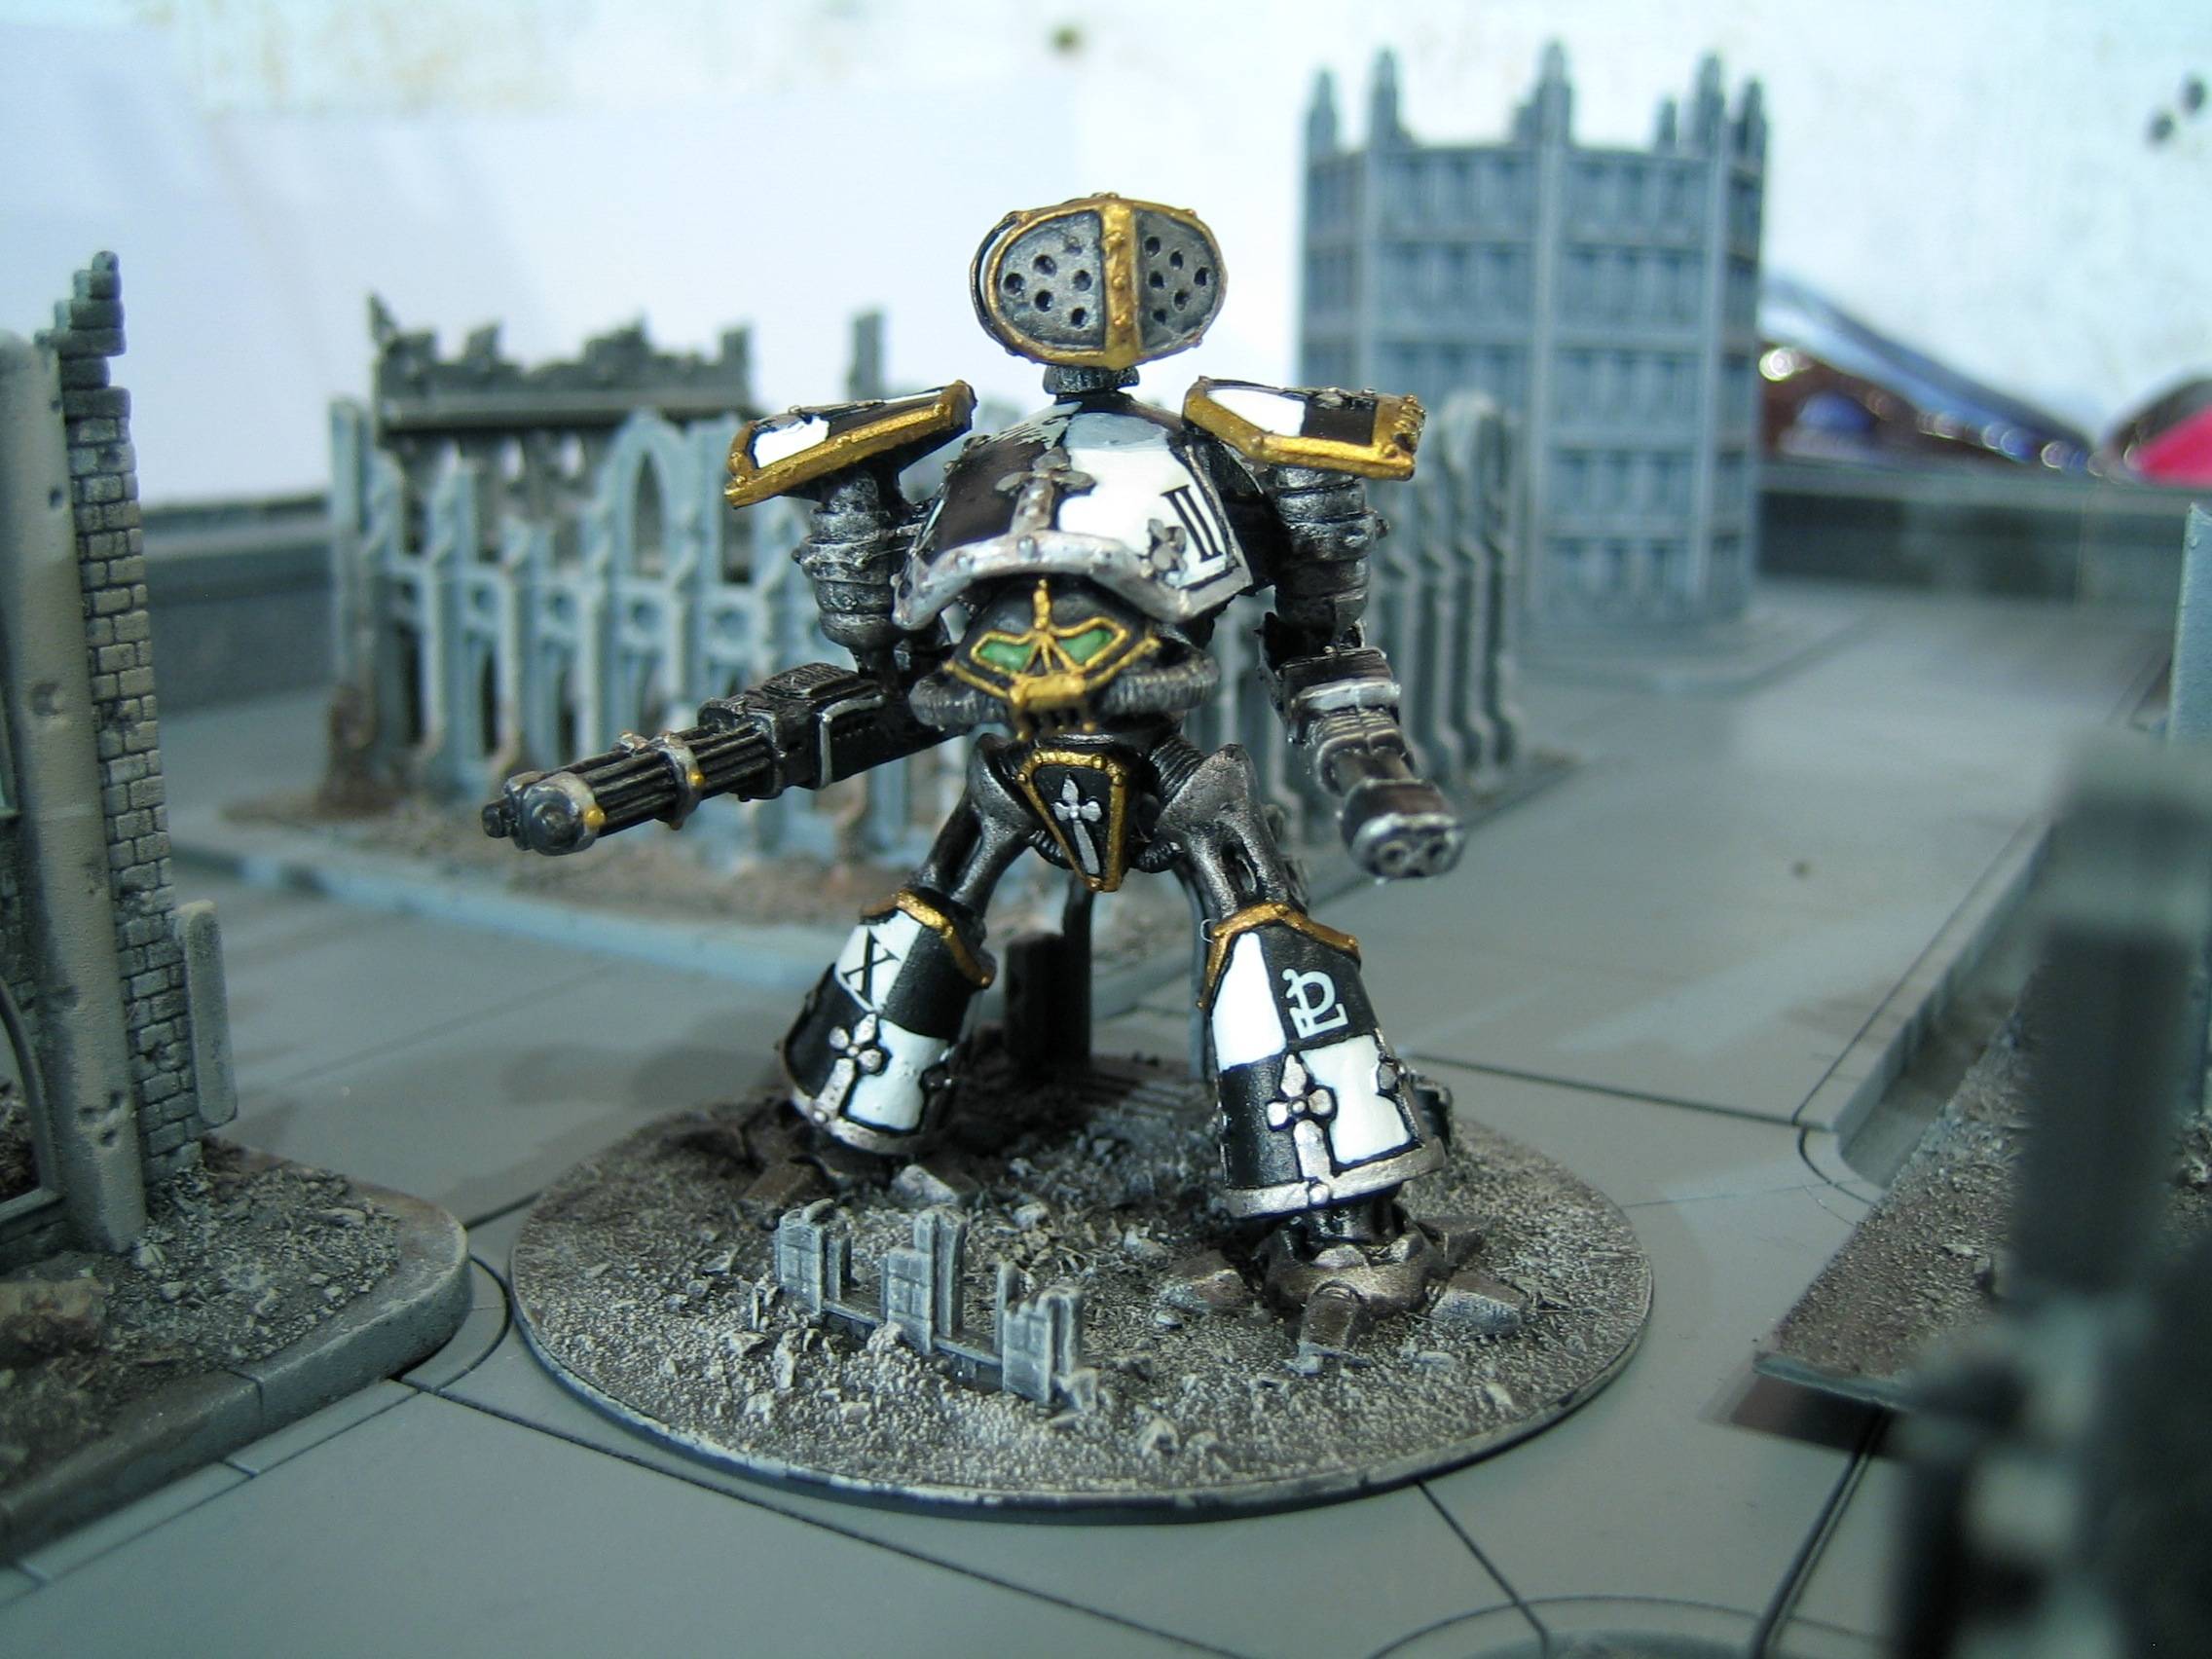
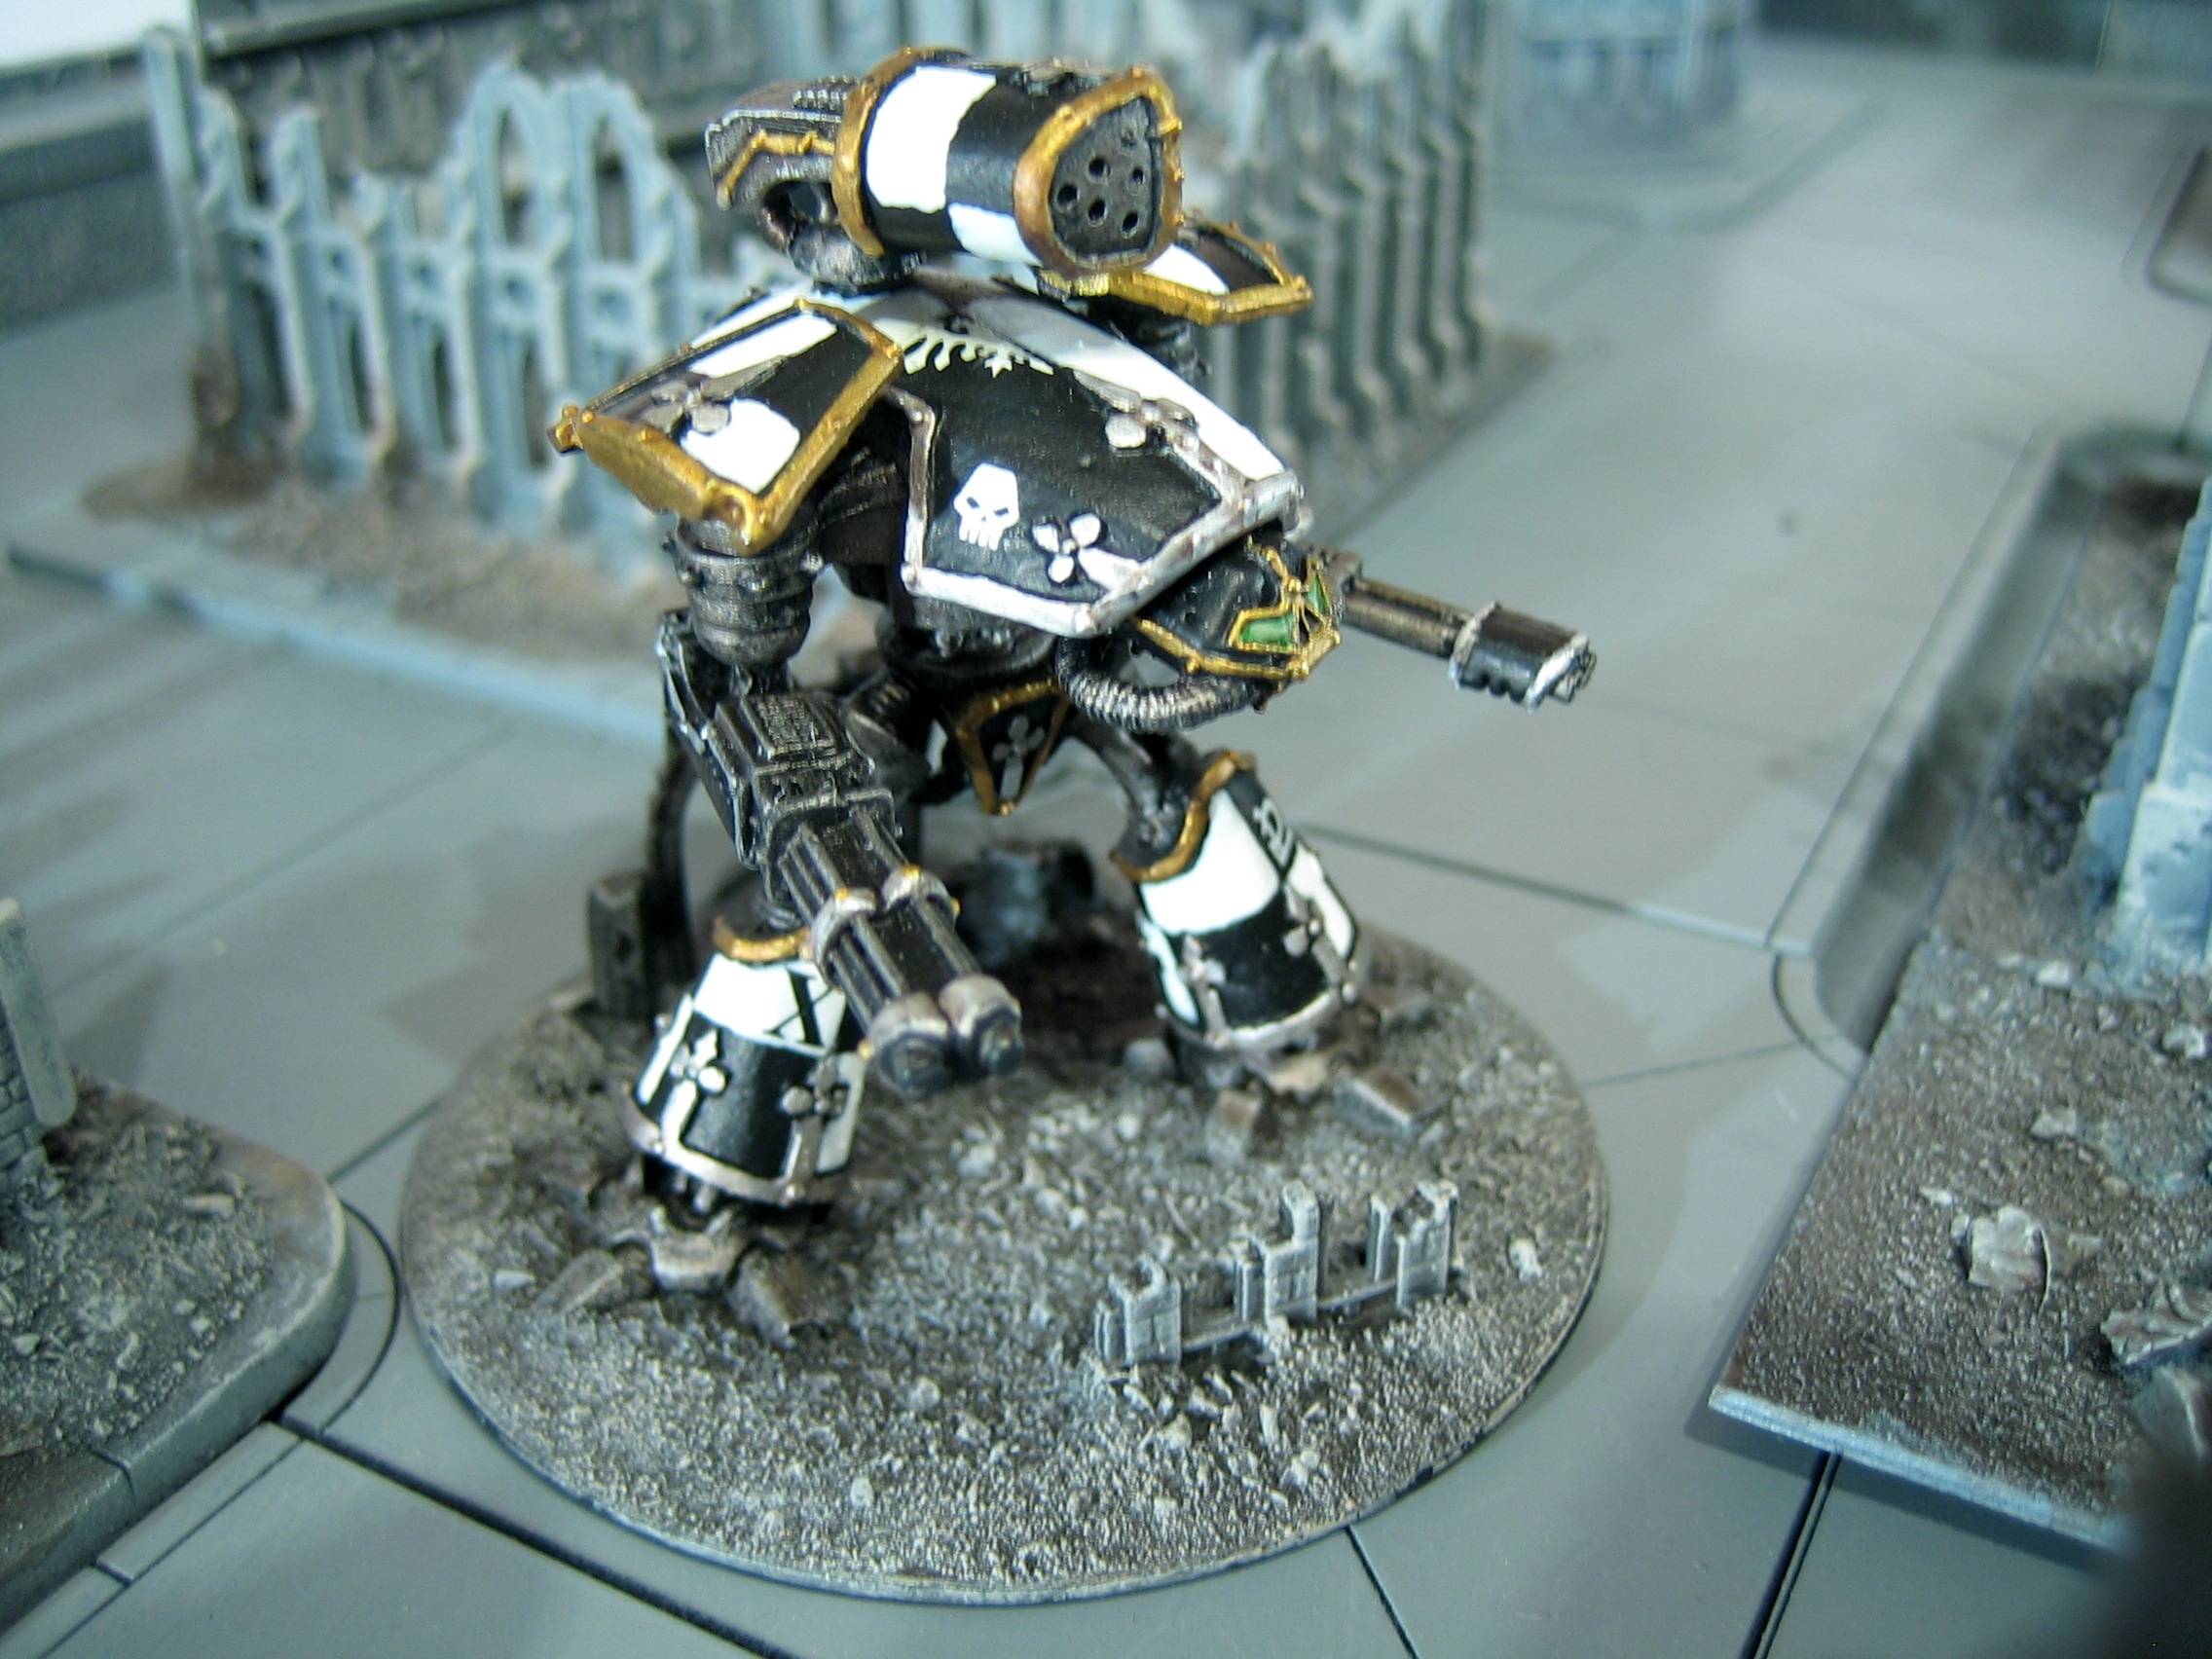
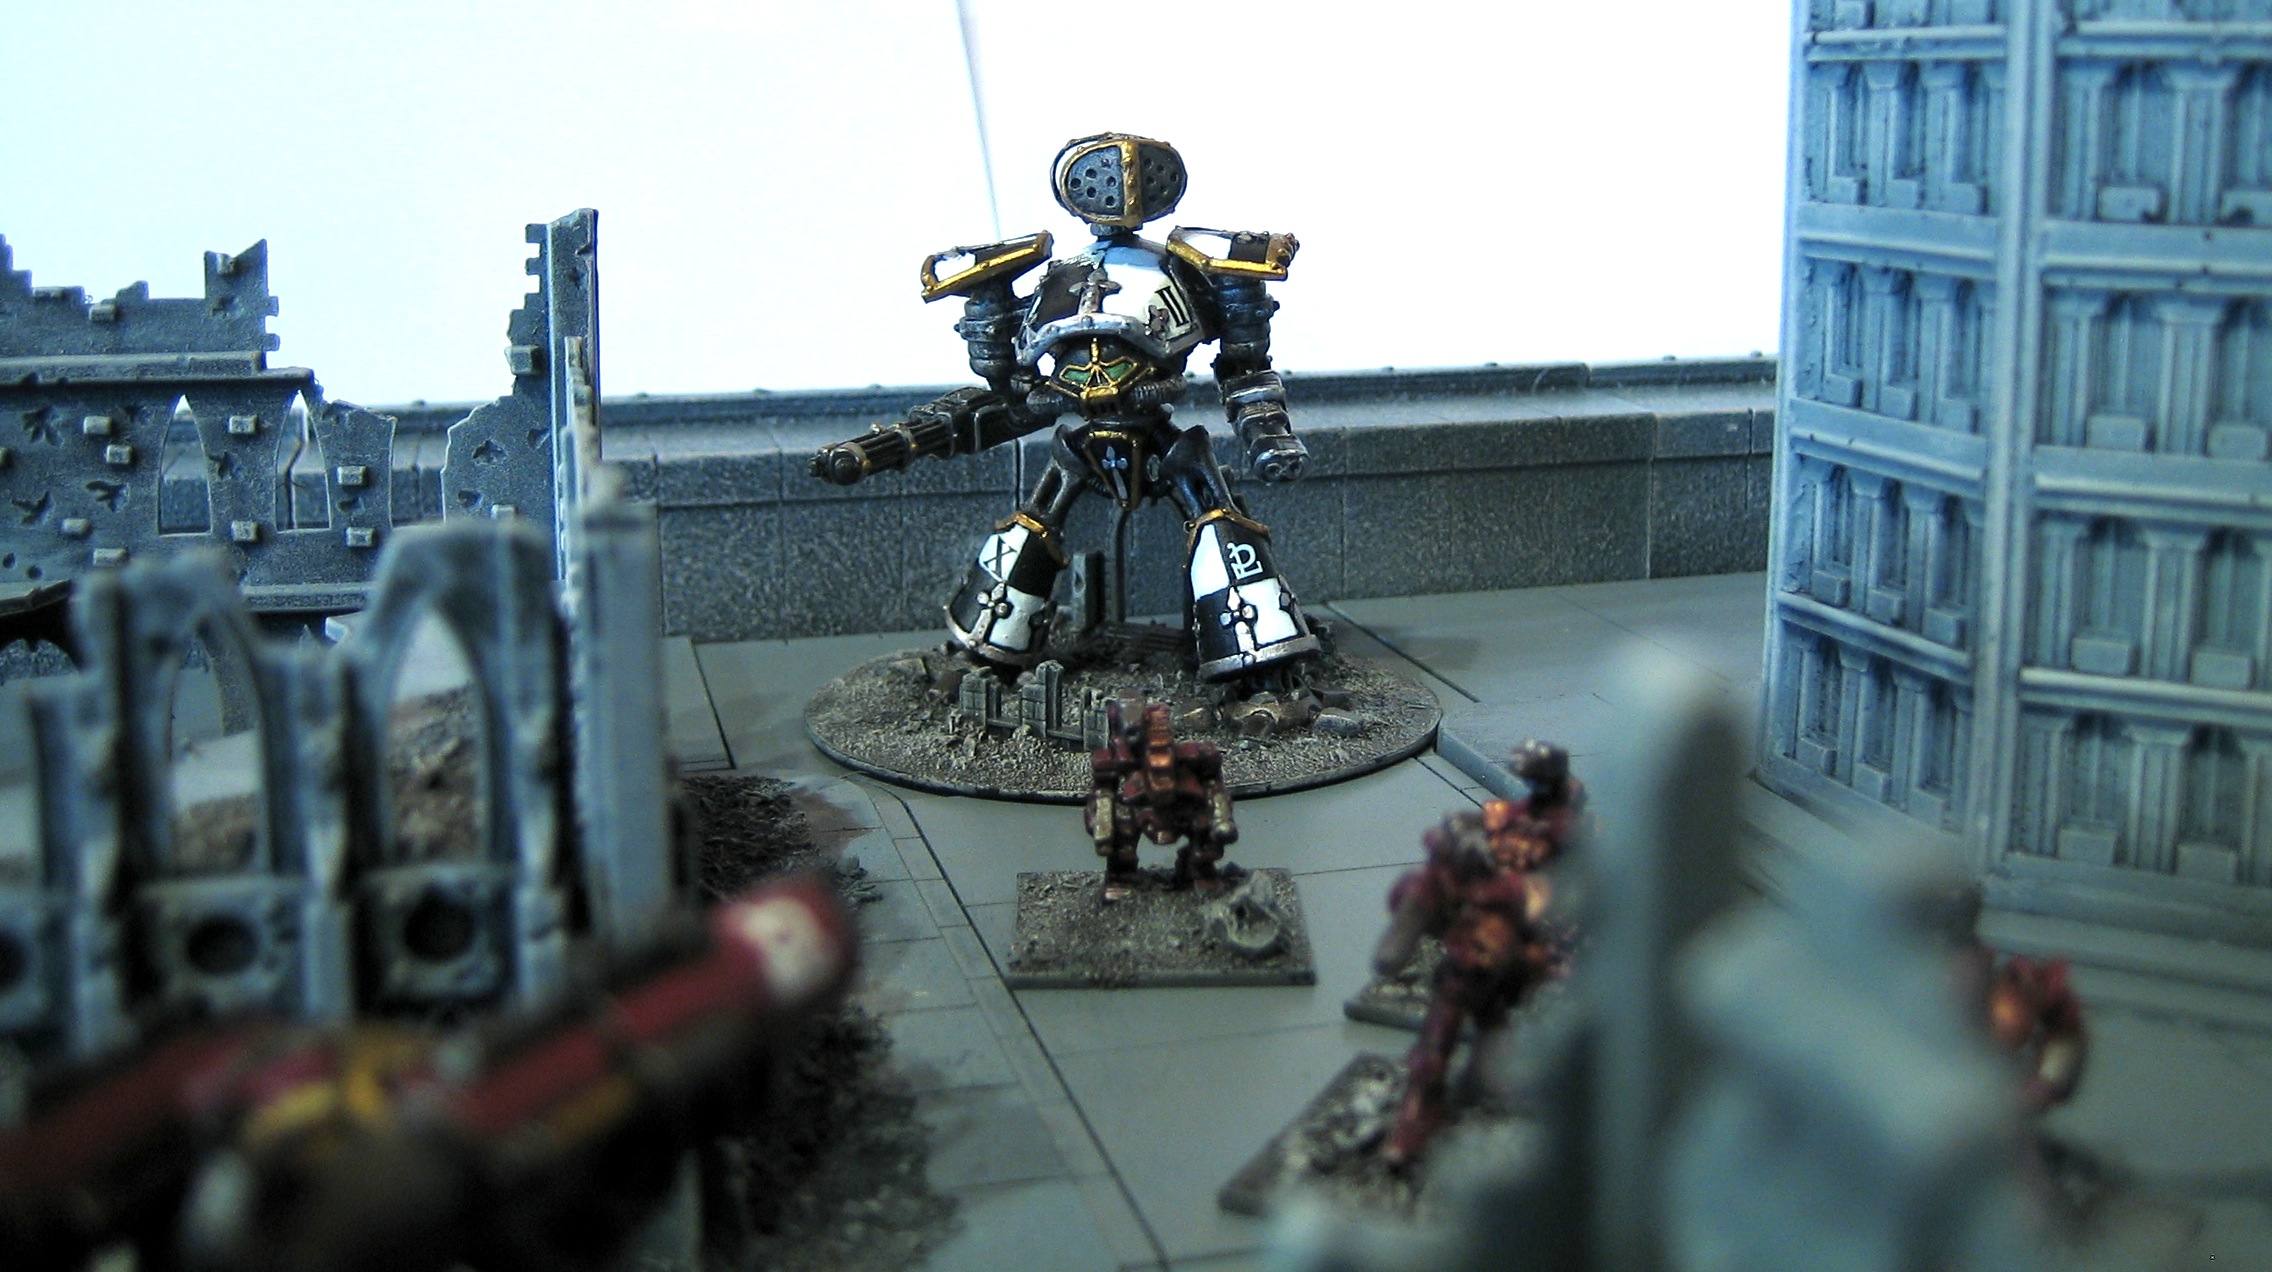
My copy of the new version of Adeptus Titanicus should arrive today, but that hasn't stopped me from continuing to paint classic Epic titans! Here is a rather esoteric one: a Custodian Titan. Each titan legion has a single Custodian titan, which replaces its carapace weapons with a Devotional Bell, built from sacred Terran metals and annointed with drop of the Emperor's blood. The bell acts as a mobile shrine for the Imperial Cult and a rallying point on the battlefield. The presence of a Custodian Titan in a battle is a complete anathema to daemonic intrusions into the material universe as it directly extends the Emperor's will and spirit to his mortal followers.
As well as its Devotional Bell, this titan also has a Command Head and Carapace multi-lasers, and its arm weapons are Lucius-pattern weapons from the Mk III Warlord Titan.
More pictures below.
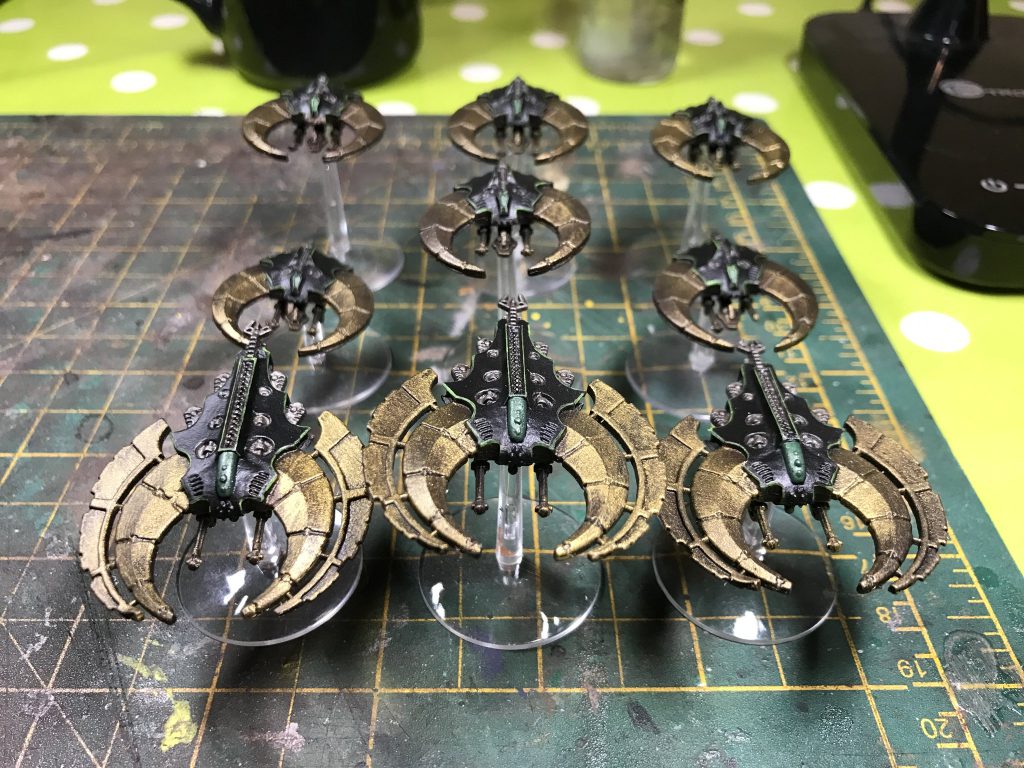
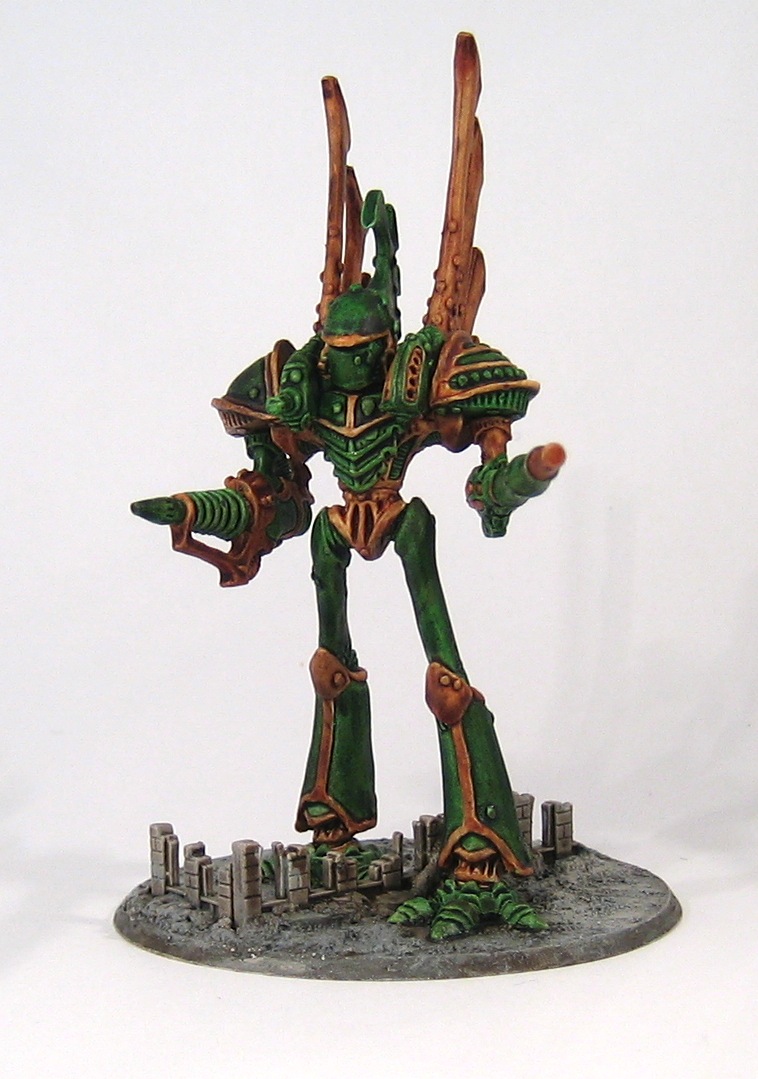
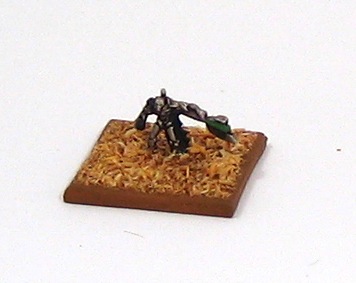
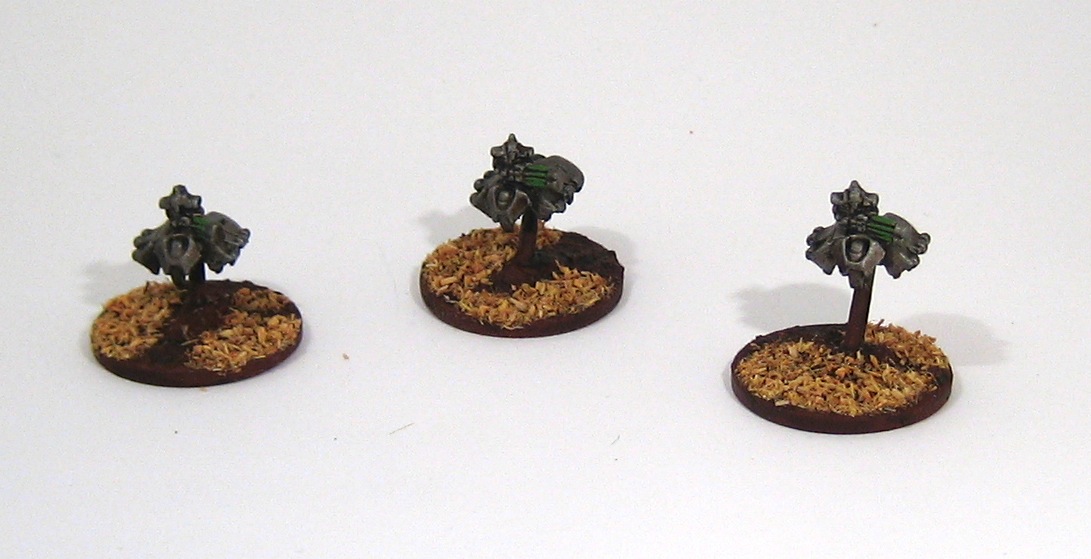
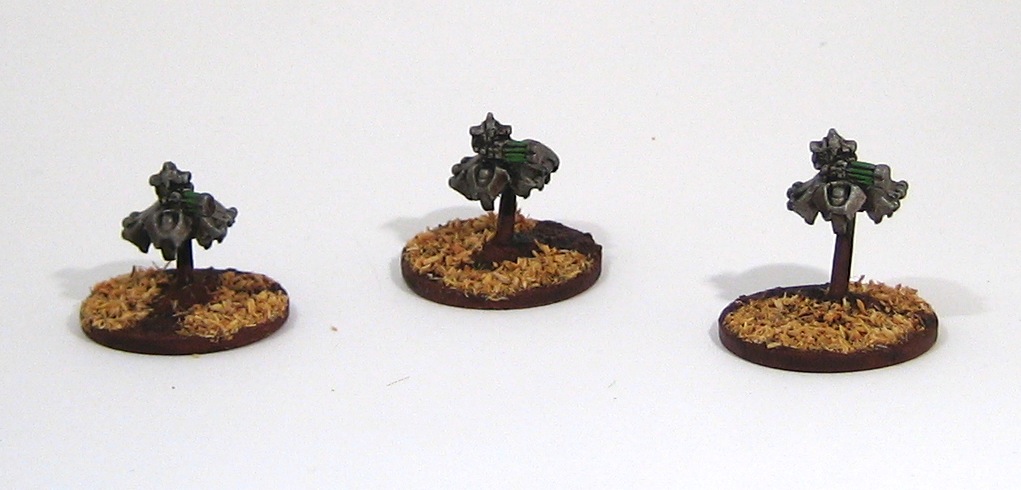
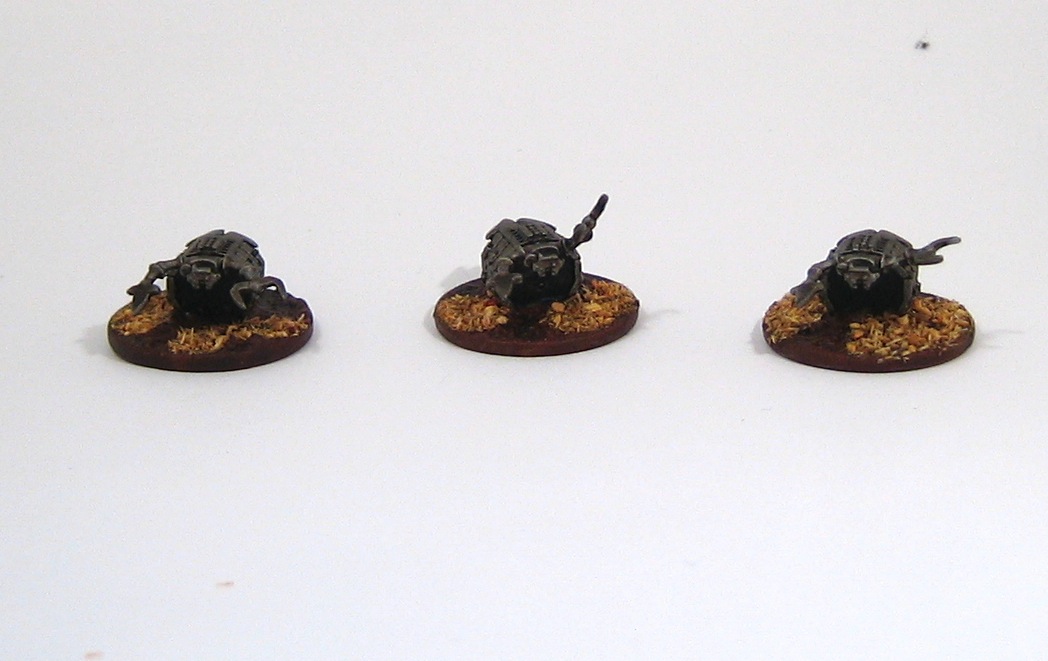
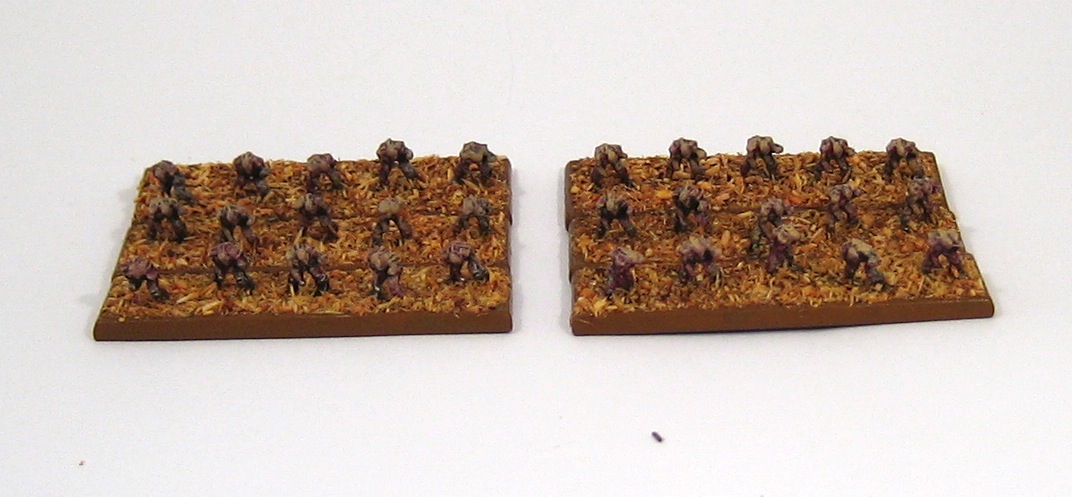
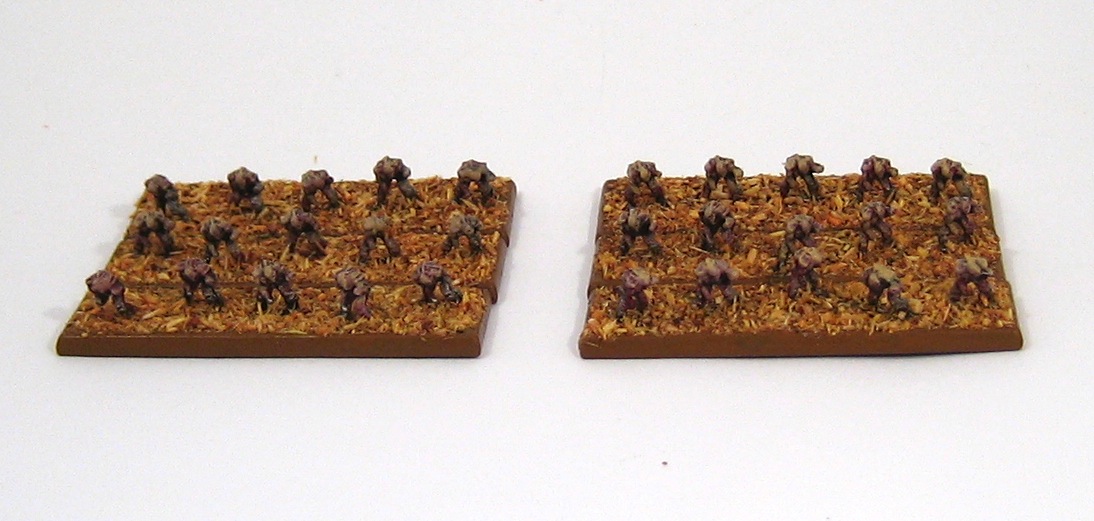
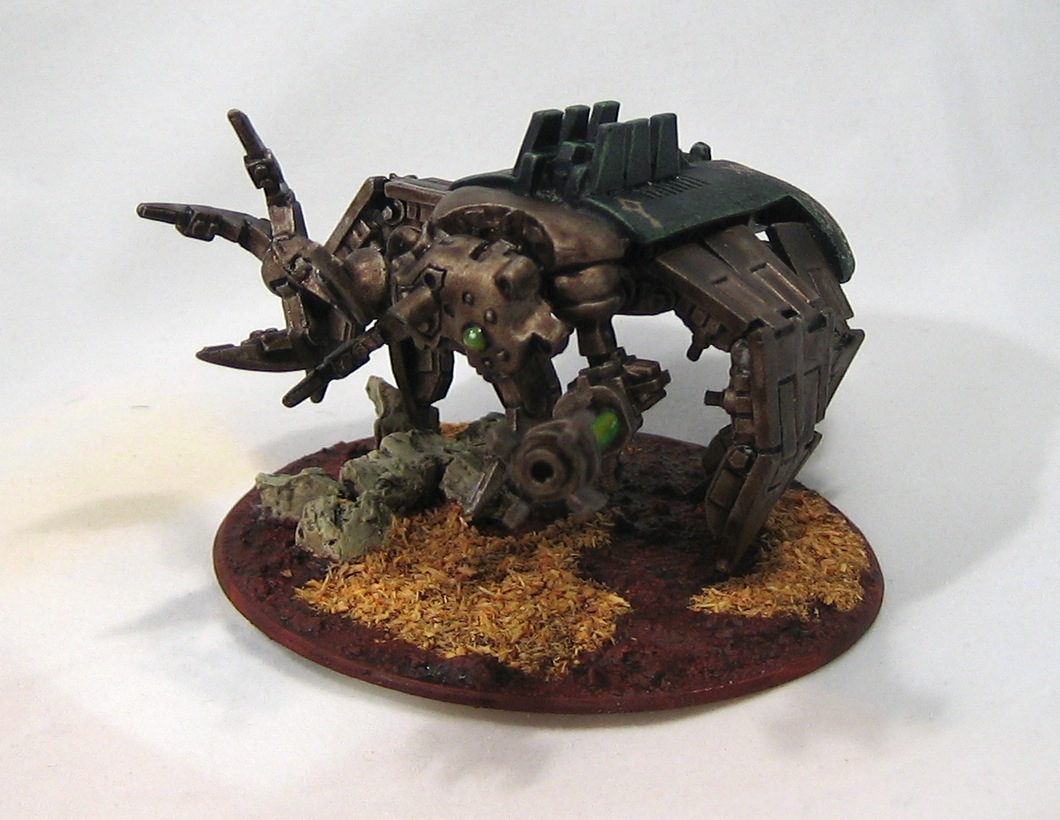
Epic-scale Necron Canoptek Wraiths
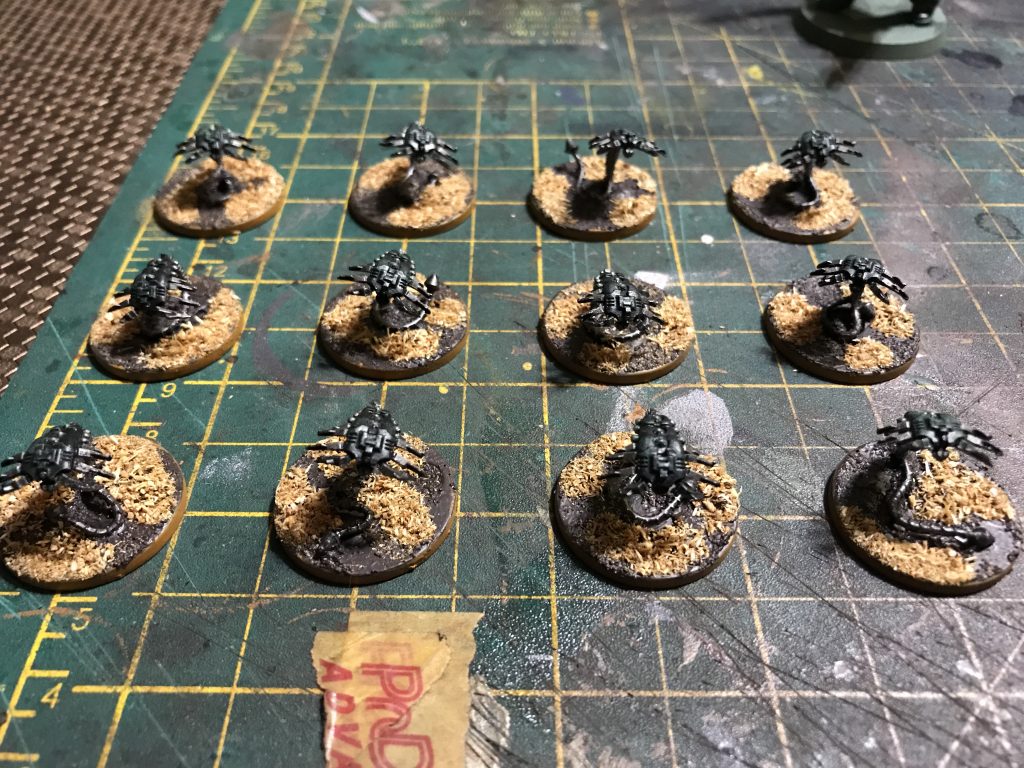
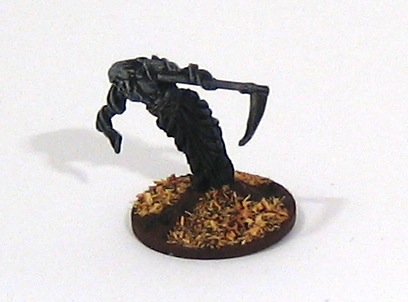
After a succession of "large" models (whether the Astraeus, the Imperial Navy fleet or the Epic-scale Necron praetorians) it was nice to get work on some small models for a change. The bases of these Canoptek Wraiths are 20mm in diameter!
My Epic Necron army, large though it is, is a bit light on close combat units (something also true of necrons in 40k) so these beasties should be a useful addition to the legions.
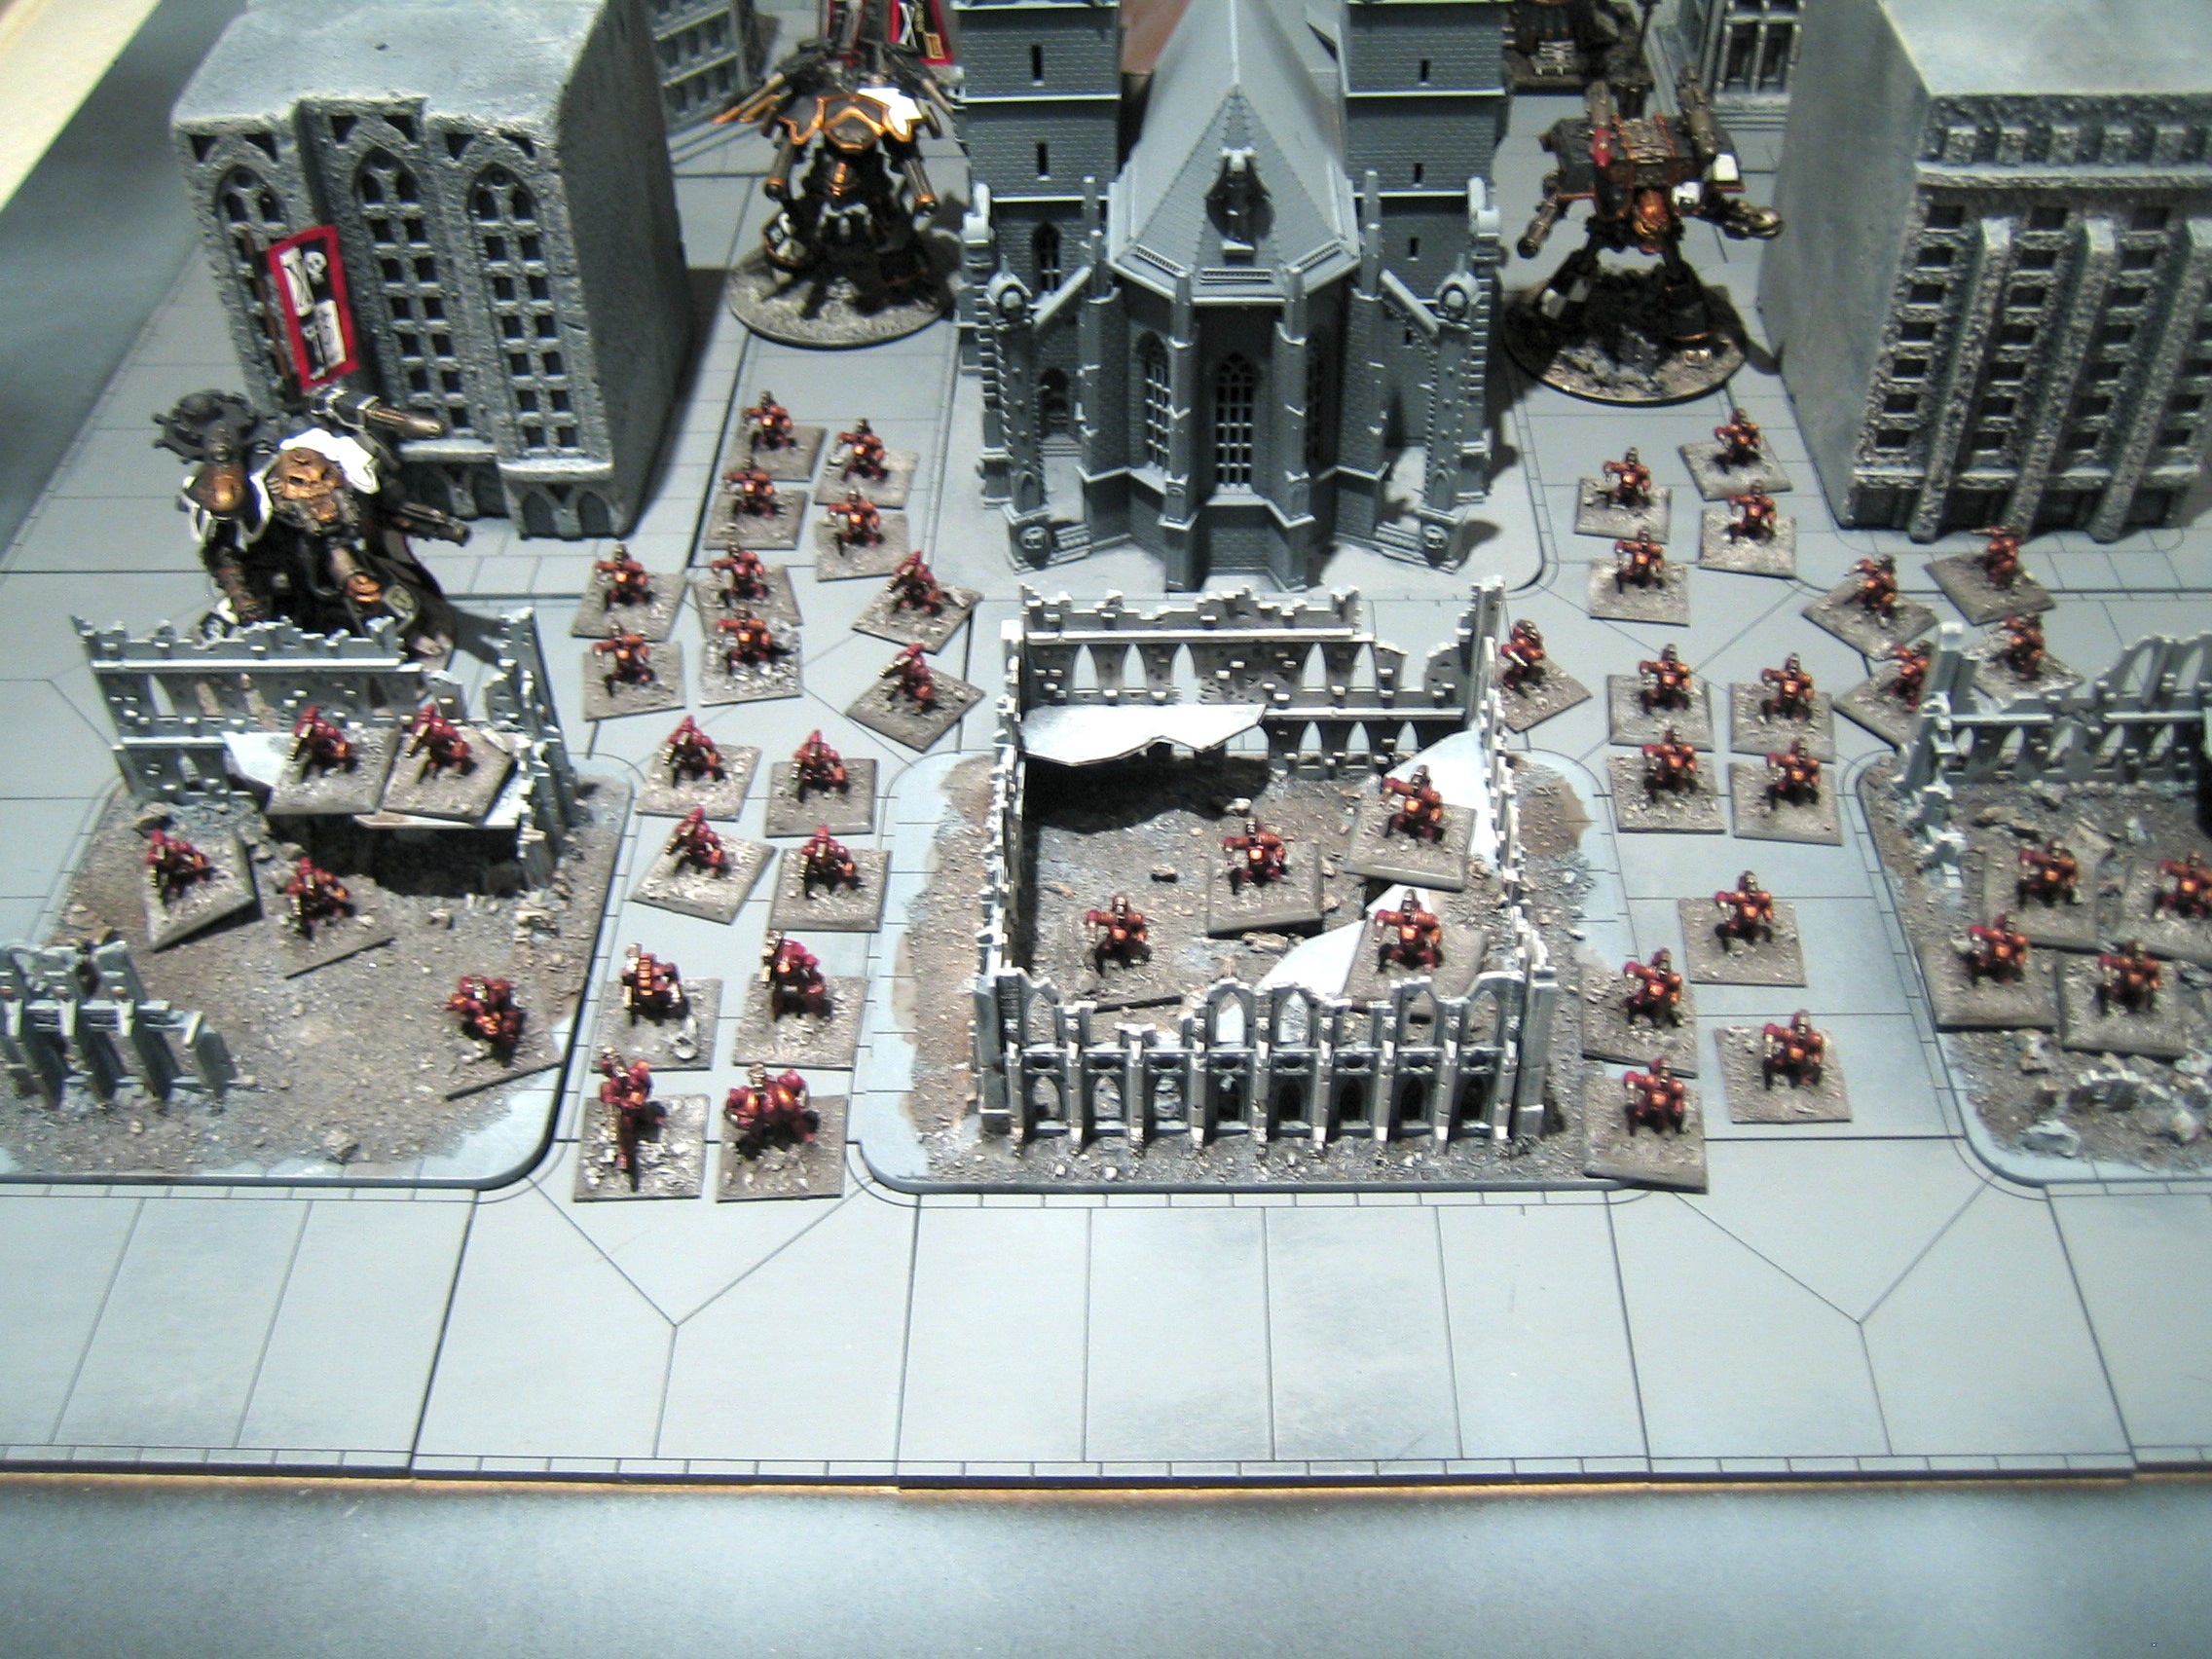
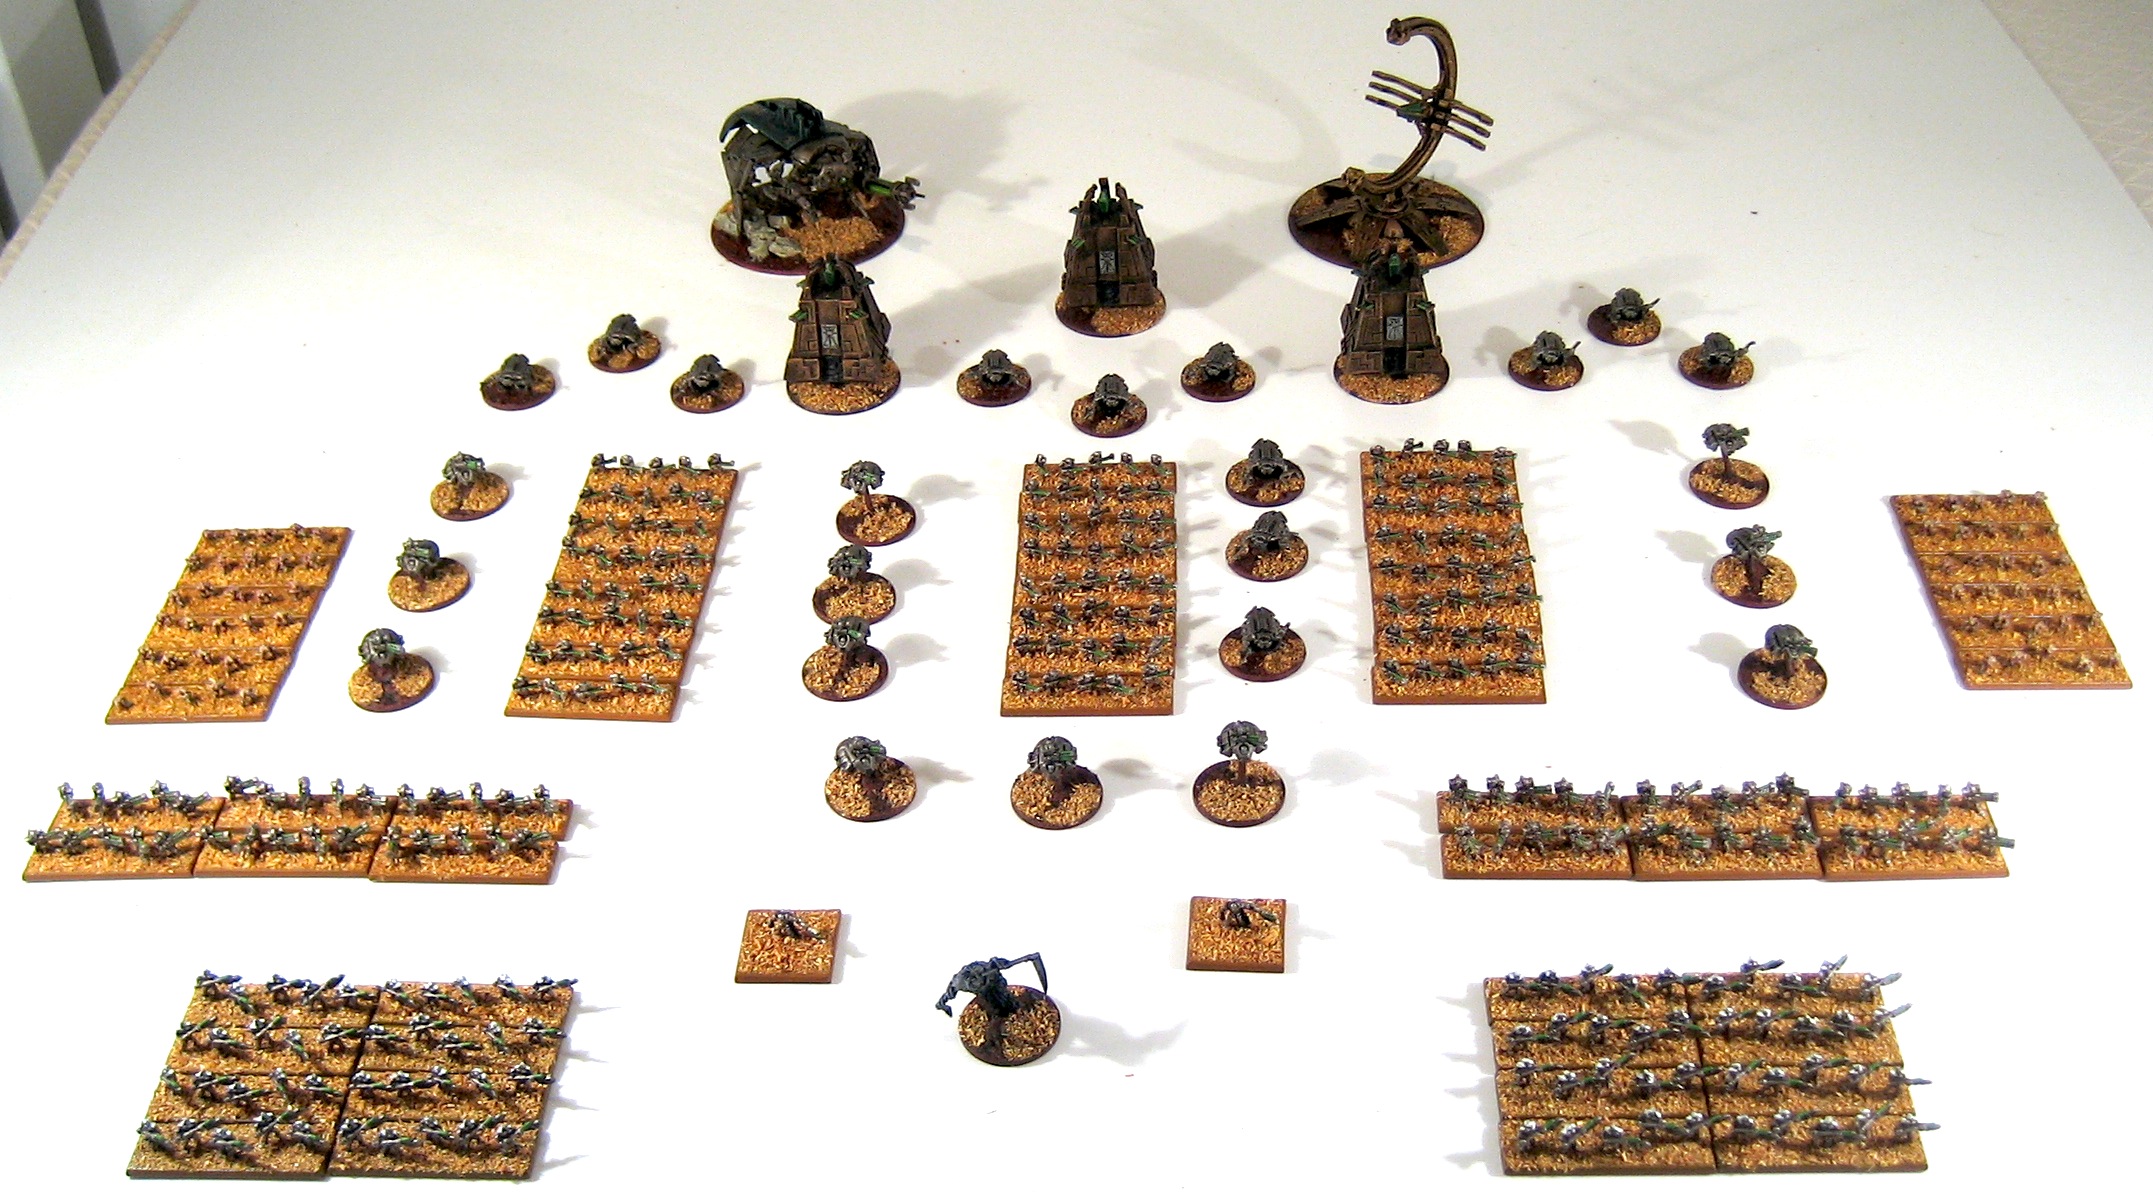
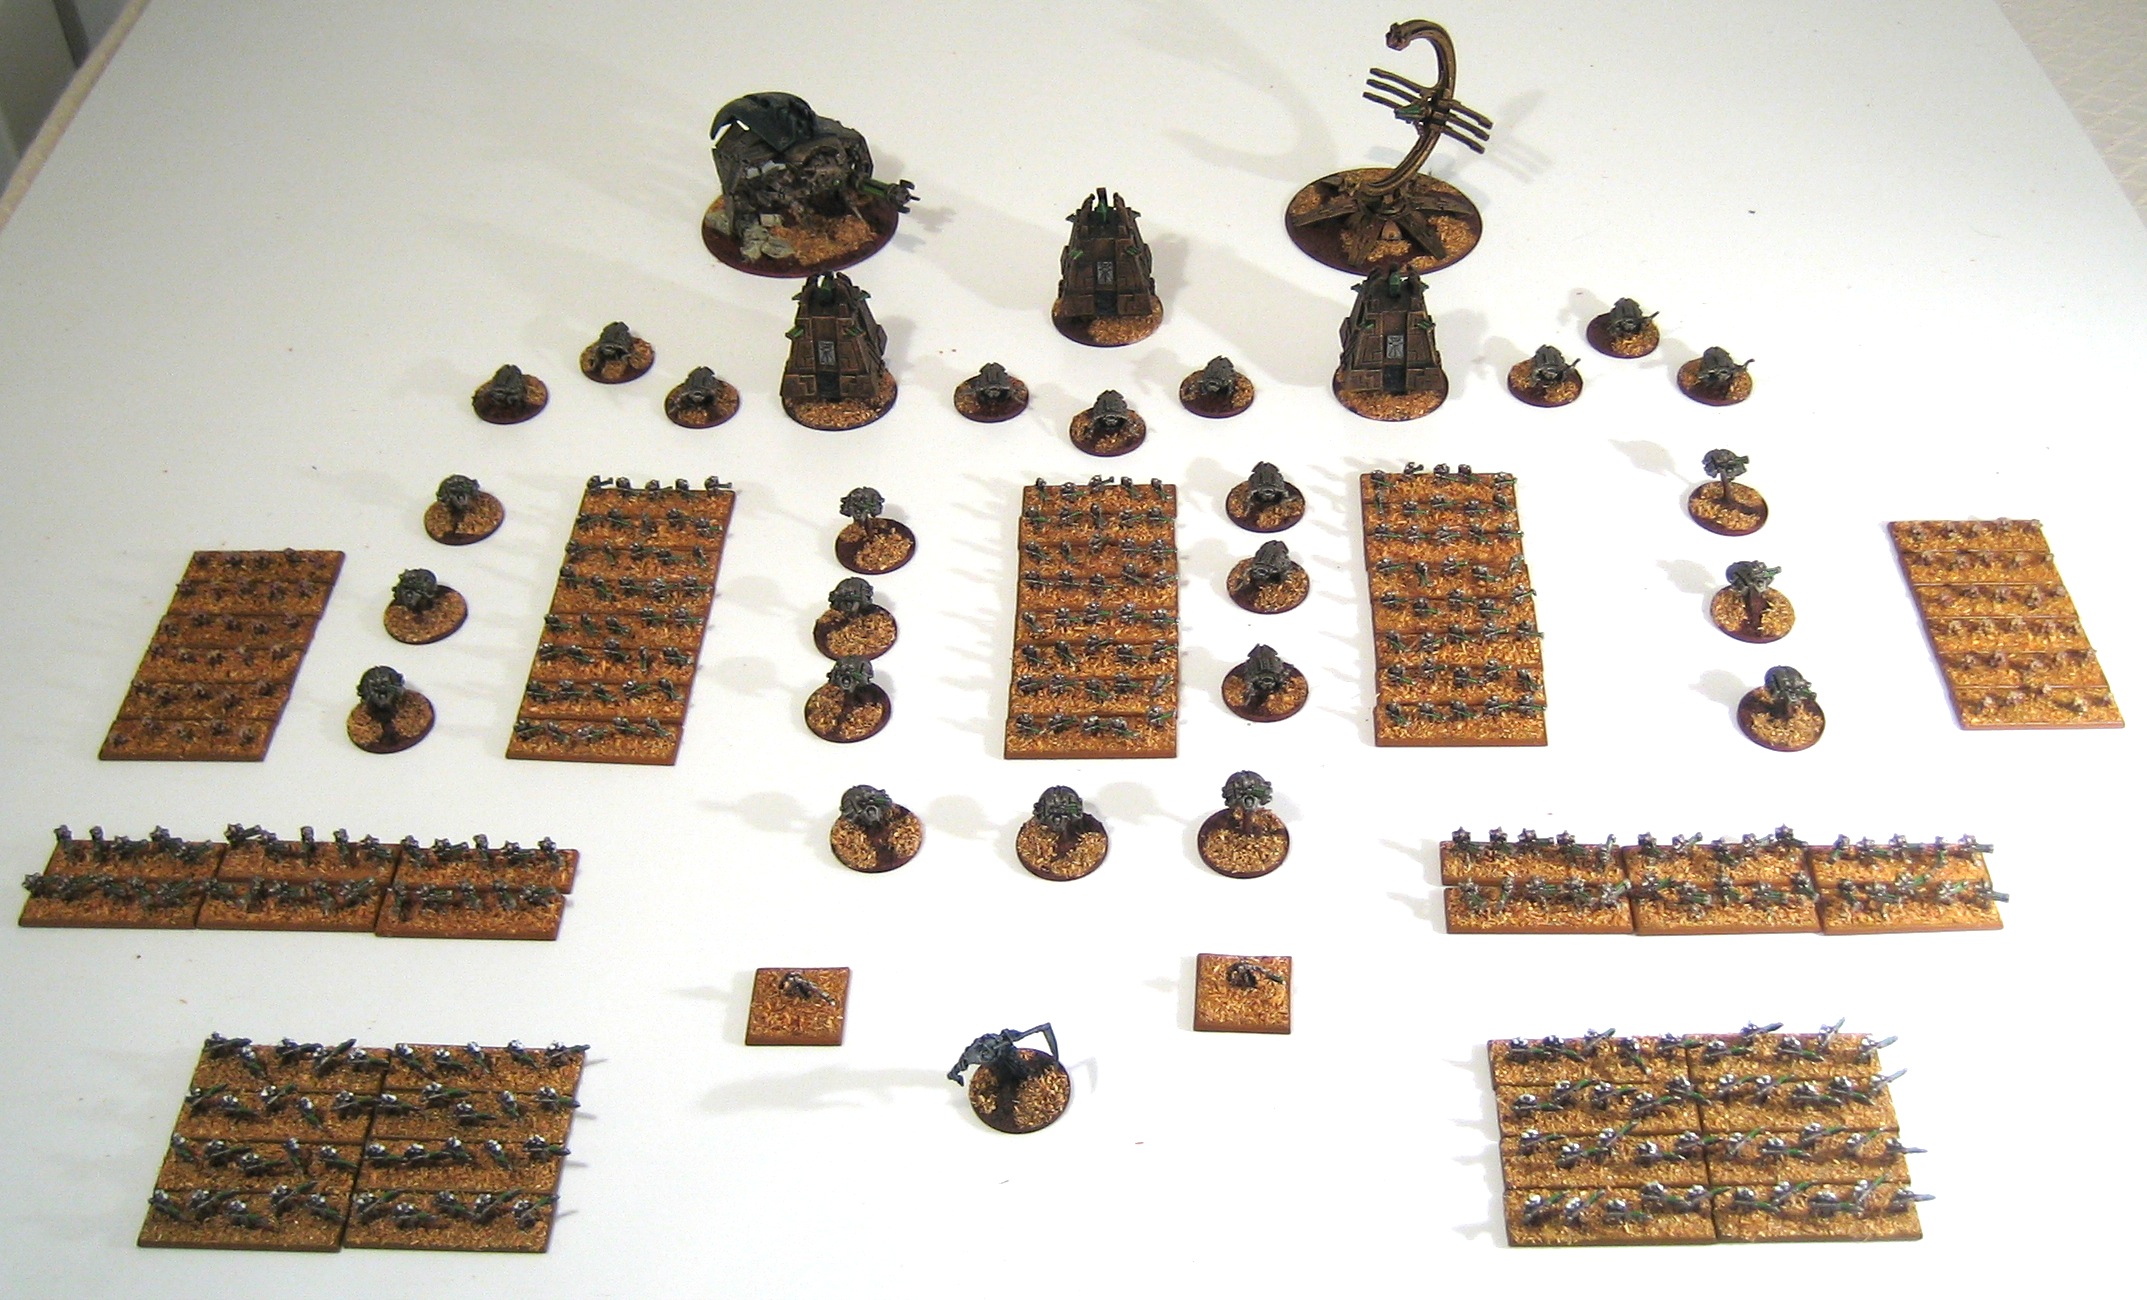
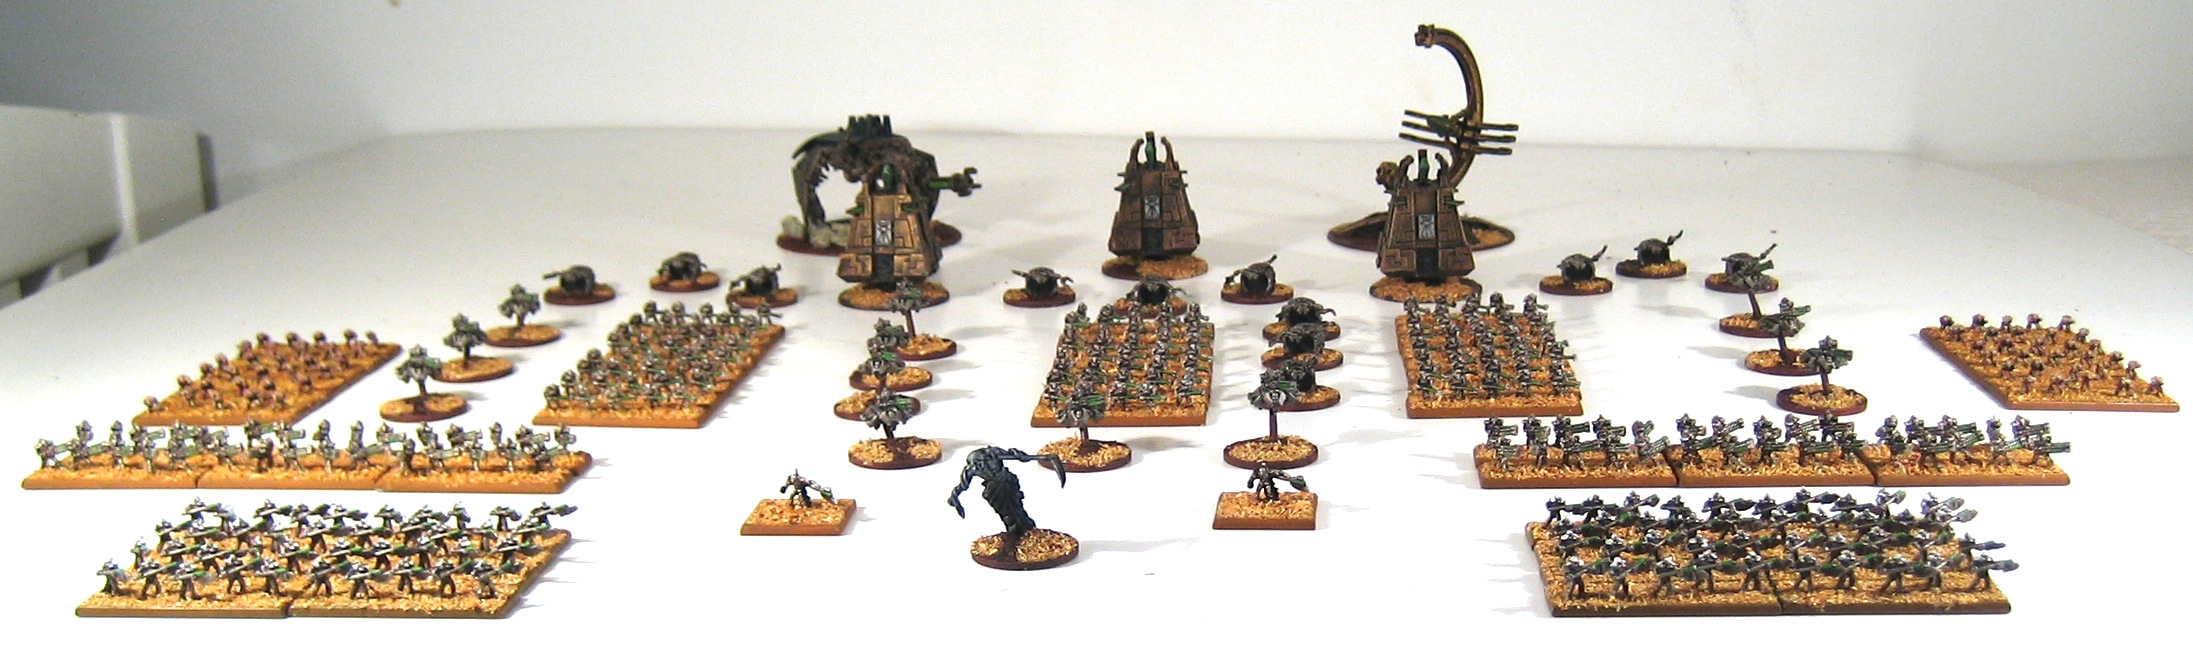
Clearing the backlog #5: Epic Necrons assembled!
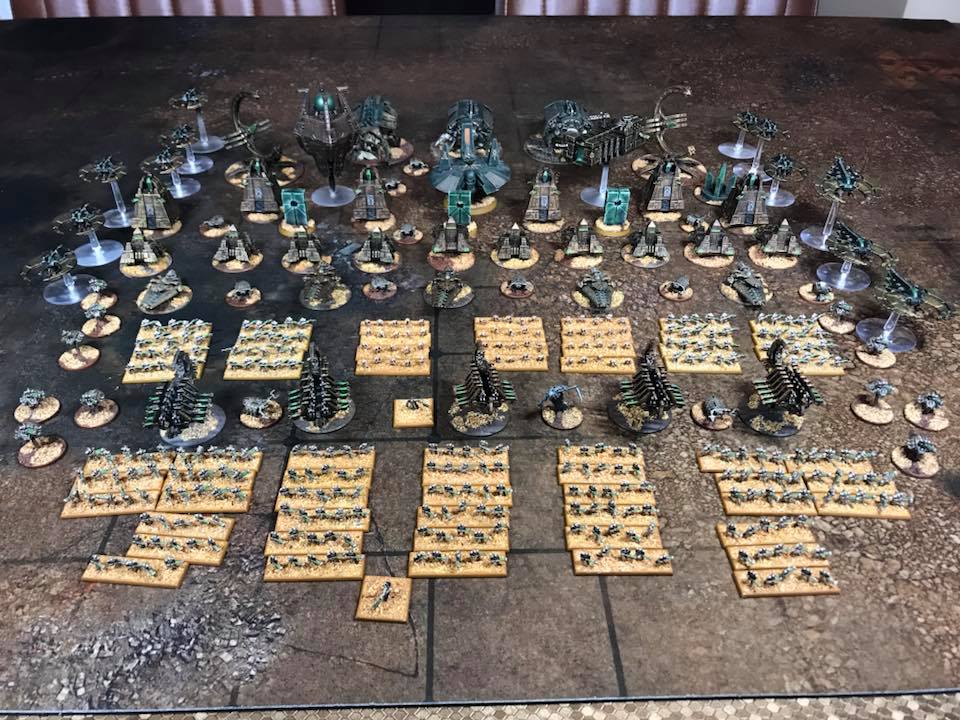
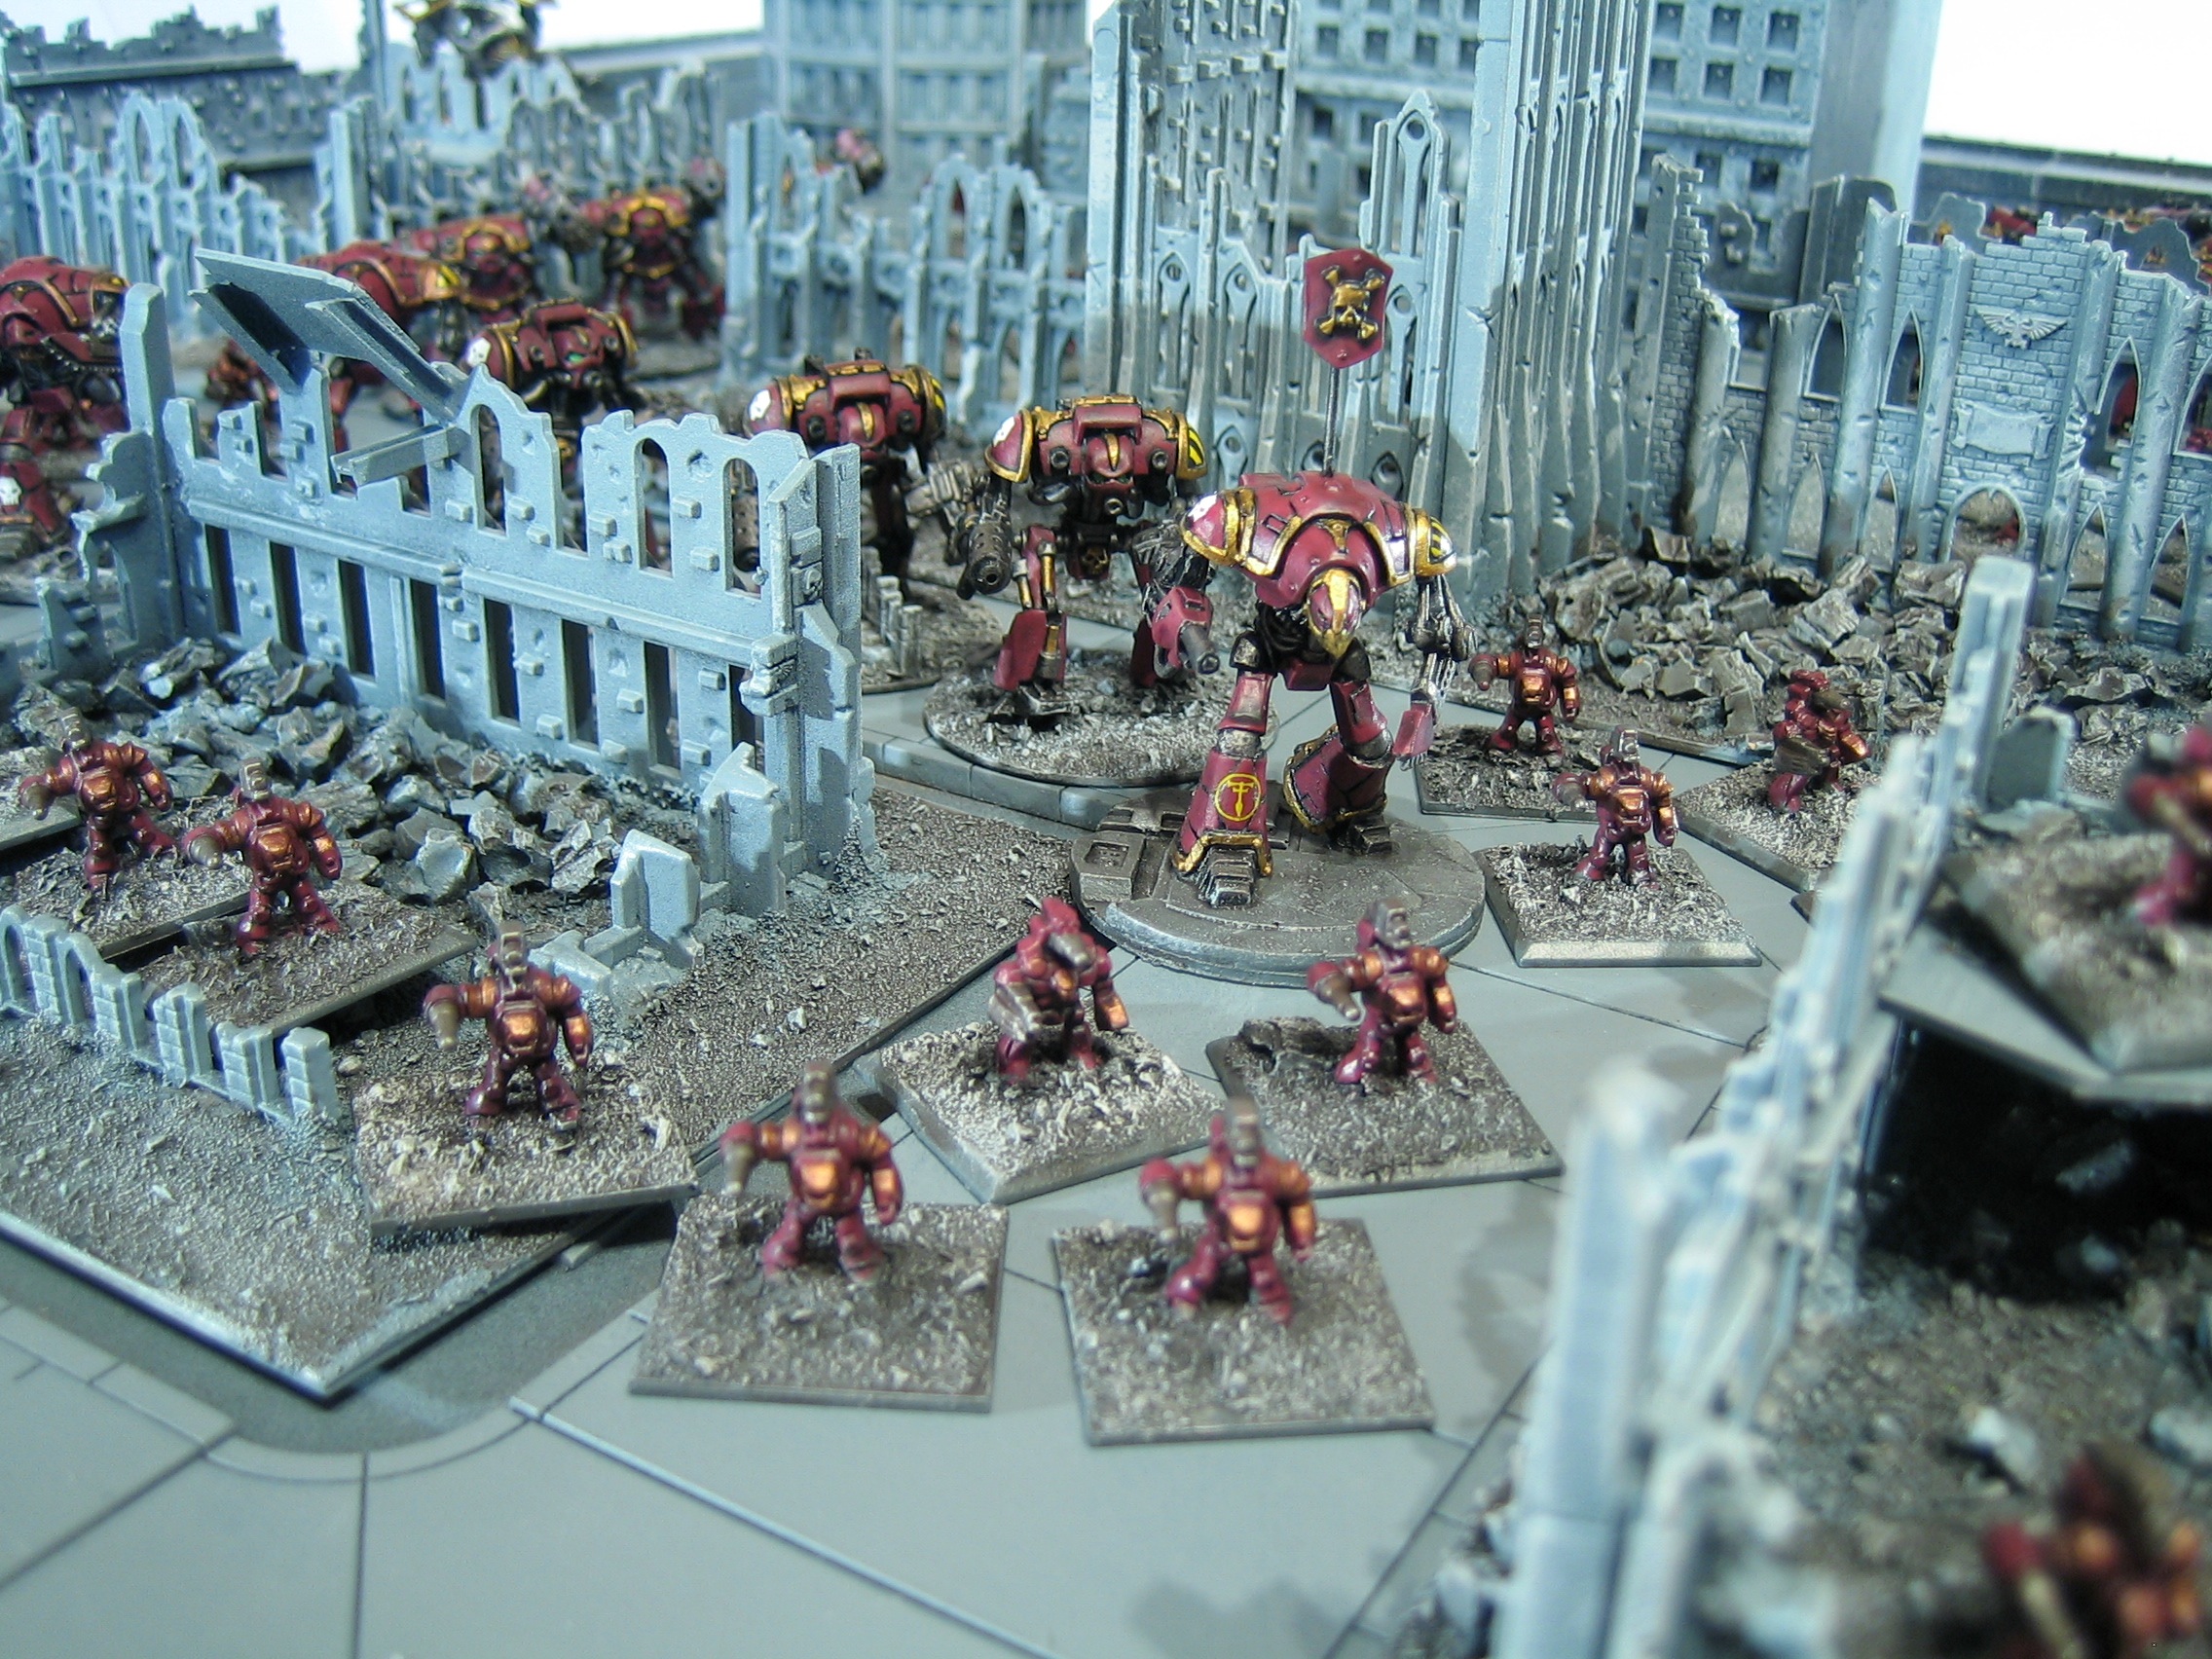
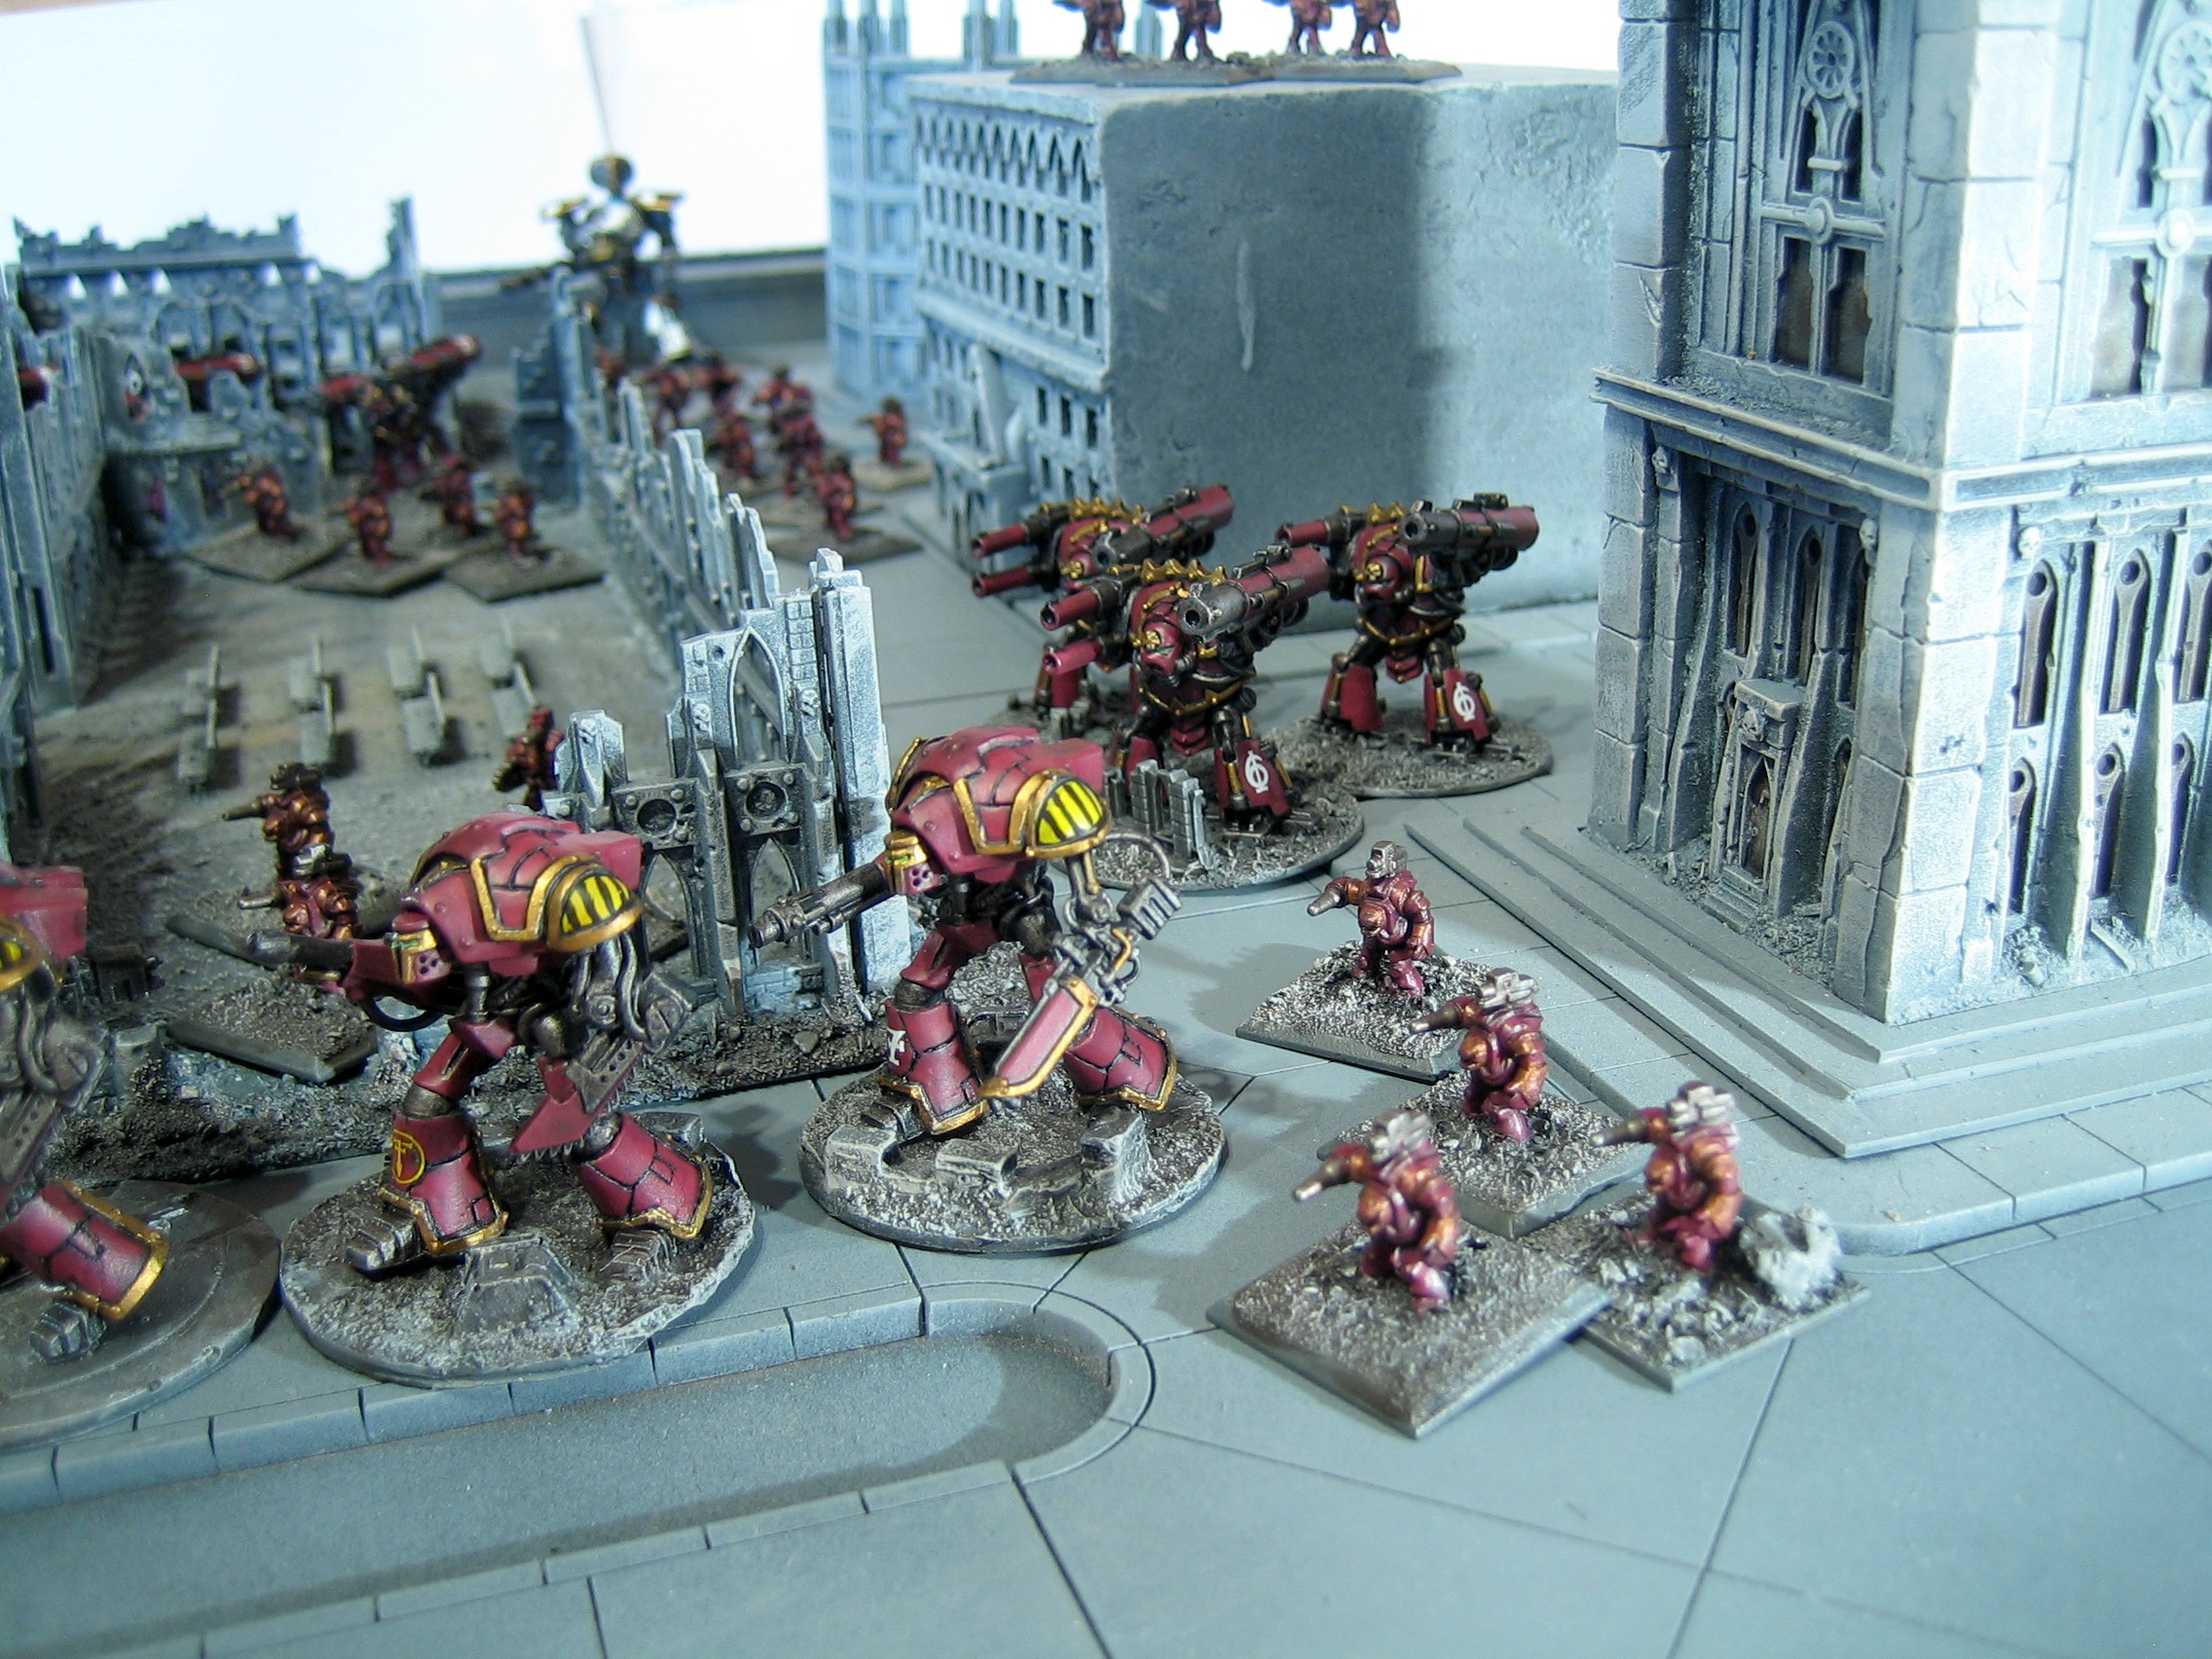
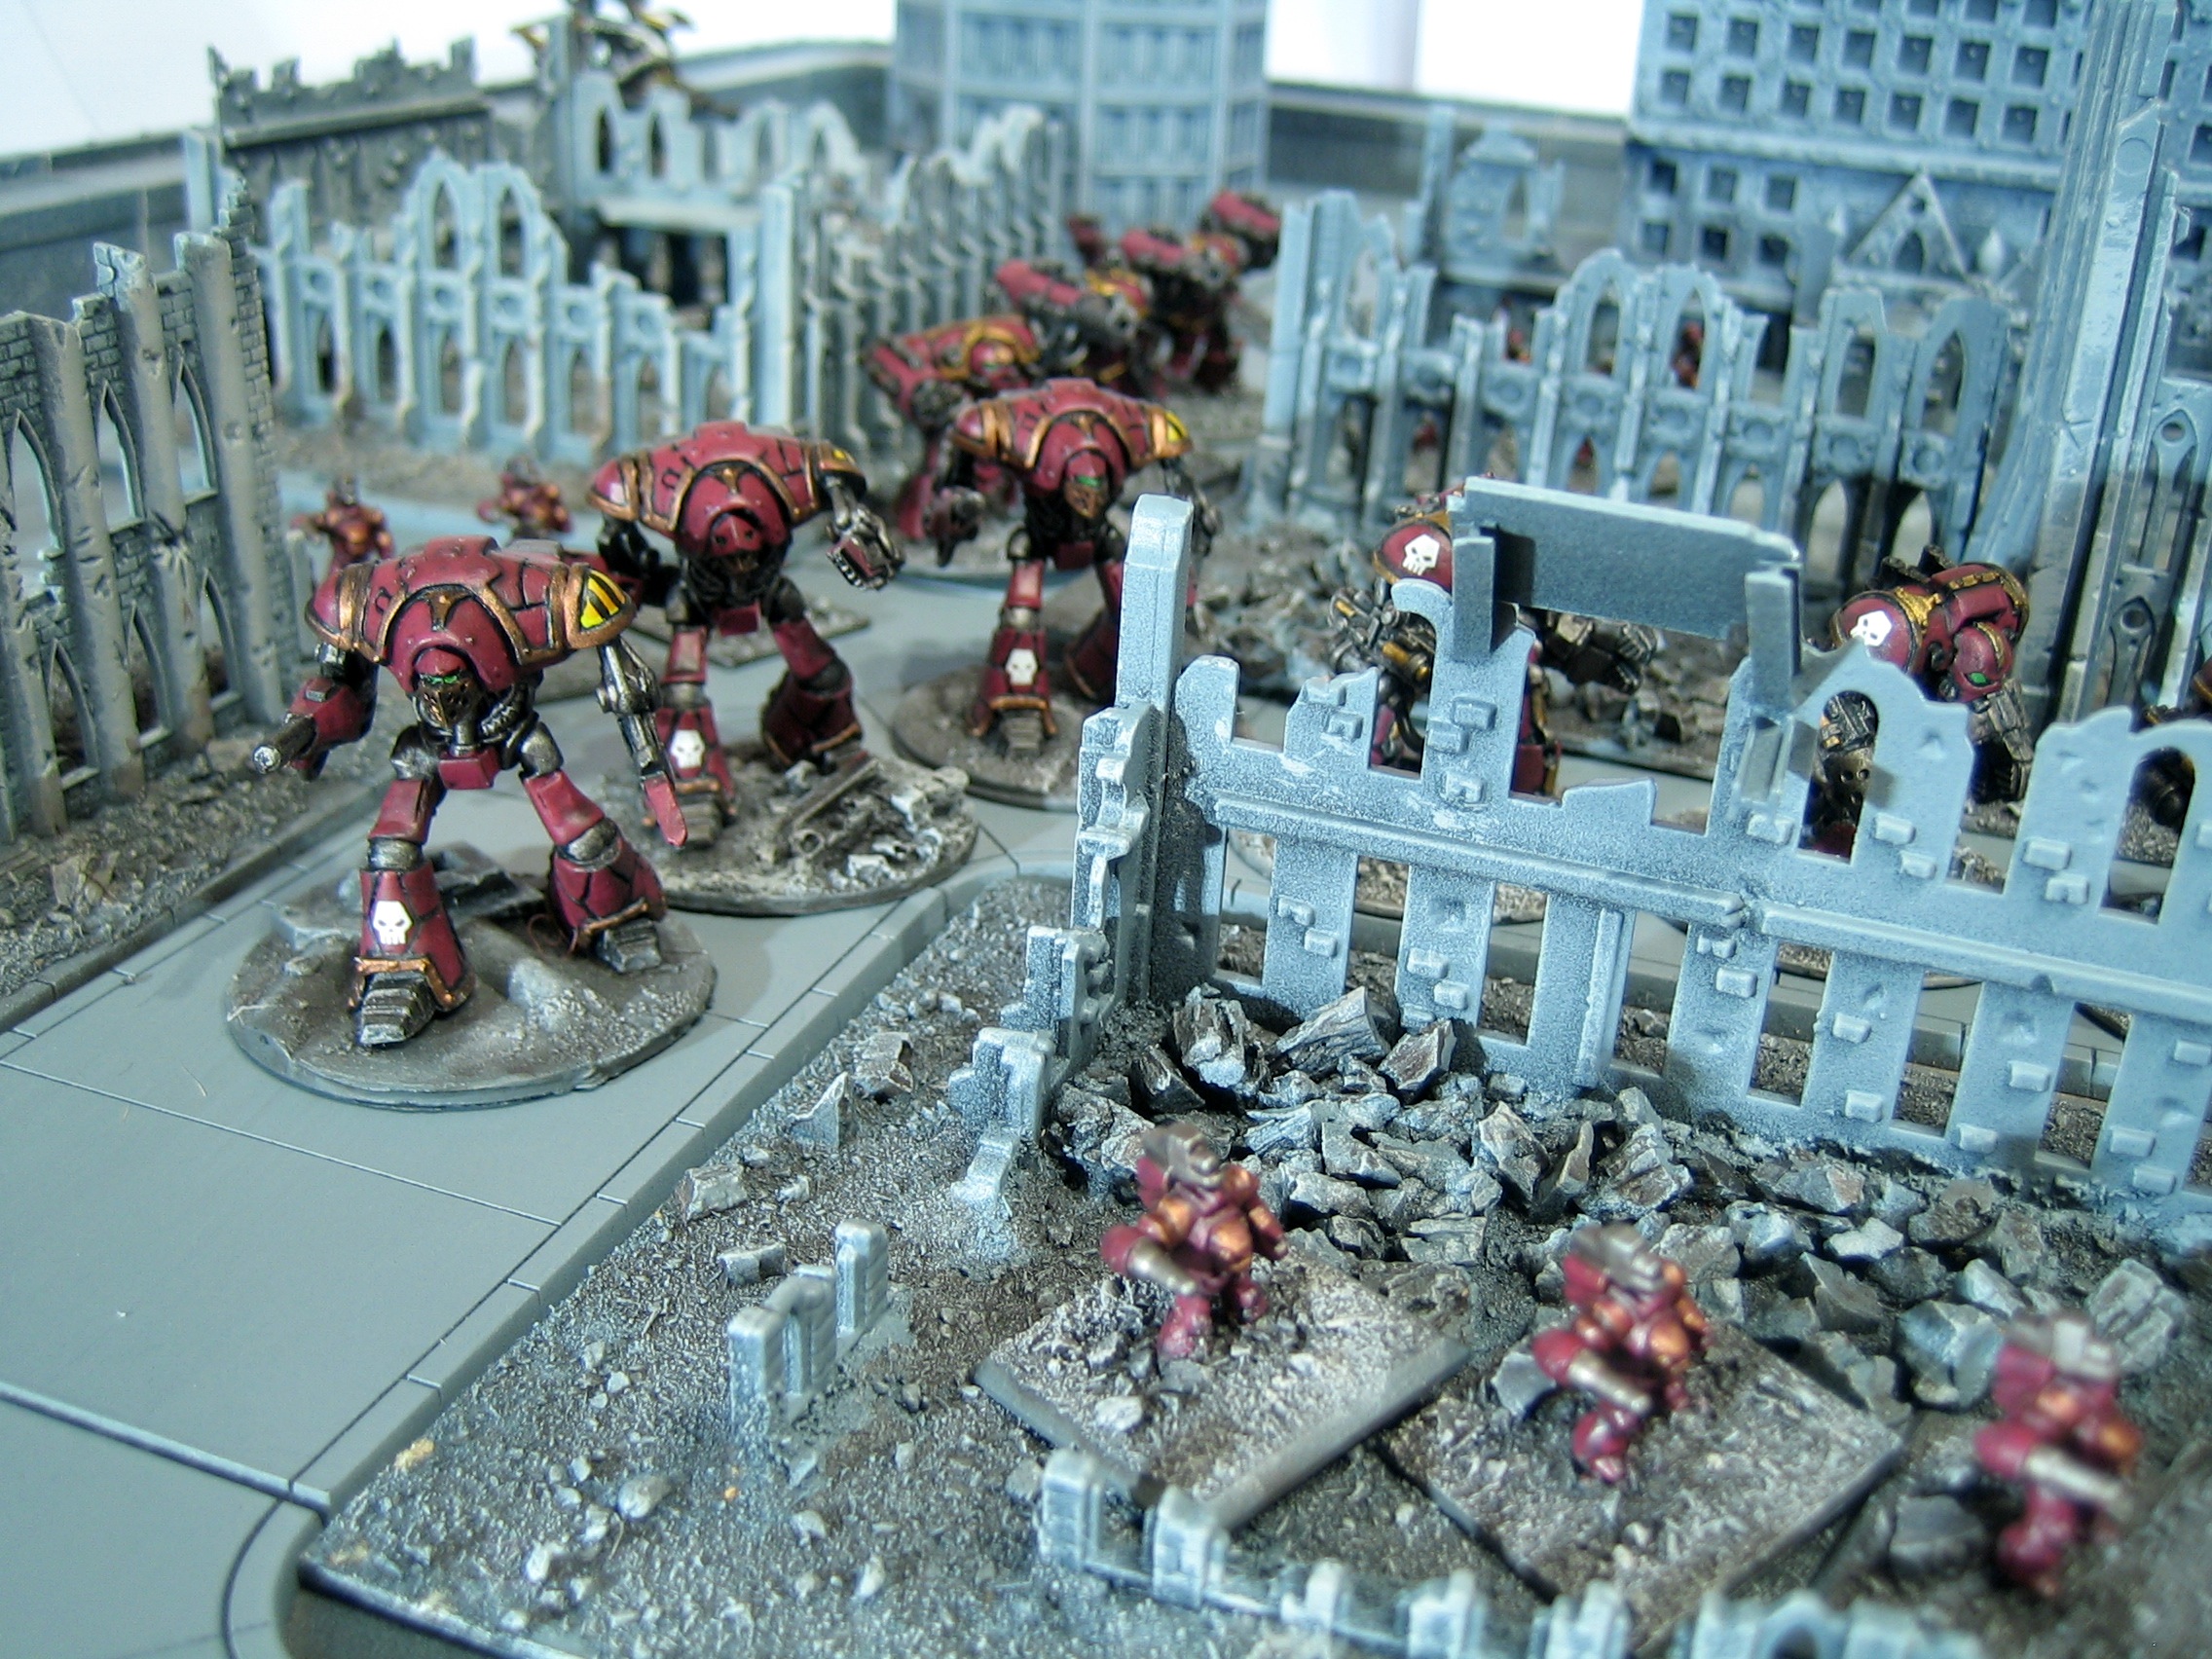
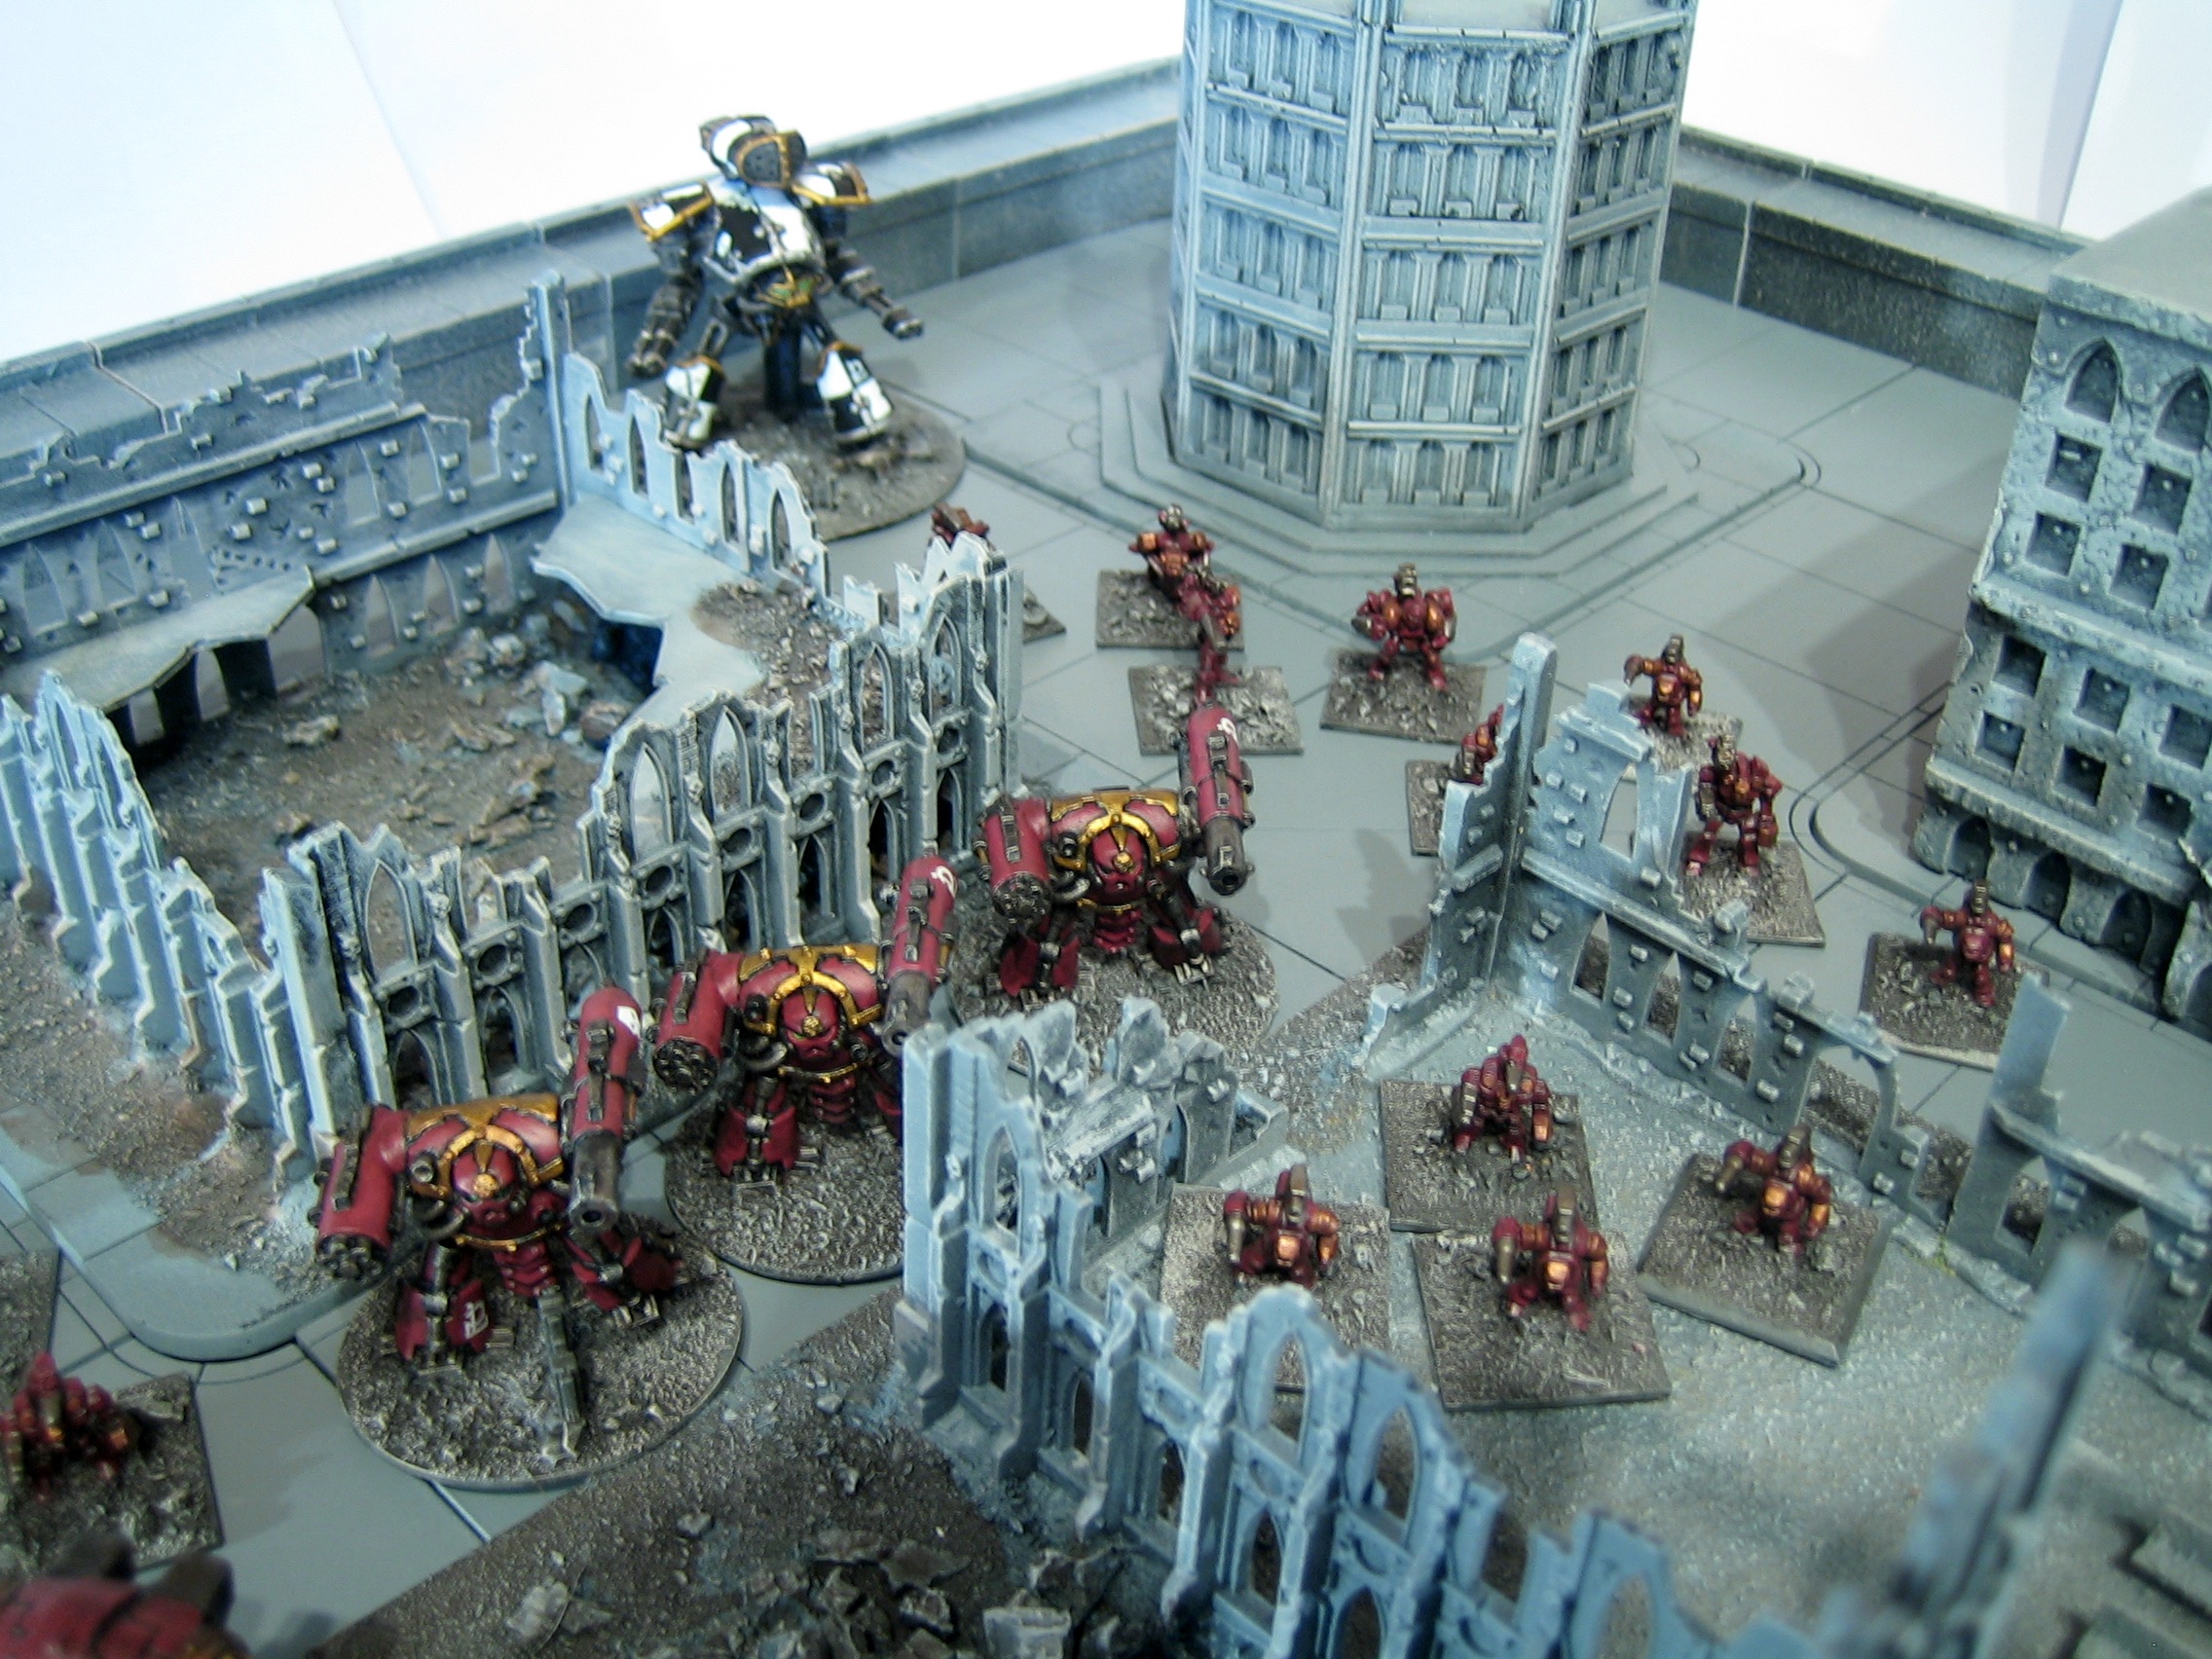
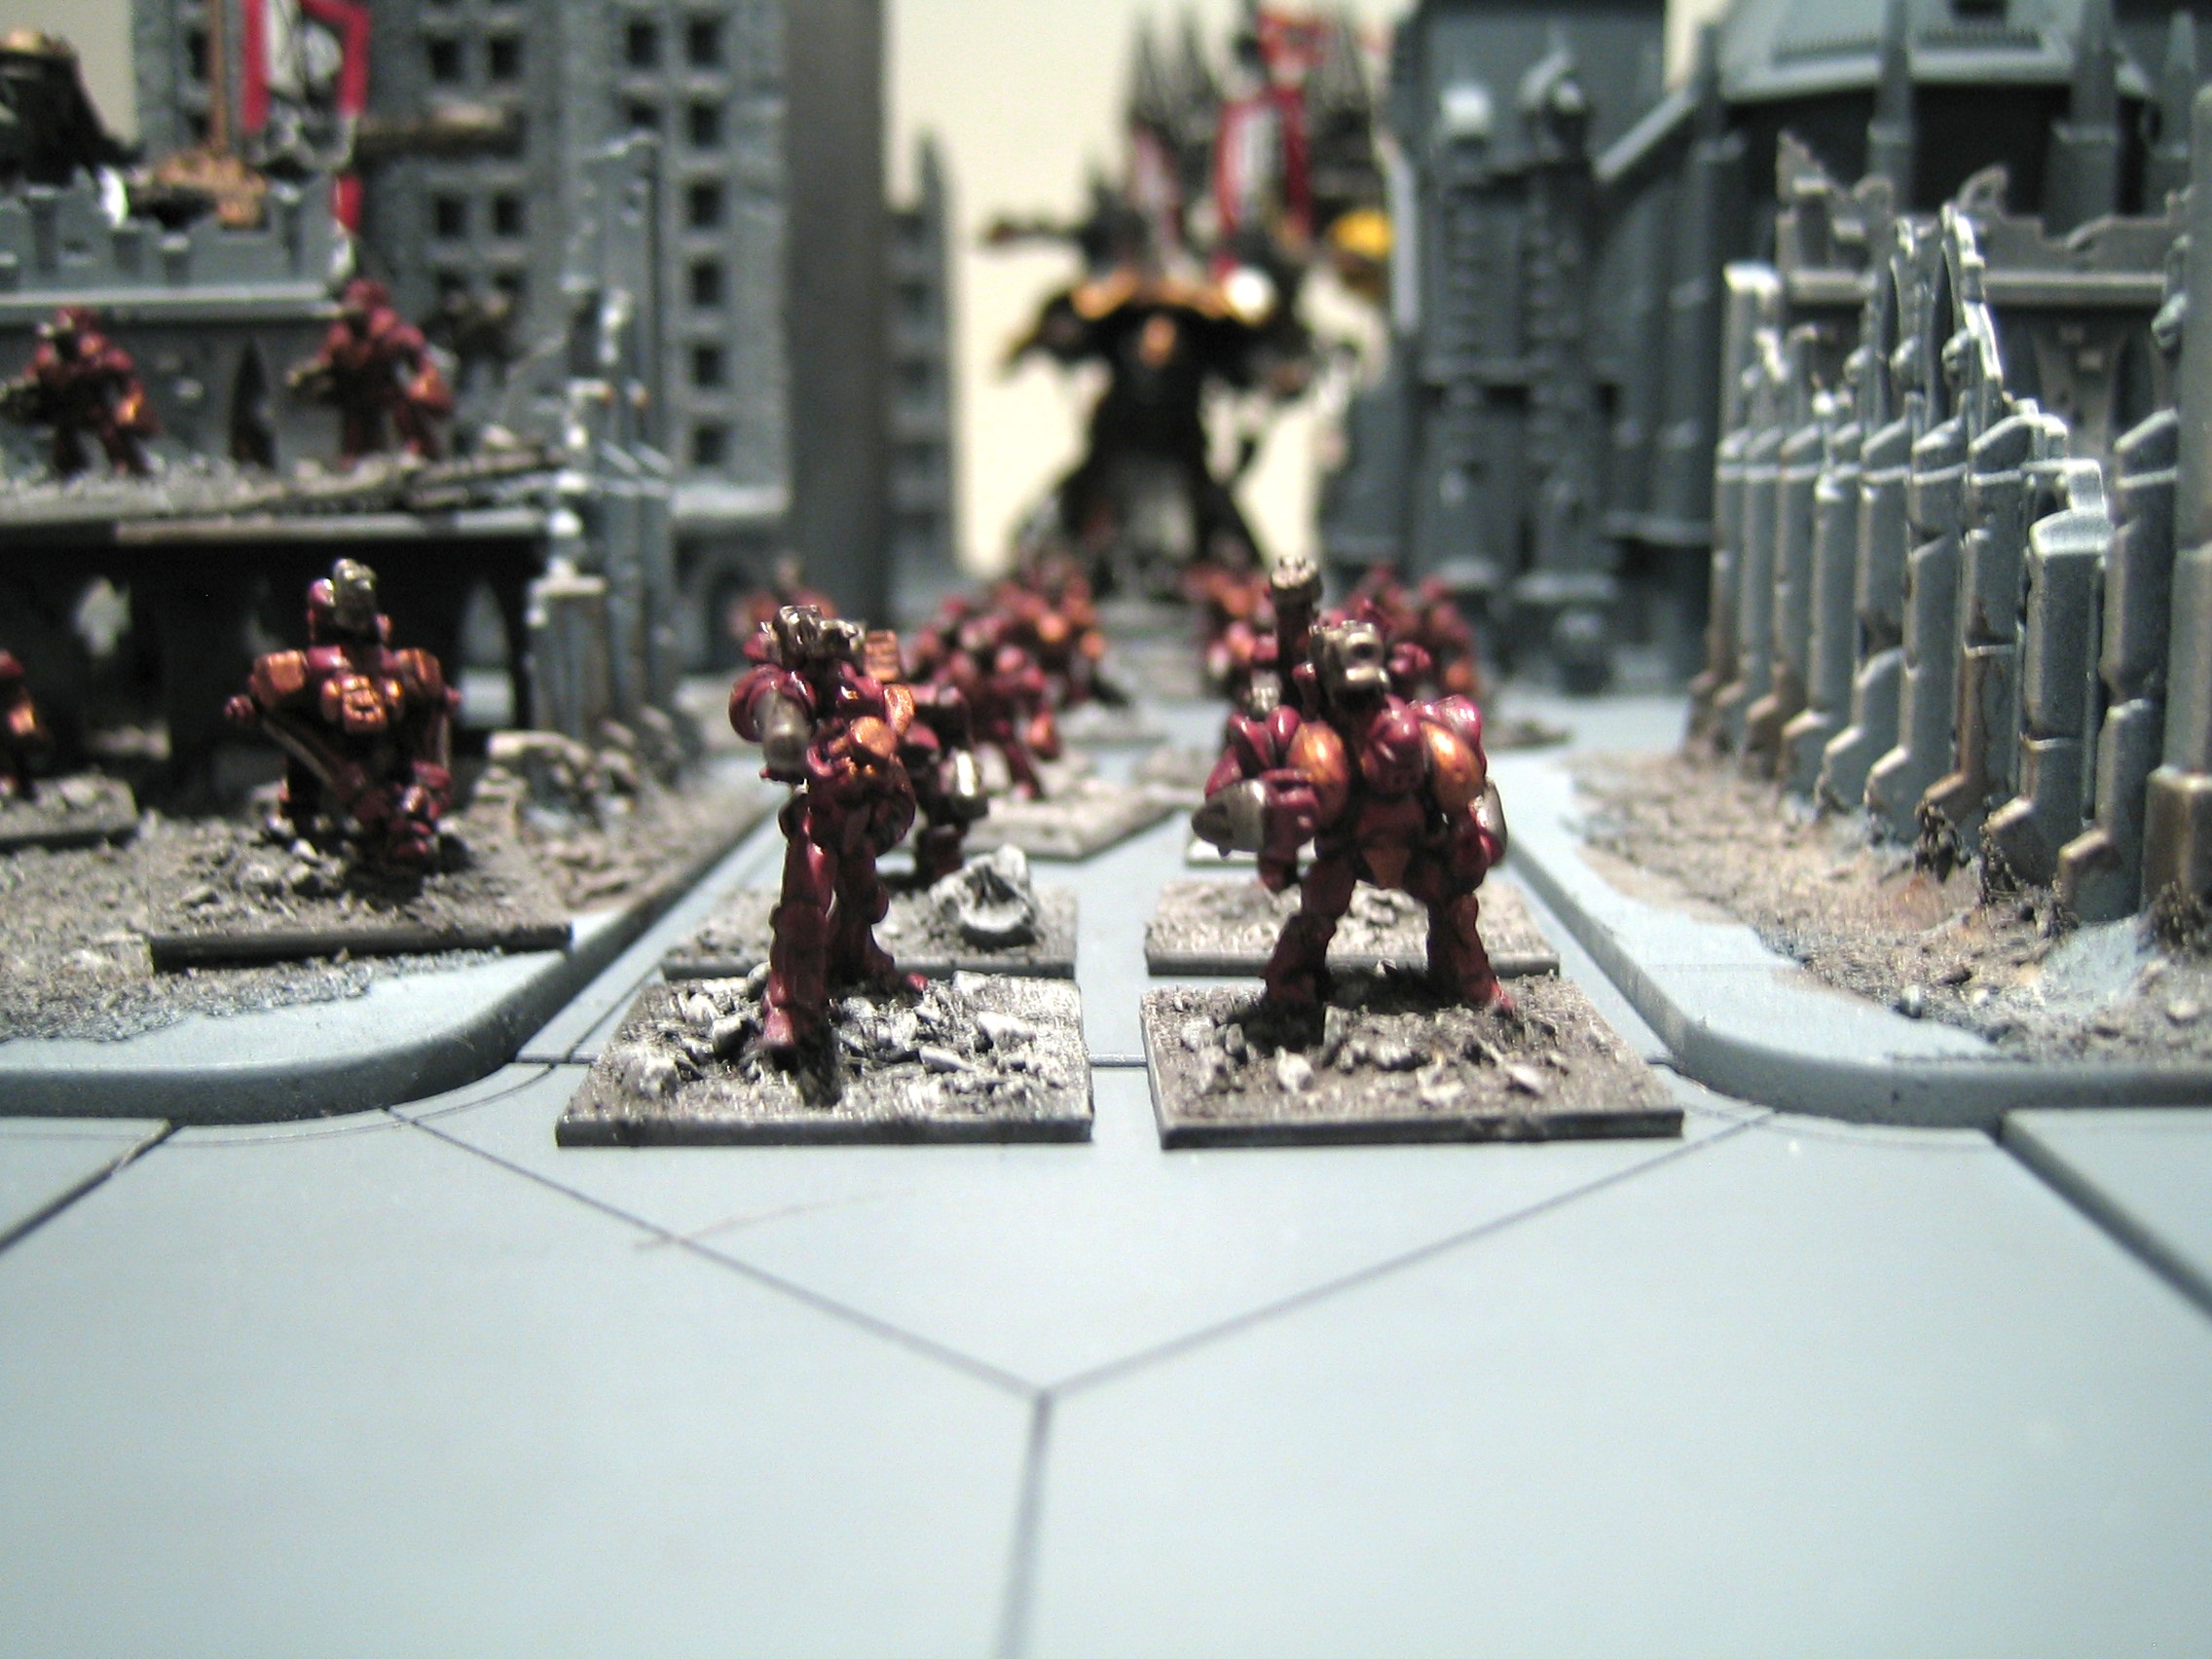
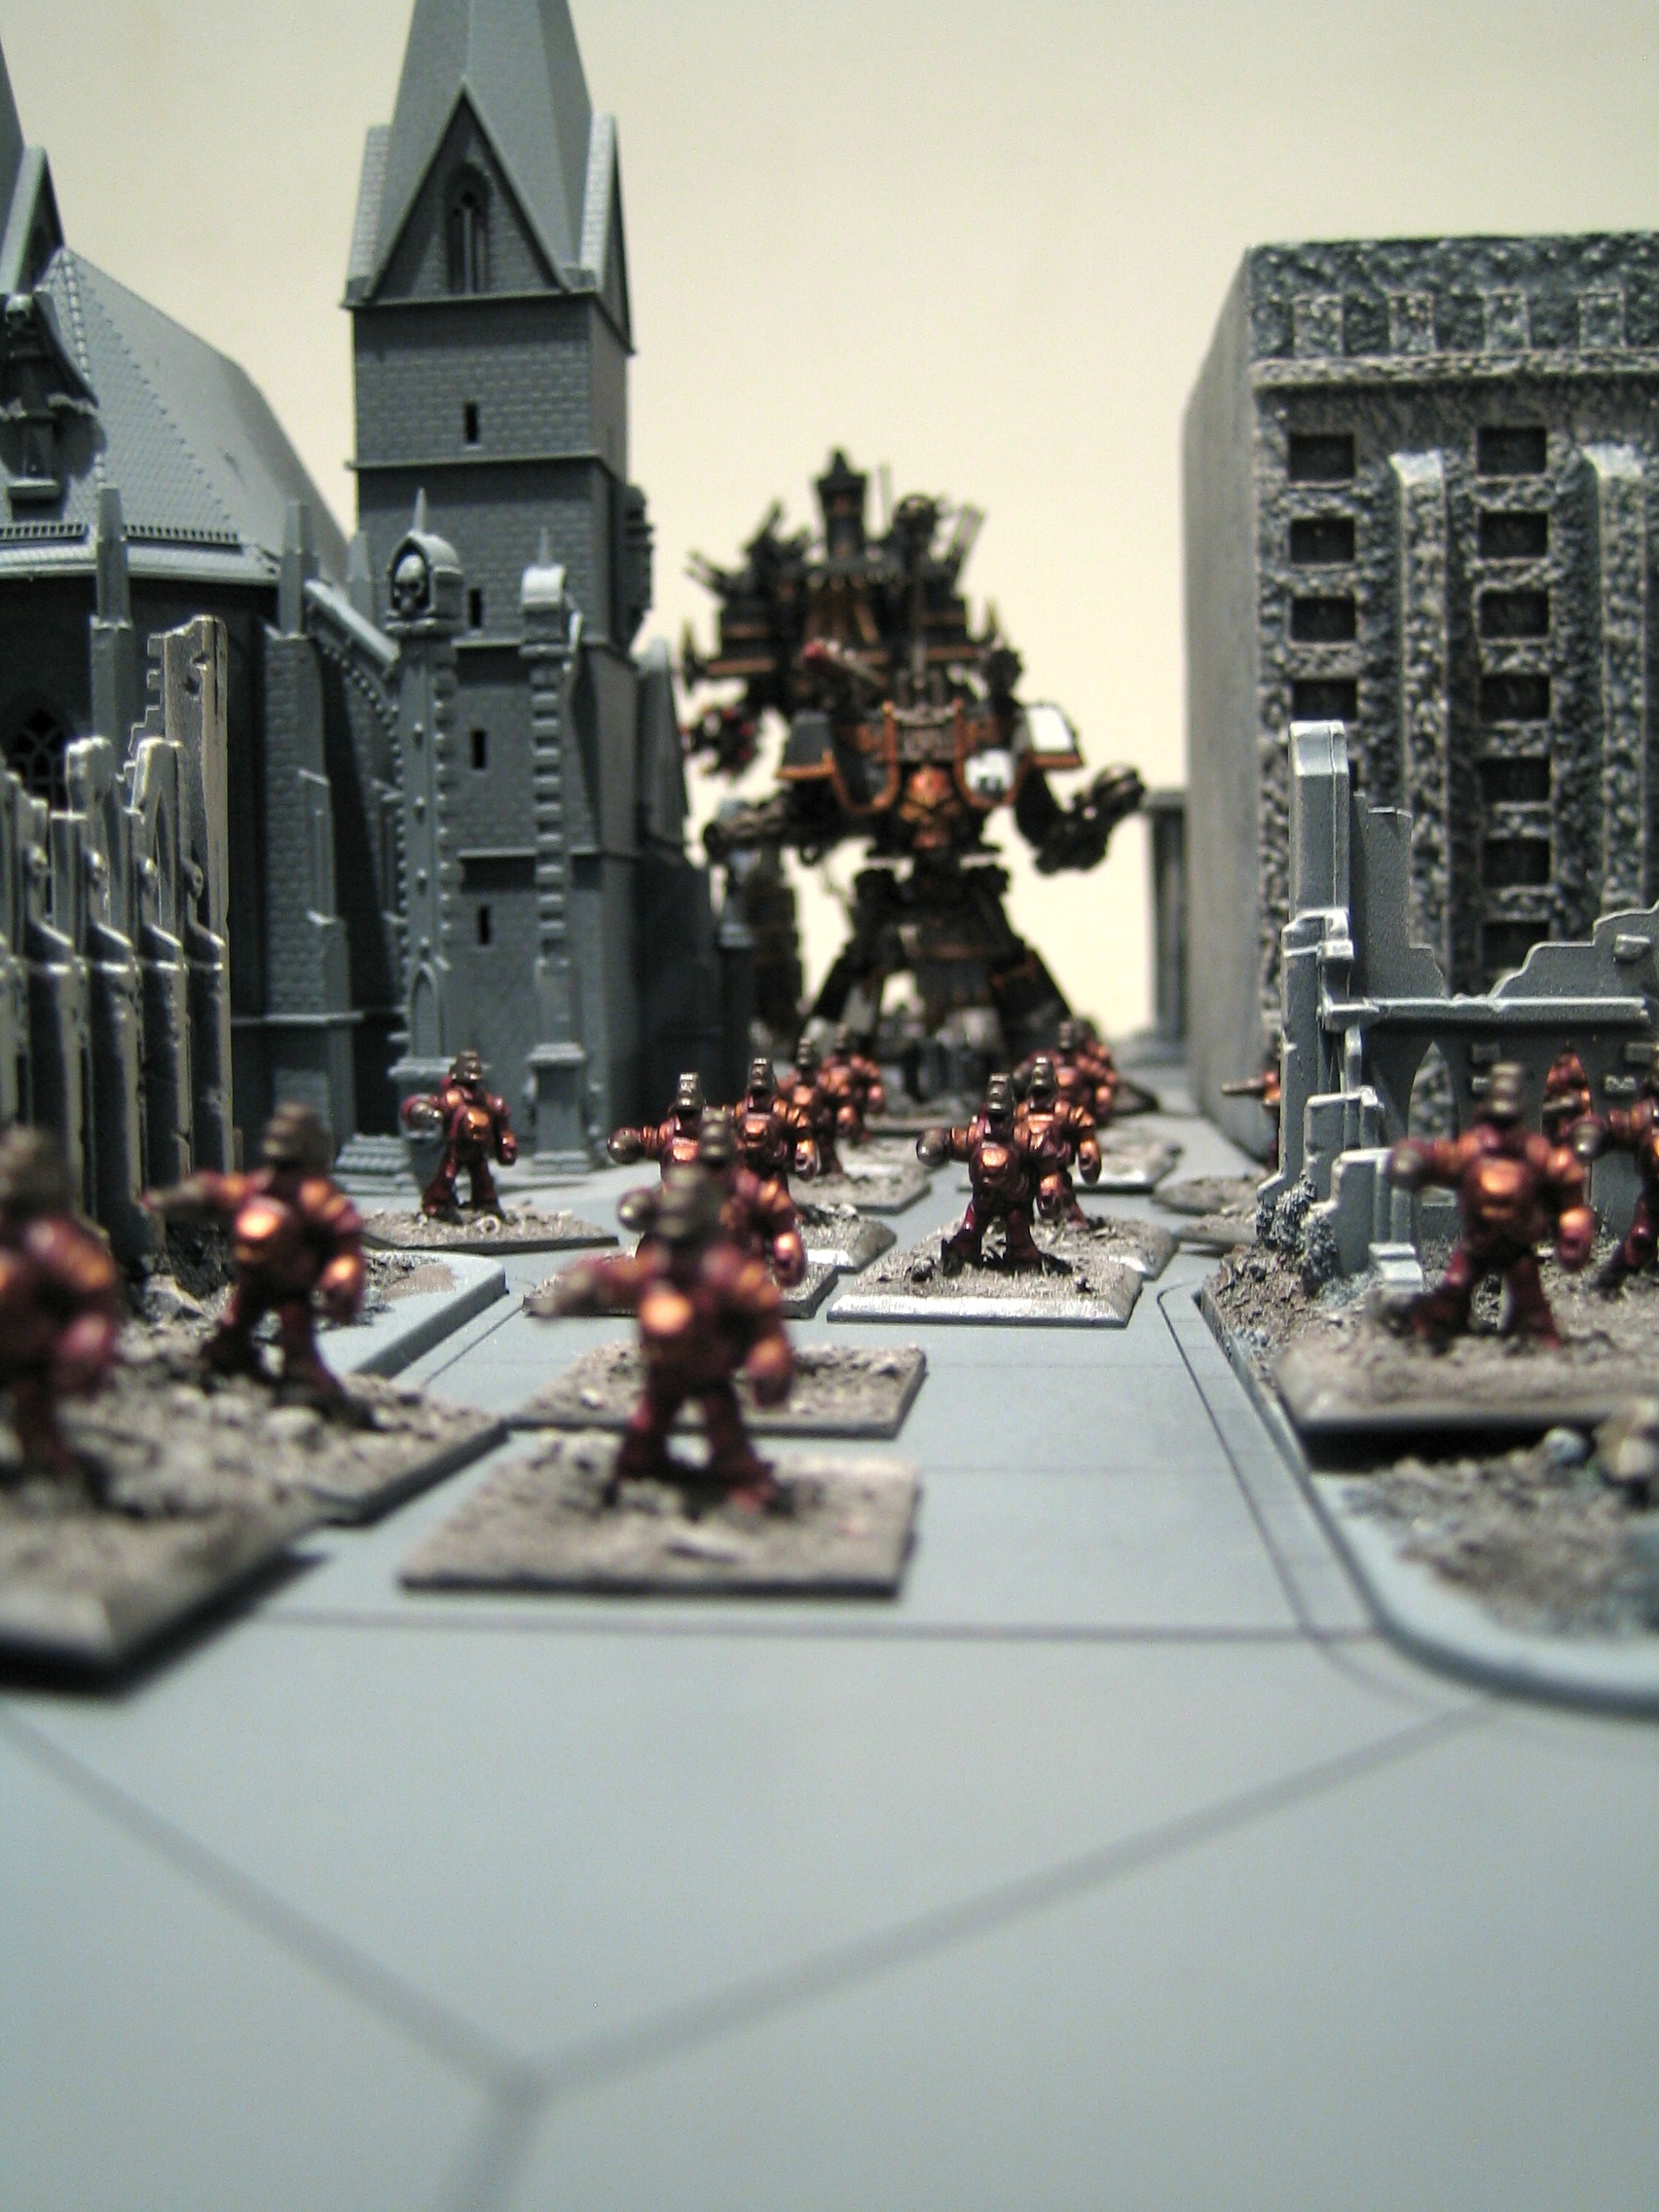
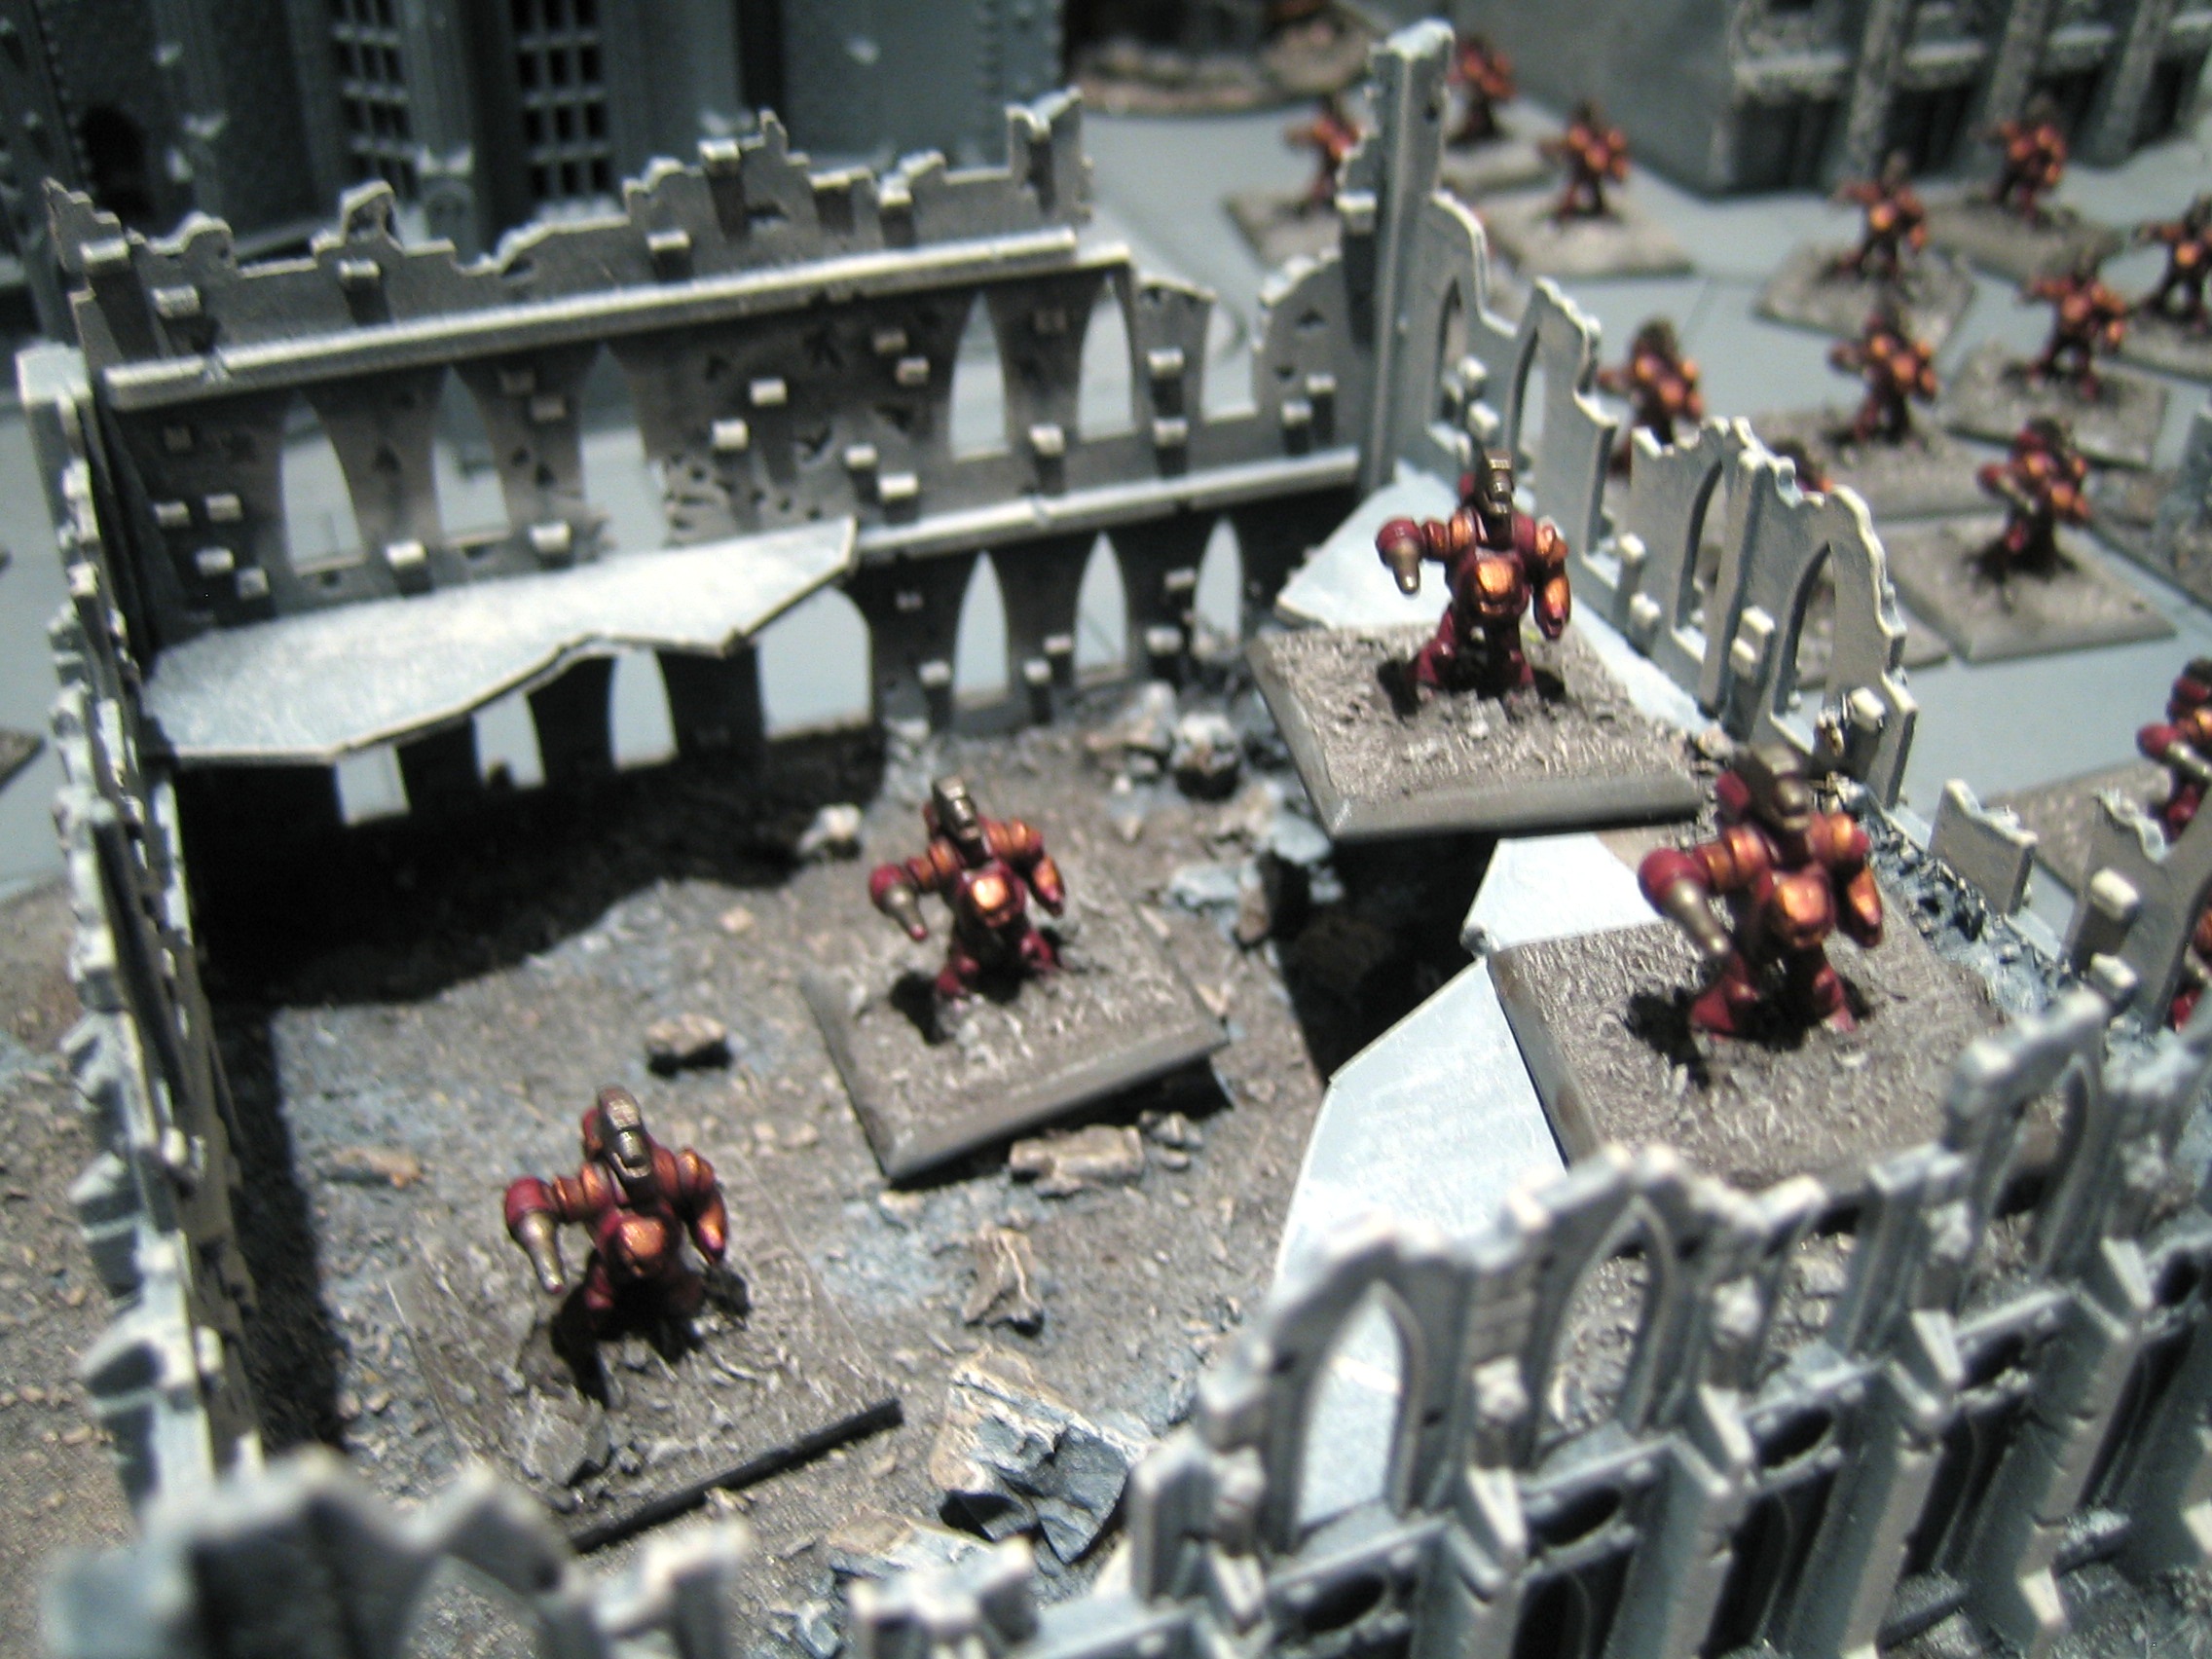
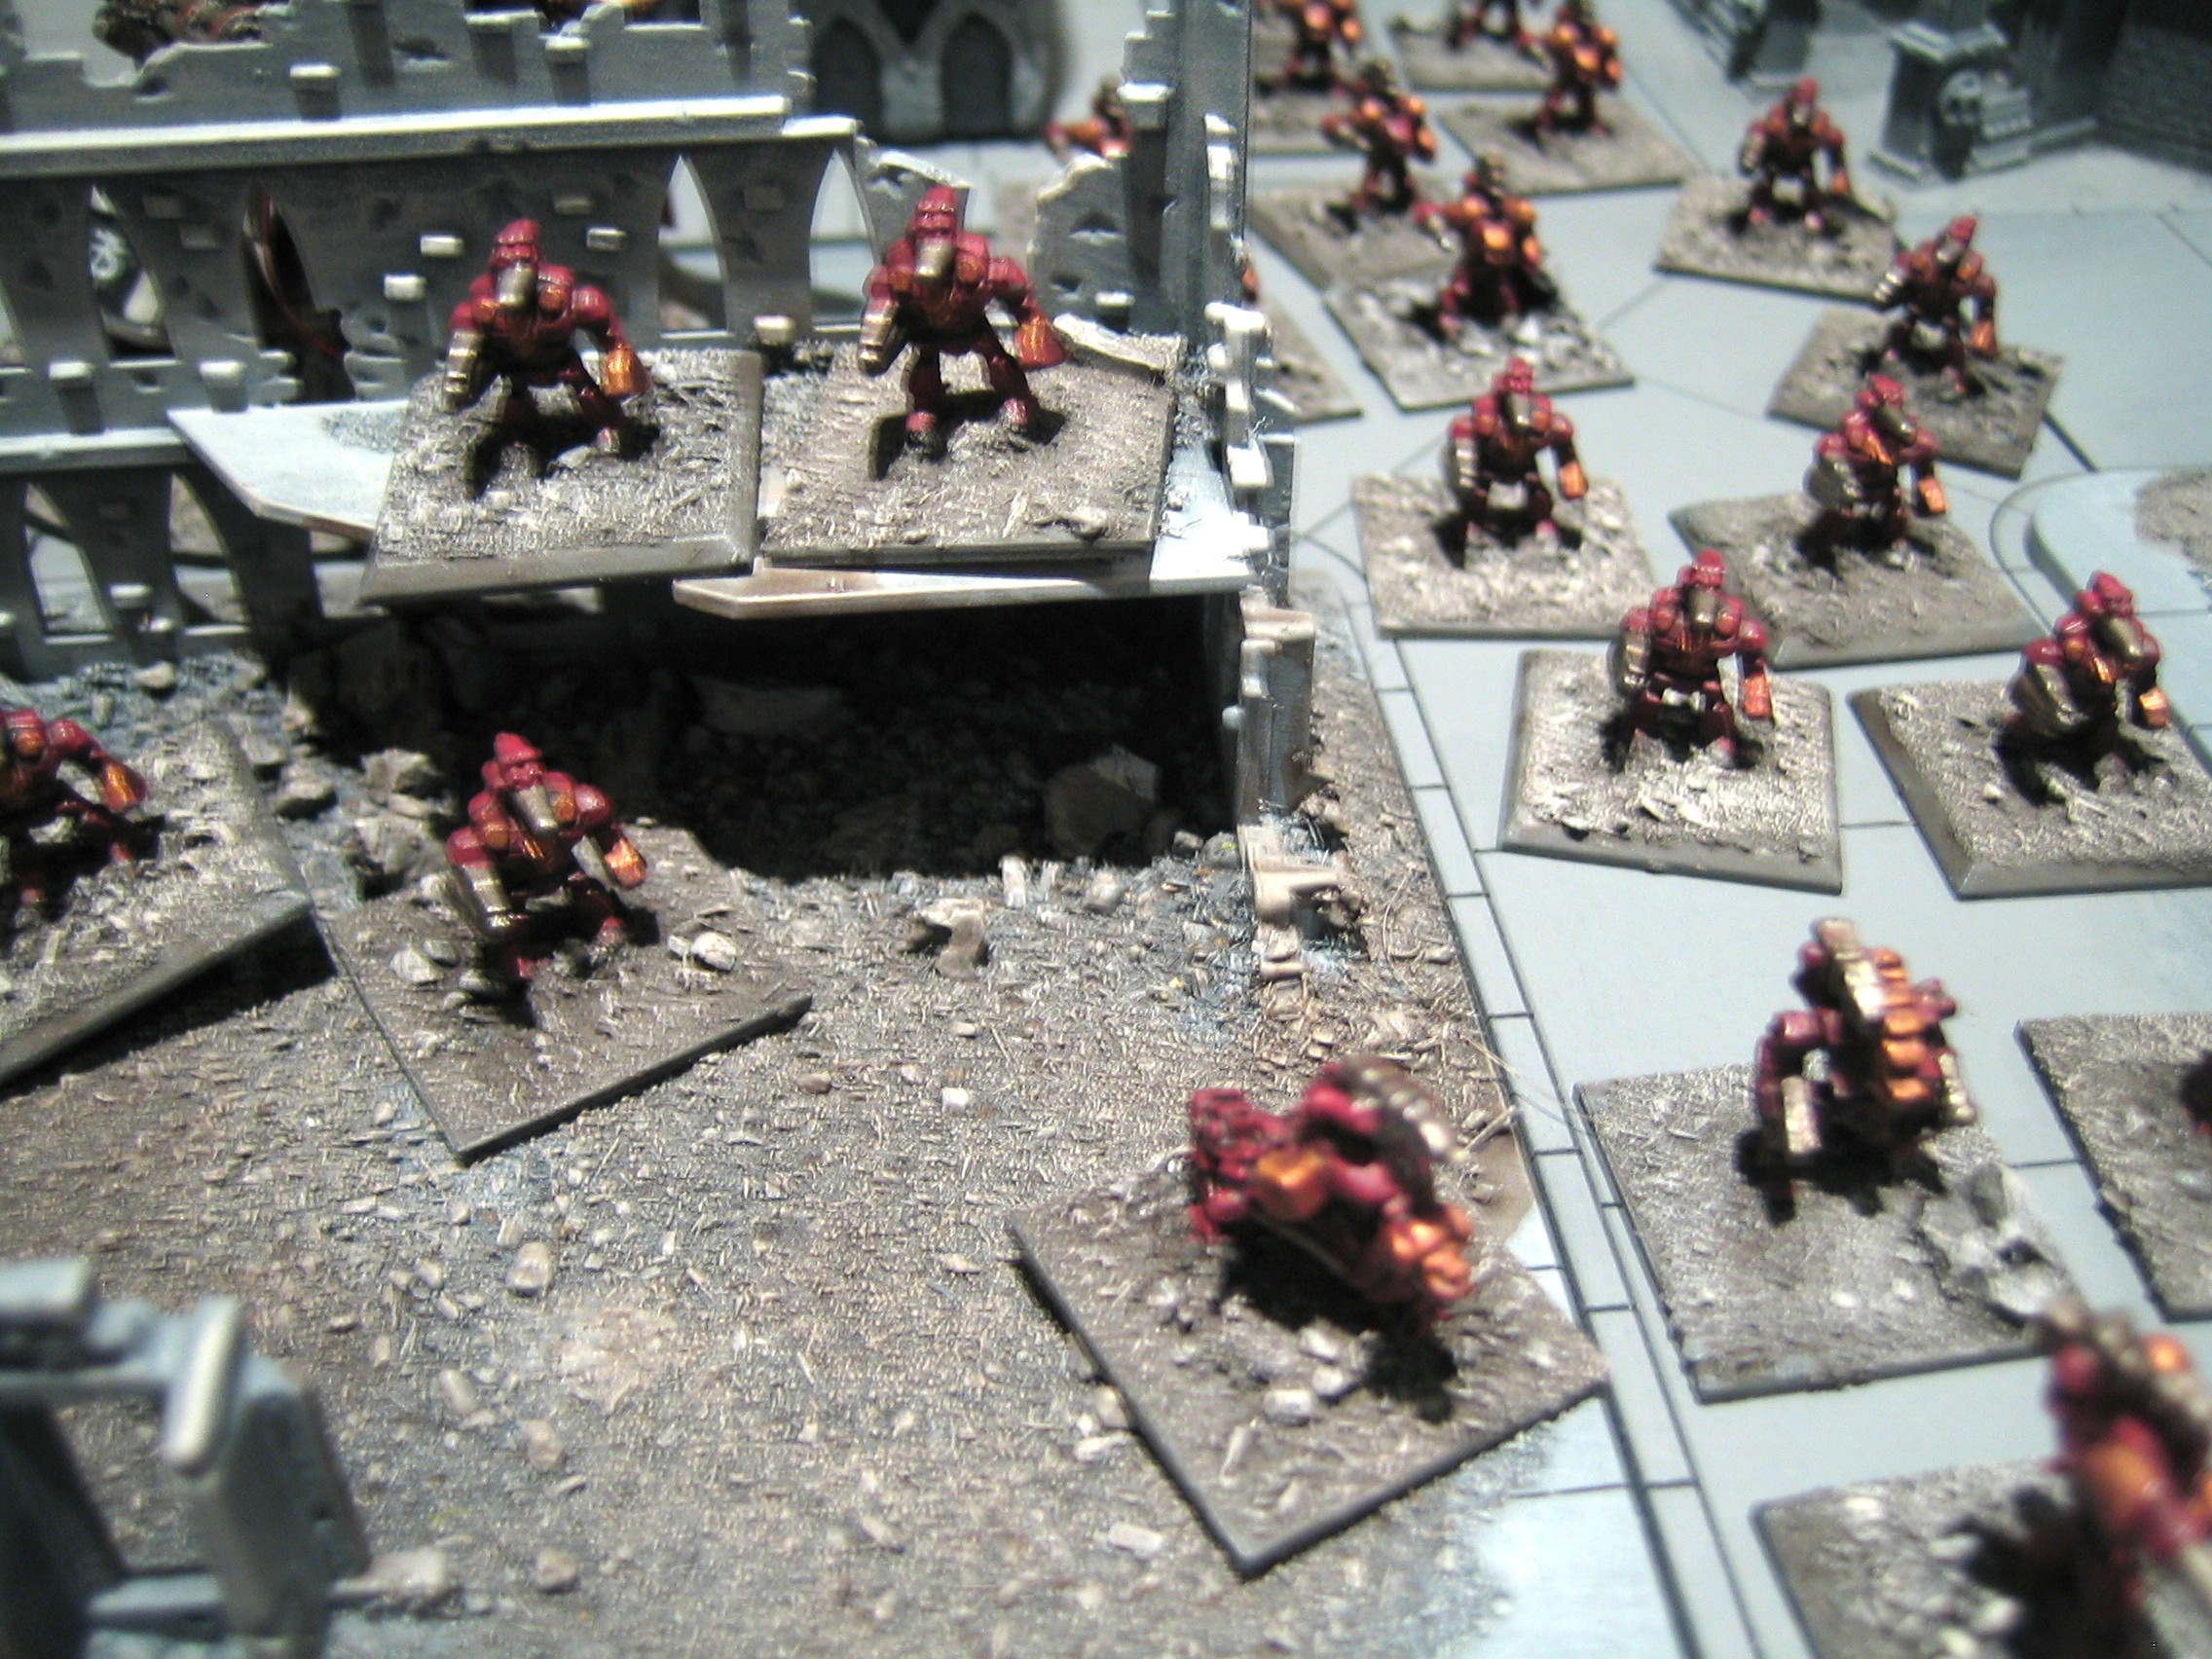
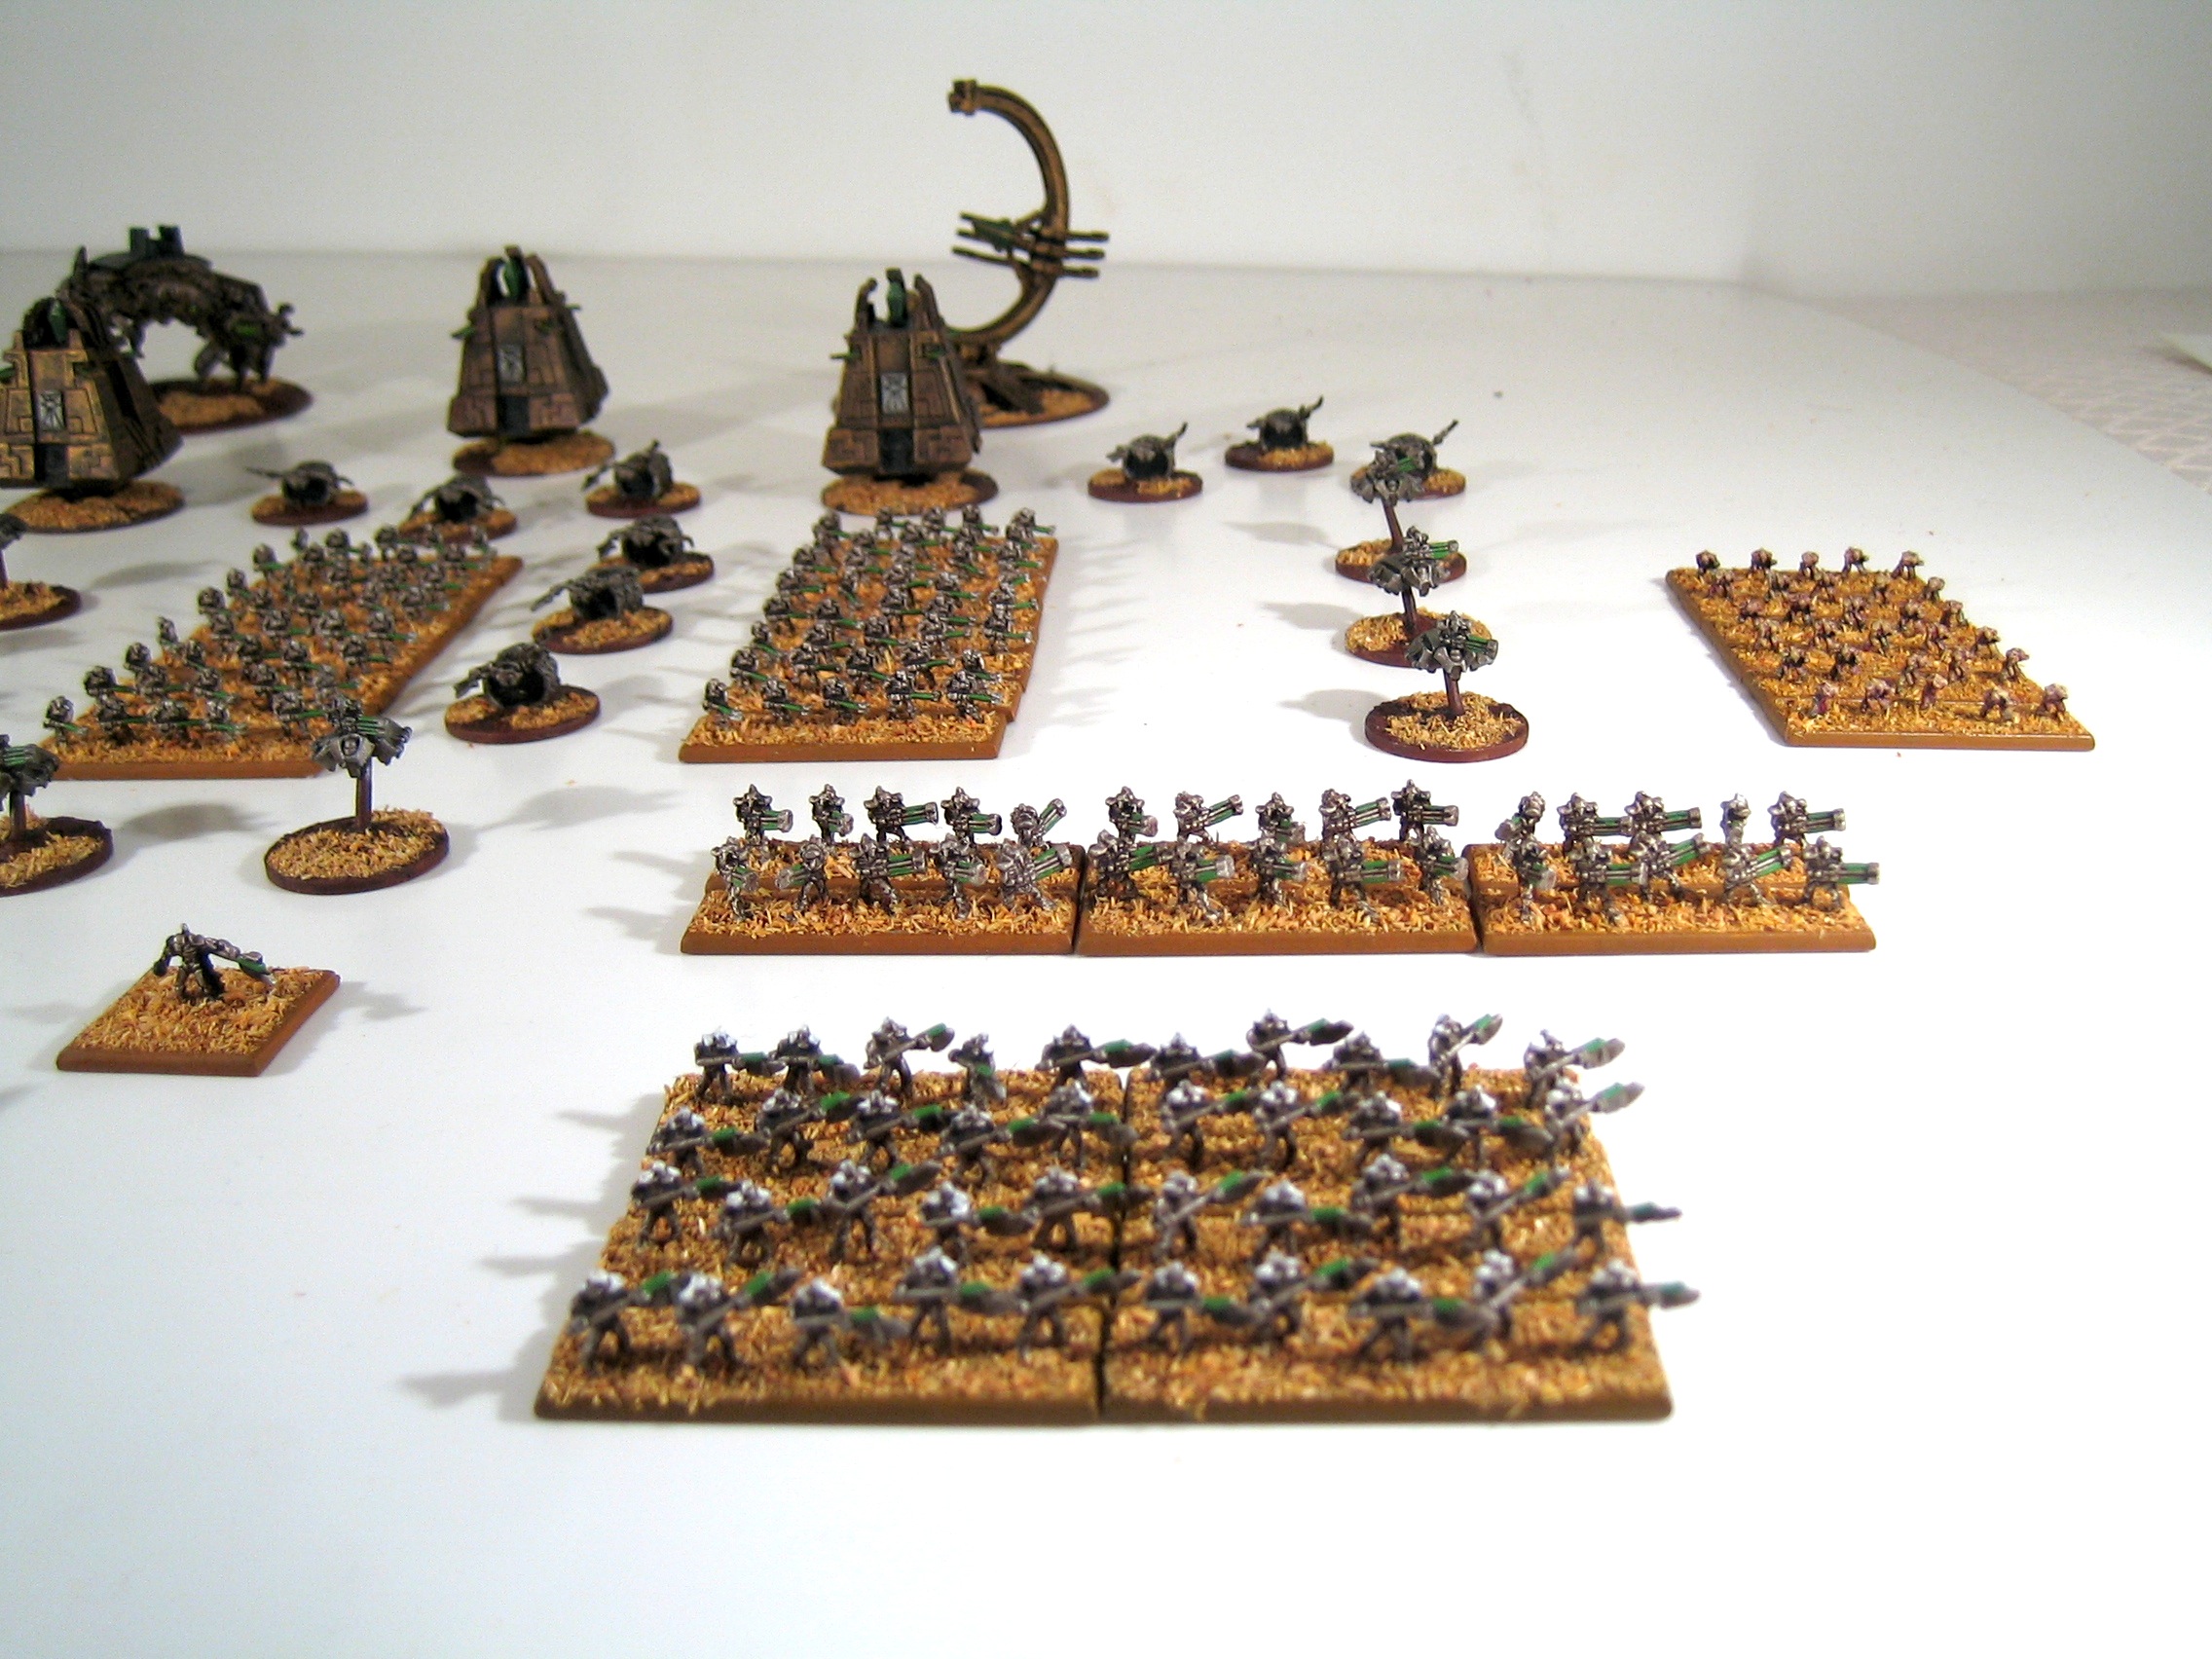
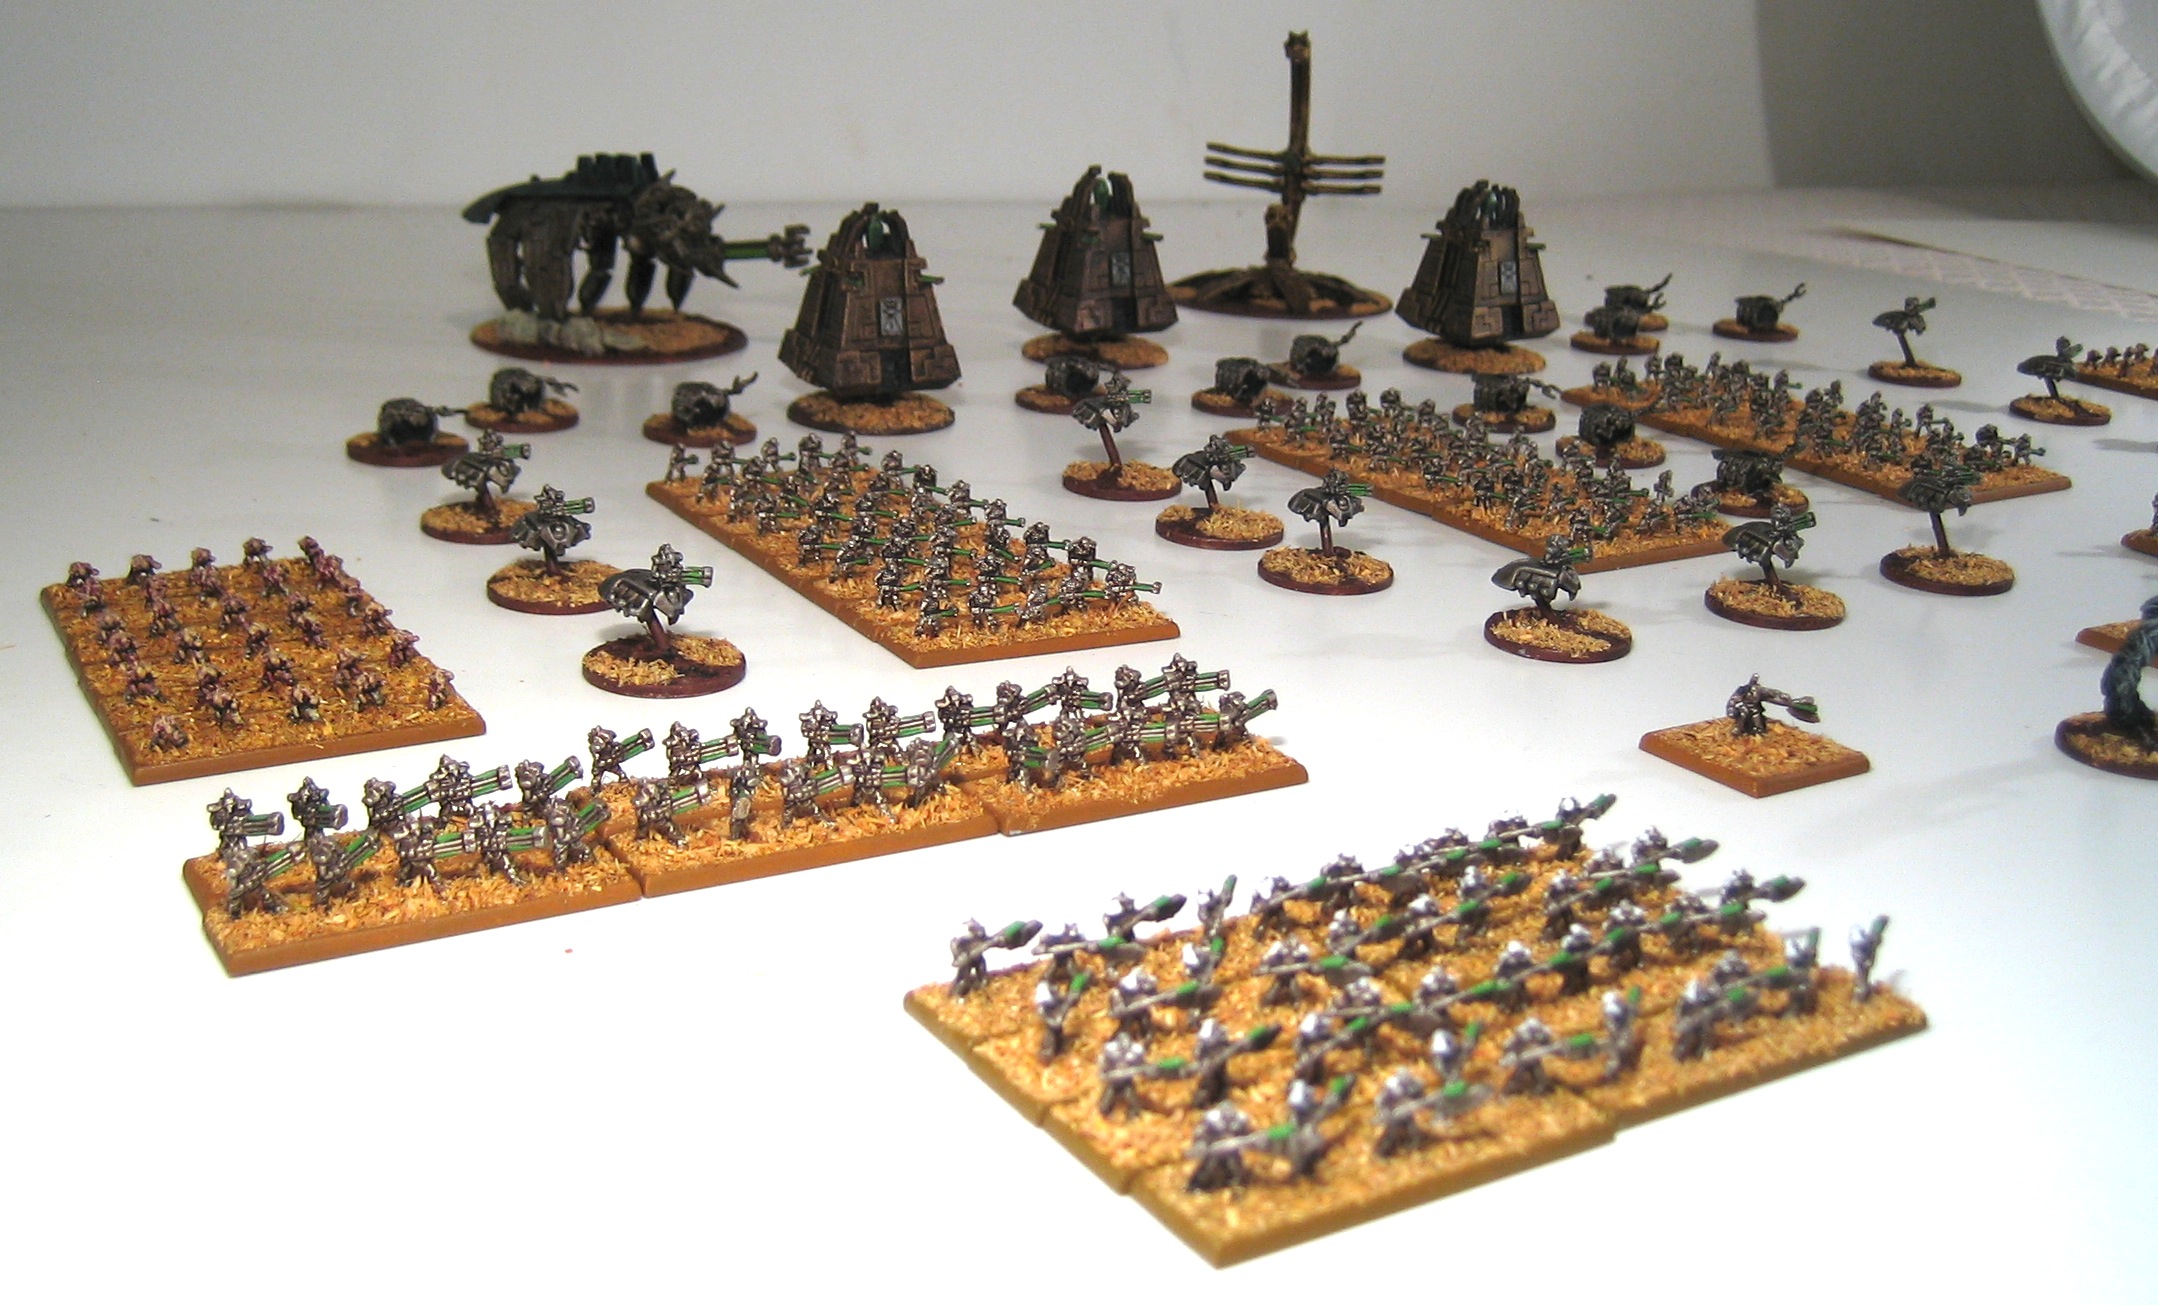
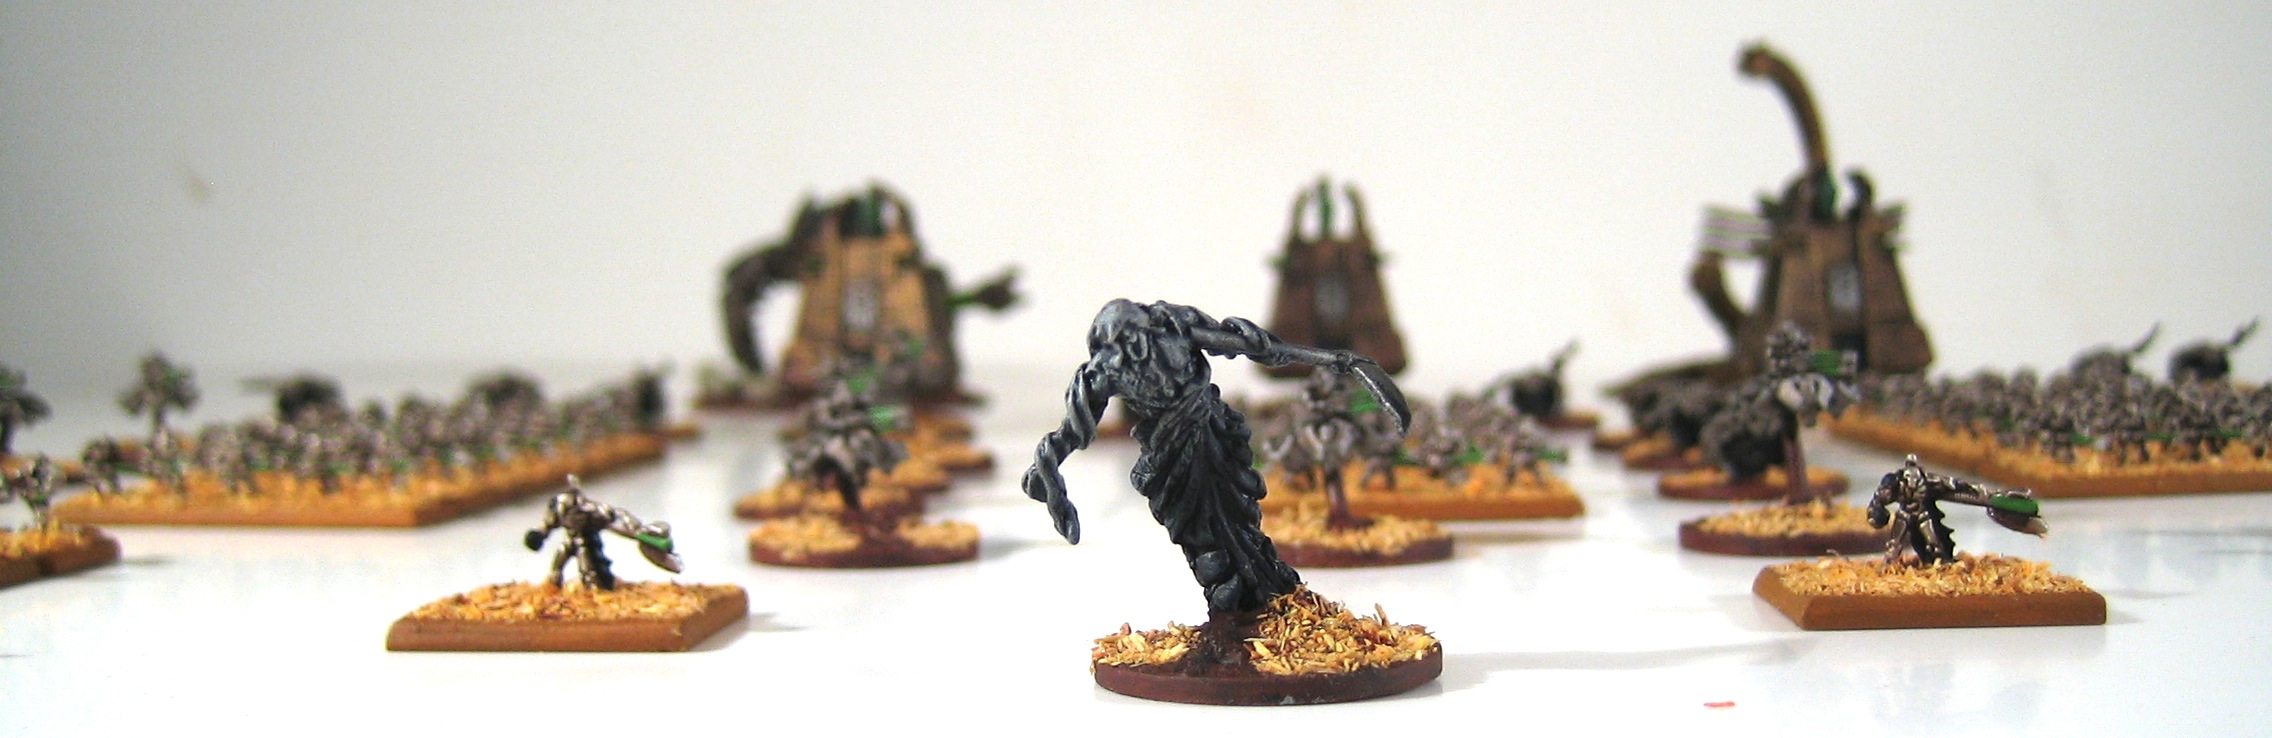
I played a game with my Epic Necrons a couple of weeks ago, and since I'd got all the models out of storage to assemble my army, I thought I'd take a moment to get everything out and take some "show us your hordes" style photos.
I still have some Canoptek Wraiths and some more Immortals to paint and add to the army. I'd also like some more Monoliths but I'm not sure I can get some that are the same design as the ones I have.
Also, check out my Necron fleet for Battlefleet Gothic and my 40K Necron army!
More pictures below.
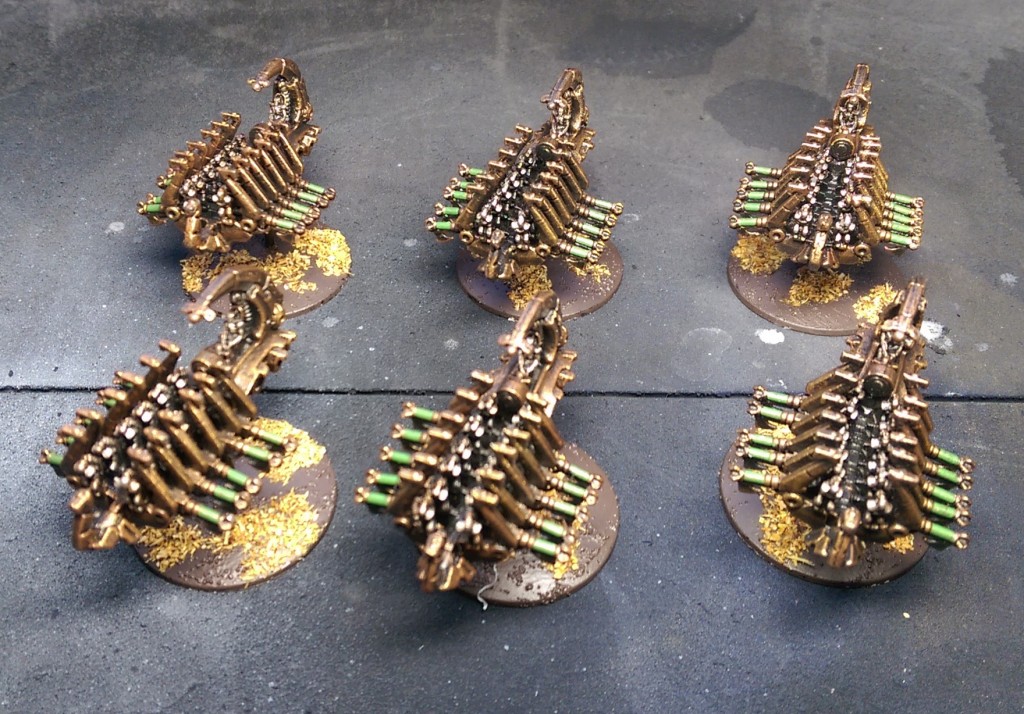
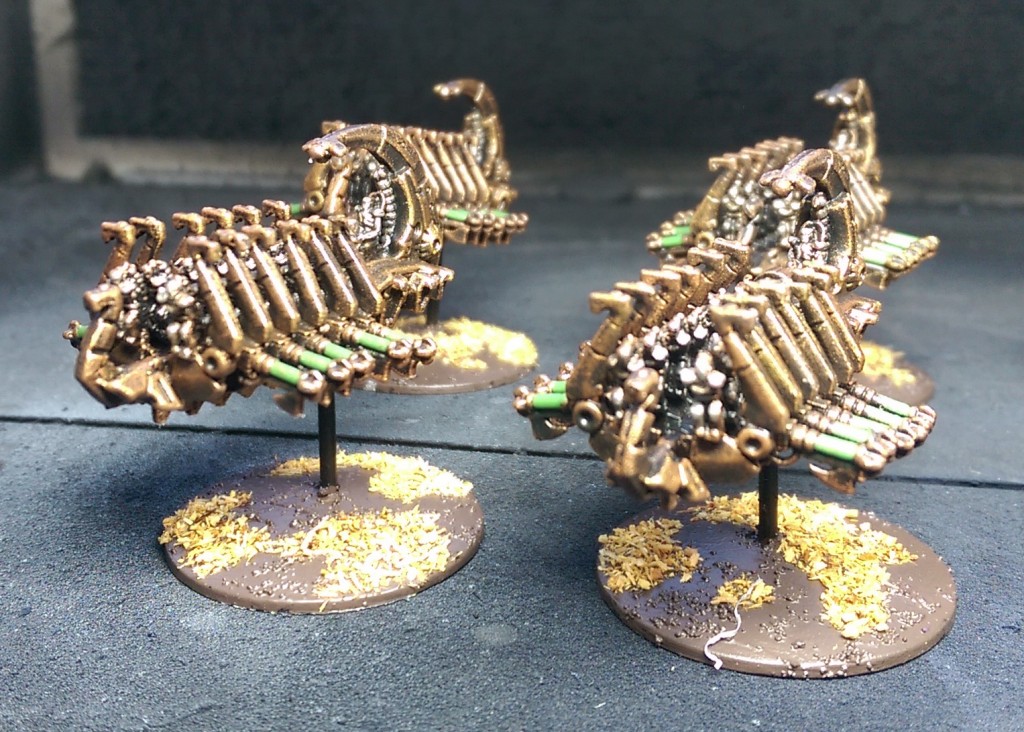
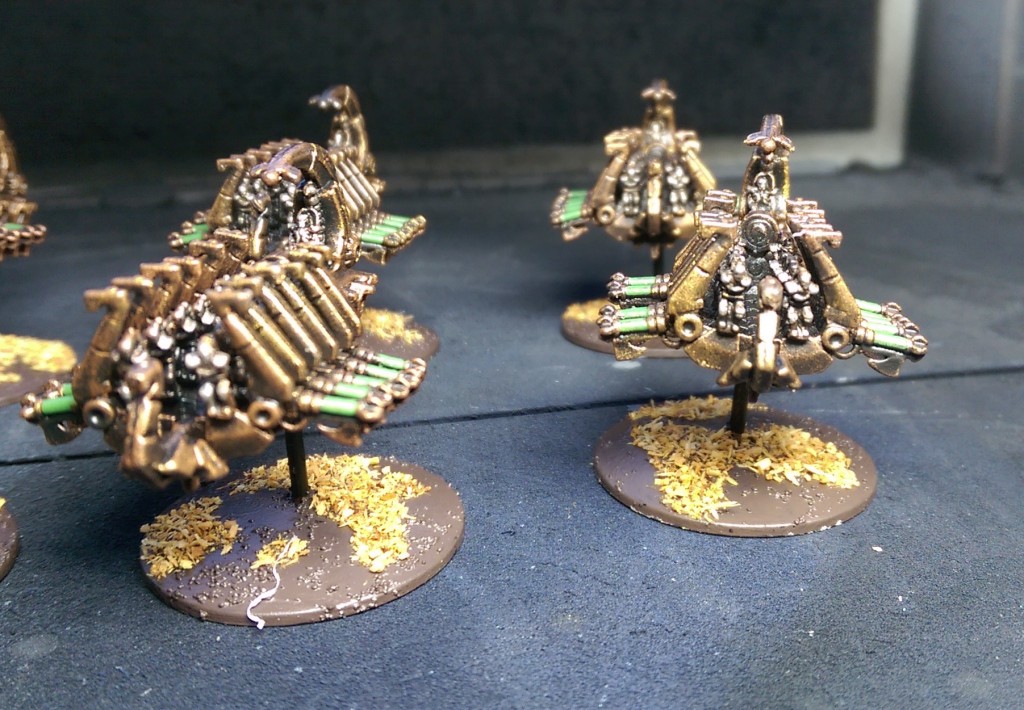
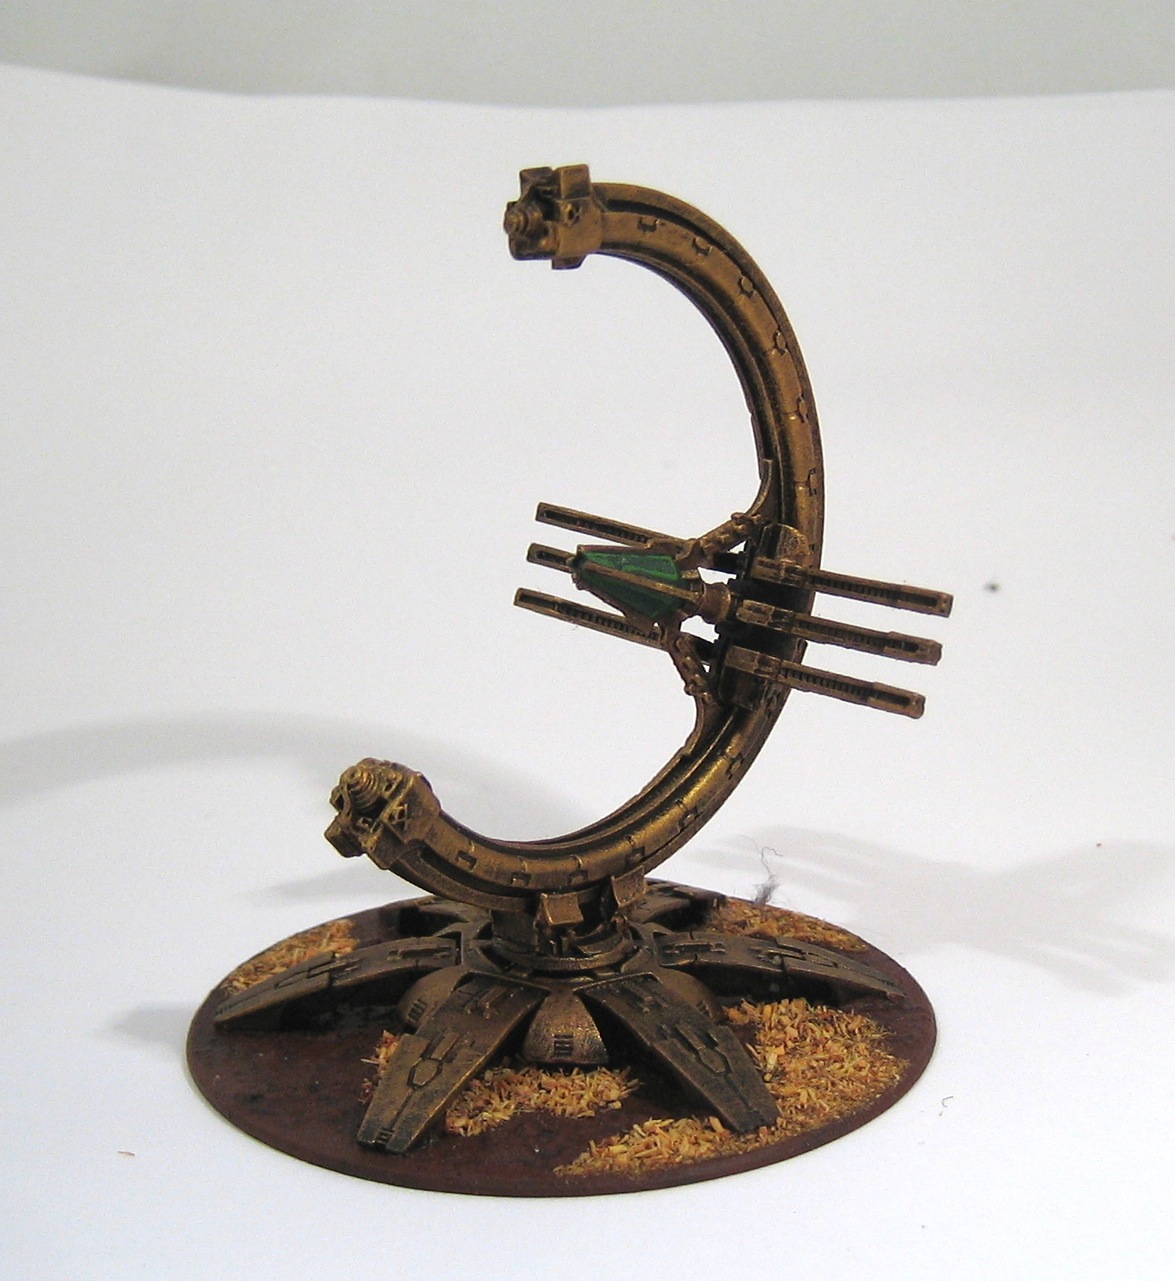
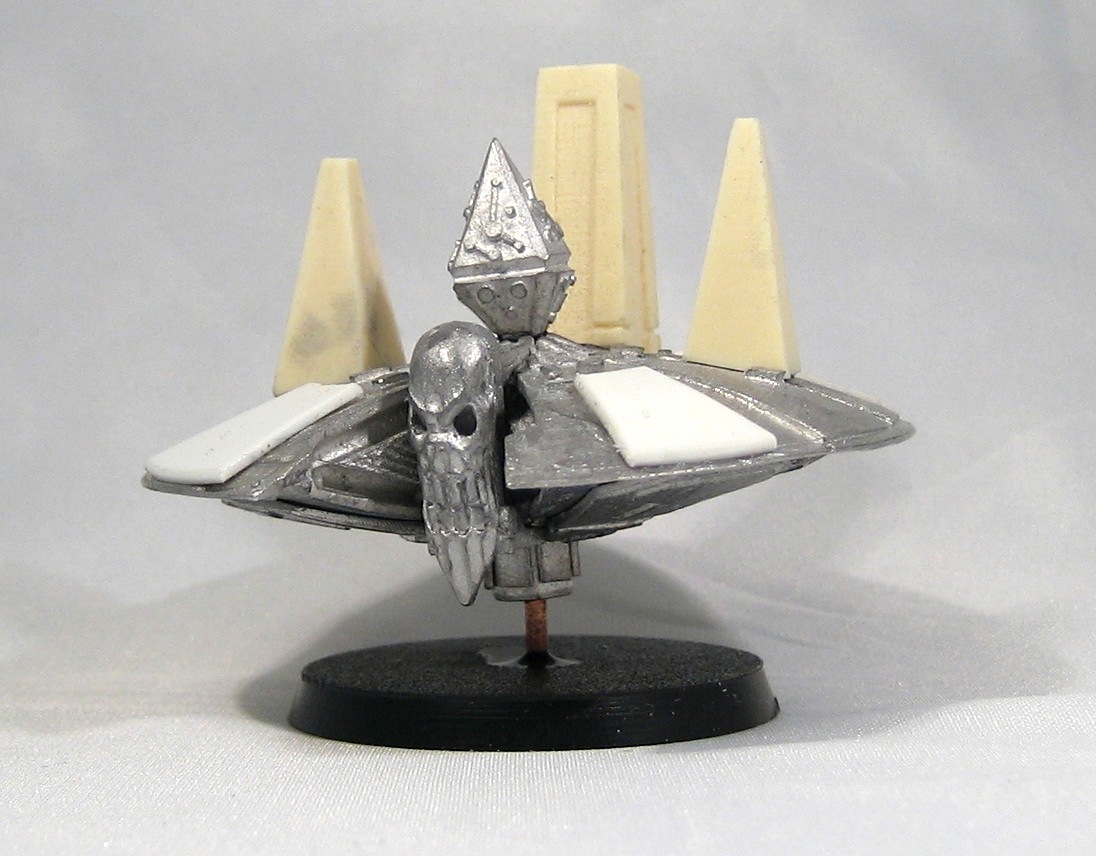
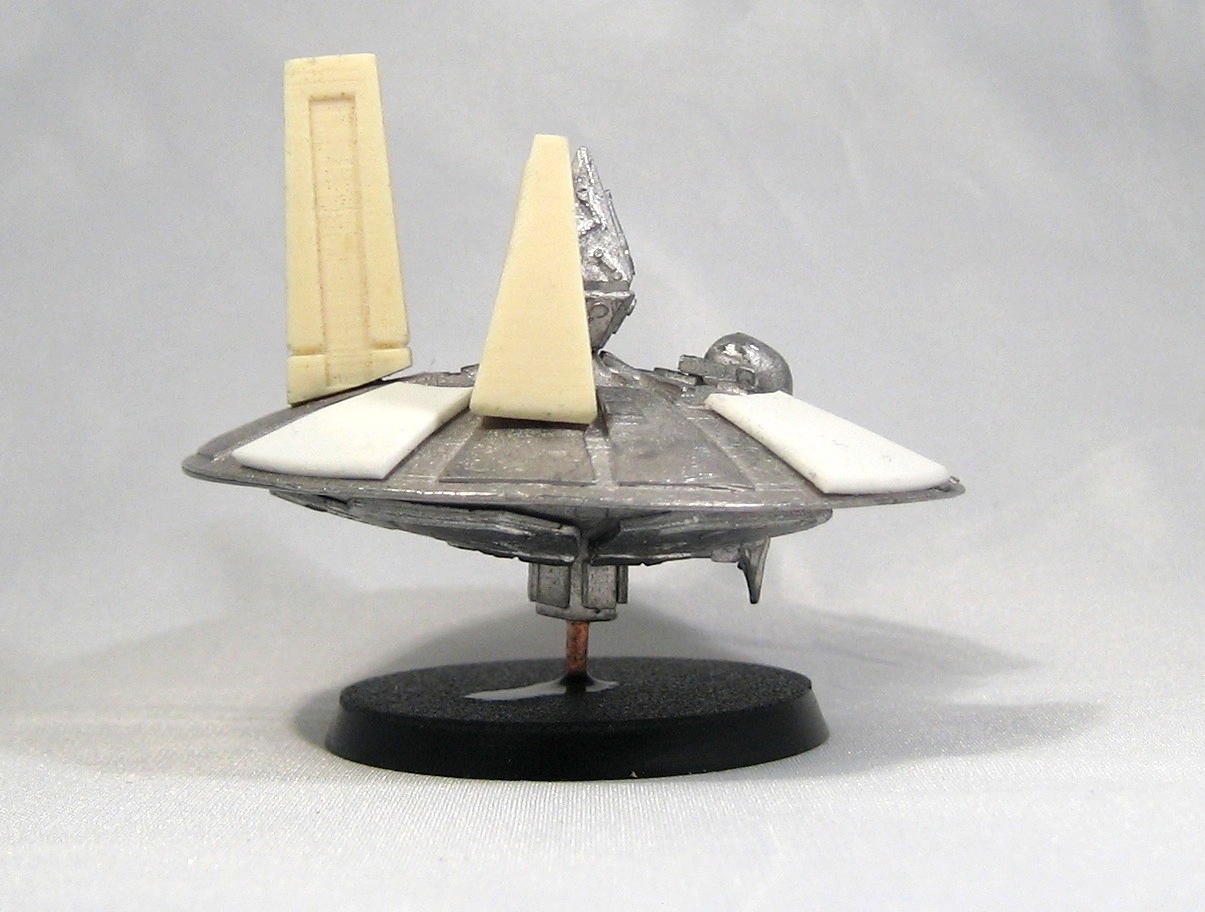
Clearing the backlog #4: Epic Necron Praetorians
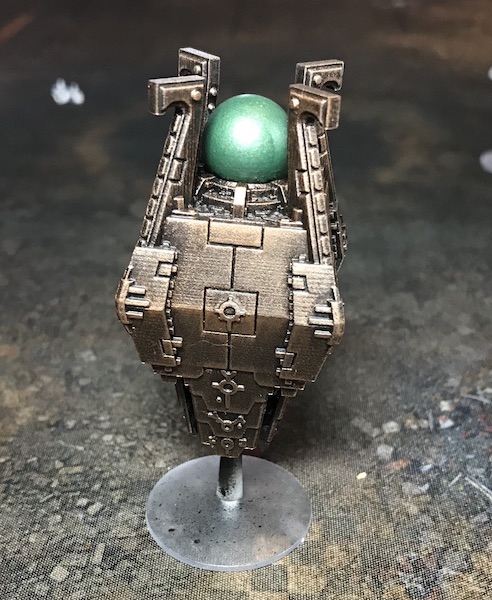
The second is a Warbarque:
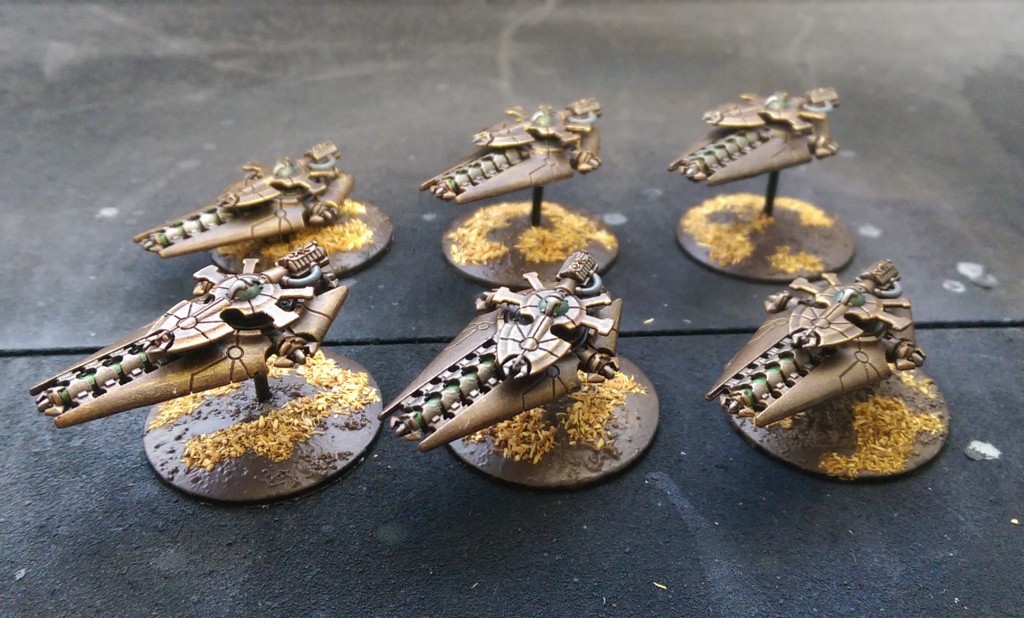
Clearing the backlog #2: Epic Necron Aircraft
Here are some Doom Scythes and Night Shroud bombers for my Epic Necron army. I love these models - they are beautiful and very easy to paint, and they are an absolute menace on the battlefield! So much so that I added another squadrom of Doom Scythes to bring the total up to four squadrons of flyers for my Necrons, who haven't lost a battle since I started using them.
I've become a big fan of the Hawk Wargames "widgets" which are perfect for miniatures that use flight stands: simply glue the widget to the underside of the model and it will provide a high grip push-in plug for 3mm flight stand poles. The model won't wobble during games, and the flight stand can simply be pulled from the widget at the end of your games, allowing the stand to be packed separately. And only 13p each!
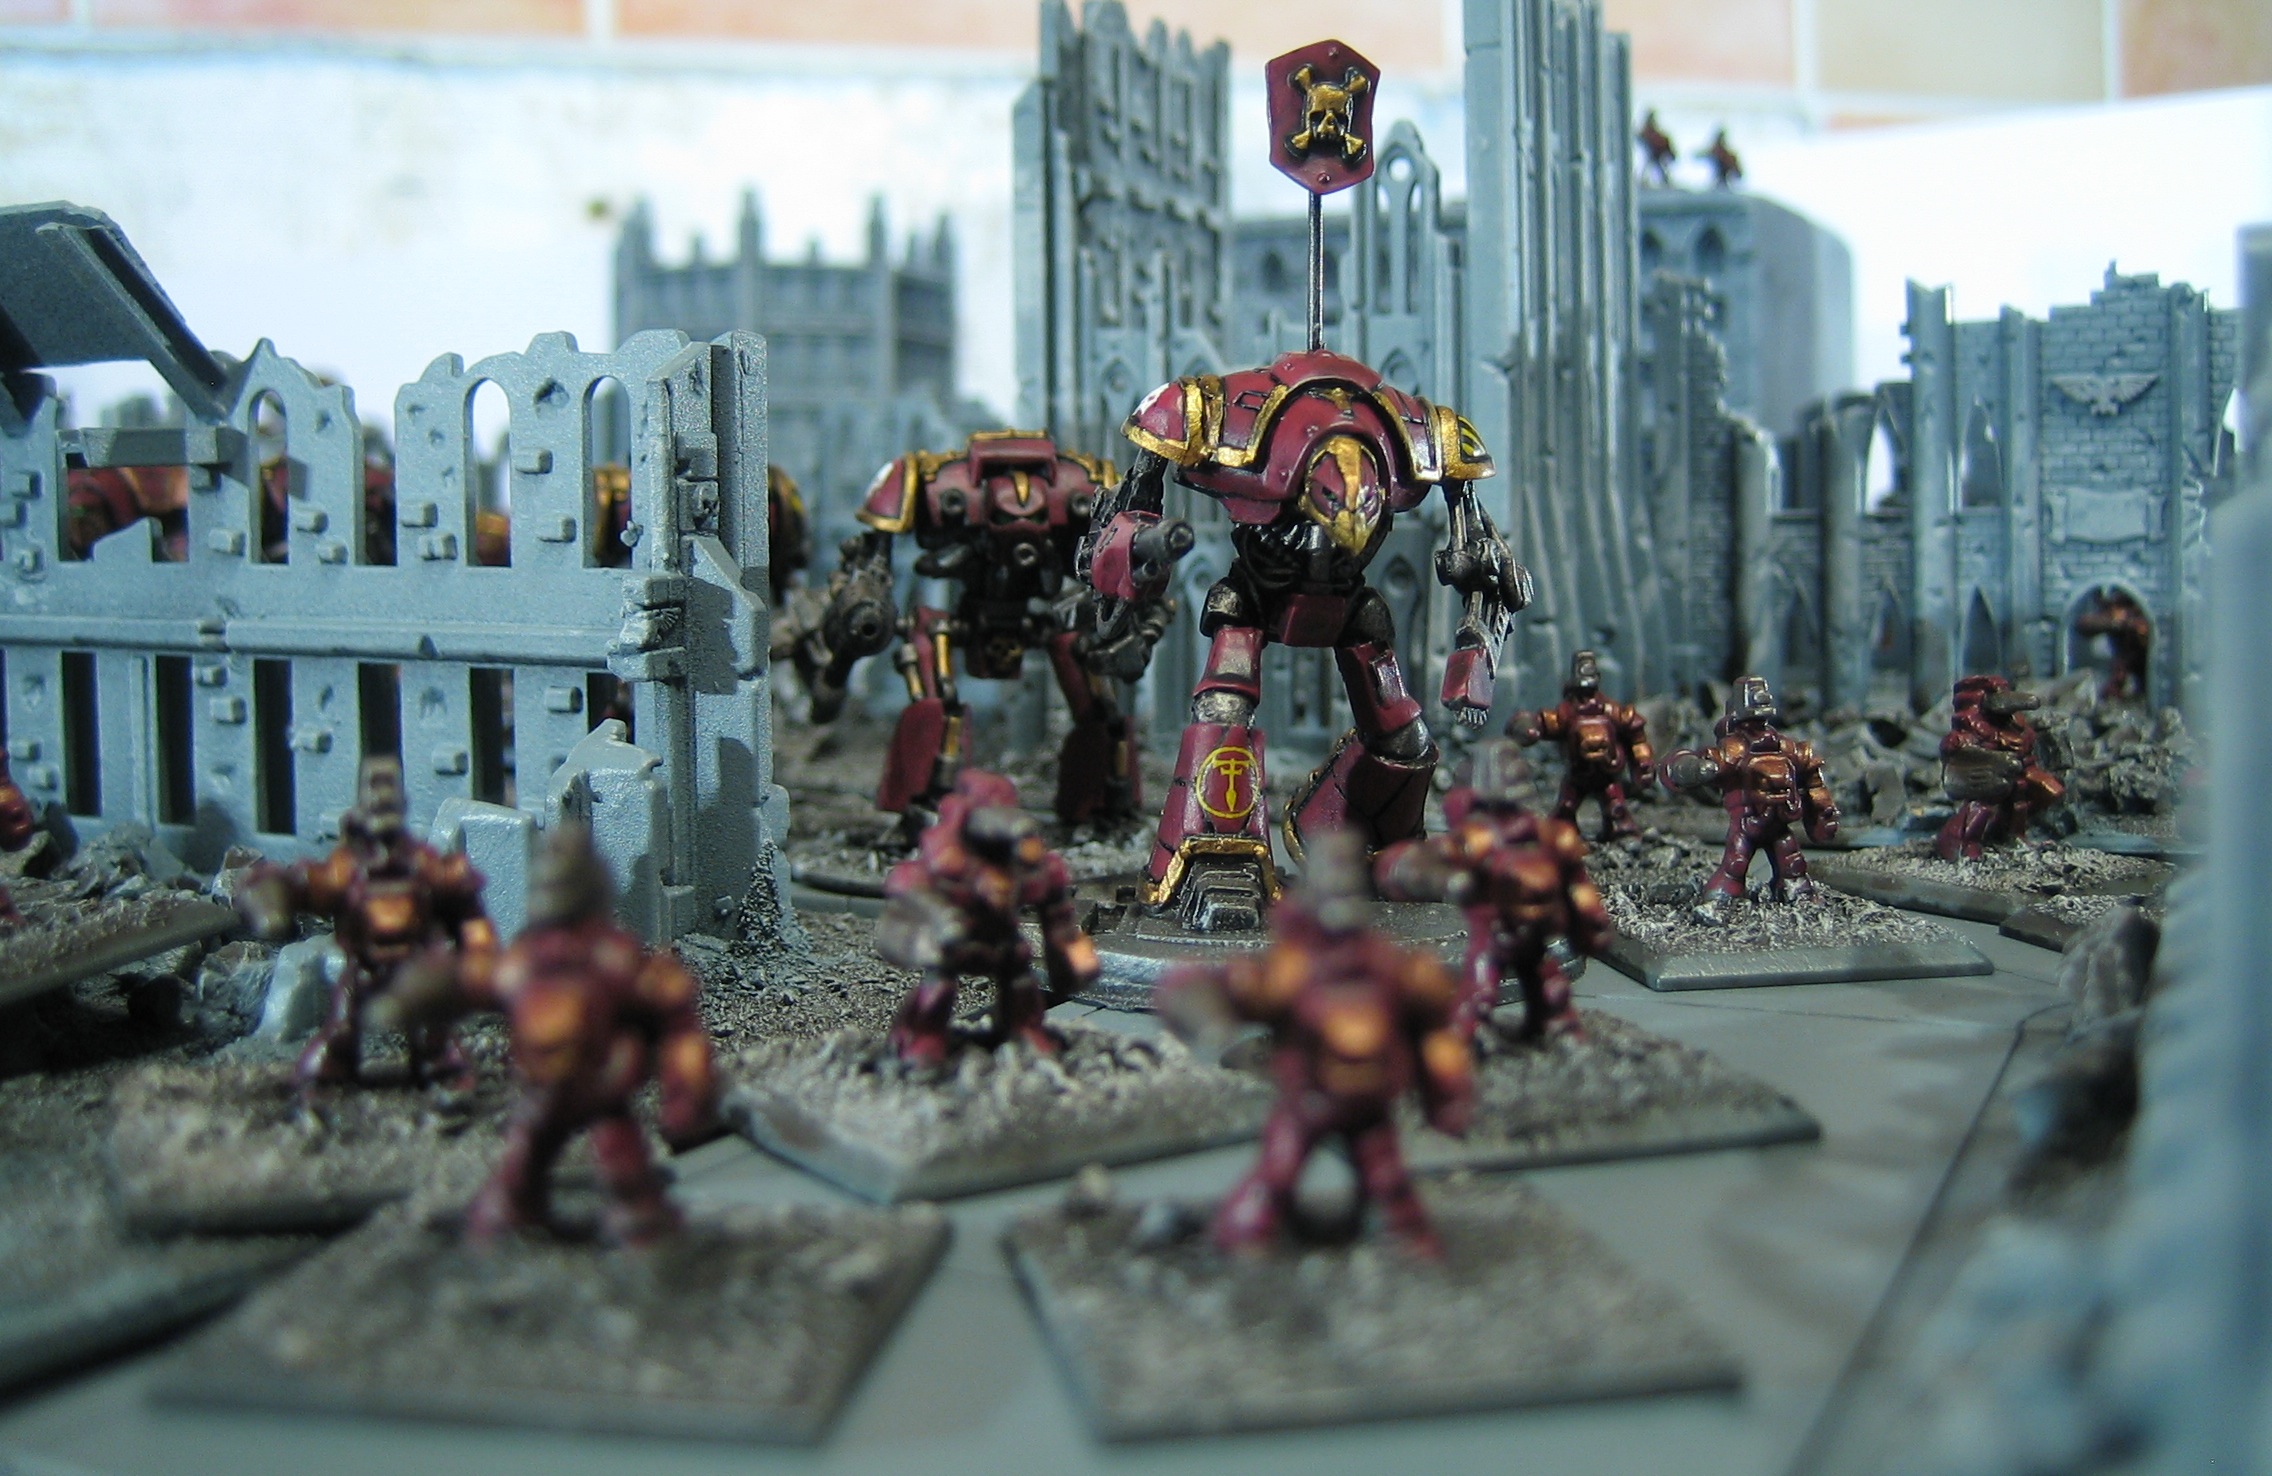
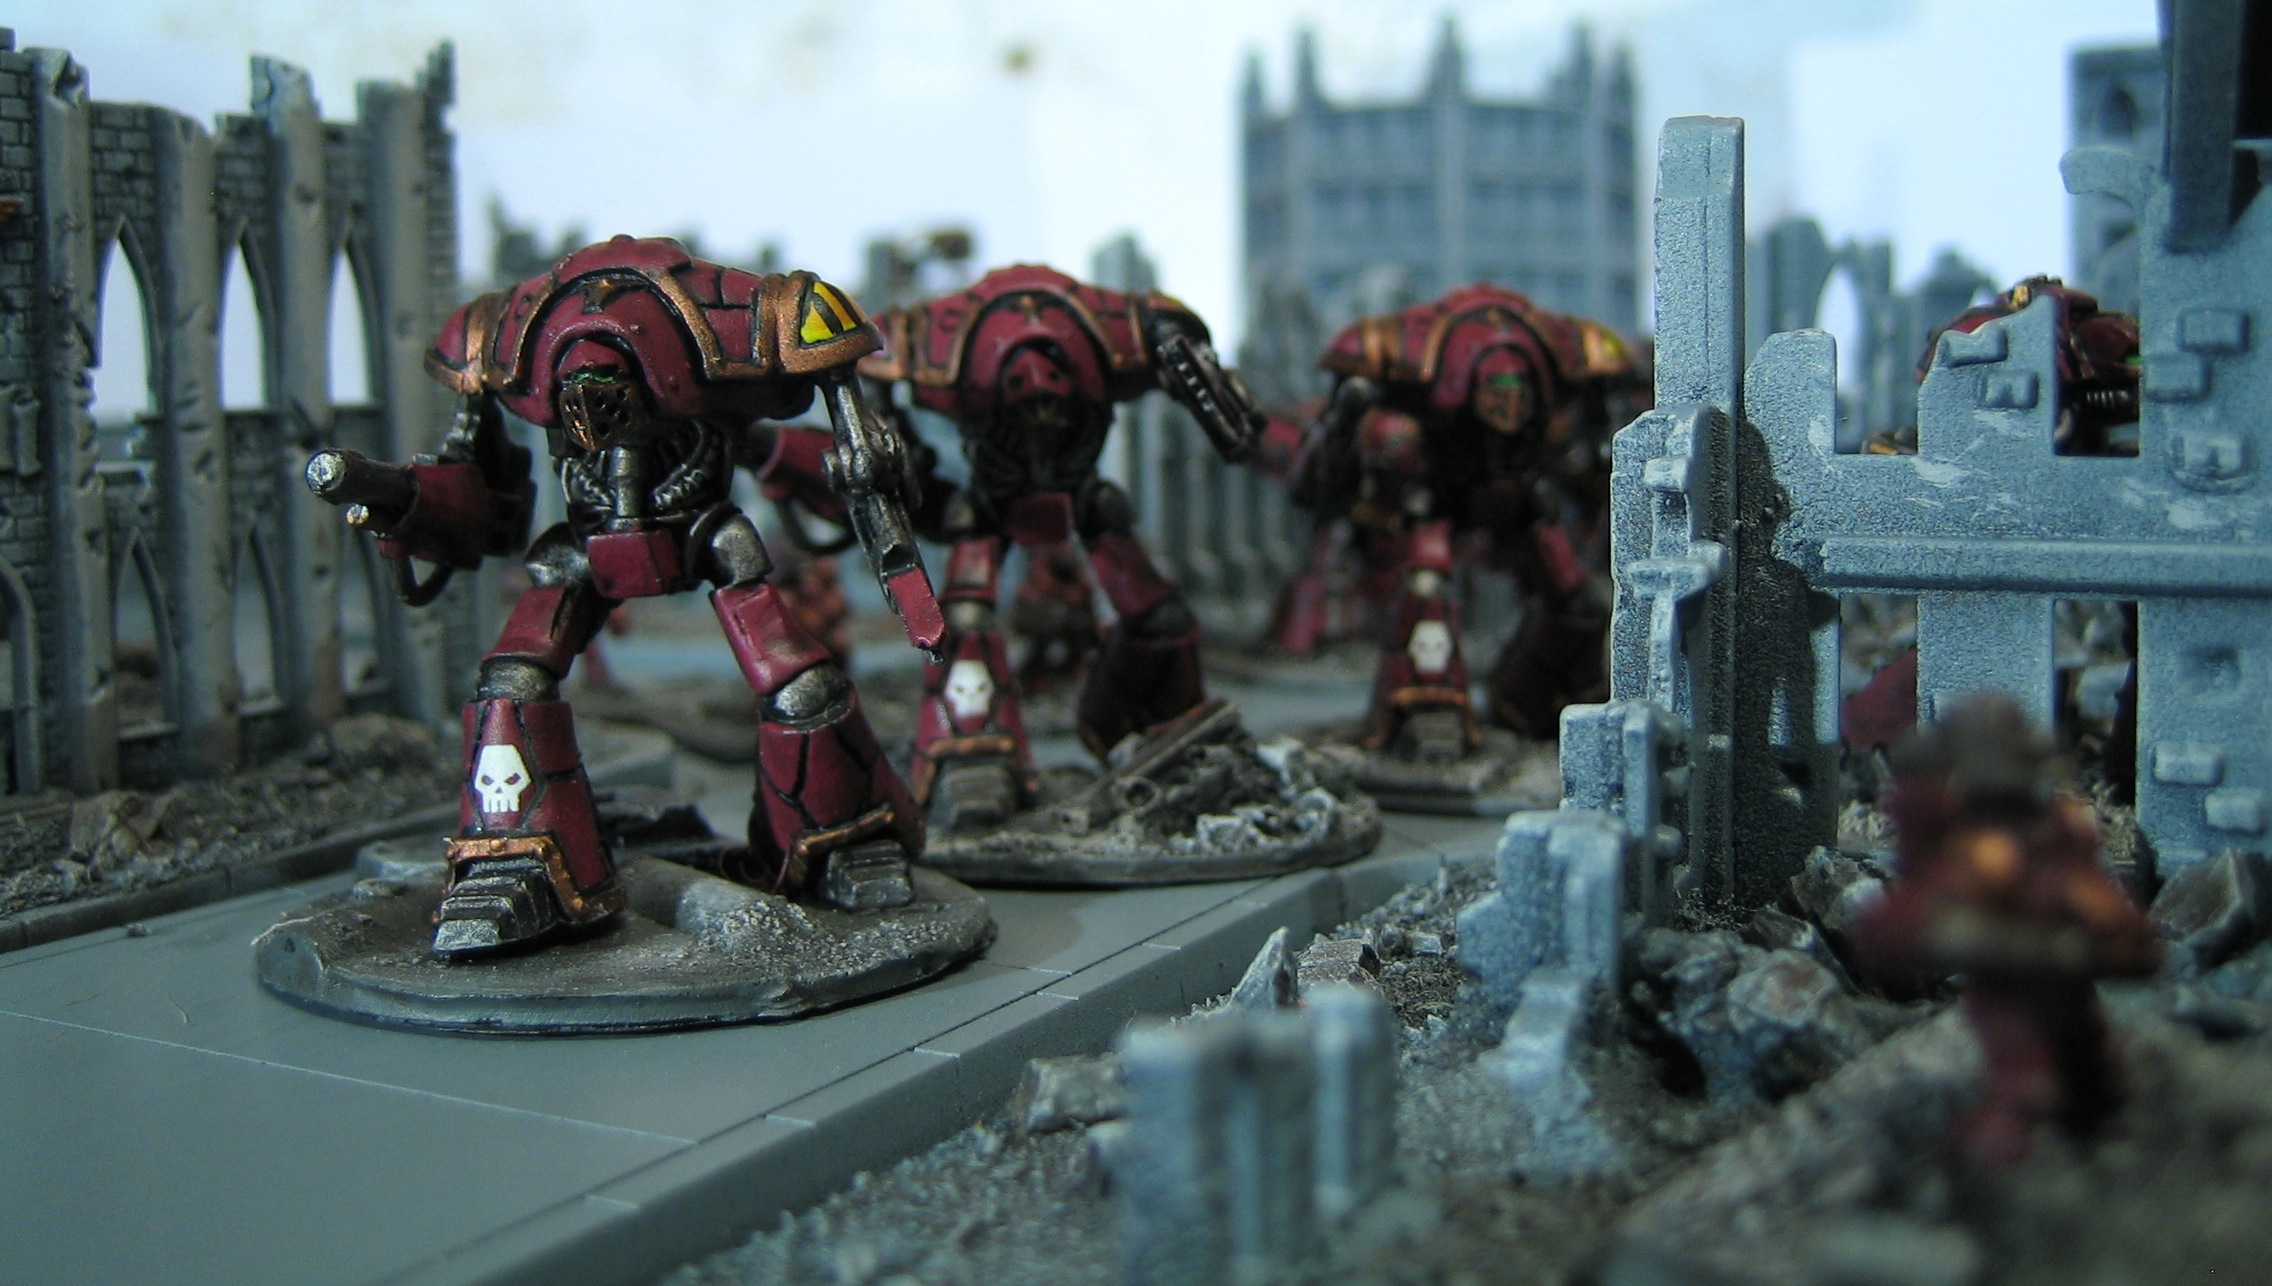
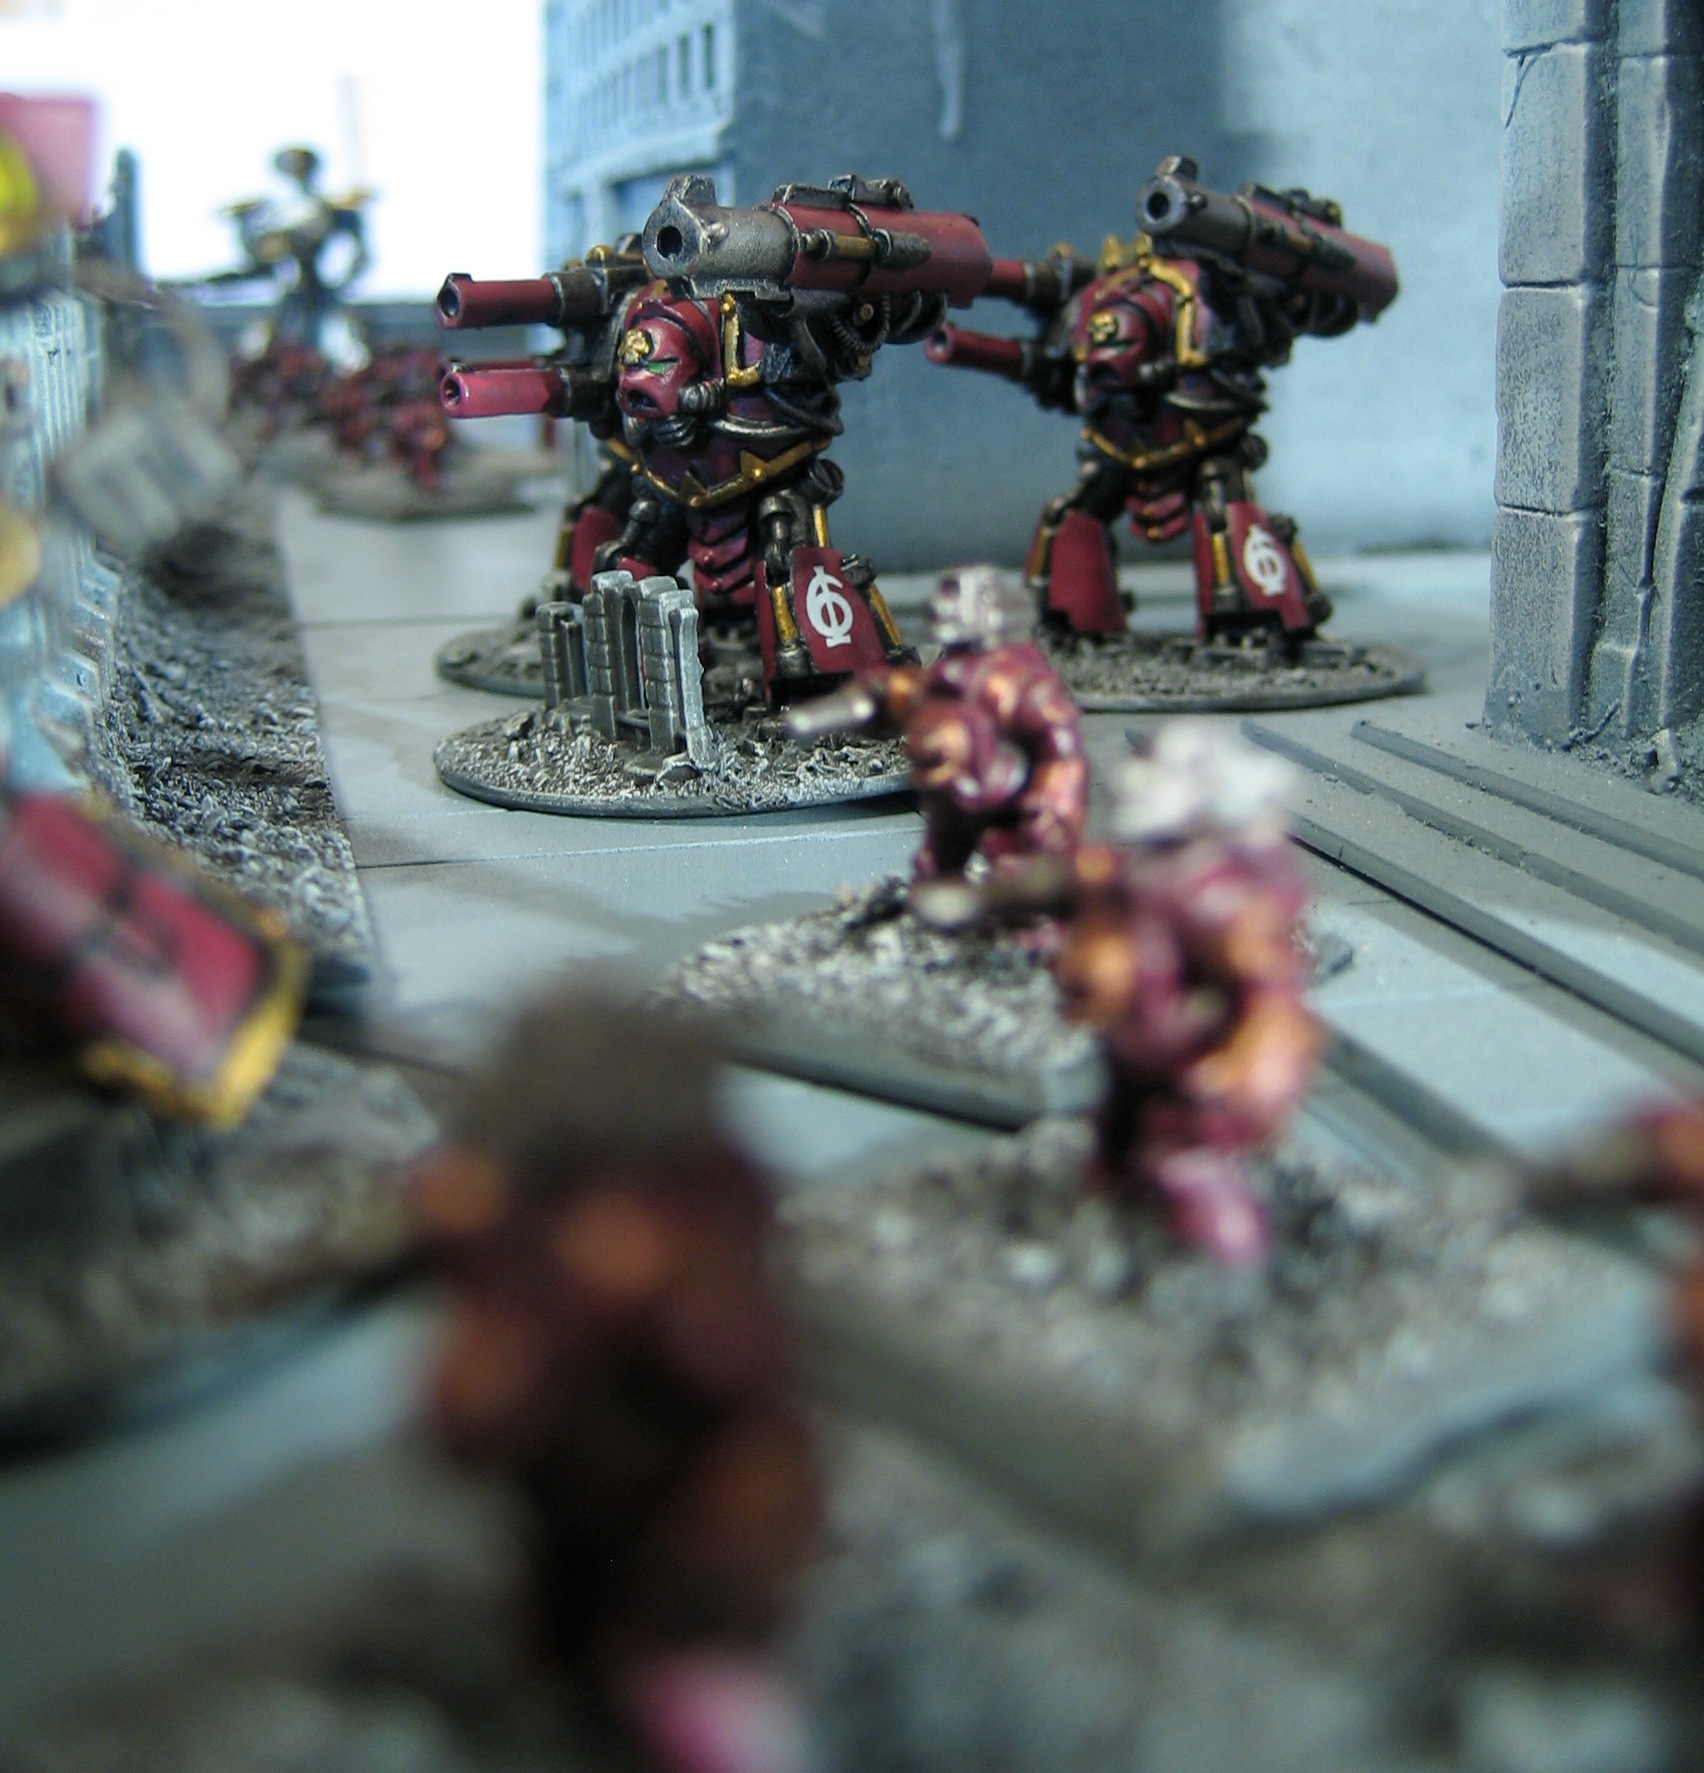
The War Engines of Legio Crassus
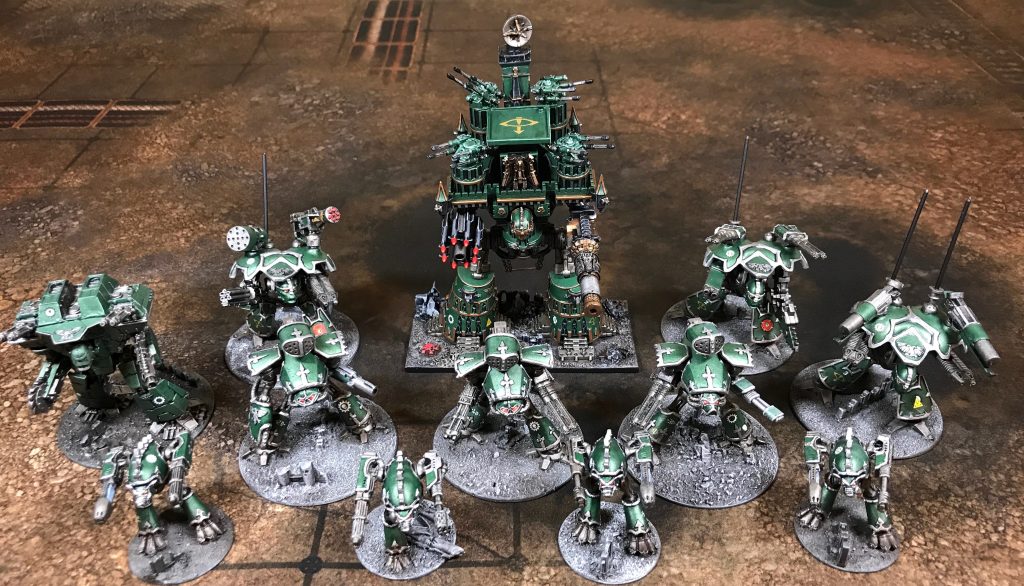
The legion consists of four Warhounds, three Reavers, four Warlords and a repainted and refurbished Warmonger (which still needs a bit of attention as one of the Hydra turrets has lost a barrel).
with the exception of the arm weapons on the Warmonger, and the Carapace weapons on the Lucius-pattern Warlord, every single weapon is magnetised, meaning that I can customise the weapons load-out of each titan as I see fit. In addition to a lot of classic metal and plastic titan weapons, I've also included some of the weapons from the Defeat in Detail Cybershadows Leviathan models to proxy as various different weapons.
These titans are painted in the colours of Legio Crassus - a titan legion that was loyal to the Warmaster during the Horus Heresy. None of the titans show the corruption of Chaos - but that might change in the future! For now, they are just a Heresy-era traitor legion, and wear the Eye of Horus proudly over their metallic green armour.
More pics below.
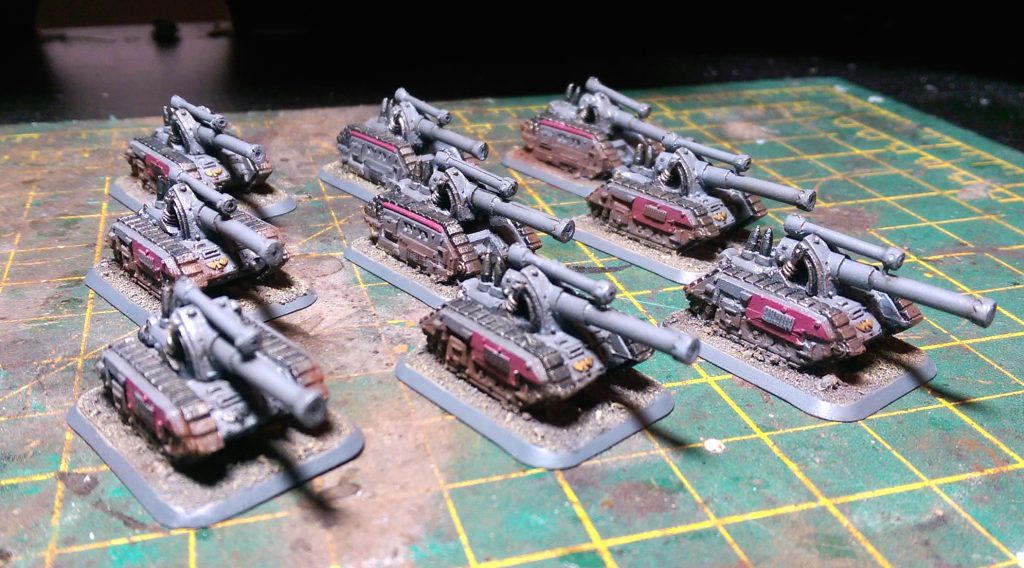
More Adeptus Mechanicus Reinforcements

Last night I finished a few new units for my Adeptus Mechanicus army. Above you can see some Knights Warden (more french chevaliers) that have been blocking my painting queue for far too long: the gun barrels on the arms were extremely fragile in resin, so I decided to replace them with new ones made from plastic tubing and brass rod. Because that was an awkward and fiddly job, they went straight into the "To Do" drawer, which has stopped me from painting any more Knights for probably a couple of years! So it's good to be able to finish them.
Below, you will also see another company of Stormblades, and a Heavy Artillery Company of Basilisks.
For the Omnissiah!
A new legion rises...
Here is the magnetised Reaver that I showed a video of in my last post. You will not that its colour scheme doesn't match my other titans: this is because I have decided to build a new legion; because of the increased interest in Epic in my local area, I've been playing more titan-versus-titan intro games, and I want to have two different legions for these games.
The colour scheme is an old one: I had a few titans painted in this colour scheme many years ago, but repainted them as Legio Pantera (something I now regret!).
I'm currently working on some Warhounds to go with the Reaver, and then a Warlord or two thereafter. I'm planning on magnetising them all!
More pictures below.

Magnetised Reaver Titan (Video)
I decided to see how effectively I could magnetise the weapons on a metal Epic Reaver. 3mm neodymium magnets work just fine, as you can see! Click here if you can't see the video embedded above.
NetEpic Imperial Titan Weapon Tactica
Click to download (PDF)
Comments and feedback appreciated!
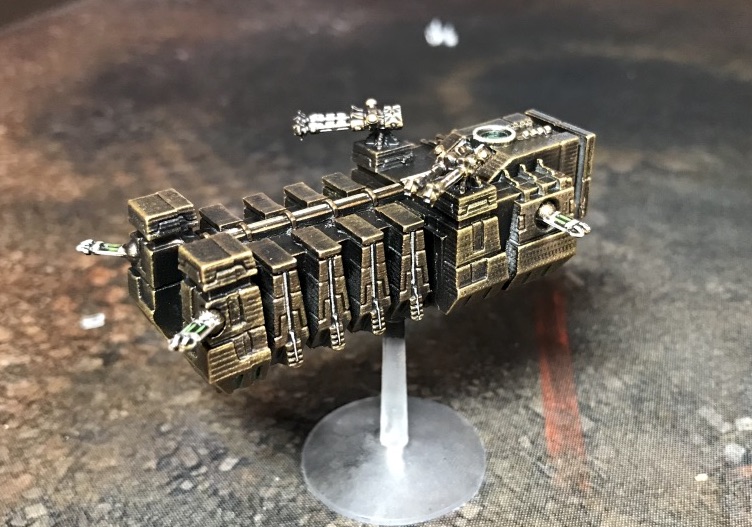
Epic Necron Ghost and Doomsday Arks
My friends and I are planning a big all-day Epic game next month and I decided that I needed to reinforce my Necron army. I picked up some Ghost Ark proxies from eBay - turns out I need another couple in order to field two legal units! D'oh!
I also painted up some more kitbashed Doomsday Arks, similar to ones I made a while back.
More pictures below.
Adeptus Mechanicus Gorgons

Here are some Gorgons for my afore-mentioned Assault Company. I need another model for the HQ, but these are done and ready for the table.
More photos below.

Adeptus Mechanicus Assault Company
 Here is my company of Assault infantry for my Epic Adeptus Mechanicus/Tech Guard army. Yes, they have jump packs! Imperial Guard Assault infantry were equipped with jump packs back in the days of Rogue Trader (they also had access to Rhinos, Land Raiders and other stuff that are nowadays reserved for Space Marines).
These troops will be deployed using either Gorgon assault carriers or Valkyries, depending on the mission. Those will be the subject of a future post.
Adeptus Mechanicus Thudd Gun Company

Here is the Light Artillery Company for my Adeptus Mechanicus army. The NetEpic rules say that these units contain both Thudd Guns and Mole Mortars, but mine is just Thudd Guns. The artillery pieces themselves are from the now-defunct Exodus Wars range, the infantry models are forumware.
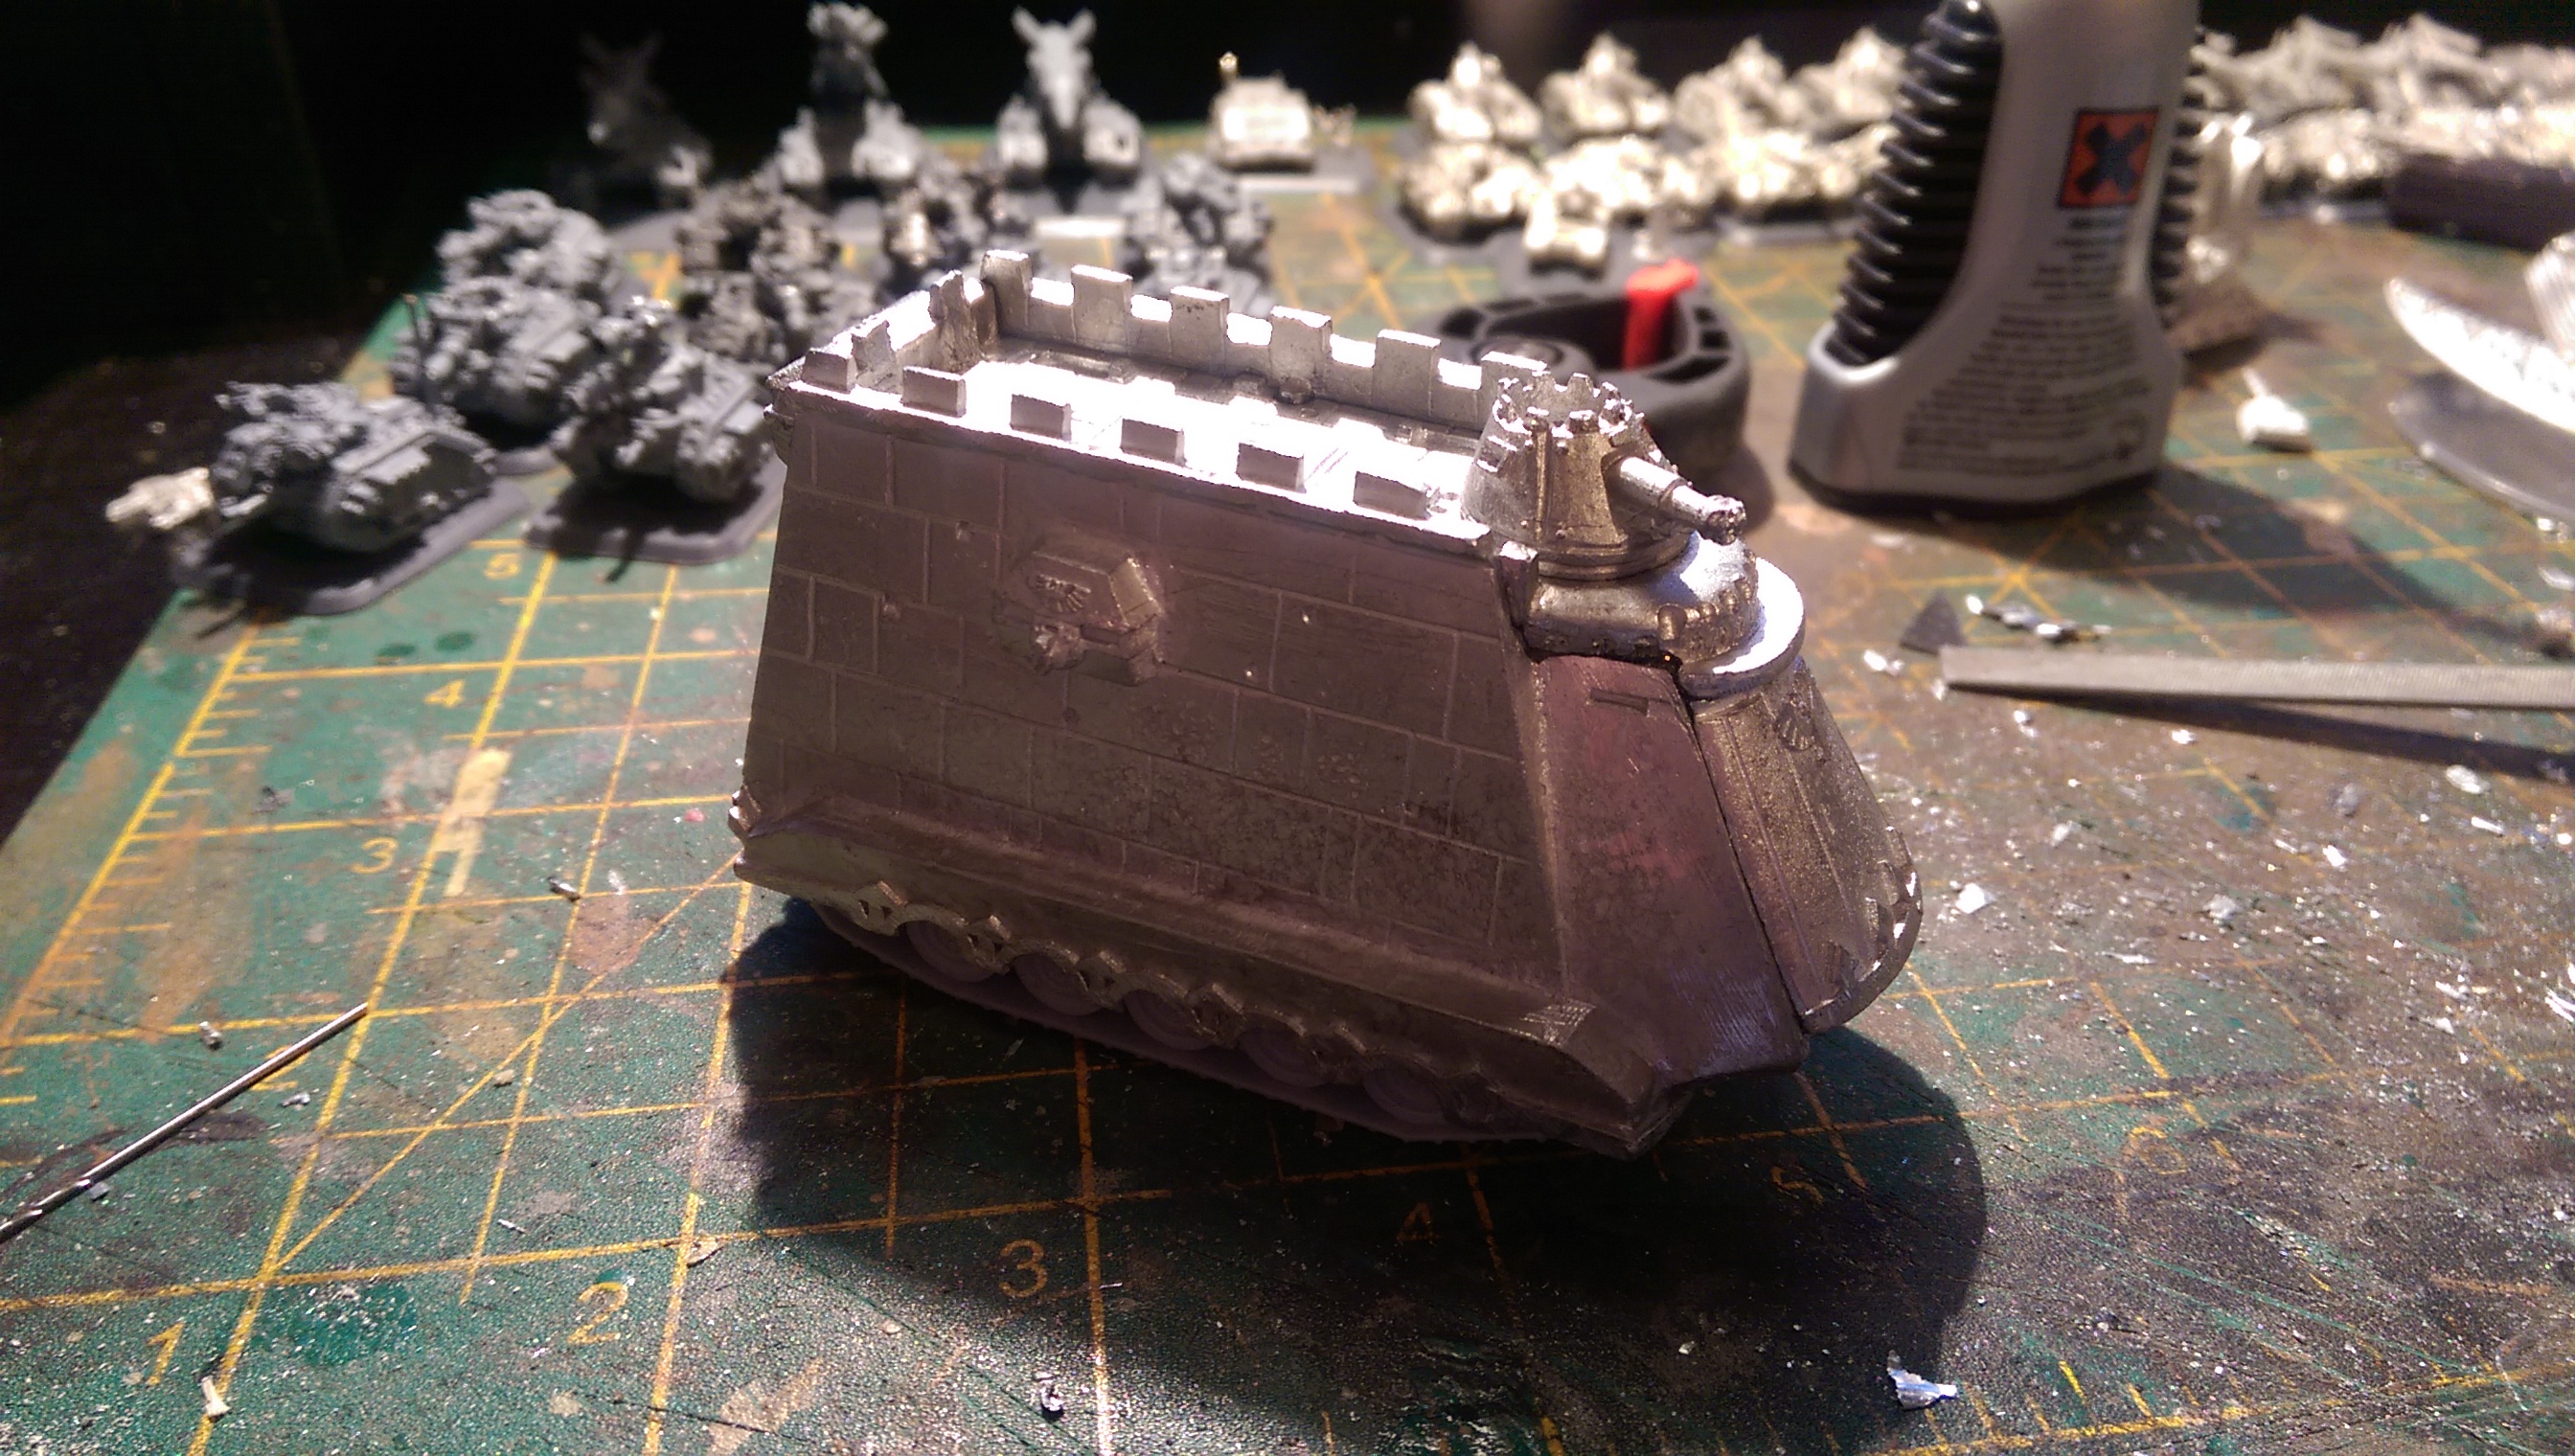
Troublemaker Games Novan Dictum Command Centre
The Novan Dictum Command Centre from Troublemaker Games is an excellent proxy for the Imperial Guard Leviathan. Here's mine. More photos below.
Capitol Imperialis
The casting of this model isn't perfect (neither is the paint job I gave it) but you can't deny it's a got a lot of character! More pictures below.
Kitbashed Adeptus Mechanicus Ordinatus Armageddon
Here is my kitbashed Ordinatus Armageddon, which has been sitting in my to-do pile for several years. I rebased it (on three Flames of War bases glued together) to match the Orginatus Golgotha and the Capitol Imperialis.
How To Assemble a Capitol Imperialis
The Capitol Imperialis is a monstrosity: old (more than a quarter of a century), heavy (at least half a kilo) and made of actual, proper lead, as in Pb-82, as in, it's actually poisonous.
Not only that, it dates from an era where assembly of such objects was left to Real Men Who Didn't Mind Losing A Finger Because The Bloody Thing Is So Blobby That You Need To Take A Dremel To It To Remove All The Excess Metal.
I make no claim to being such a man, but I was able to assemble my own Capitol Imperialis, to my own satisfaction at least, thanks at least in part to Mike "The Welsh Wizzard" Hobbs. And so for posterity, and the benefit of those who come after, here is how I did it.
The Return to Epic
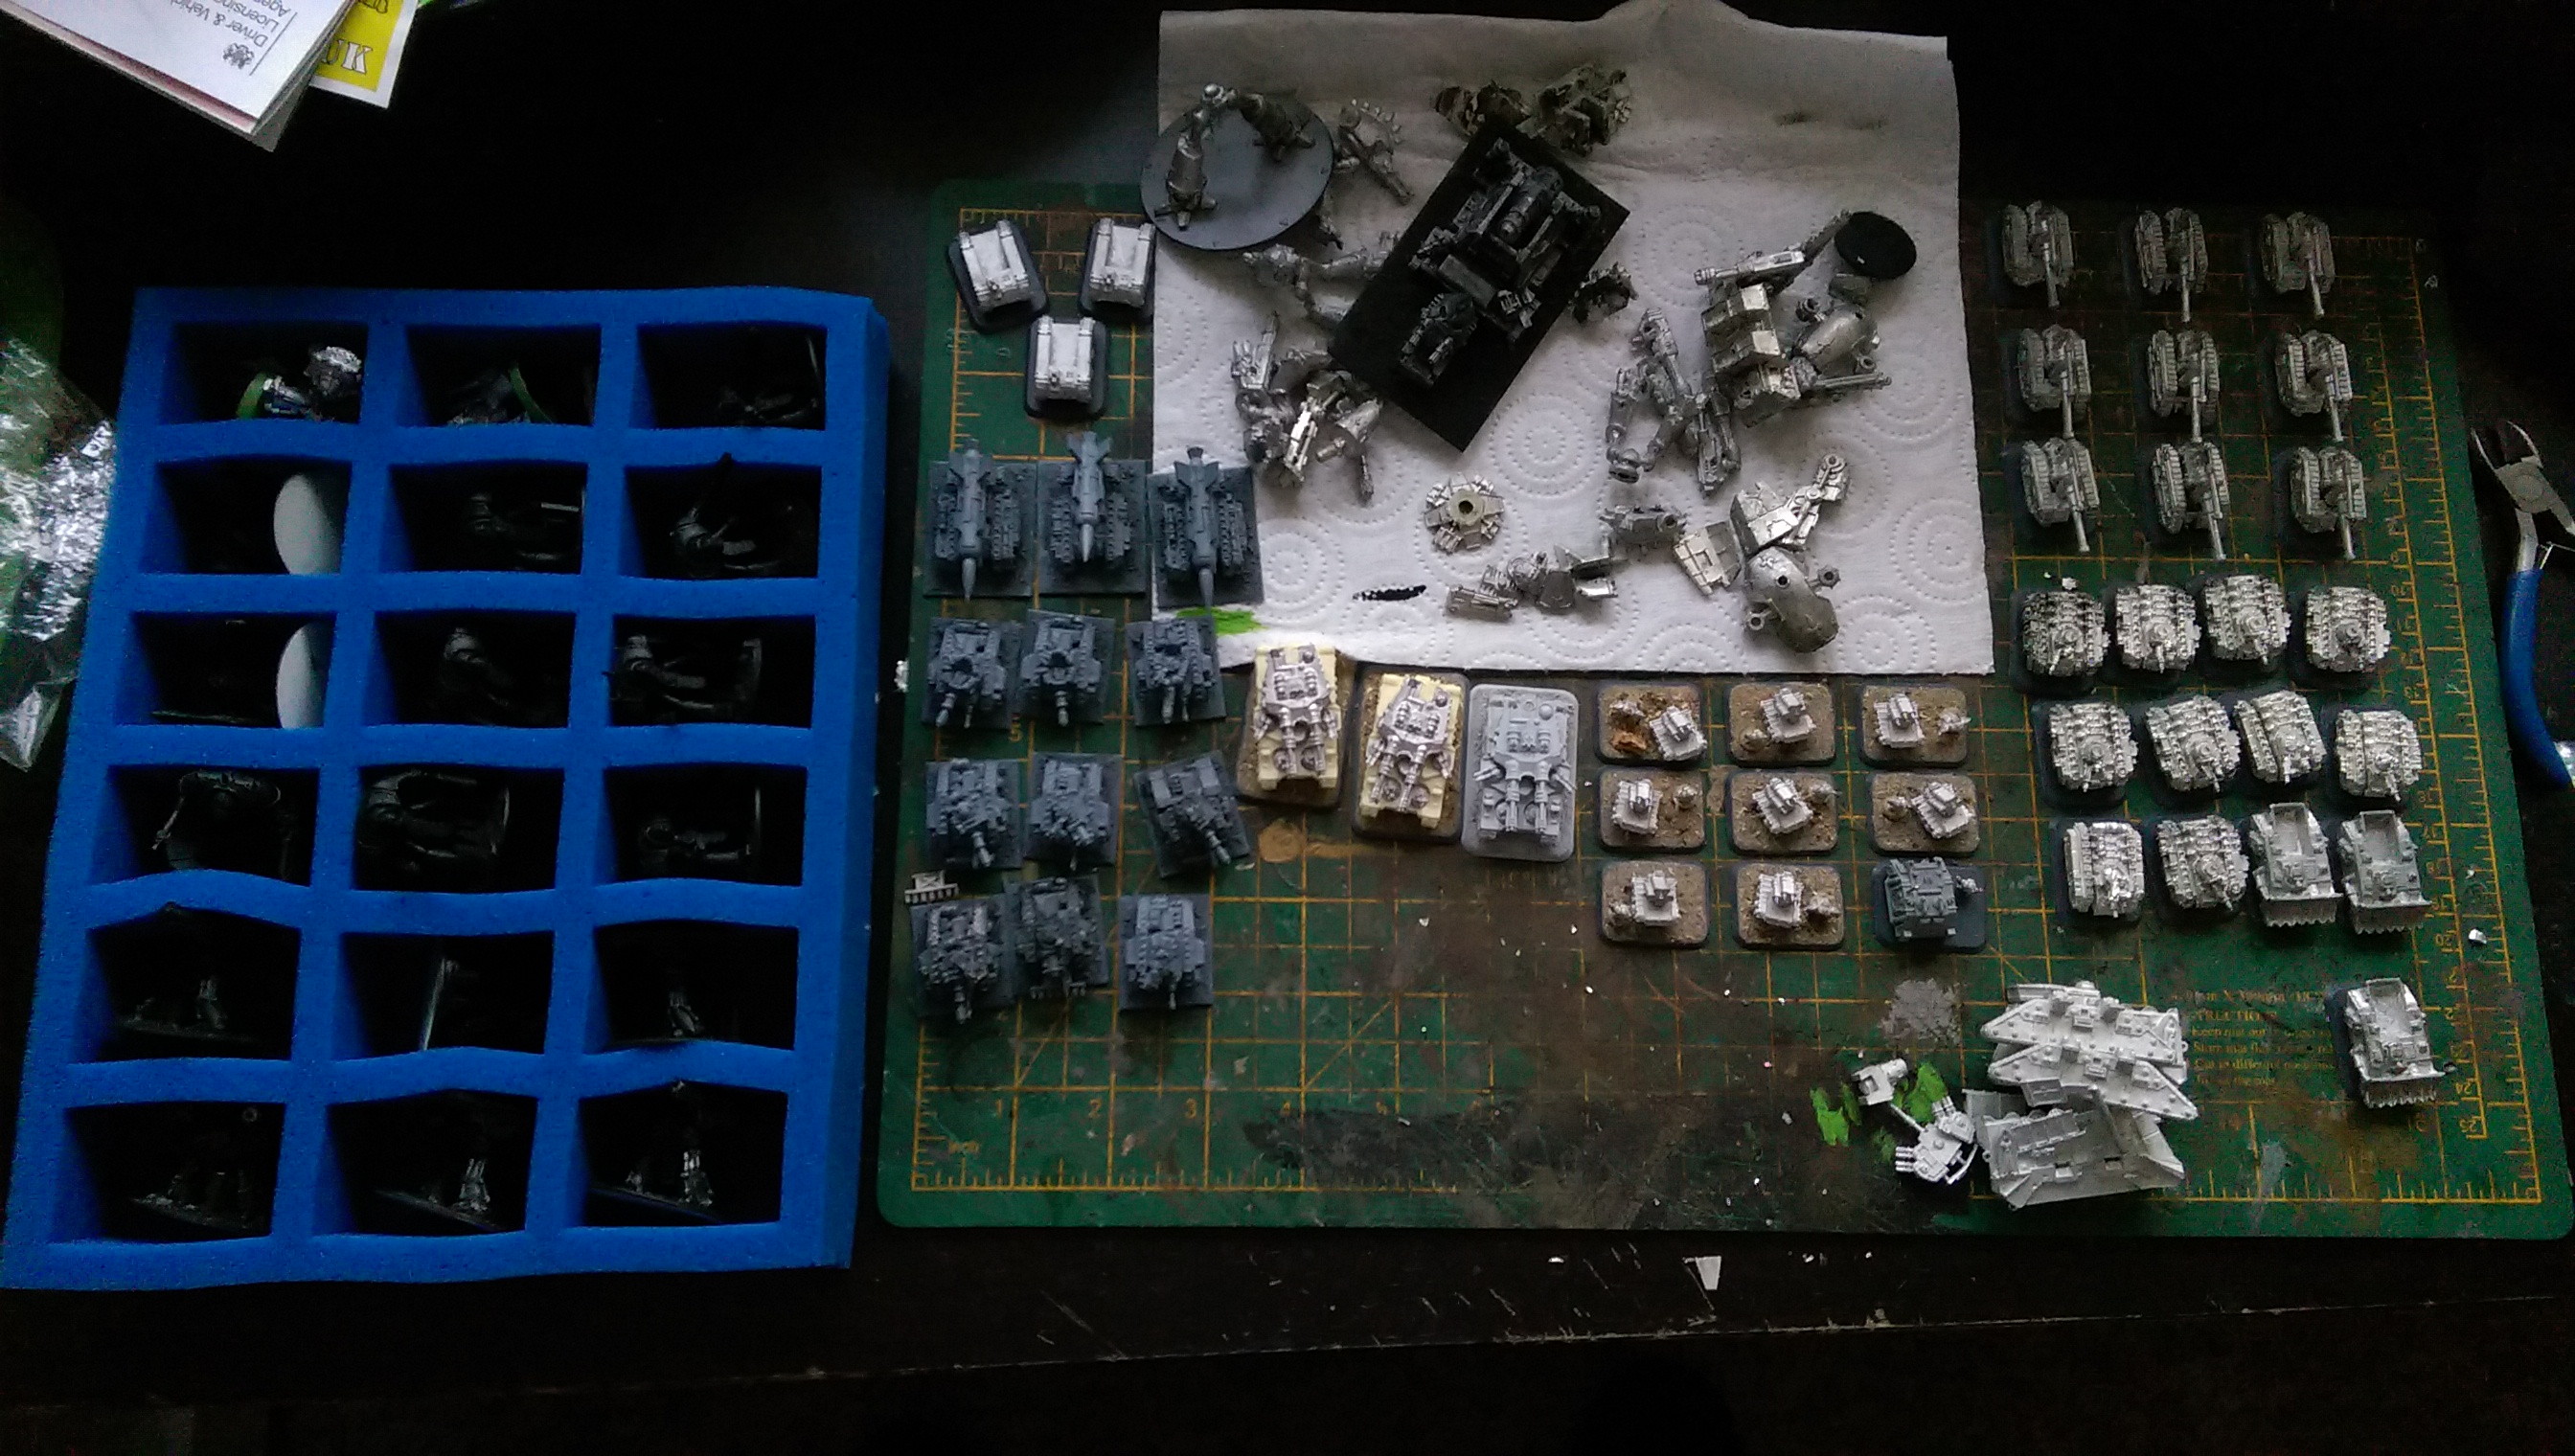
Here is a small sample of the models from my next hobby project: infantry and armour support for my Imperial Knights. This has been on the To Do List for a couple of years, before I got distracted by Salamanders, the Reaver, and upgrades to my 40K Necrons.
In this photo:
- Leman Russ tank company
- Earthshaker Company
- Thudd Gun Company
- Deathstrike Battery
- Gorgon Squadron
- Ordinatus Armageddon (kitbashed)
- Leviathan (actually a model from Troublemaker Games)
- Various knights and titans
Not shown: a Capitol Imperialis, and lots and lots of infantry!
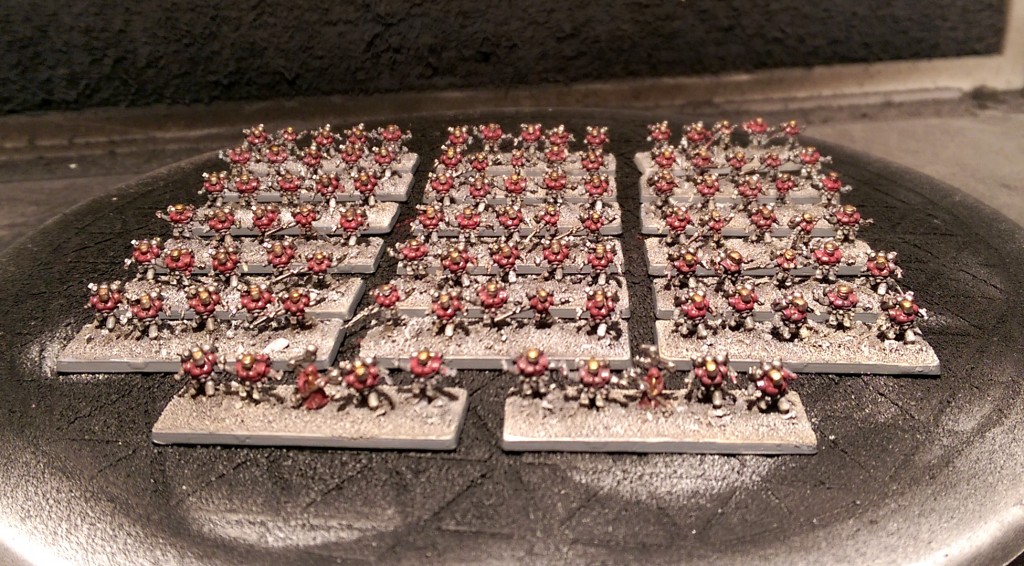
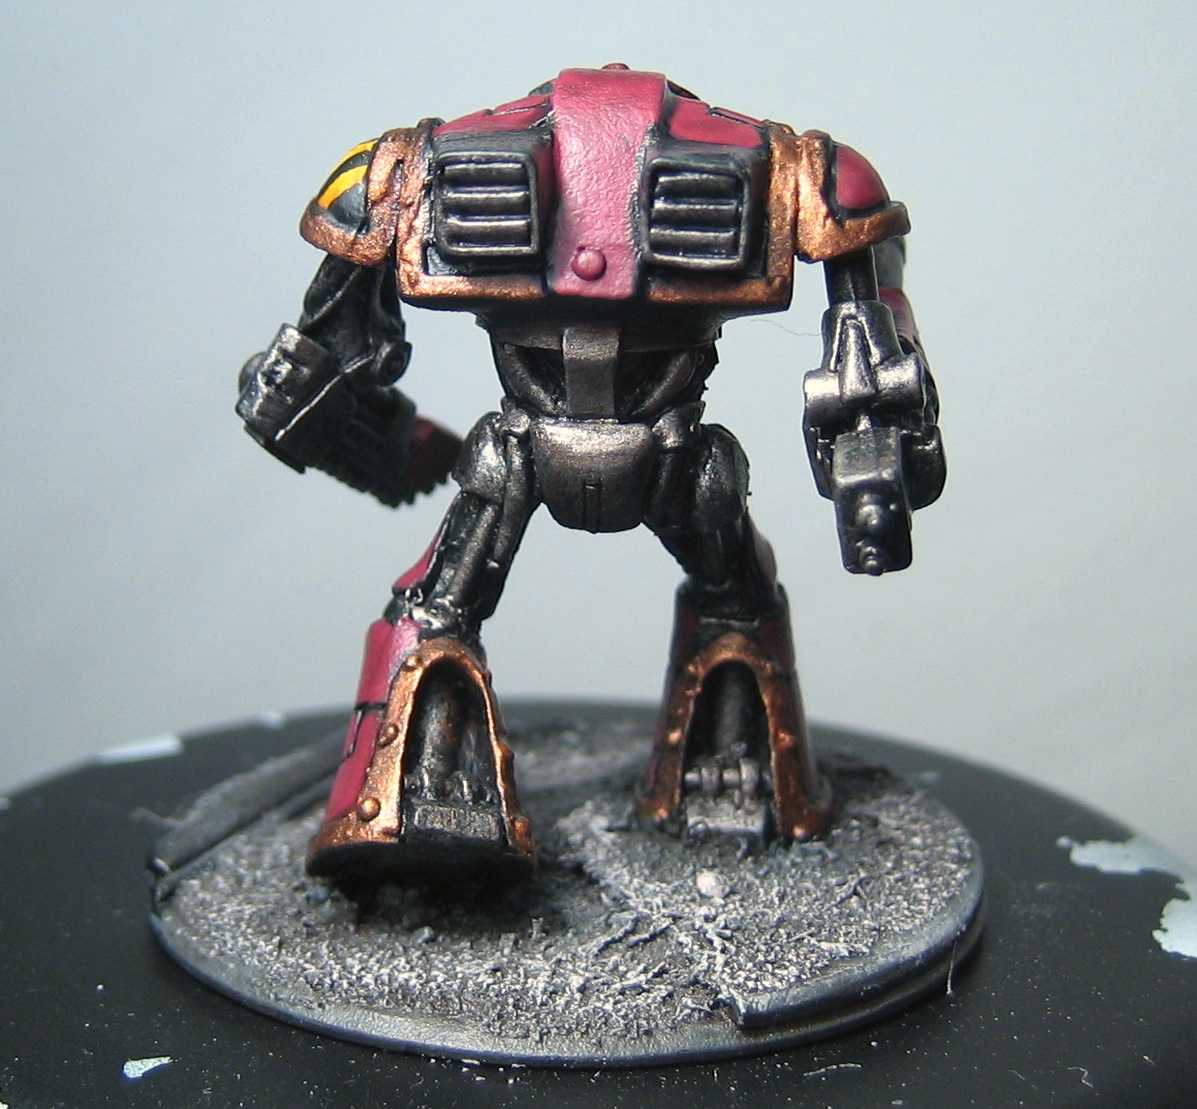
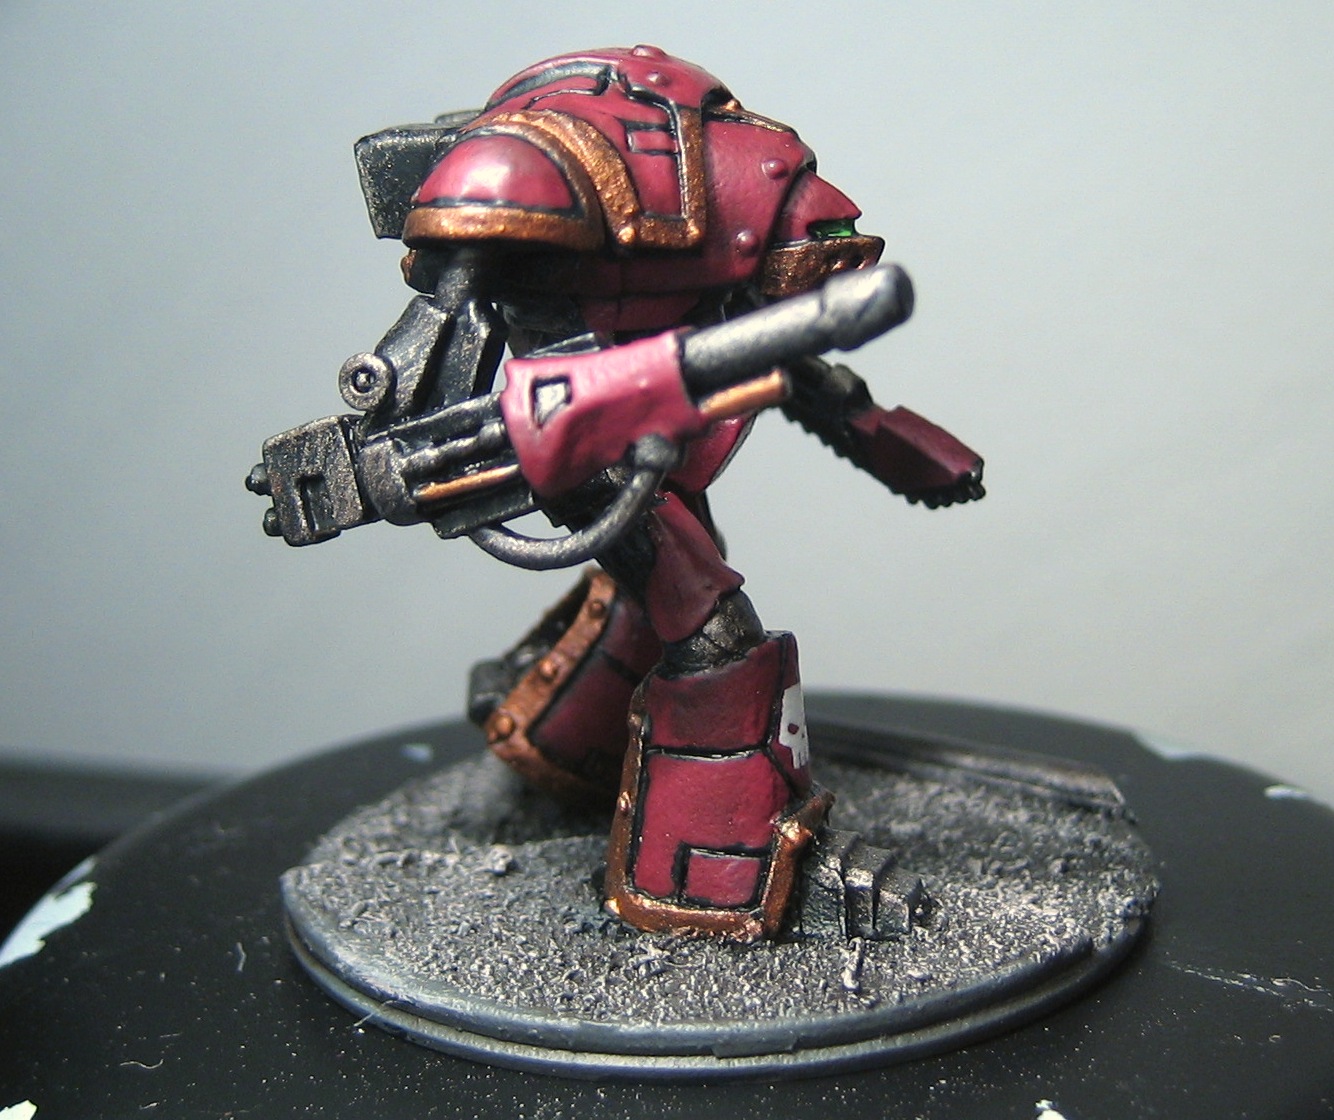
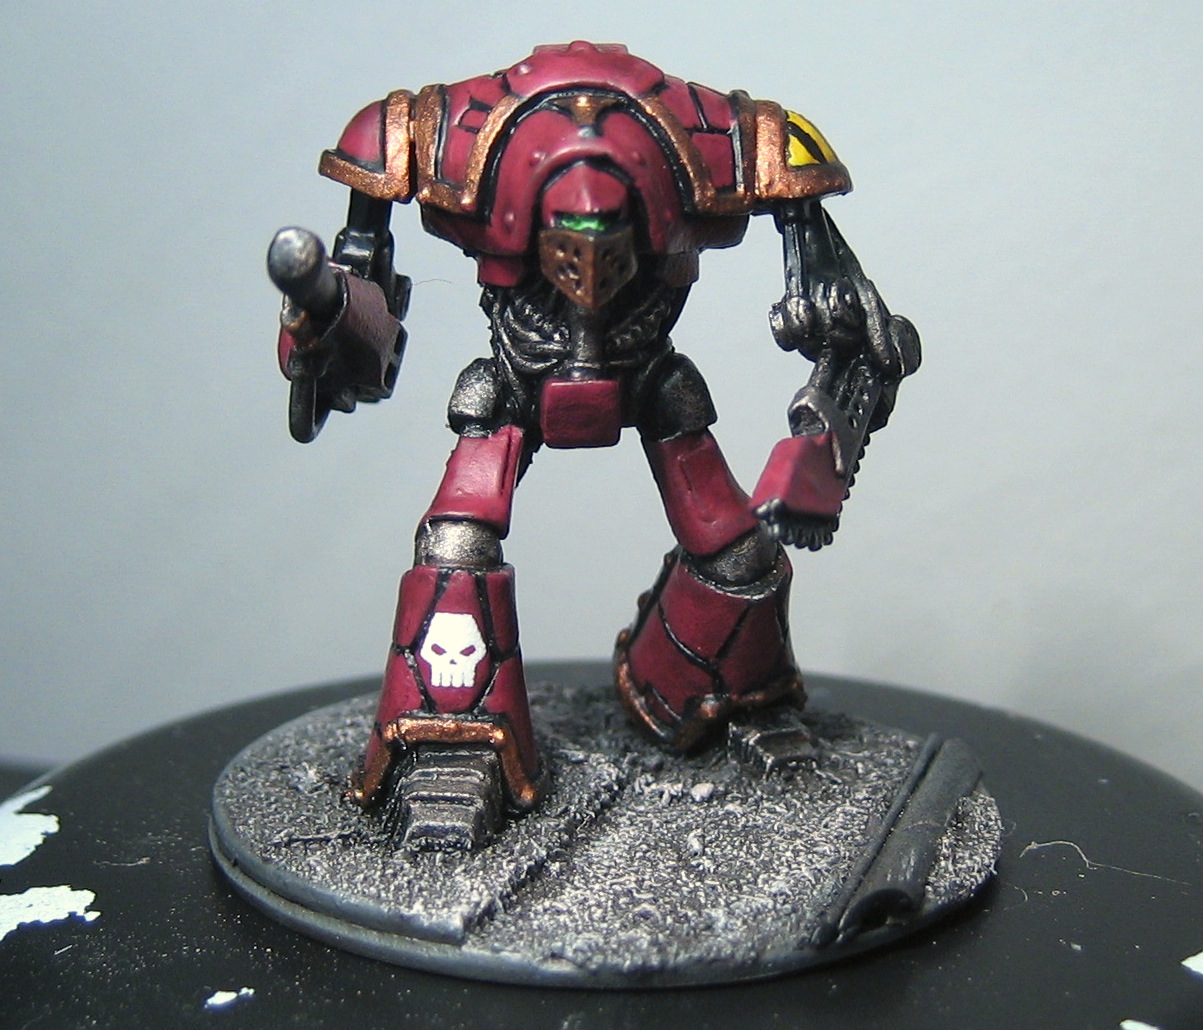
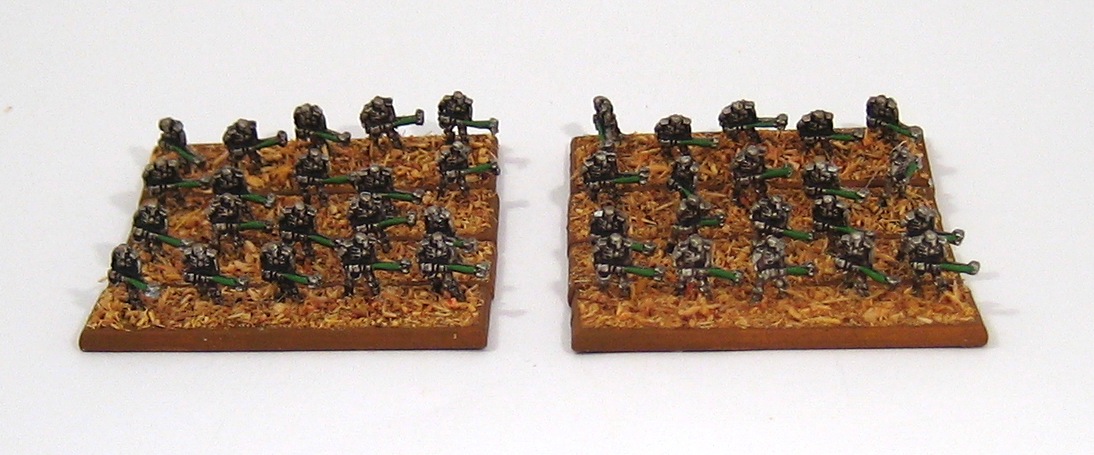
Necron Triarch Praetorians
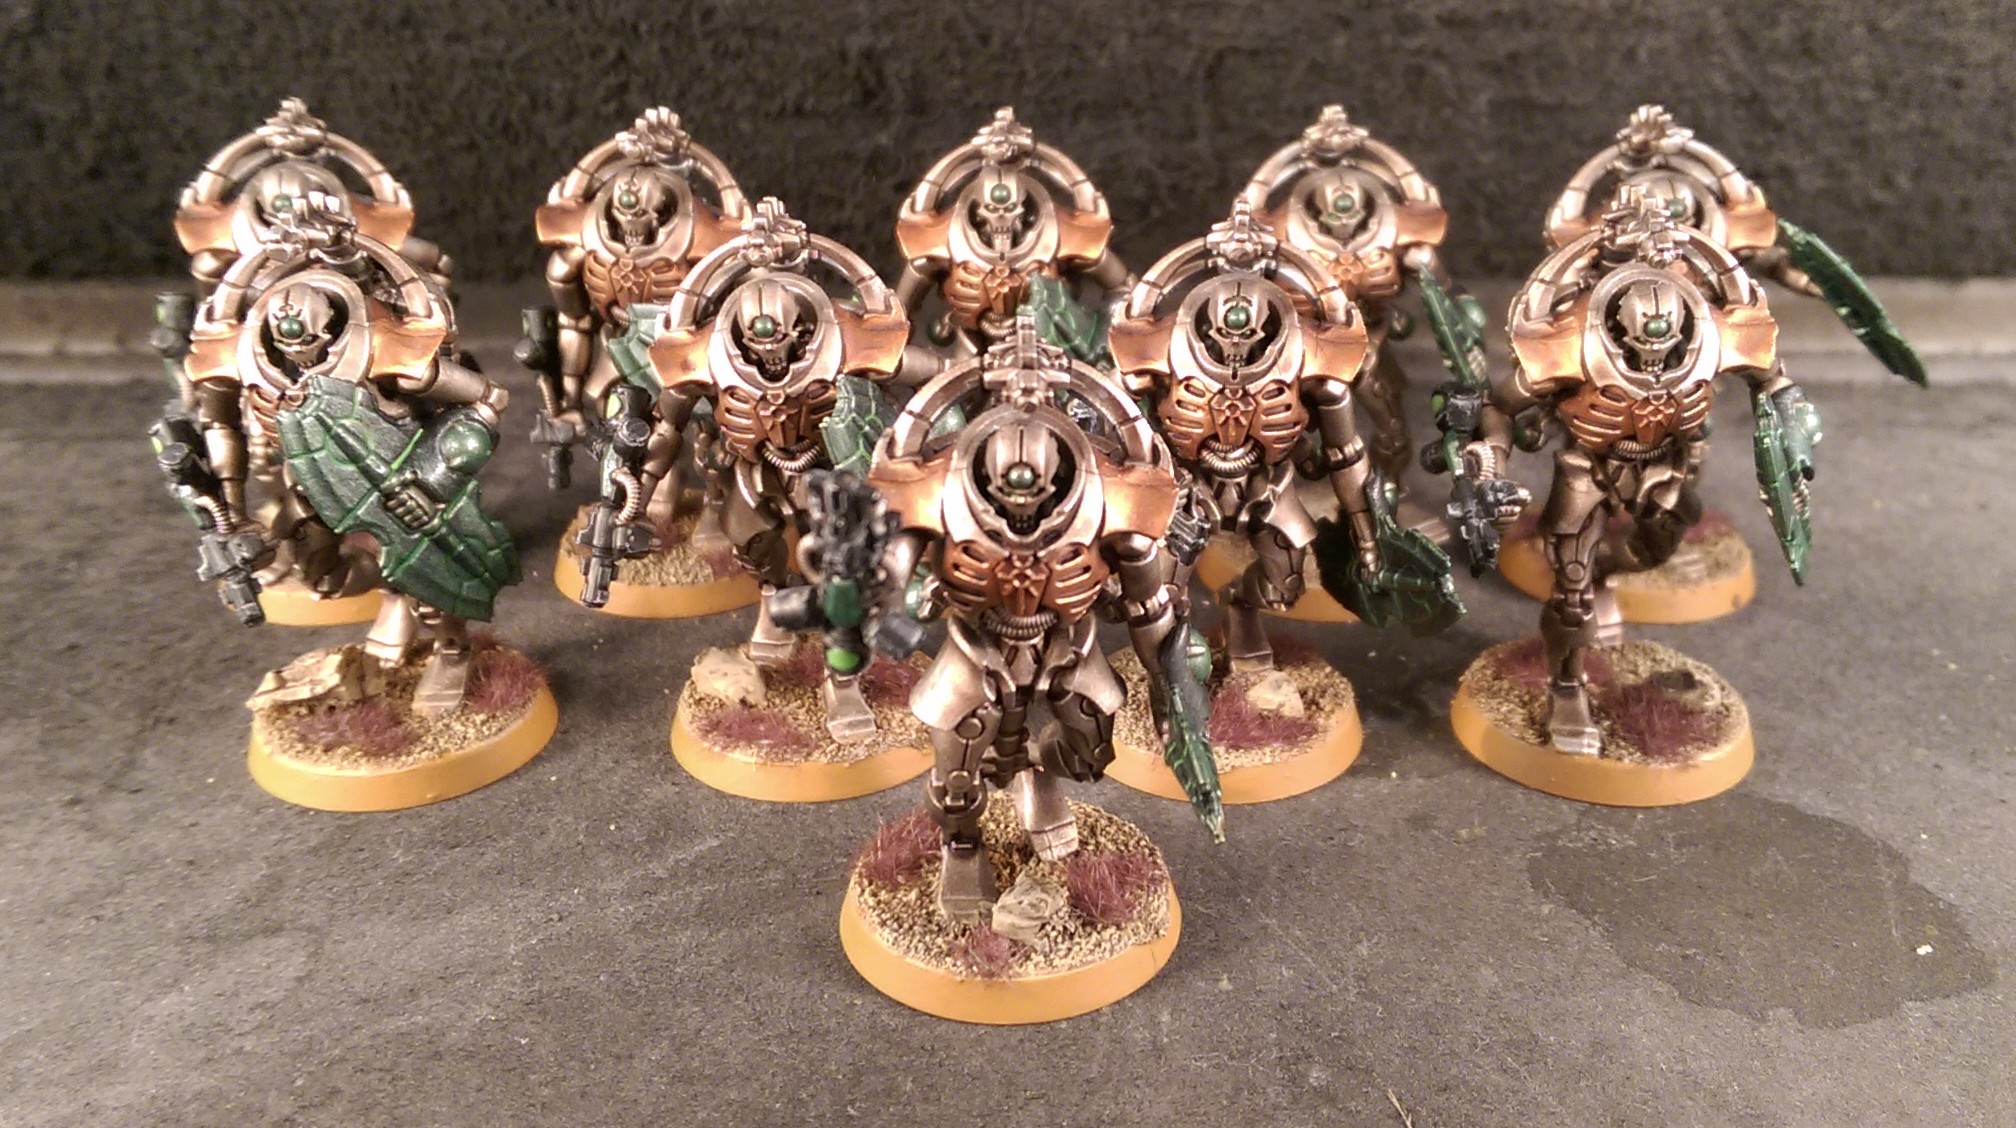
Here's the last of the infantry reinforcements for my Necrons. The Voidblades on these Triarch Praetorians were a bugger to paint and in the end I pretty much just gave up on them. But they look OK if you don't look too closely!
Now I just need to paint the Night/Doom Scythe, and I can finish this project and get stuck into some Epic!
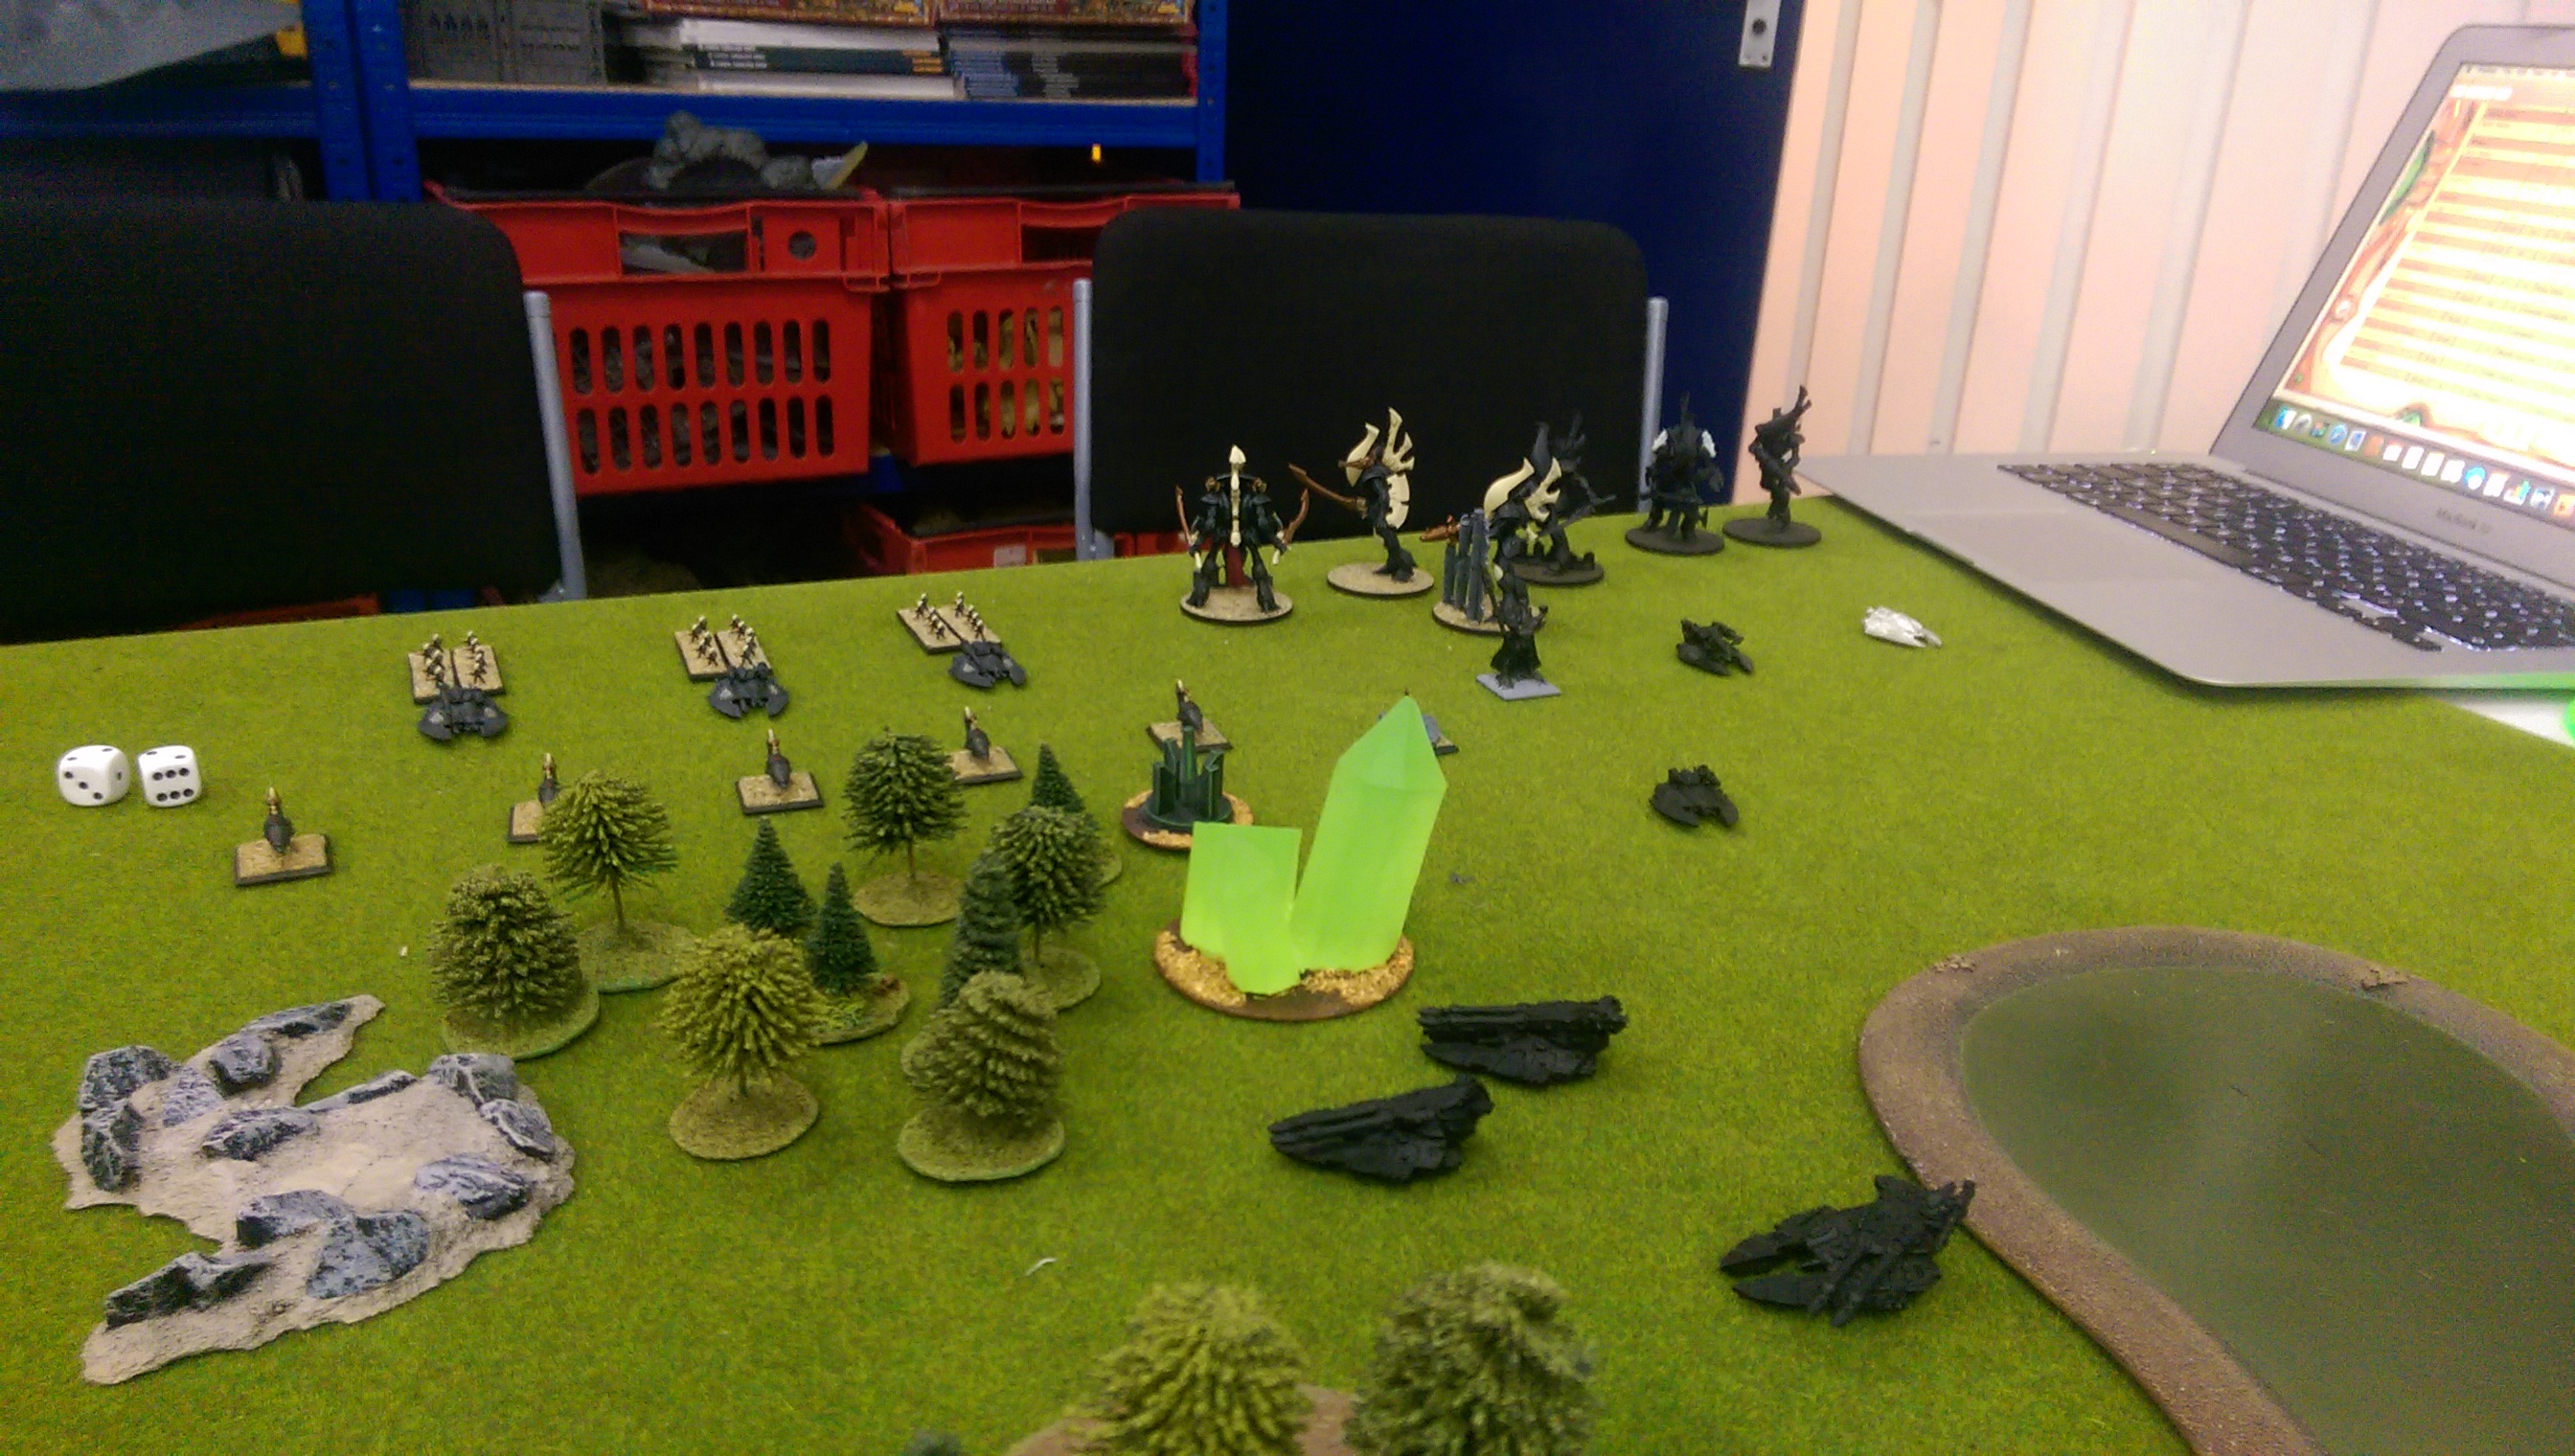
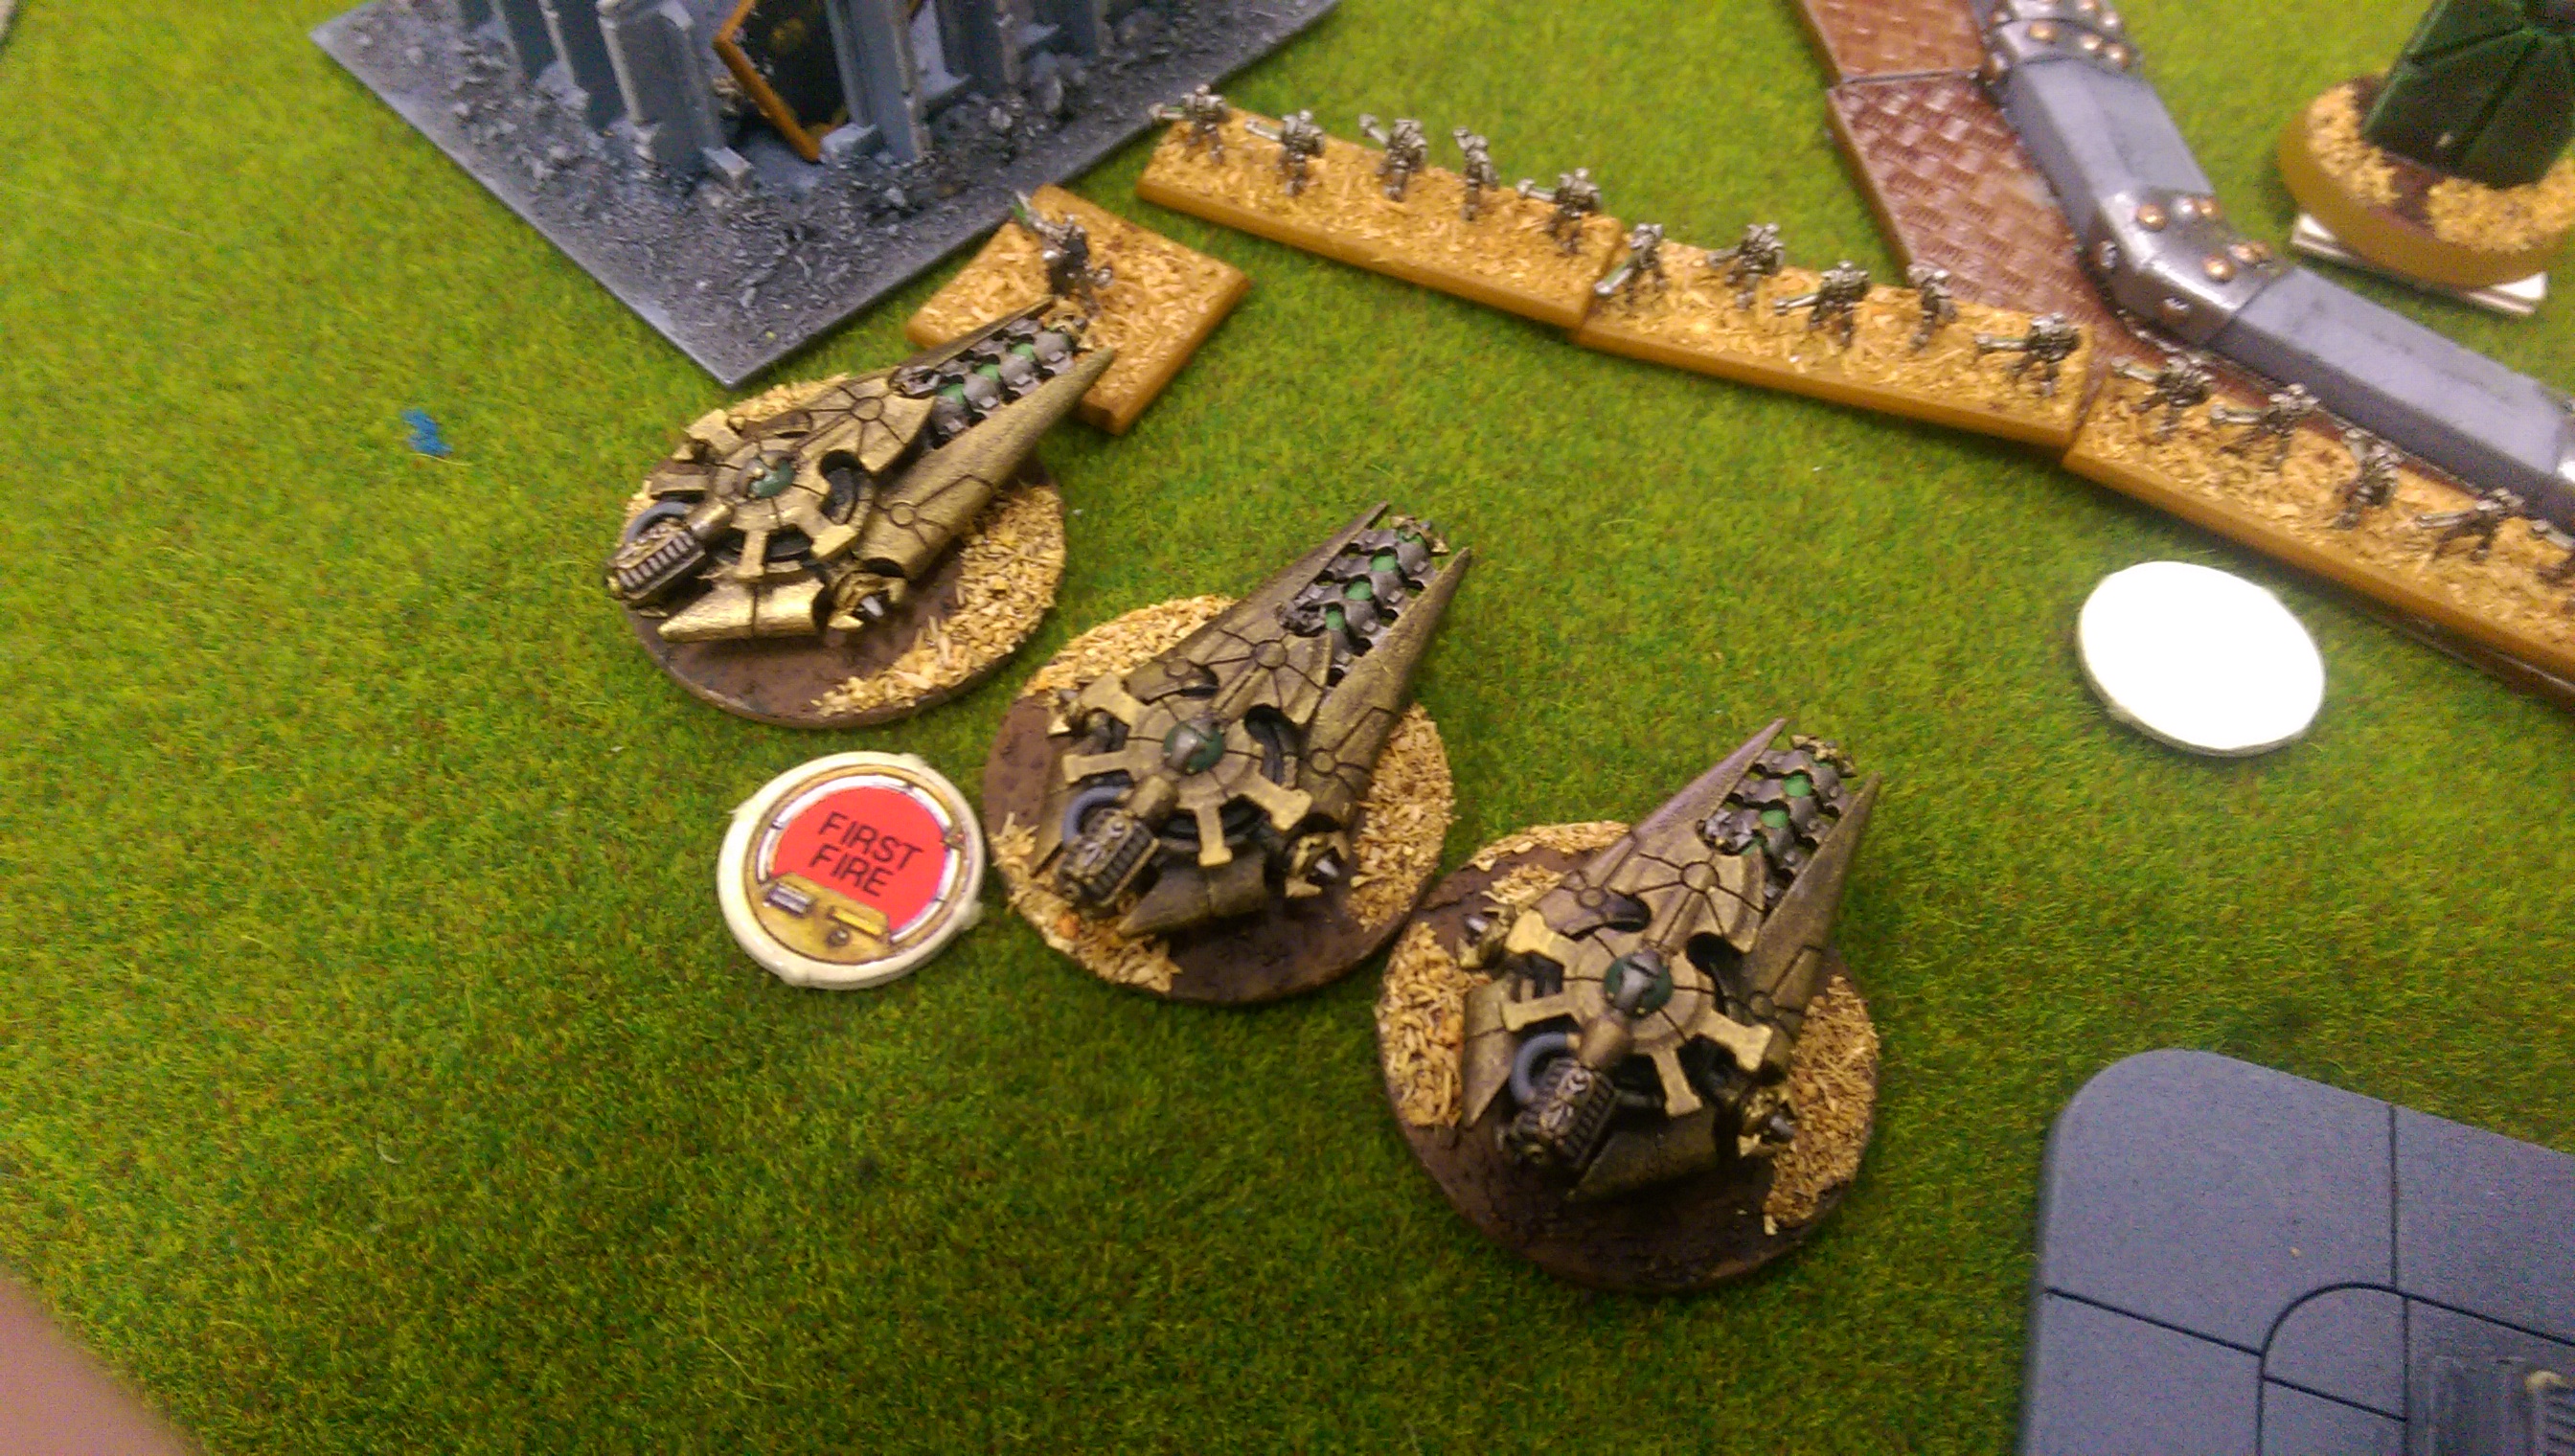
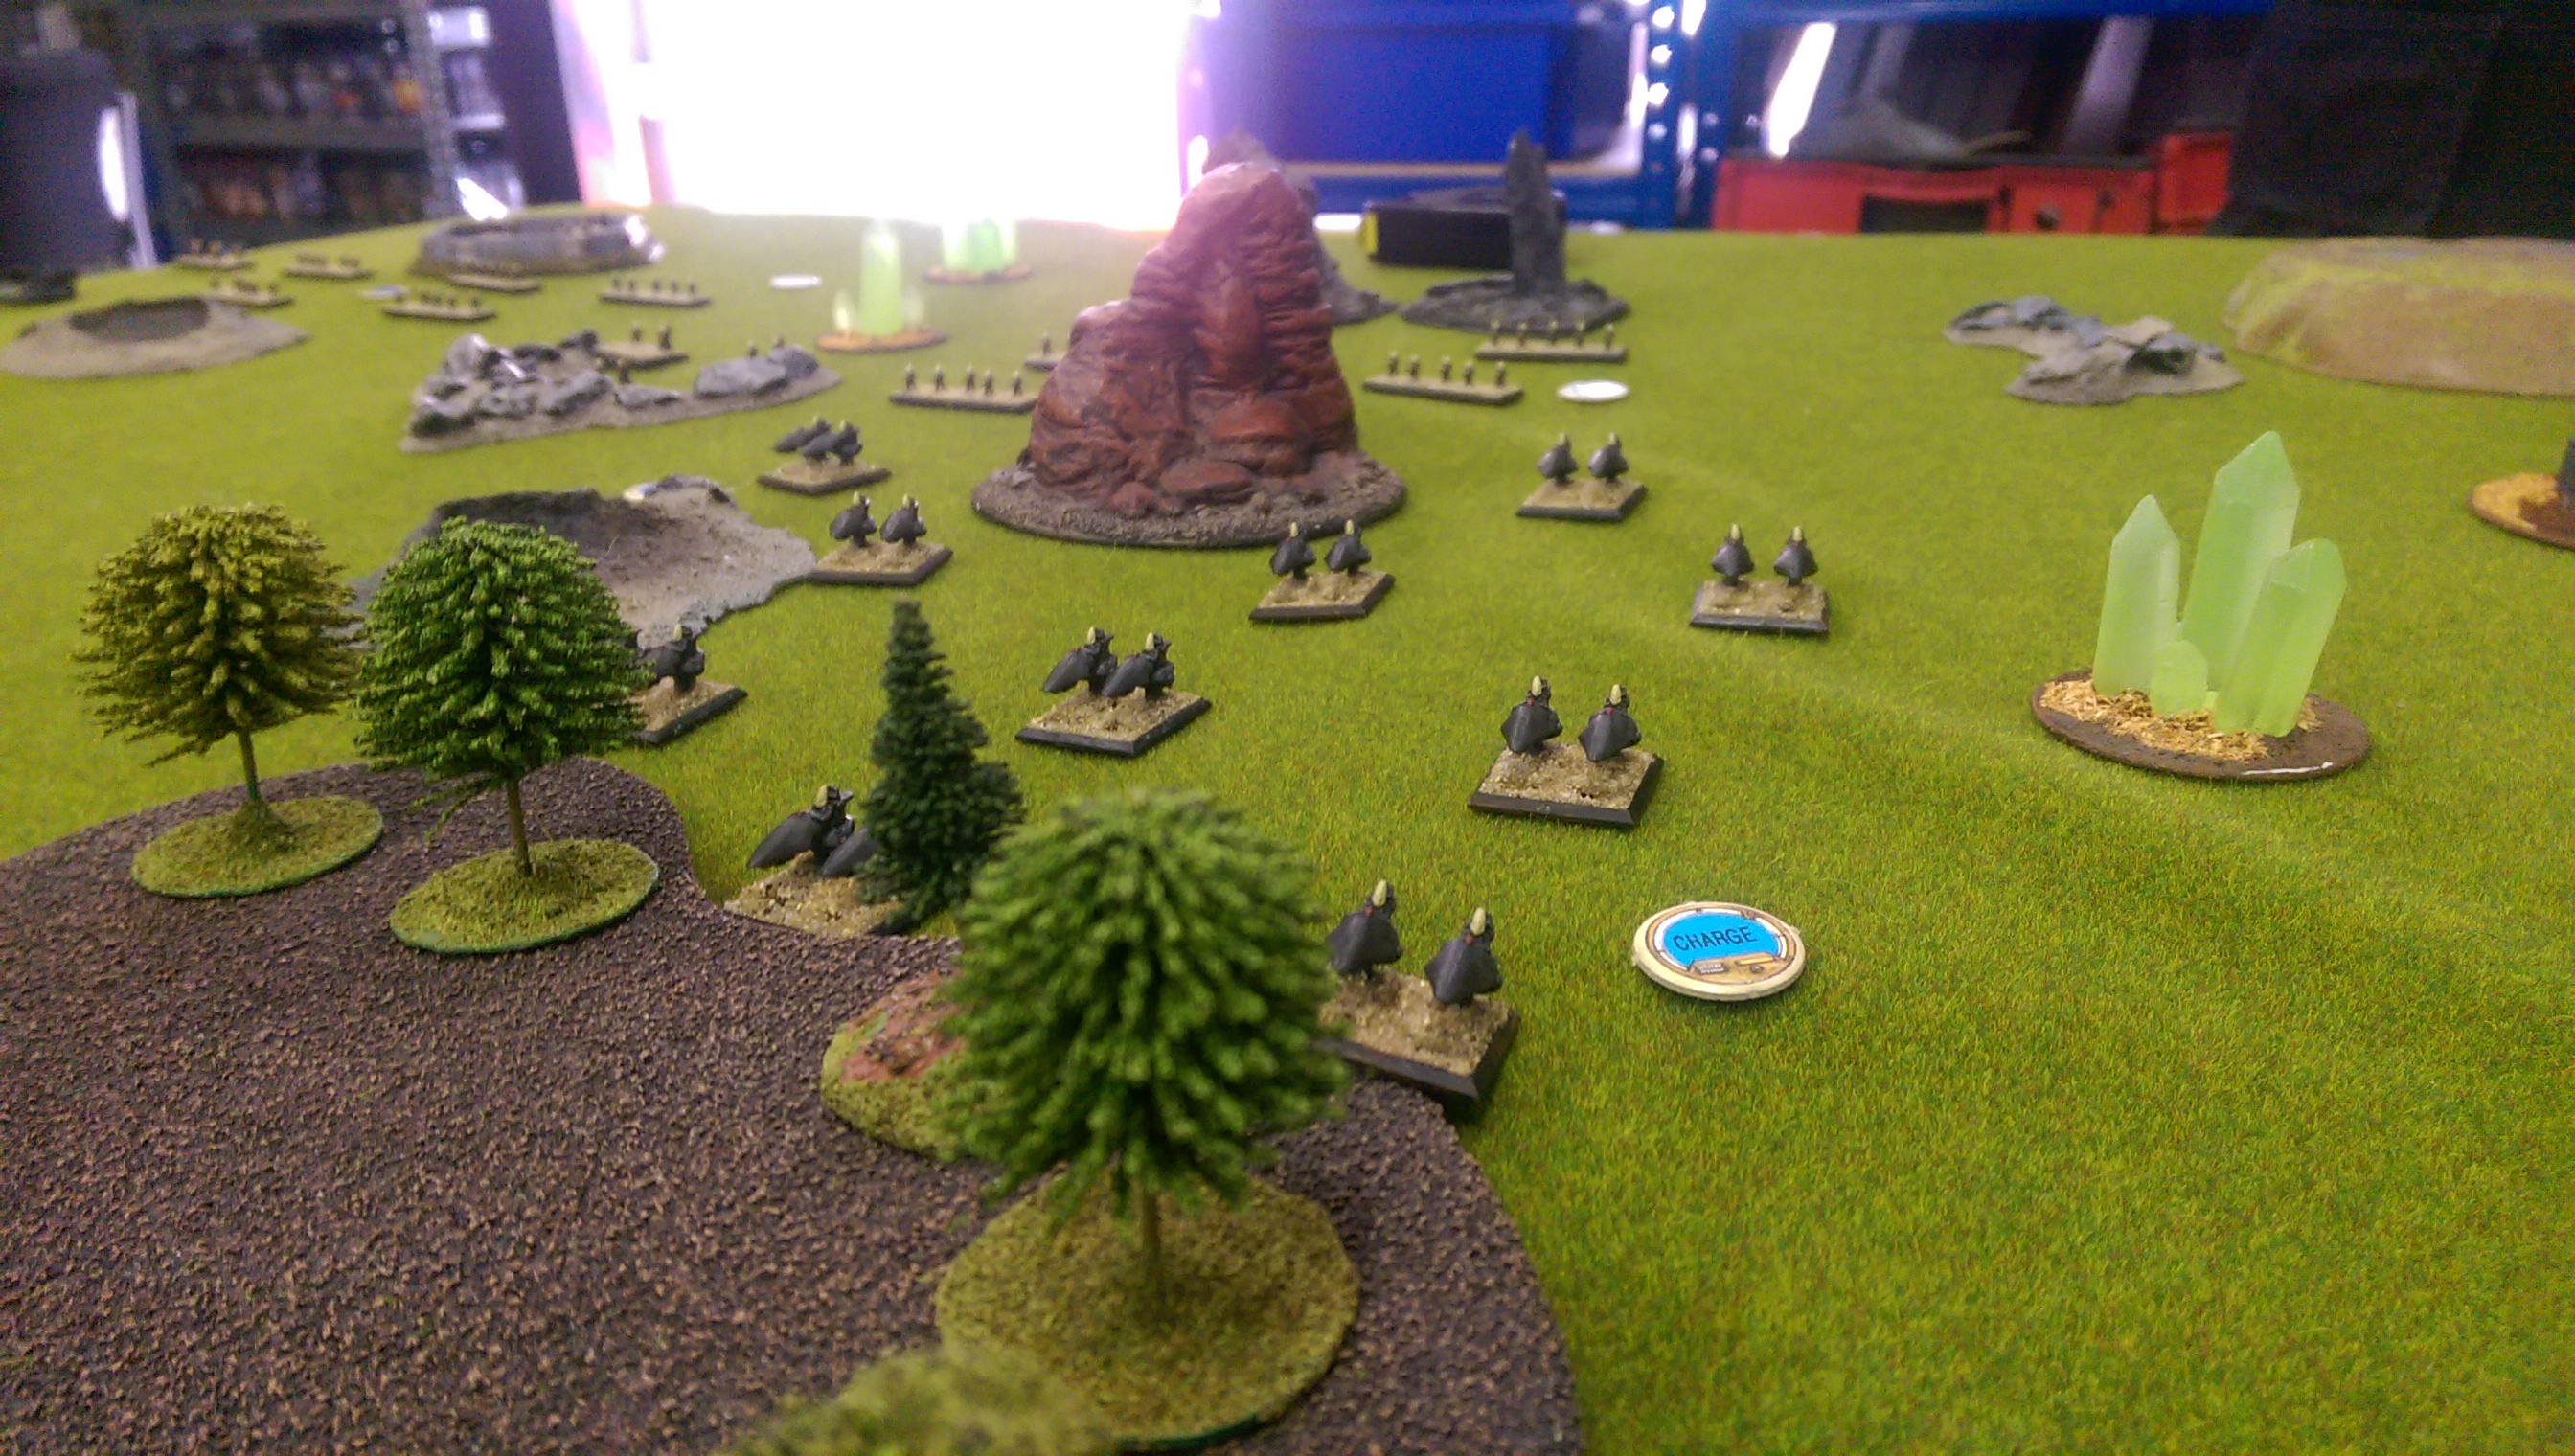
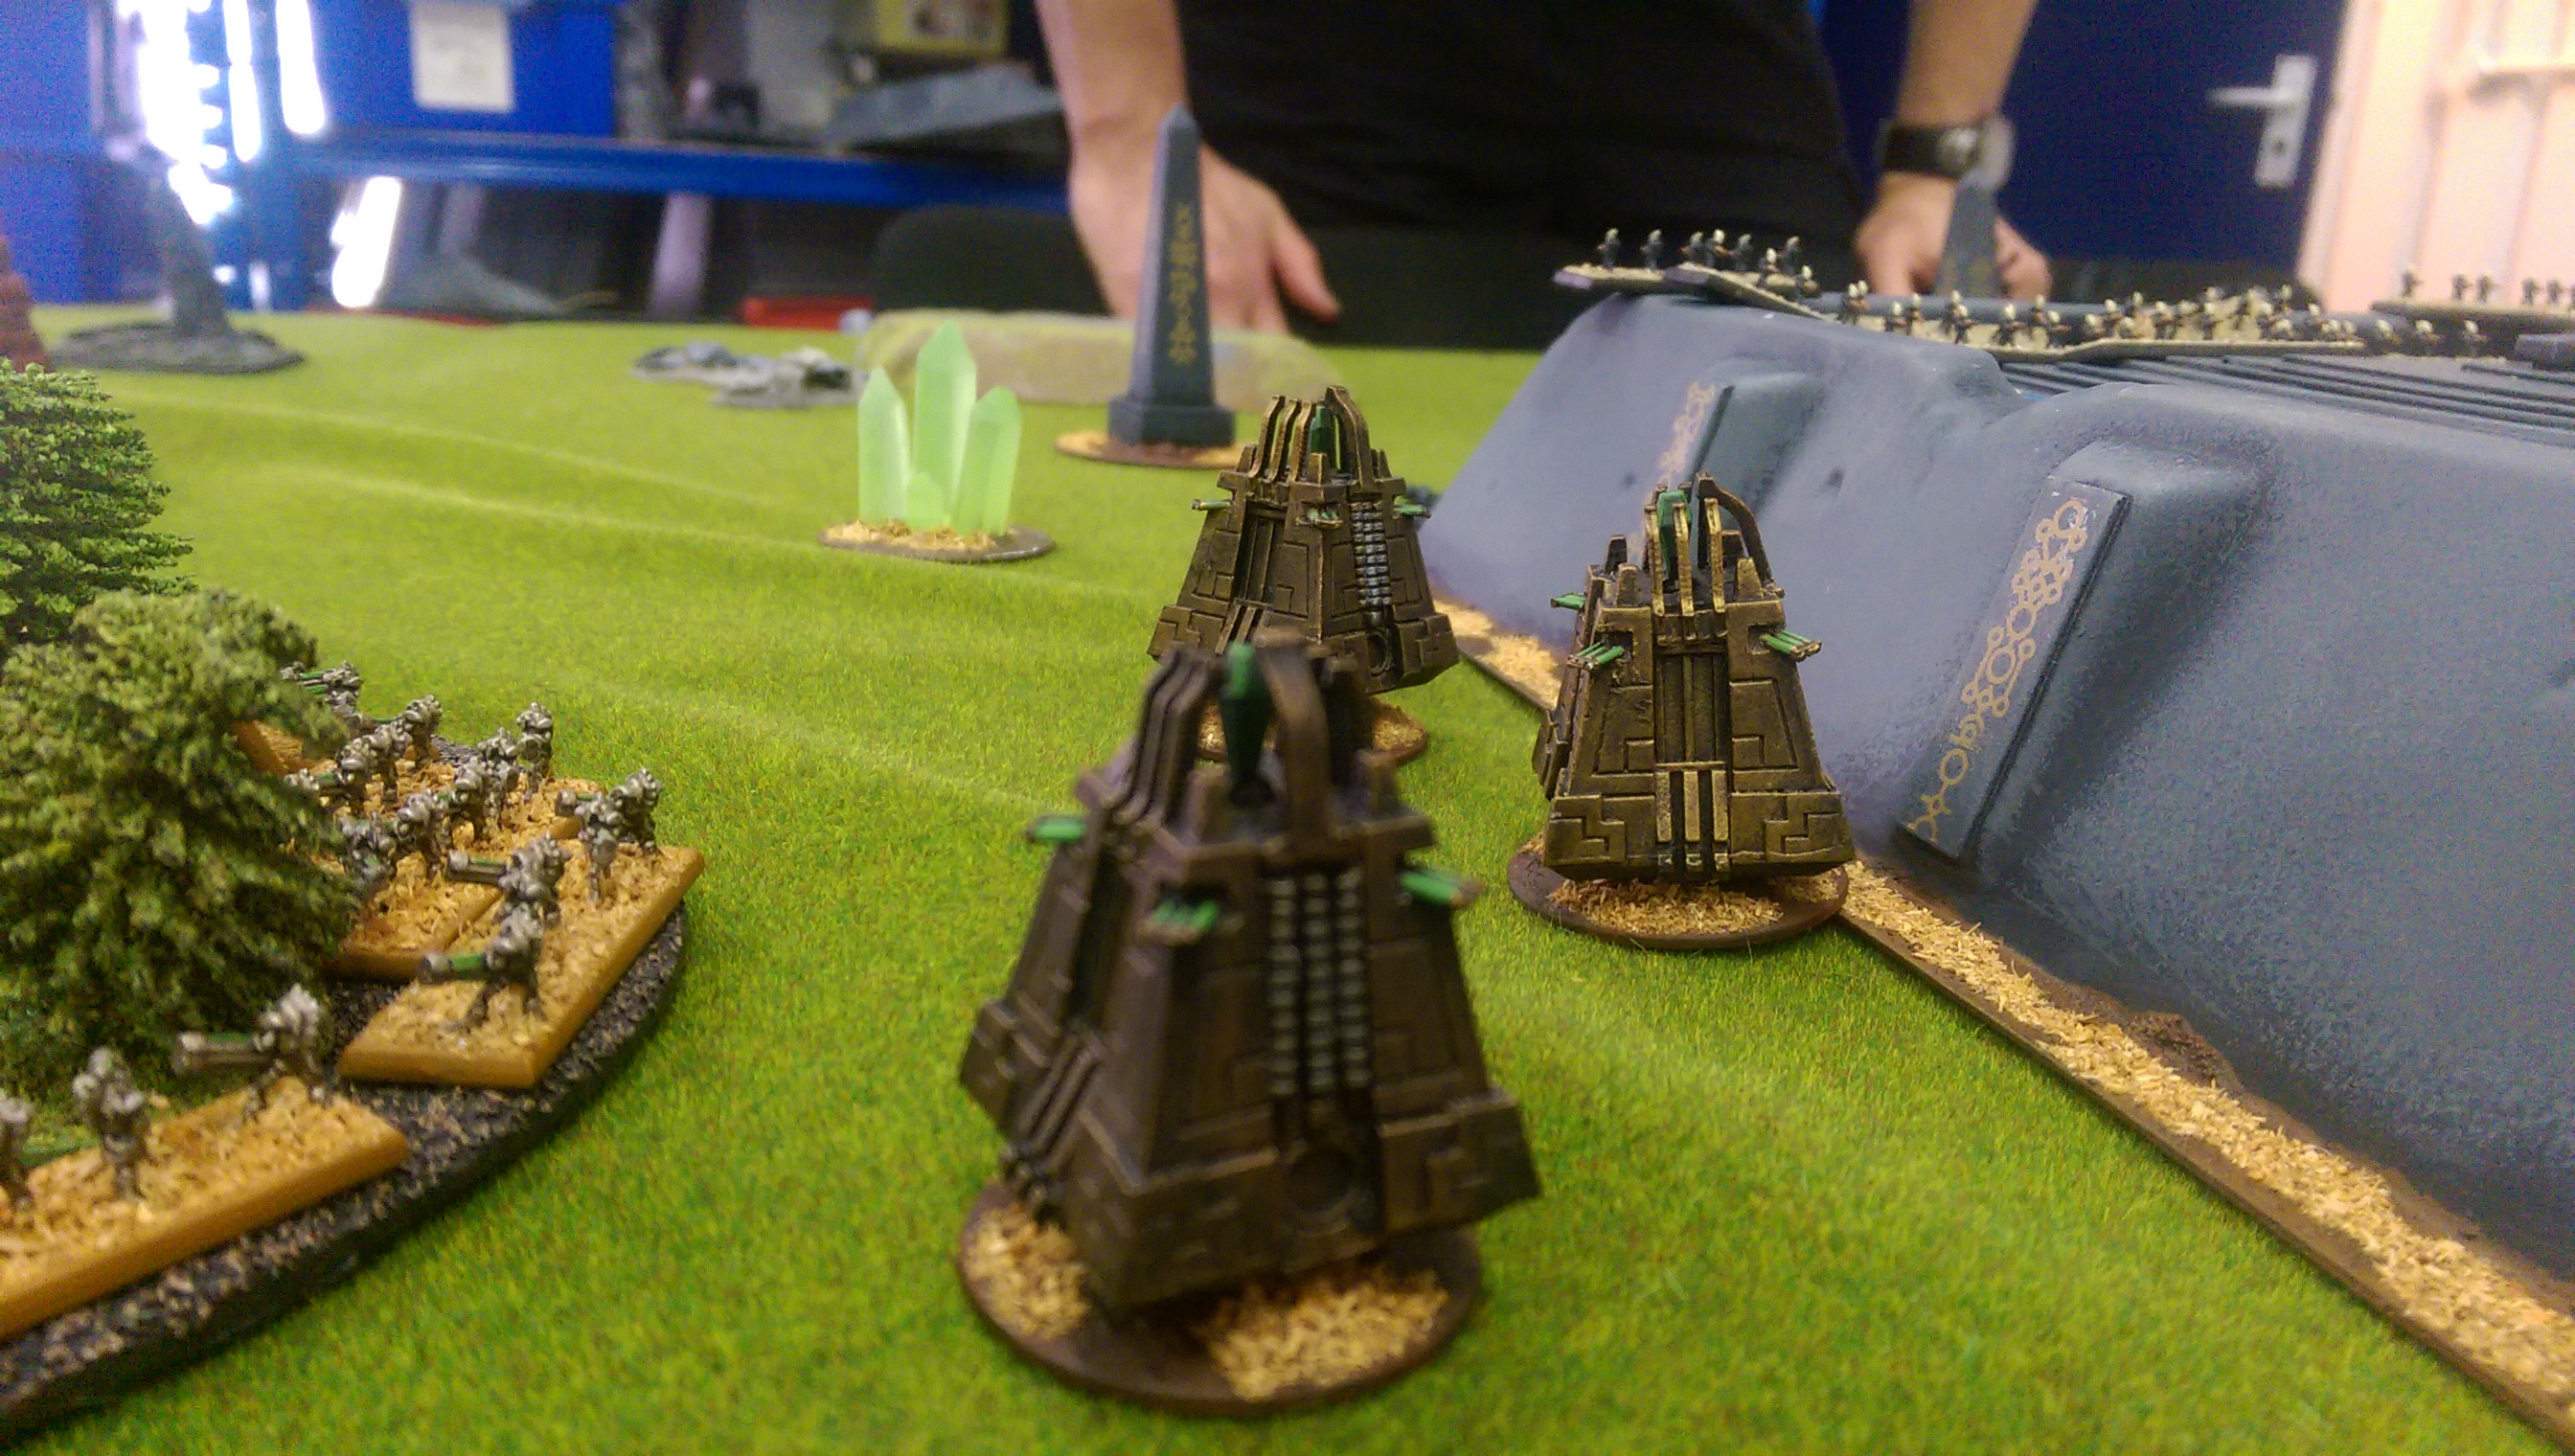
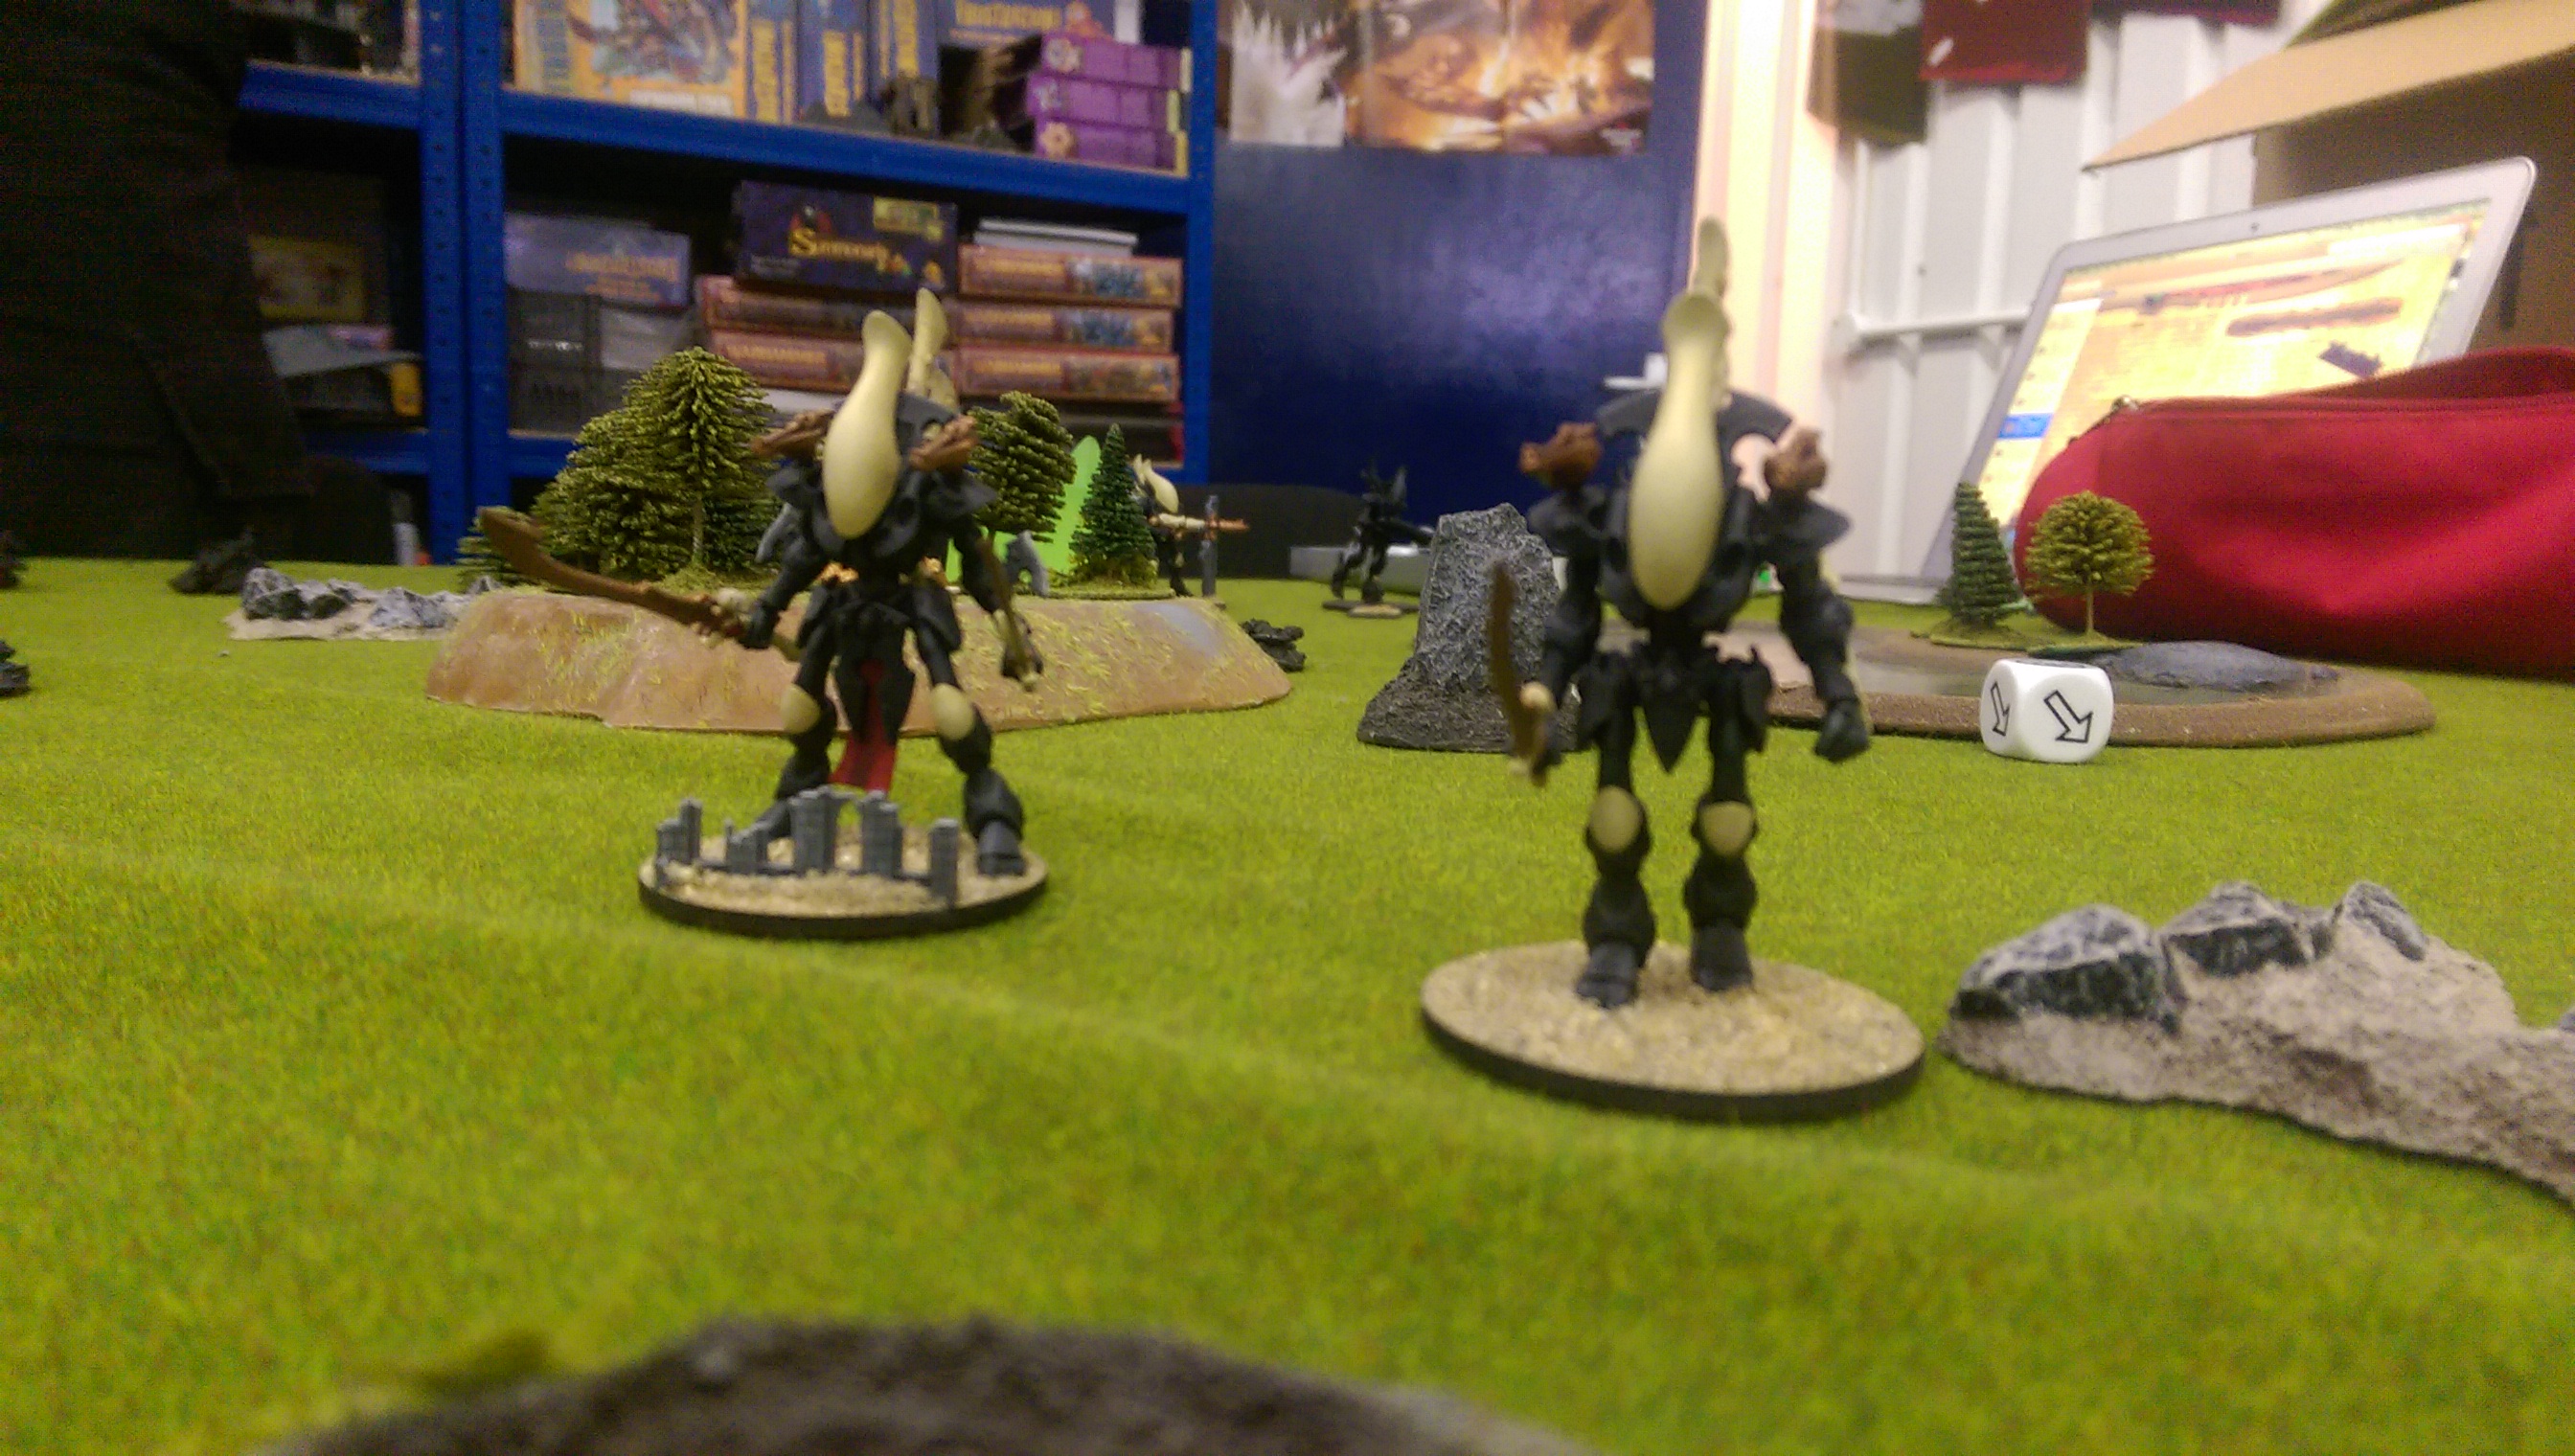
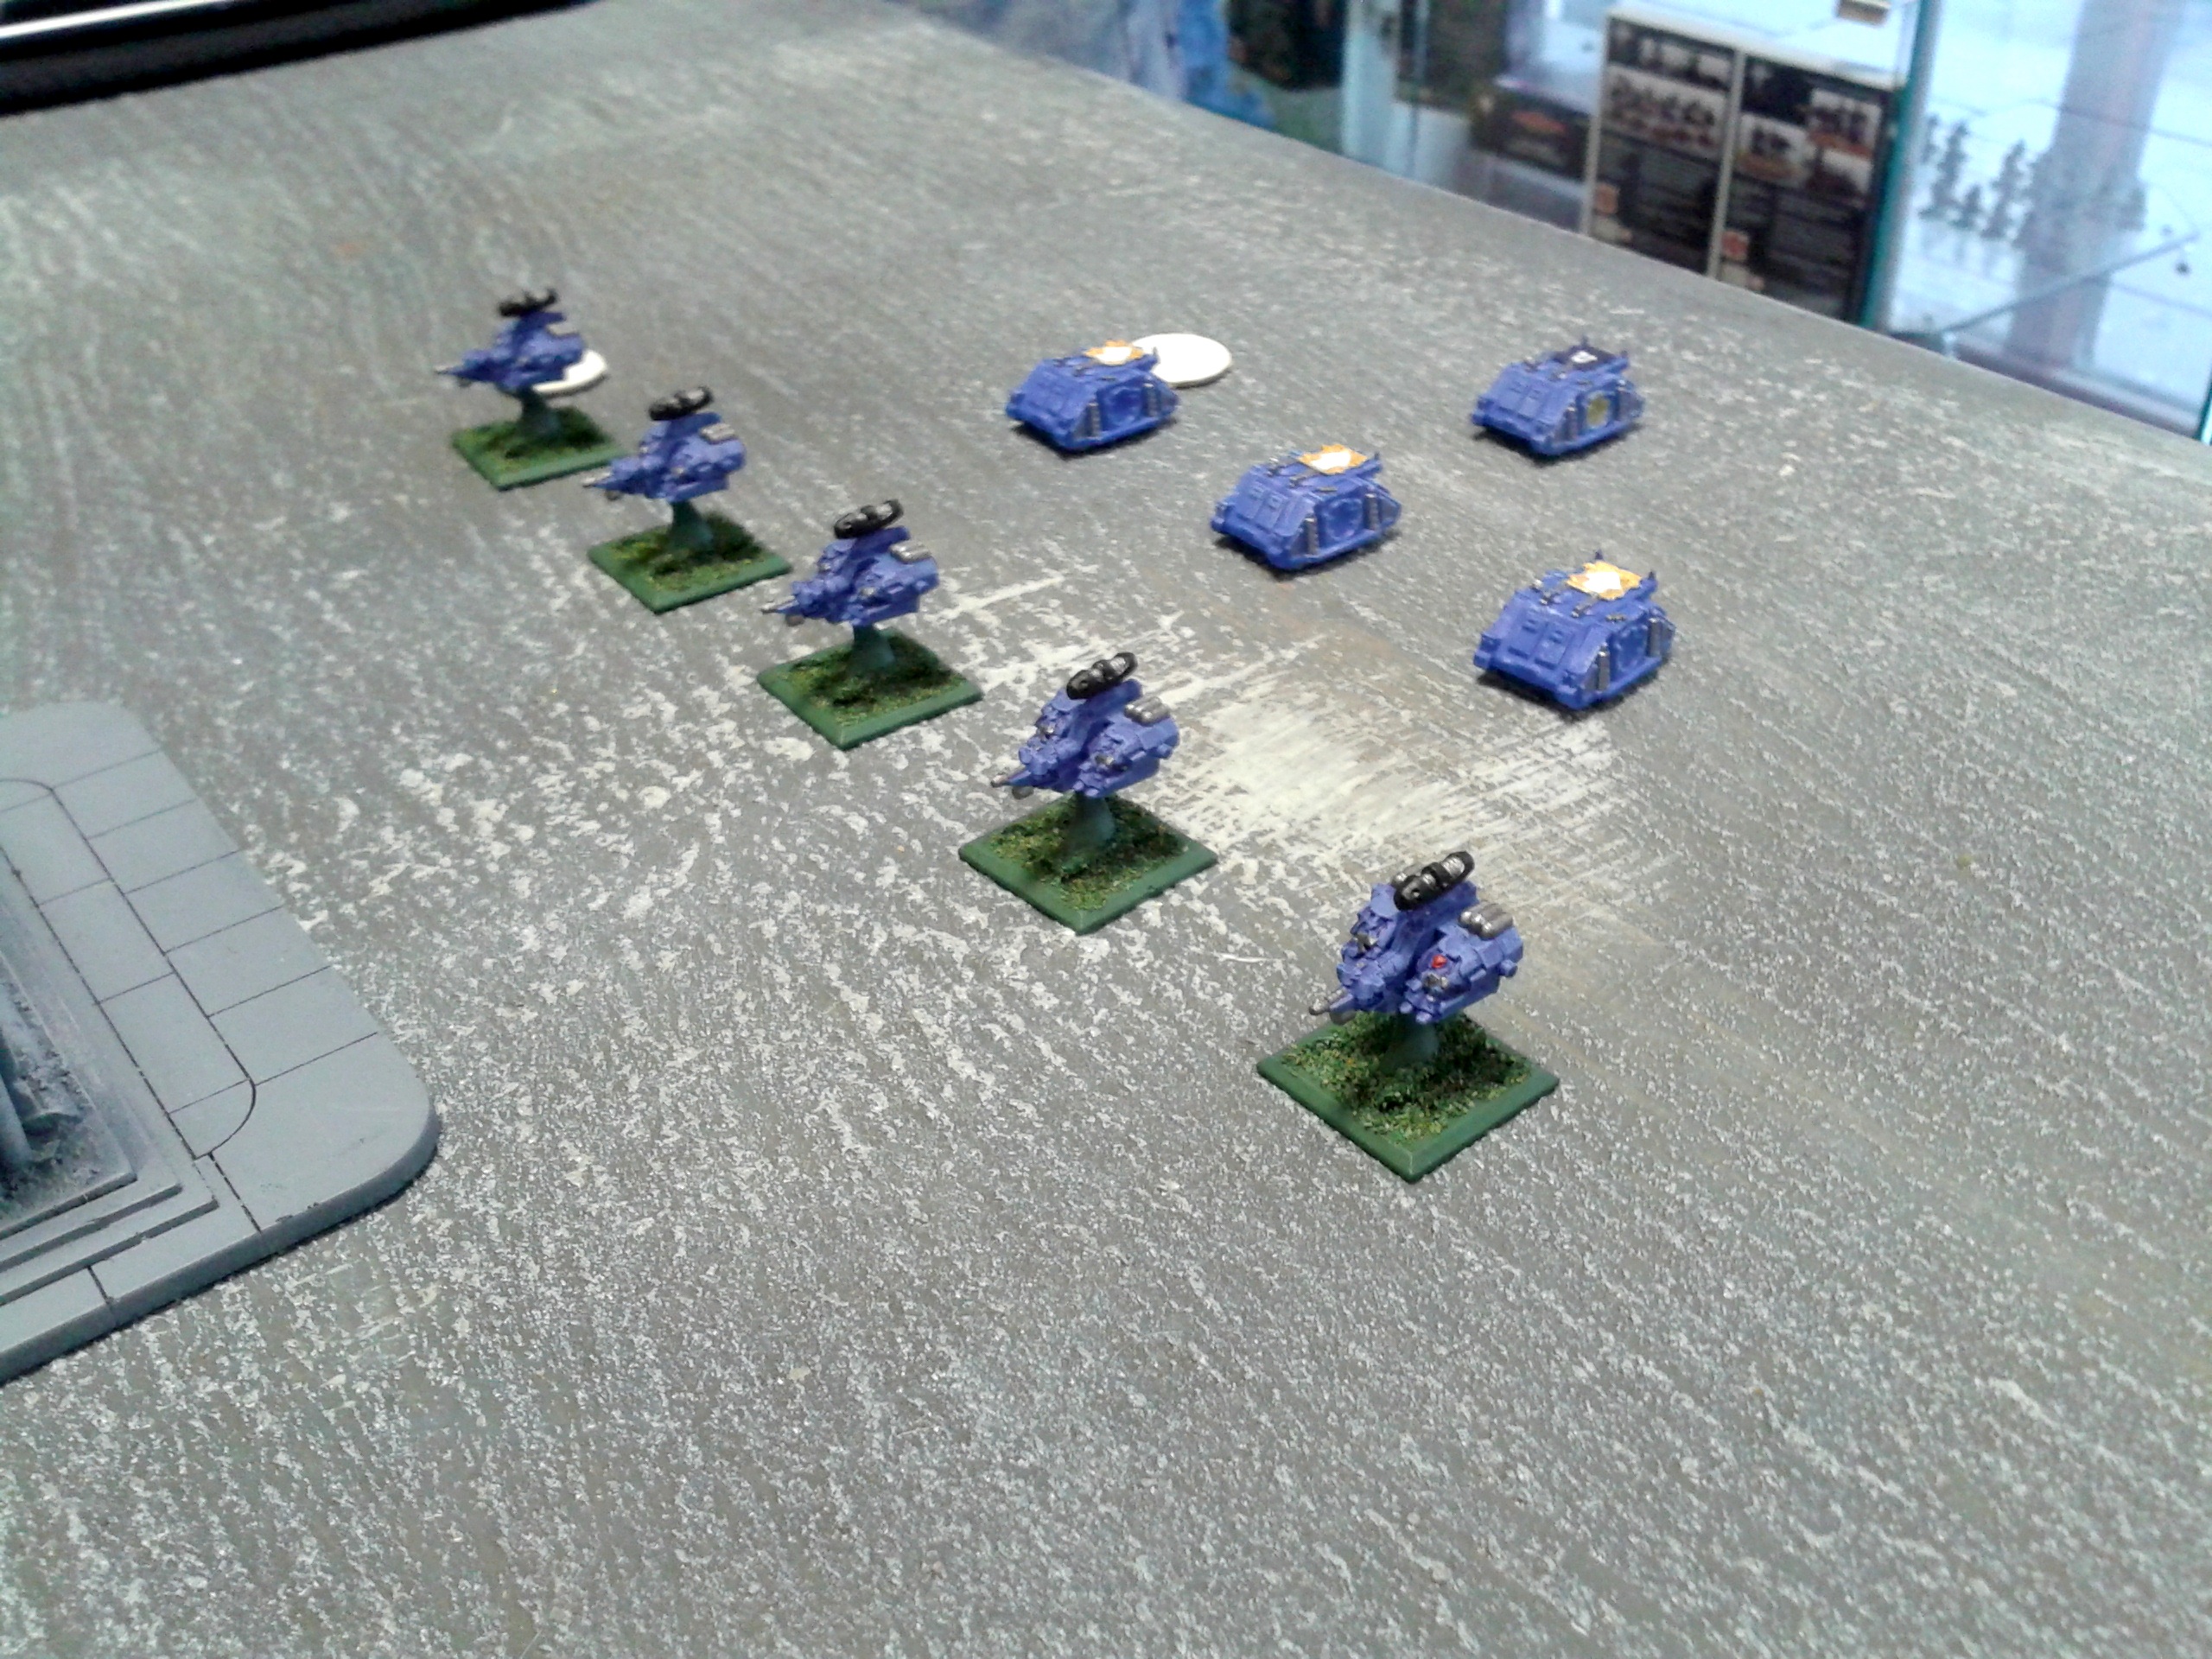
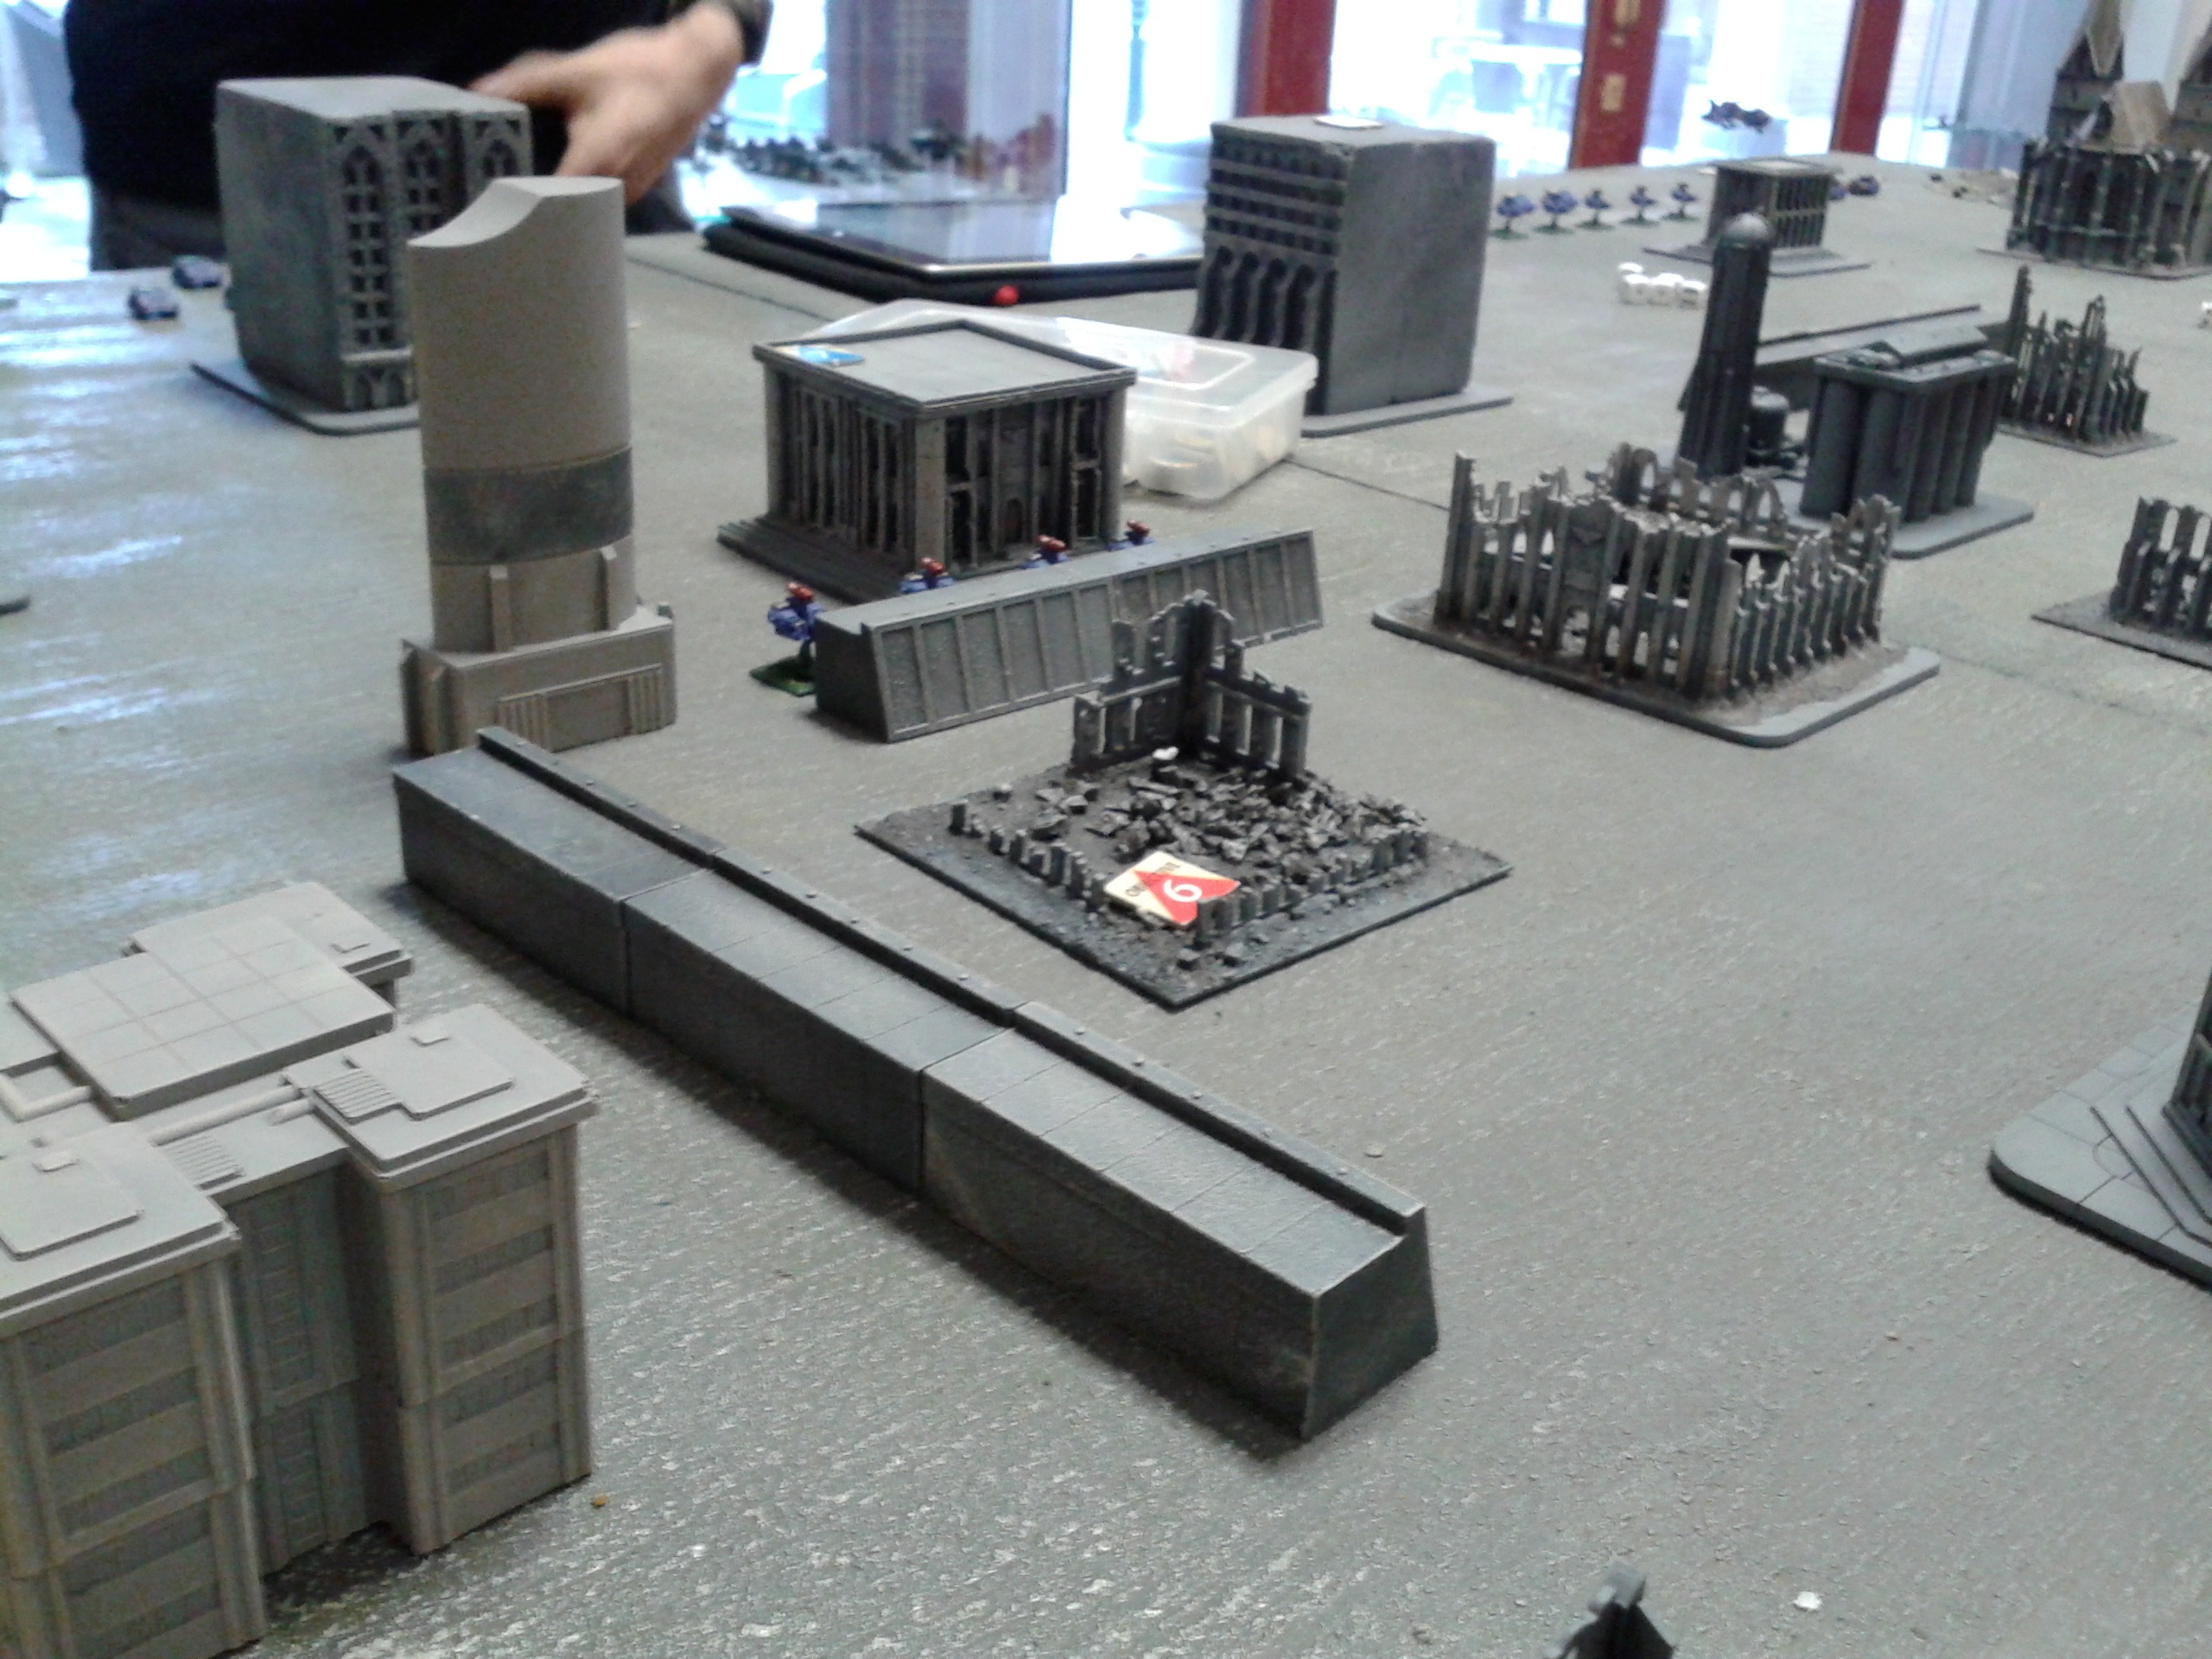
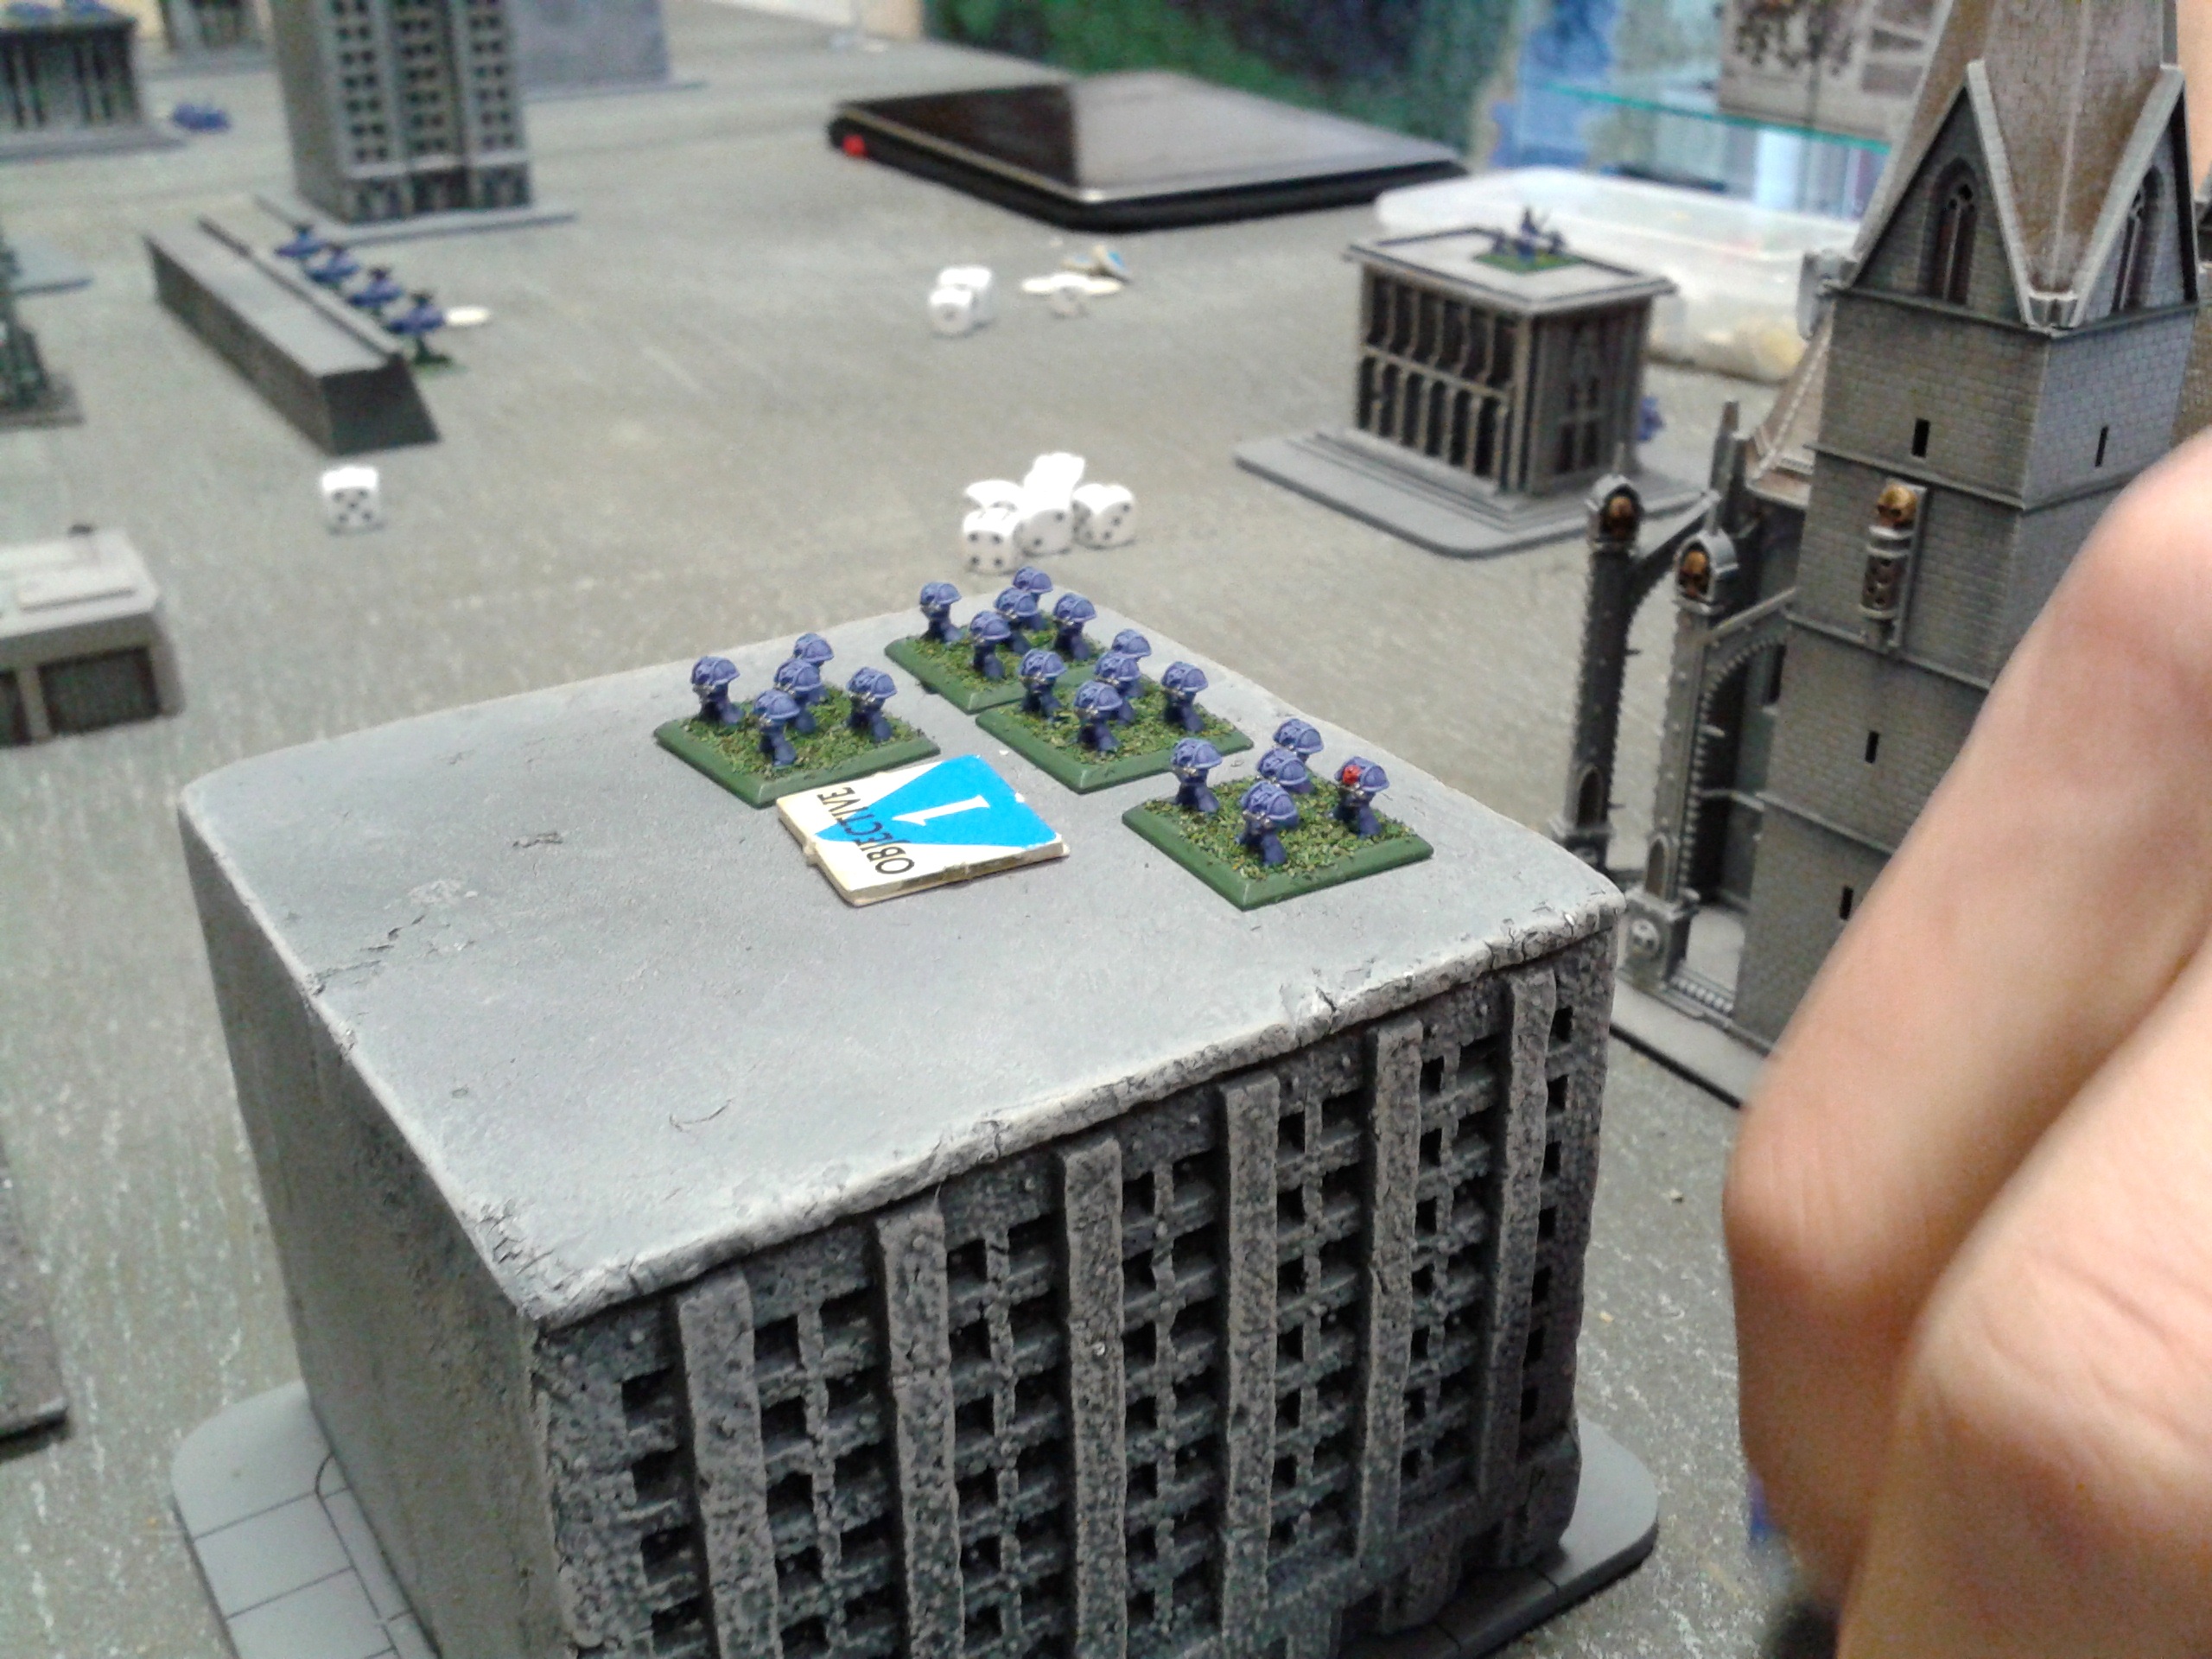
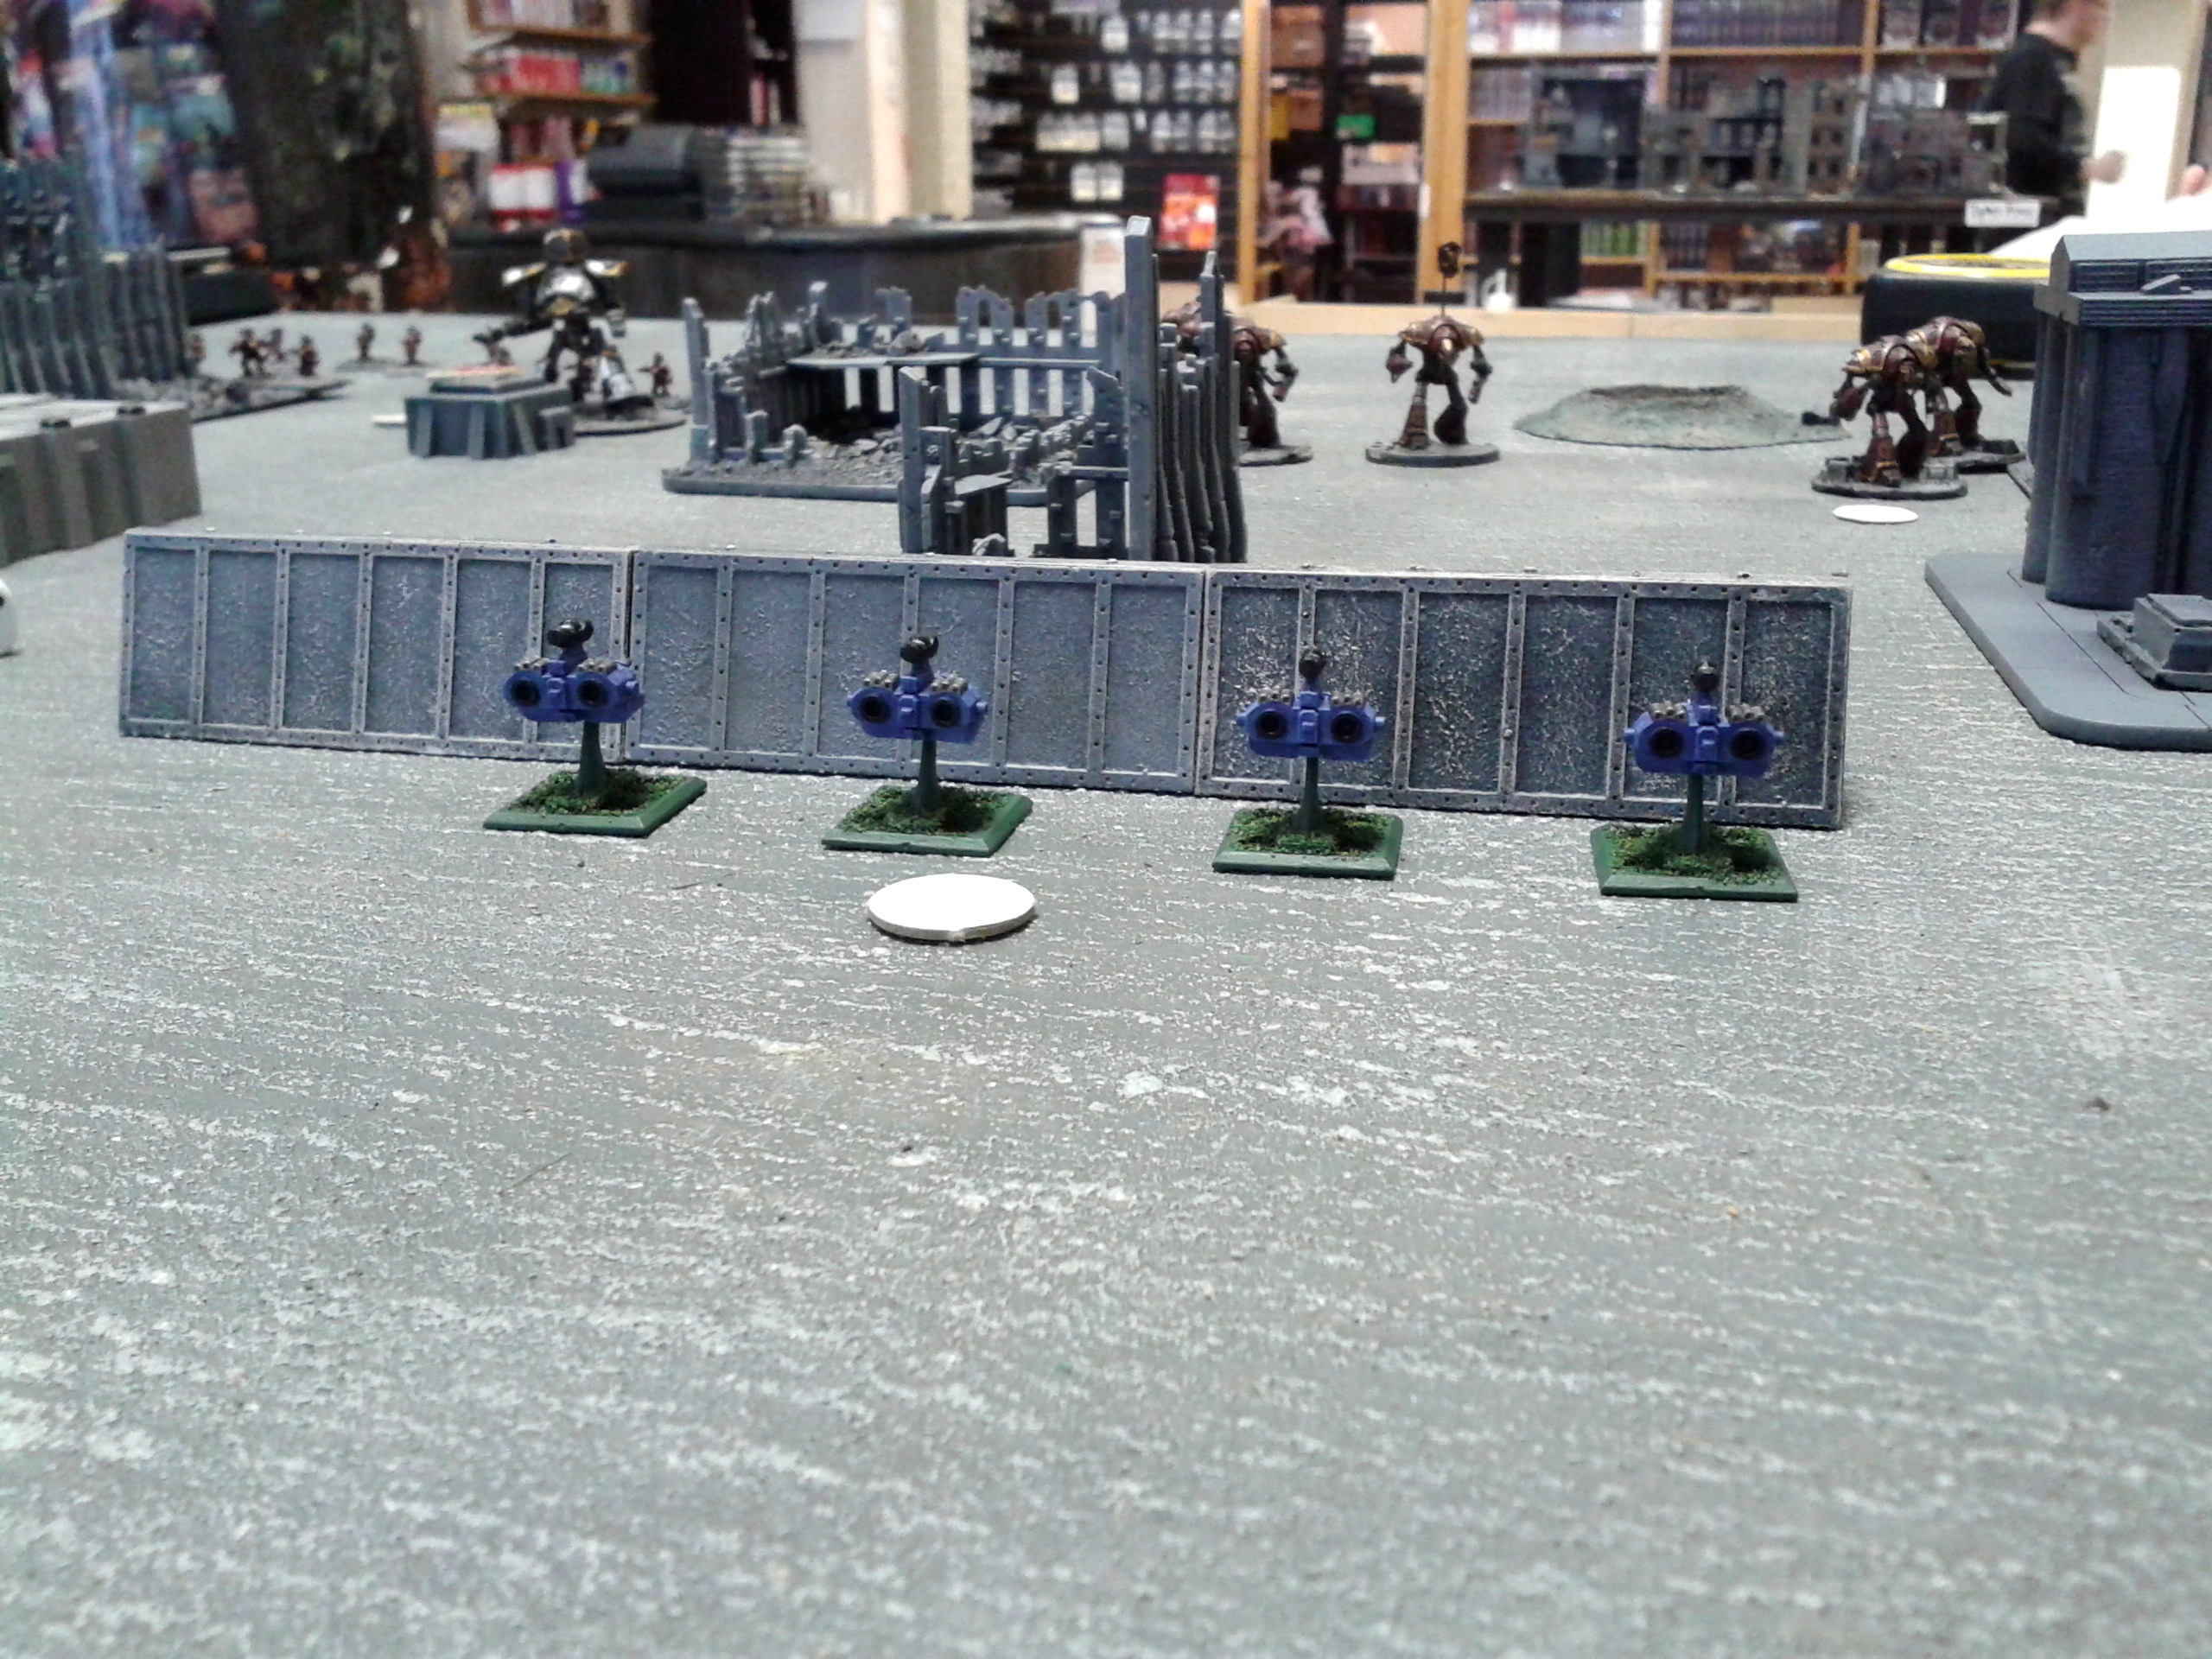
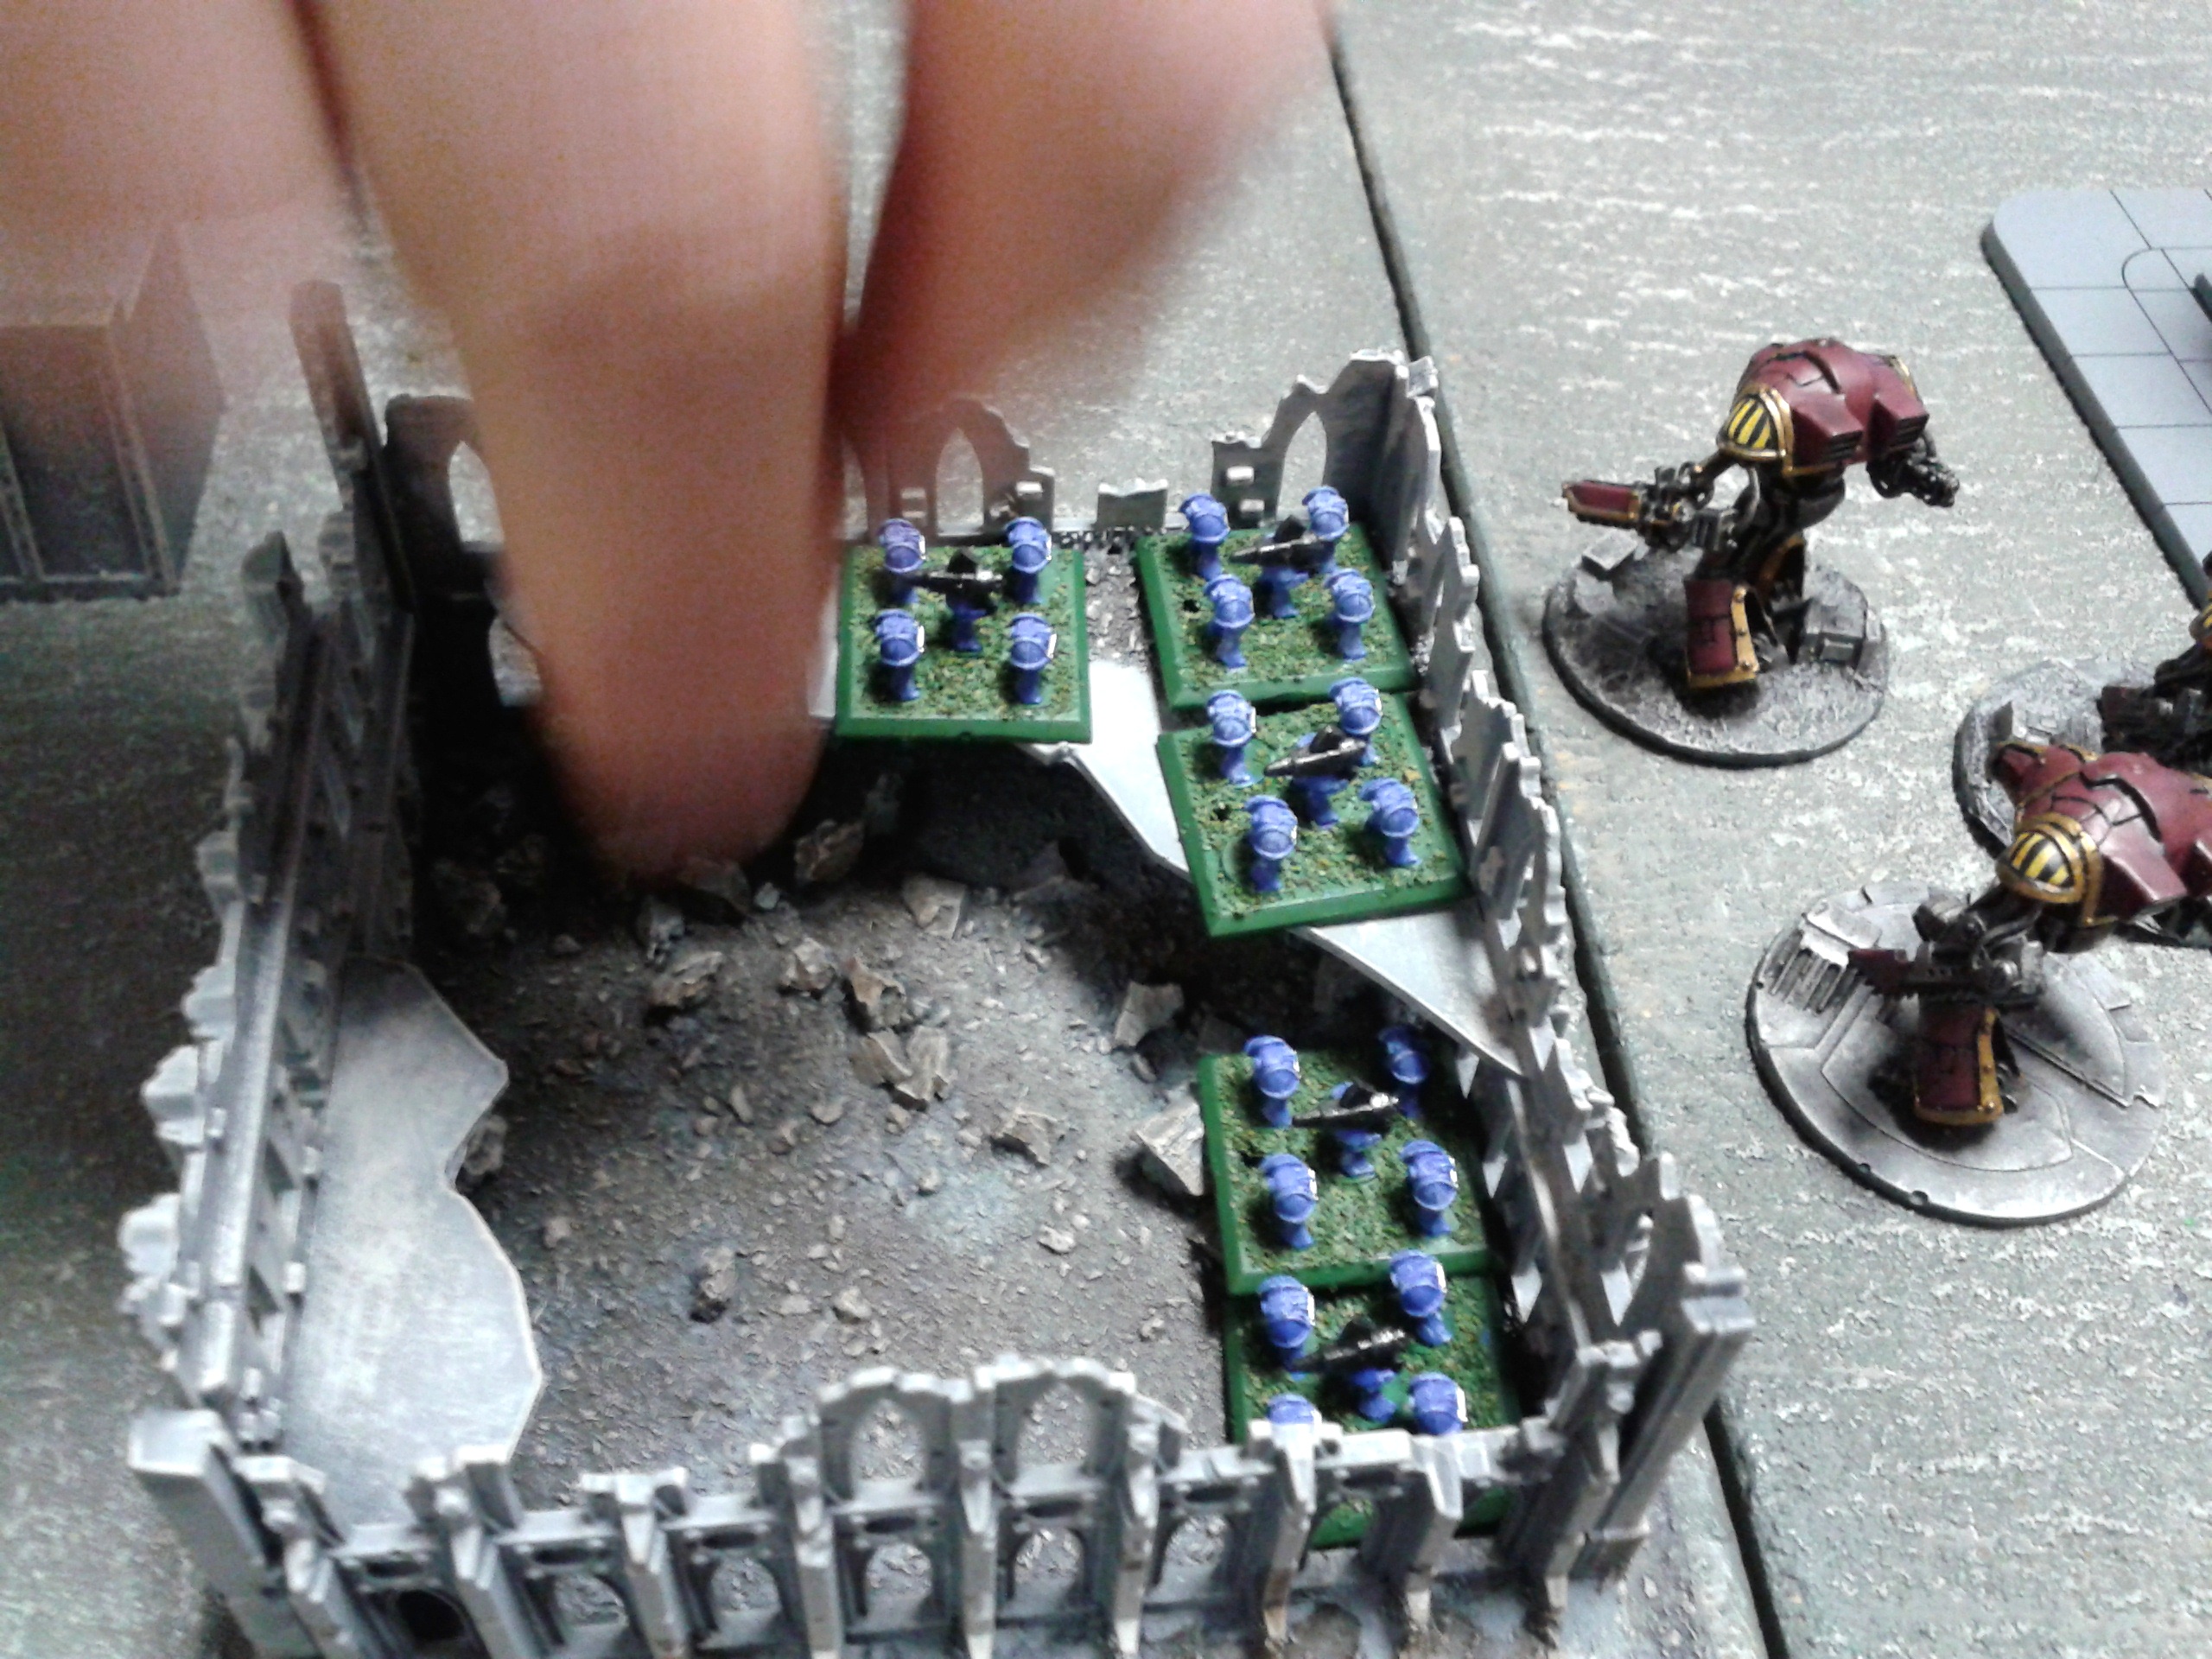
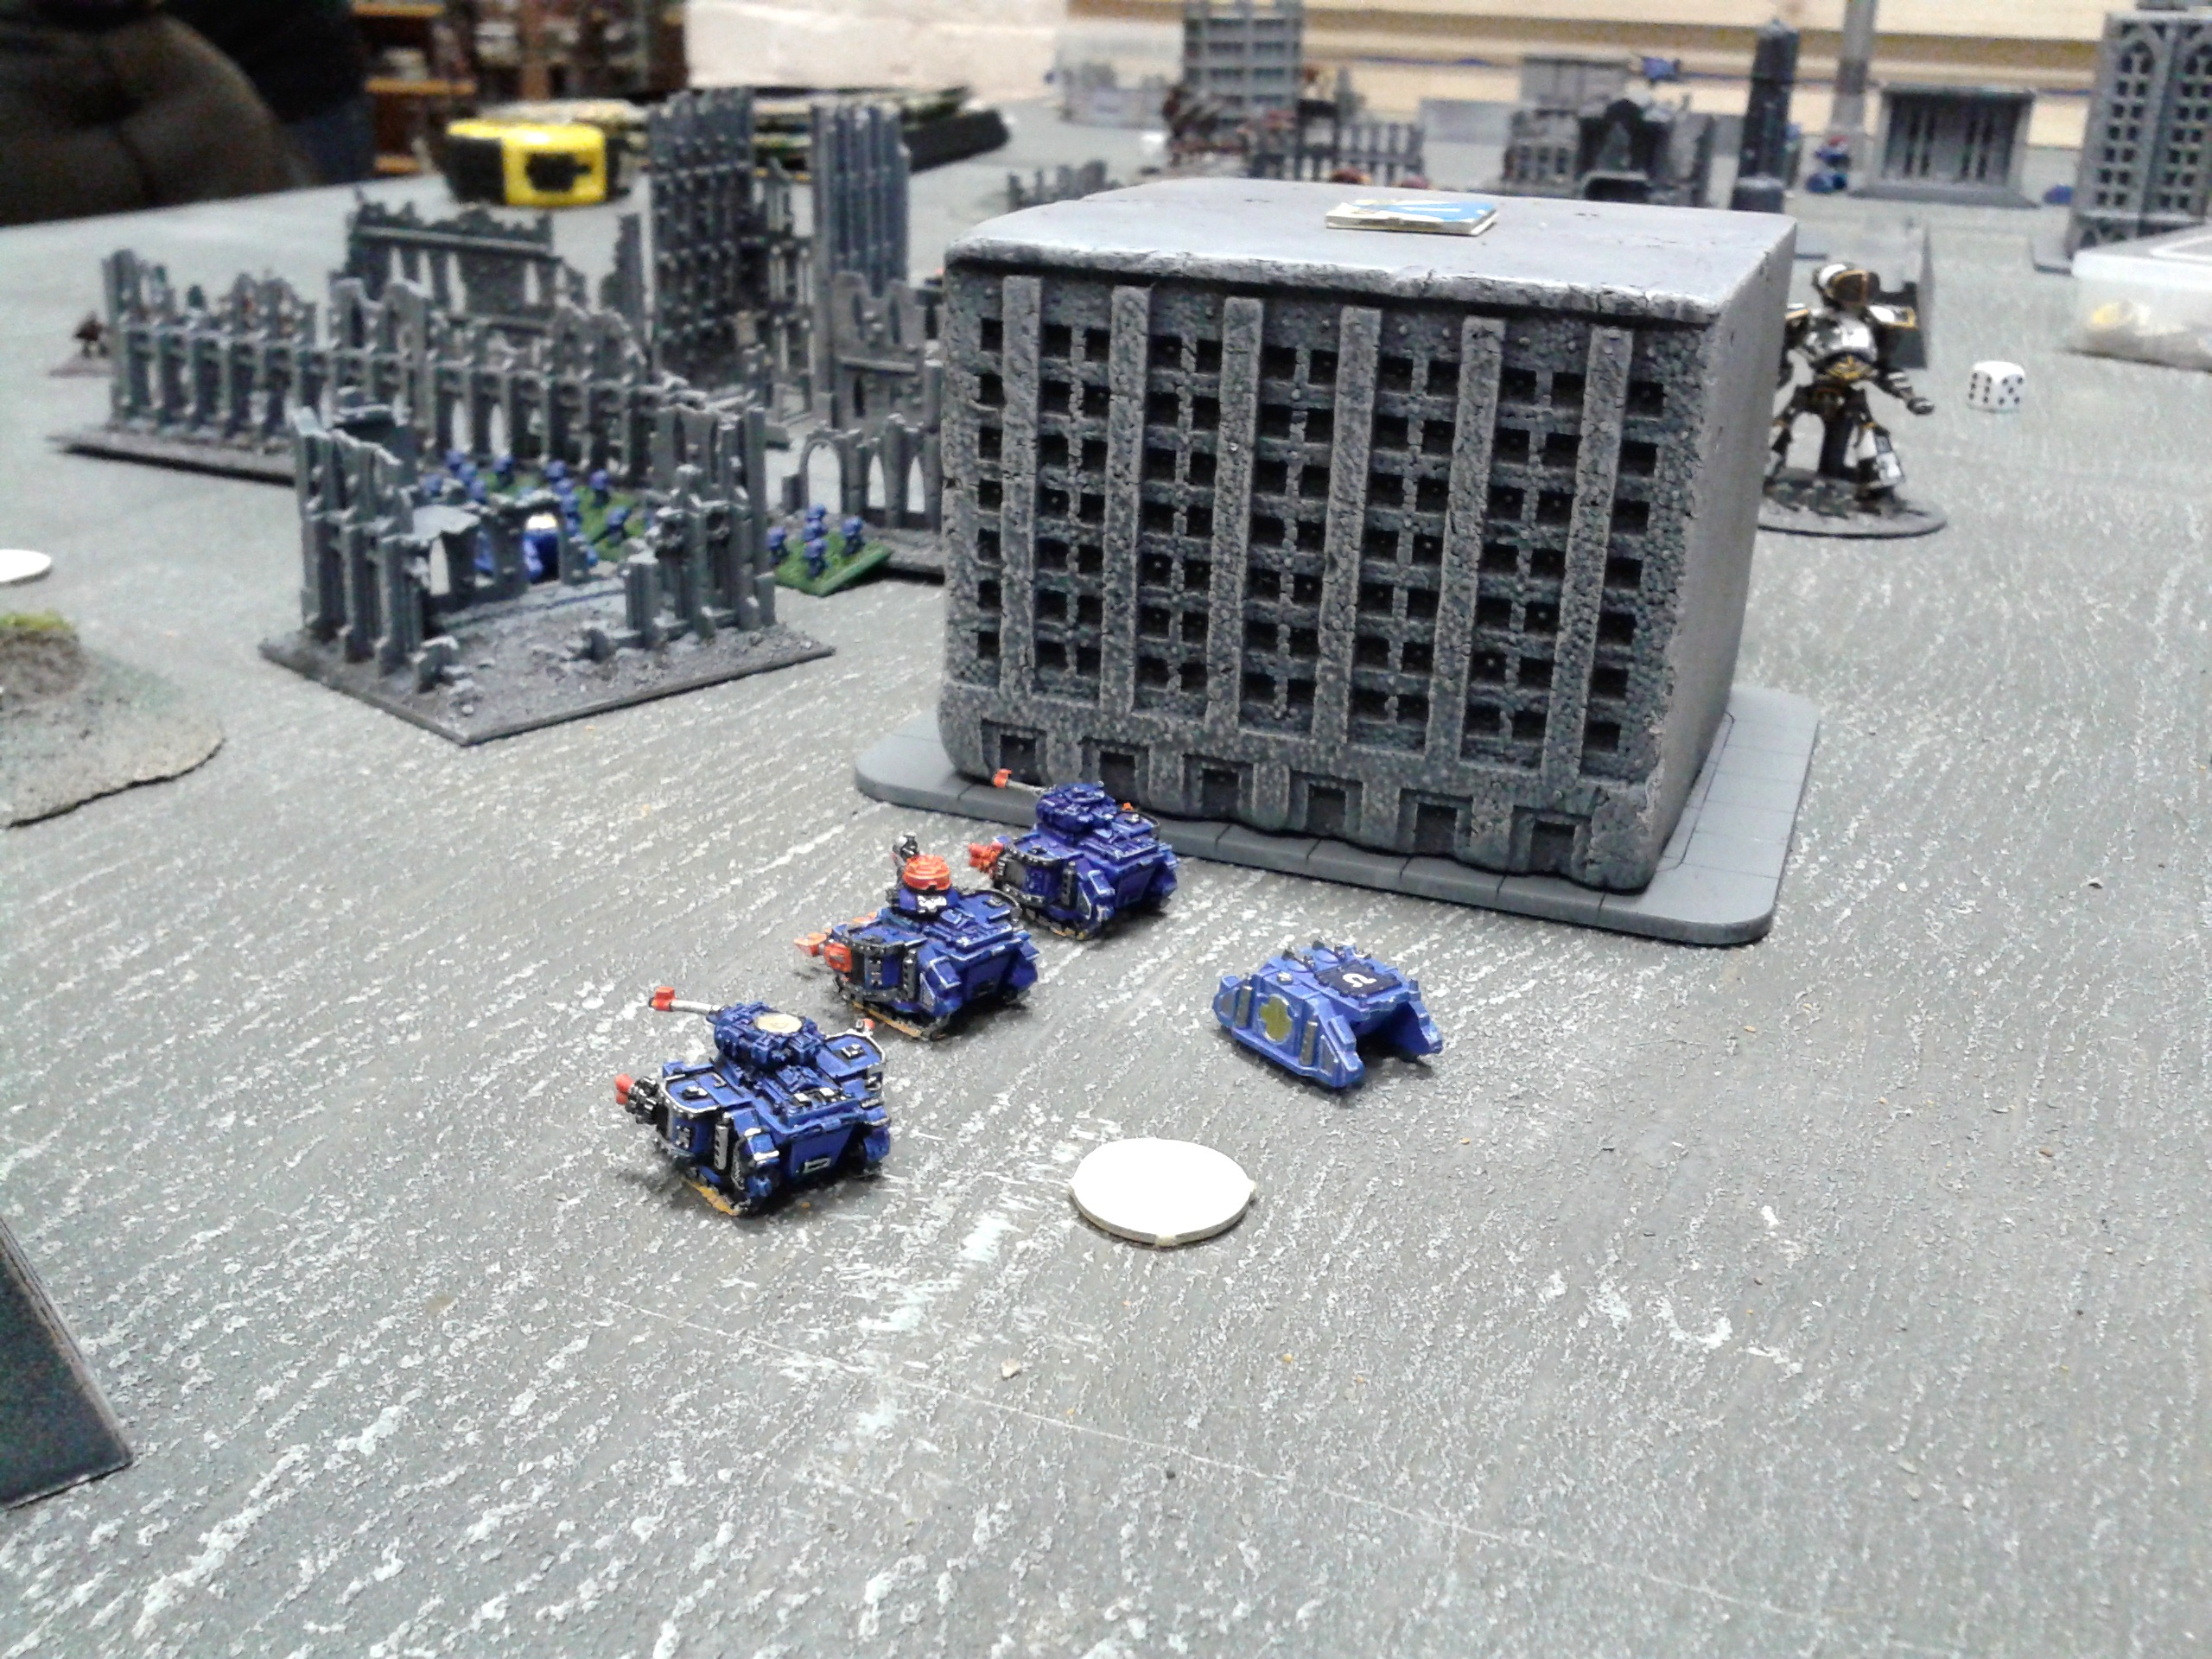
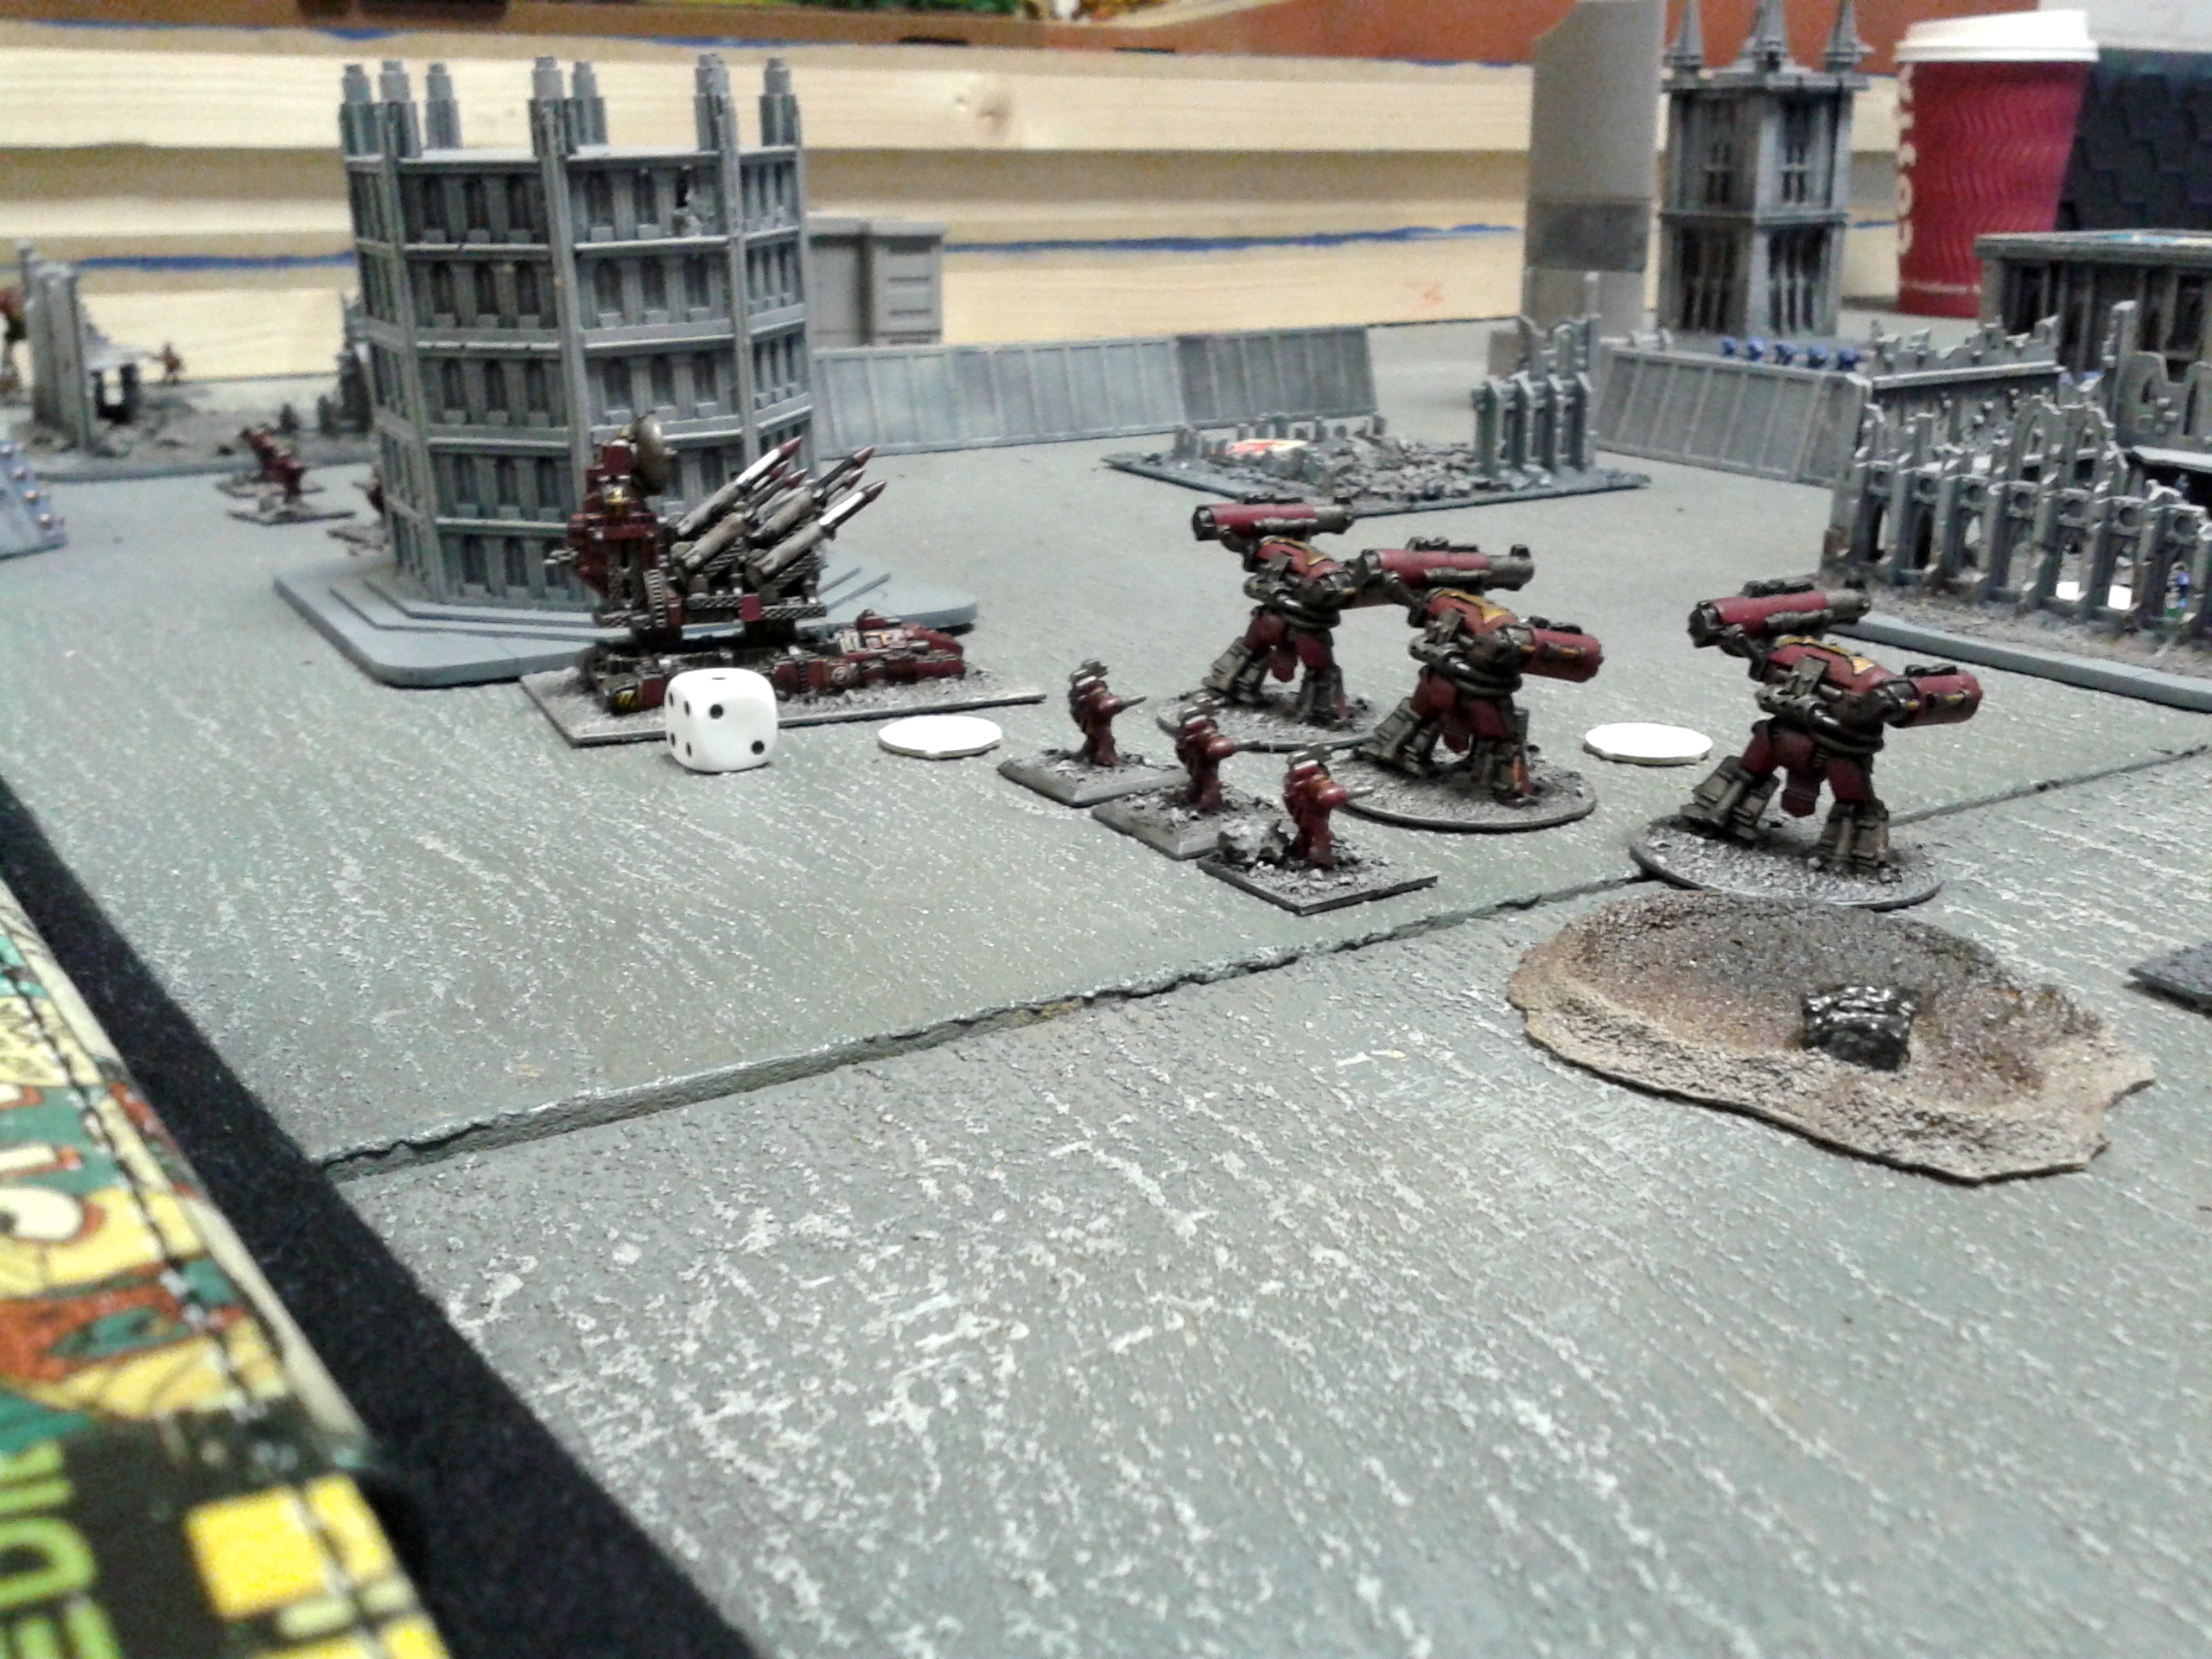
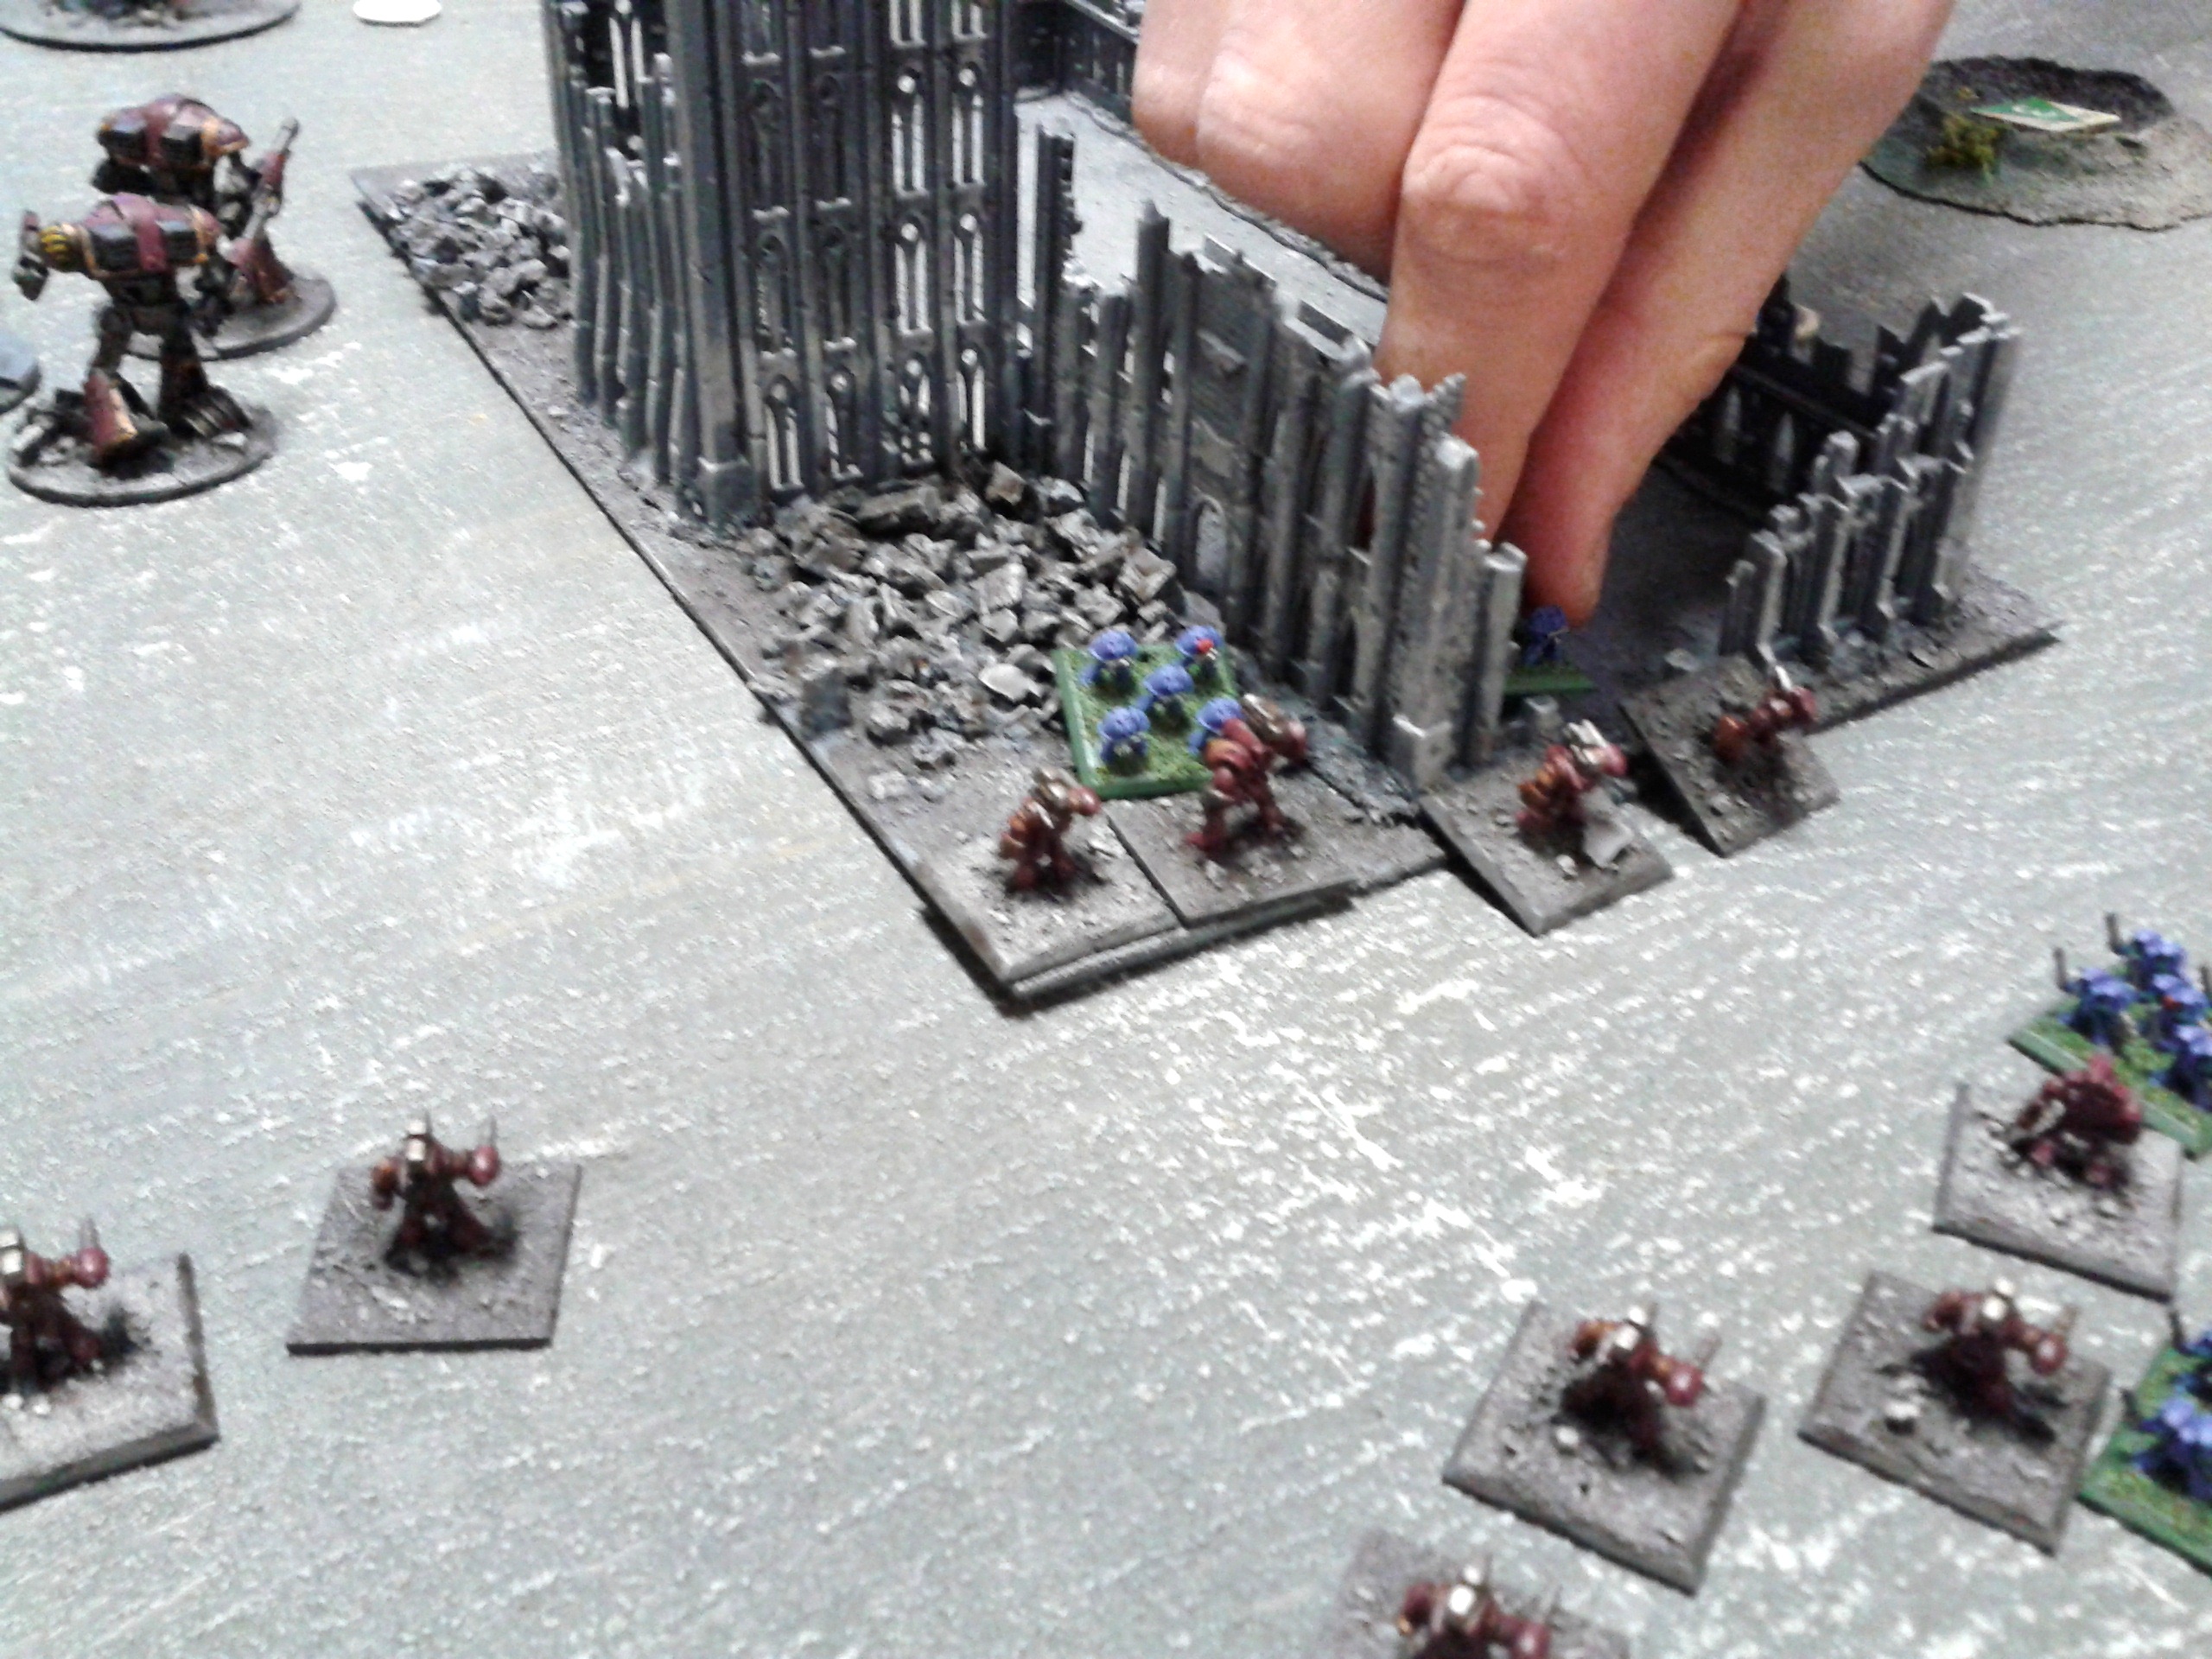
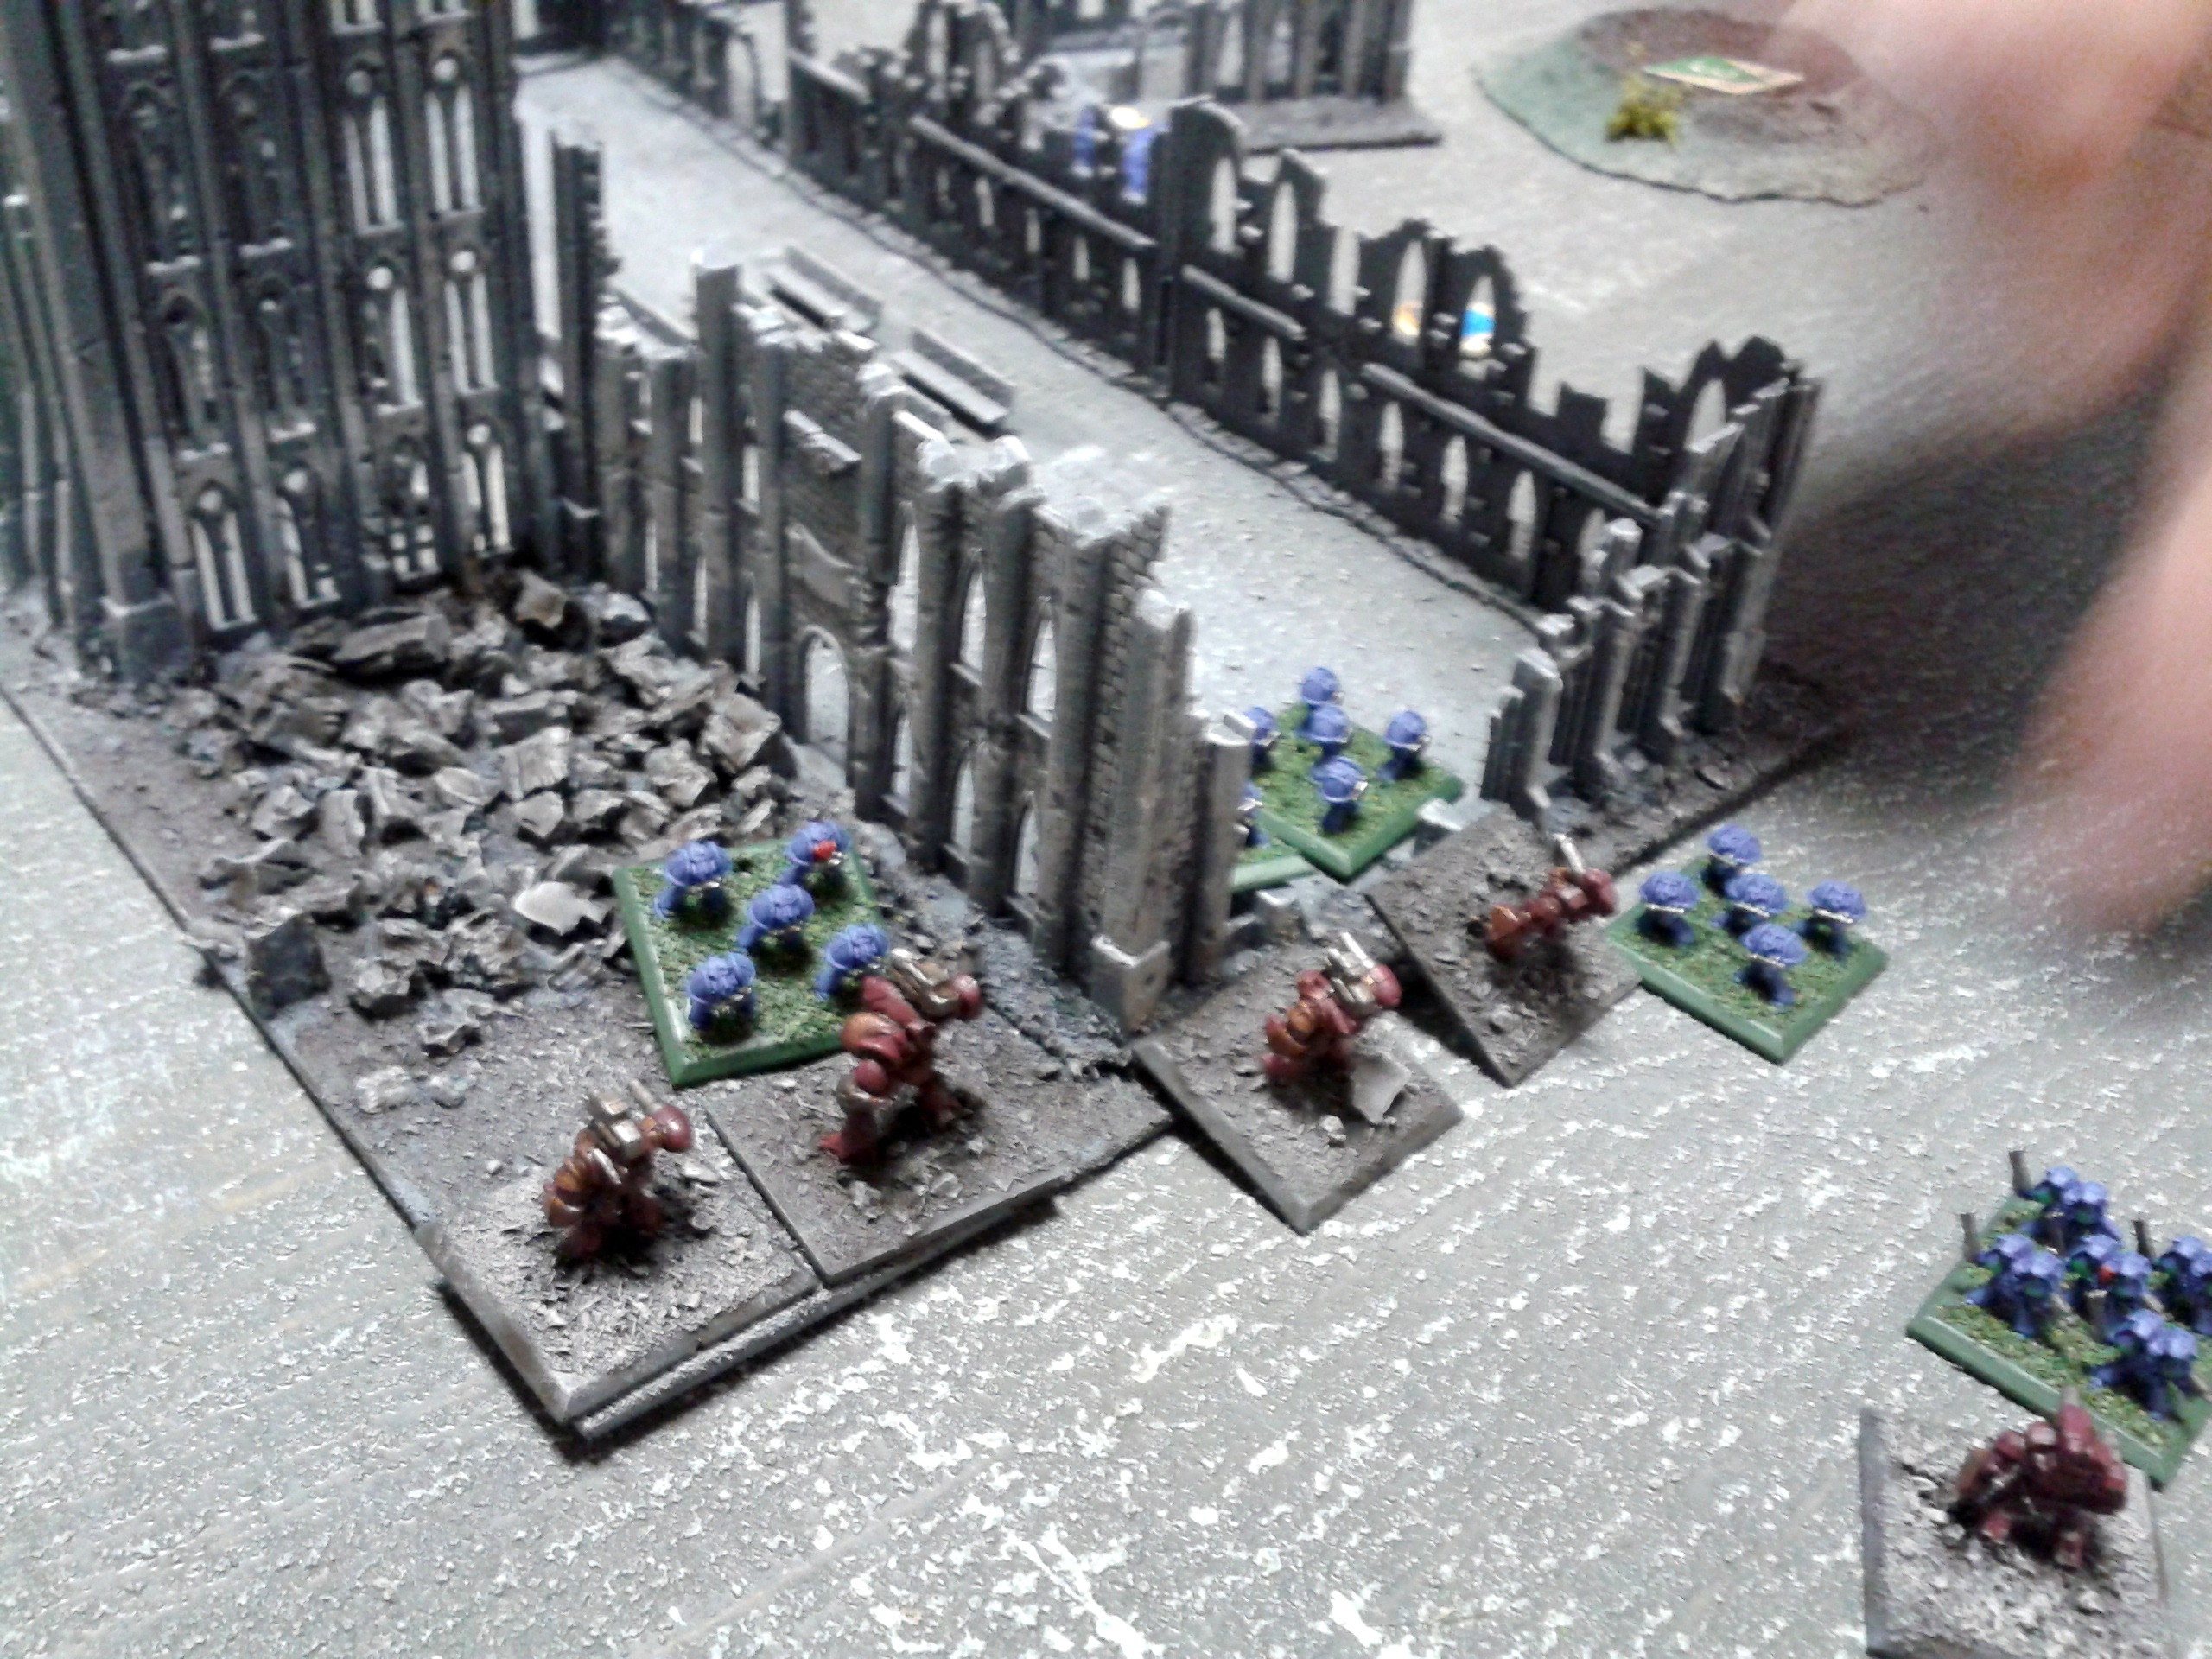
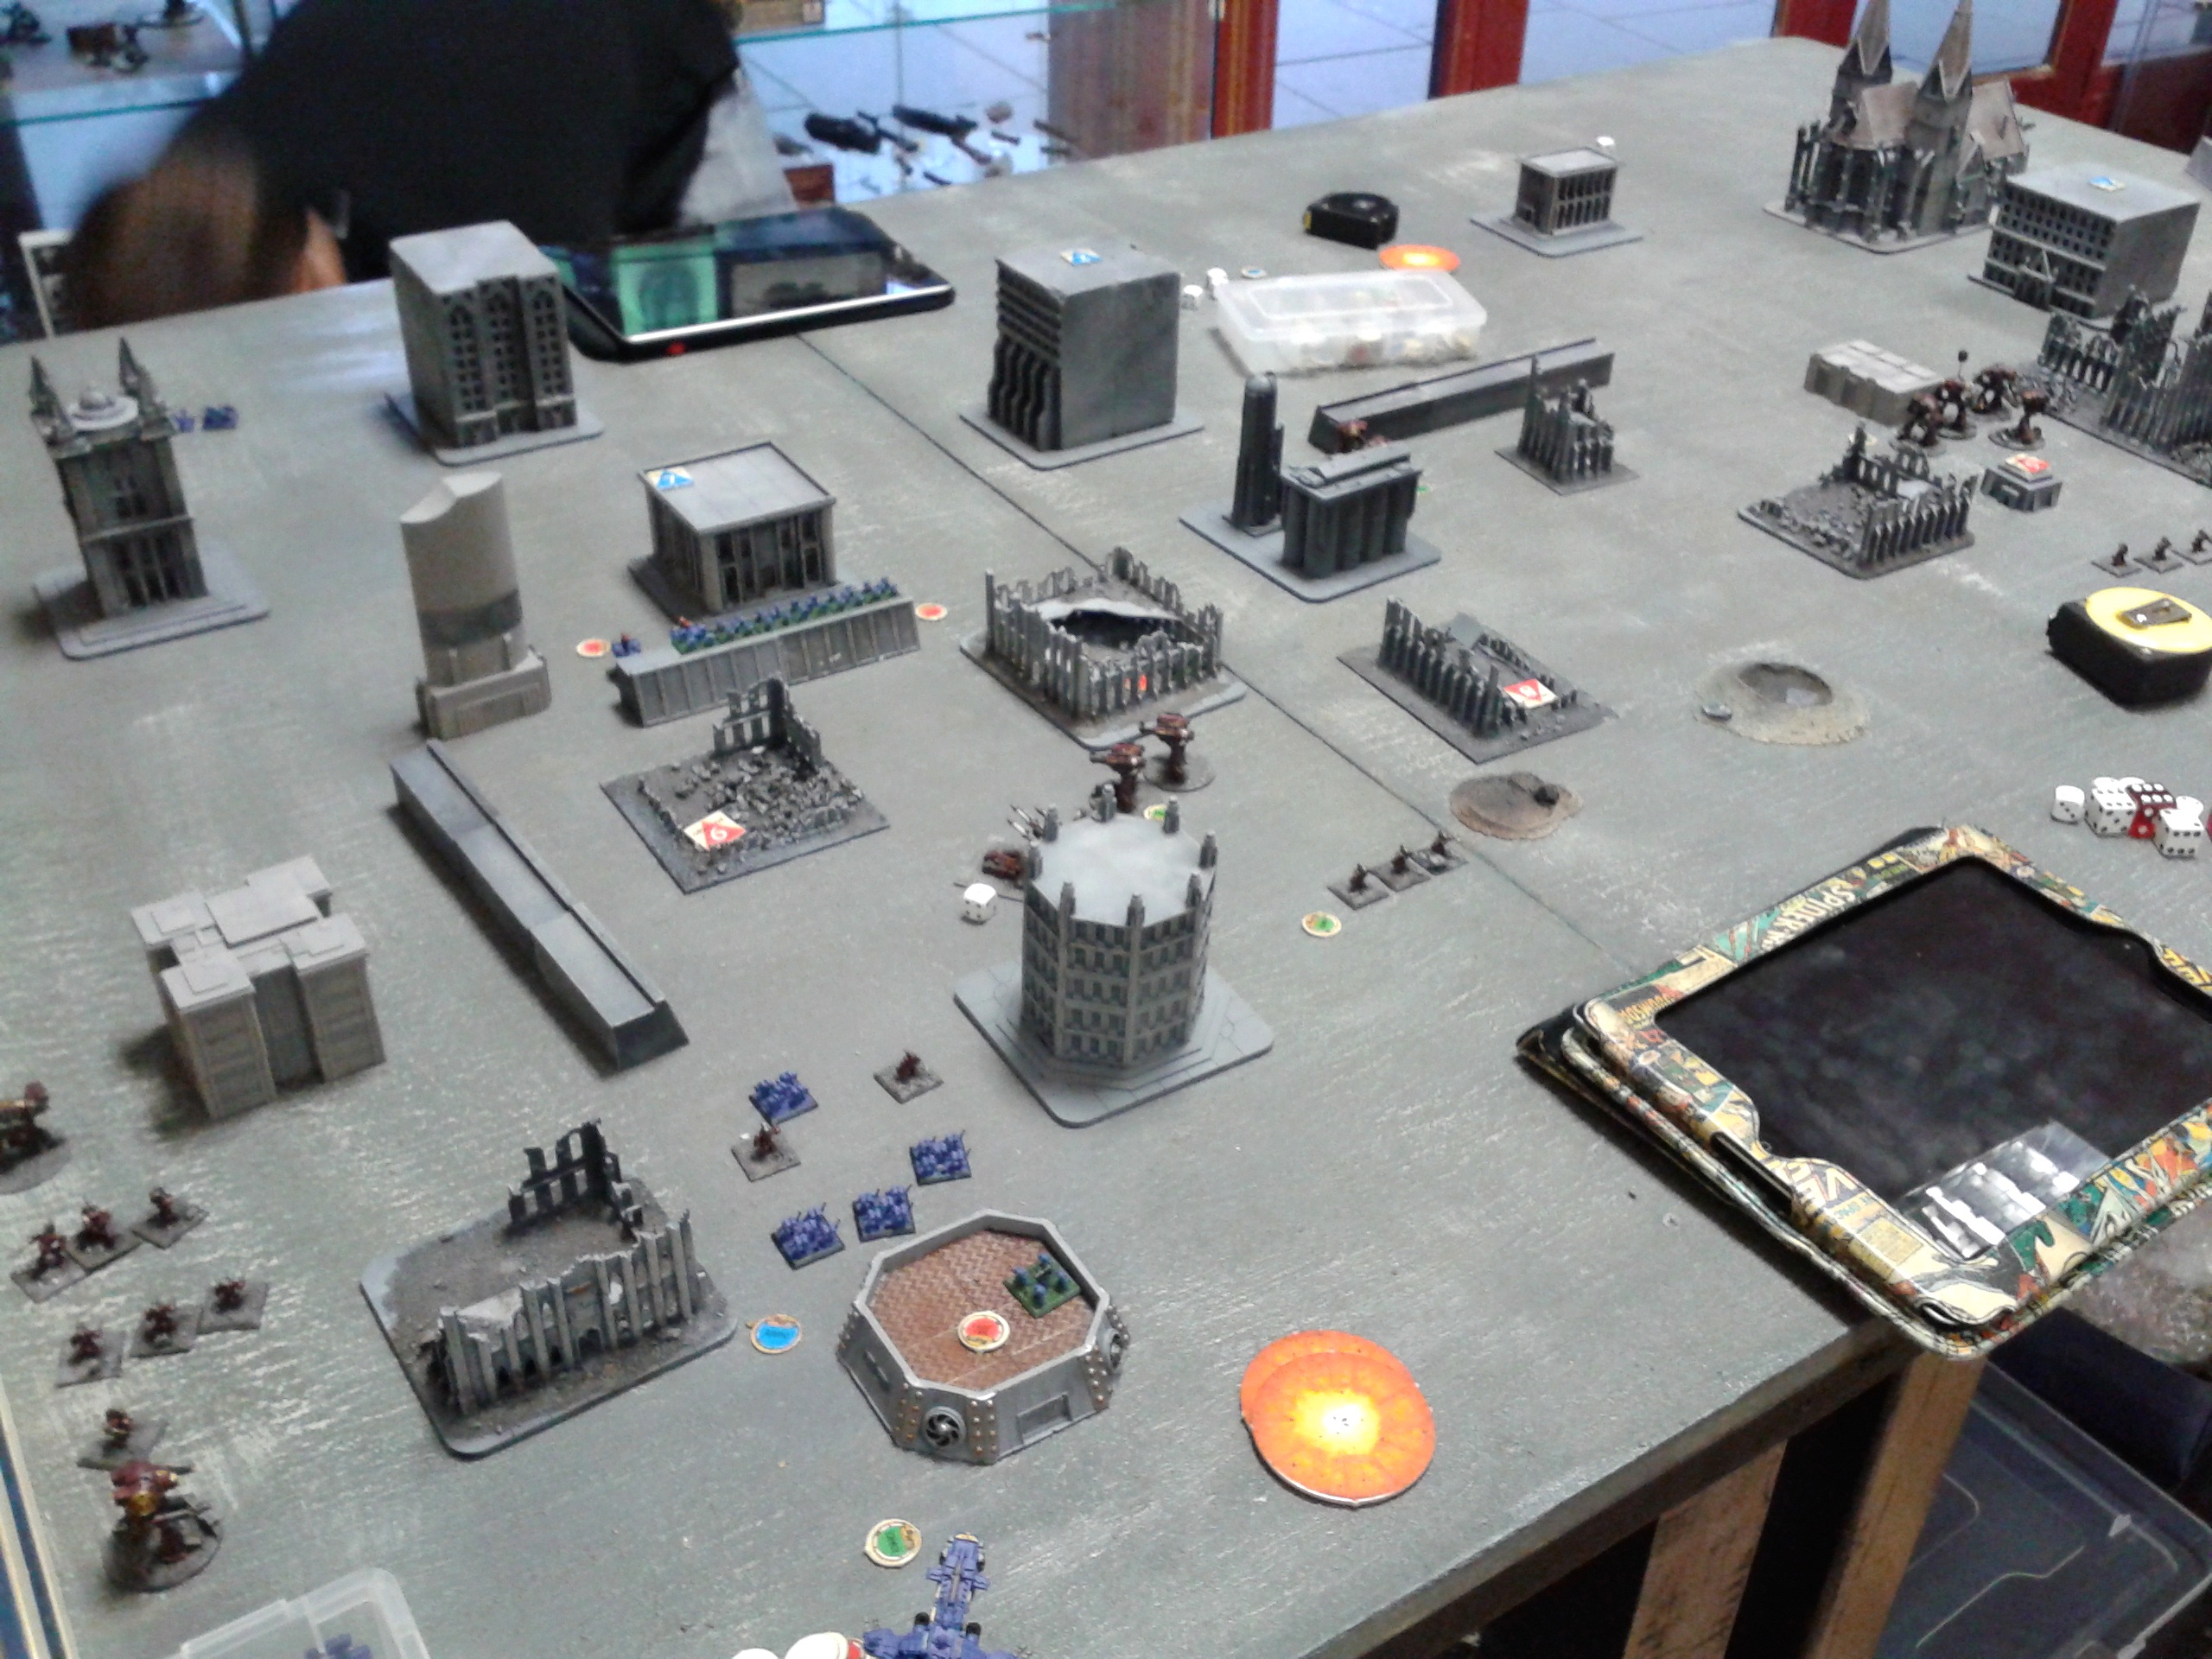
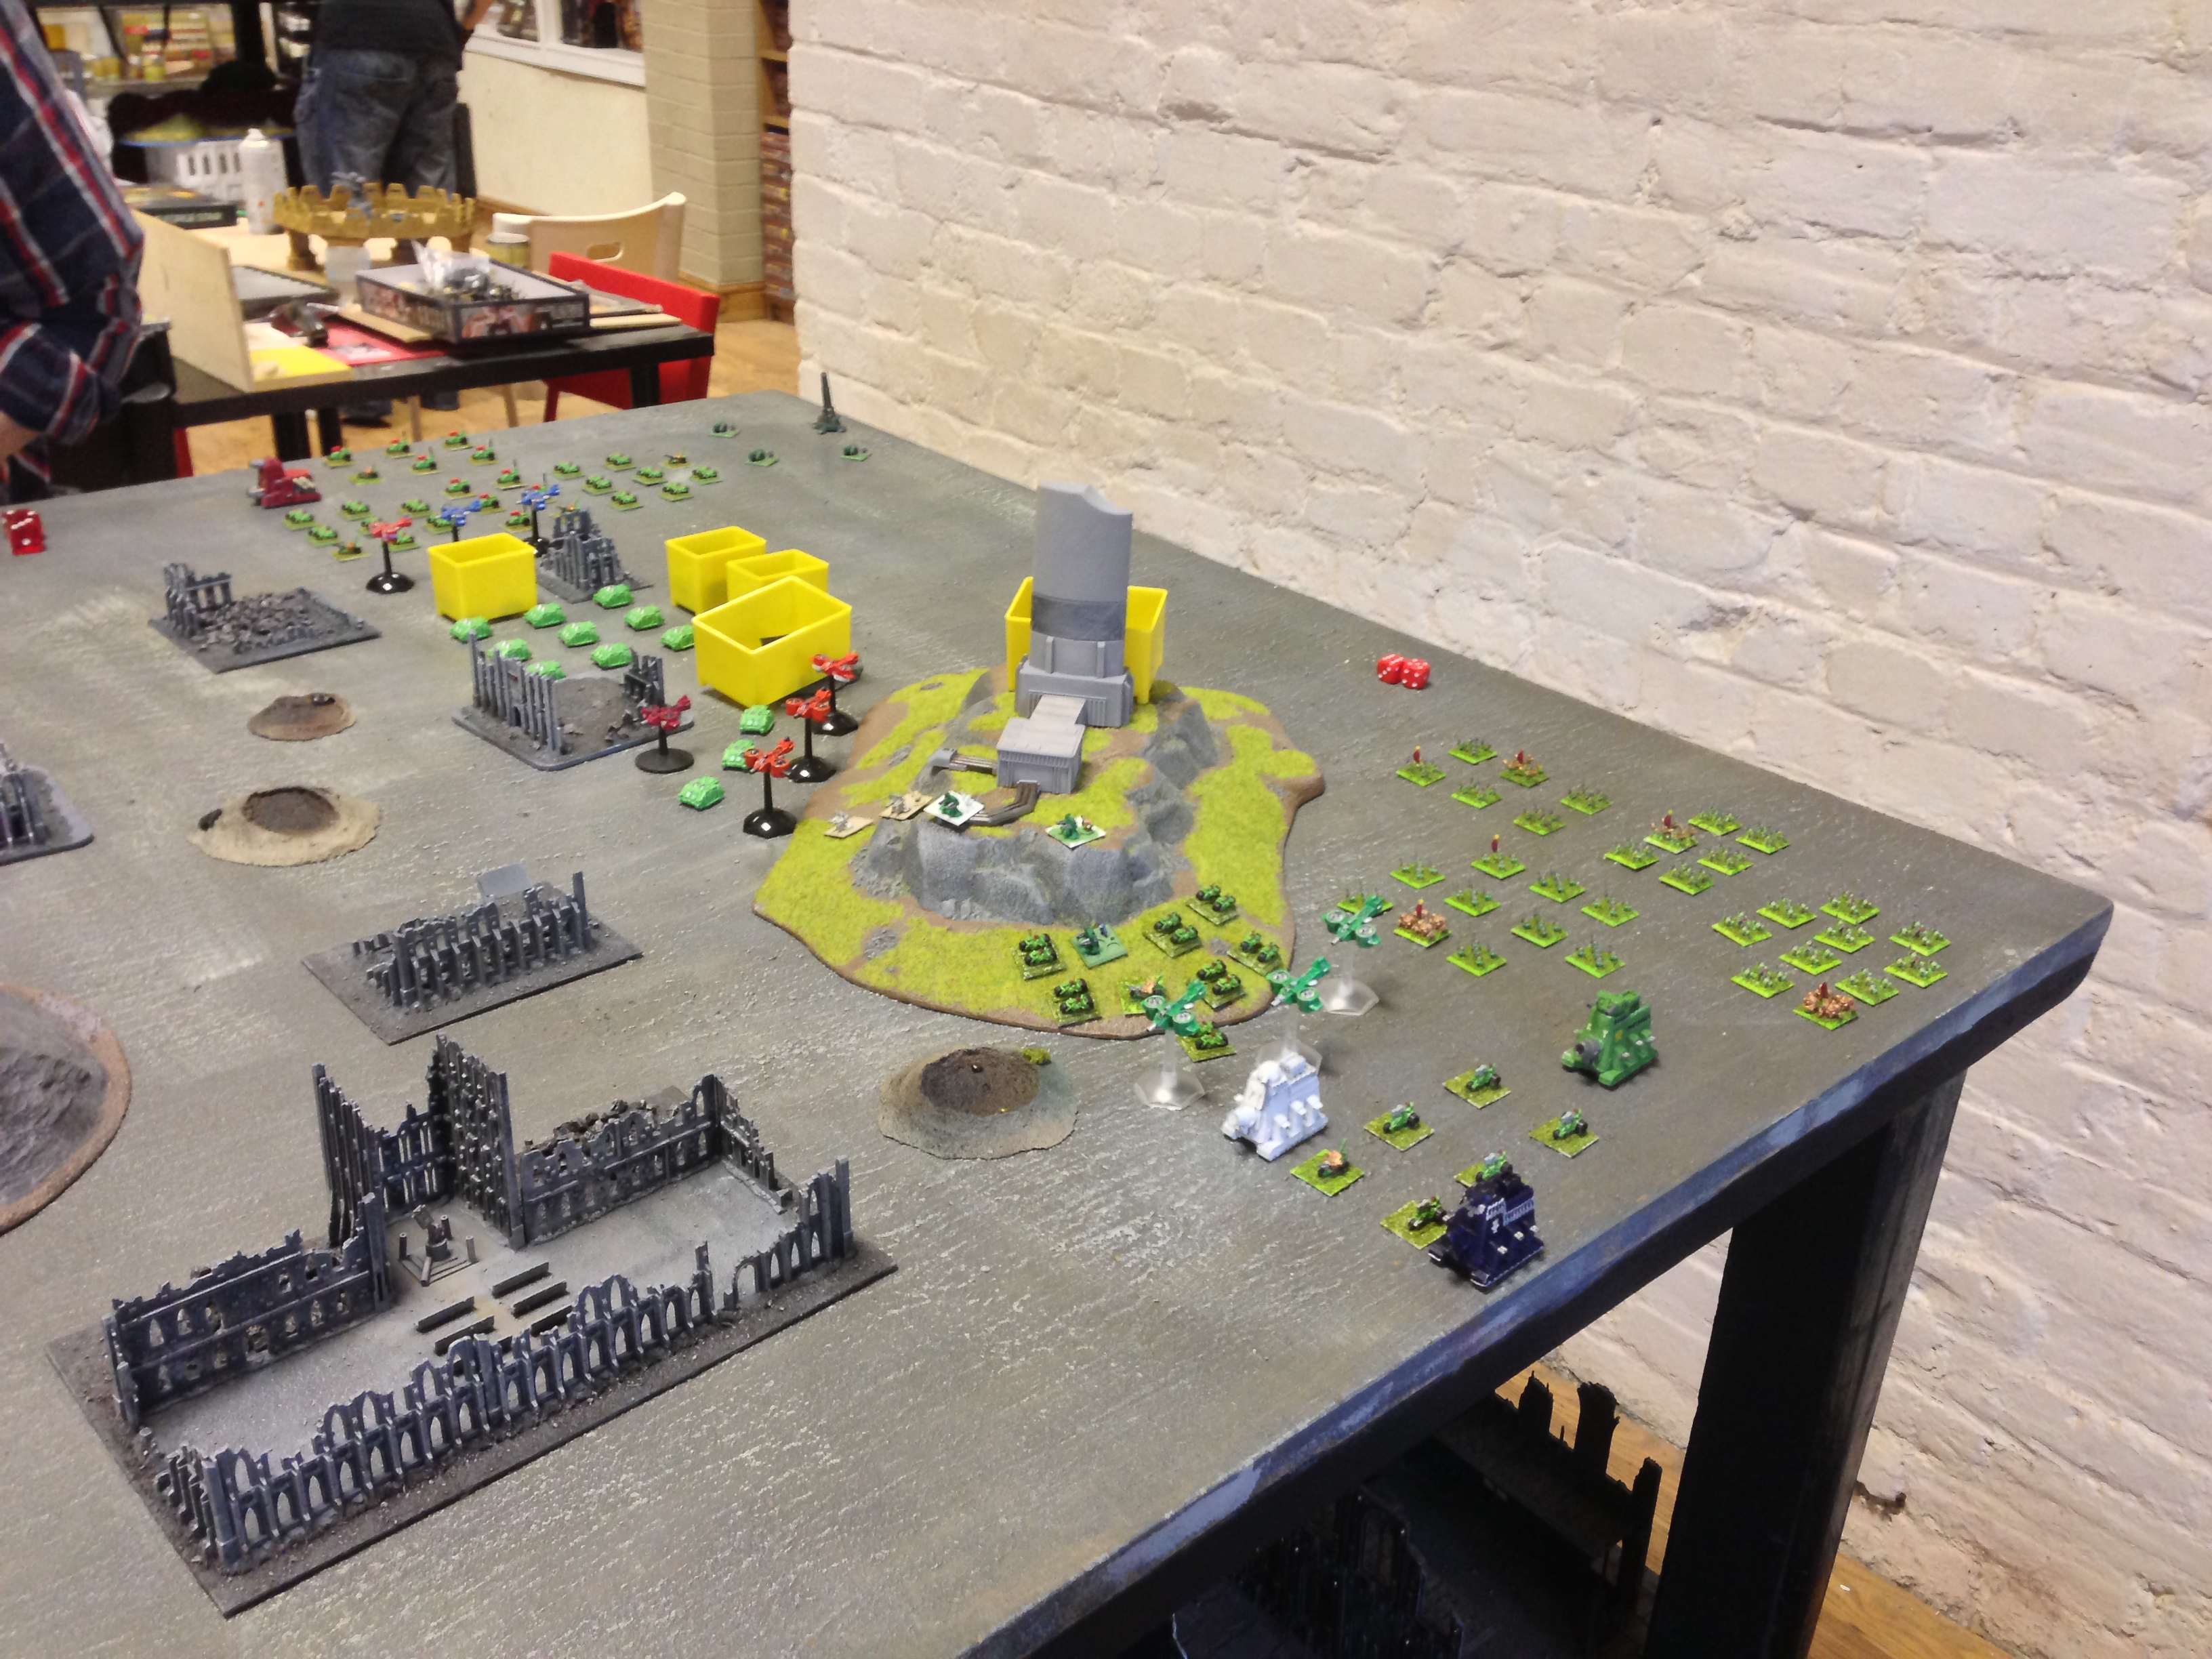
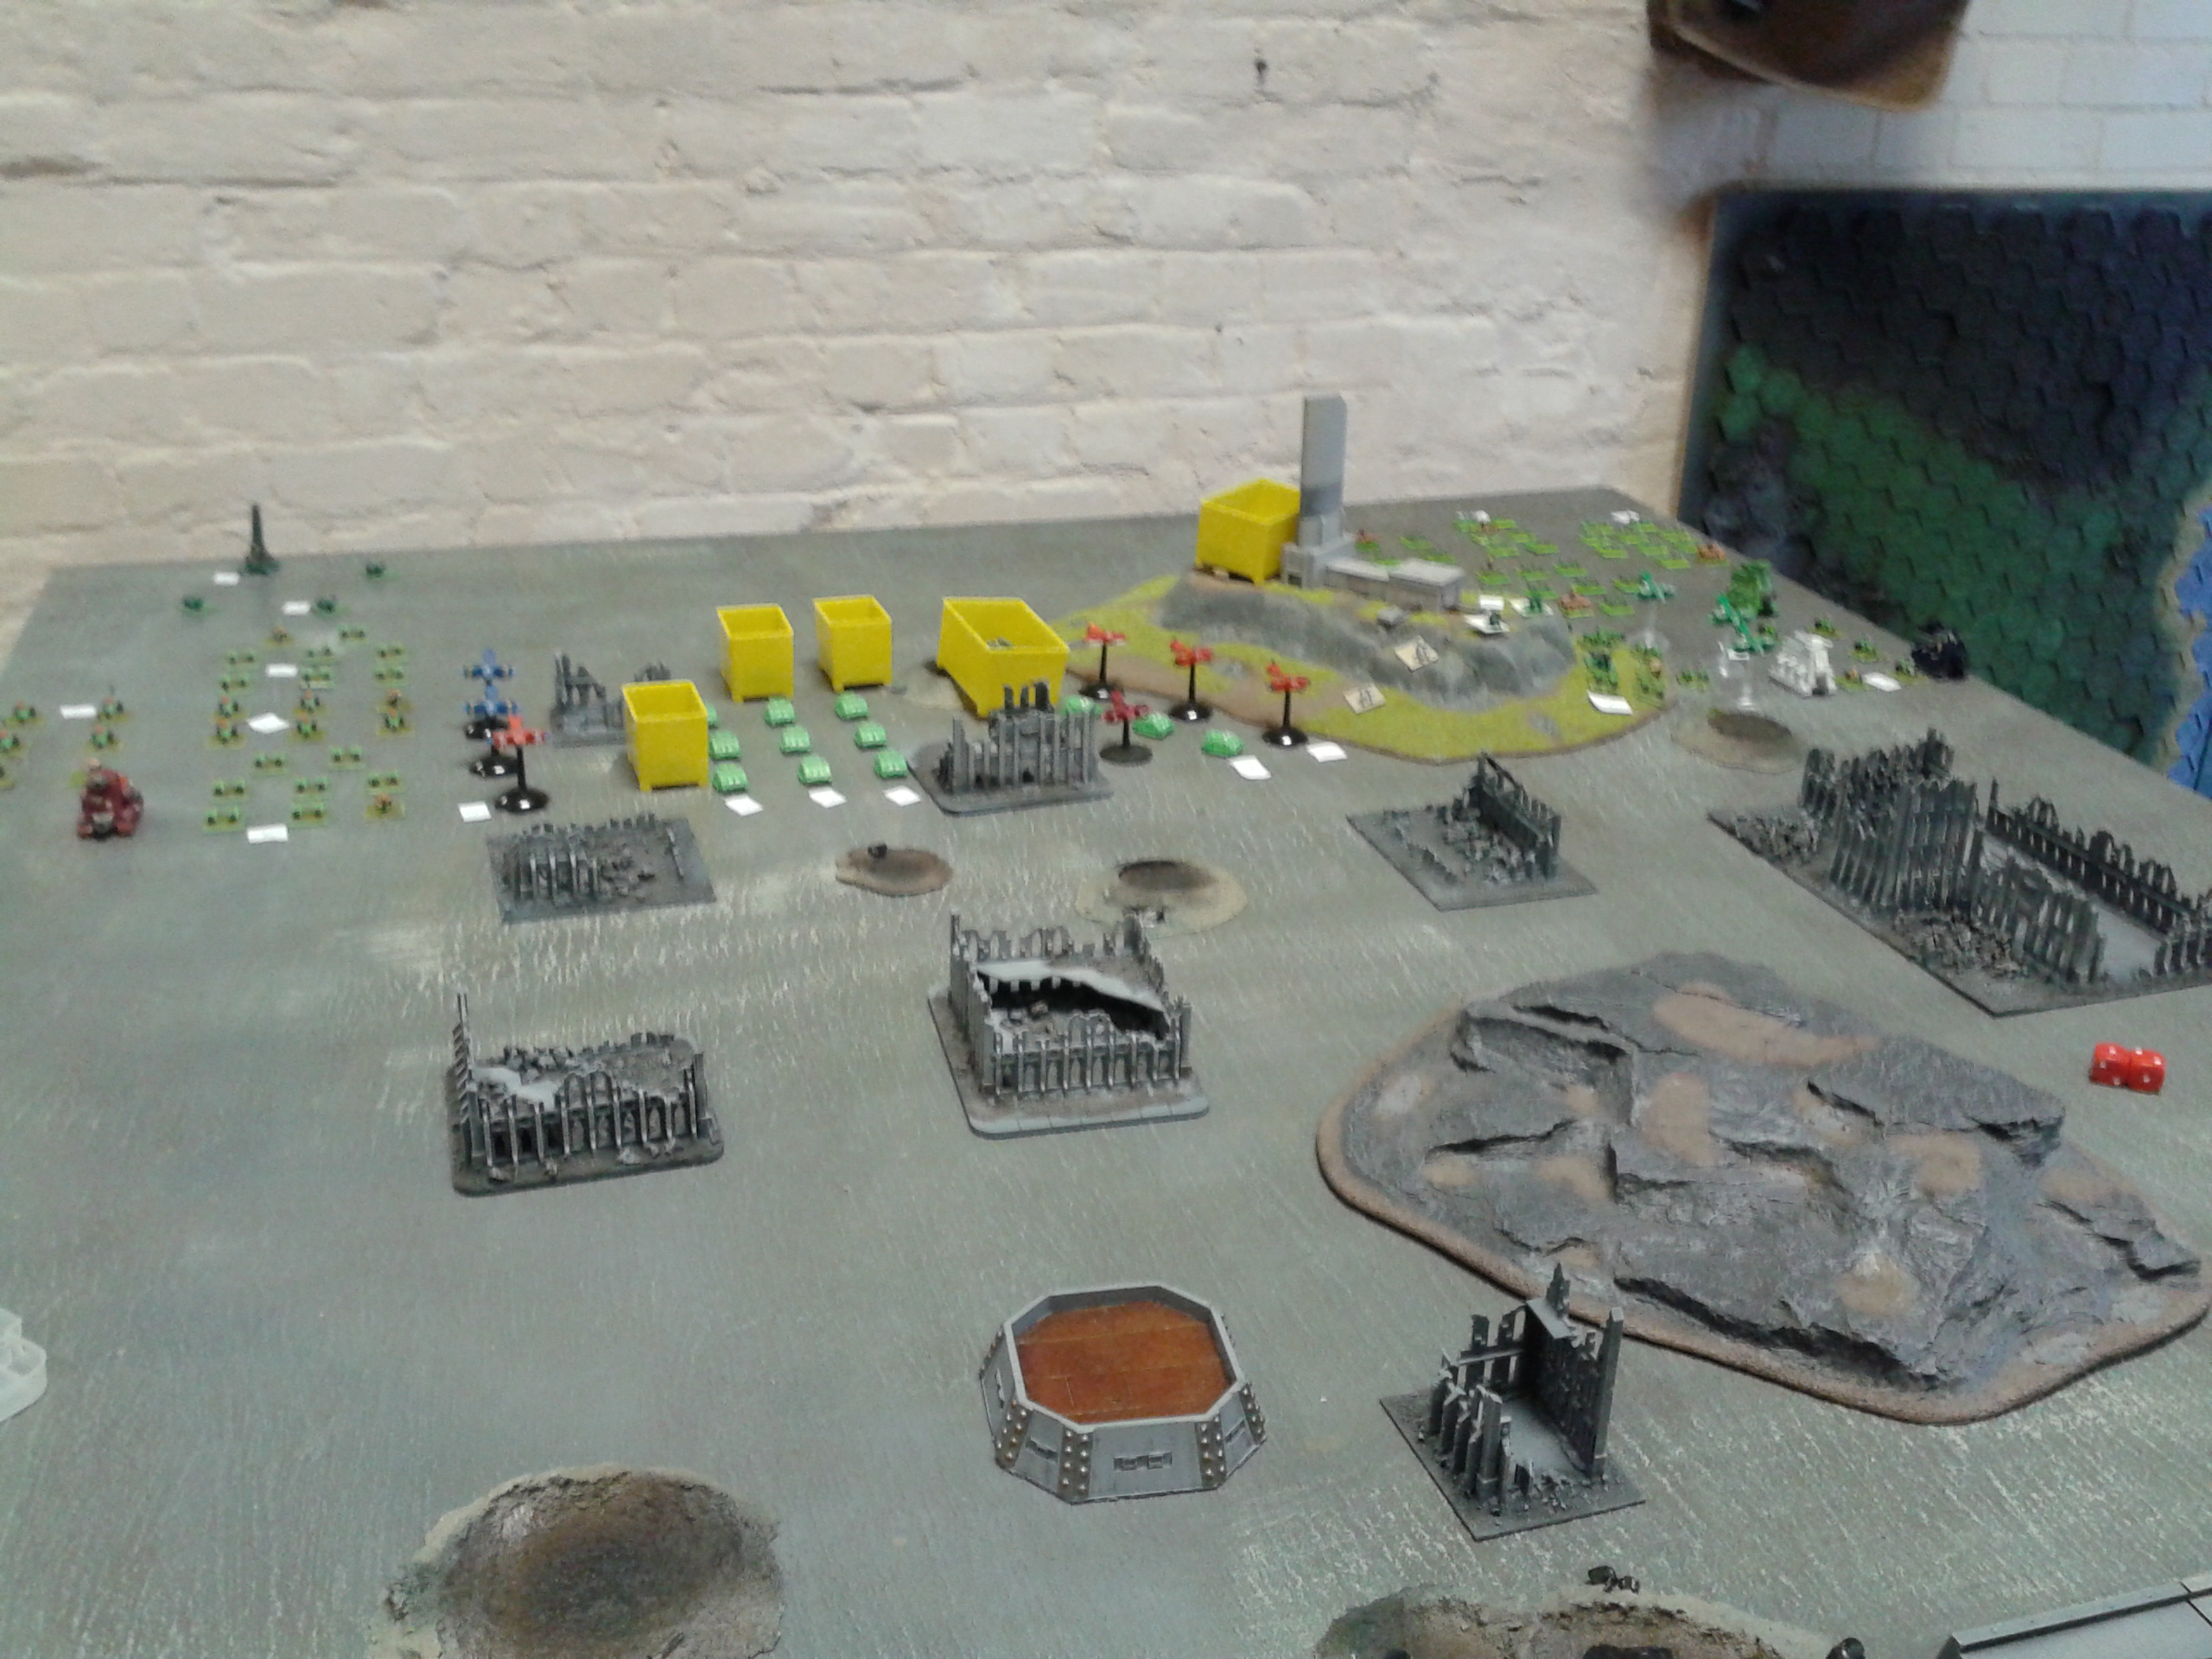
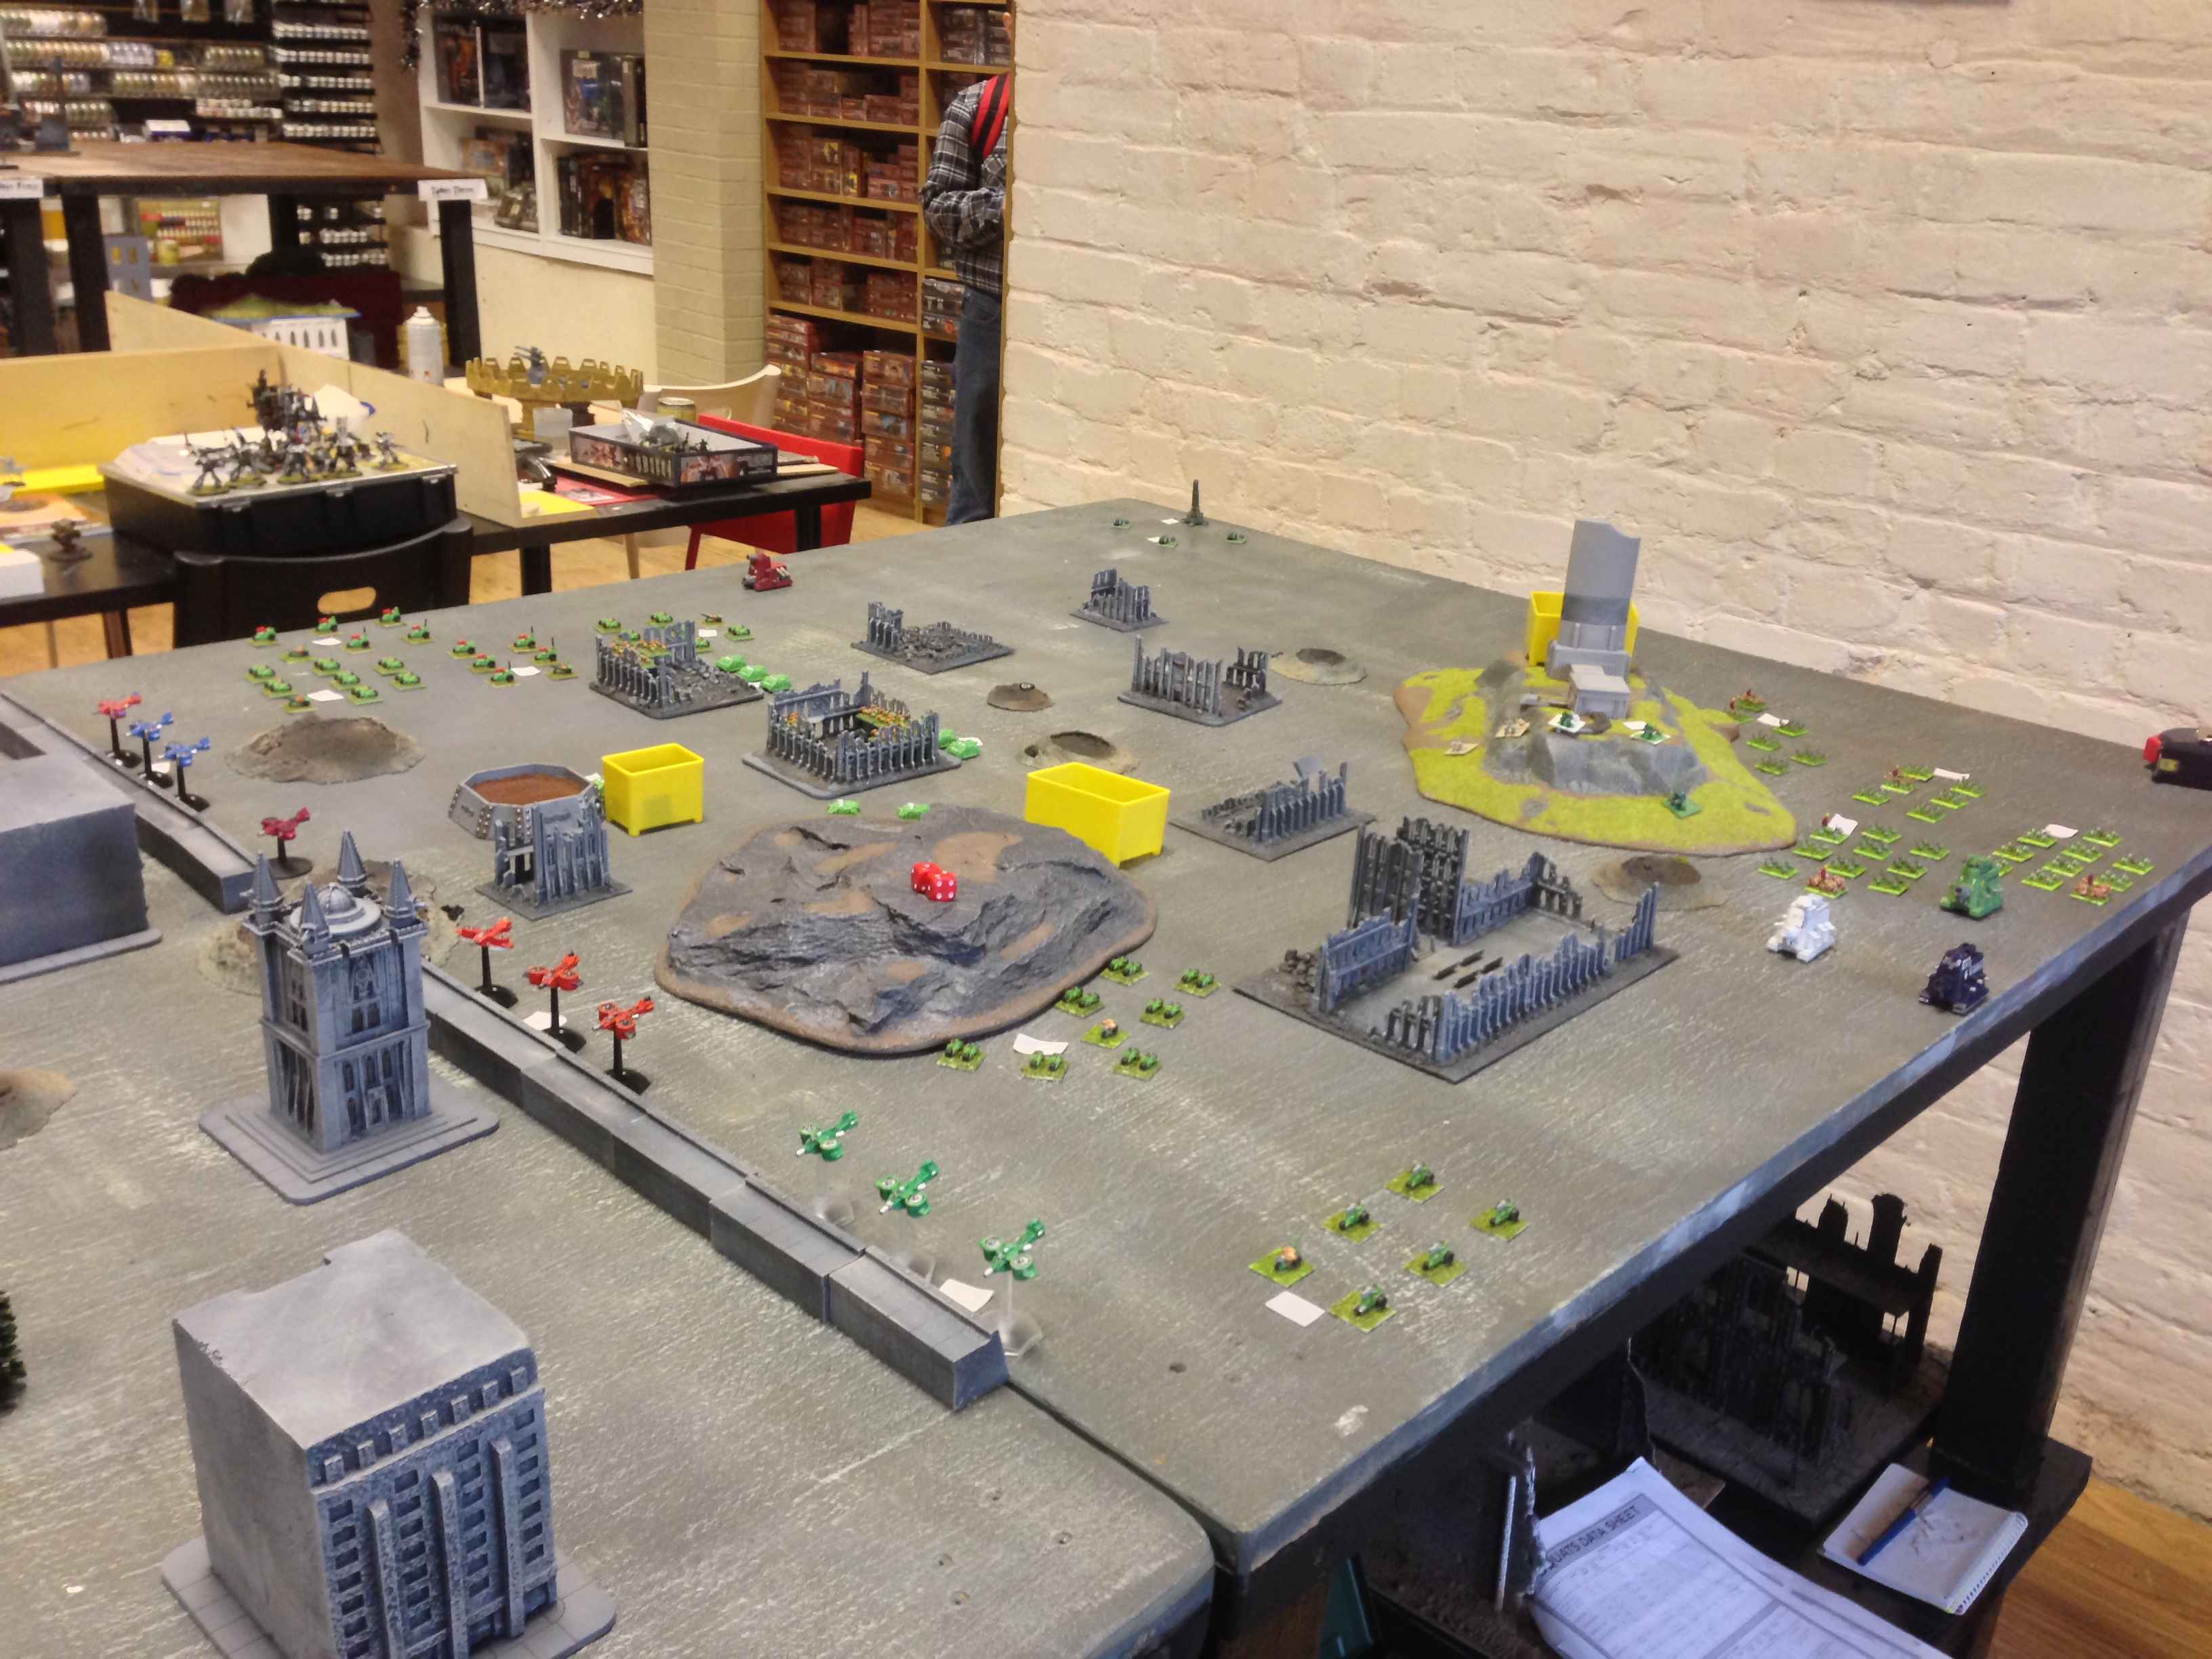
3,000 Point NetEpic Necrons versus Eldar
Some photos from the game are below. My army was:
- Venator Legion:
- 1x Necron Lord
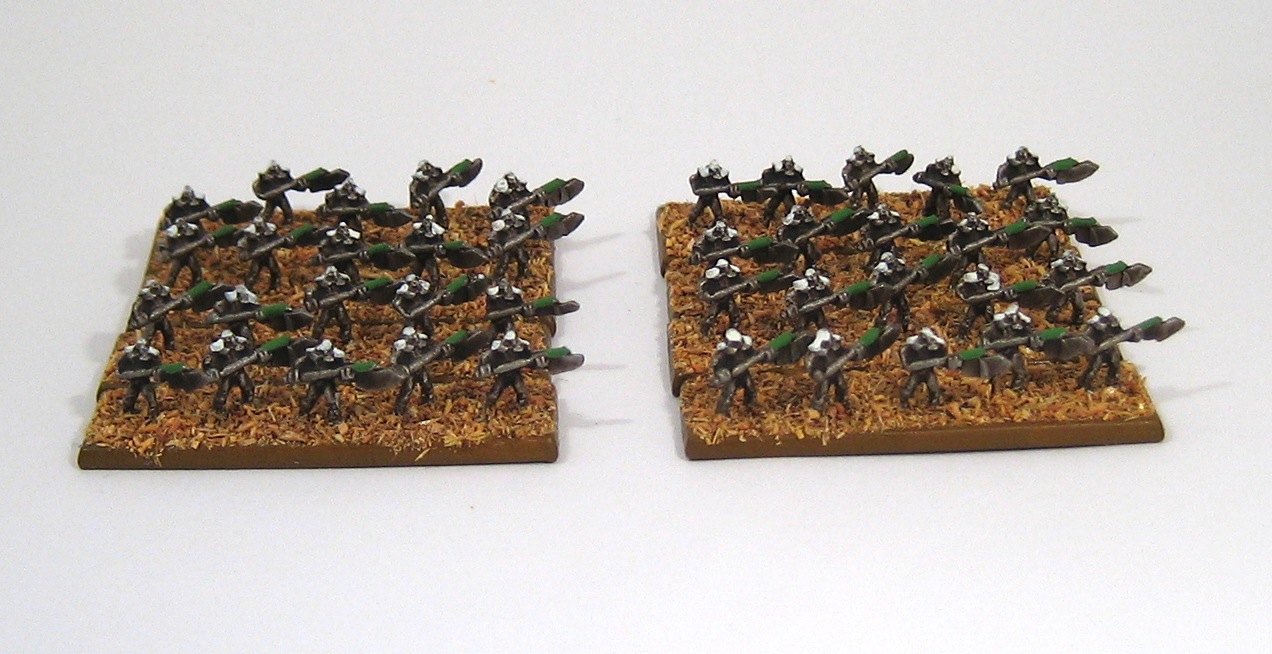
- 1x Warrior Phalanx (8 stands)
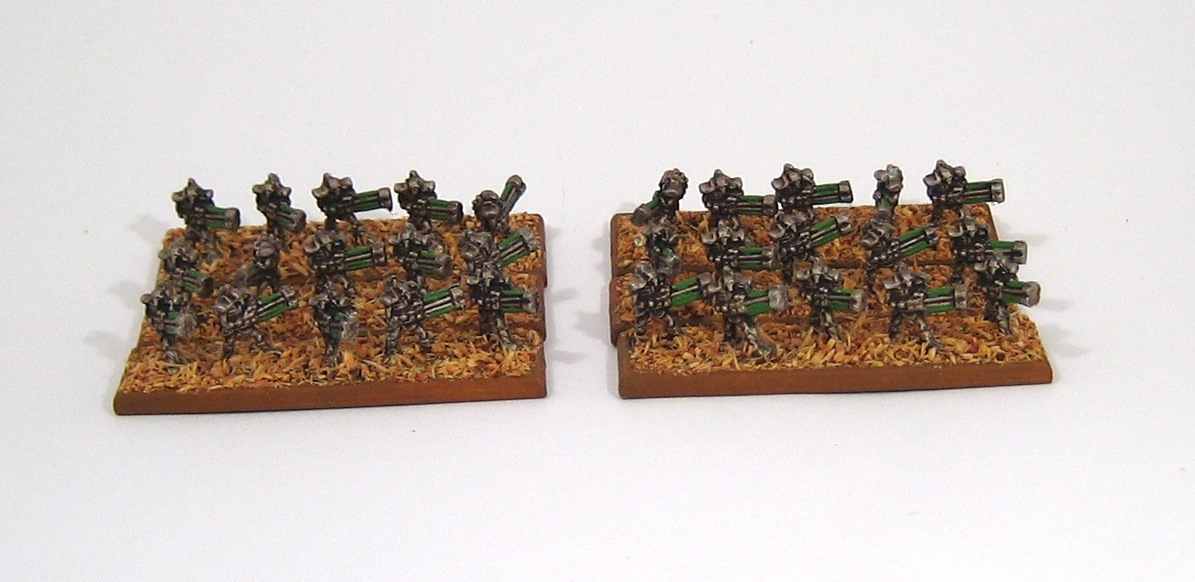
- 1x Immortal Phalanx (6 stands)
- 1x Monolith Triceps (3 Monoliths)
- Immortal Phalanx (6 stands)
- Monolith Triceps (3 Monoliths)
- Doomsday Ark Triceps (3 Doomsday Arks)
- Praetorian Phalanx (4 stands)
- Praetorian Phalanx (4 stands)
- C'tan Shard
Preparing for tomorrow's game. The harvester legion awakens... pic.twitter.com/K6ju4YOLDv
— Jodrell (@J_Plays_Games) February 14, 2015
And this is what it looks like. Just need to get those tanks painted tonight! pic.twitter.com/PuwobAMlKx
— Jodrell (@J_Plays_Games) February 14, 2015


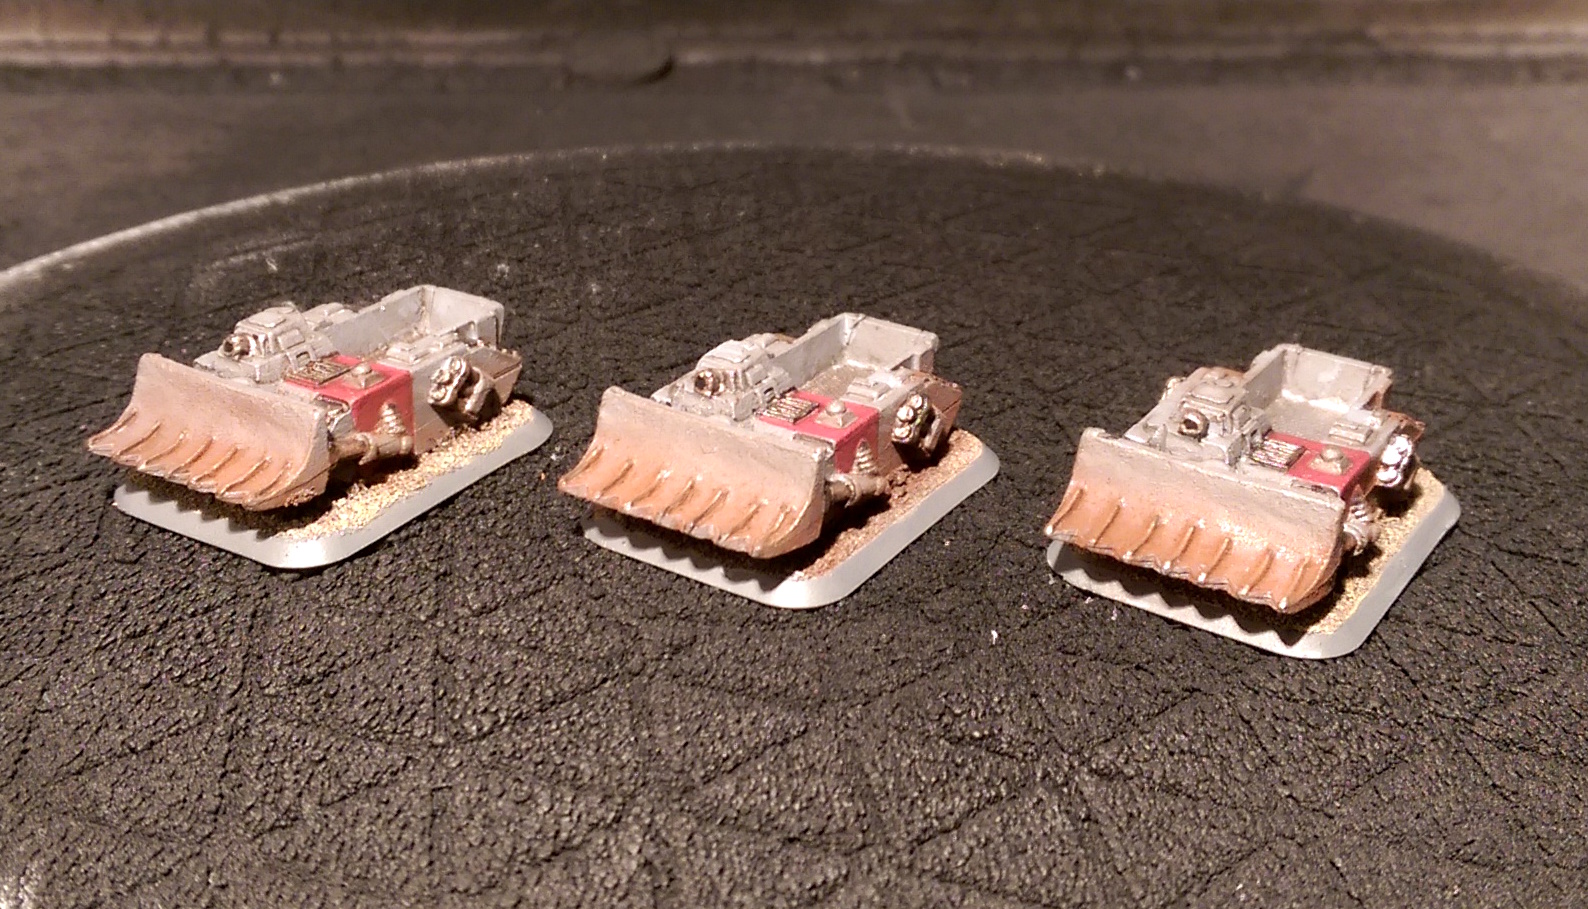
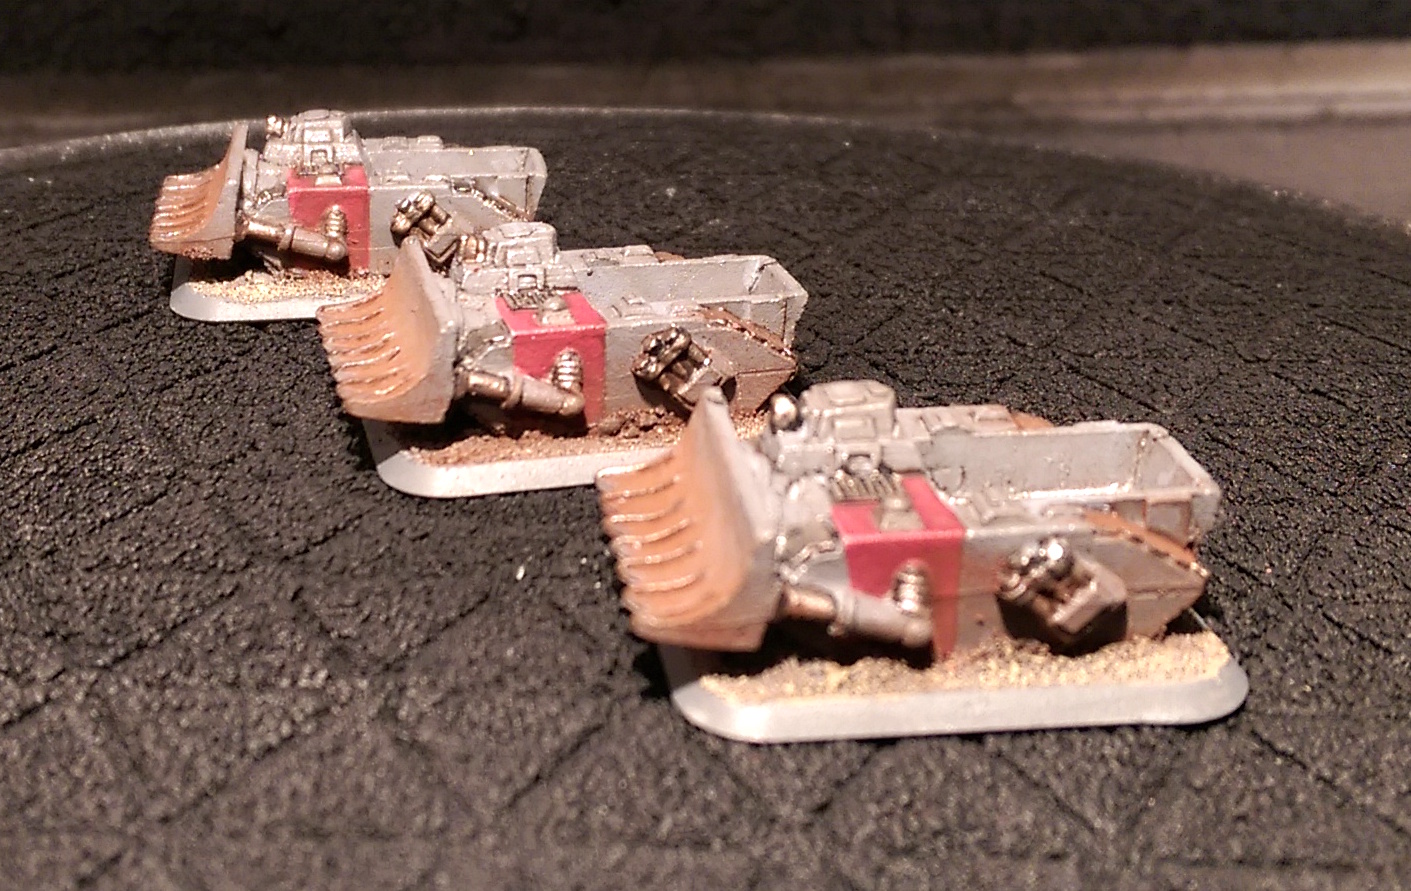
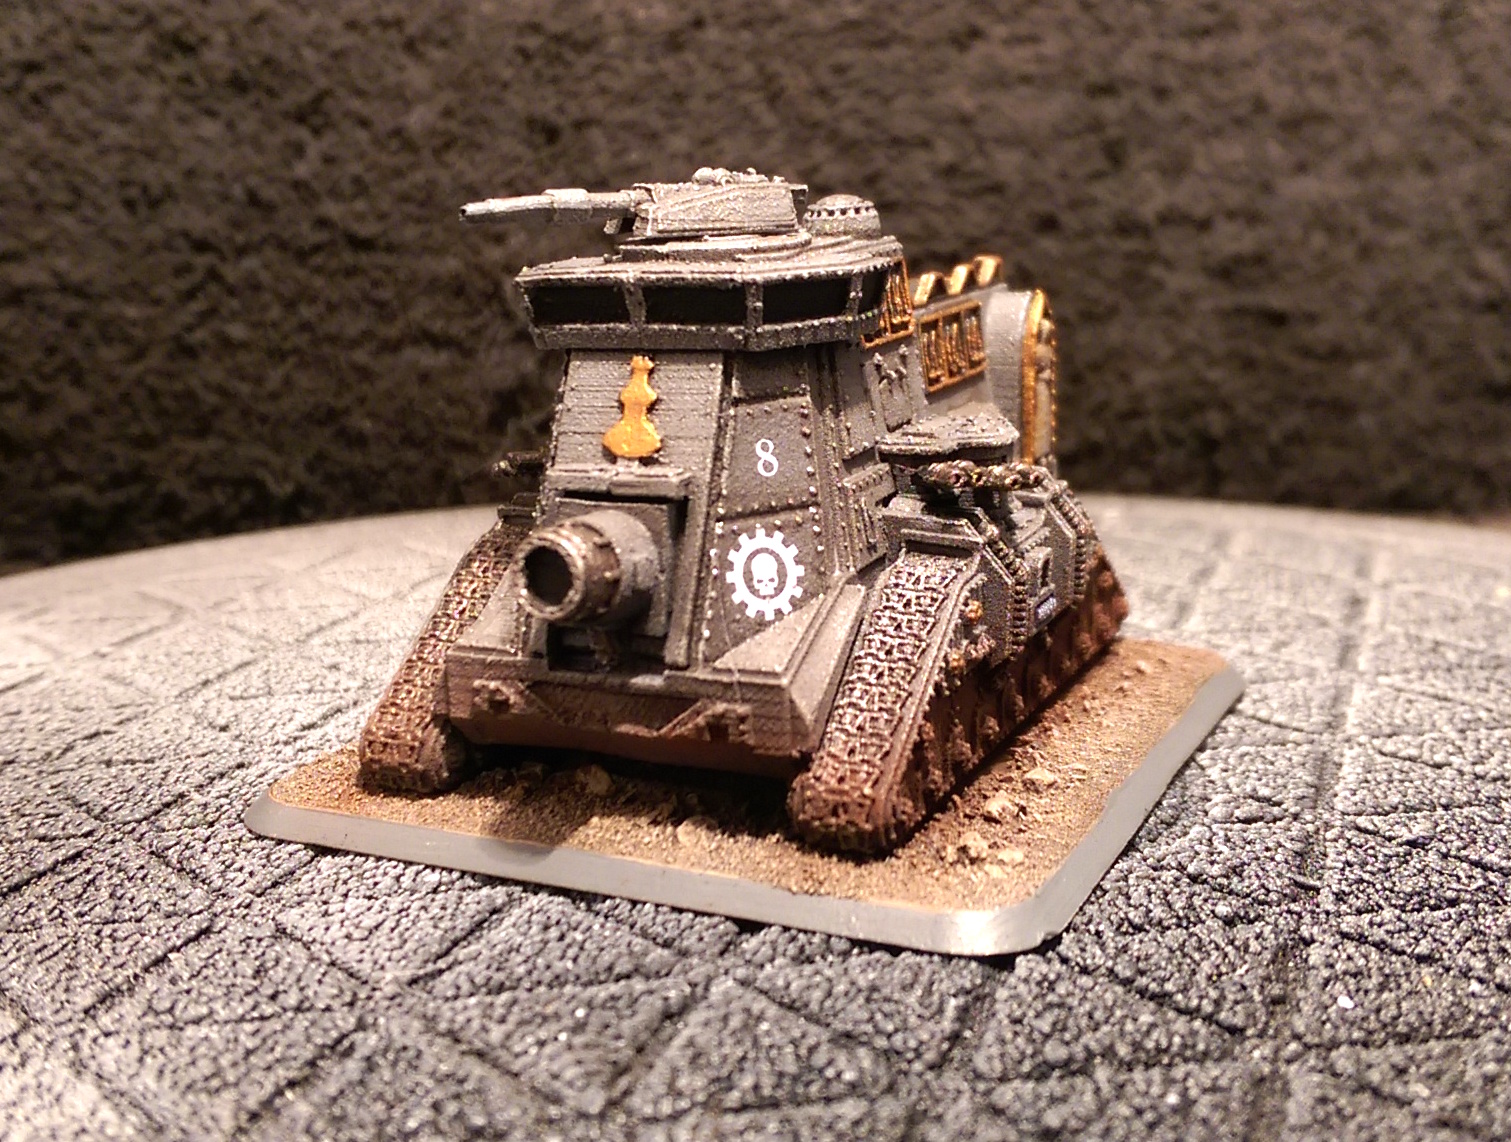
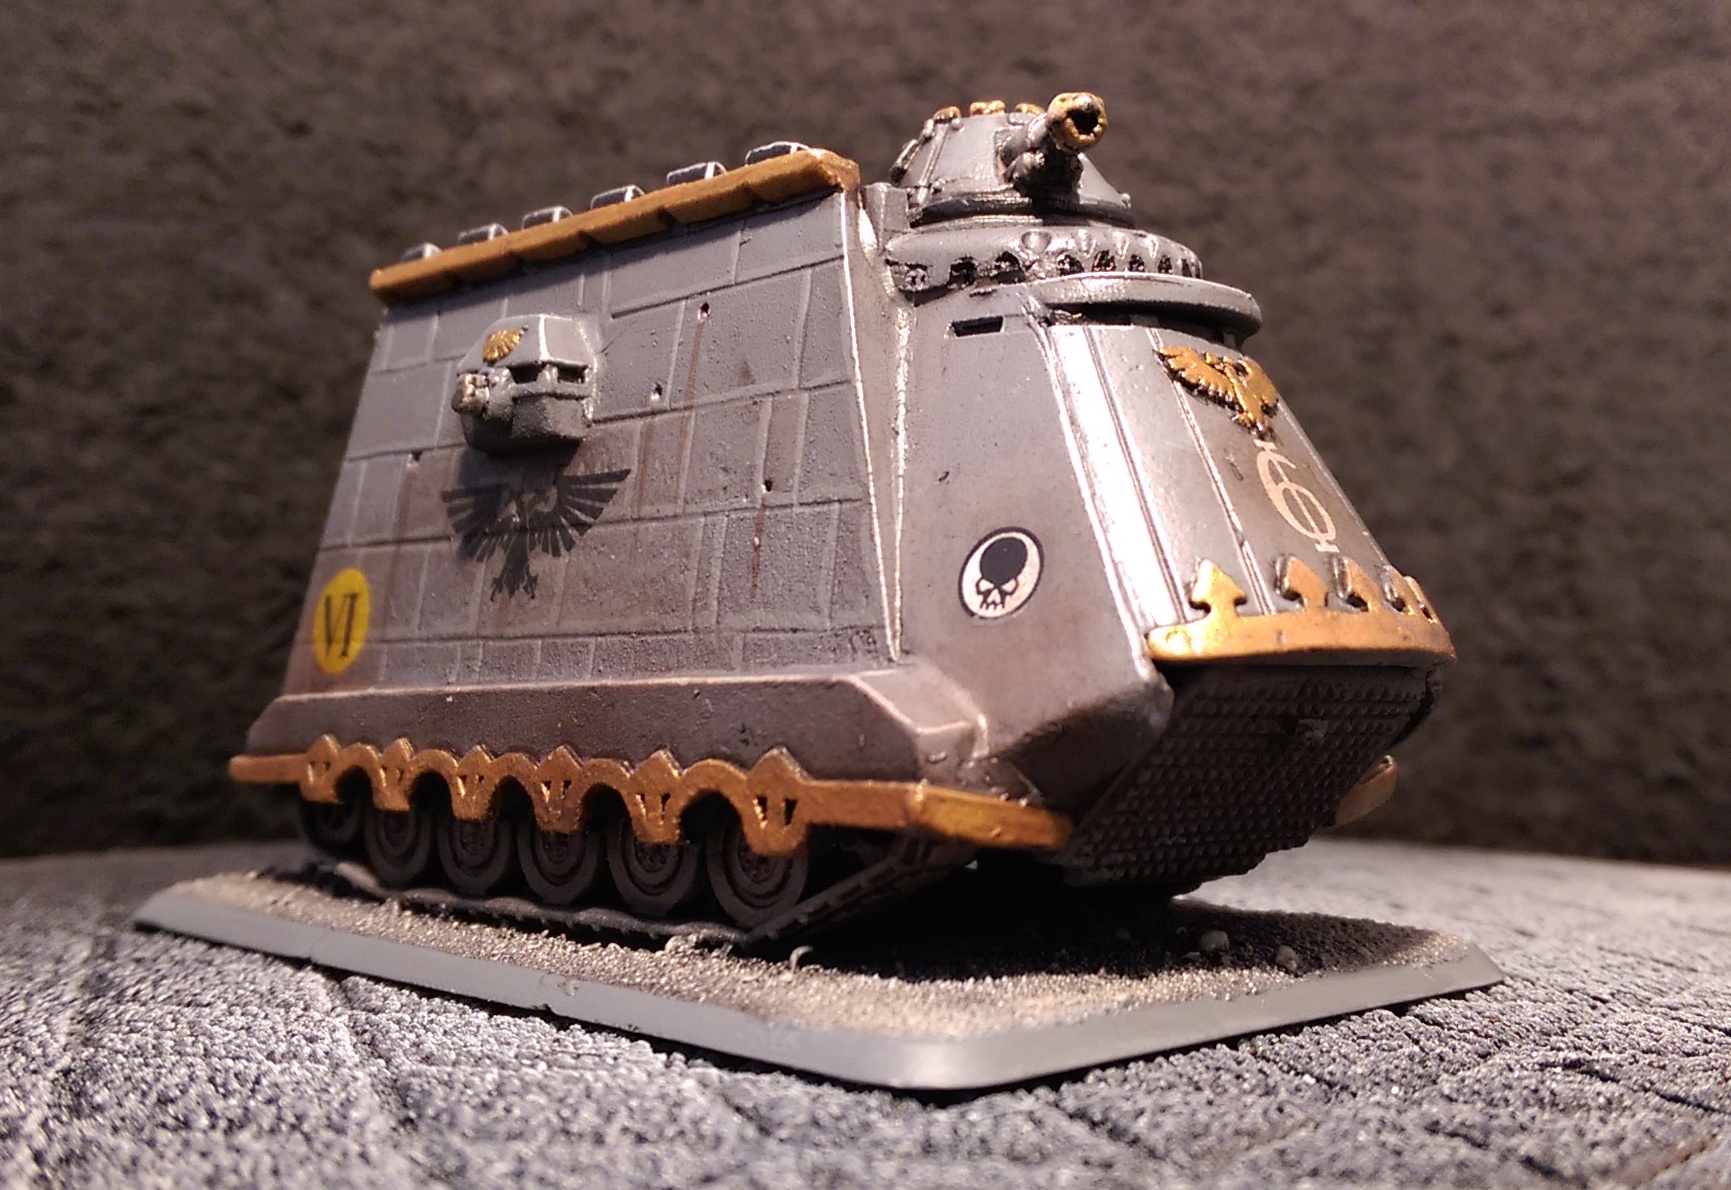
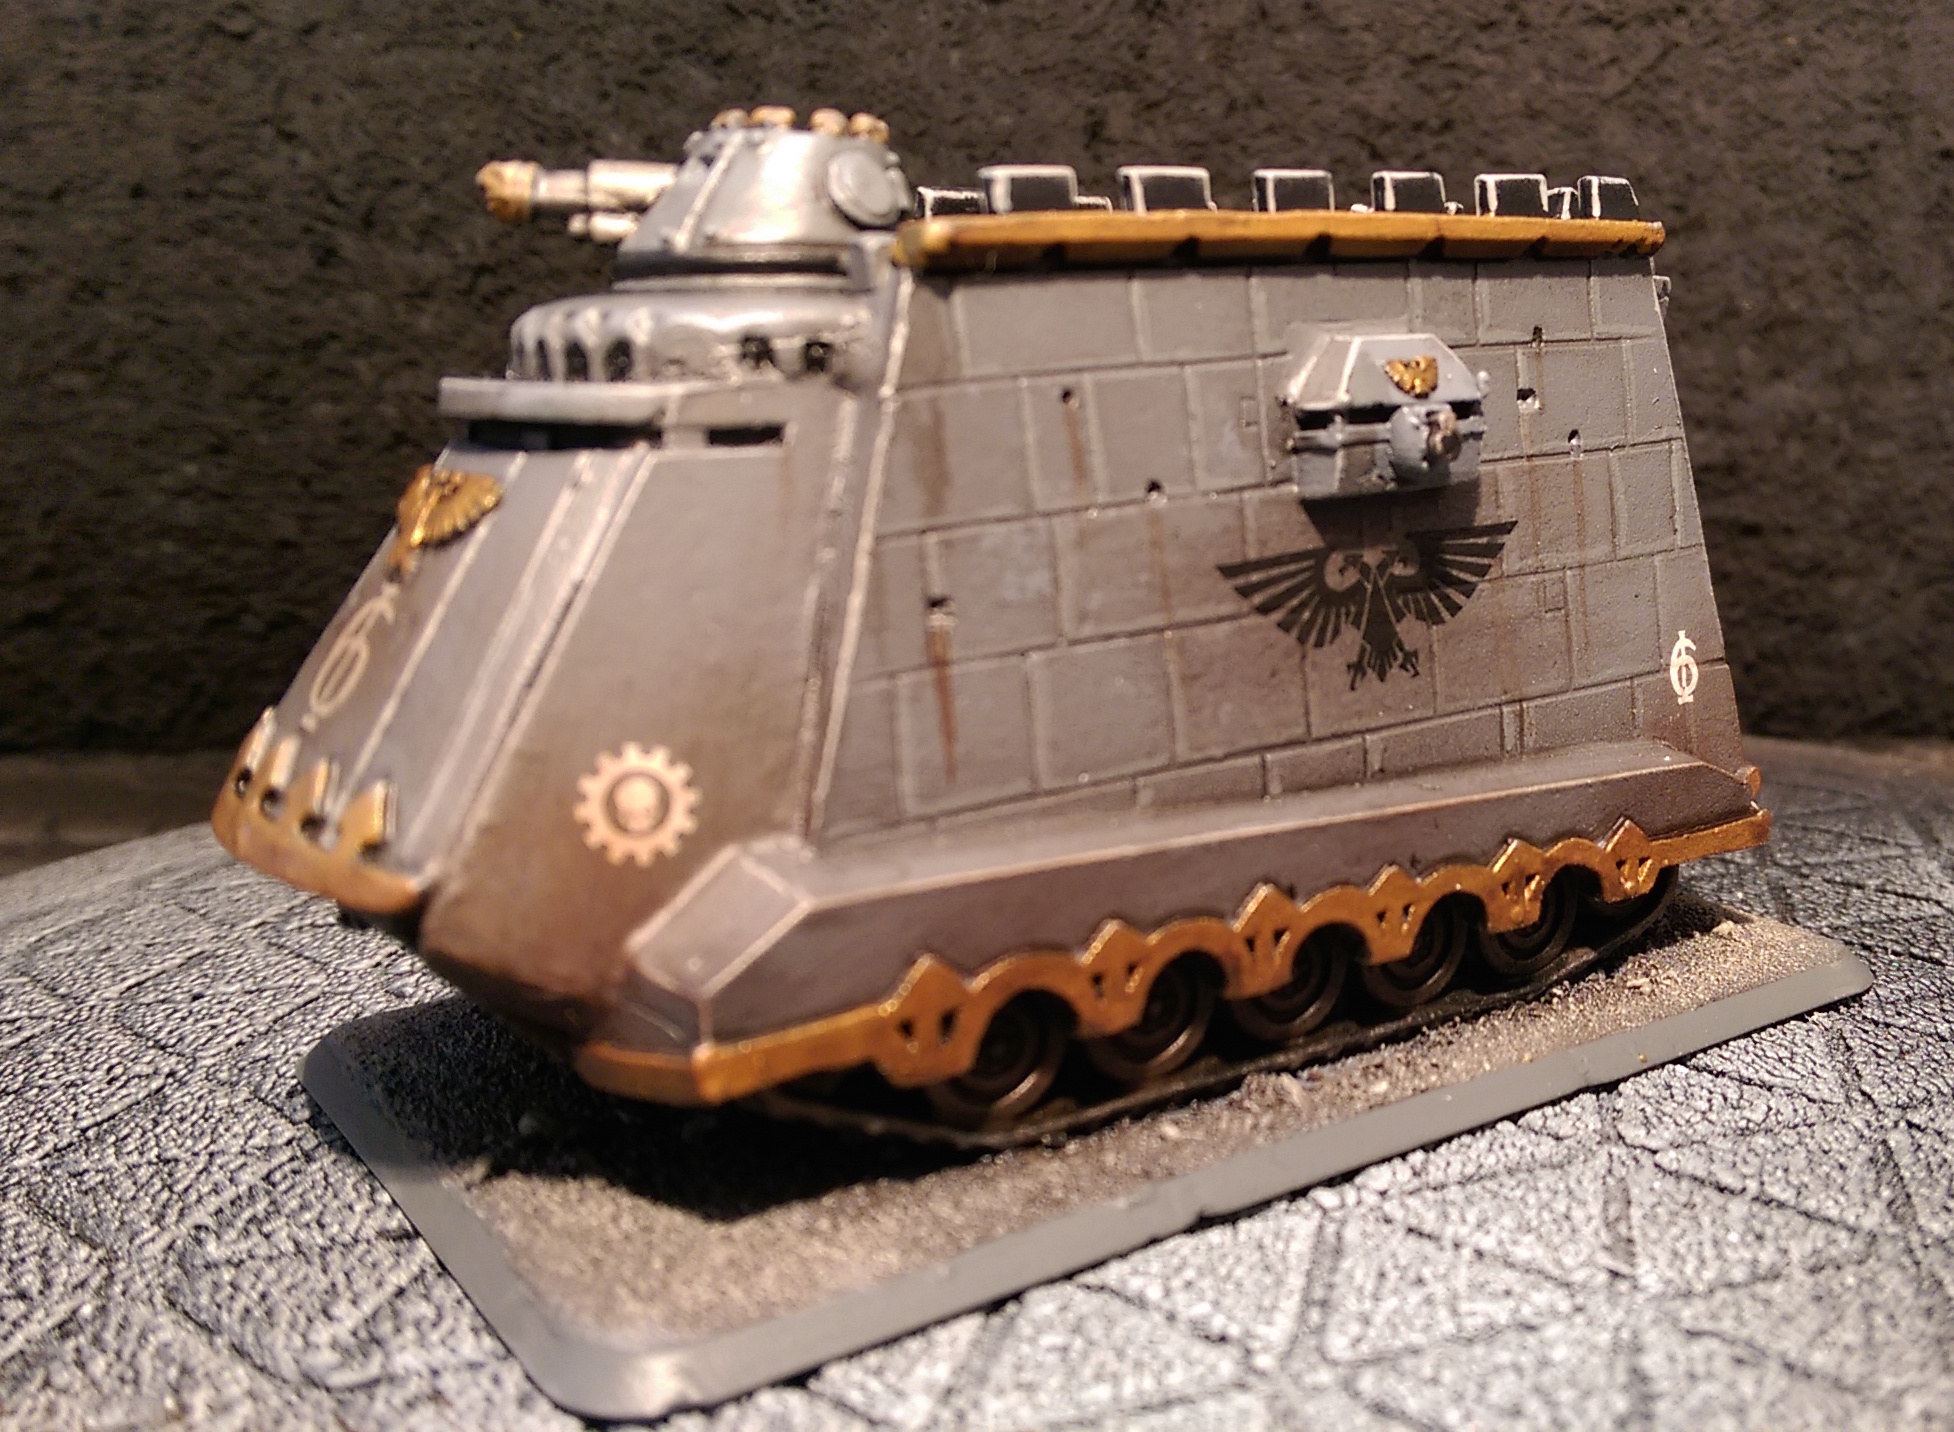
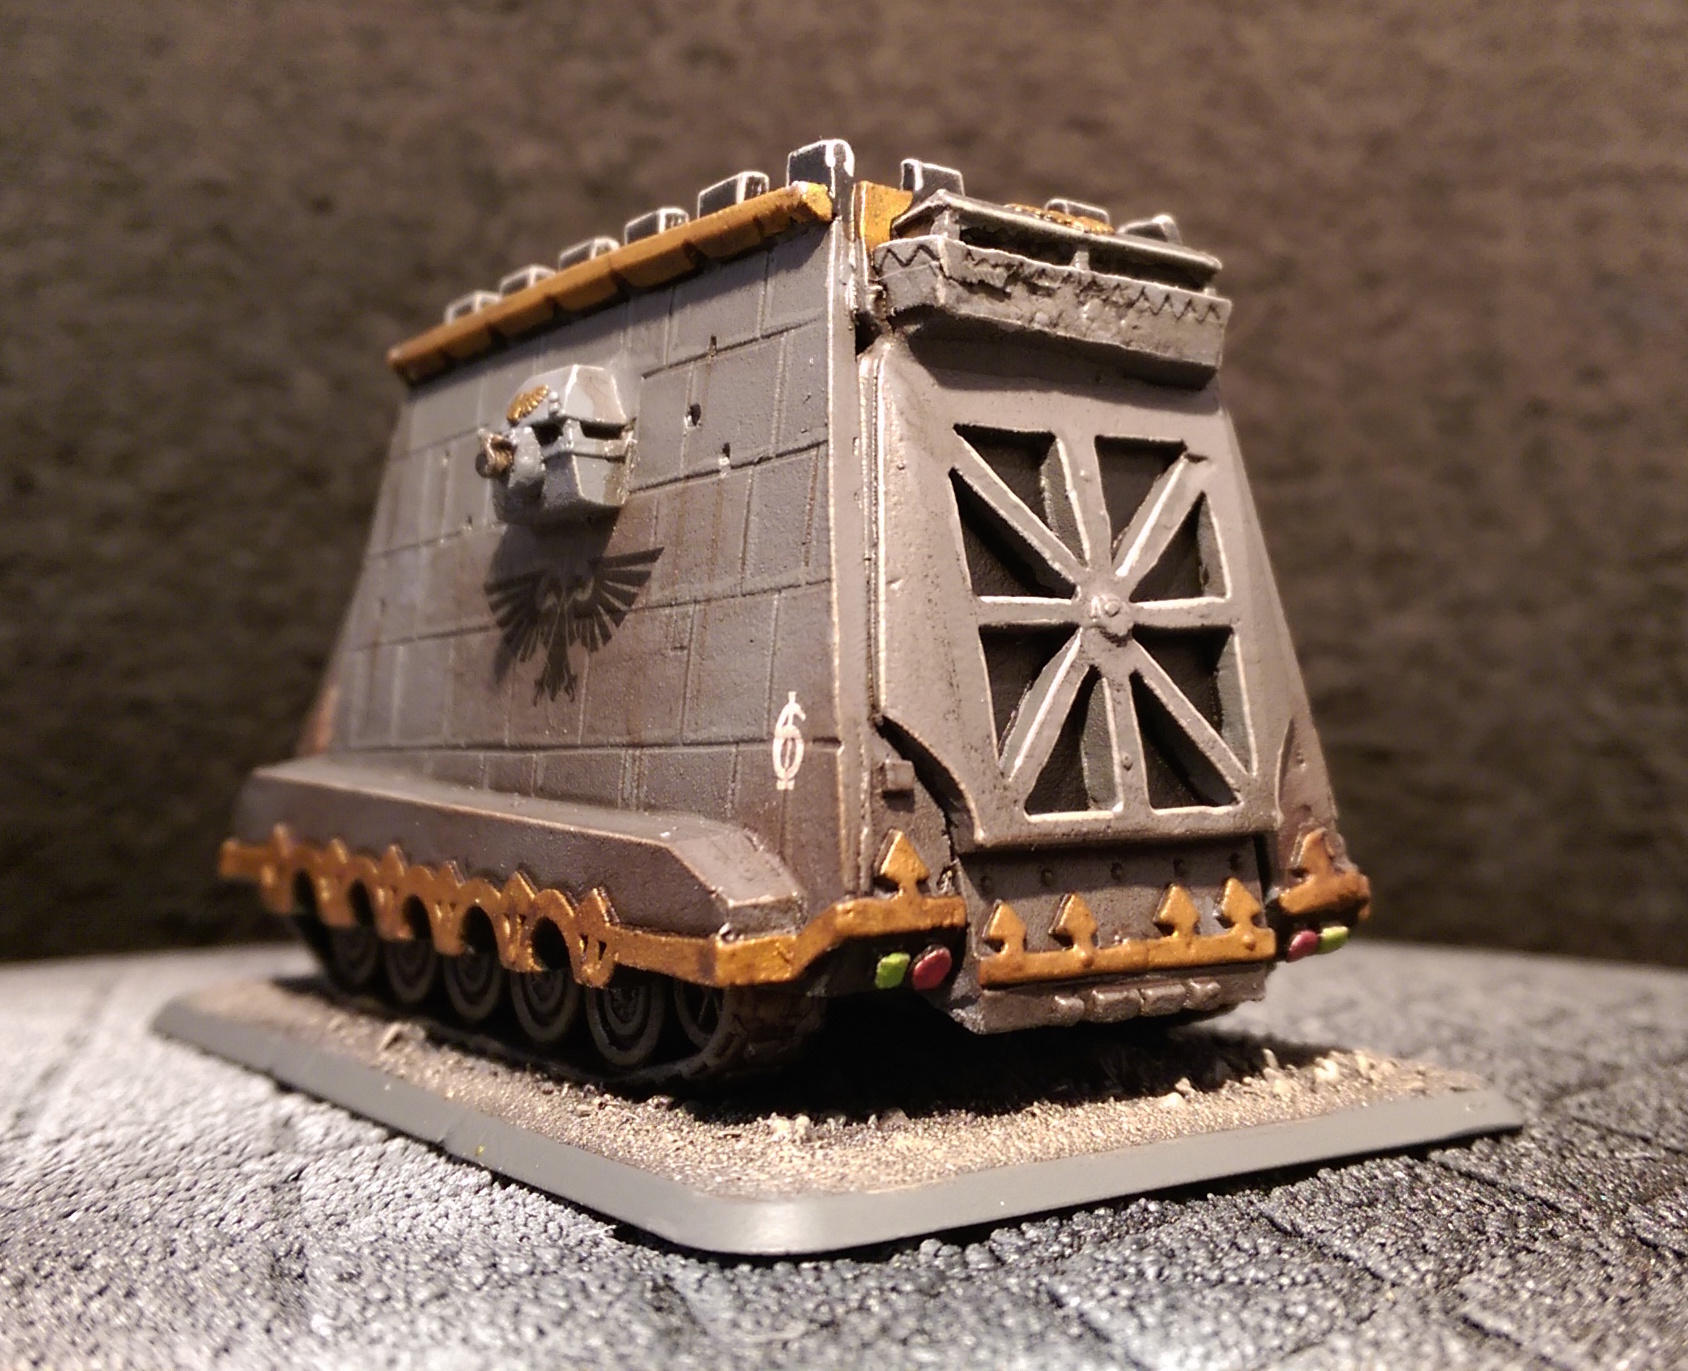
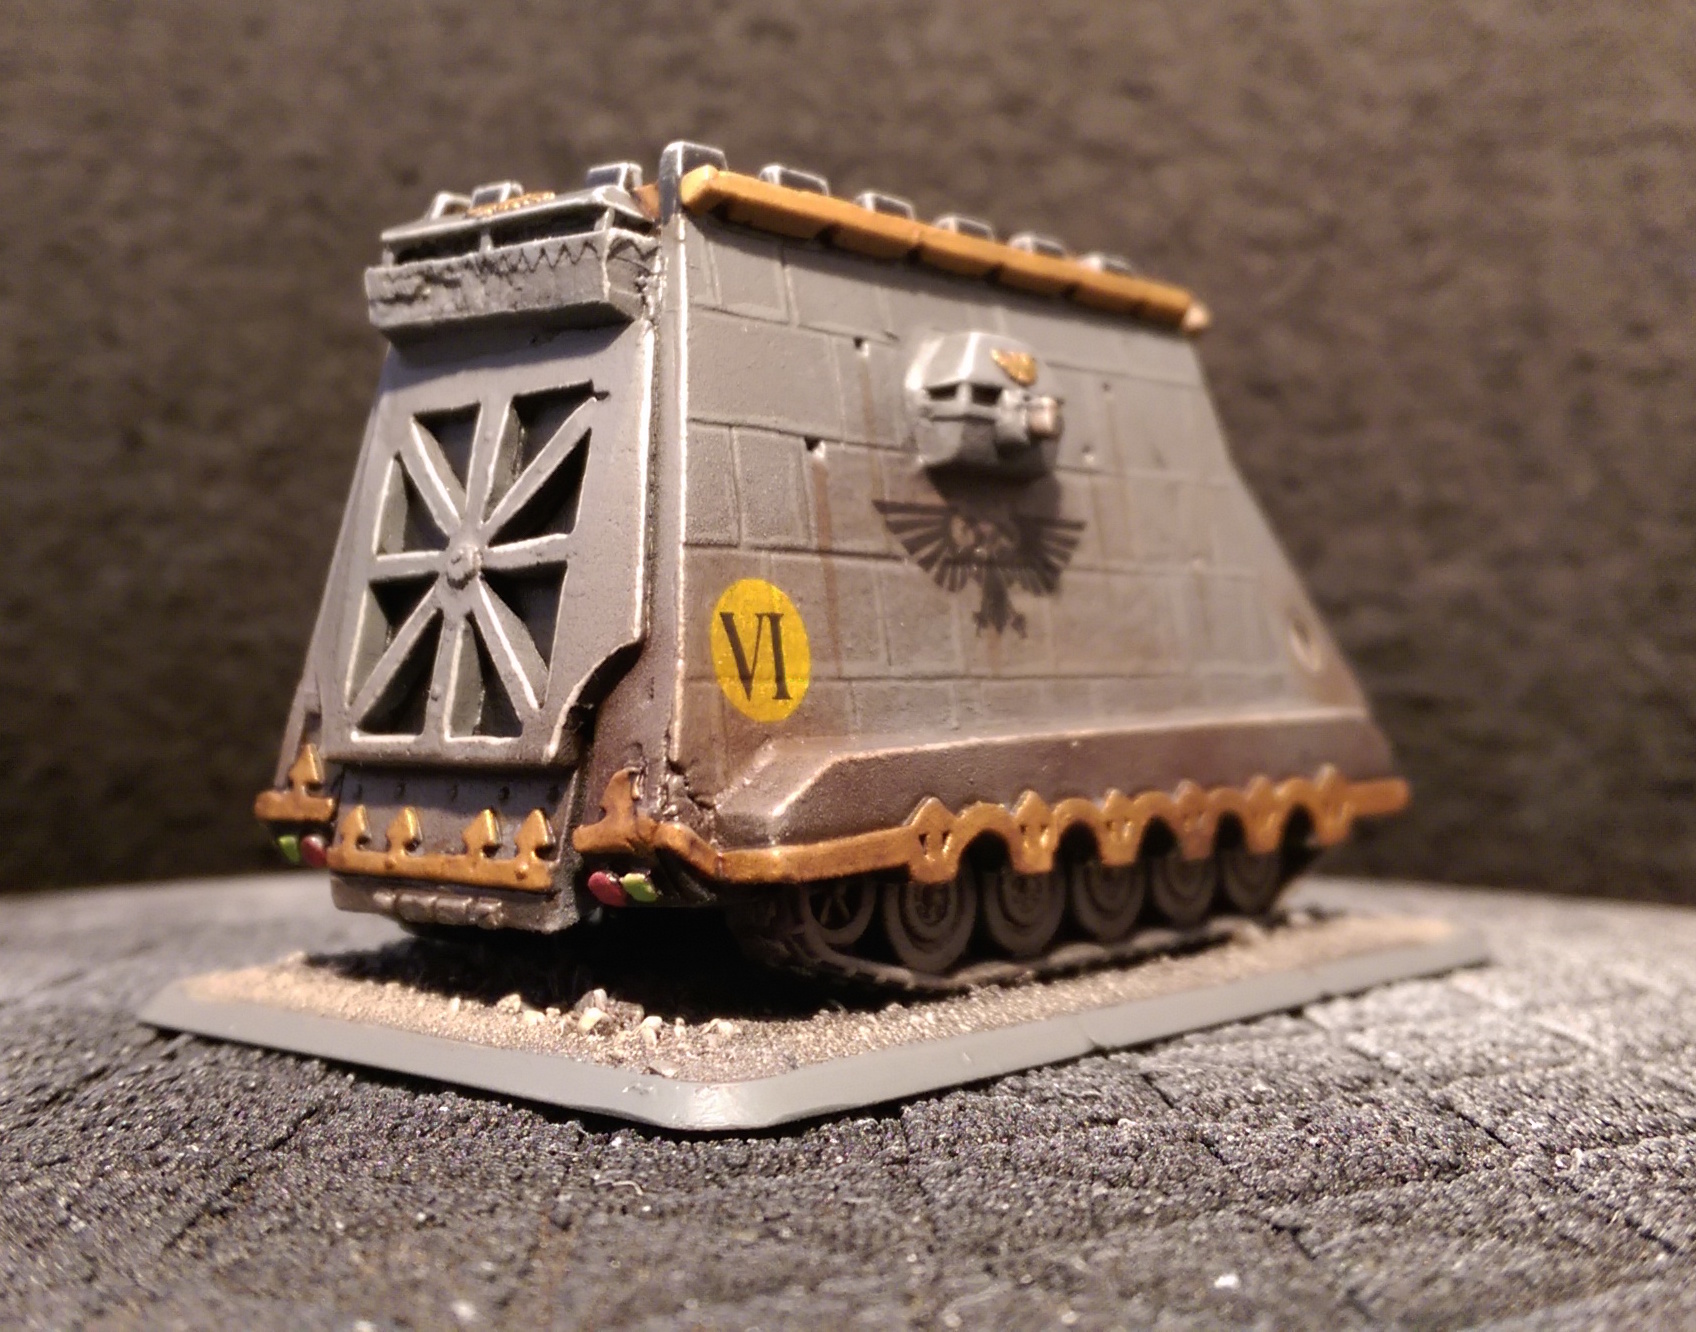
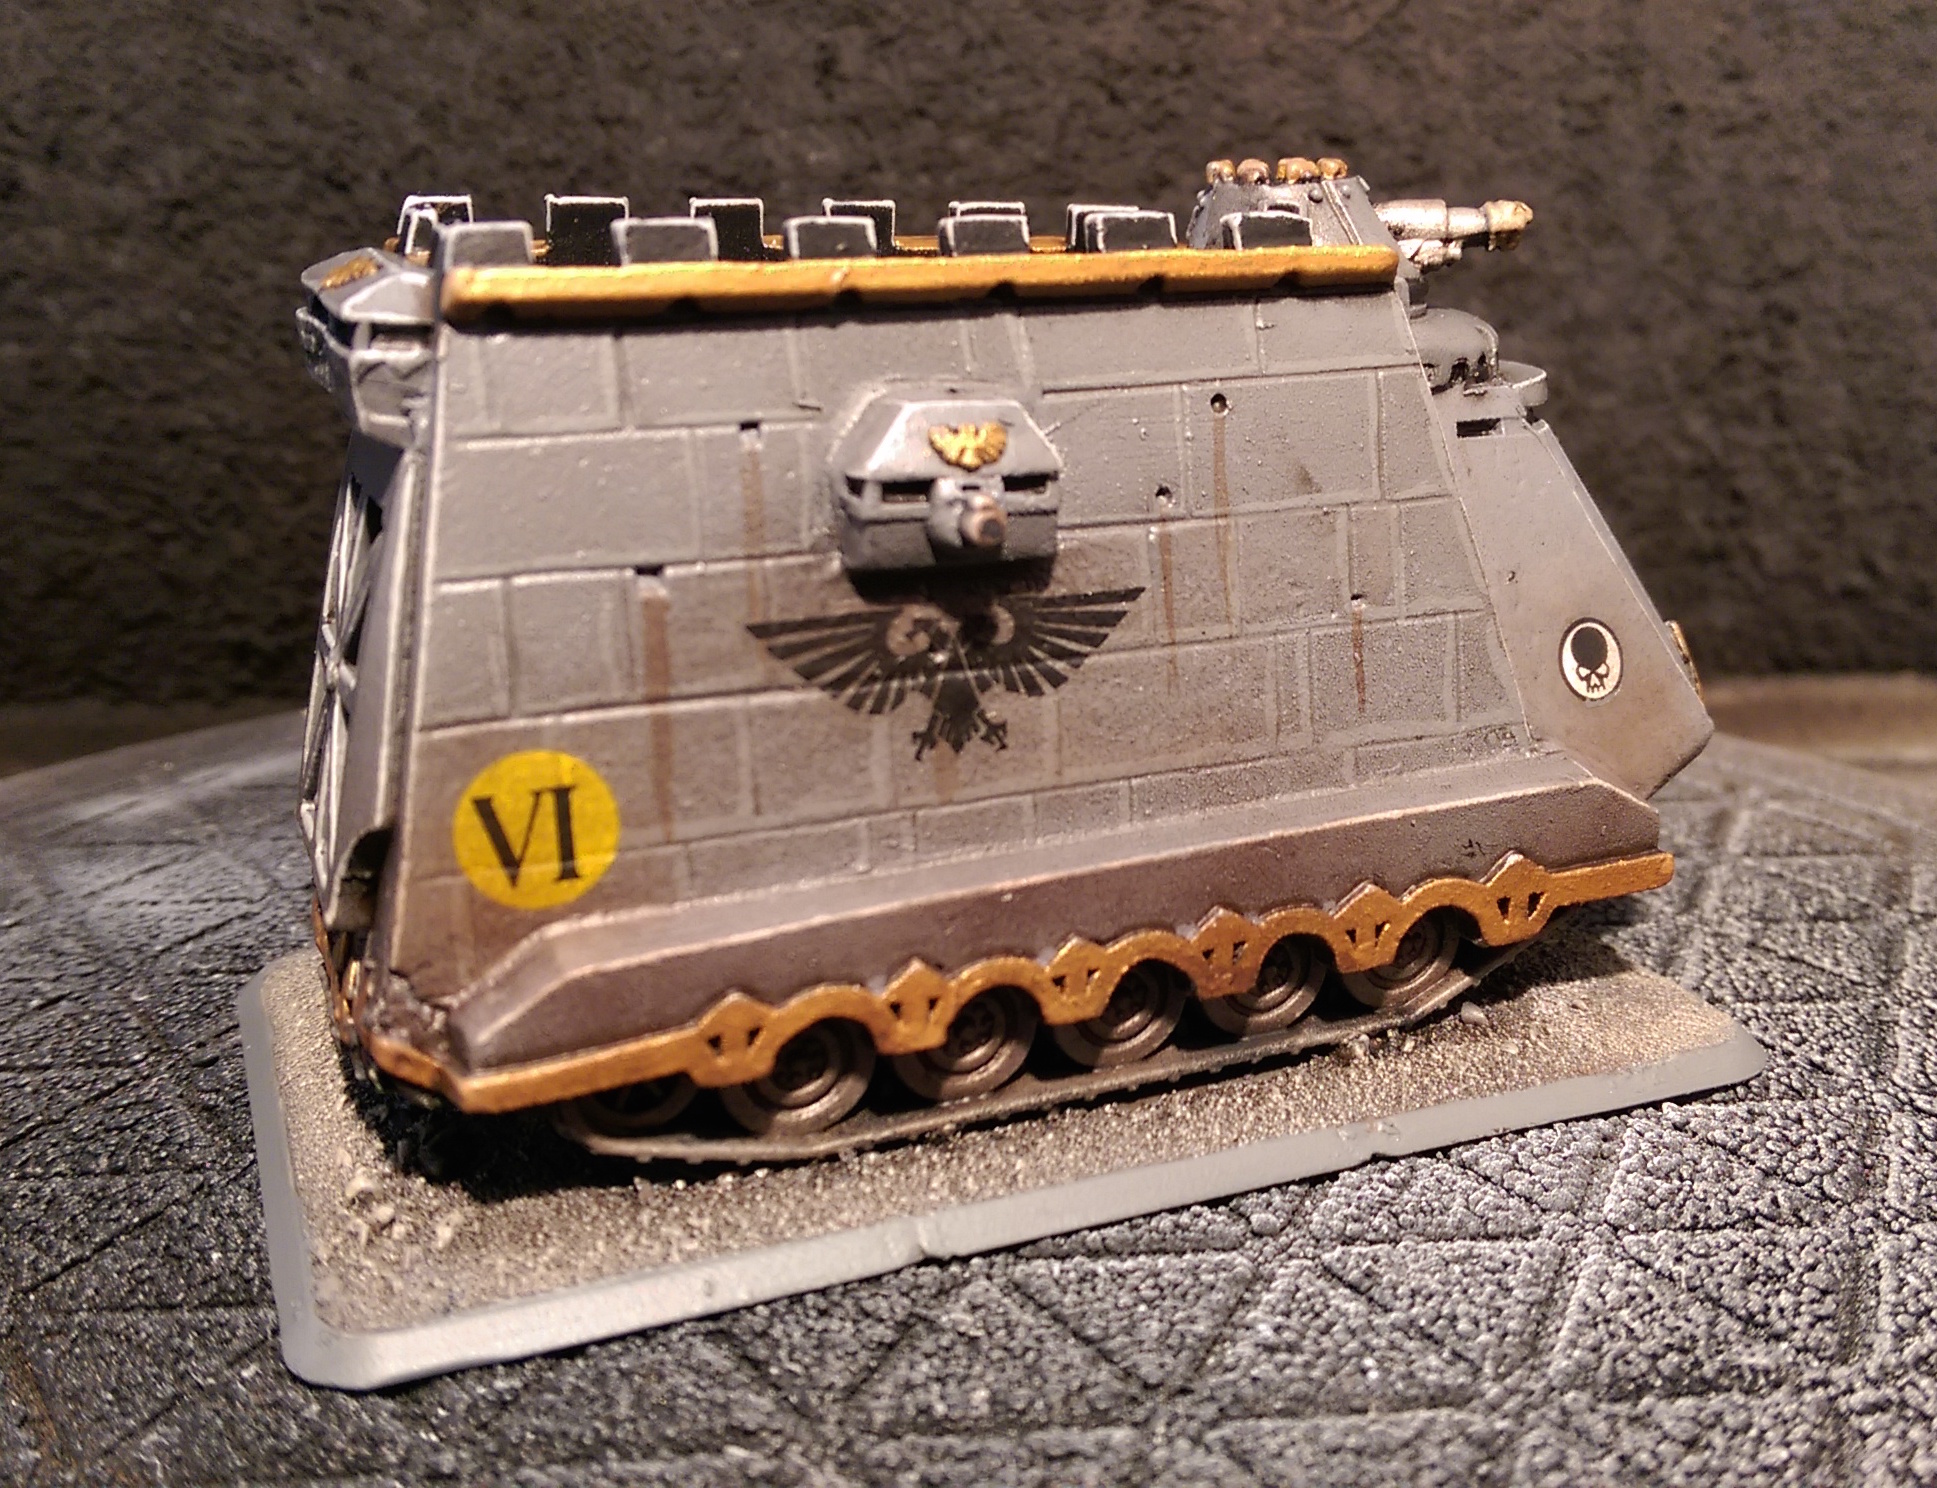
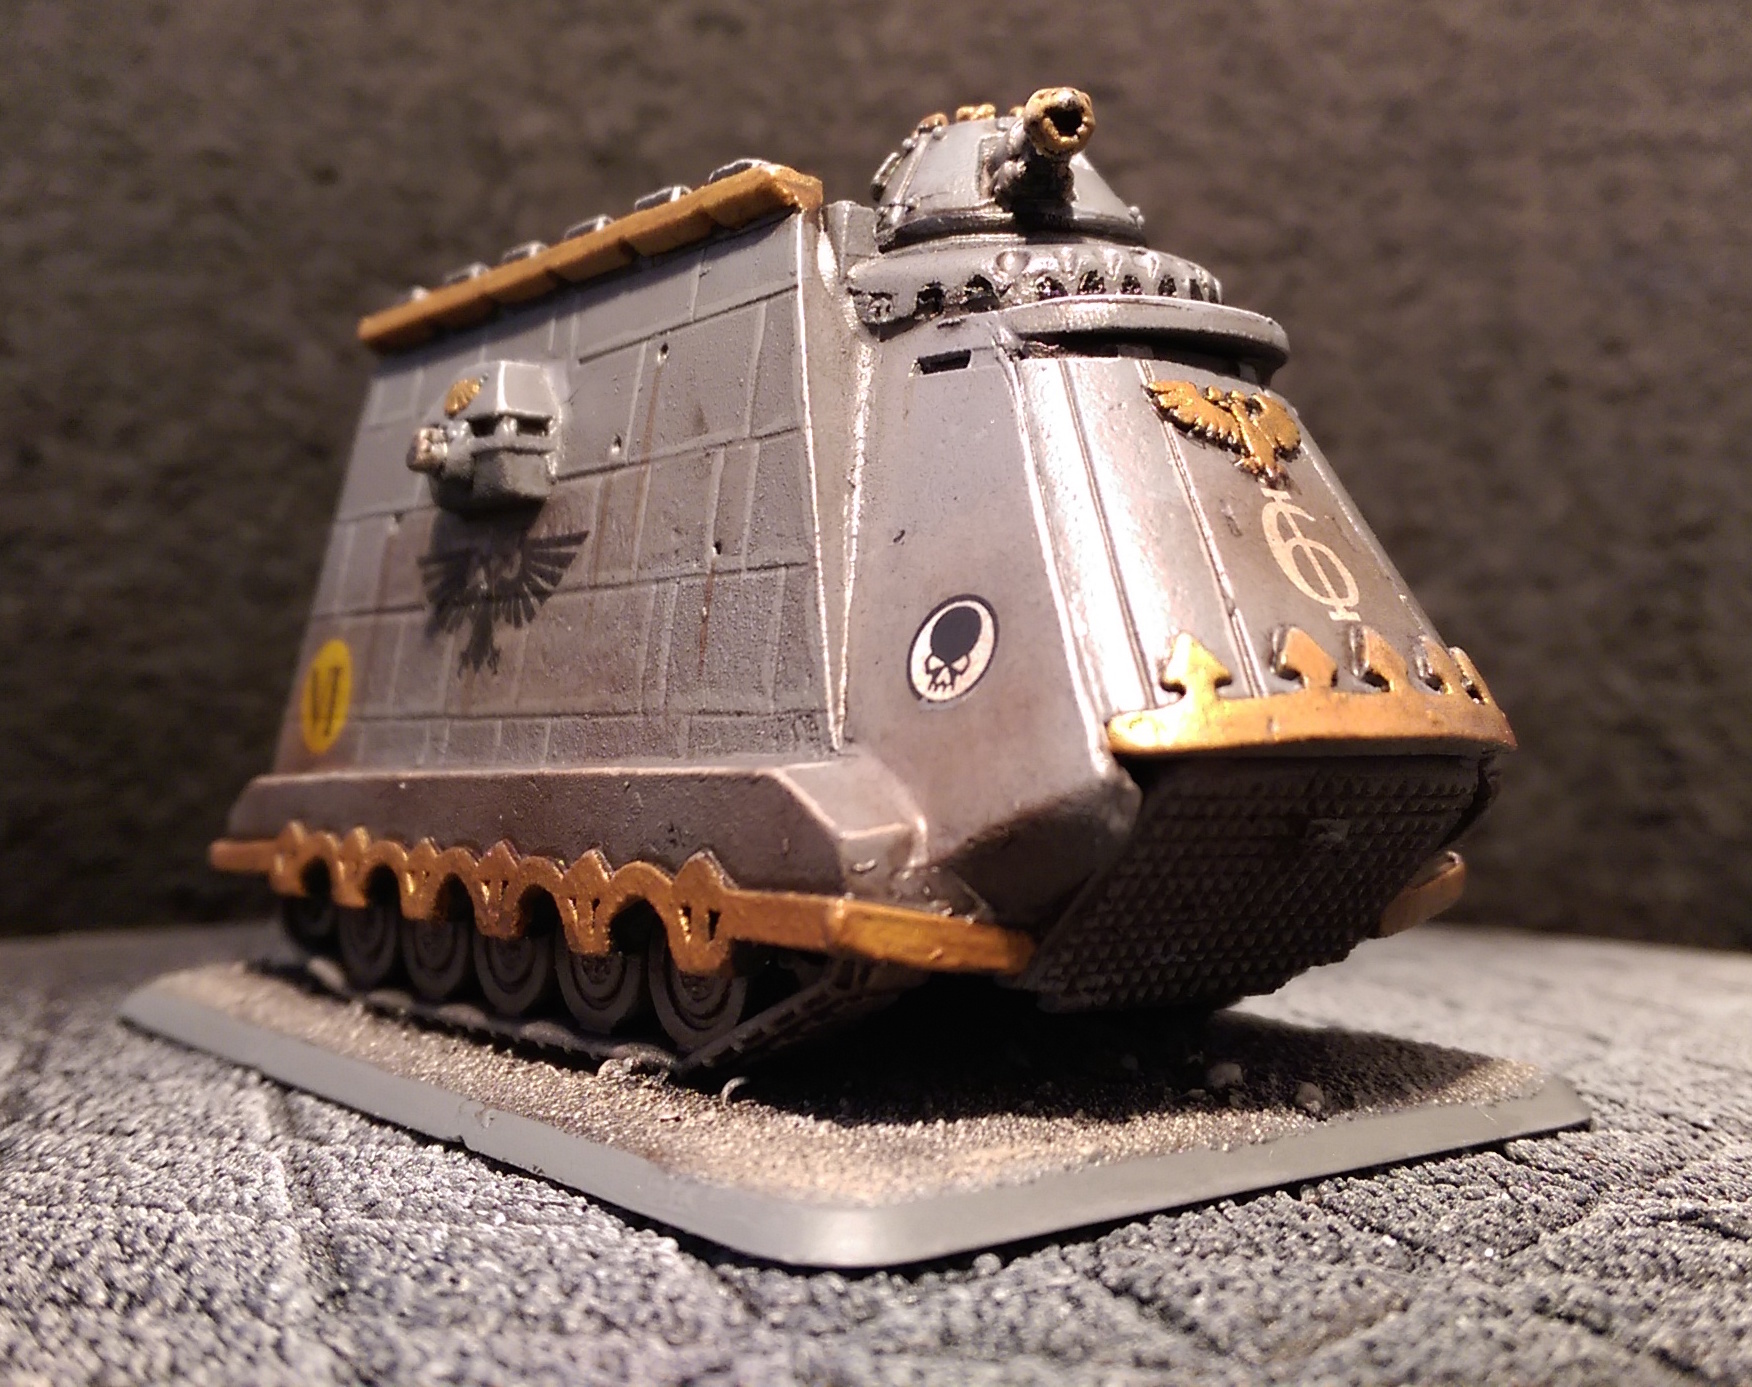
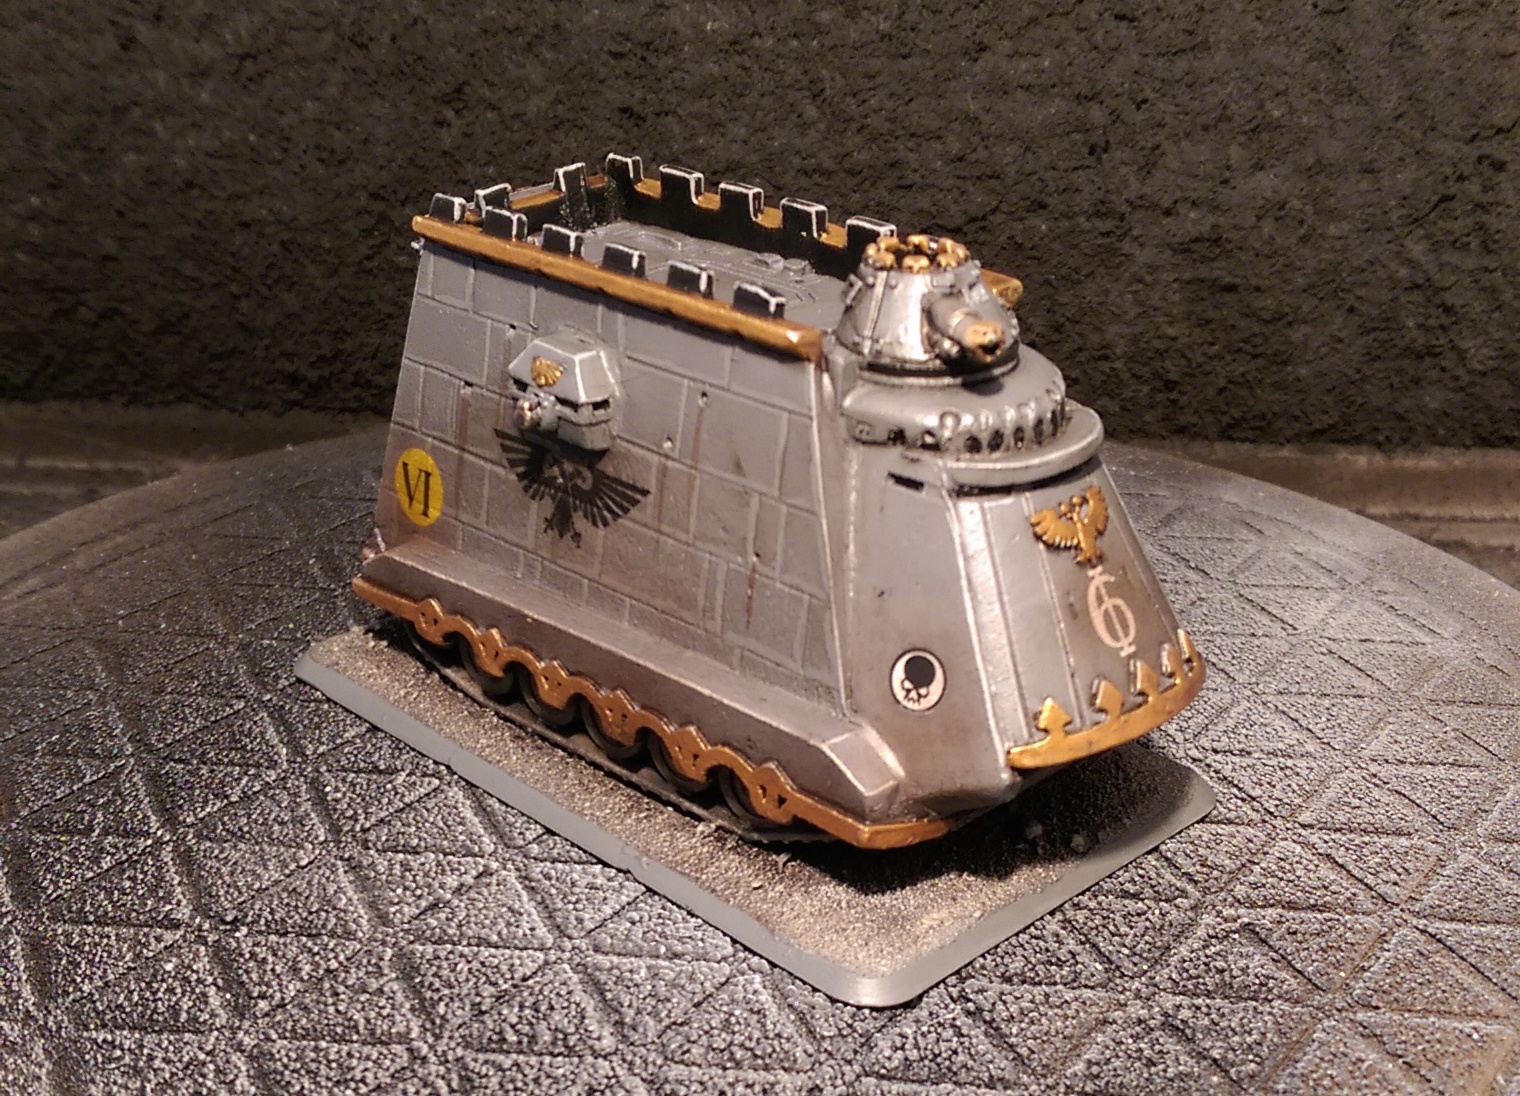
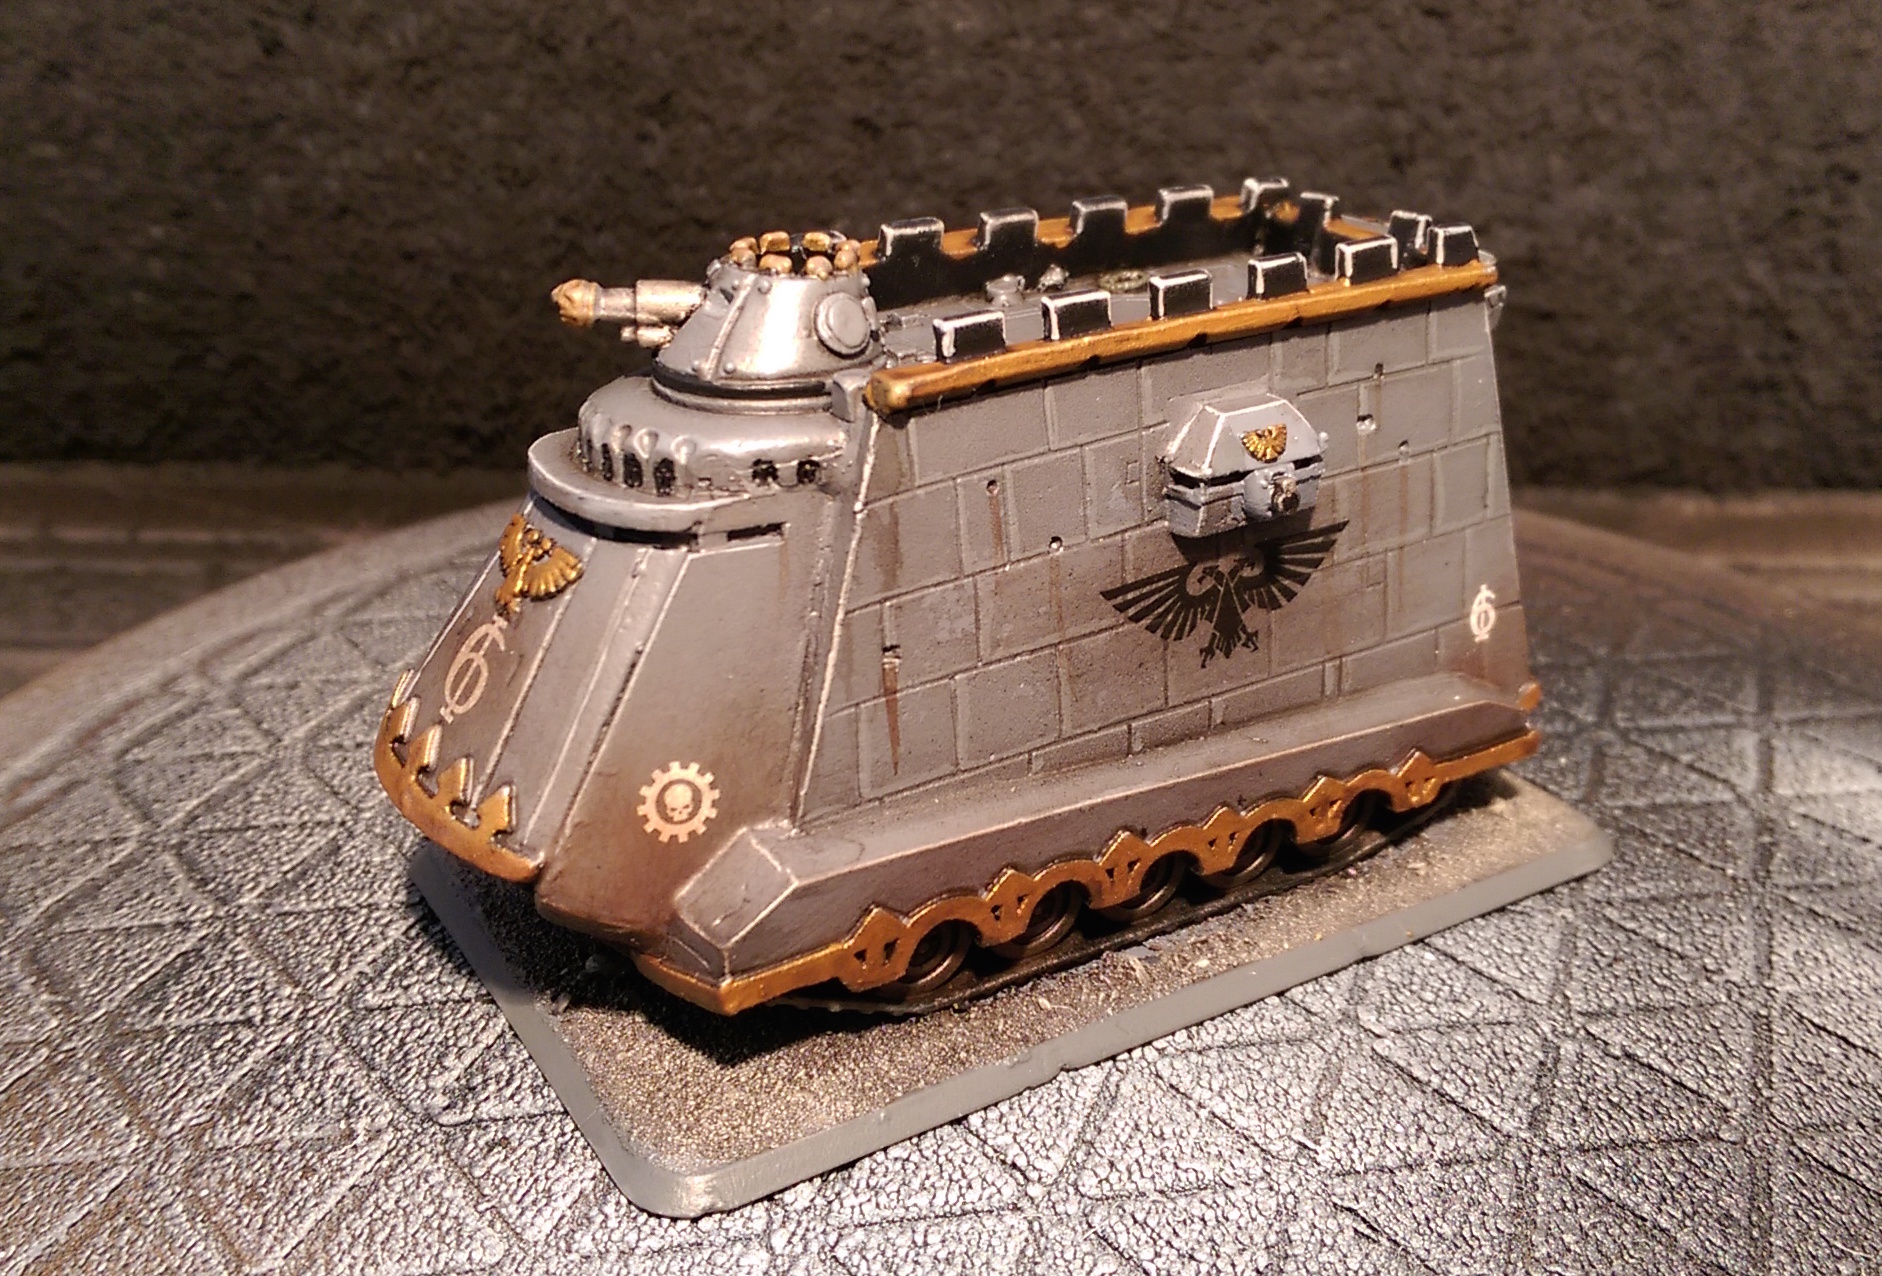
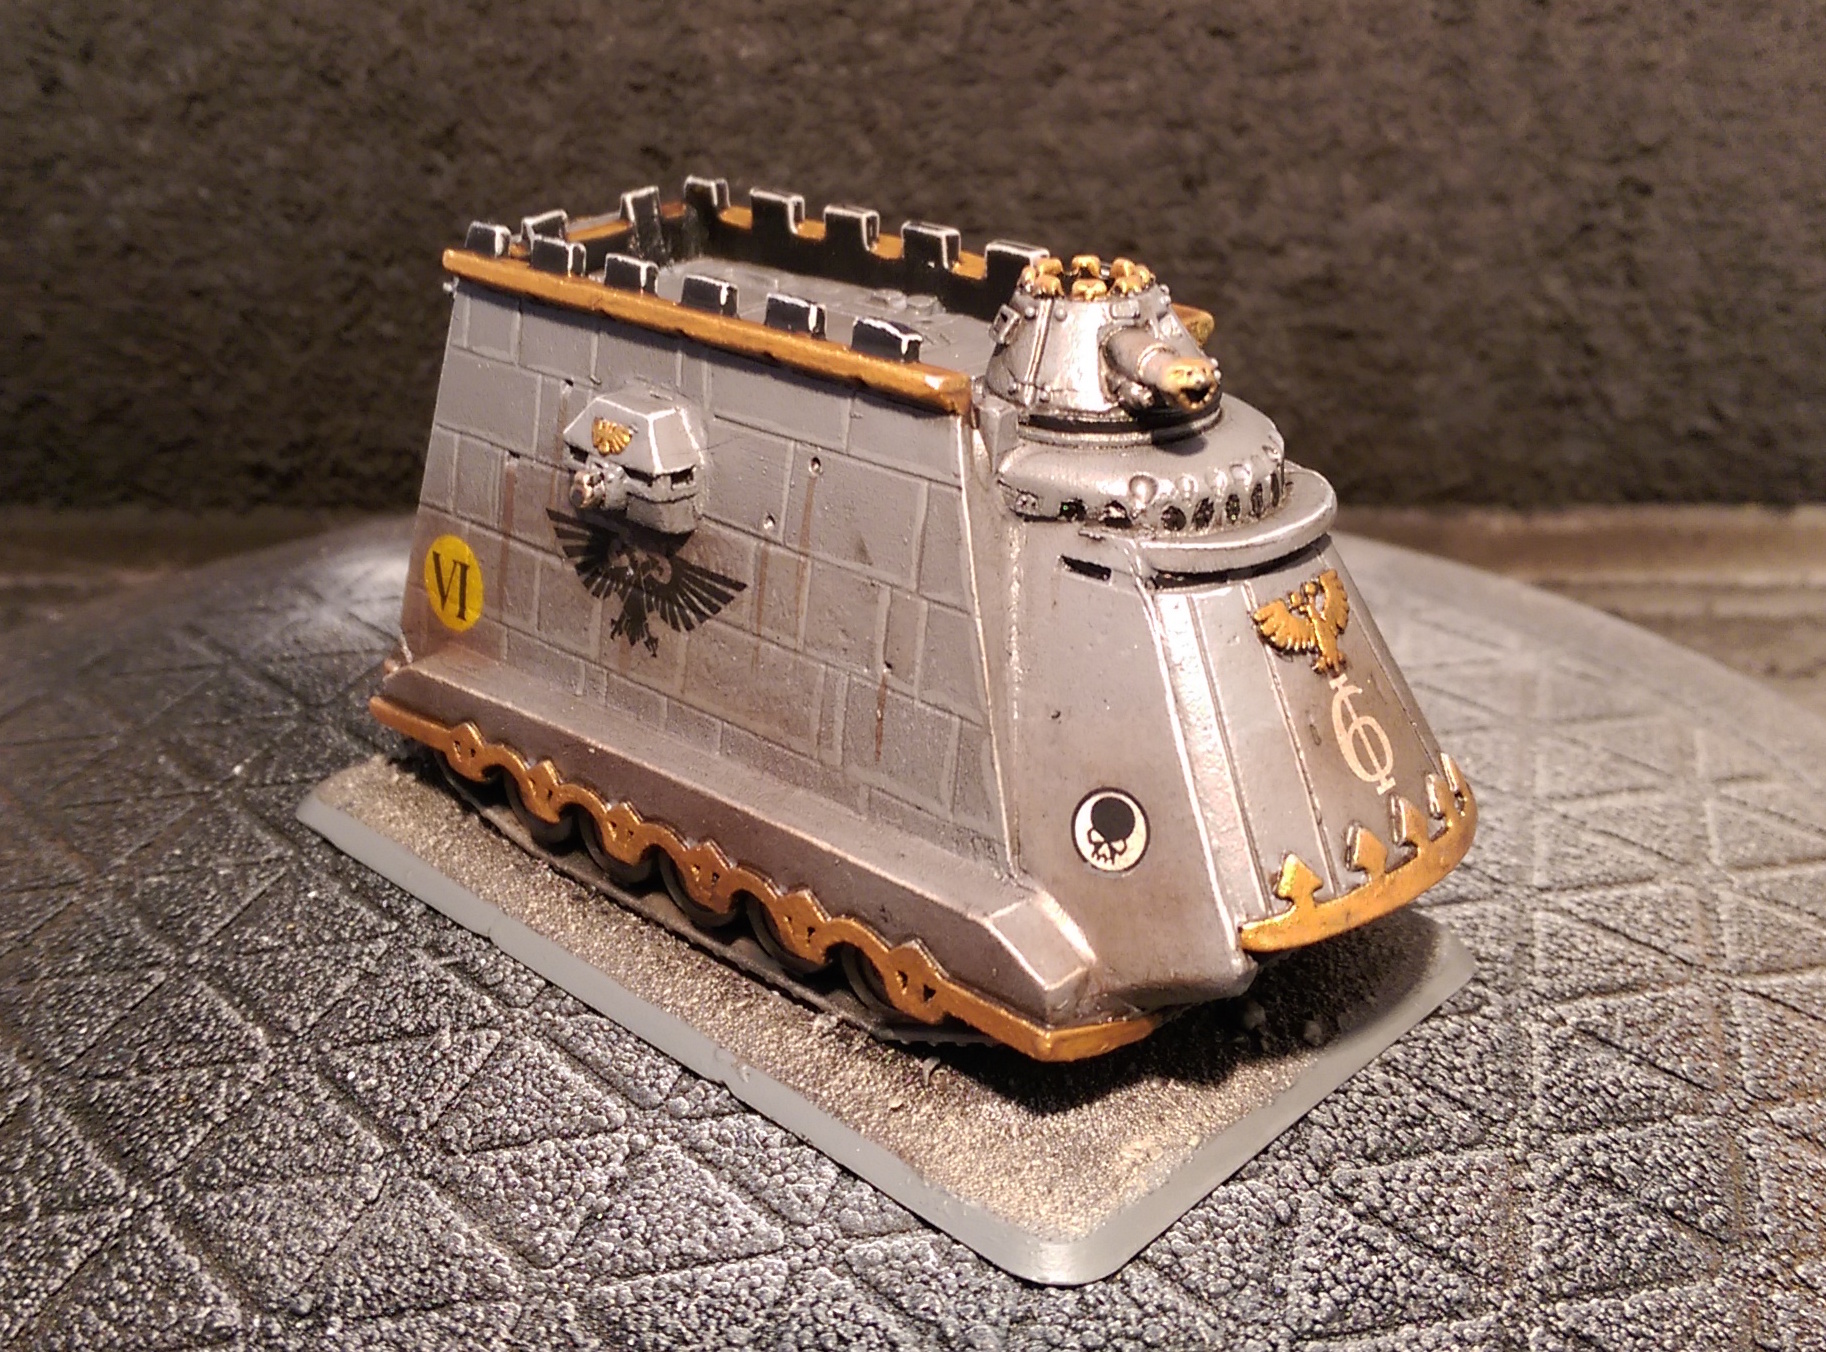
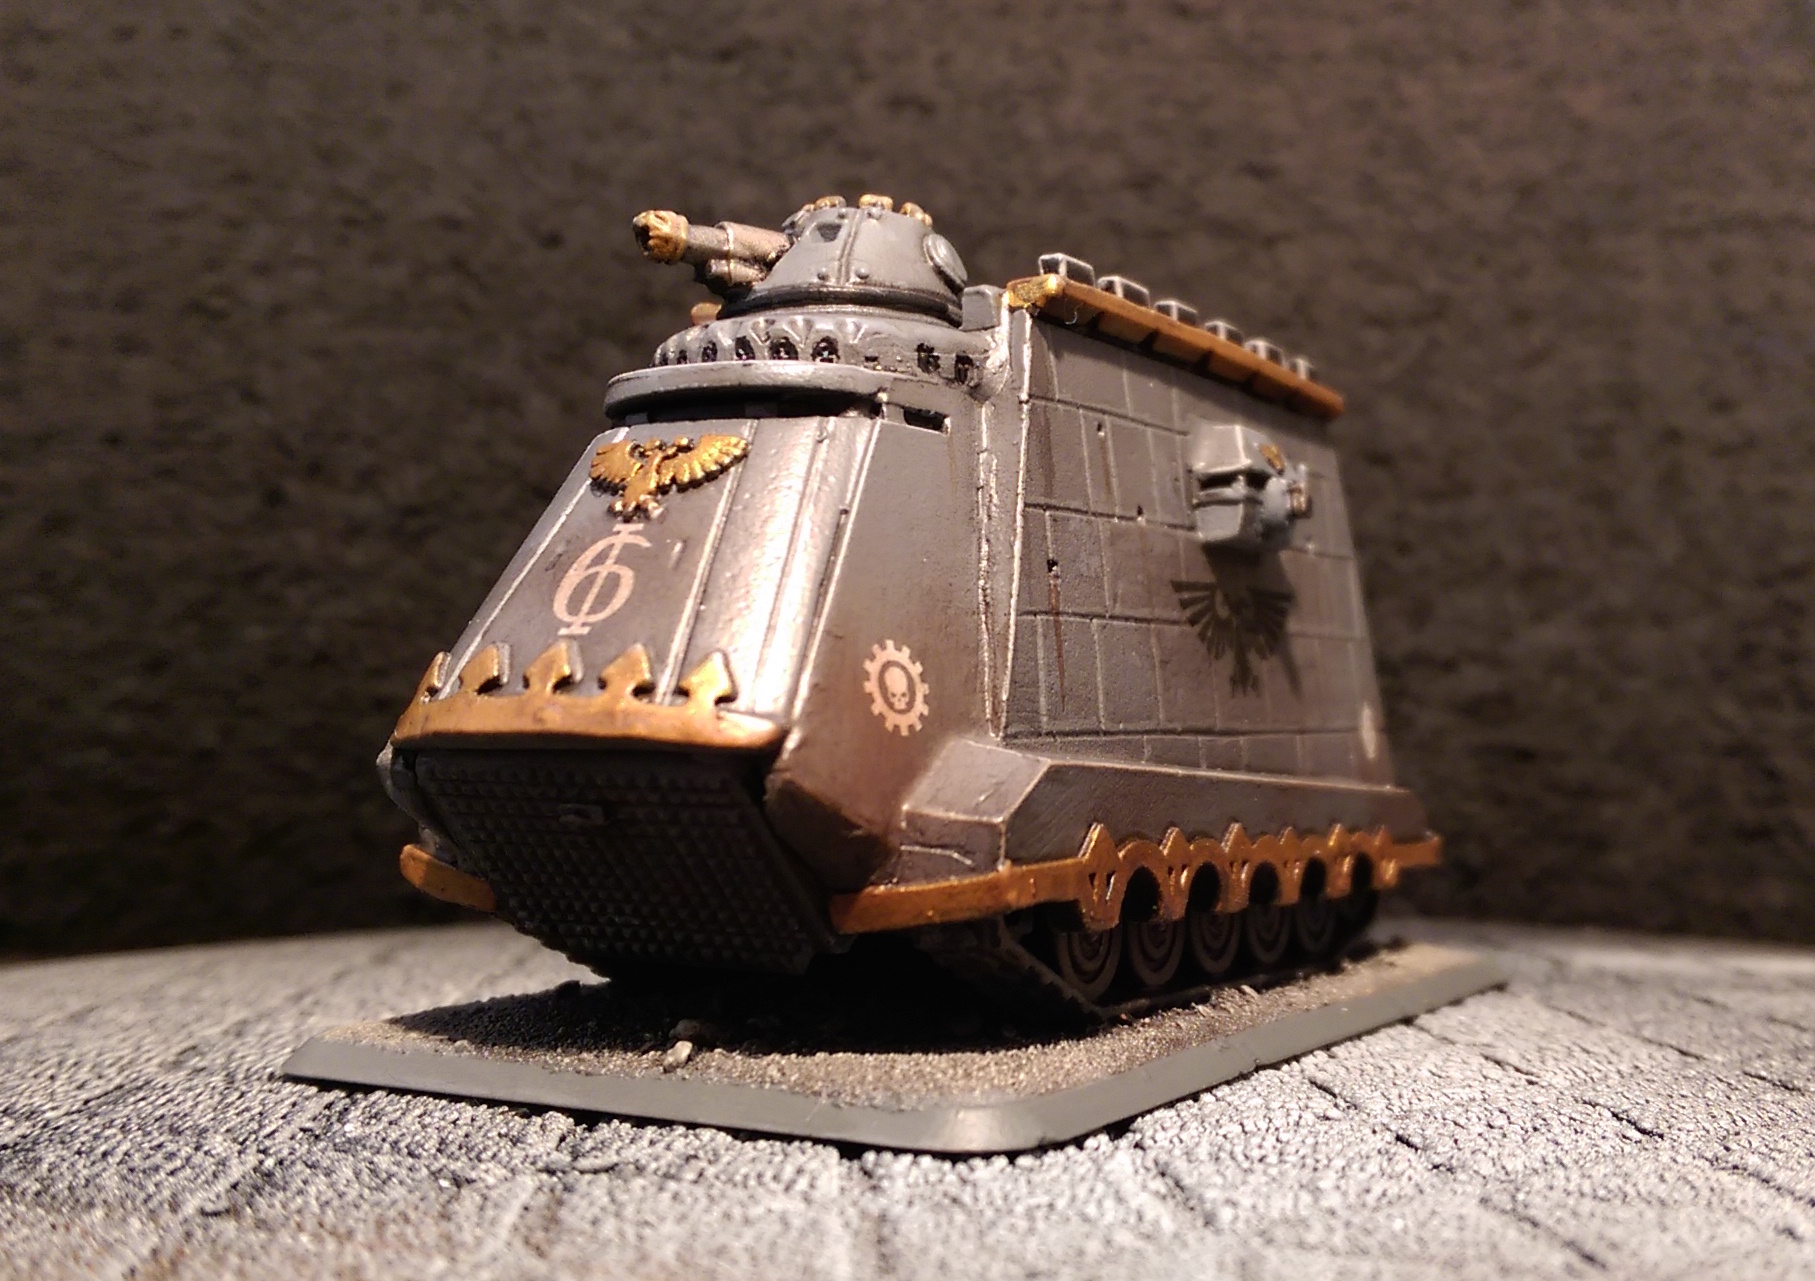
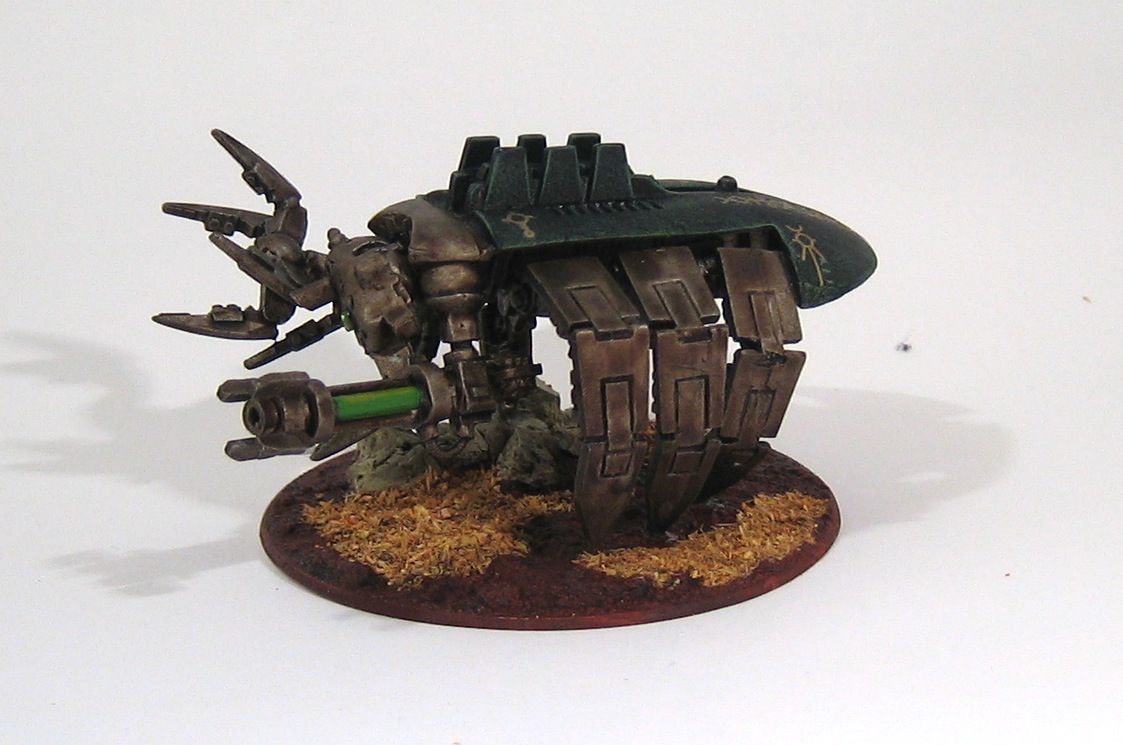
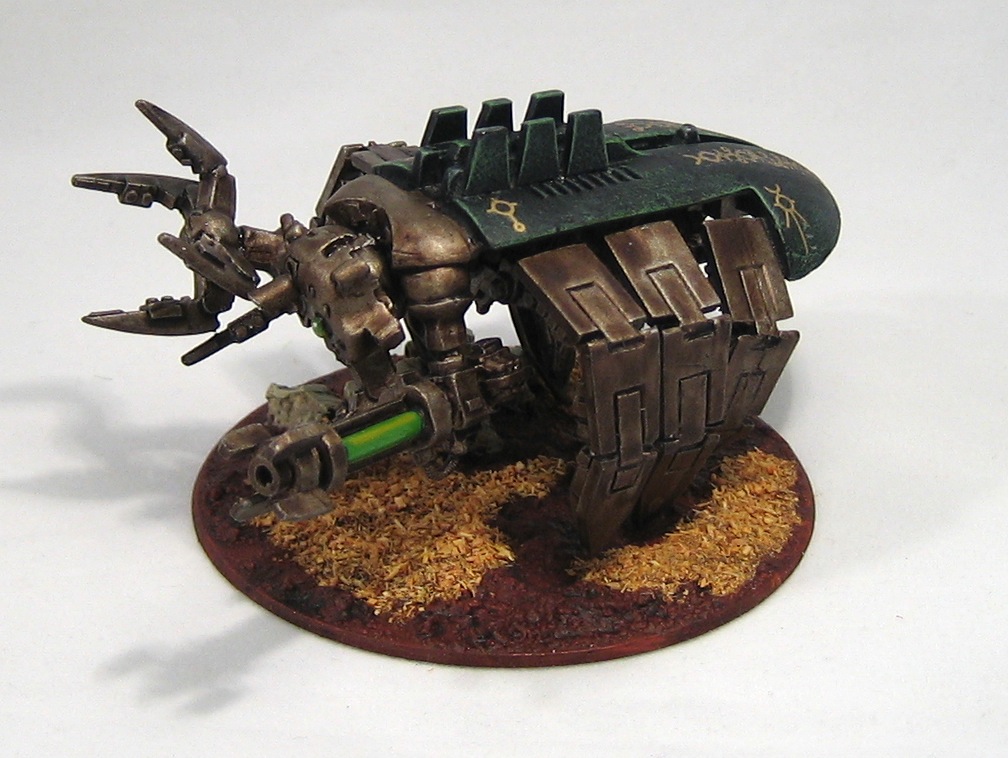
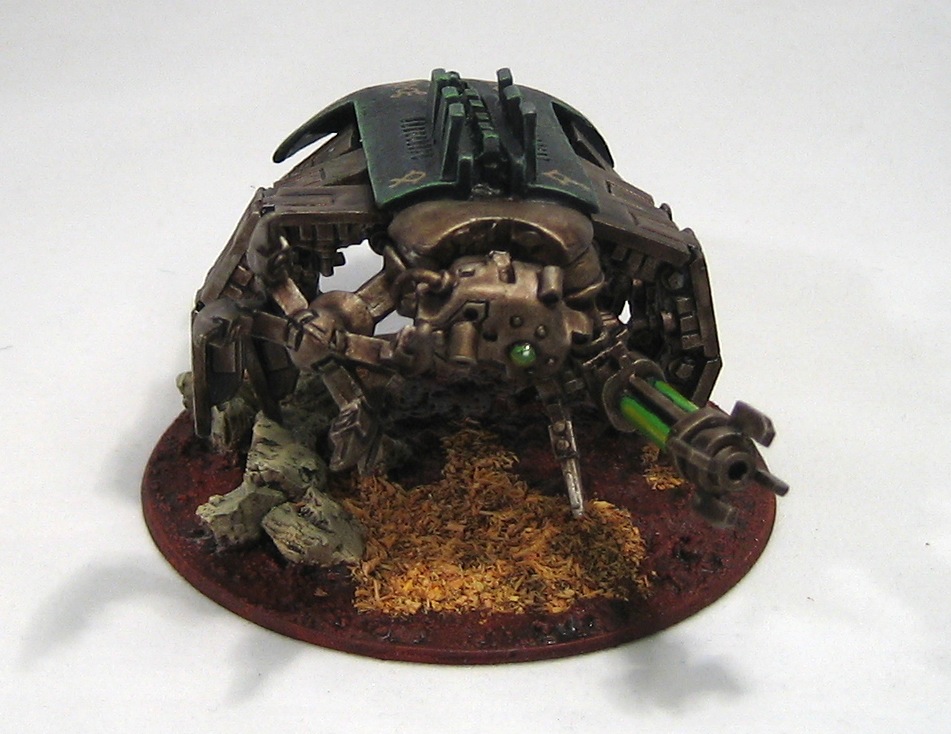
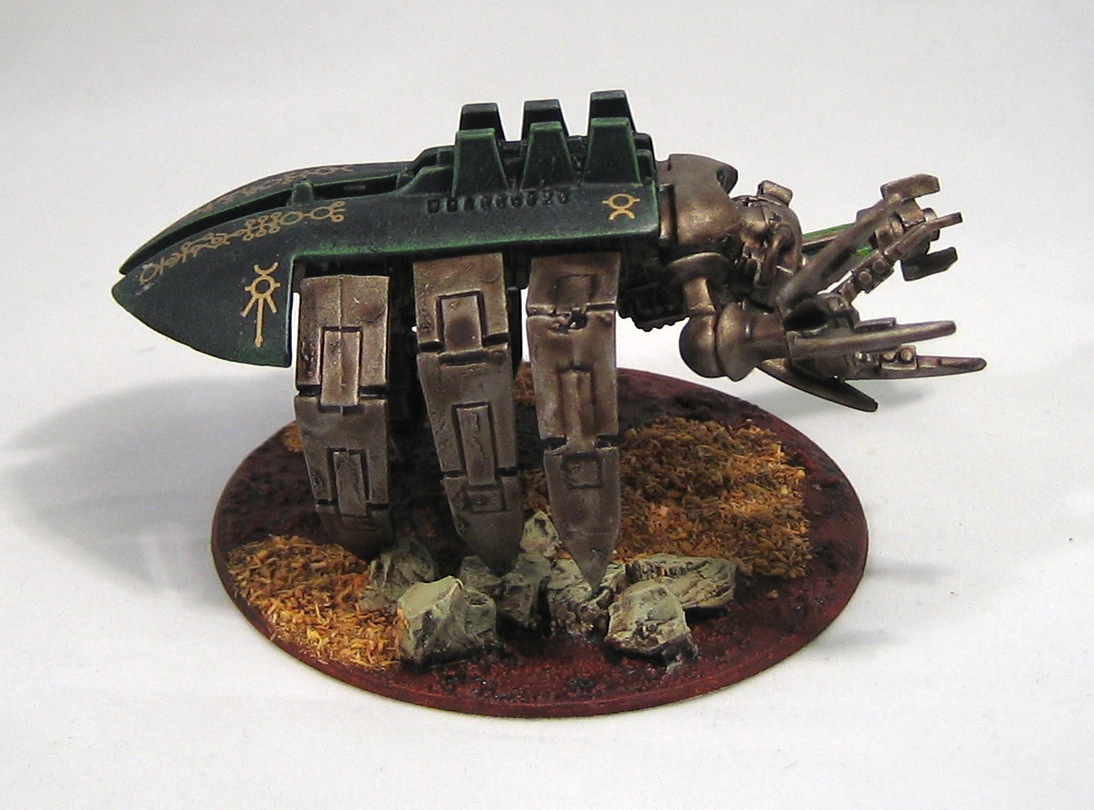
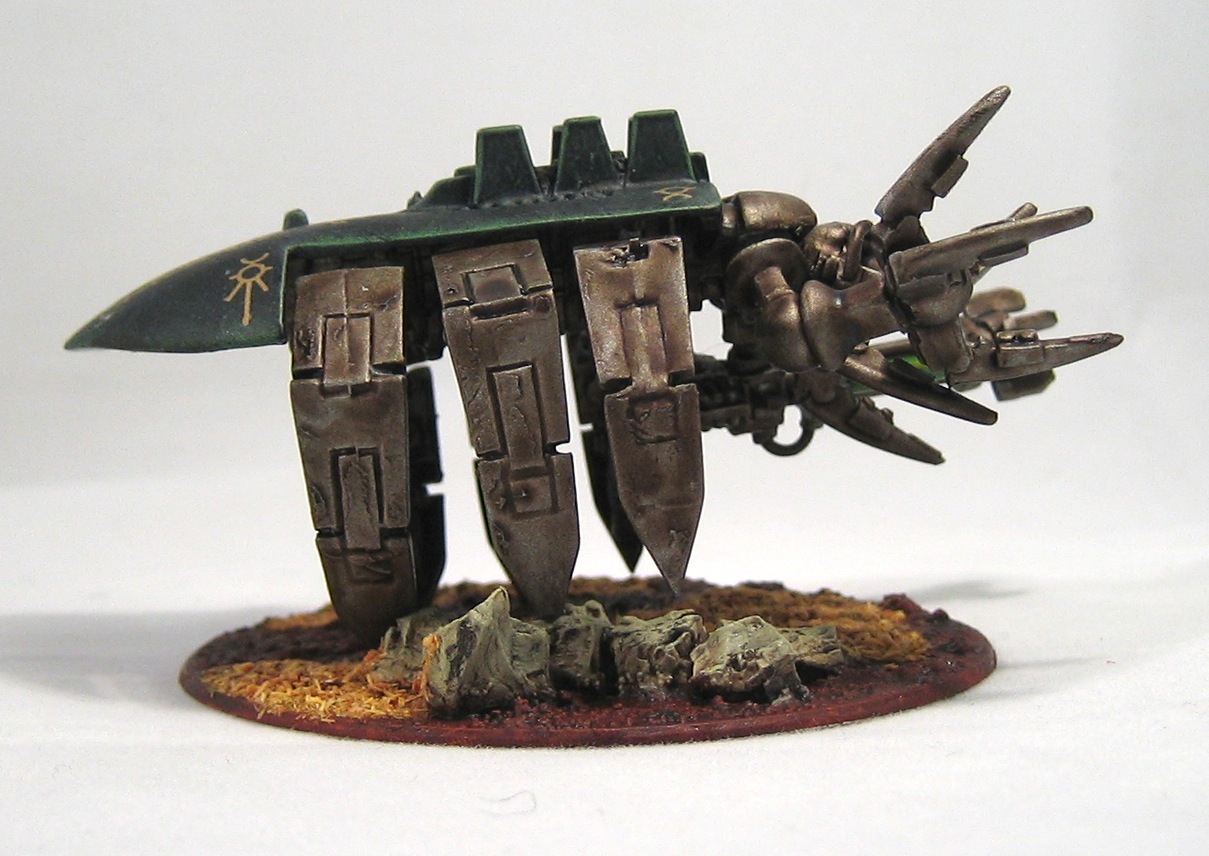
Kitbashed Epic-scale Necron Skimmer Tank

Years and years ago, someone on the Tactical Command forum posted a photo of a prototype Necron tank, kitbashed from leftover parts from the Lychguard/Triarch Praetorian box. When I saw it, I immediately wanted to build some of my own, but never had access to the parts. But when I bought two boxes of Praetorians for my 40K army, I knew that I'd finally get a chance.
More photos after the jump!
A Brief History of Imperial Knights
Hmmmm so this is the big boy for a new Imperial Guard release? Color me interested... pic.twitter.com/kztVOV9qNY
— Kevin (@d6_hobbyist) February 13, 2014
It looks like Knights are about to return to Warhammer 40,000 in 28mm scale. Before they become the new hotness, I thought it might be fun to run through their history.
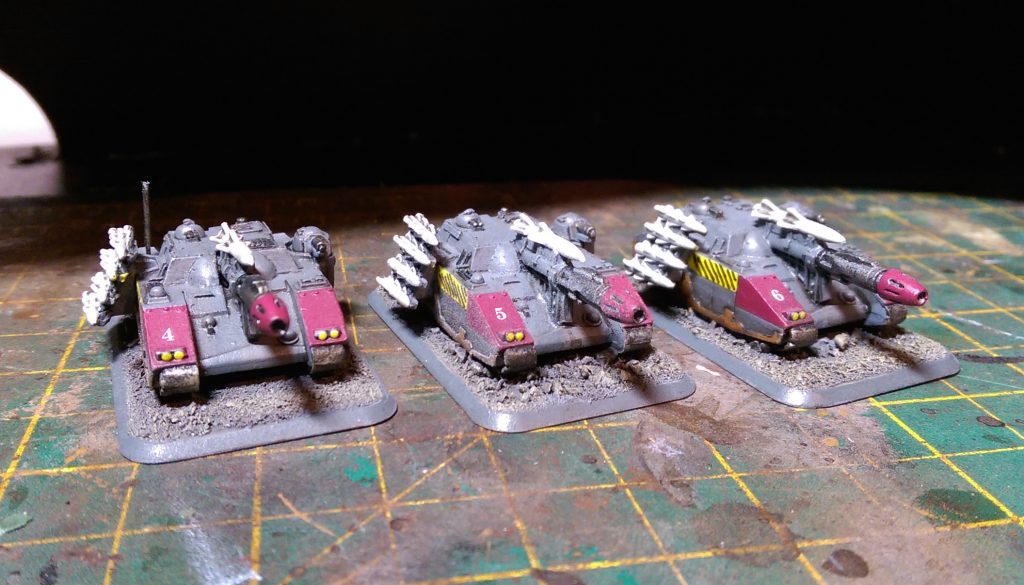
Epic Stormblades on Flames of War bases
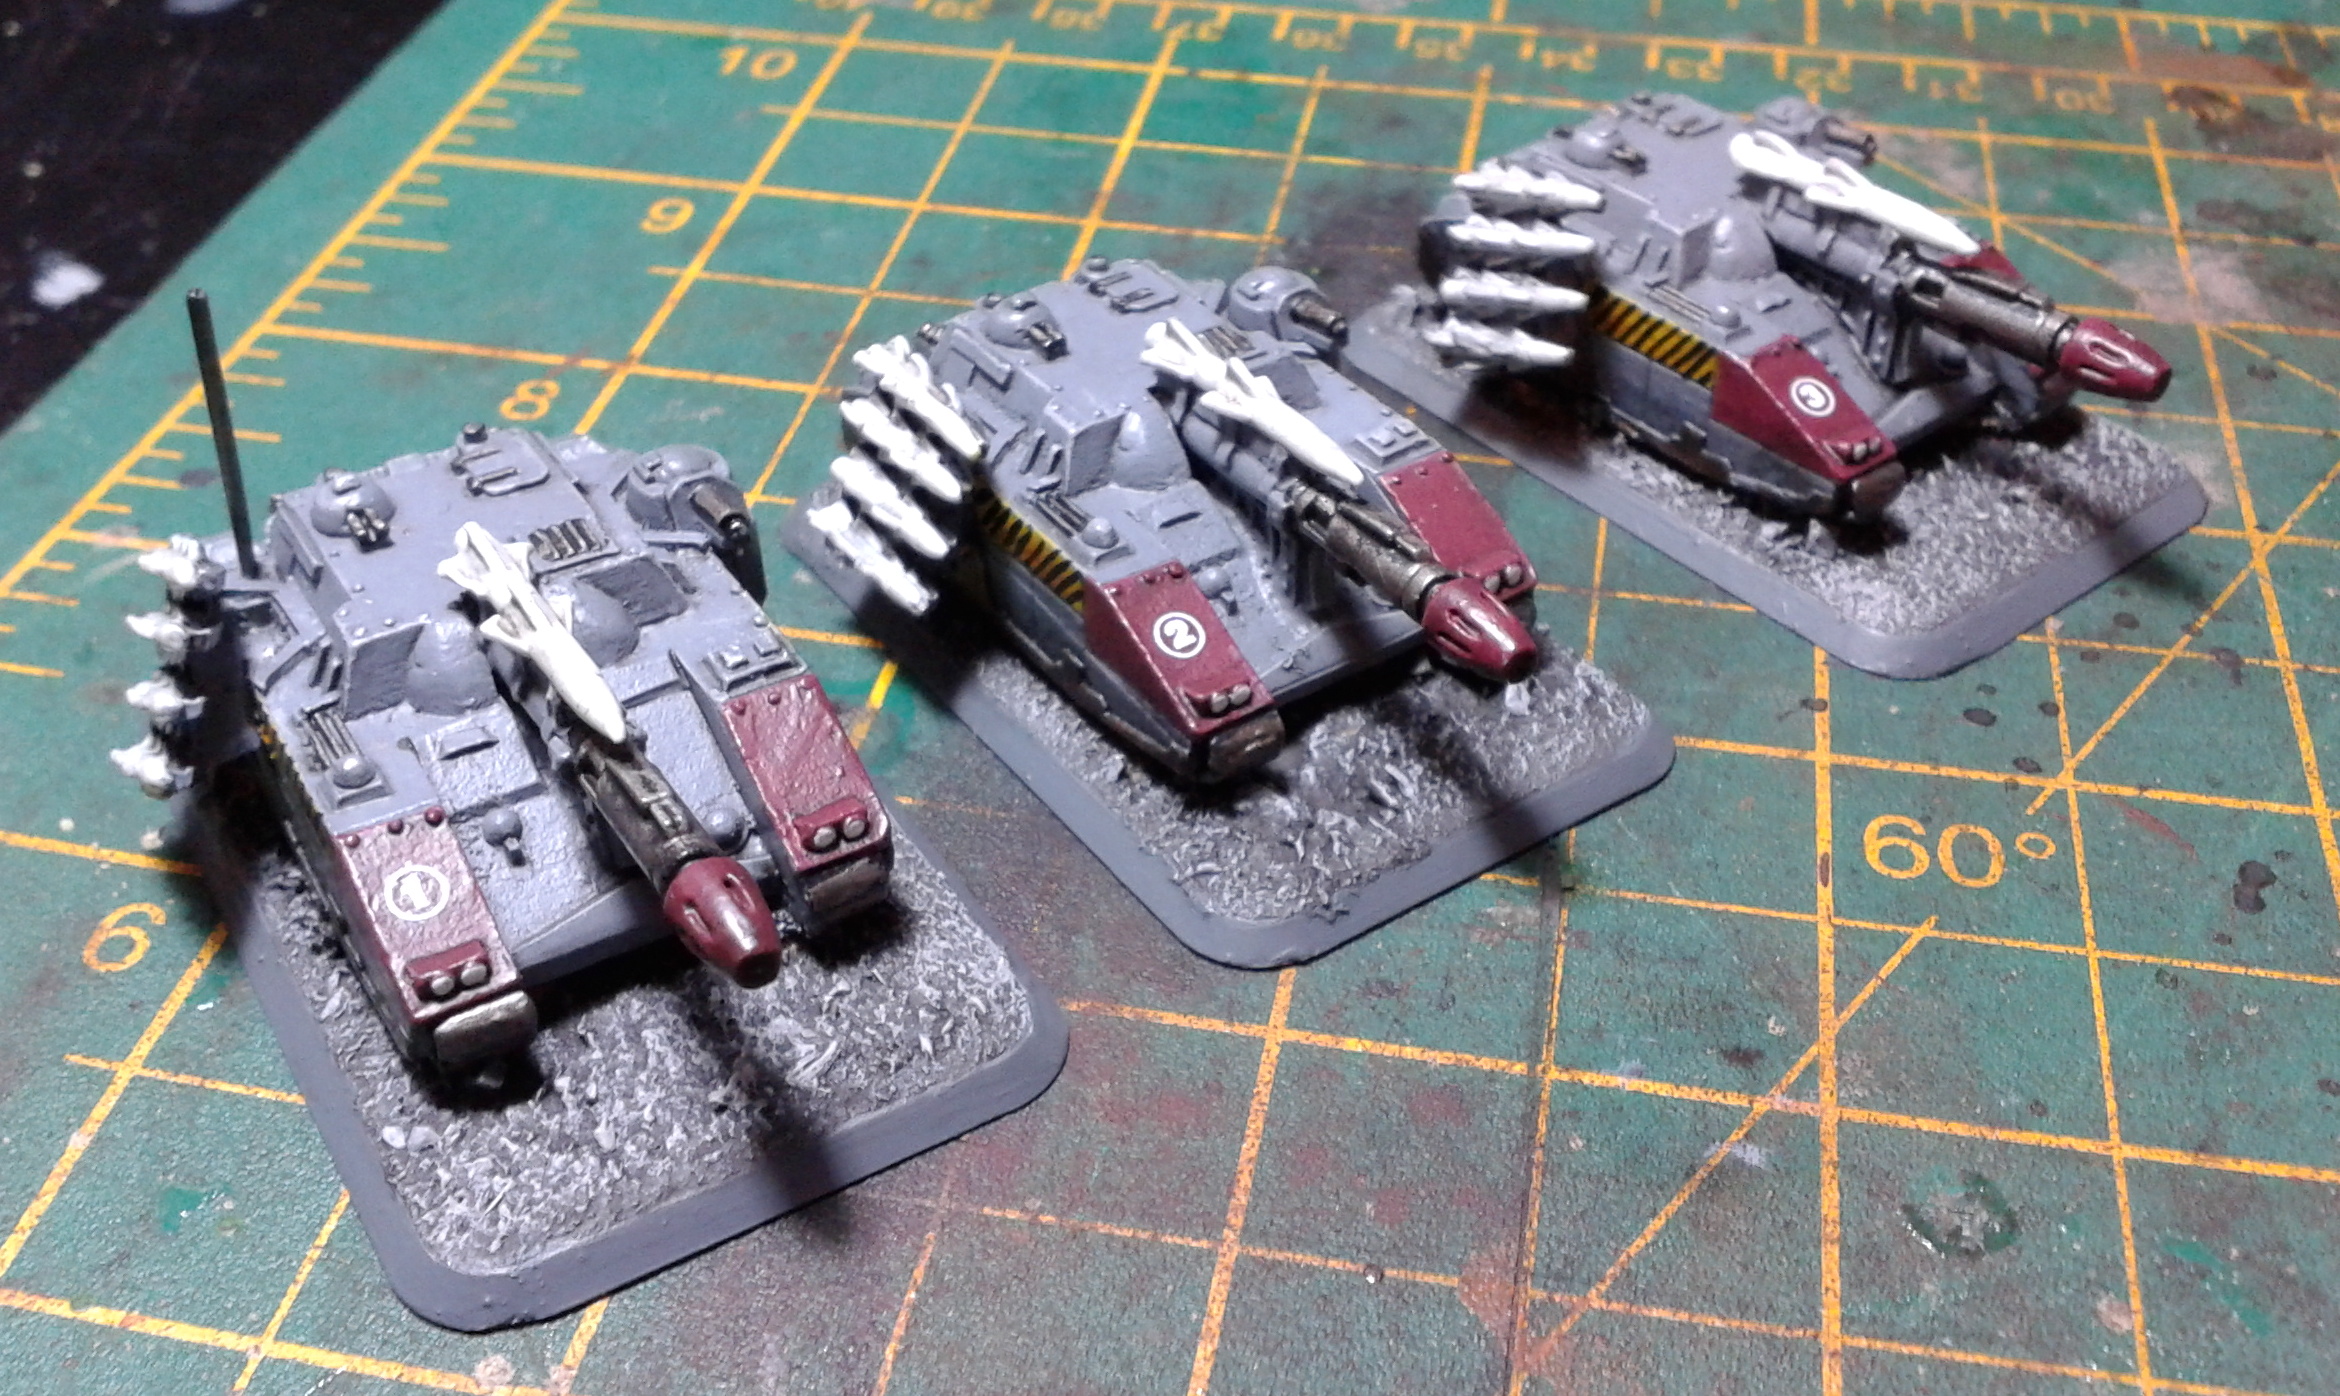
Back in January I mentioned that I was painting a company of Stormblades and said I'd post when I'd finished them. Somehow that post never materialised, but since I've just rebased these models onto Flames of War bases (which are perfect for Epic models) I thought I'd fulfil my promise.
These super-heavies will (along with the Ordinatus Golgotha) provide the backbone of armour for the Skitarii force which supports my knights and titans. I have a Leman Russ Tank Company and a Skitarii Mechanised Infantry Company also in the works, and the colour scheme on the Stormblades will be replicated on the Leman Russ tanks and Chimeras of the mechanised infantry company. These models will also be based on Flames of War bases.
The Milk Float, Completed

Here's the completed Mk II Warlord "Milk Float" titan I mentioned previously. The right arm weapon is the improved Melta Cannon.
More pictures below the fold.
Specialist Games isn't Dead
But here's the thing. Despite GW officially abandoning Epic: Armageddon, Battlefleet Gothic, and the other SG names, they're not really dead. They will never be dead if the community of gamers and hobbyists continues to play games, develop rules, build and paint miniatures, and share their hobby online.
Now is the time for the various communities that have developed around these games to take ownership of them and carry them forward. This has already happened with Epic: Armageddon: the playtesting groups that helped Jervis Johnson develop the game never went away, and now after over a decade, those people are still developing new and improved rules and army lists for the game, following the same path as the original NetEpic team did. They took what GW abandoned, and are giving it new life. This should absolutely be happening with the other SG games.
Rules are only part of the picture. Obviously there are models as well. Apart from eBay, which will probably provide plentiful supplies of second-hand miniatures for all the Specialist games for decades to come, players of the 28mm based games (Necromunda and Mordheim) can make use of miniatures from Warhammer 40,000 and Warhammer: it's a great opportunity to customise and convert. There is already a thriving Inq28 community of gamers who play Inquisitor using 28mm miniatures: some of the conversion work I've seen is amazing!
For Epic, BFG and Warmaster, the solution is to look for proxies: miniatures from other games and manufacturers that look similar to the "official" models. And for those who like taking risks, you can expect there to be a thriving black market in 6mm scale versions of 40K models, and re-worked variants of the old BFG ship range: if you know where to look, you can get what you need (note: I do not condone such activity, as it is clearly illegal, but I won't deny that it doesn't happen).
So you see: although Specialist Games (the GW division) may now be dead, the Specialist Games themselves can, should, and very likely will, live on.
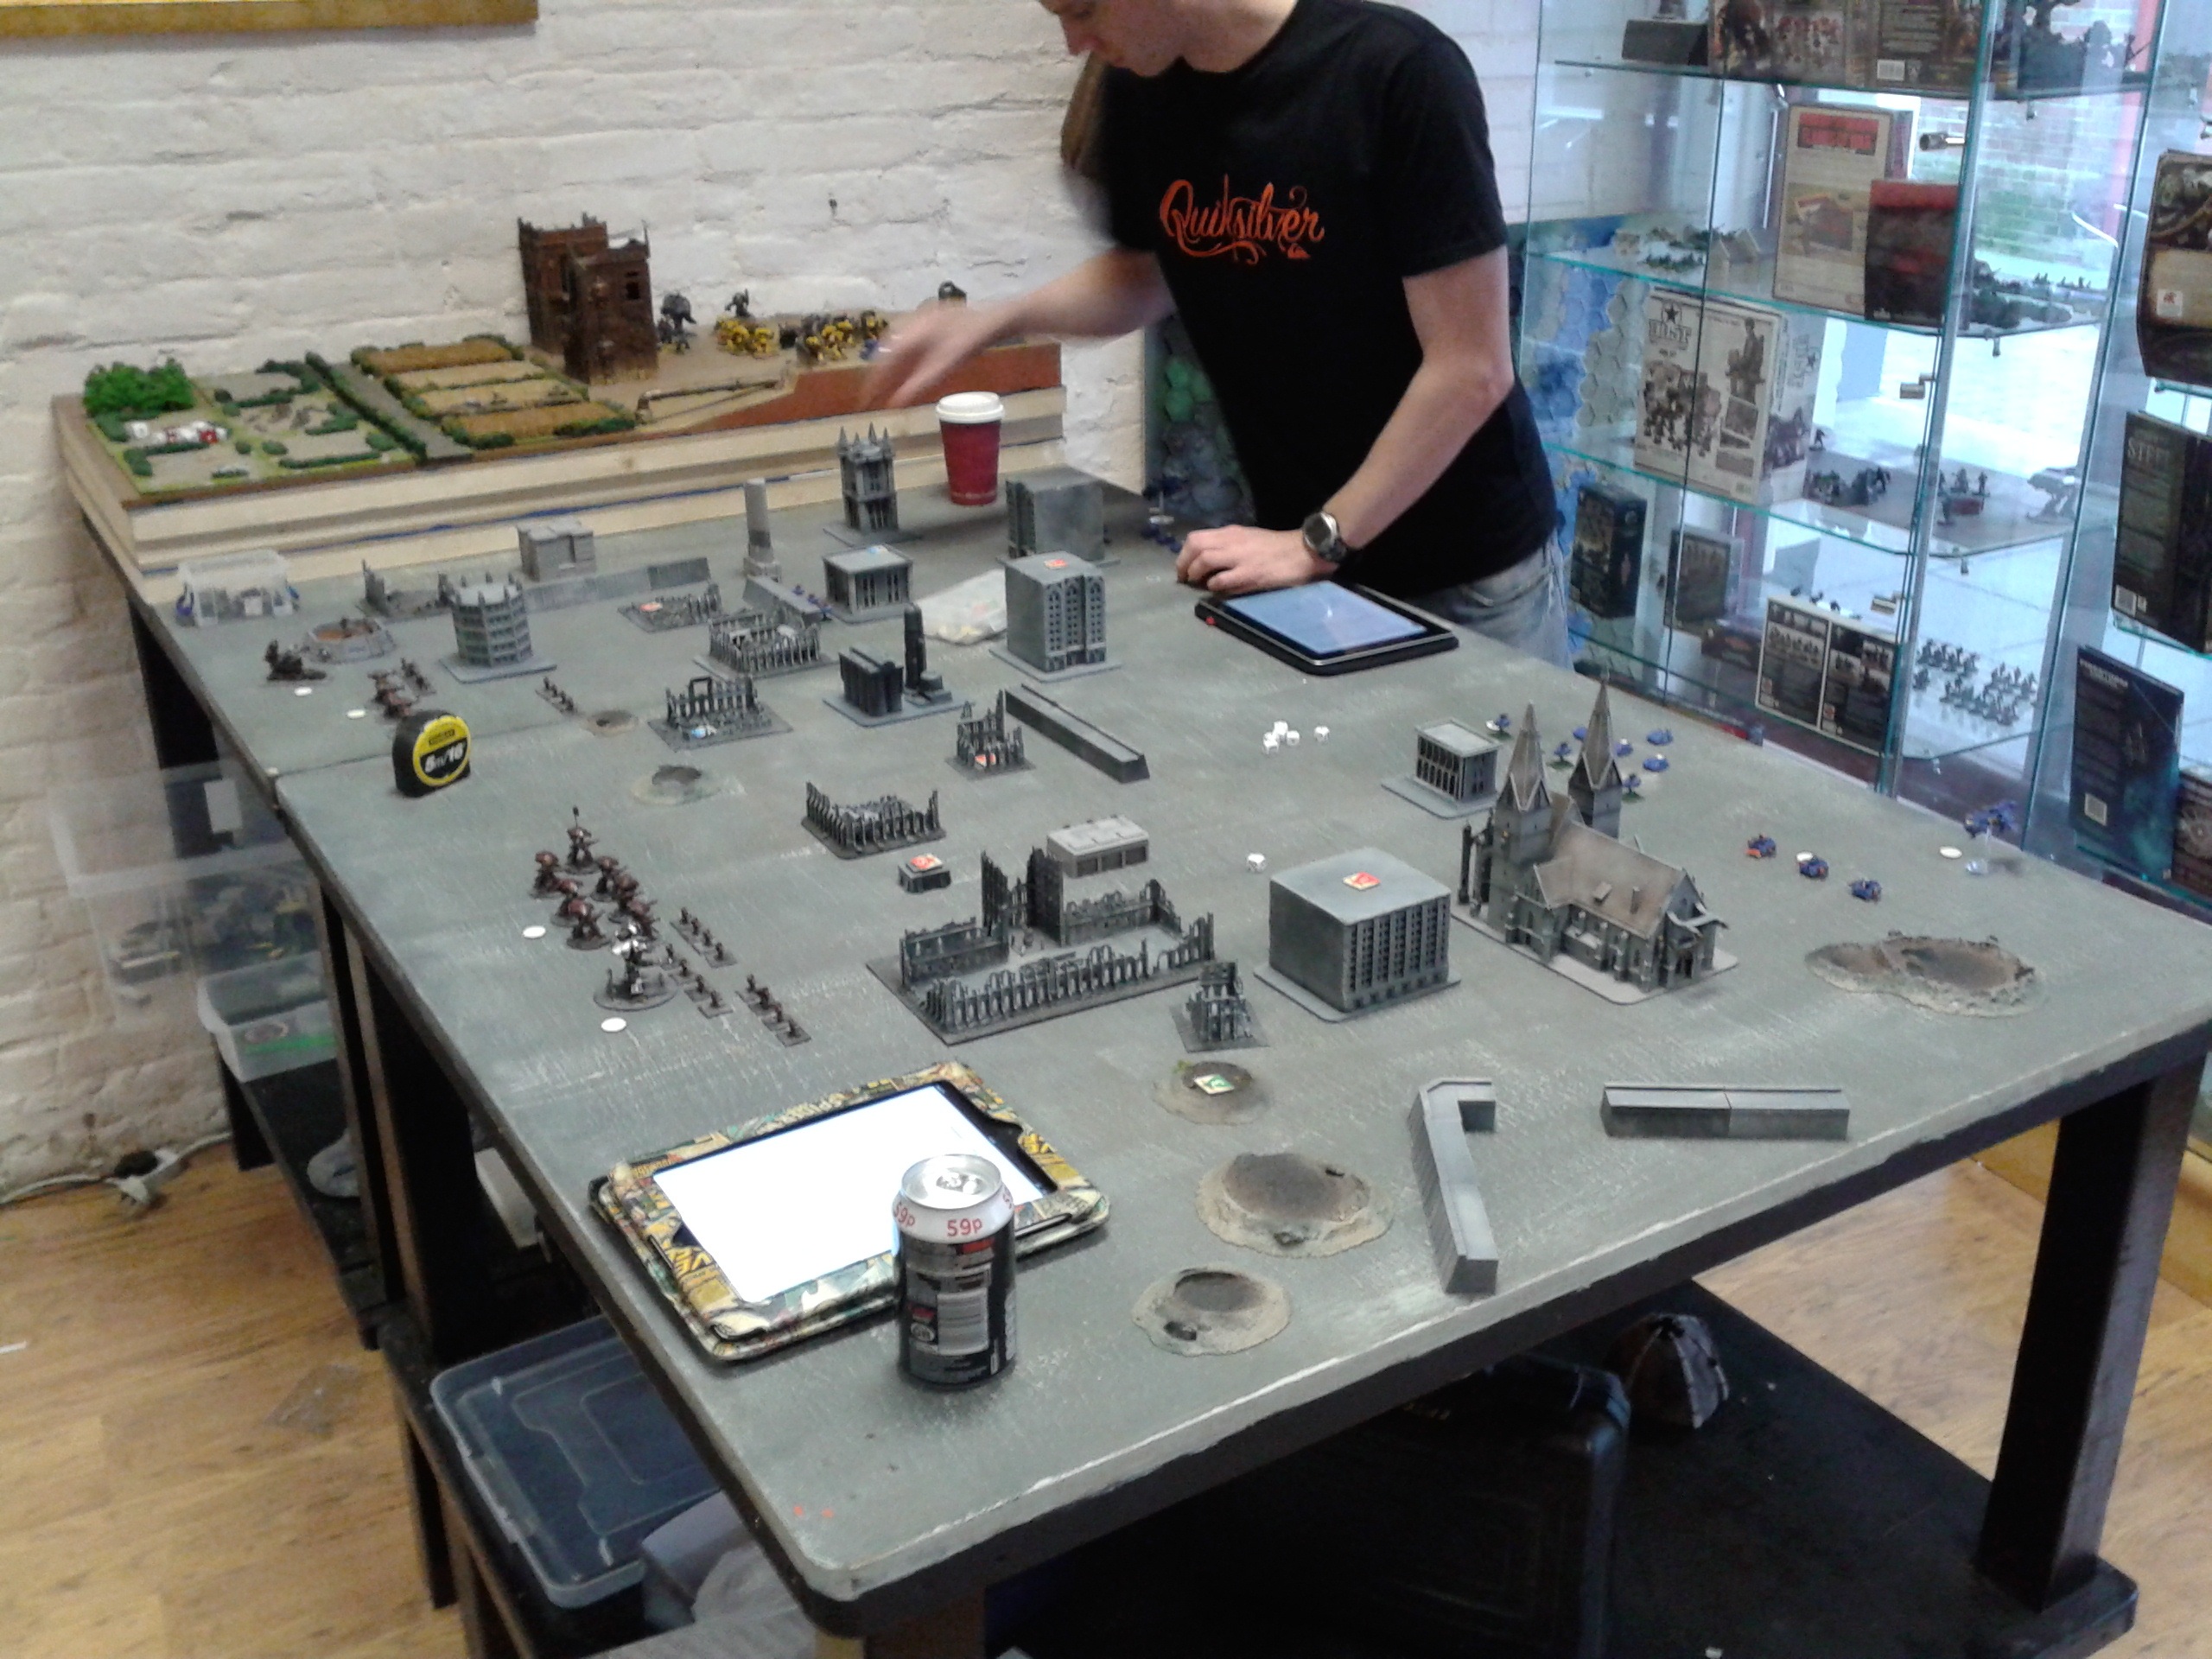
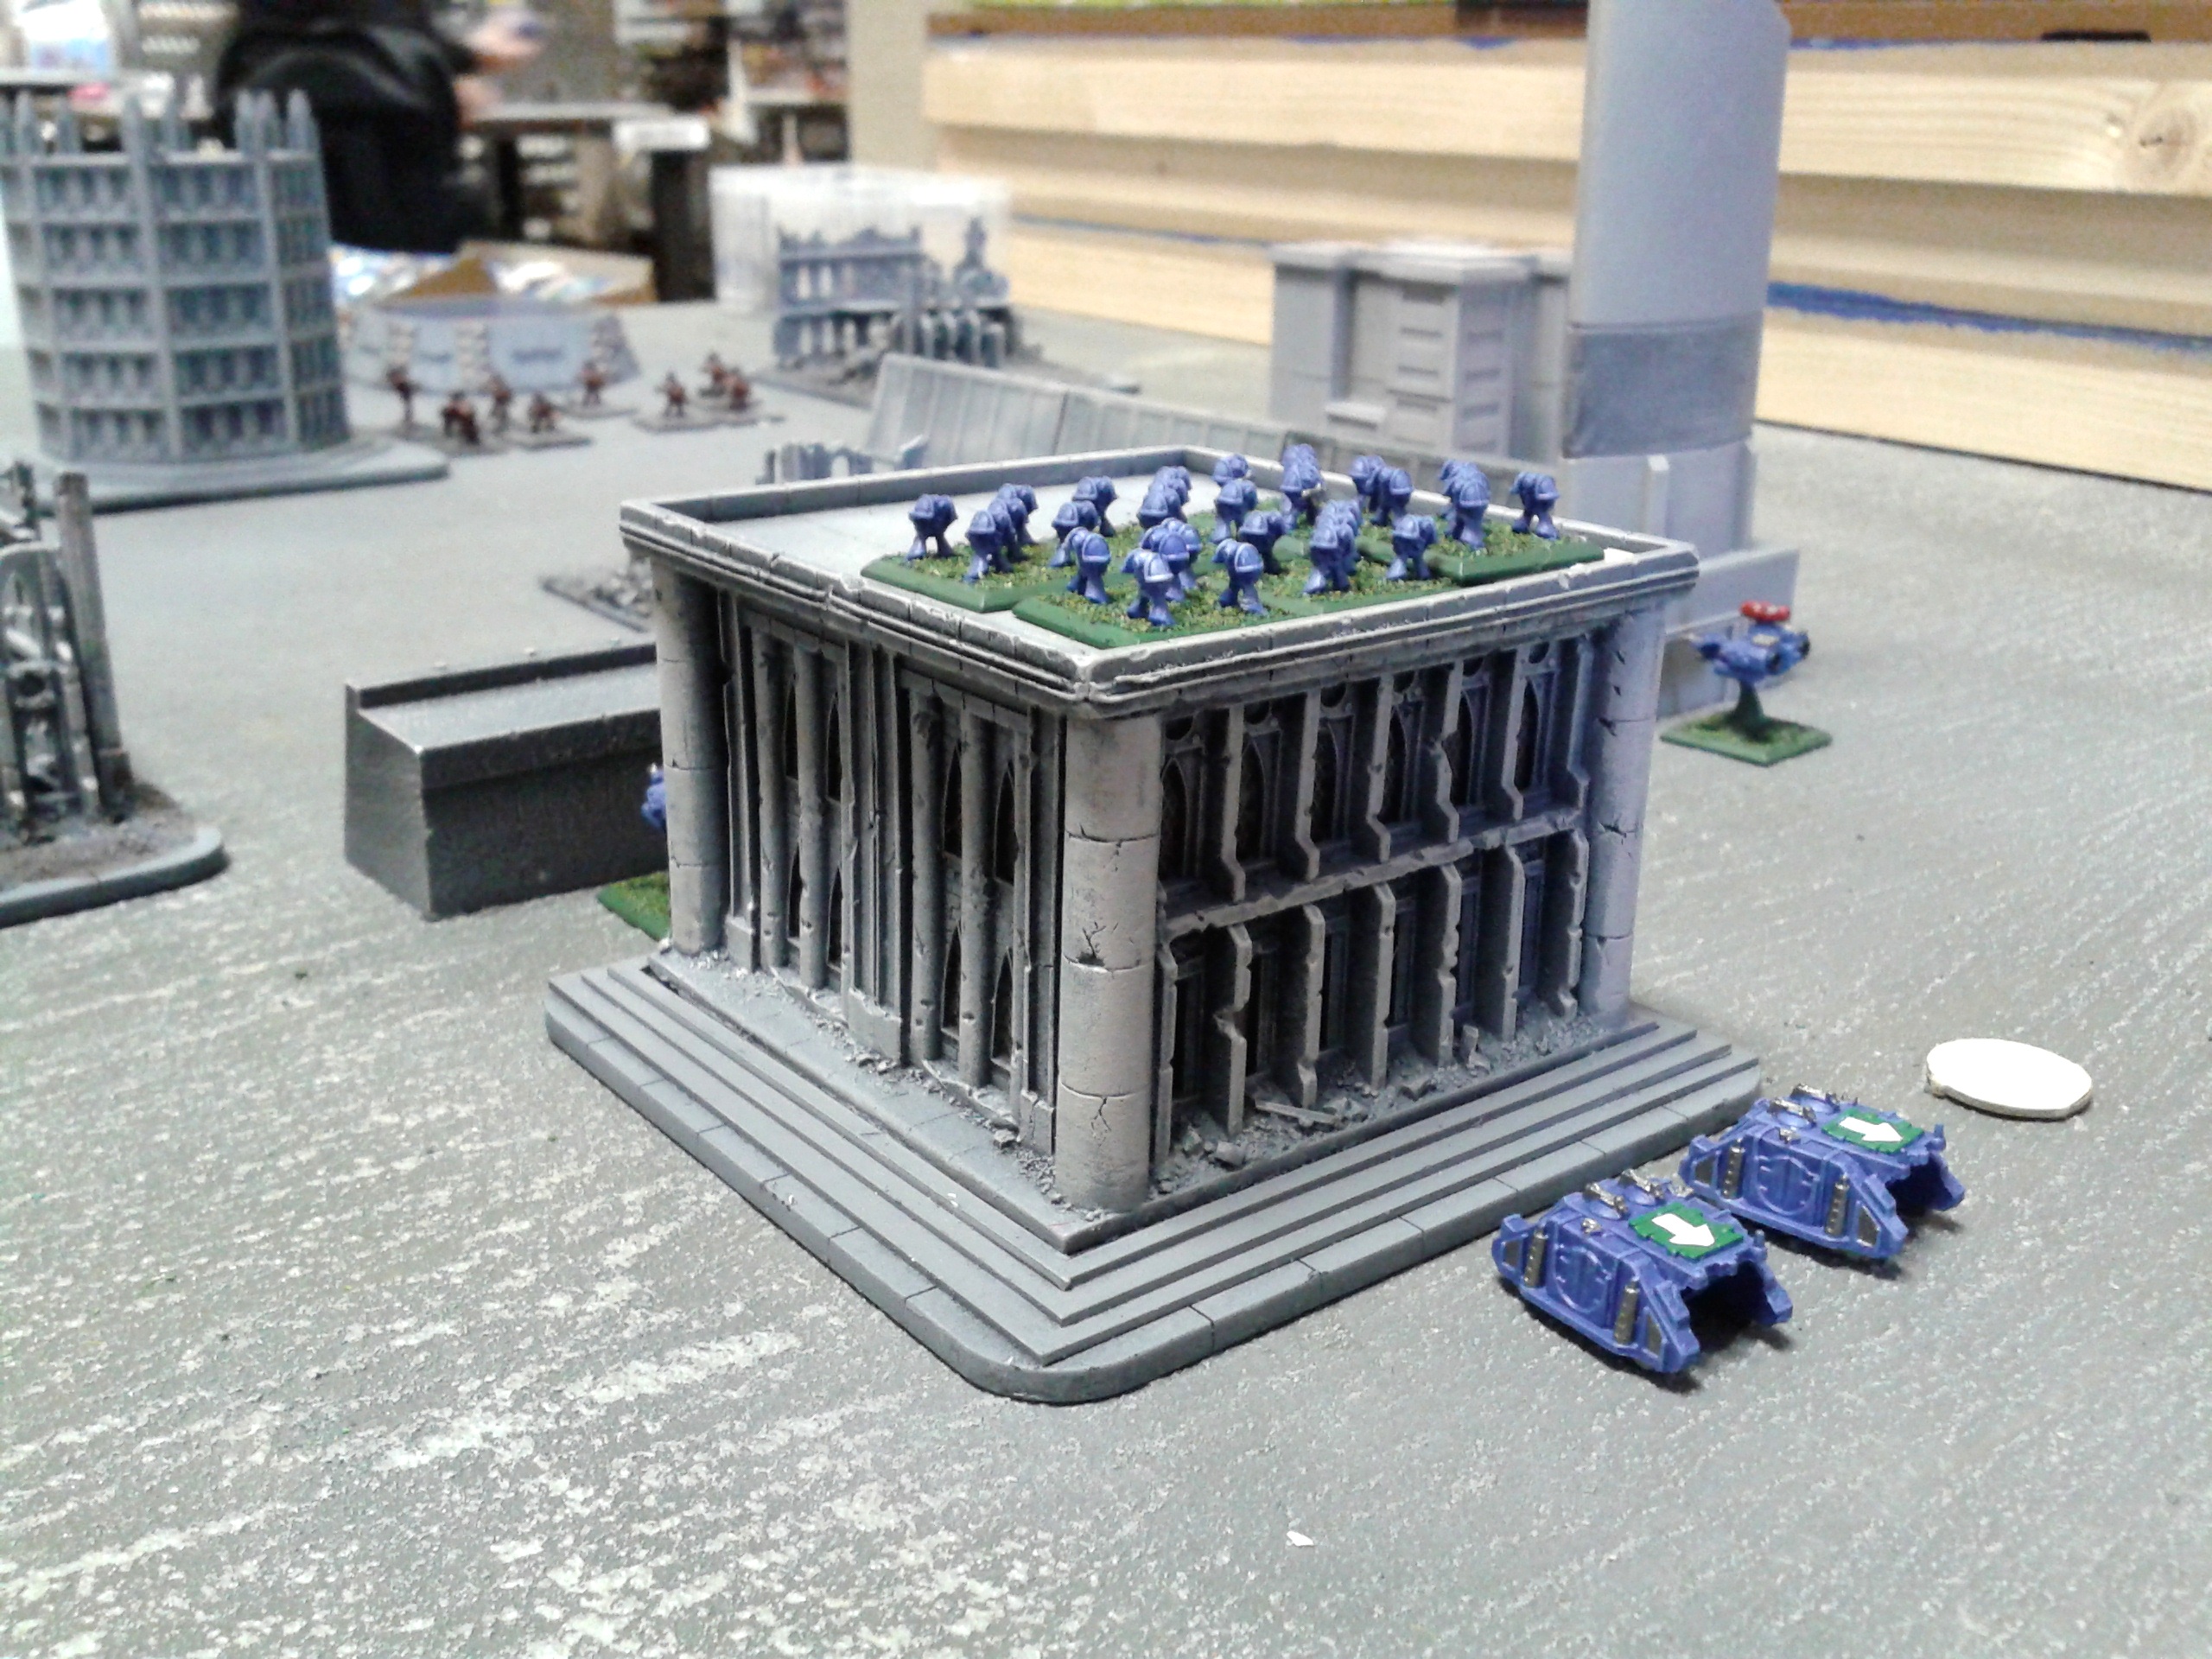
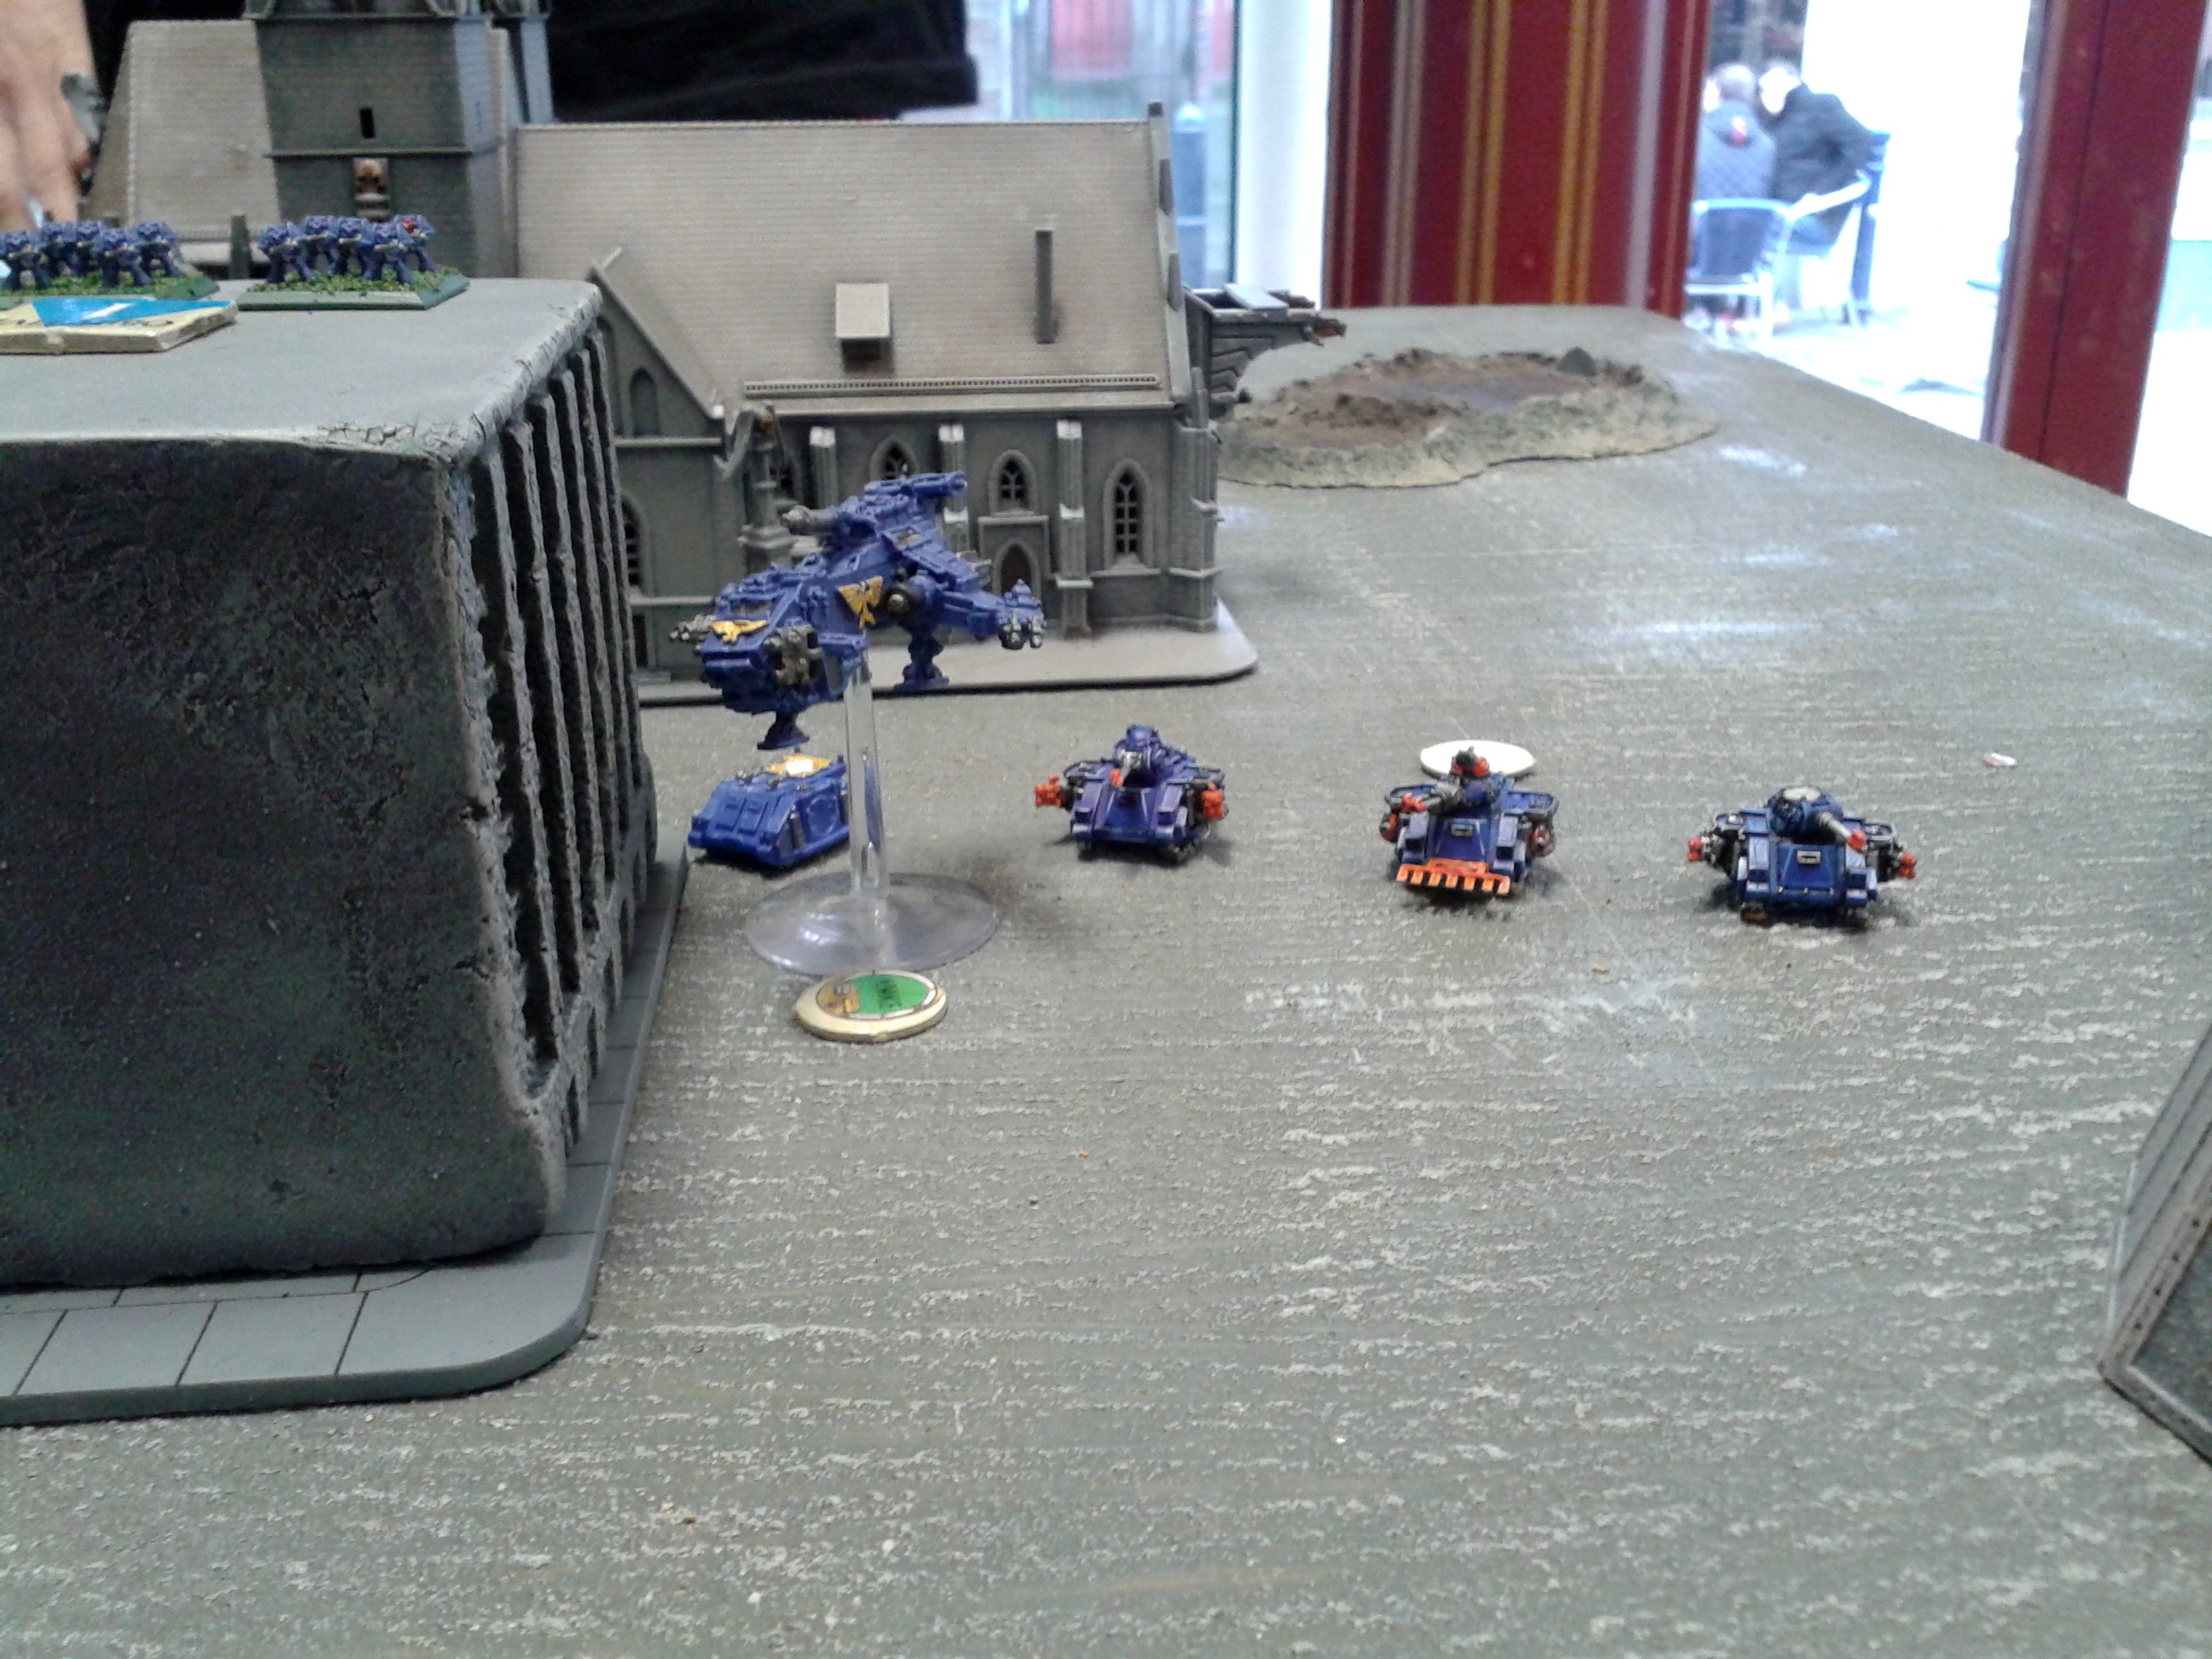
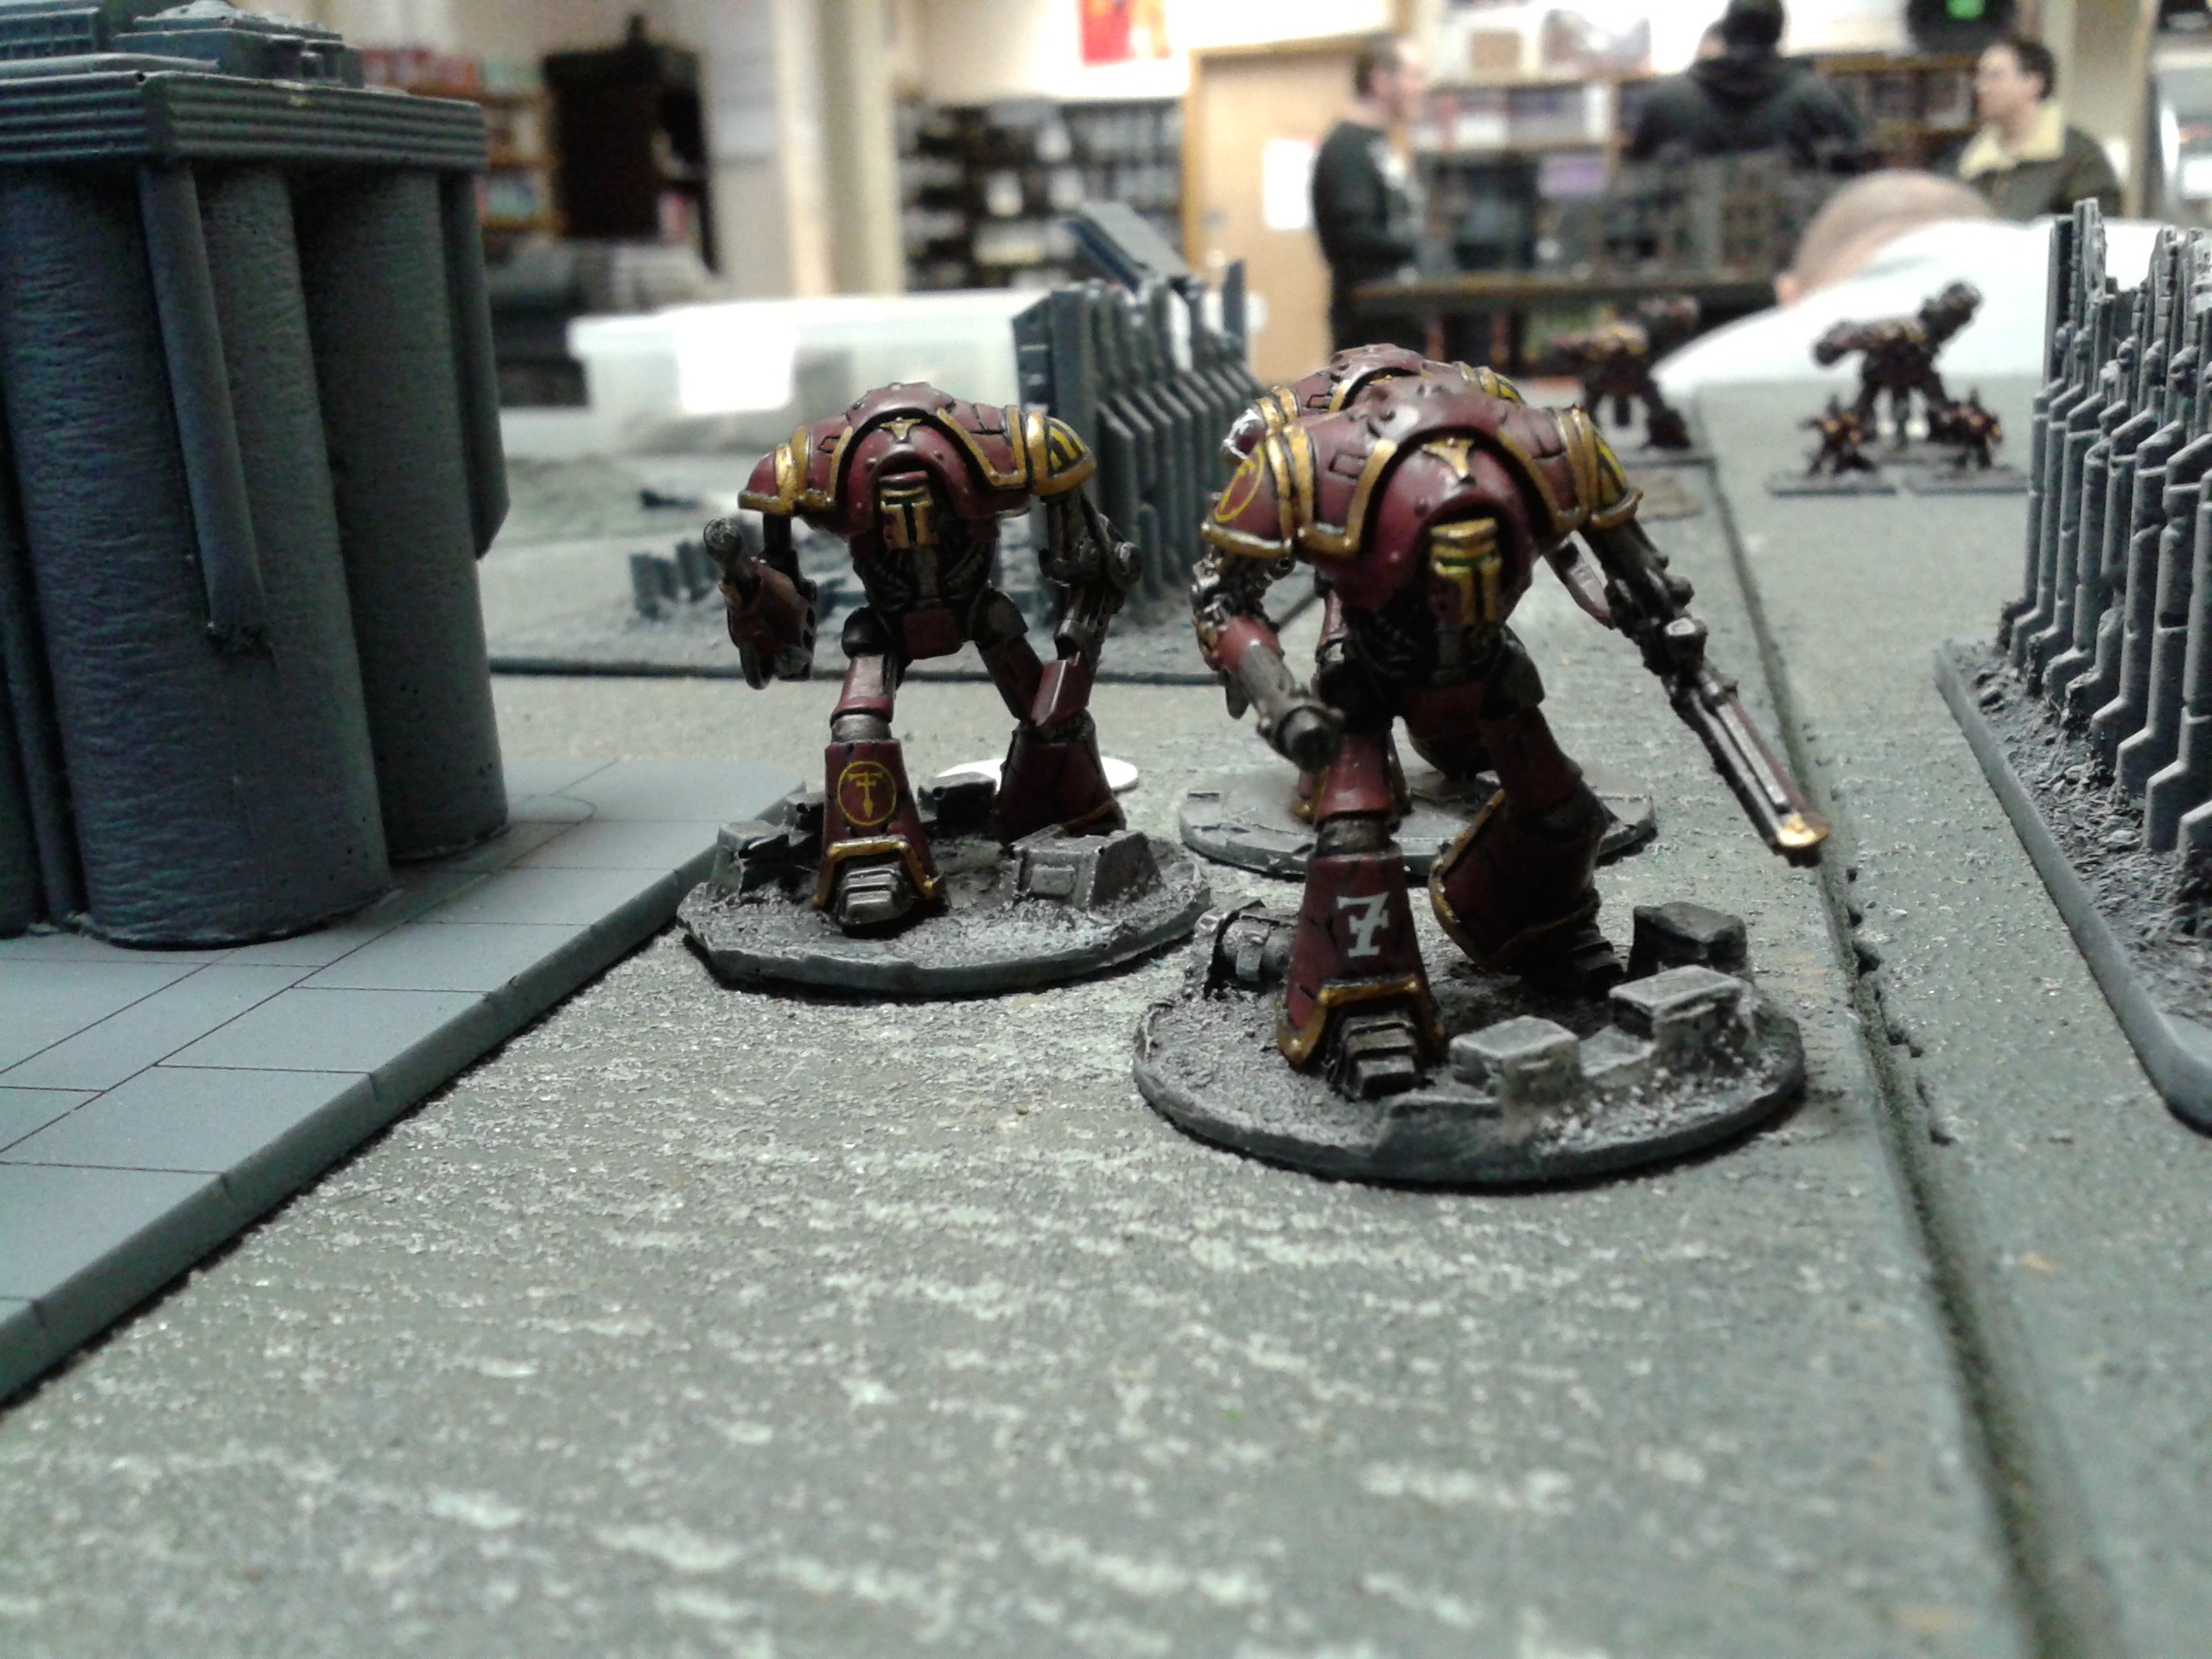
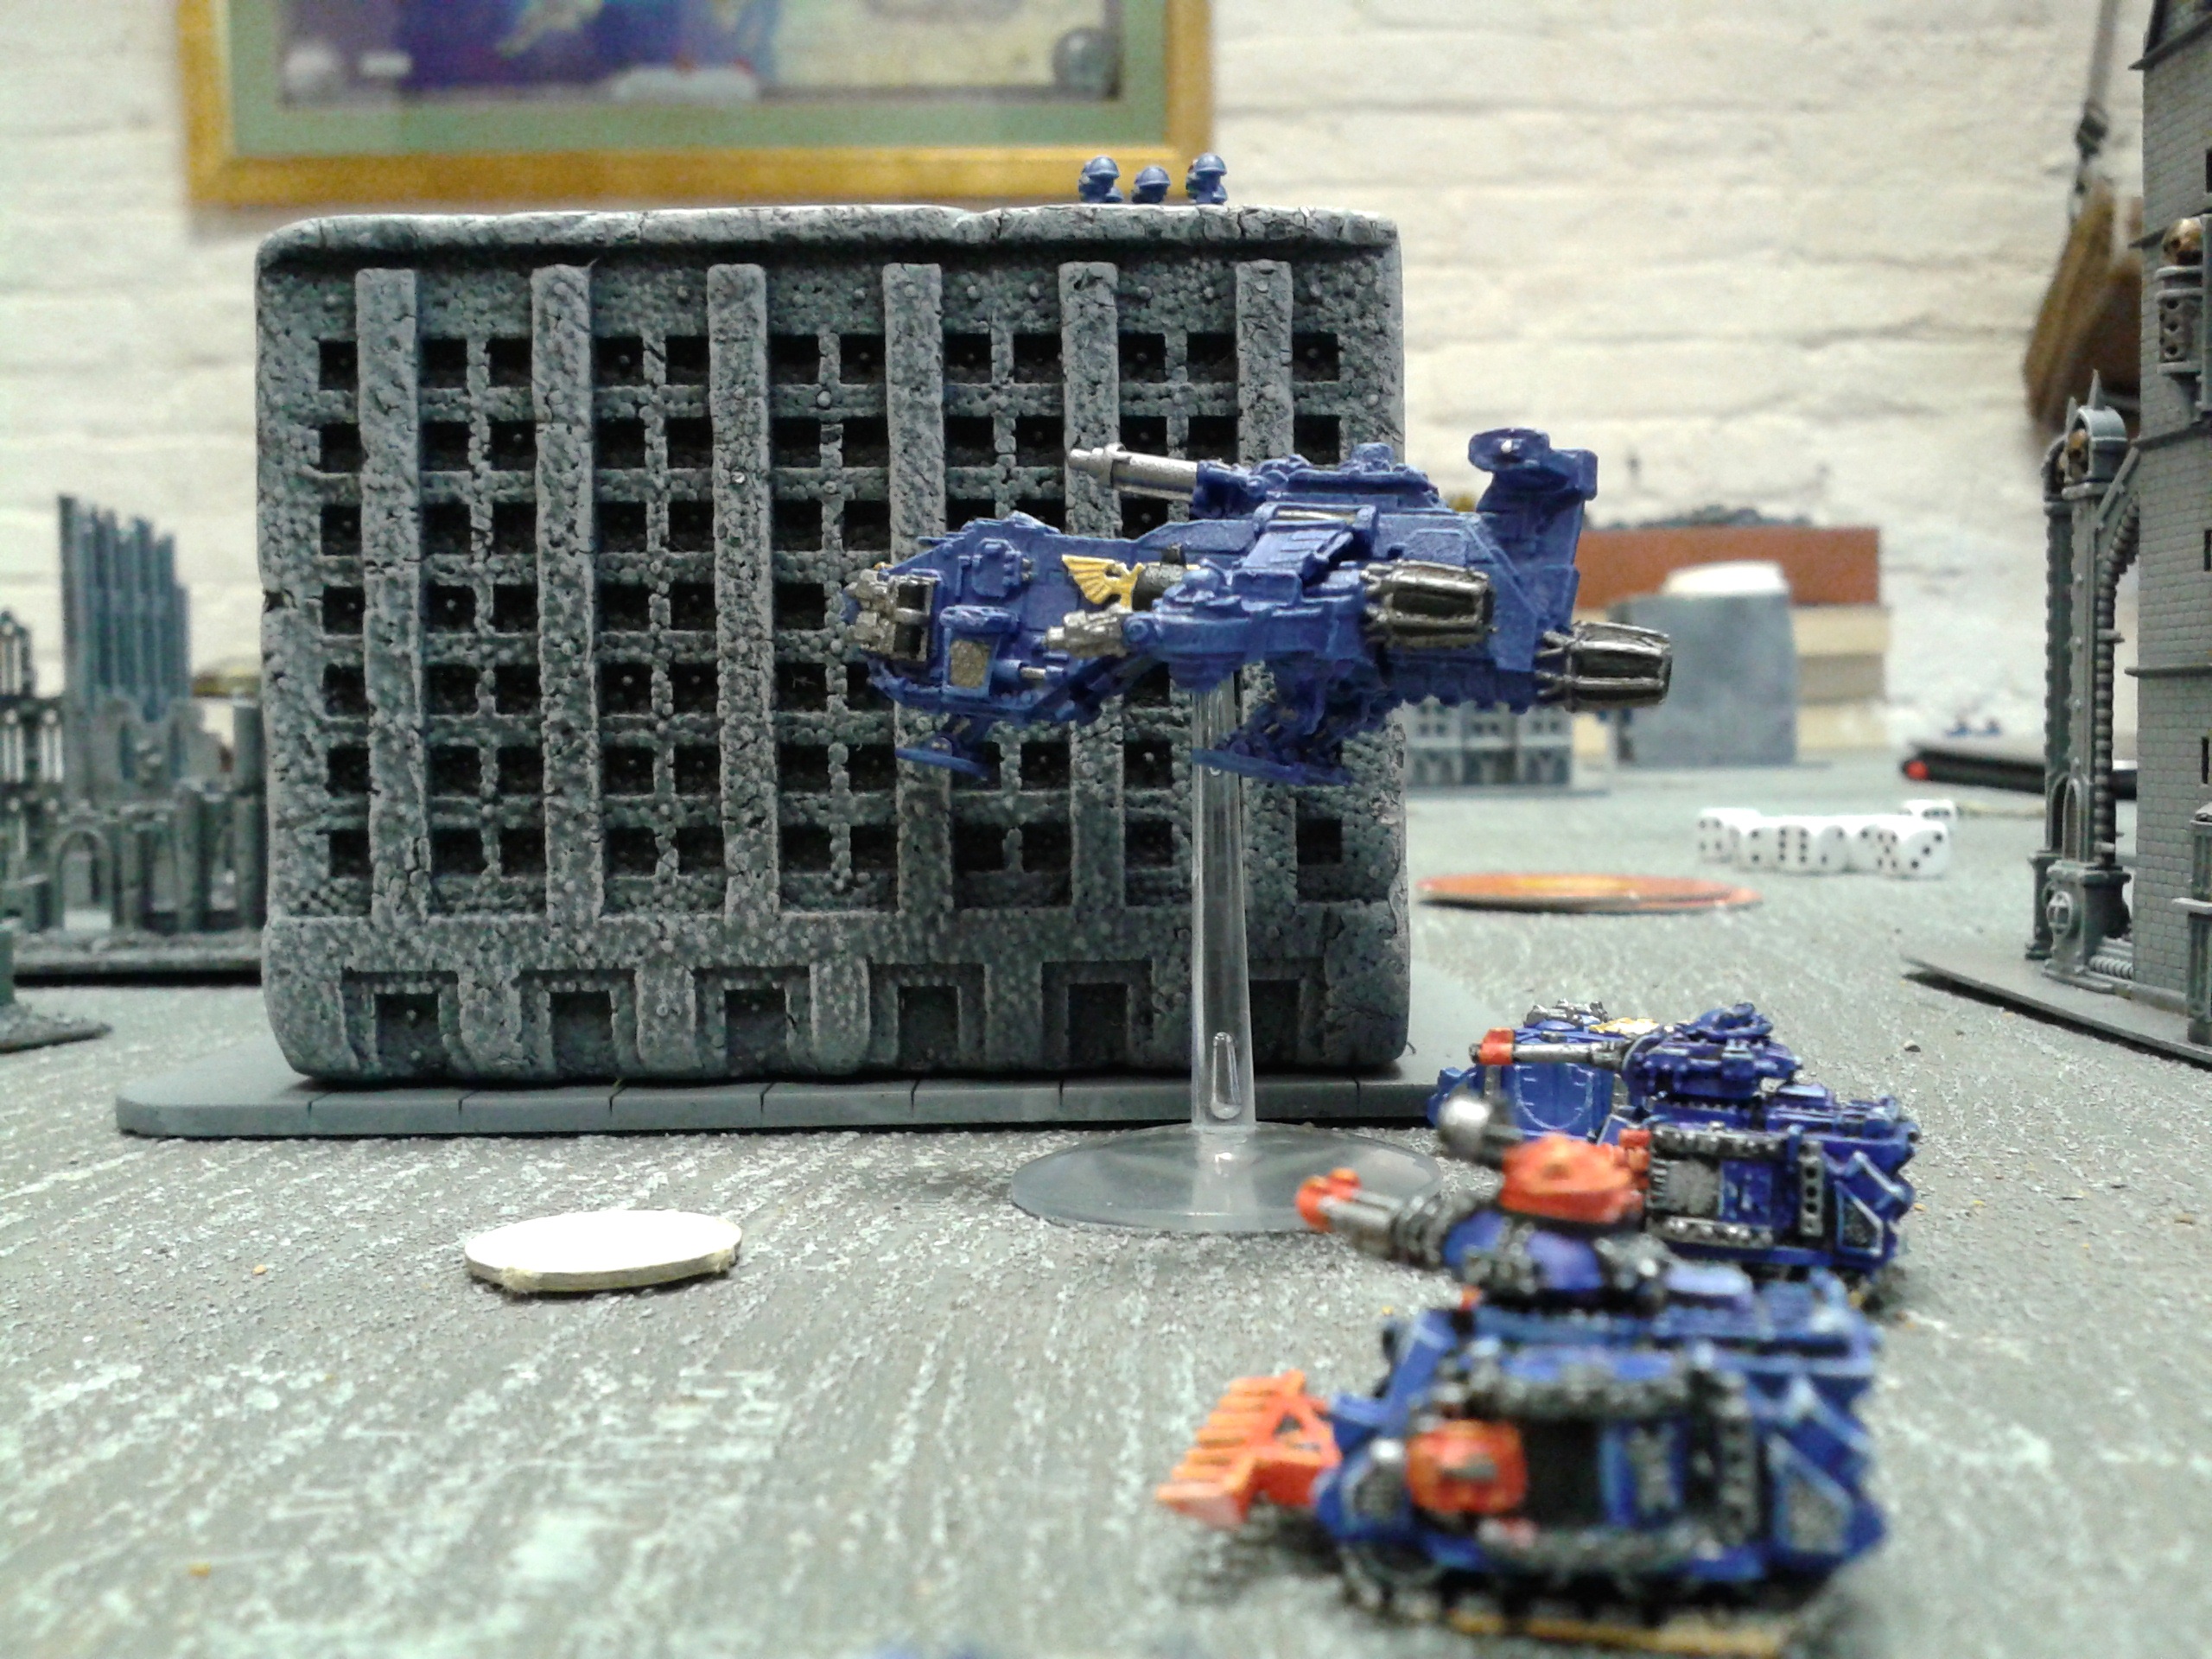
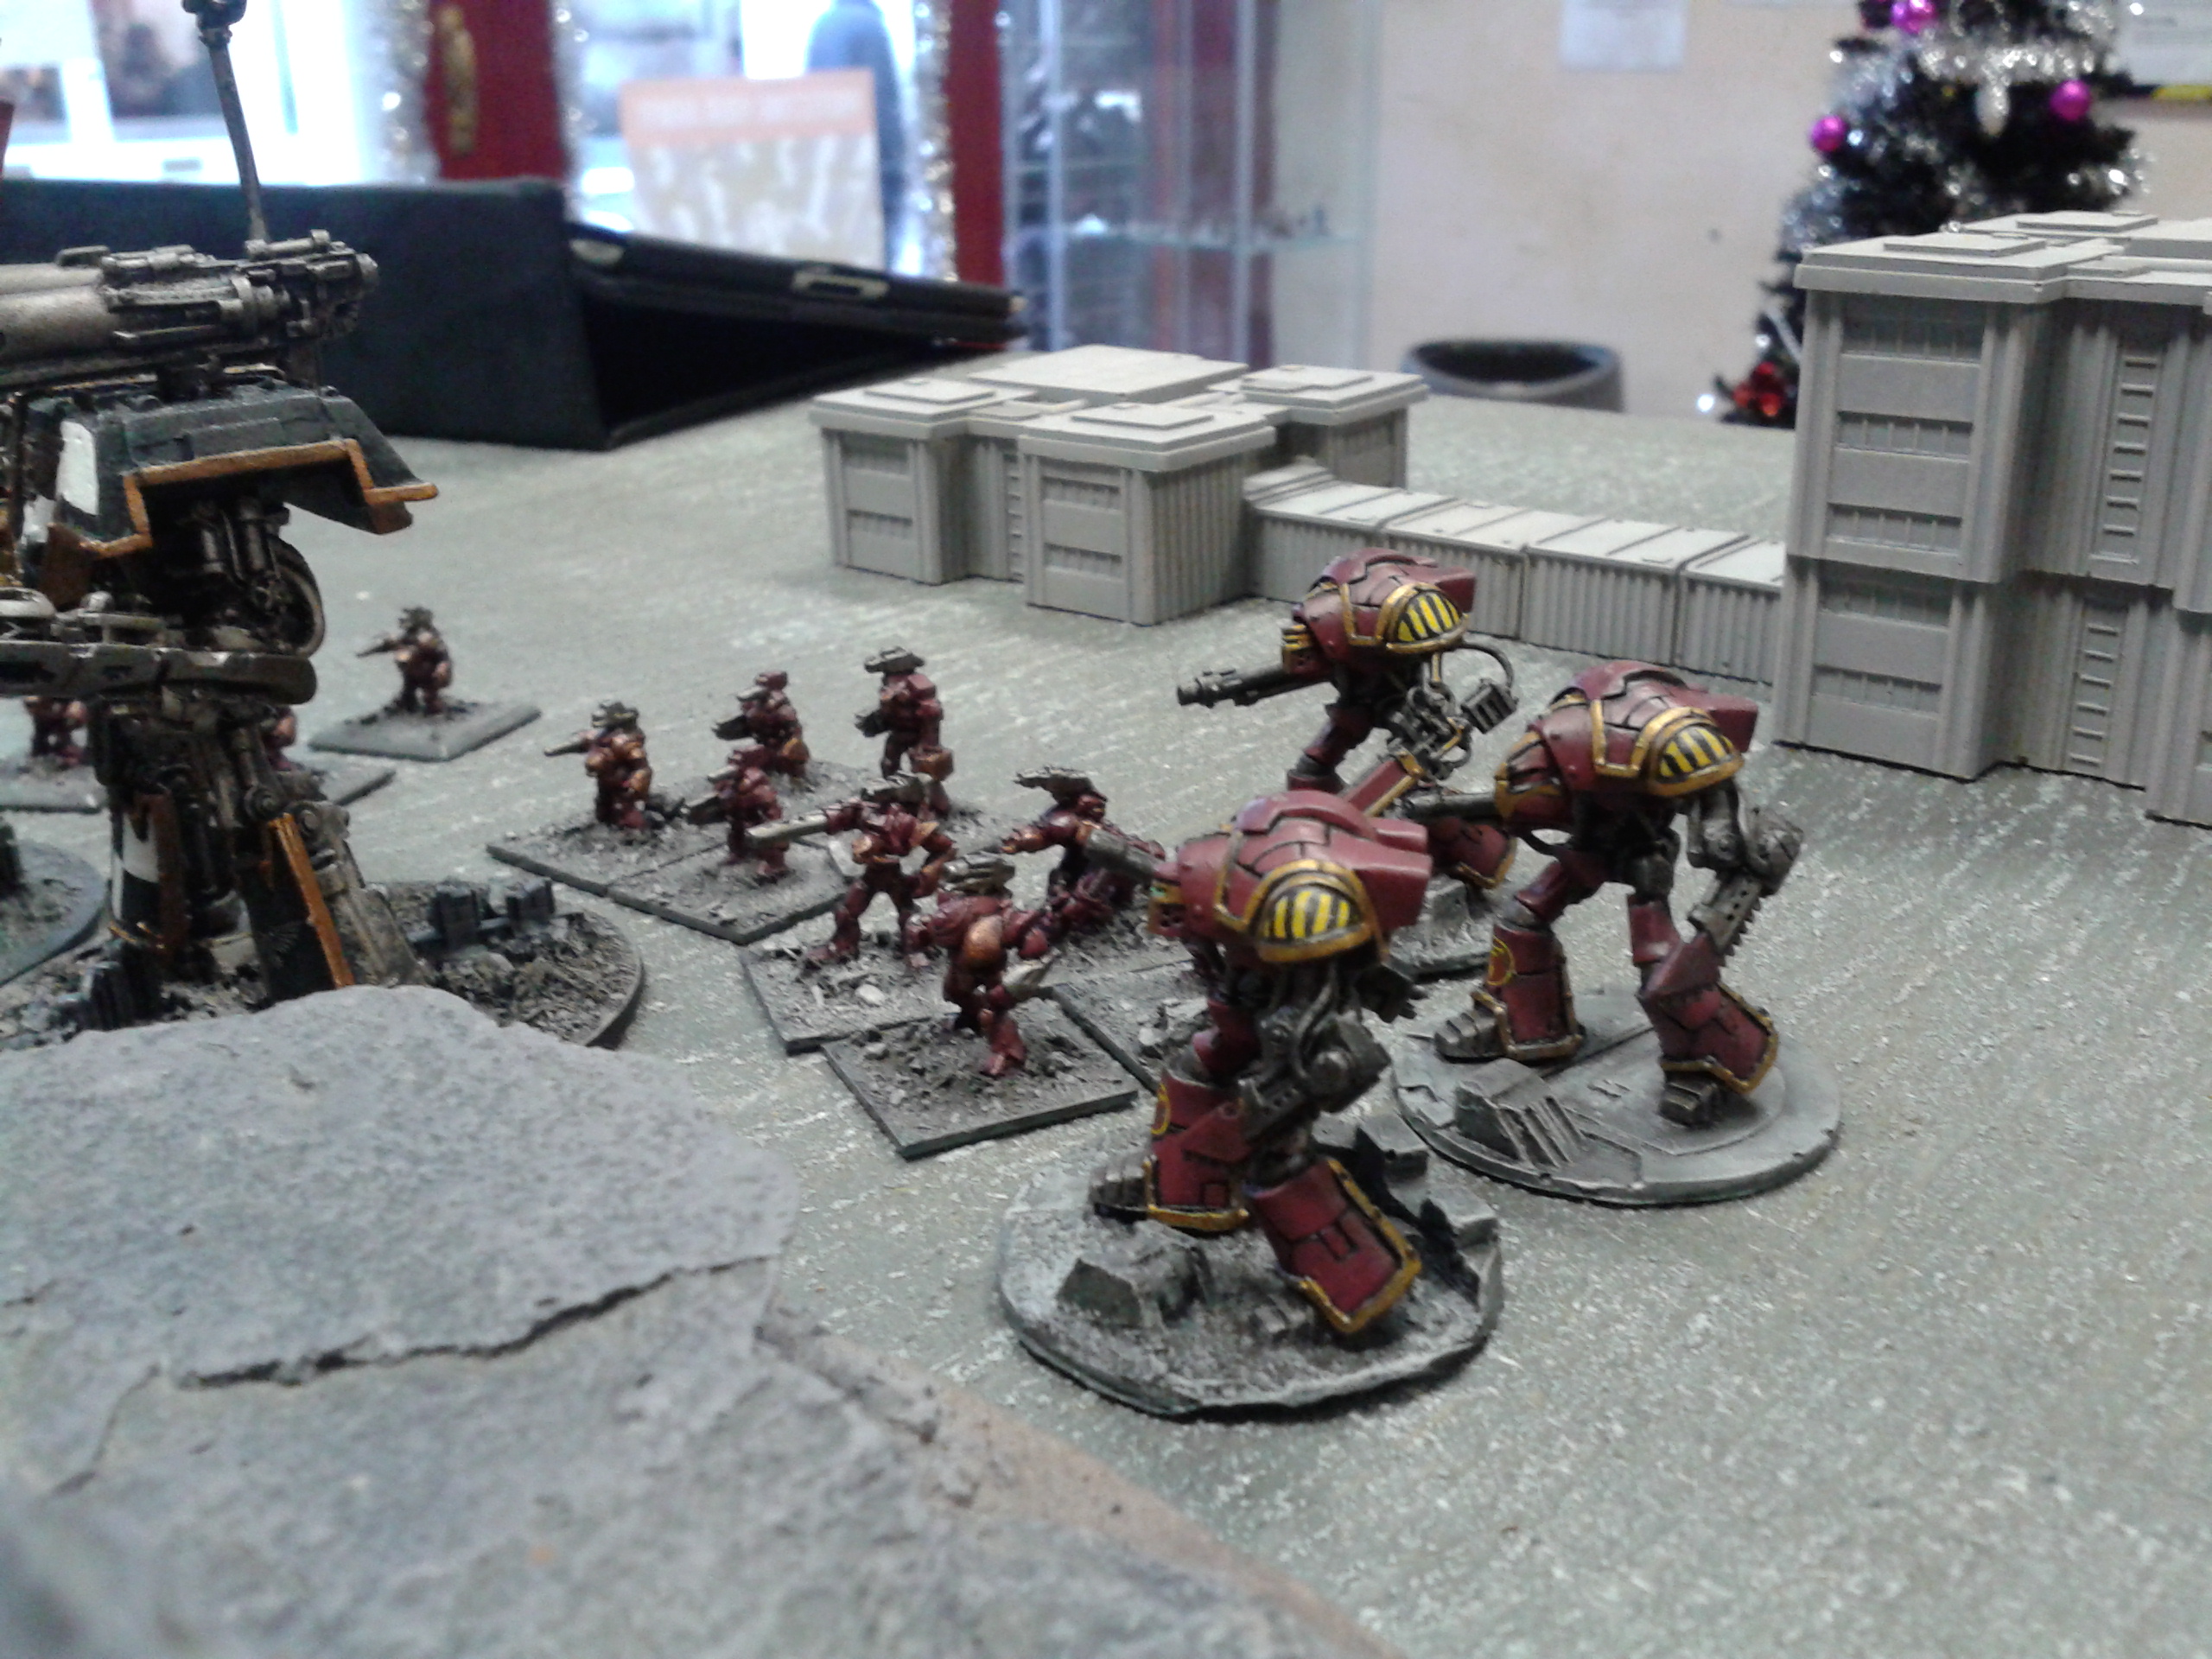
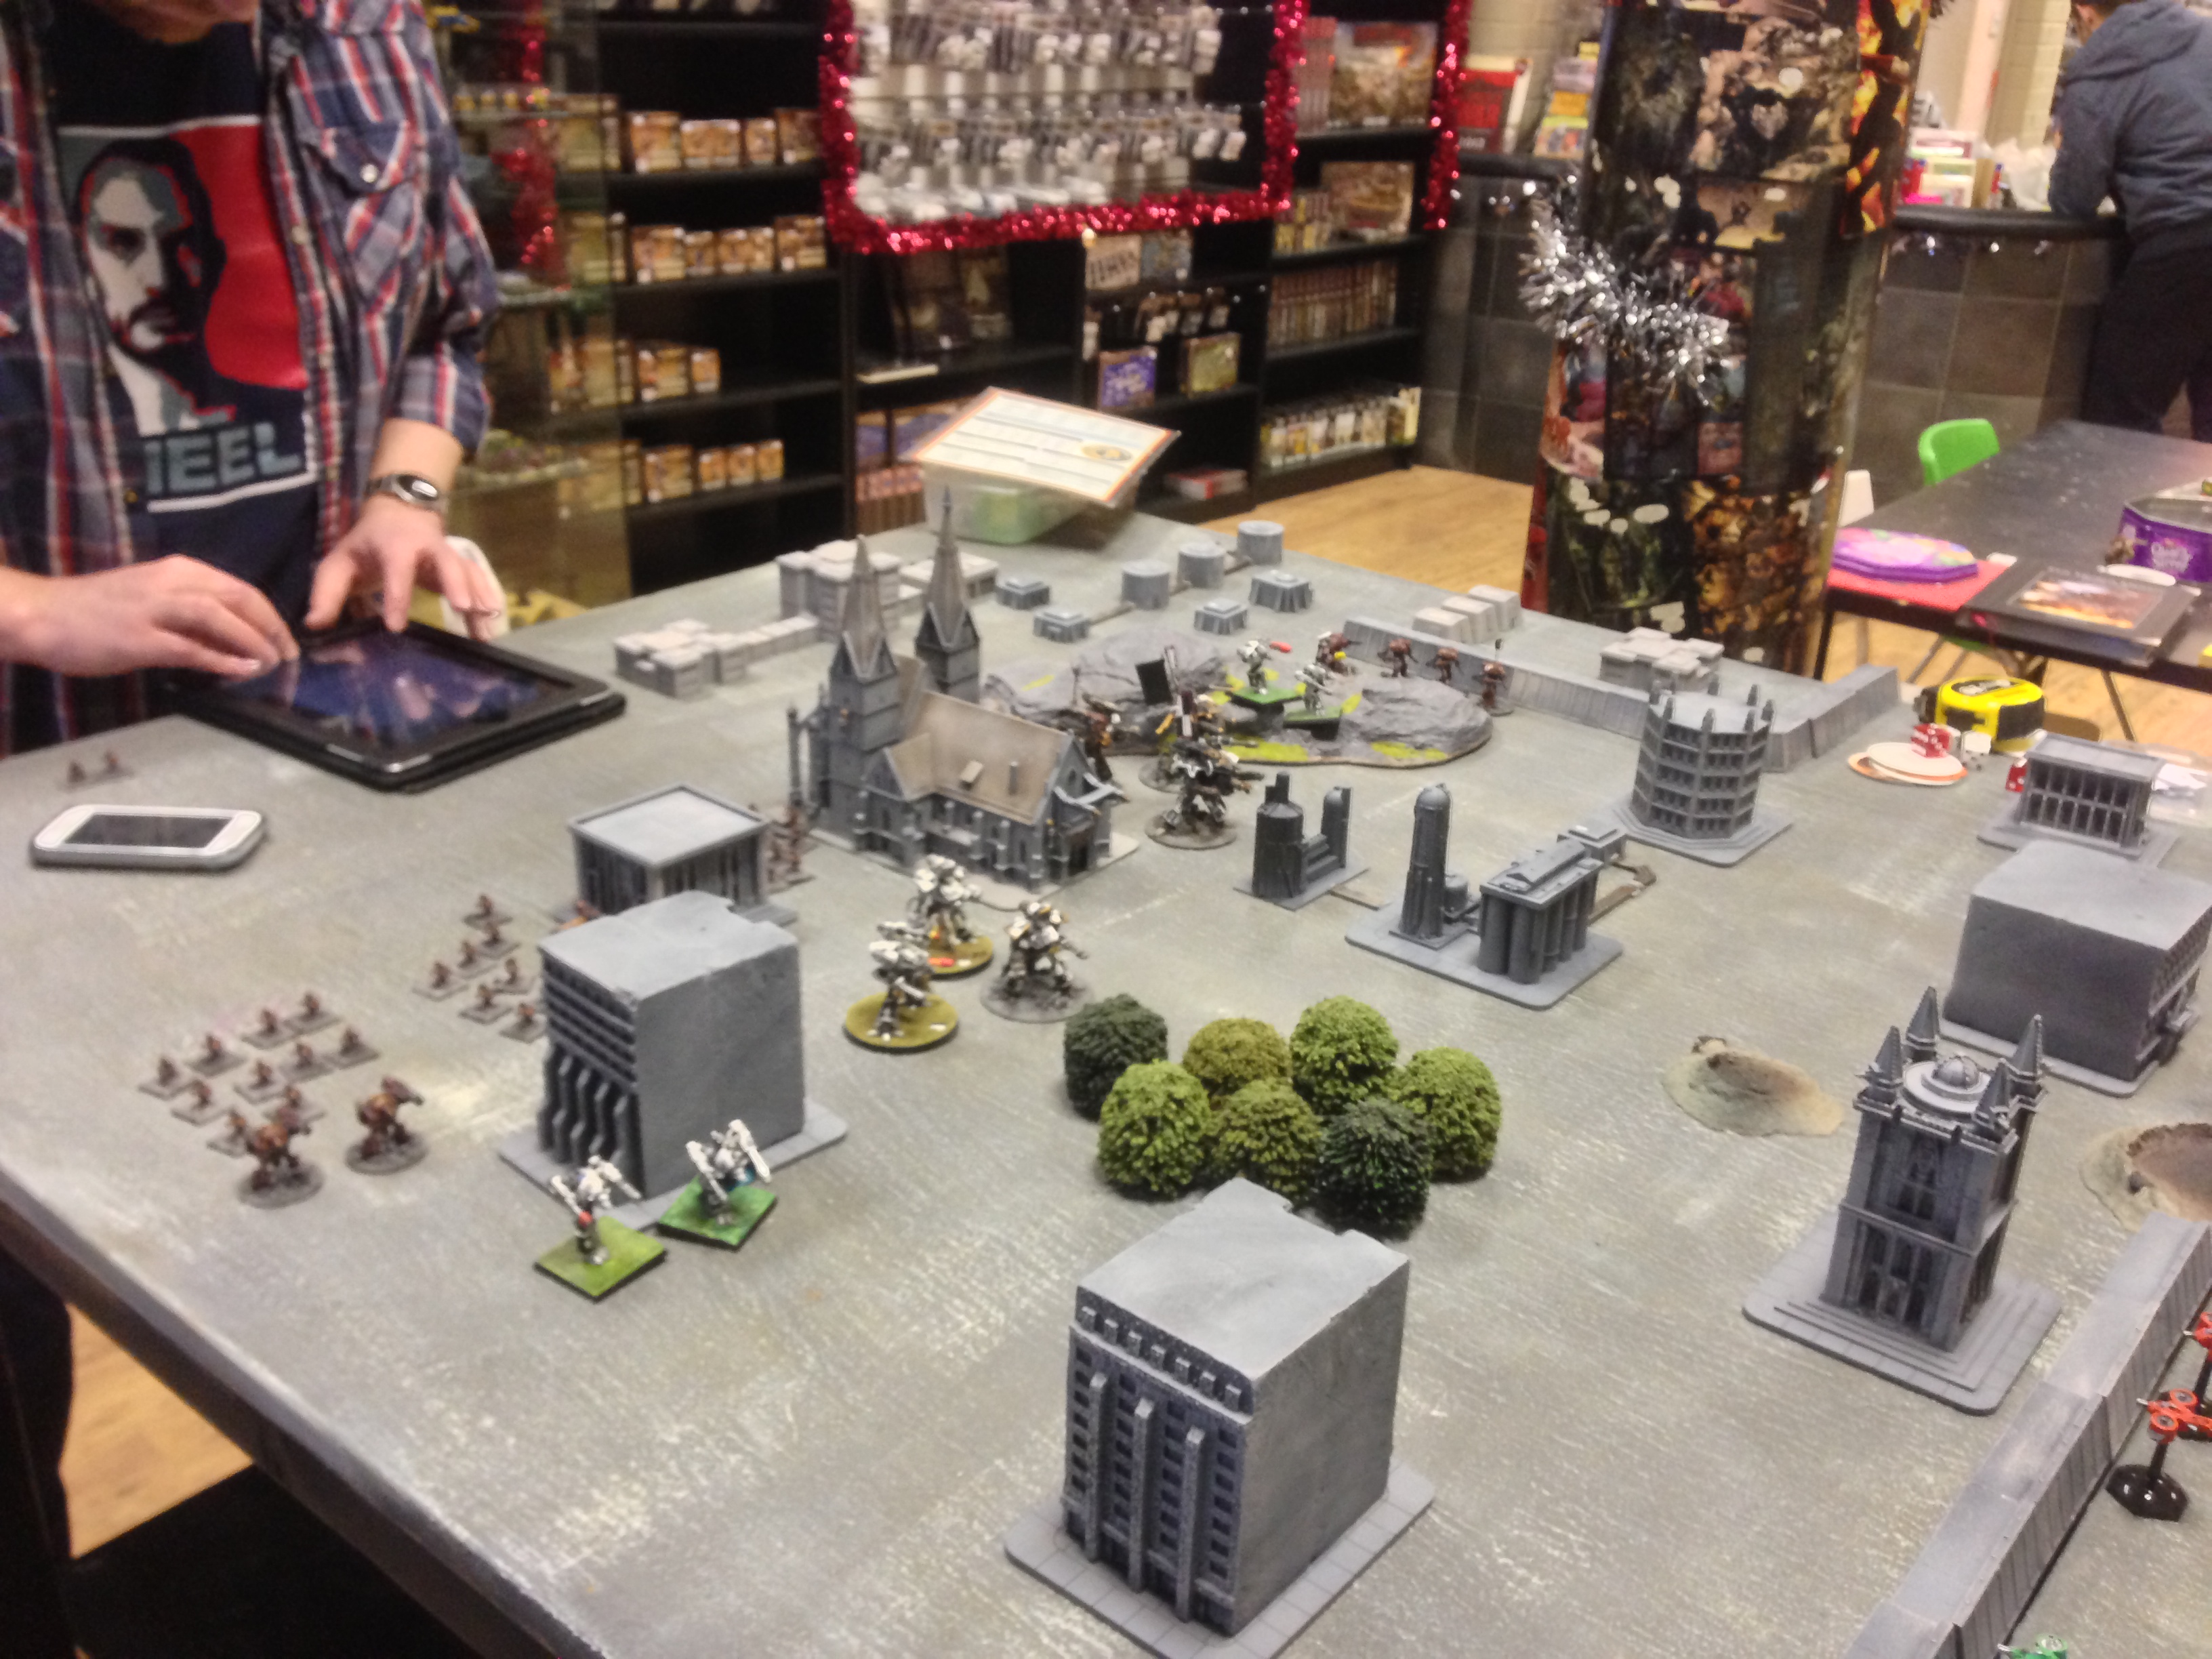
Epic Battle Report: The Author (et al) vs Dan Abnett
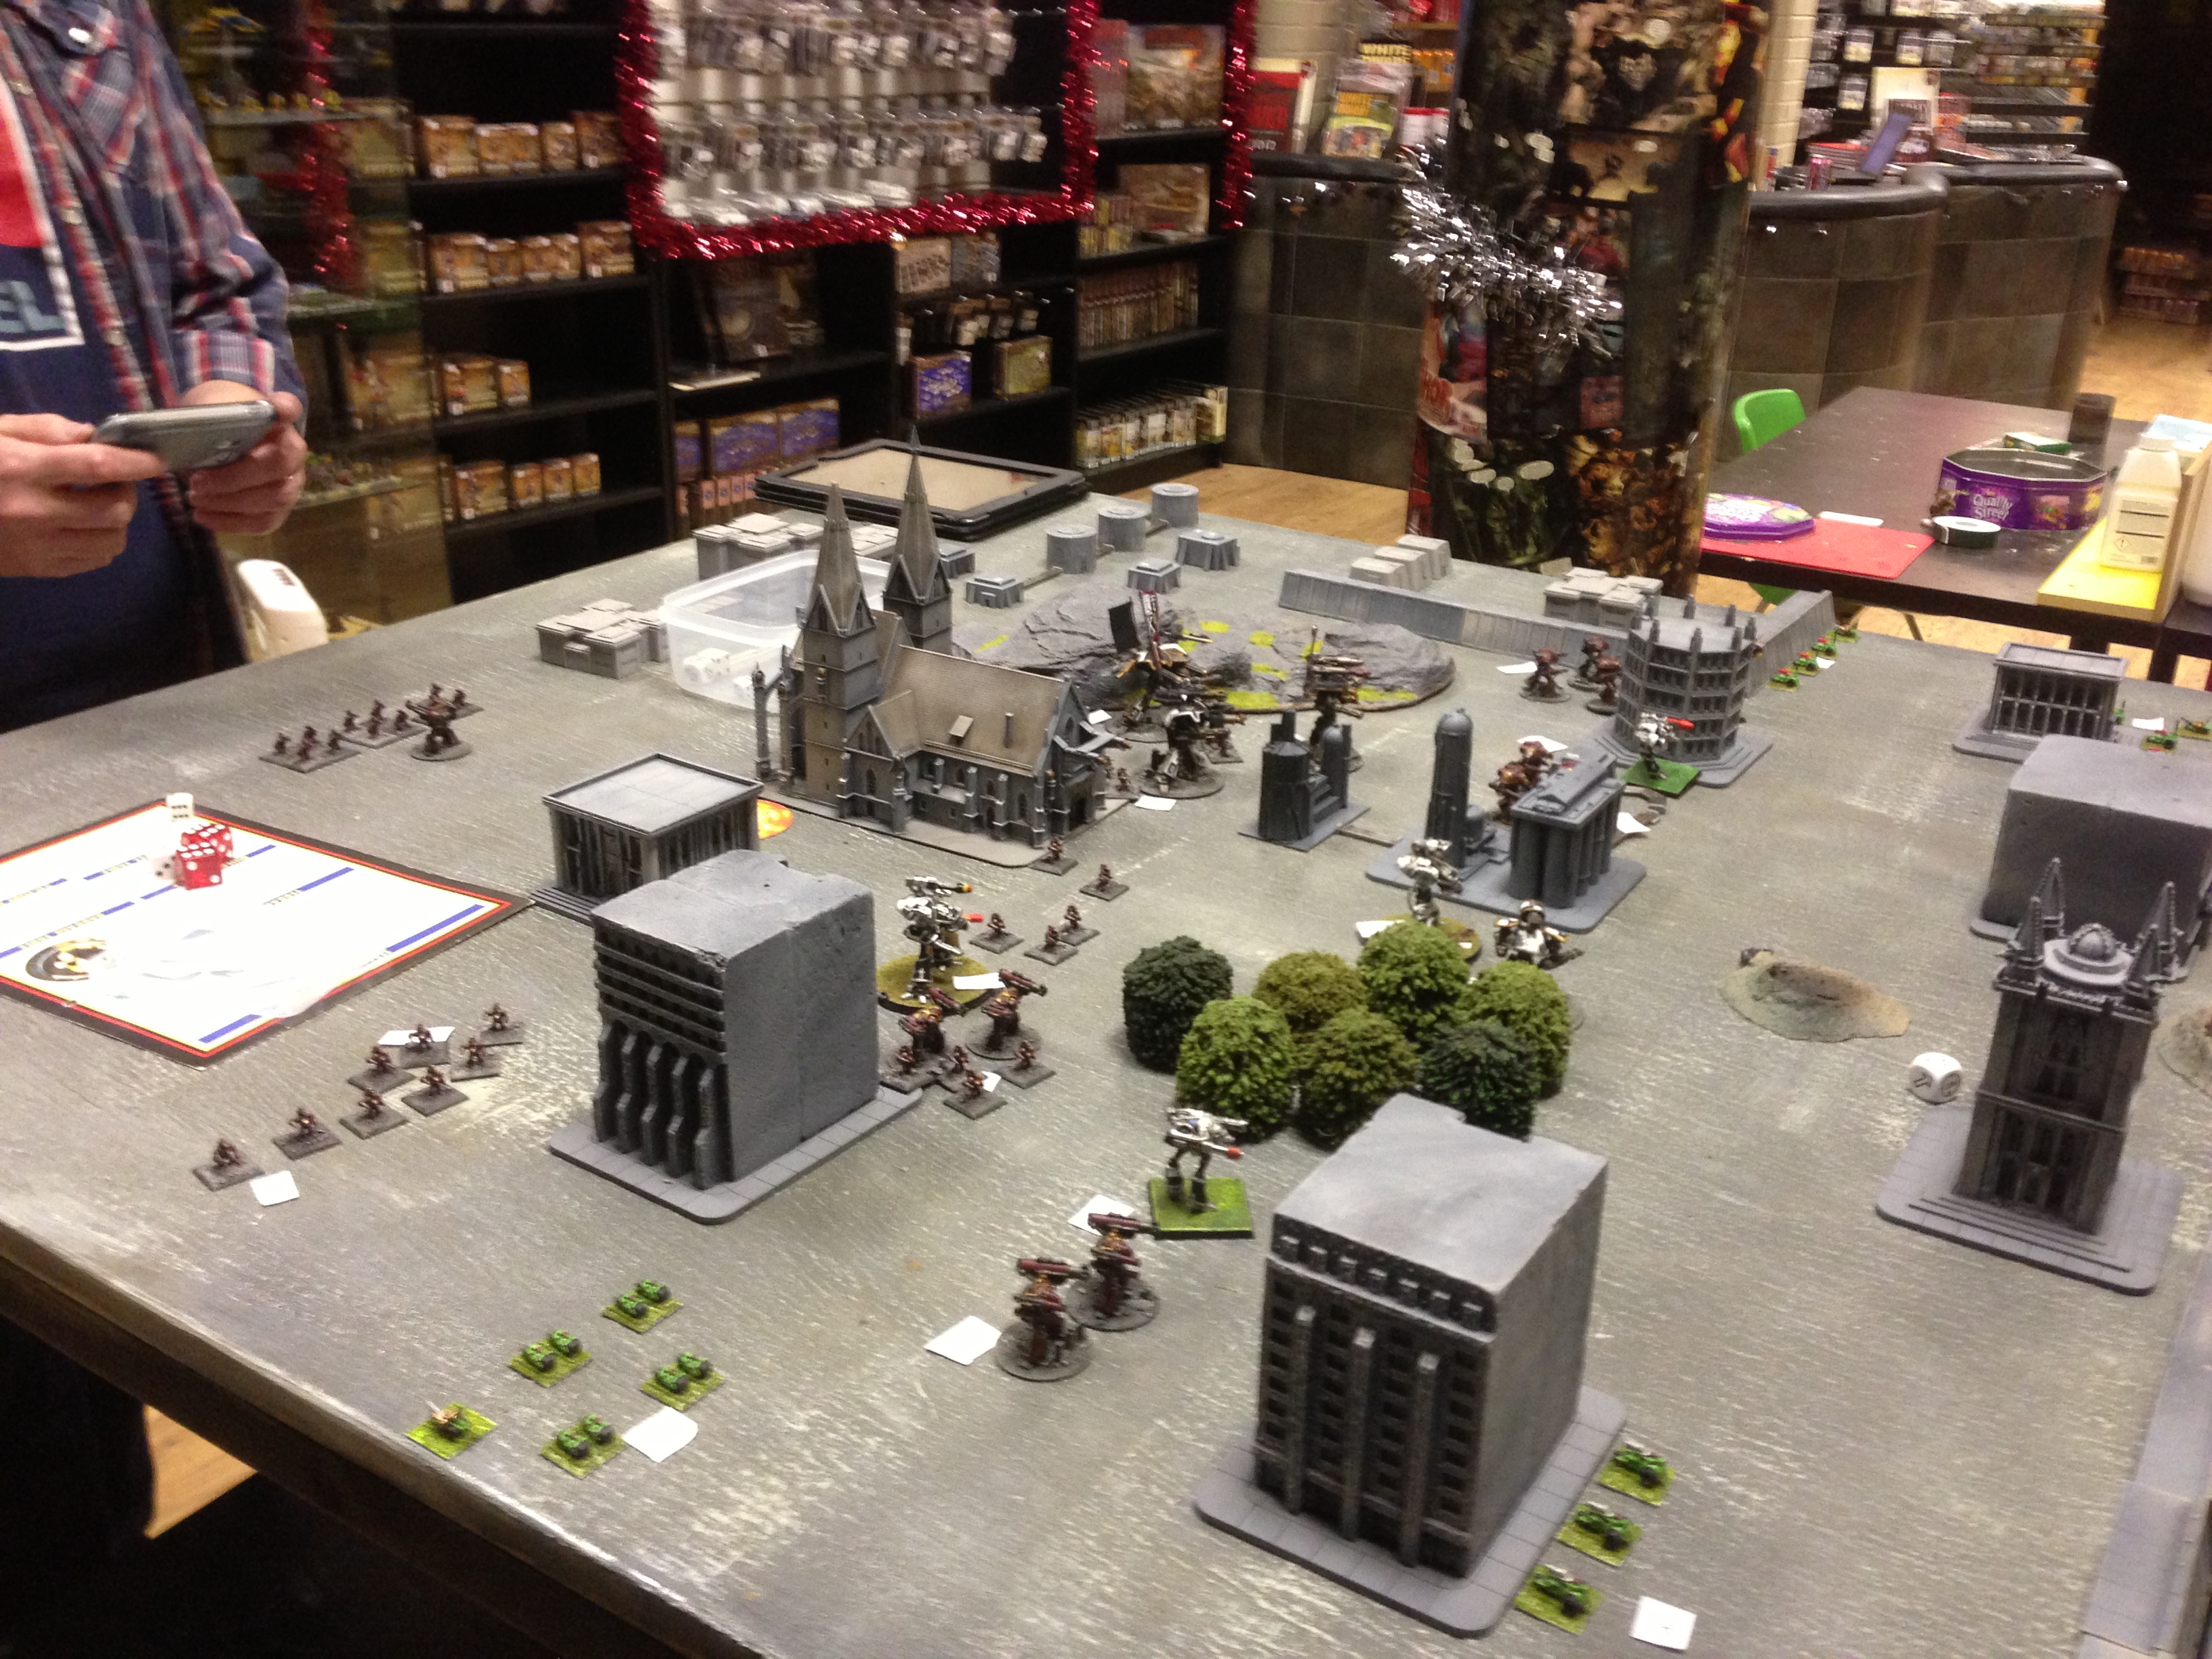
Last weekend, No Mans Land had a grand re-opening in its new location in a swanky shopping arcade, and Dan came along to sign books, answer questions from the gathered throng, and throw some dice and push some models around a table.
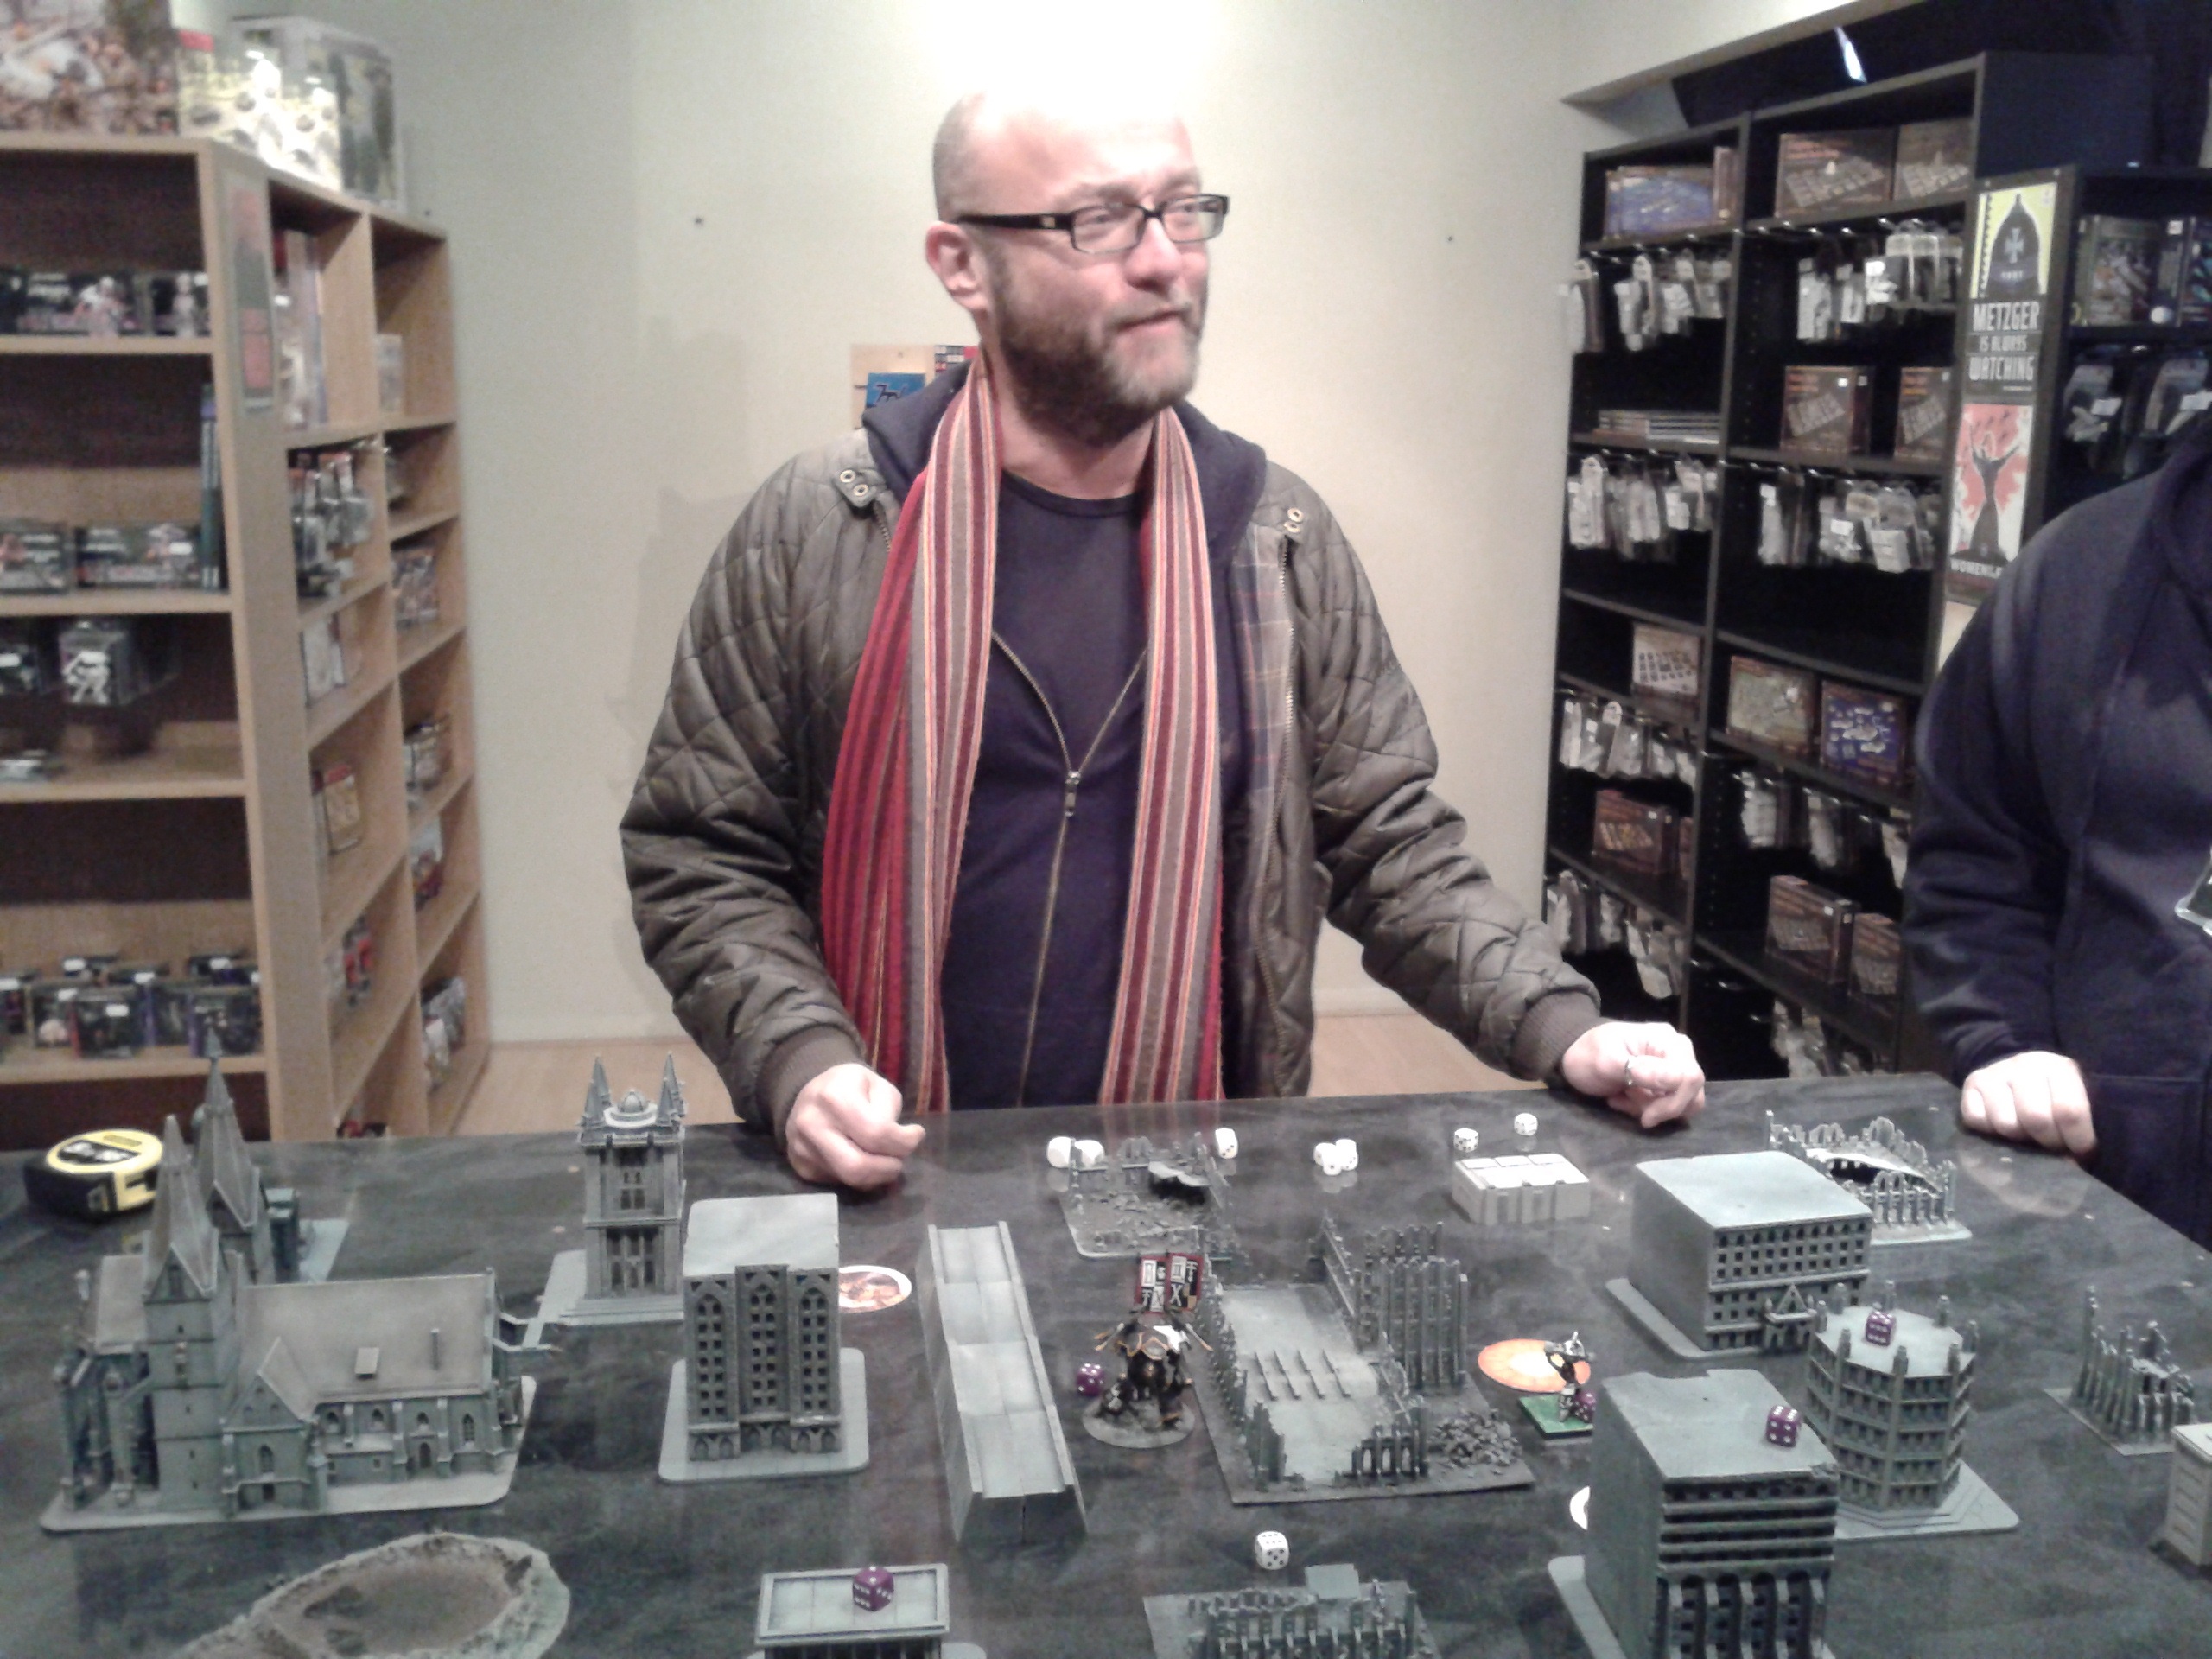
Dan played two games of Epic - one versus me, and then another (which I GMd) against Darren (also known as The Burning Beard), another store regular, using the NetEpic rules, slightly modified to suit small Adeptus Titanicus games.
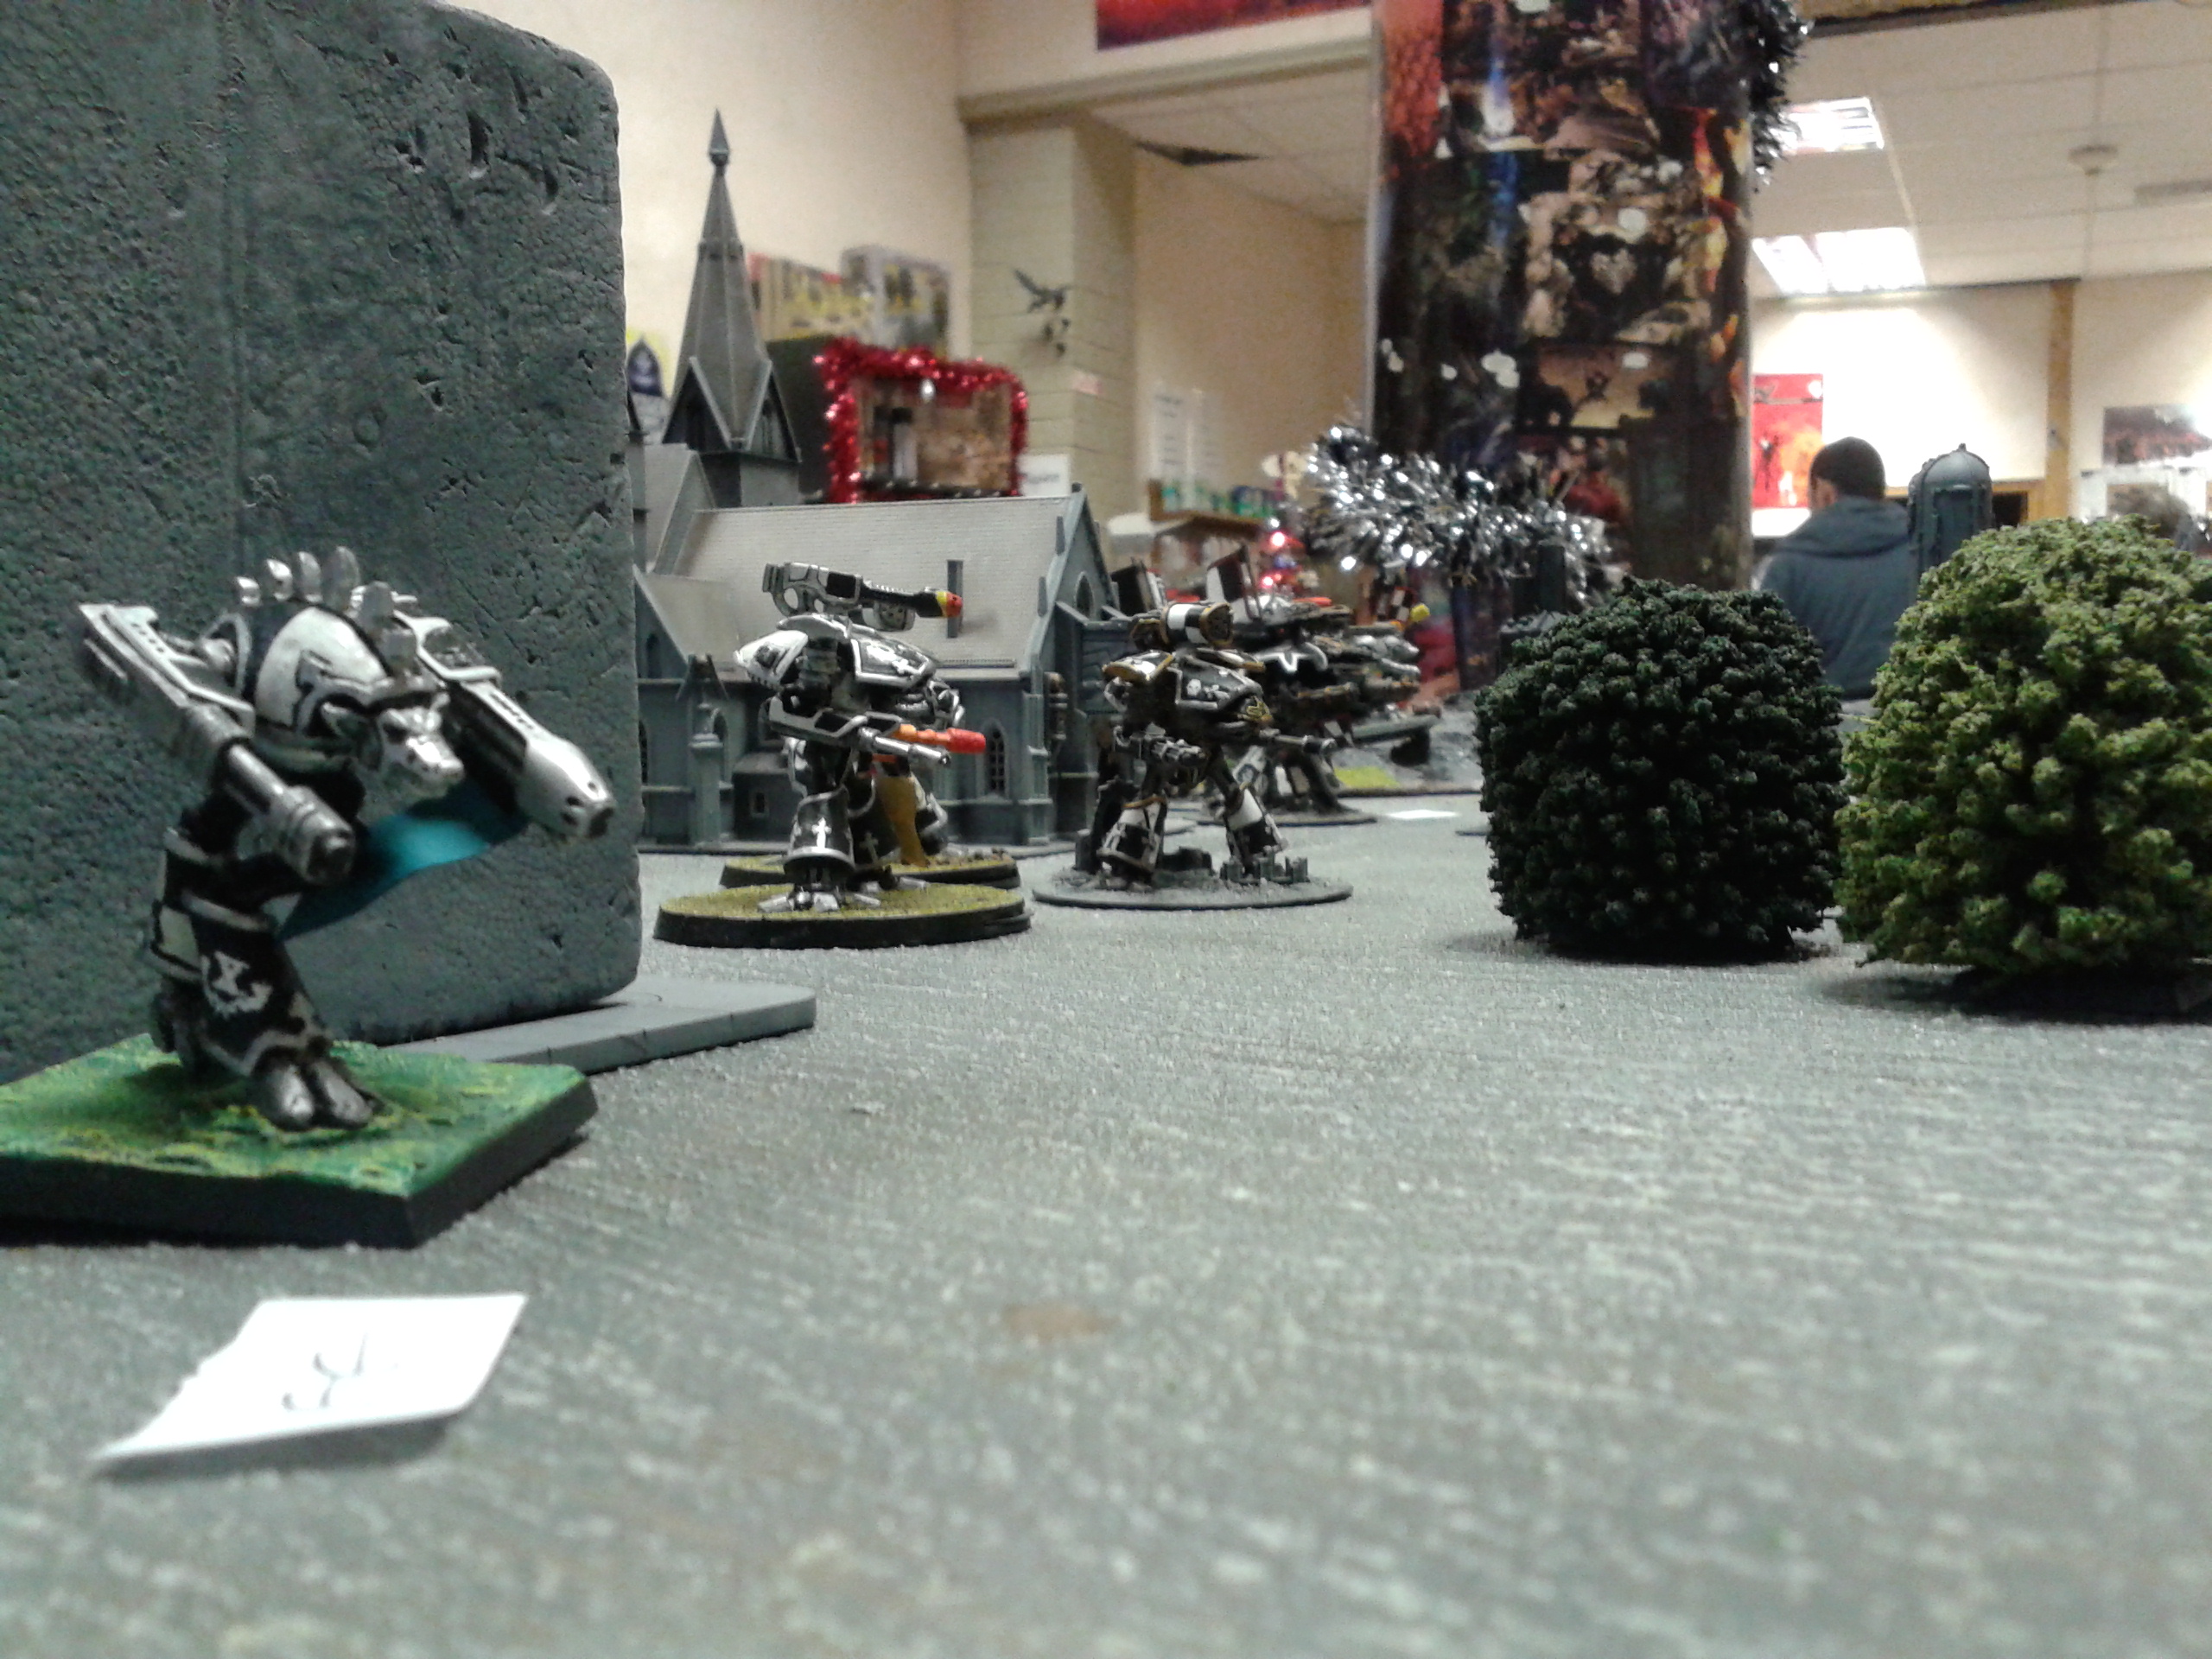
In the first game, we took one Warlord, Reaver and Warhound each and squared up against each other. I was able to knock out his Reaver in the first turn. My Warhound survived a strafe from his Warlord and ended up in close combat with the Dan's Warhound. Meanwhile, our Warlords went toe-to-toe with almost identical loadouts: my titan had twin Gatling Blasters, A Quake Cannon and a Volcano Cannon, Dan's had twin Gatling Blasters and twin Volcano Cannon. Dan's only mistake was moving his titan when could have stood still; that meant that I could open up on him in First Fire before he could hit me (he'd won initiative). My Gatlings and Quake Cannon stripped his remaining shields, and the Volcano Cannon dealt the final blow.
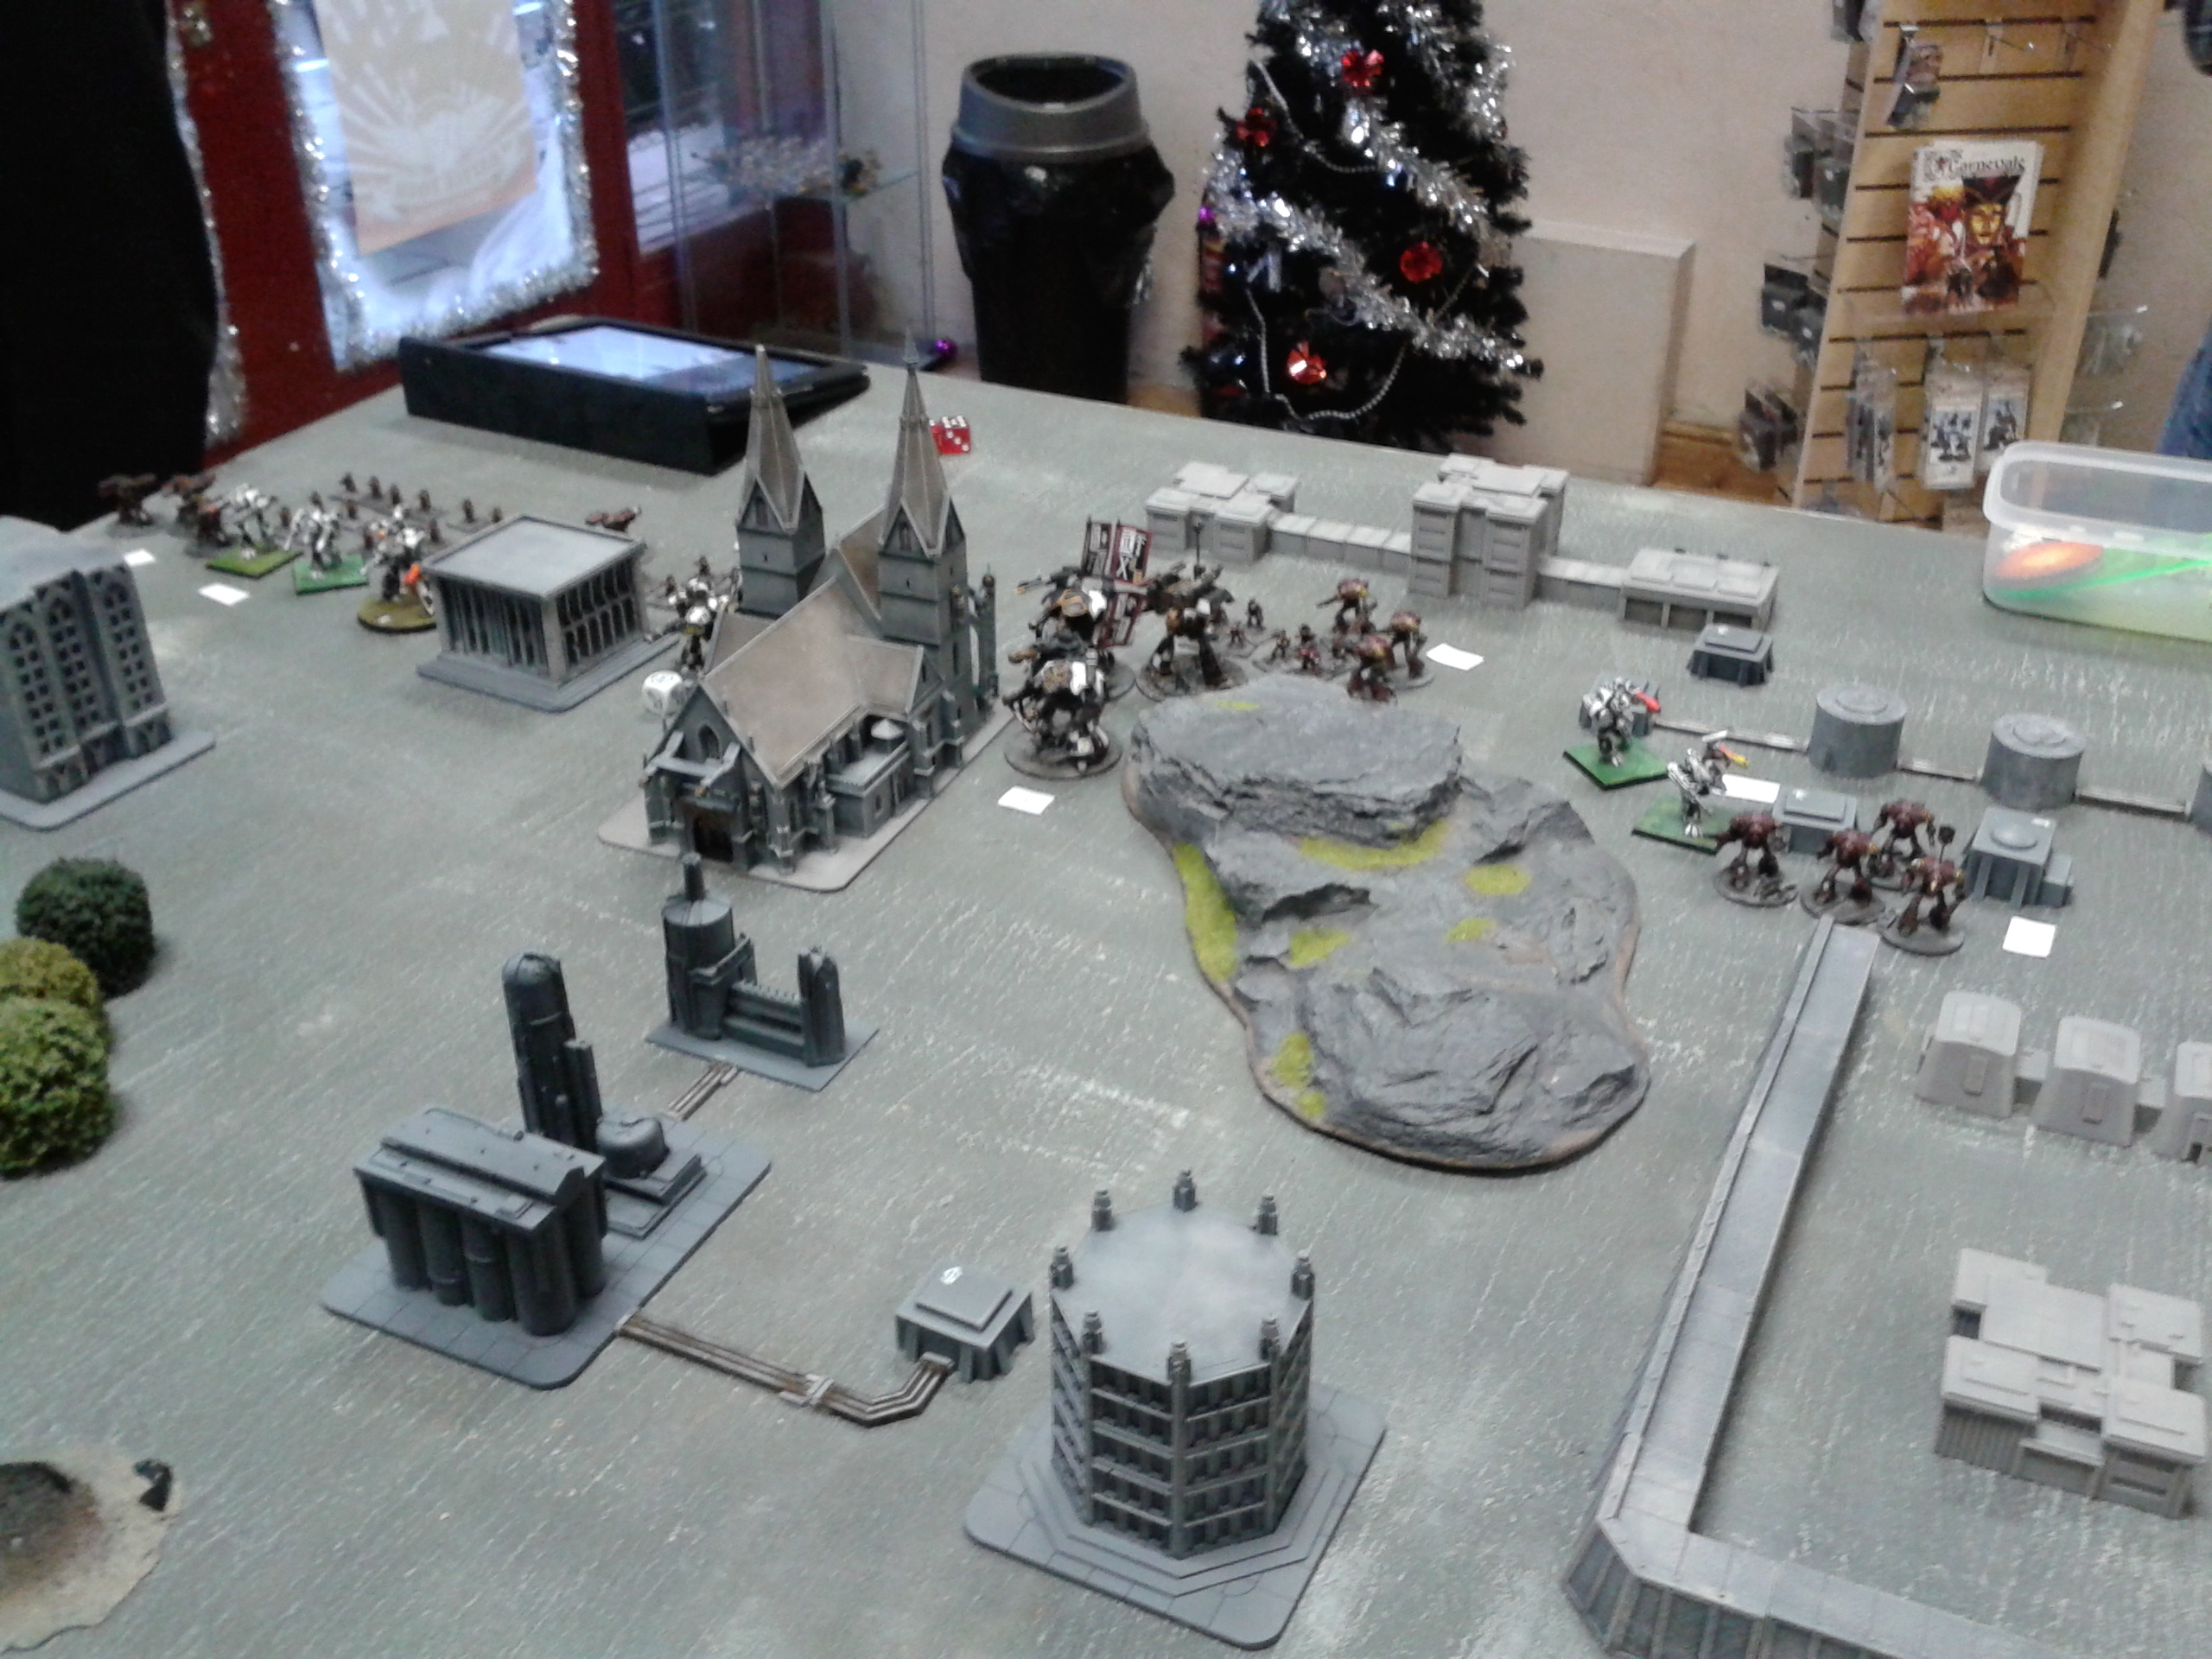
For his second game, Dan wanted to do something a bit different, and decided that he wanted to take out my Imperator, Machinator Formidabilis ("Fearsome Engine" in Low Gothic), against a pack of four Warlords, commanded by Darren.
The game began, and the Imperator stood and watched (and saved up plasma in its reactor) as the Warlords approached.
But calamity! In a well co-ordinated (and unexpected) surprise attack, all four Warlords pounced at once, stripping the Imperator's shields and starting to do damage! First a gun tower was knocked out, then a sensorium. Just when it seemed that the Machinator was going to survive the turn without any serious damage, a deflected shot took out the coupling on the left arm, and the mighty Plasma Annihilator came crashing to the ground!
With Machinator's most deadly weapon wrecked, and surrounded on all sides, there was little that Dan could do as the Warlords moved in for the kill. One of the Warlords was reduced to slag by the defence laser, but in the same turn, a shot from the rear penetrated the plasma reactor, and KABOOM! For the first time in twenty years of combat, my beloved Machinator Formidabilis was destroyed in a mighty conflagration.
Despite the ignominious defeat of an ancient and noble God-engine, great fun was had by all, and No Mans Land had a fitting and enjoyable (if rather chilly) re-opening.
On Warlord Titans, and Hyperbole
 Here's the last #Epic Beetleback Warlord Titan that I will ever paint (I hope)
I immediately regretted the above sentence, because I know that it isn't true: I am pretty sure that at some point in the future, I will repaint all the old Beetlebacks in my Titan Legion, using a different colour scheme so that I have two opposing forces to play against each other.
Even though this is the last Beetleback Warlord to emerge from my bits box, there's still the milk float Mk II warlord to paint, and a pair of Reavers. So don't expect the photos of stompy castle robots to dry up any time soon!
2,500 Point NetEpic Ultramarines vs Adeptus Mechanicus
My army list:
- Paladin Household
- Castellan Knight Squadron
- Reaver Titan
- Robot Maniple
- 2 Robot Squadrons
- Ordinatus Golgotha
Pete's:
- 2 Battle Companies
- 2 Land Speeder Squadrons
- 2 Thunderhawk Gunships
- Predator Squadron
This was the first game of Epic that I've ever played against someone outside my close-knit circle of gaming friends, and it was a most enjoyable experience. I'm looking forward to the rematch!
Pics from the game below.


NetEpic 1K - a simple Epic-scale skirmish game
More recently, there's been quite a bit of interest at No Mans Land in starting up with Epic, so I decided to commit the rules of our game to paper, and am calling it NetEpic 1K.
- Click here to download the NetEpic 1K Rules (PDF, 86KB)
If you have any comments or suggestions, please post a comment! See also the discussion on Tactical Command.
Update: for absolute beginners or people getting back into Epic, Steg and I have produced a number of sample 1,000 point army lists (XLSX file). If you don't have the army lists handy, this spreadsheet includes the models that make up each unit.
Ordinatus Golgotha

Here's the Ordinatus Golgotha I previously mentioned as being part of the mechanised firepower that will support my knights. This is an old model of mine that I stripped and repainted.
The paint scheme is simple enough, but I had a real headache with the hazard stripes. There's just no way to do them neatly at this scale! Fortunately I was able to hide the more egregious examples with some weathering powder.
I am currently working on a trio of Stormblades, and will post photos when they're done. They are important because the colour scheme I choose for them will probably decide the colour scheme I use for the rest of the Skitarii: a Leman Russ company, and a load of infantry supported by APCs.
Improving a Melta Cannon
The Melta Cannon is fairly plain, but the version created for the Forge World Reaver Titan looks rather cool, so I thought I'd have a go at improving the stock version.

Apart from the arm, which I made from plastic rods of various sizes, there are three new additions. First is the piping on the back - this is from the arm of a 40K scale Necron Destroyer (the arm is discarded when you upgrade to a Heavy Destroyer). Second, I've added the muzzles from a Necron Immortal's Gauss Blaster to the front of the gun.
Finally, the underslung piping and housing is from the powerfist of a Space Marine Terminator.
Here's the Melta Cannon, attached to the main body of the Titan:

Here cometh the Milk Float!
I also raided my bits box, giving it a close combat head and a pair of Exodus Wars Edenite Reaper turrets as Vulcan Mega Bolters on the carapace. I'm still not sure what I'll be mounting on the right arm.
The new pose means that the feet are no longer flat on the base, so I built up a pile of rubble using pieces of cork to create a stable platform for the front foot. The rear foot is pinned to the base.
Click to embiggen.

6,000 NetEpic Game: Adeptus Mechanicus vs Squats at No Mans Land
The battle was incredibly one-sided, as you can see from the live-tweet below. This was primarily due to the cheesy nature of my Adeptus Titanicus army, which included ten titans, combined with the relatively inflexible Squat army list which had been designed to deal with swarms of robots.
Here are the pics we took during the game:


http://twitter.com/J_Plays_Games/status/279700414771888128
http://twitter.com/J_Plays_Games/status/279945725251559424
http://twitter.com/J_Plays_Games/status/279949425684643841
http://twitter.com/J_Plays_Games/status/279953201028022273
http://twitter.com/J_Plays_Games/status/279969623863066625
http://twitter.com/StegTheDinosaur/status/279968899544539137
http://twitter.com/J_Plays_Games/status/279979574488612864
http://twitter.com/StegTheDinosaur/status/279995070256660480
How to get hold of Thom's Robots
Reaver Titan
Here are a few shots. You can also see this beastie in the background of my EpiComp submission.
The Epic reaver is Games Workshop's oldest model still in production, and this item does sort of show it: it's hard to guess how old the cast is (I bought it off eBay, so it could be two years or twenty years old), but the detail is pretty poor, and the flat surfaces are rather pitted.
Colour-scheme wise, this guy is nothing new. He has the same black and white checked pattern I've used on all my titans (one day I'll do a big family shot so you can see them all), with the additional bronze edging that I've given to the "elite" titans (on the Warmonger side of the family).
This is the first Reaver I've painted since the mid-nineties, and I have two more to do to complete the second battlegroup. One thing I'll do differently next time is paint them in pieces and then assemble afterwards: there are a lot of fiddly bits!
EpiComp 2012 - My Submission

It occurred to me that I with a bit of work, I could probably get my knights into a state where I could submit them to this year's EpiComp.
For those of you who don't already know, EpiComp is the premiere (ok, probably only) annual Epic-scale painting competition. It regularly brings in some amazing work by the best painters and modellers working in the 6mm scale.
You can see my submission above. I took a load of photos, which, due to the limitations of the competition rules, I can't submit, so I'm posting them here.
This represents about one third of the models that are going to form the Knight army. I still have another squadron of French chevaliers, two squadrons of Castellans, and a load of Paladins still to paint, not to mention a Leman Russ Company, a Stormblade Company, two Ordinatii majoris, and some Skitarii. You'll be seeing more of them in 2013. In the meantime, these photos include everything I've painted (Epic-wise) in 2012. Enjoy!


Getting back in the swing of things
This is a bit disappointing, but it does mean that I've been able to break out the toy soldiers again!
While my wife took the kids to visit her sister, I've had a few days entirely to myself, and I've been making good use of them. Apart from making inroads into the 3rd edition of In the Emperor's Name (for which I'm the editor), I've also been working on some more knights.
Here's the first finished squadron of Castellans:

And here's some Errants, which just need a decal on the right shoulder and they're done:

Finally, here's a Reaver titan, the first I've painted since the mid-ninities:

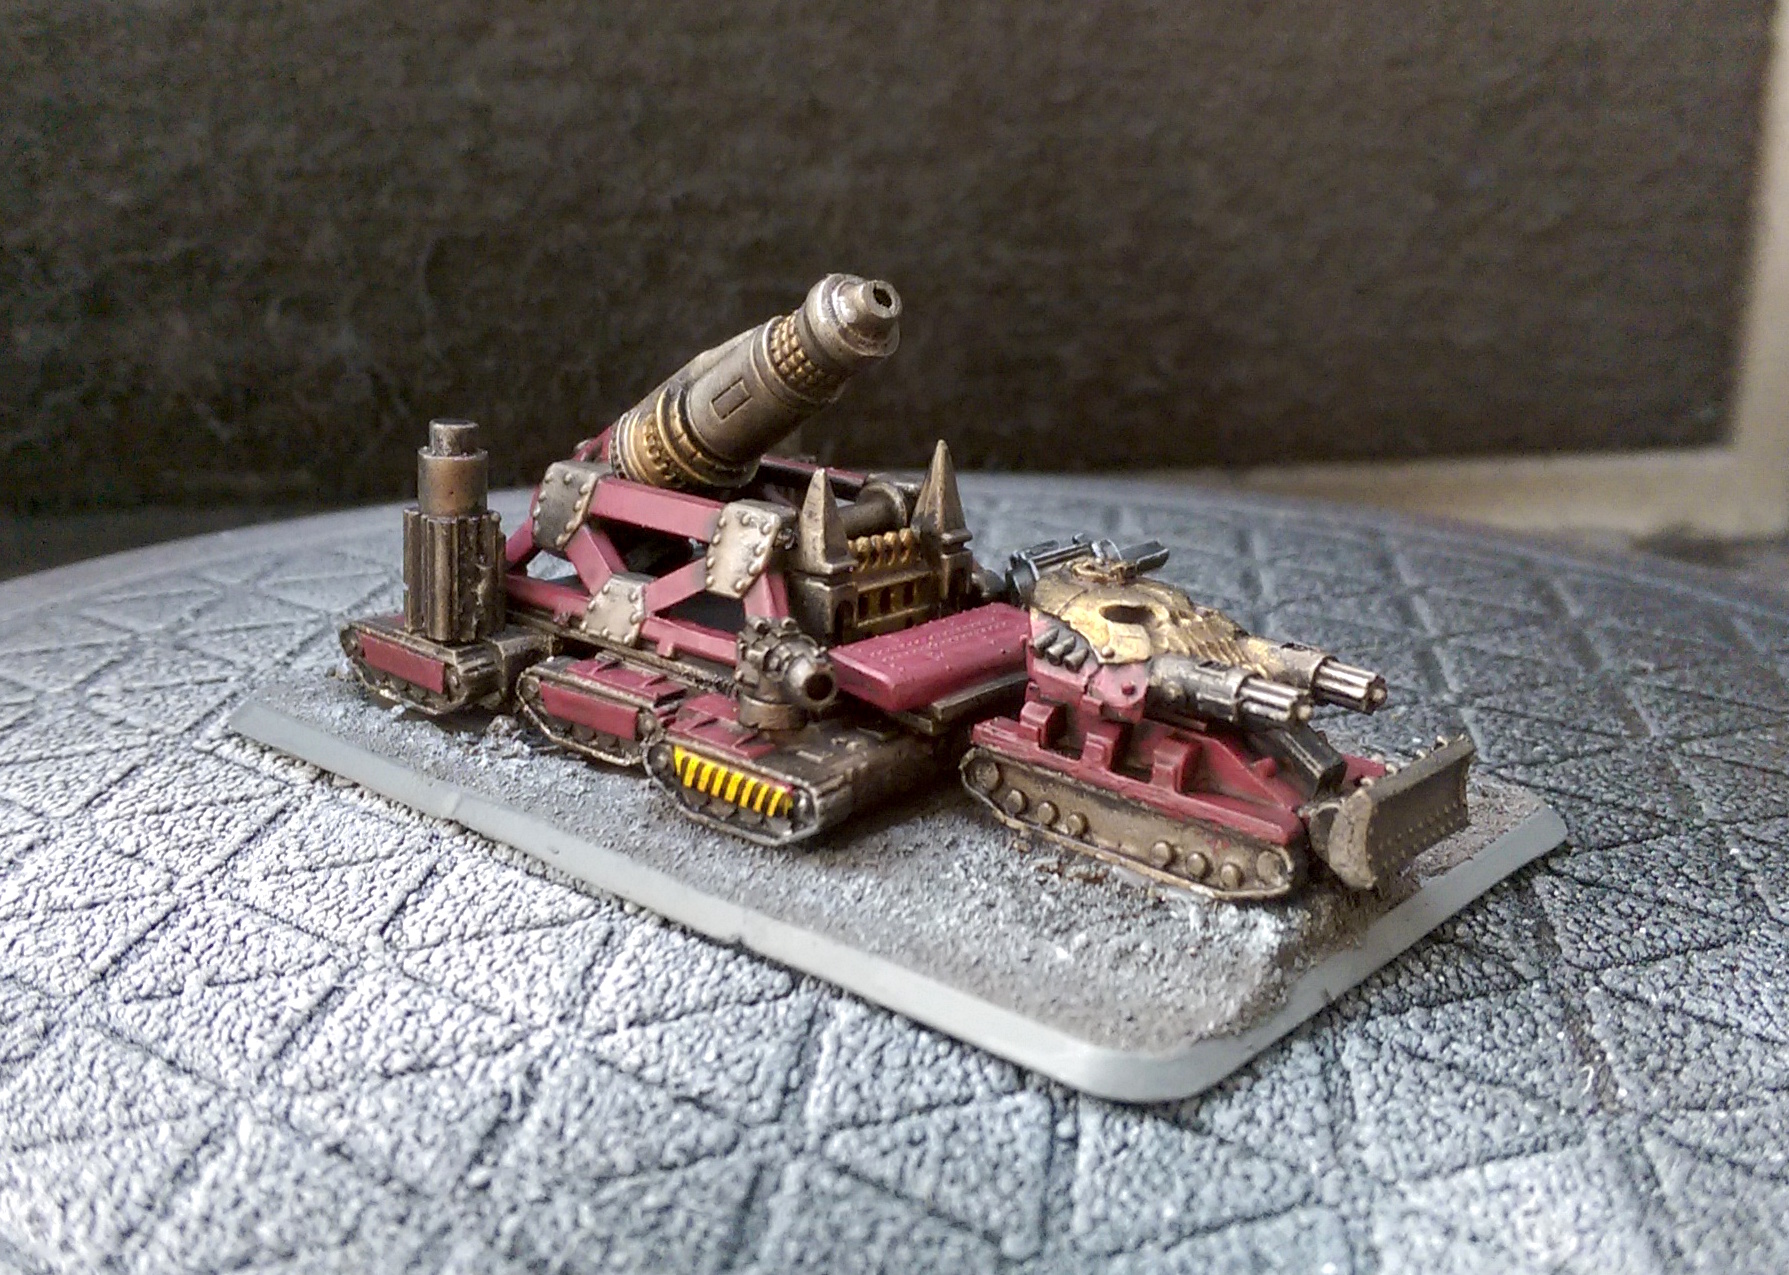
Kitbashed Ordinatus Armageddon
The Ordinatus Armageddon mounts a giant plasma cannon that can fire using either all available energy for one devastating blast, or several smaller pulses. Its main weapons system is essentially a slightly smaller, vehicle mounted version of the Plasma Annihilator carried by Imperator titans.
I have an original Ordinatus Golgotha model which I love using, especially against Orks (any unit which suffers casualties from a Gologtha's Hellfire missiles must pass a morale test or go on Fall Back), but I wanted to expand my collection. Unfortunately I don't have £100 spare so I decided to kitbash one using some Neo-Soviet tanks from Brigade Models as the chassis.


I'm looking forward to getting it painted and on the table!
Knights: Test Castellan

The brass areas were painted using Vallejo brass rather than the Coat d'Arms that I've used on previous models (I seem to have picked several pots from a bad batch, so I'm waiting for them to be restocked). The Vallejo paint is much shinier so I toned it down with some Scab Red. The difference between the two colours is visible, but not so much as to ruin the consistency of the paint scheme between models.
Knights: Baron and First Squadron

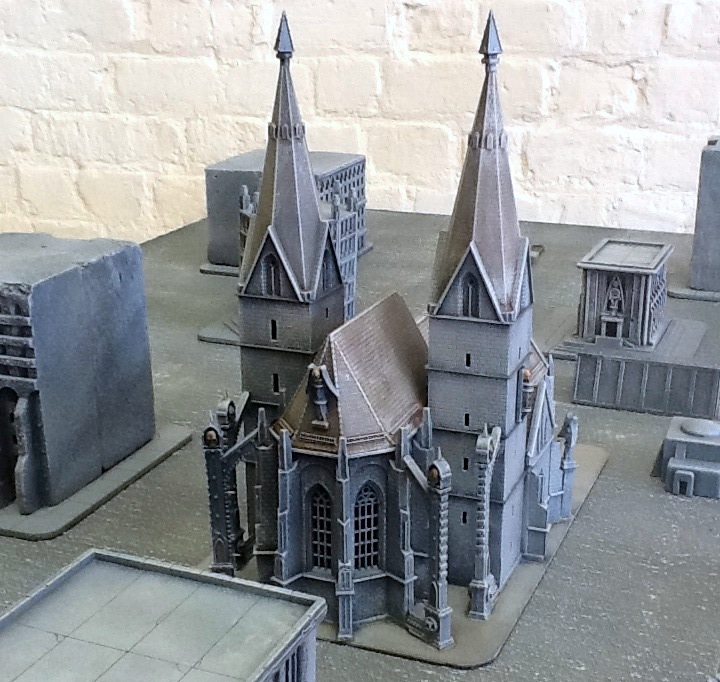
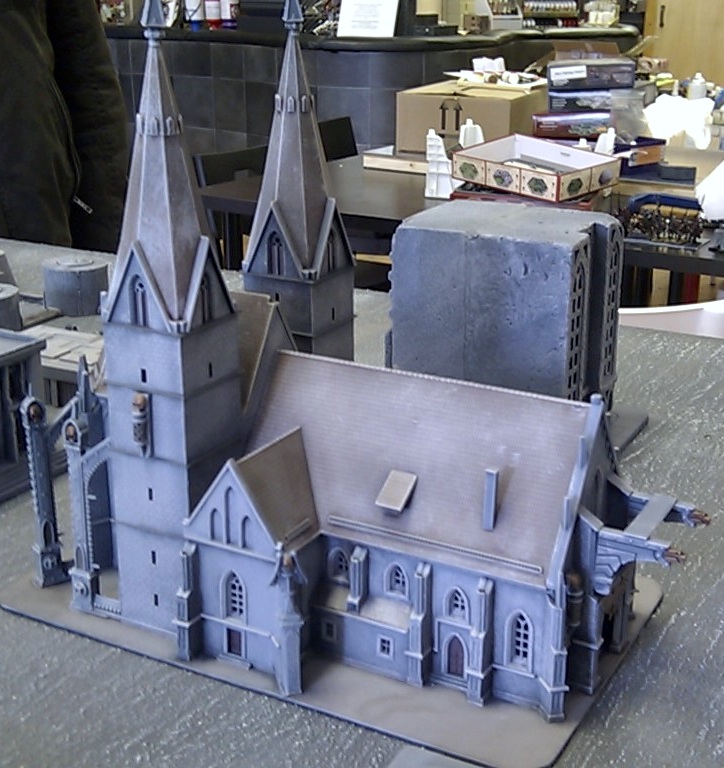
Epic Terrain: Kibri 6818 Gothic Cathedral (Basilica Imperialis)
Here are some photos of the cathedral itself. It was relatively simple to paint: I sprayed it black, then sprayed it with Army Painter Uniform Grey. The roof was washed with Gryphonne Sepia and Devlan Mud, then the whole thing was drybrushed with Coat d'Arms Mid Grey. Then I picked out details such as the shutters, doors and various spikey bits.
These photos were taken with a crap camera, I will update the post with decent pics later on. For now, I'm off to London for Salute!
6,000 NetEpic Game: Necrons vs Squats at No Man's Land
Knights: Test Chevalier

Here's the first of Thom's chevaliers painted in the same colour scheme I tried out on the test knight. Looks pretty good I think.
I just have to paint all the rest now!
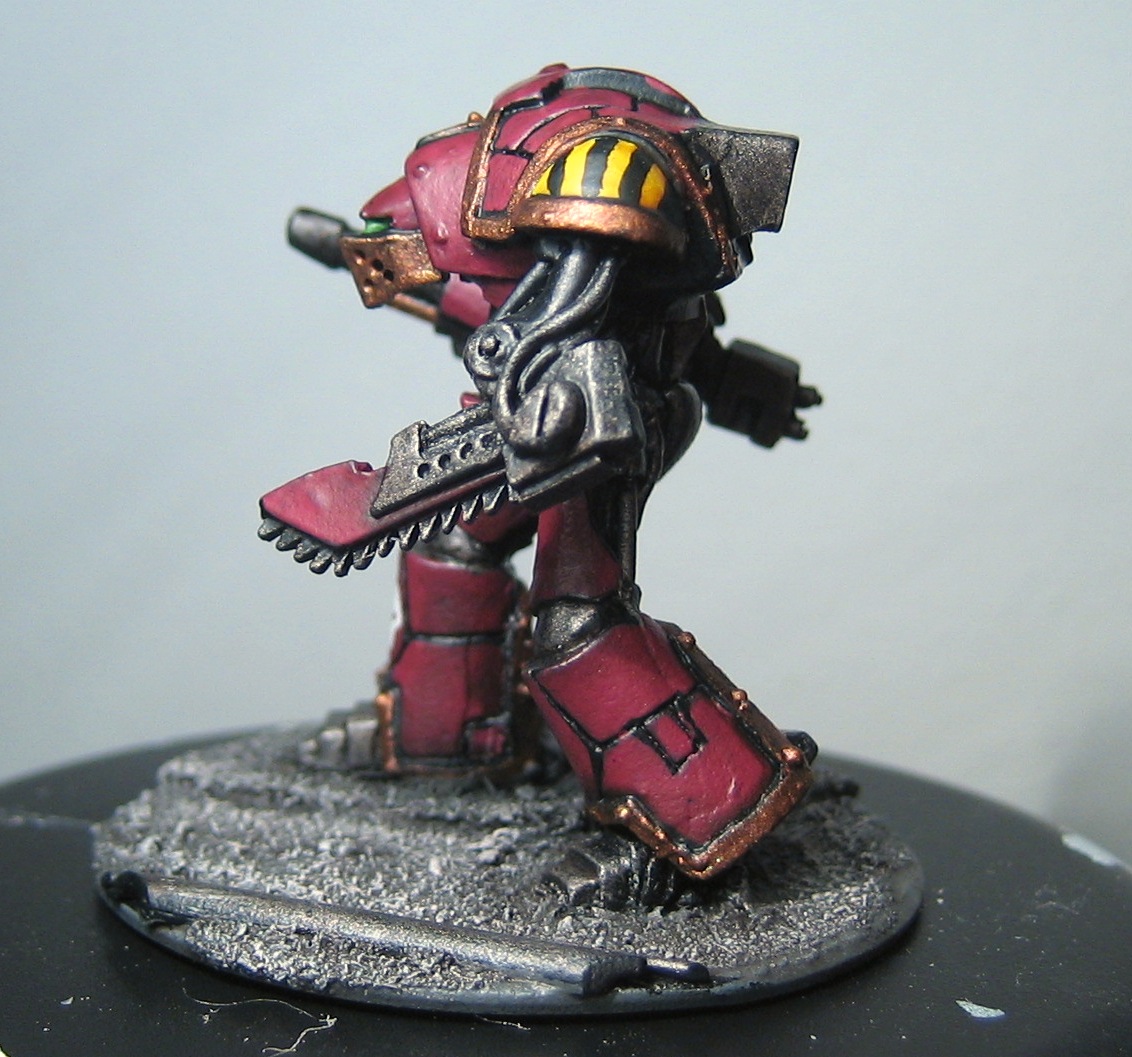
Knights: Robot Cohorts completed
First, I undercoated all the models with black. Then, I base coated them with a mix of Scab Red and Deneb Stone: mixing a bit of Deneb Stone (which is a "foundation" paint) in with the red increases its opacity gives it better coverage.
One this was dry, I painted Coat d'arms Slate Grey onto the base, then I painted details in Boltgun Metal and Coat d'arms Brass. Then they were all given a coat of Devlan Mud - including the base. Once this was dry, I drybrushed the base Deneb Stone.
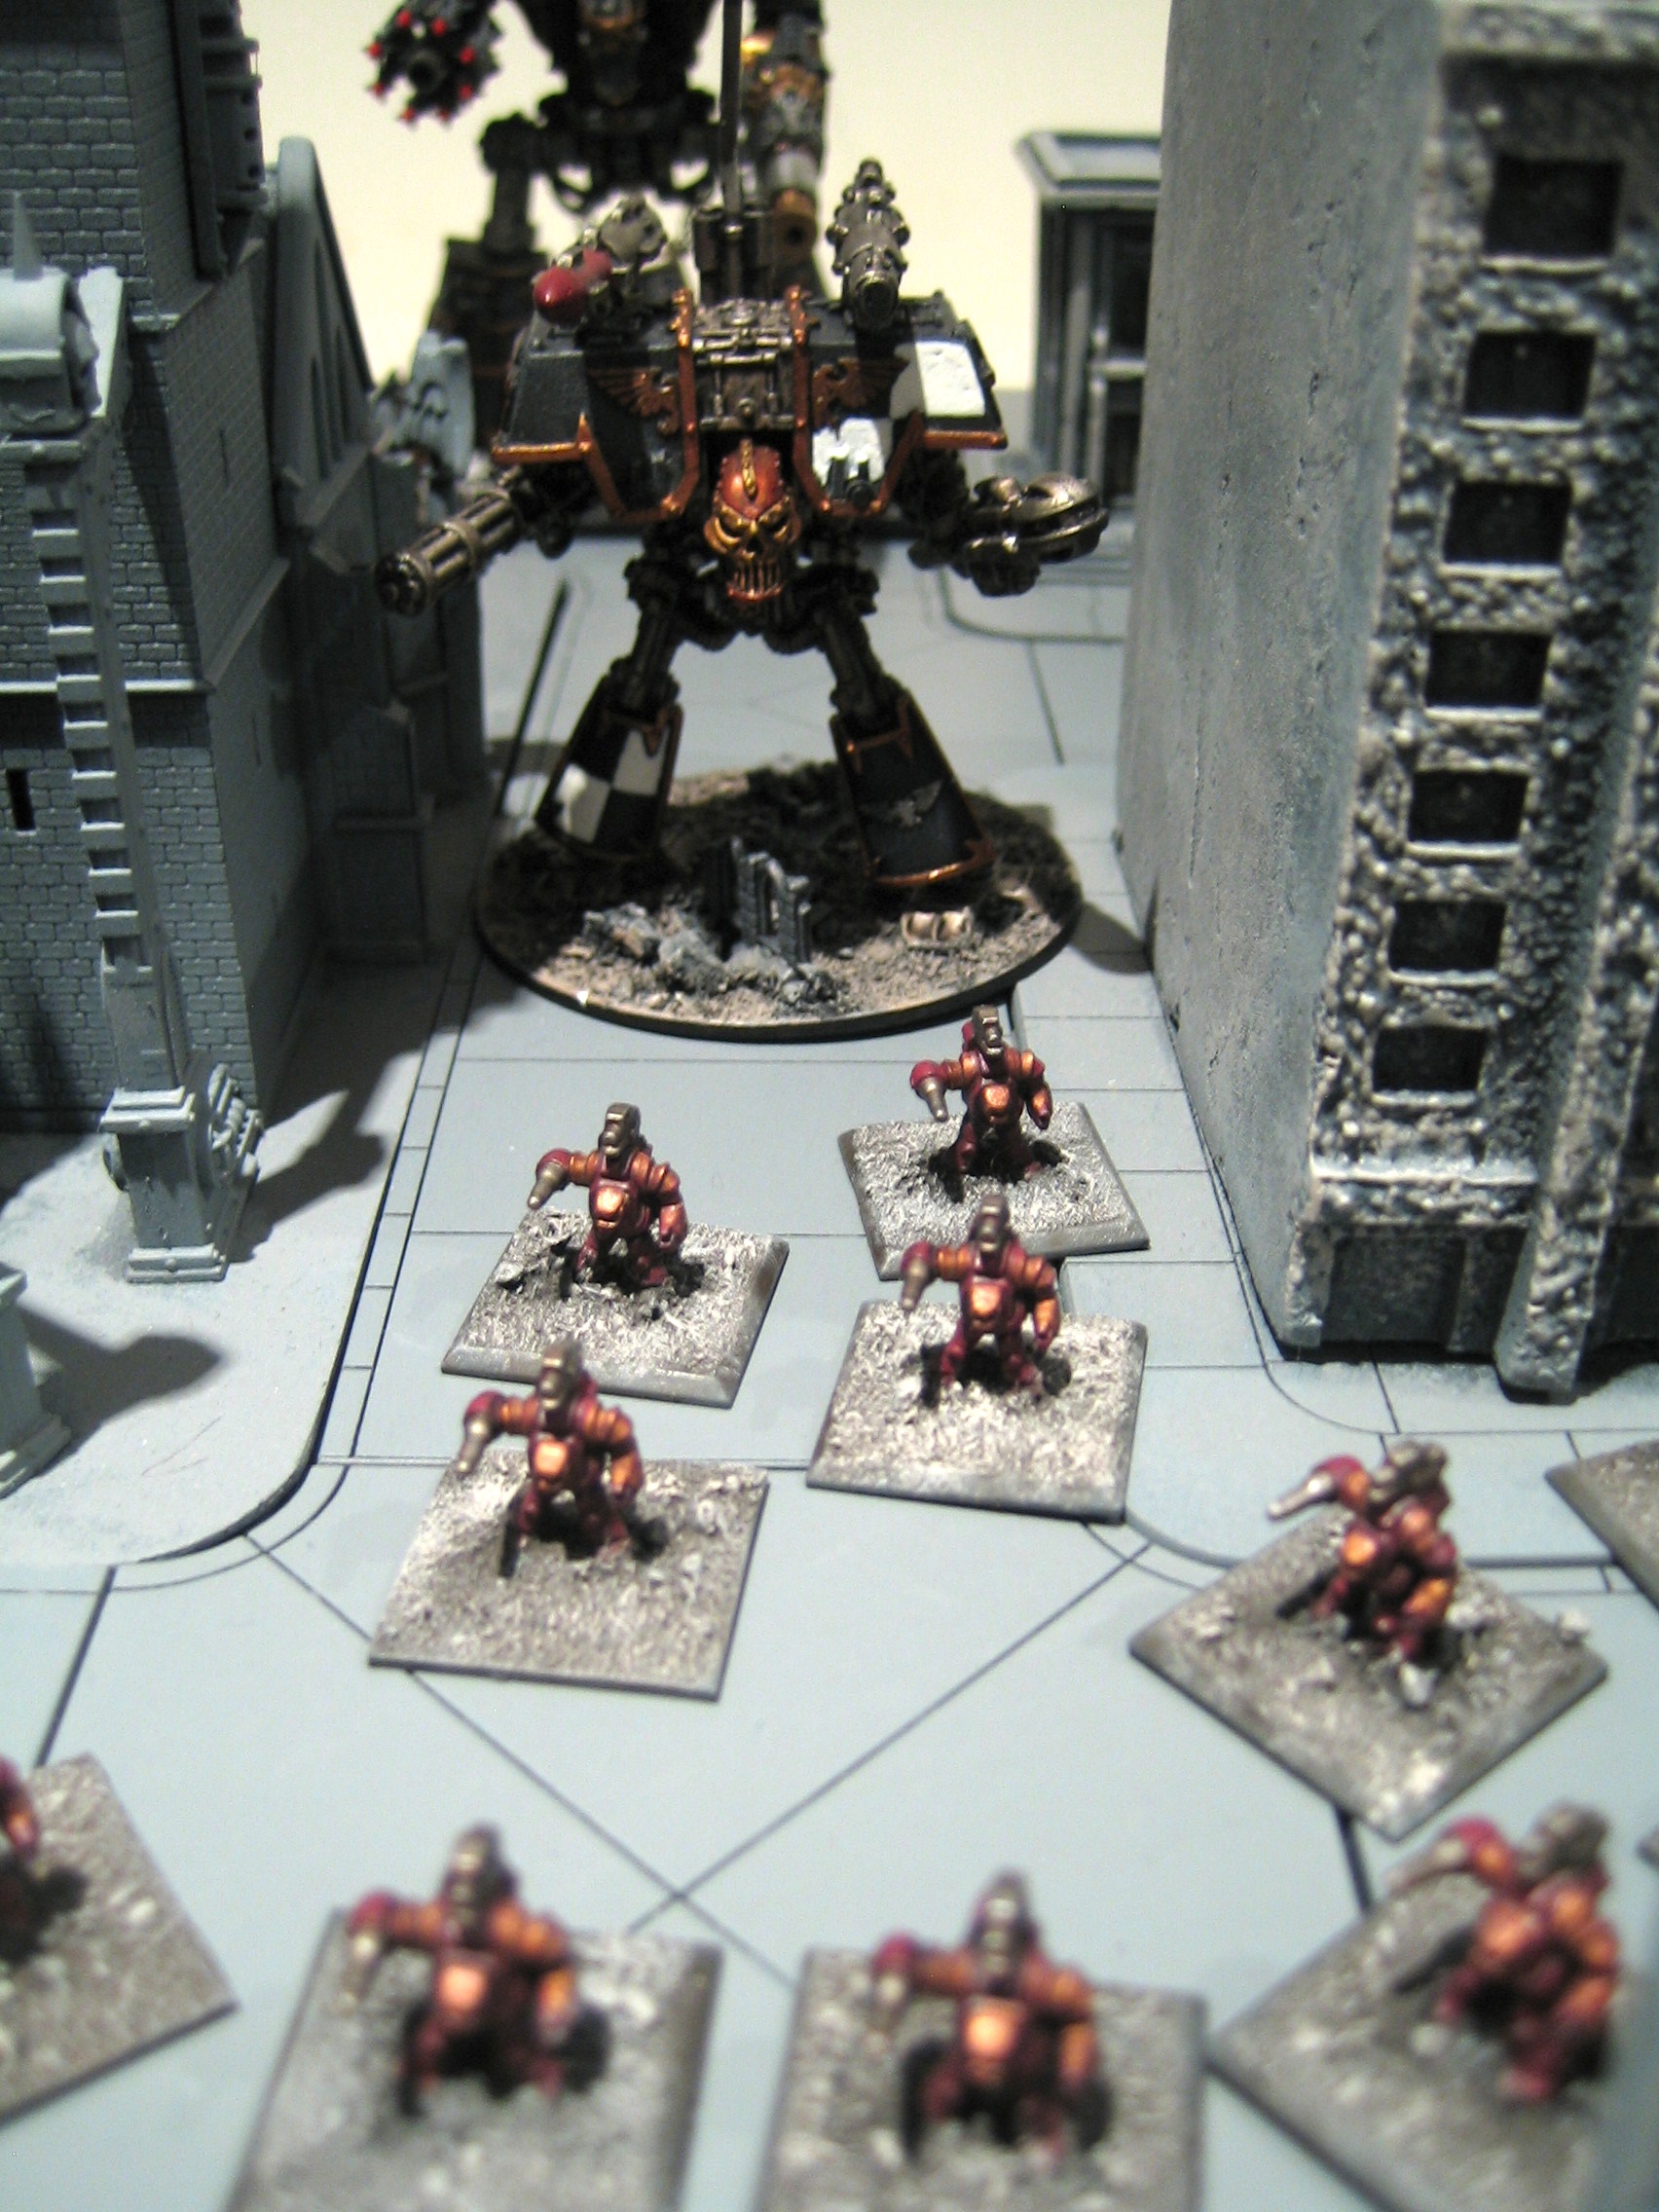
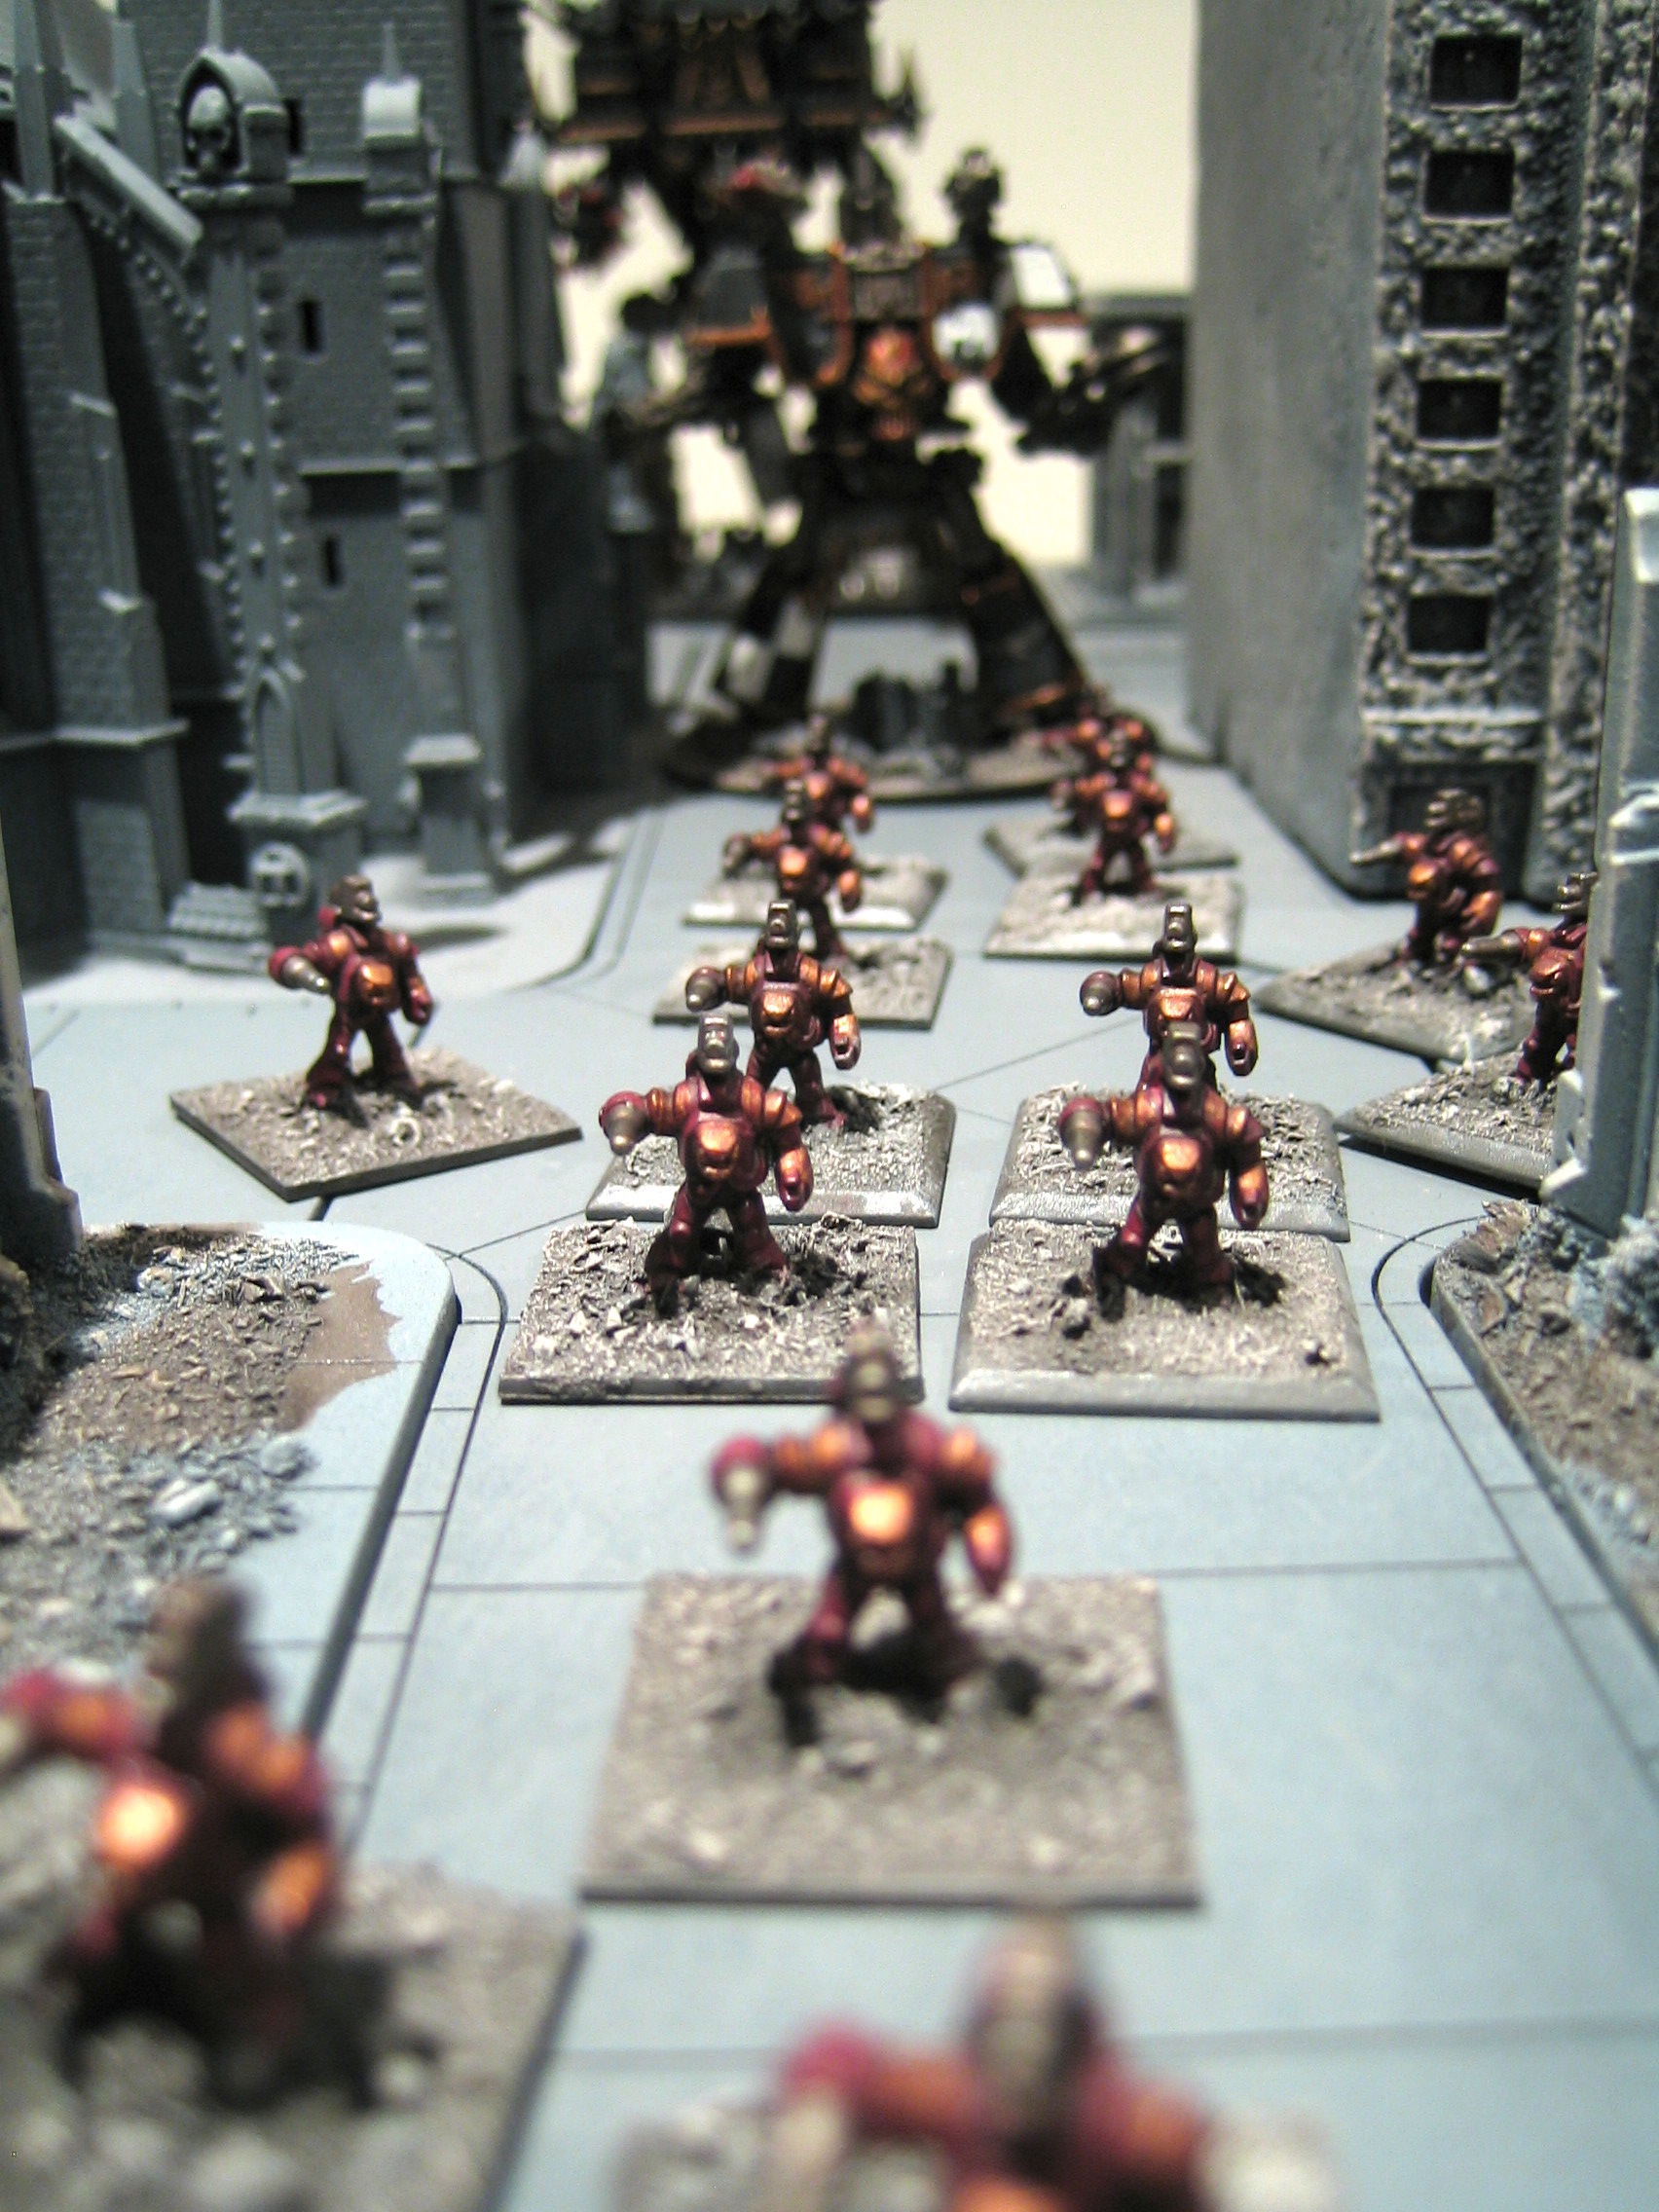
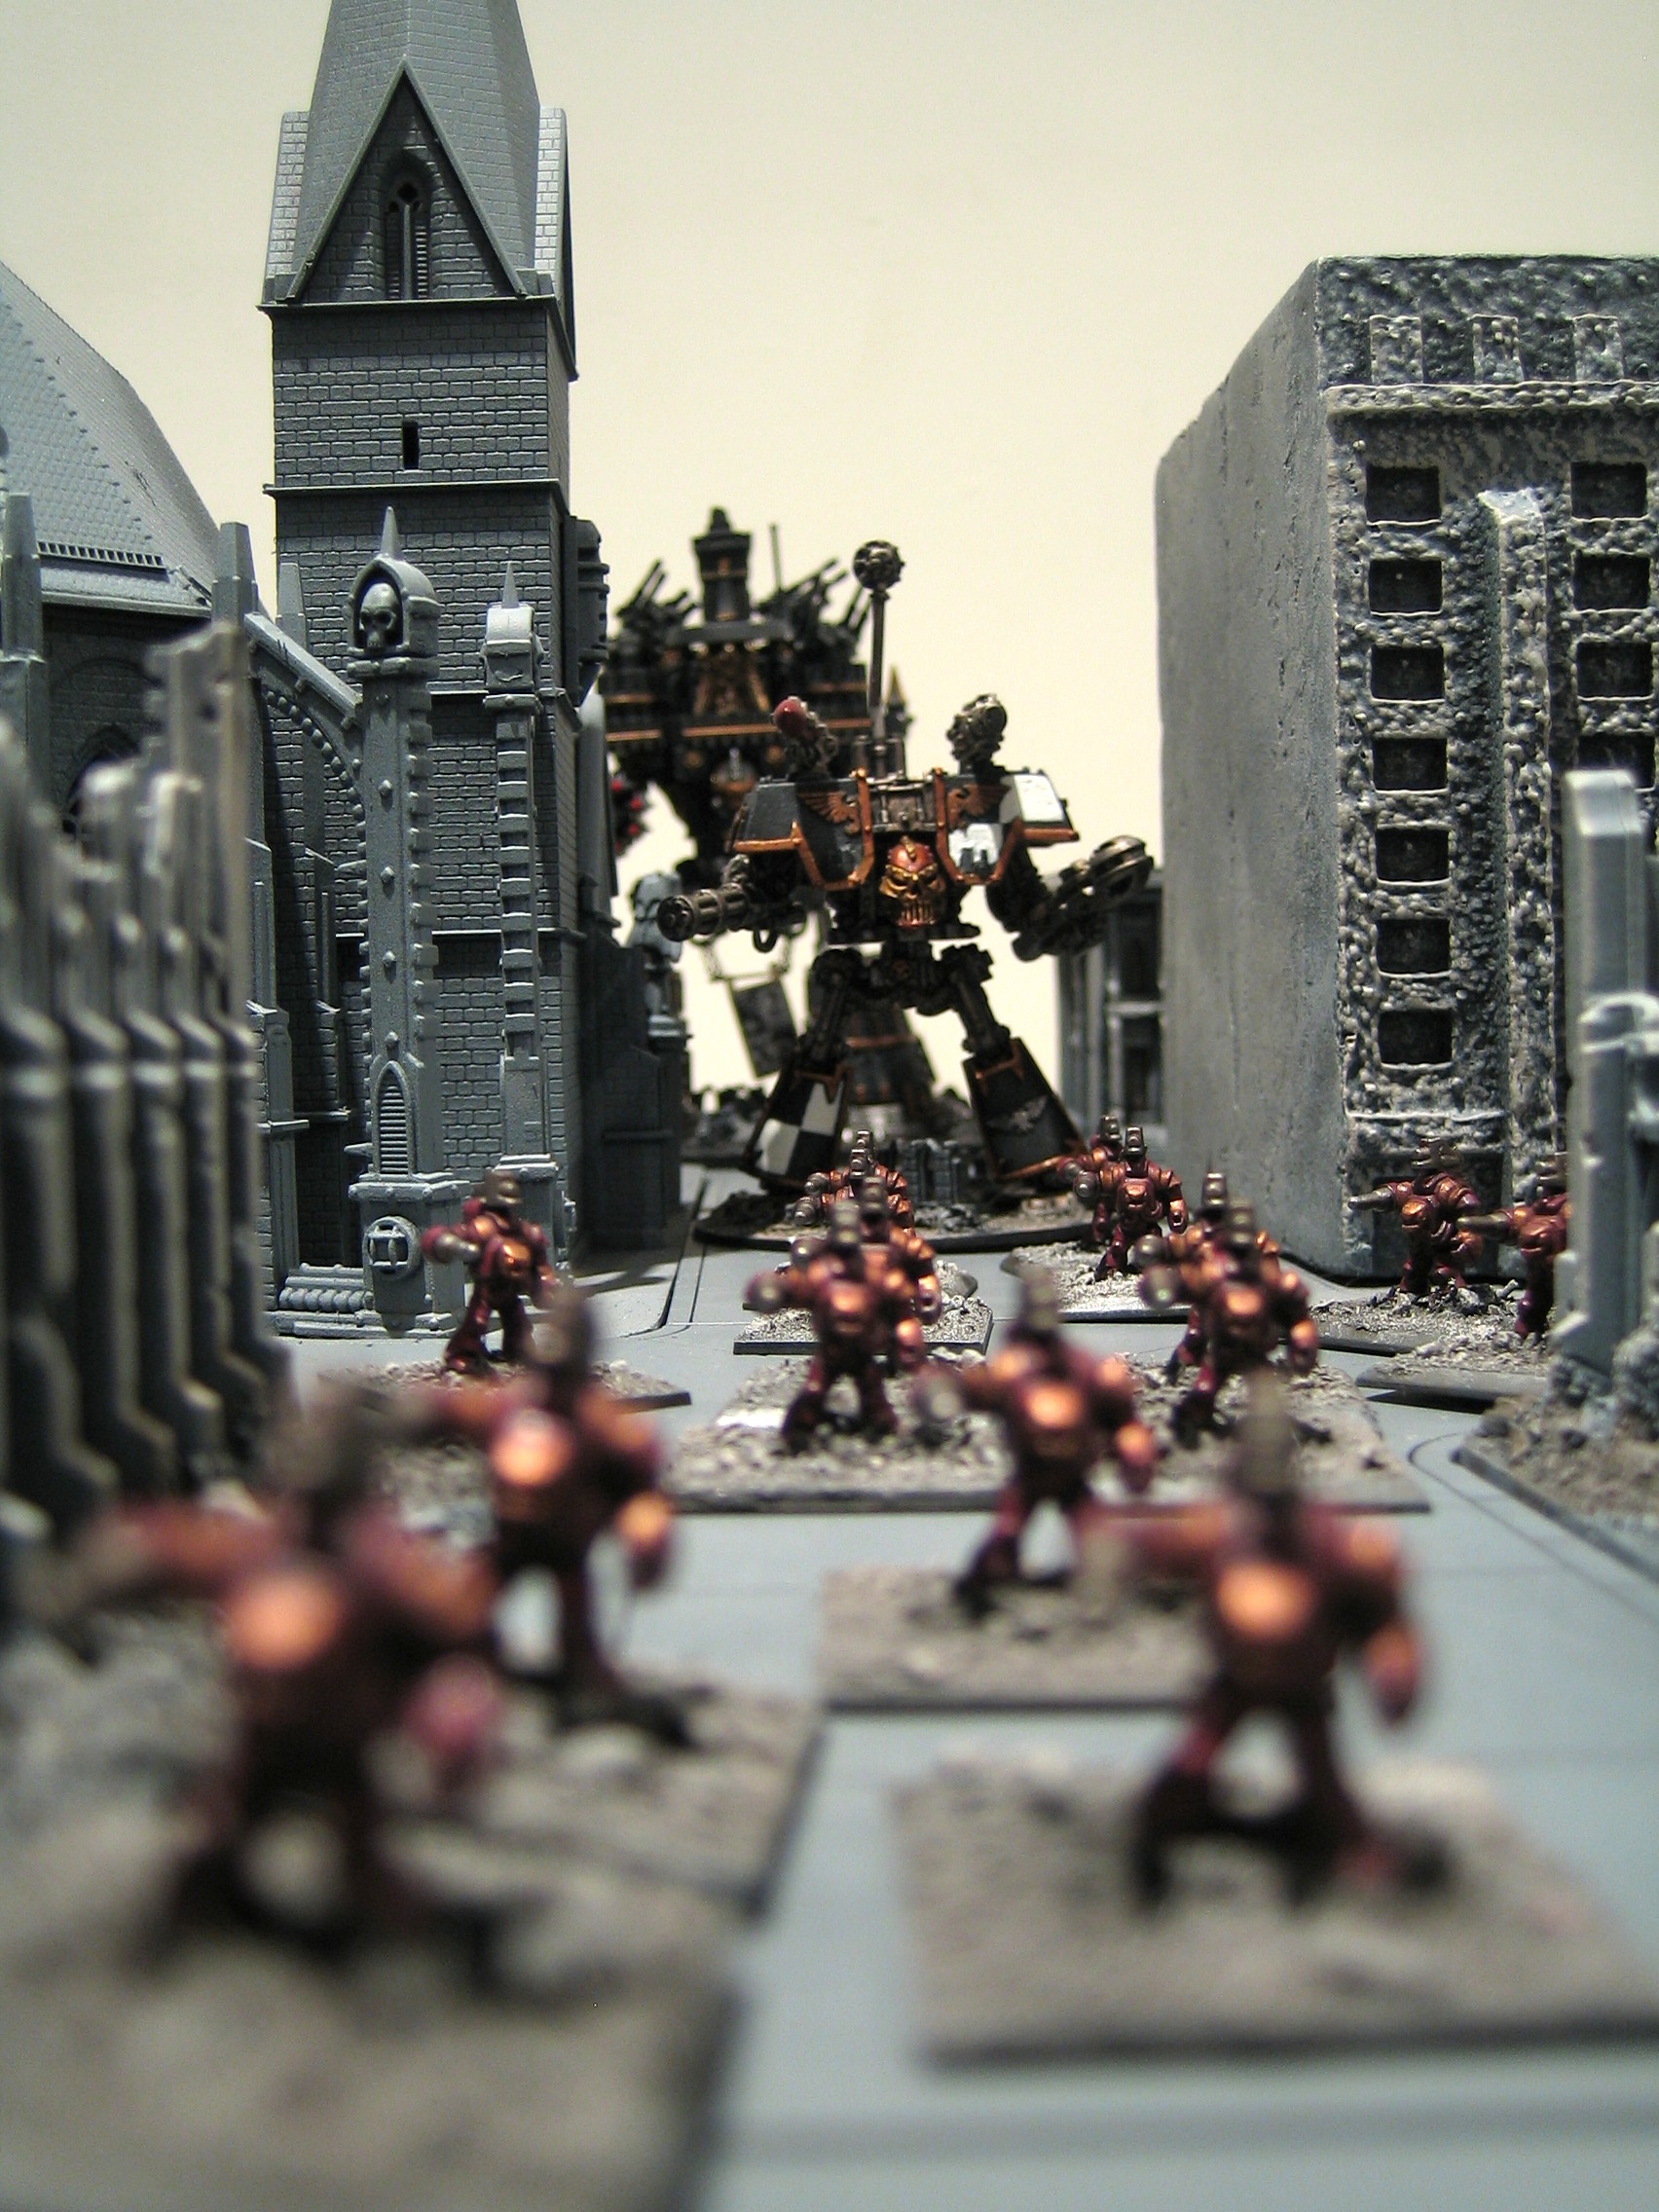
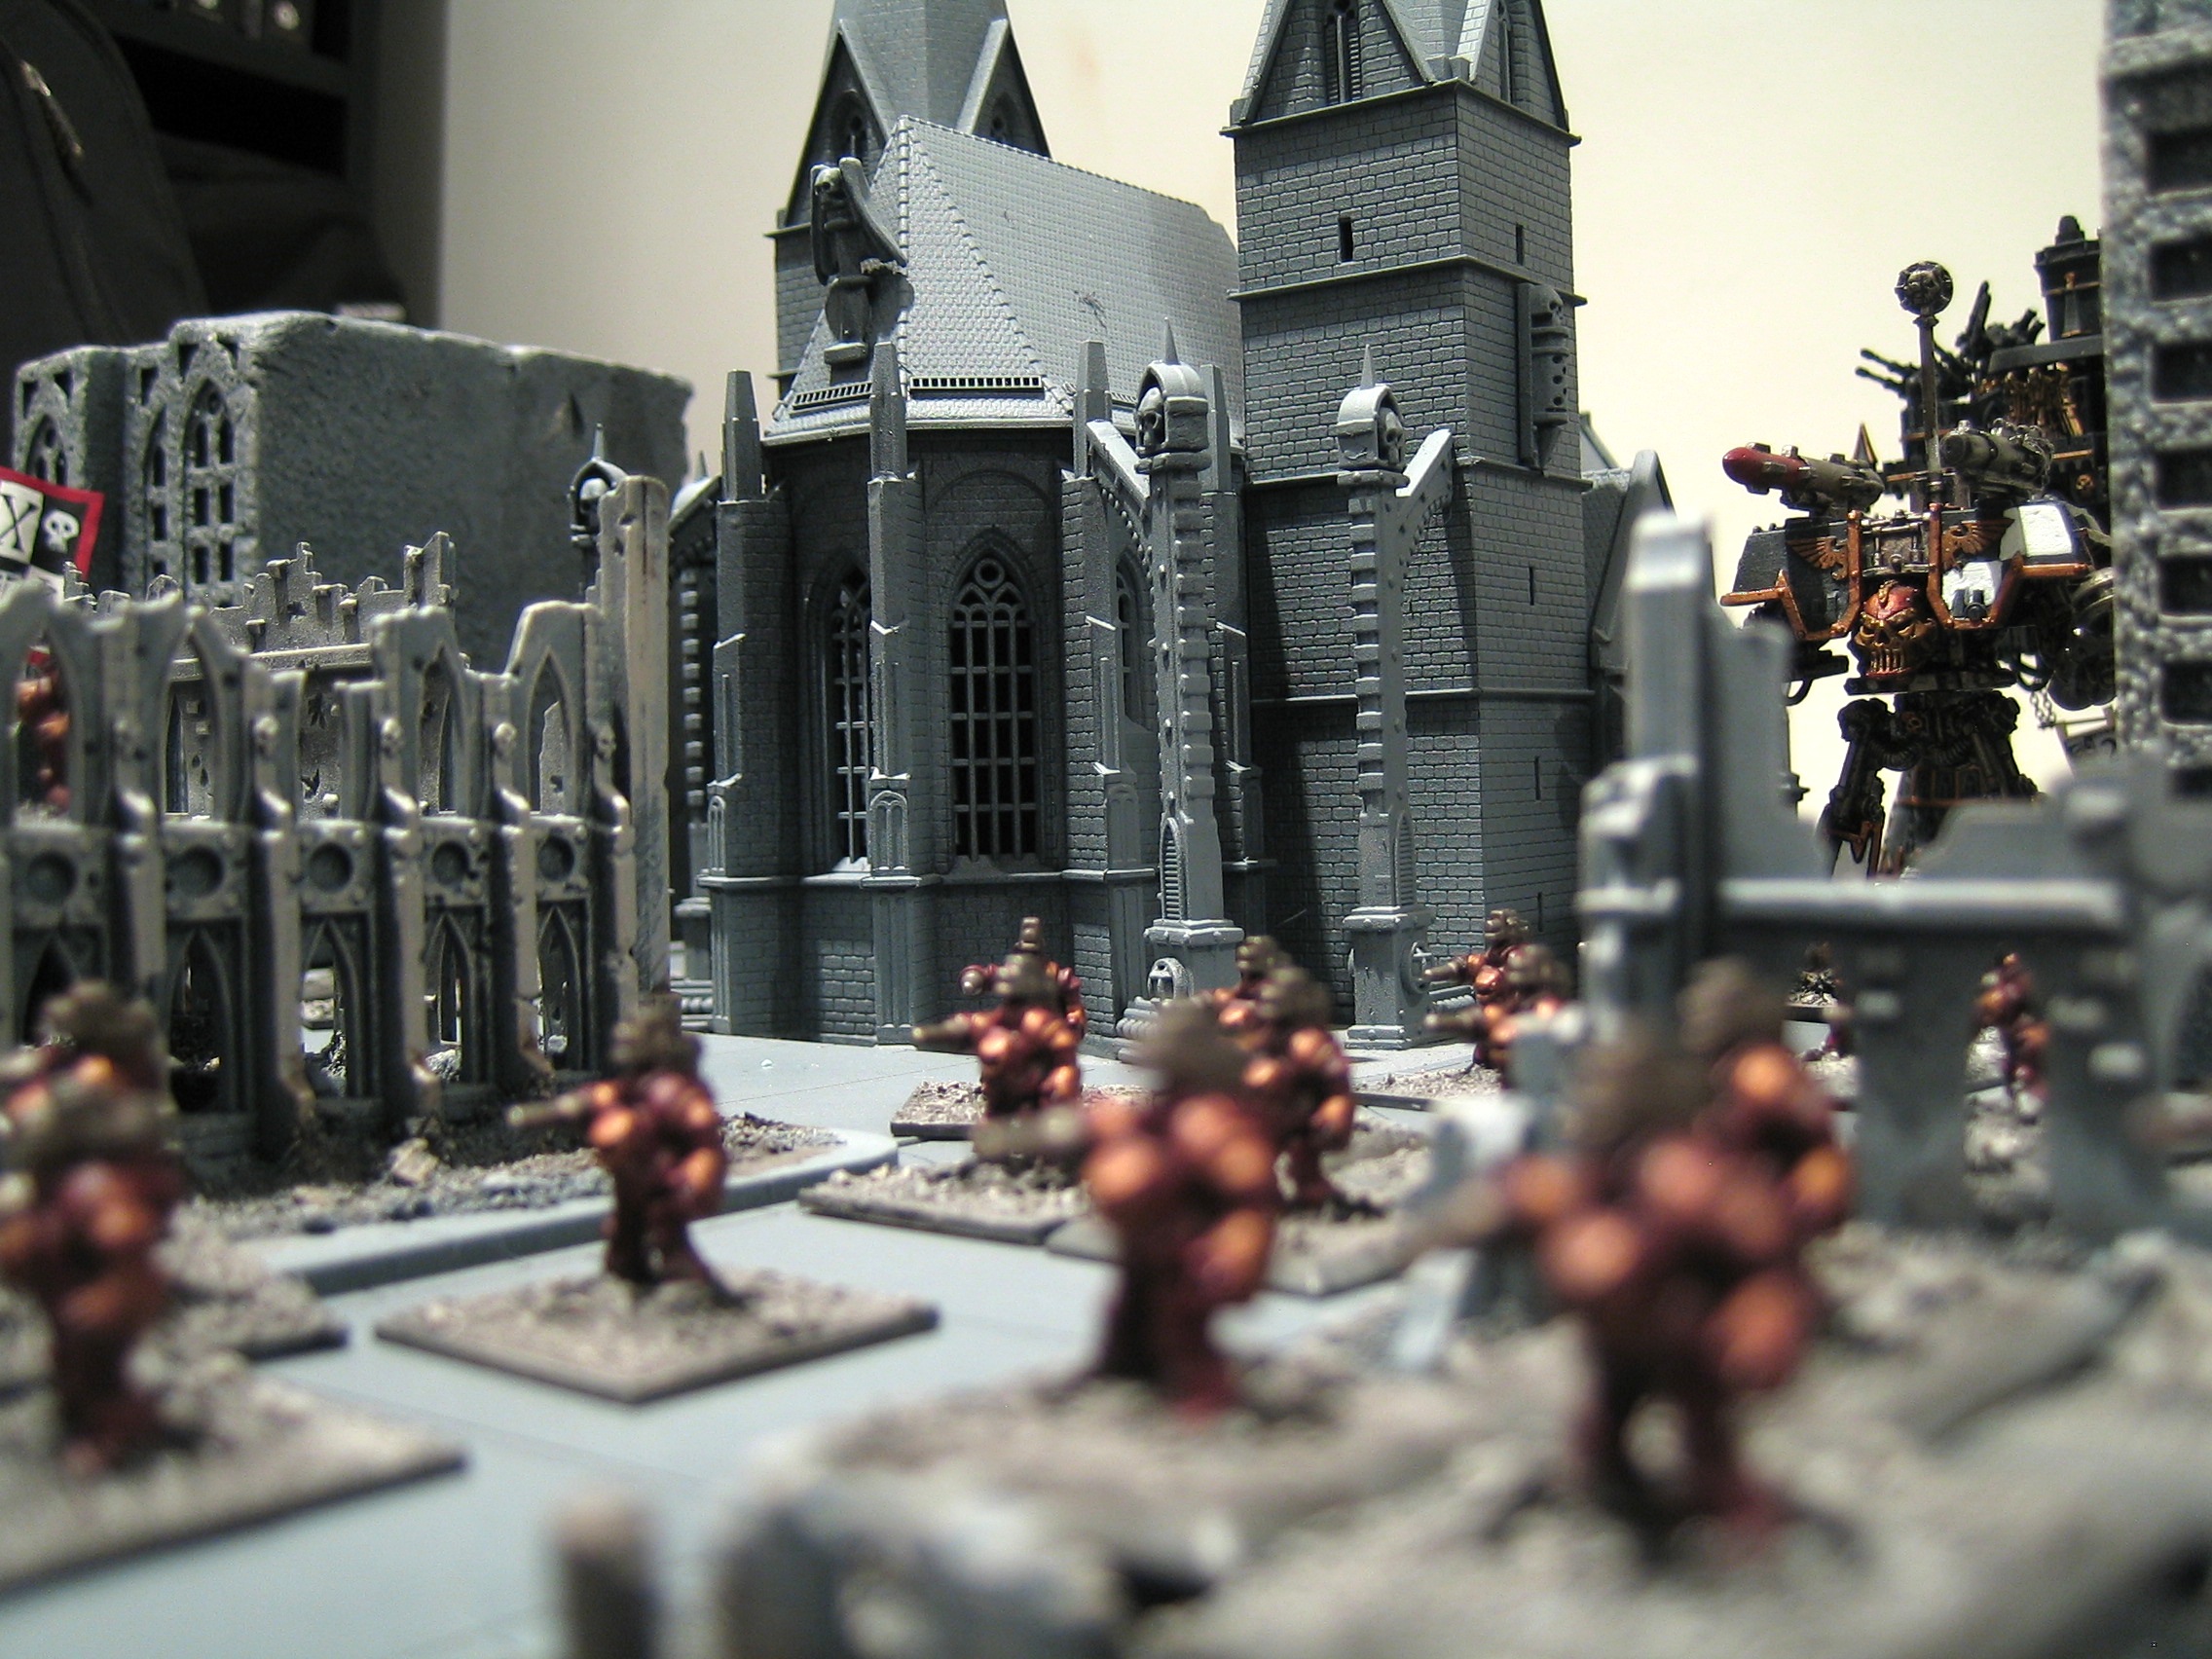
Here are some photos of the robots laid out on my city board: the bases are intended to match the boards. The robots have support from a few titans of the Legio Pantera.


Knights: Test Model Completed
The first step was to spray the model with a black primer spray. Once this had dried I drybrushed boltgun metal onto the areas where I wanted the metal to show through.

Knights: Robot Test Model Completed

Knights: stripped and assembled
I've also stripped and rebased all the robots. The next step is to add texture to the bases, and then they can be undercoated!


Knights: Baron and Errants
This afternoon I've been reassembling and basing the models. The first model I dealt with was the Baron, the Knight HQ unit.
I've never been very keen on this model. The banner pole it had made it look very tall and gangly. But I'm really pleased with the new incarnation:

I've ditched the banner pole, gave the torso a twist (I used a razor saw to cut the torso away from the hip, then pinned and reattached) and altered the stance of the legs. This makes the model much more dynamic. It also worked really well for some Errants.
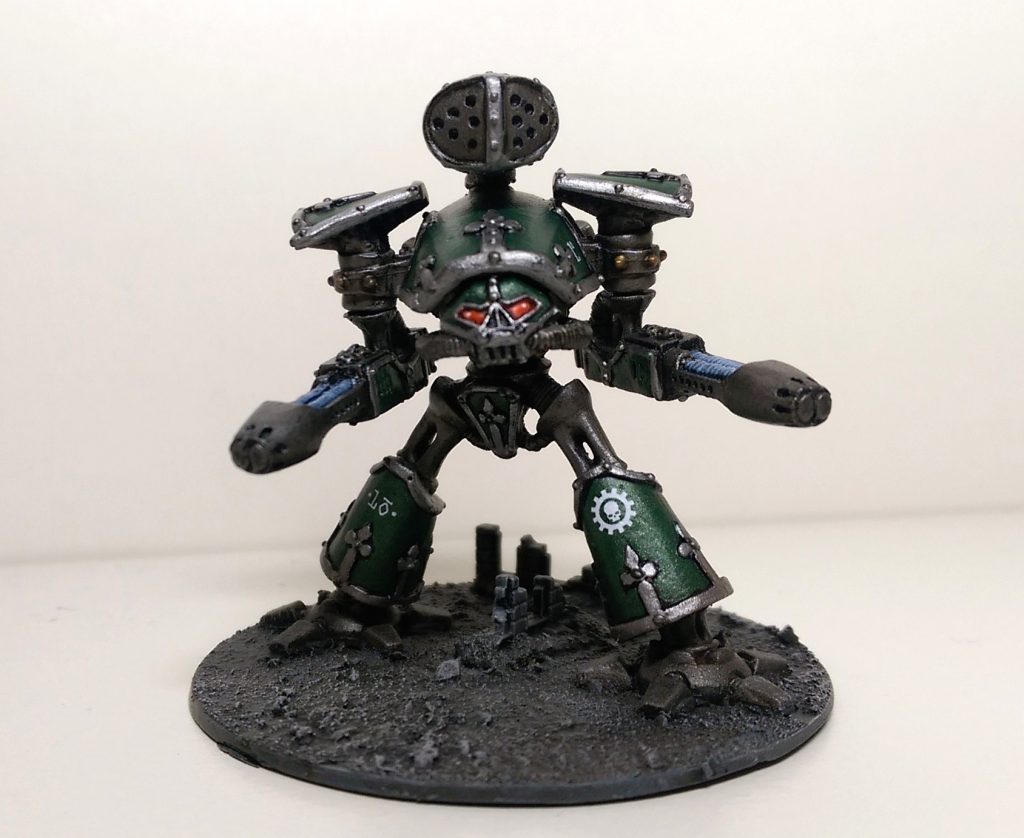
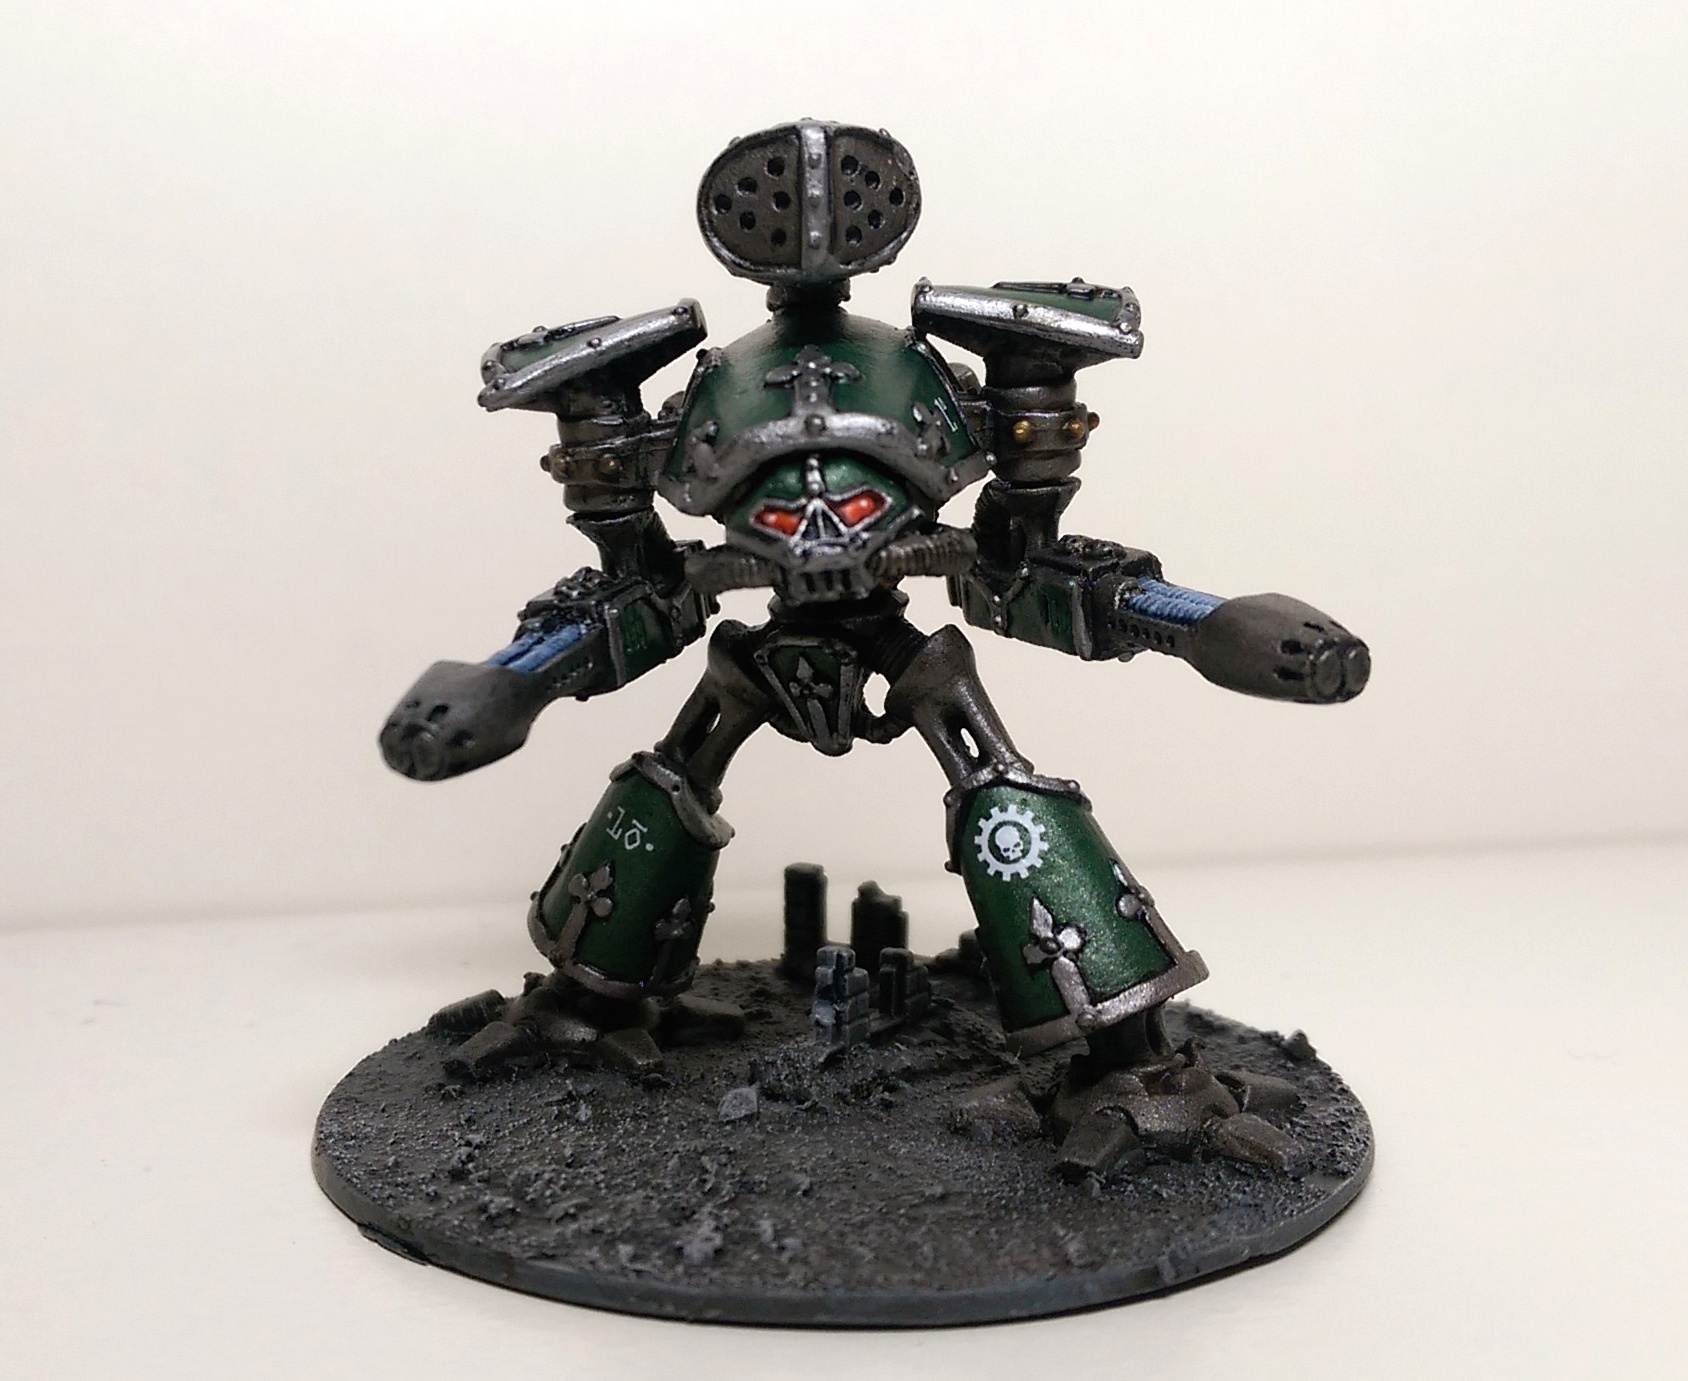
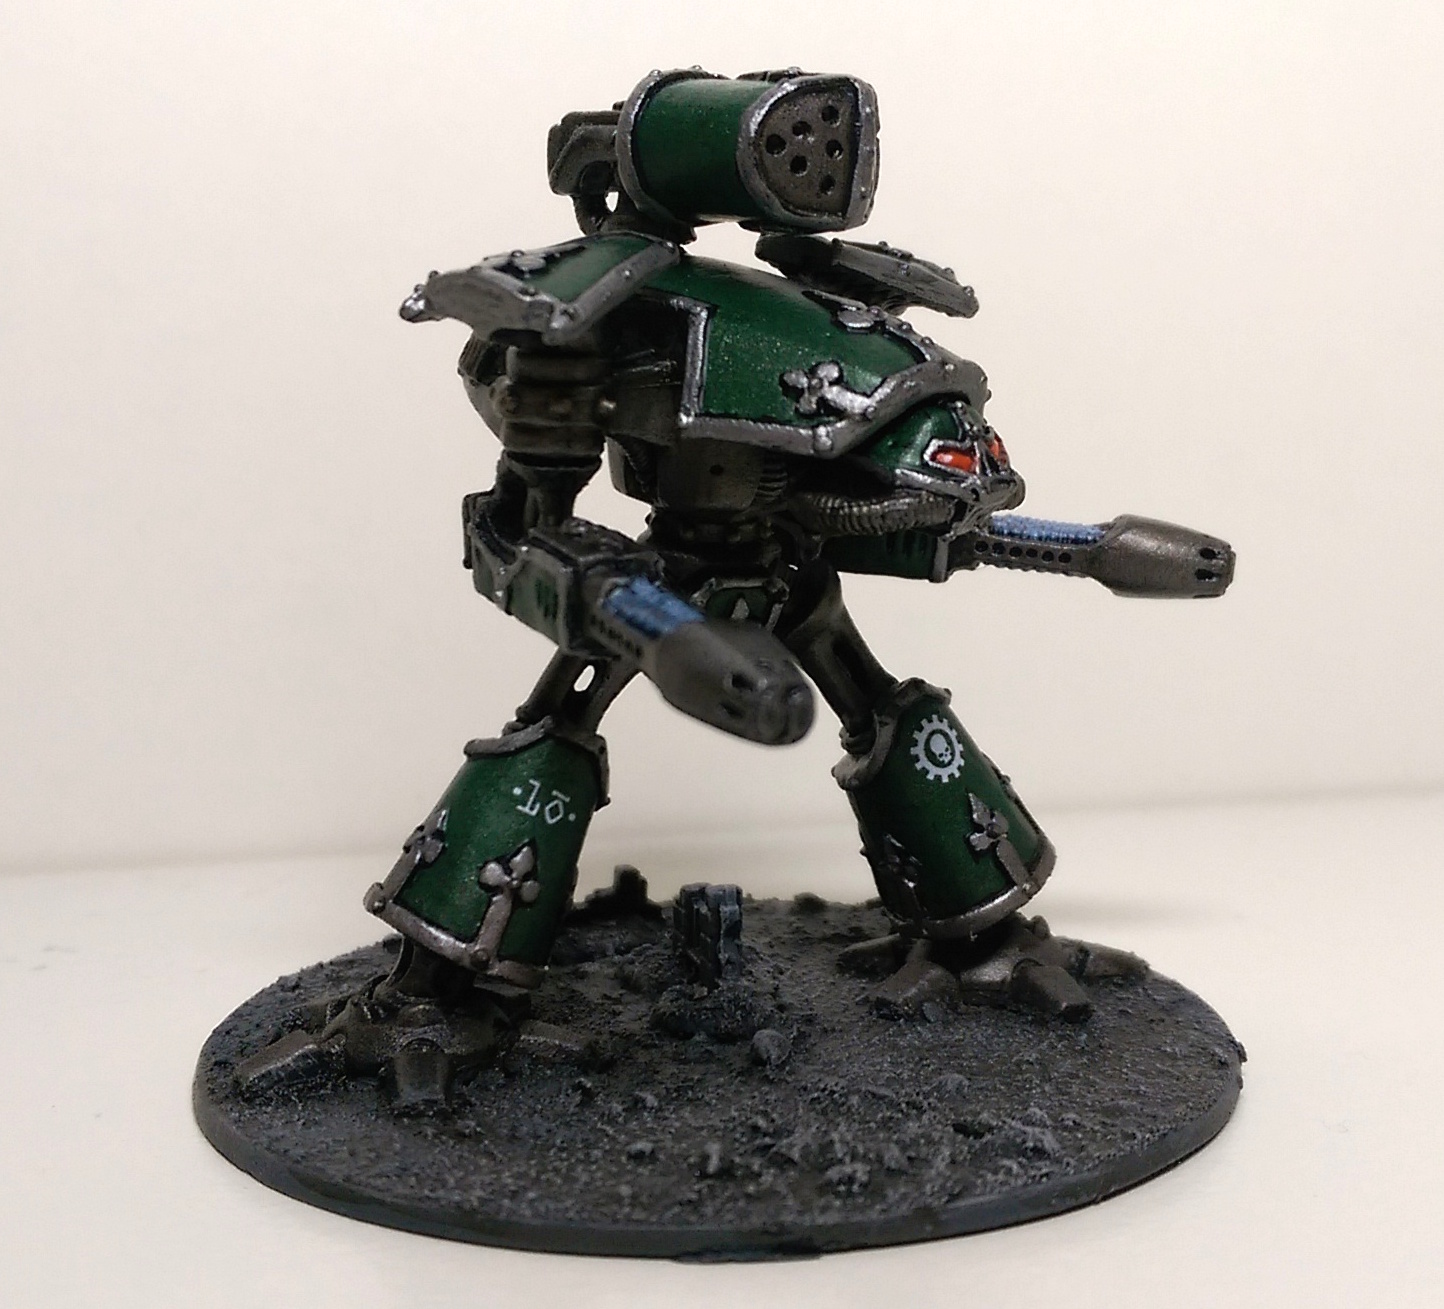
Robots of the Legio Cybernetica
Here's a picture of the assembled maniples just before they went into Dettol to be stripped. In OpenEpic they represent about 2,000 points, which should be enough to provide the Knights with a screen of ground pounders.

You can see a mix of all the different robot types (Crusader, Castellan, Cataphract, Conqueror and Colossus) in both metal and plastic.
Announcing OpenEpic
Some years ago I posted on the NetEpic mailing list about making NetEpic "open source". Primarch and other list members seems pretty keen on the idea, but I think the delays in getting NetEpic Gold released meant that it was sort of forgotten about.
I decided to scratch my own itch and do something about it! I wanted to find a way to make the NetEpic rules system available under a proper Creative Commons copyright regime, but which also enabled gamers to easily contribute back, to make the rules a living, breathing thing, always changing, and (hopefully) always improving.
I realised that a wiki was the perfect solution. Wikis should be familiar to most people, because Wikipedia is a wiki. A wiki is a web site that allows its users to edit its contents. There is a simple formatting system, and a set of tools which make it very easy for groups of people to collaborate.
After registering a domain and setting up the wiki software, I have now finished entering the NetEpic core rules into the wiki. Other than reformatting the text to use standard wiki layout (and fixing a few typos that annoyed me), nothing in the text has been changed.
So I now feel that I'm ready to go public with the site: OpenEpic.org. For the time being, although you can view the site anonymously, you have to be logged in to edit the pages, and account requests have to be manually vetted by me.
The next step is to import the army lists. This is a bit more difficult because the army lists contain lots of tables and diagrams, and MediaWiki (the software I'm using) isn't well suited to those sorts of things. But there's more work to do: fixing typos, updating with errata, and so on.
I make no claim to become some sort of benevolent dictator over this, I'm just an itch scratcher who has volunteered to do the sysadmin. I also have no idea whether anyone else will think of this as a good idea, which is why I'm writing this post: to see who else is interested.
Epic Knights, Part 1: old and new
However, I am temporarily putting that project on hold. I'm going to use the Army Painter camo green primer as the base coat, and as you may know, Army Painter have just announced a range of acrylic paints that match their primer sprays. Army Green is included but won't be out until the end of March, so I've decided to wait until I can get some before I start painting. That way I can correct mistakes without having to mix my own paint.
So in the meantime I'm making progress with one of my other 2012 objectives: getting my Epic knight army repainted. I've just taken an inventory of my old army, and thankfully it's survived a decade of neglect quite well:

What you see there is ten plastic Paladins (plus another three on sprues), three Errants, three Crusaders, six Castellans, one Baron, and three of the old Adeptus Titanicus era metal knights: one Paladin and two Wardens.
These are all going to take a bath in Dettol to strip the paint off. I don't think I'll be going with the old green and white quartered scheme this time: I'm currently thinking along the lines of a more AdMech combo of red and bronze.
As well as these models, I also have some of the amazing chevaliers by Thom from Epic-FR. The quality on these resin miniatures is absolutely awesome: I've never seen such impressive detail and design on "amateur" miniatures before.
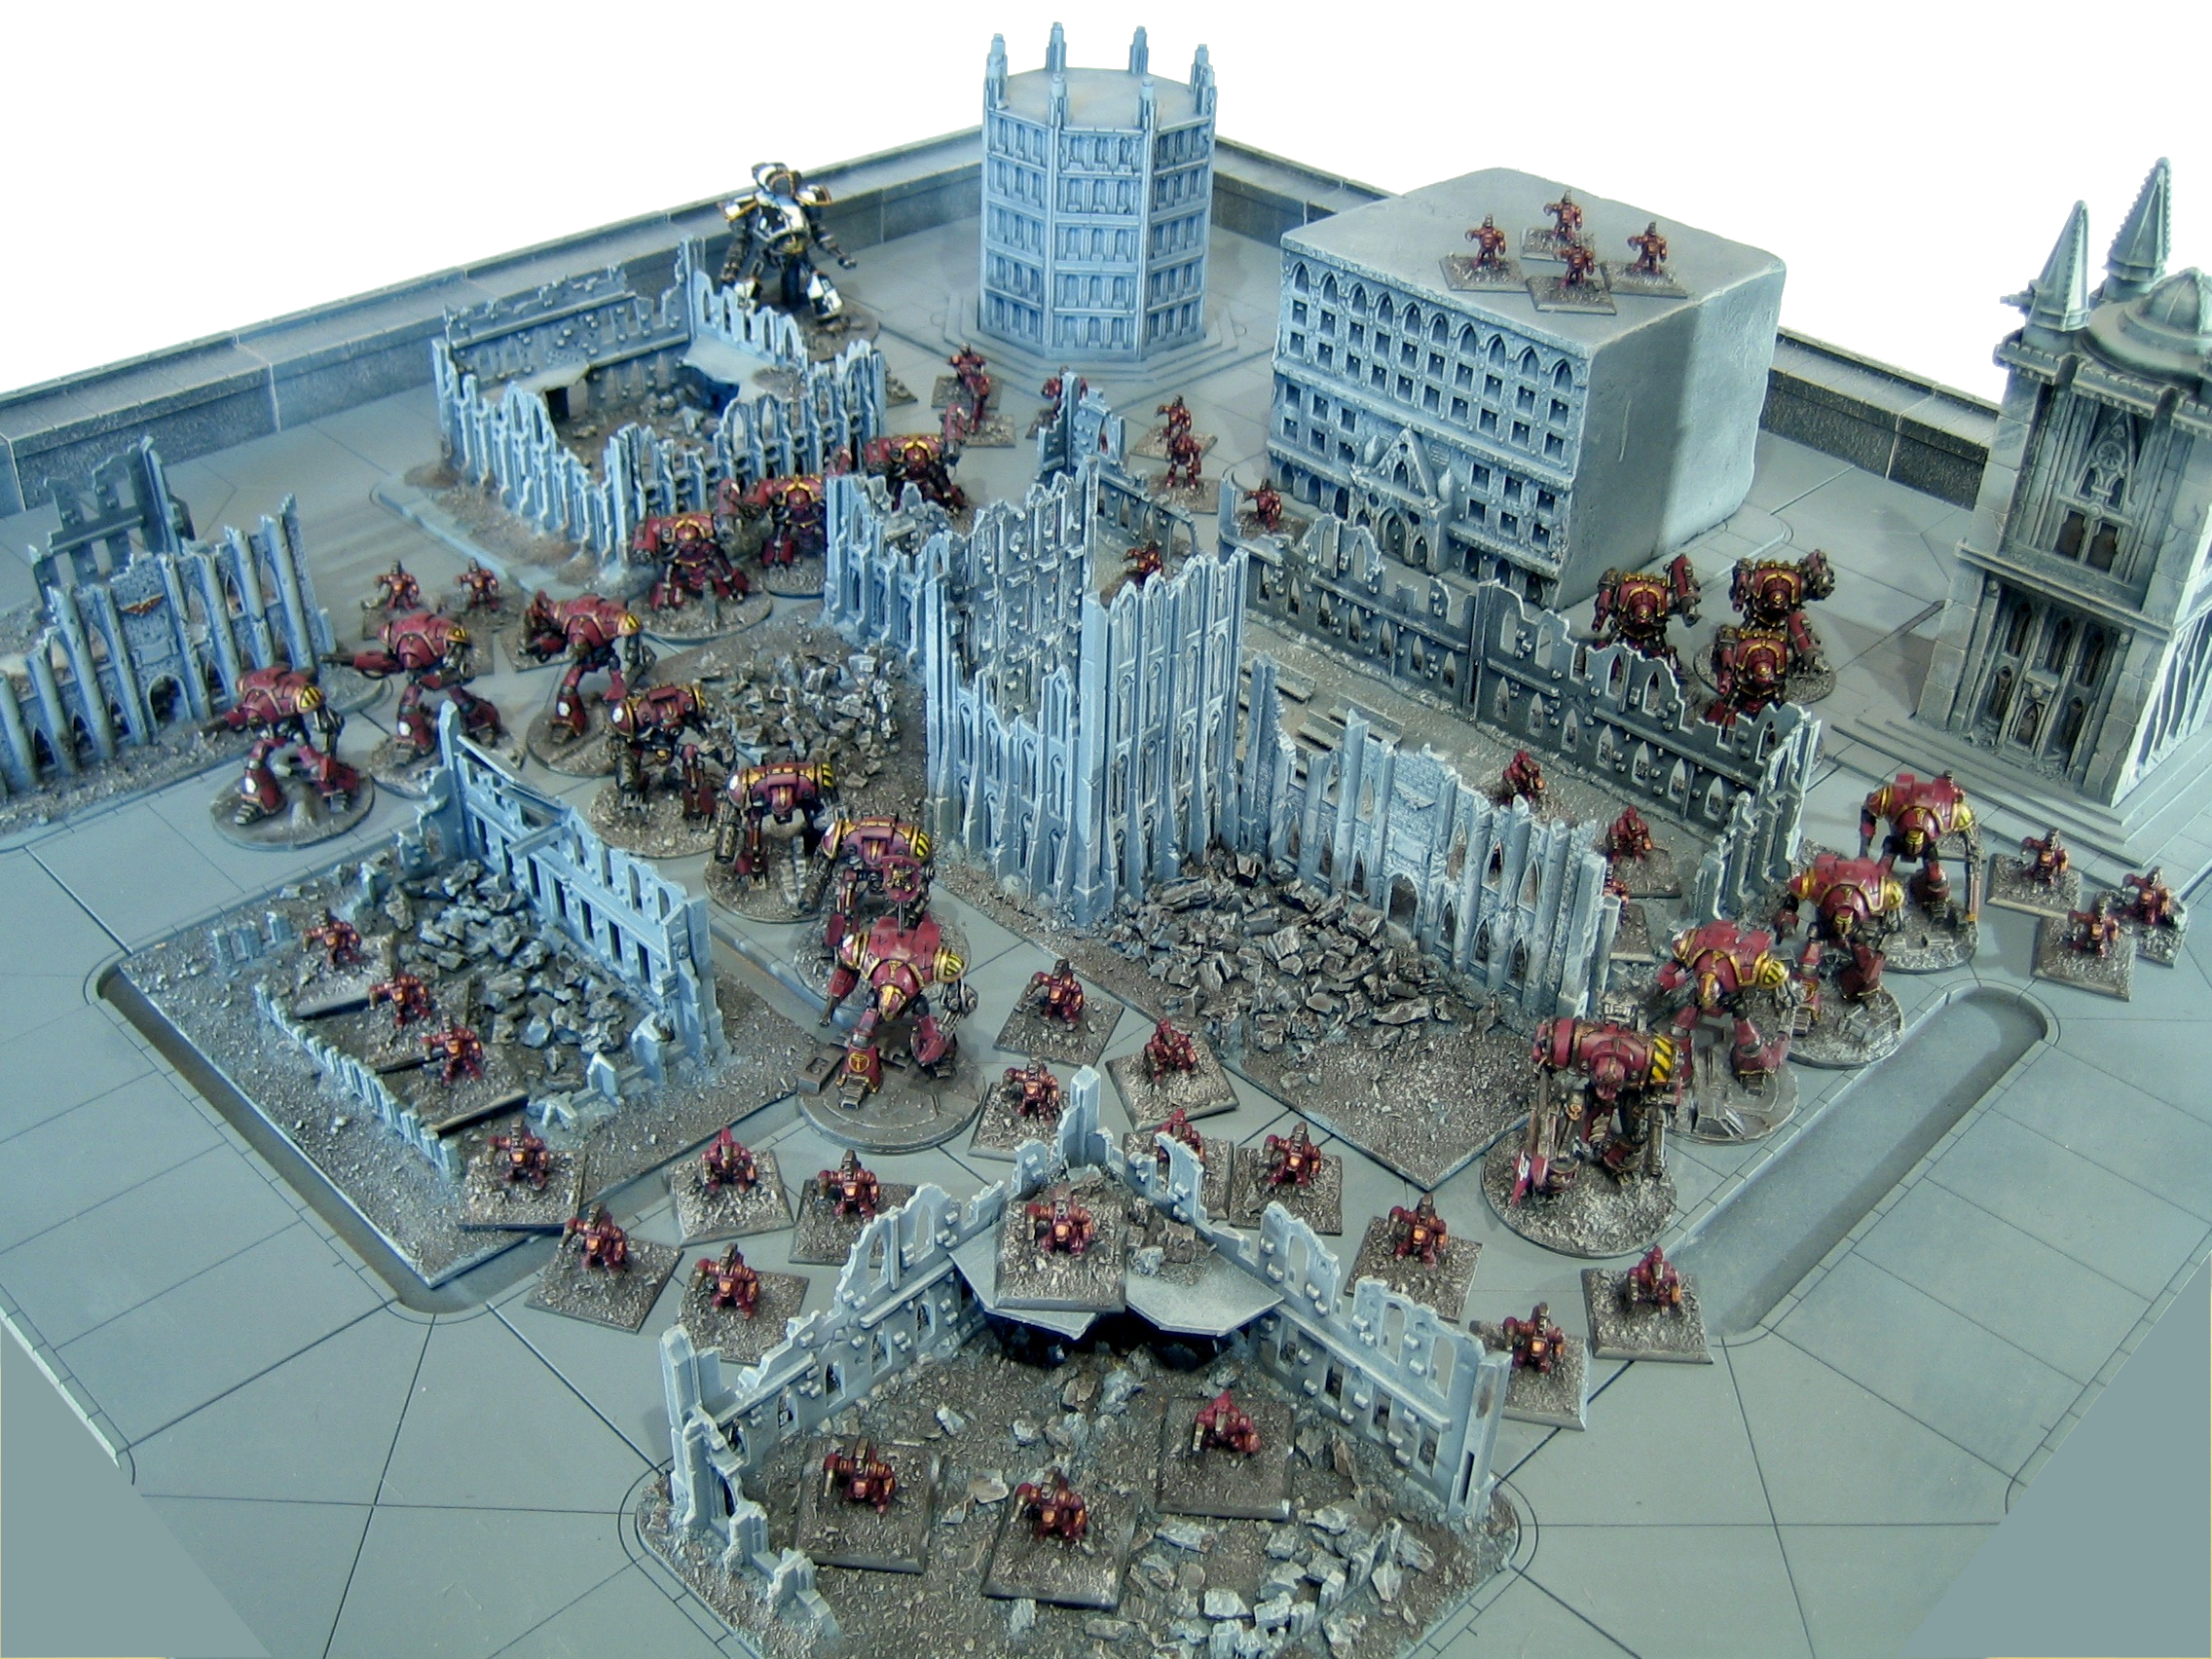
Work-in-Progress: Epic Imperial City

With the building modules removed, you can see the road layout:

There are pieces of plasticard in the slots to elevate the building modules. This gives the effect of a slightly elevated pavement. The buildings represent three generations of Epic: the original foam buildings from the Adeptus Titanicus boxed set, the ruined buildings sprues from Epic 40,000 and the later Forgeworld Epic buildings:


You can also see a building from Gateshead Gaming, and the previously mentioned Kibri church, which is the centerpiece:

I've also created some ruined buildings, which could be used to replace buildings destroyed during the game:

The roads are arranged so that another board can be slotted in on either of two sides (assuming S6 starts selling the road system again, or I'm able to find suitable replacements). The other two sides will have a reinforced defensive wall from GameCraft Miniatures.
Grimdarking the Kibri Goppingen Church

But if you want to use it to play Epic, it's a little plain. It needs grimdarking, with the judicial application of spikey bits:


Having just bought a bunch of Cityfight boxes to build some 40K terrain, I've quite quite a few leftover pieces, which I've used to add some character to the building.
I've finally started to make some progress on my modular city system. I've glued down the roads and junctions in an arrangement that will let me expand to another board if/when Scott starts S6 Engineering back up again (or I find someone who can make some custom pieces for me). I'm planning on using the Fortress Walls system from GameCraft Miniatures to add a defensible city wall along two edges. More details to follow.
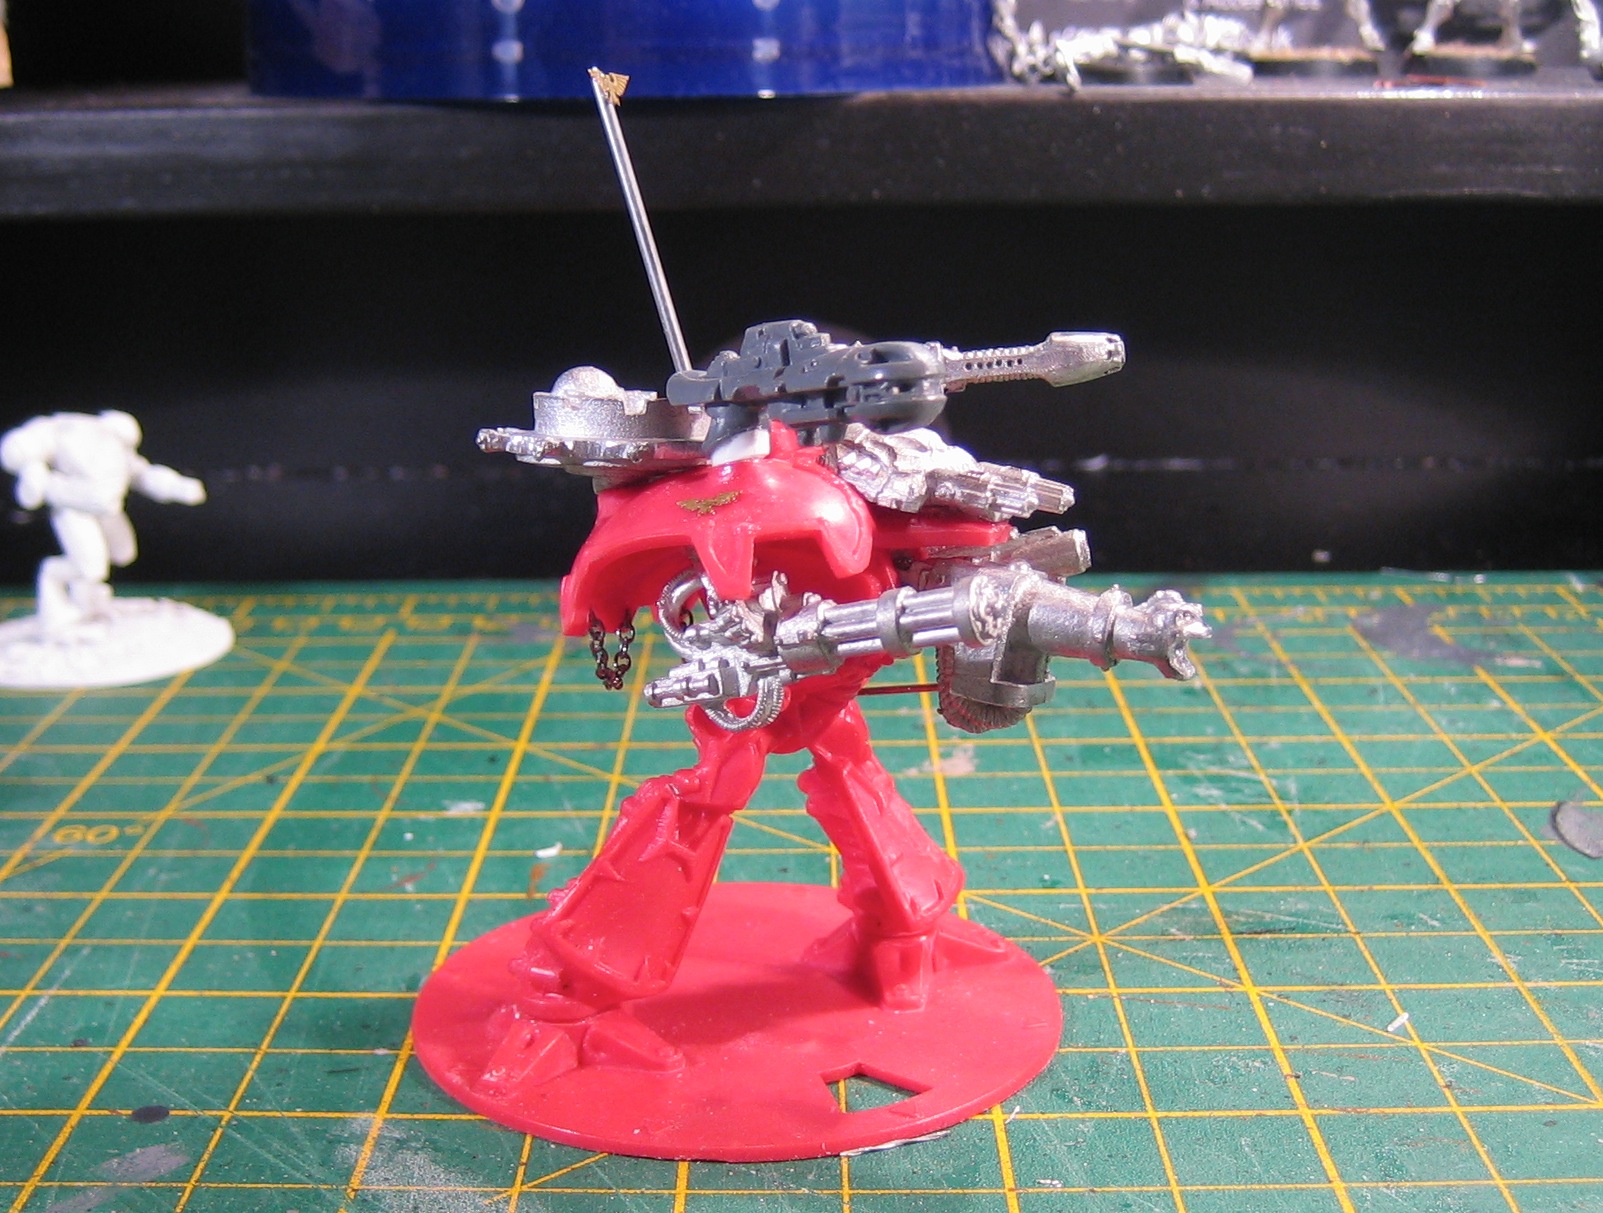
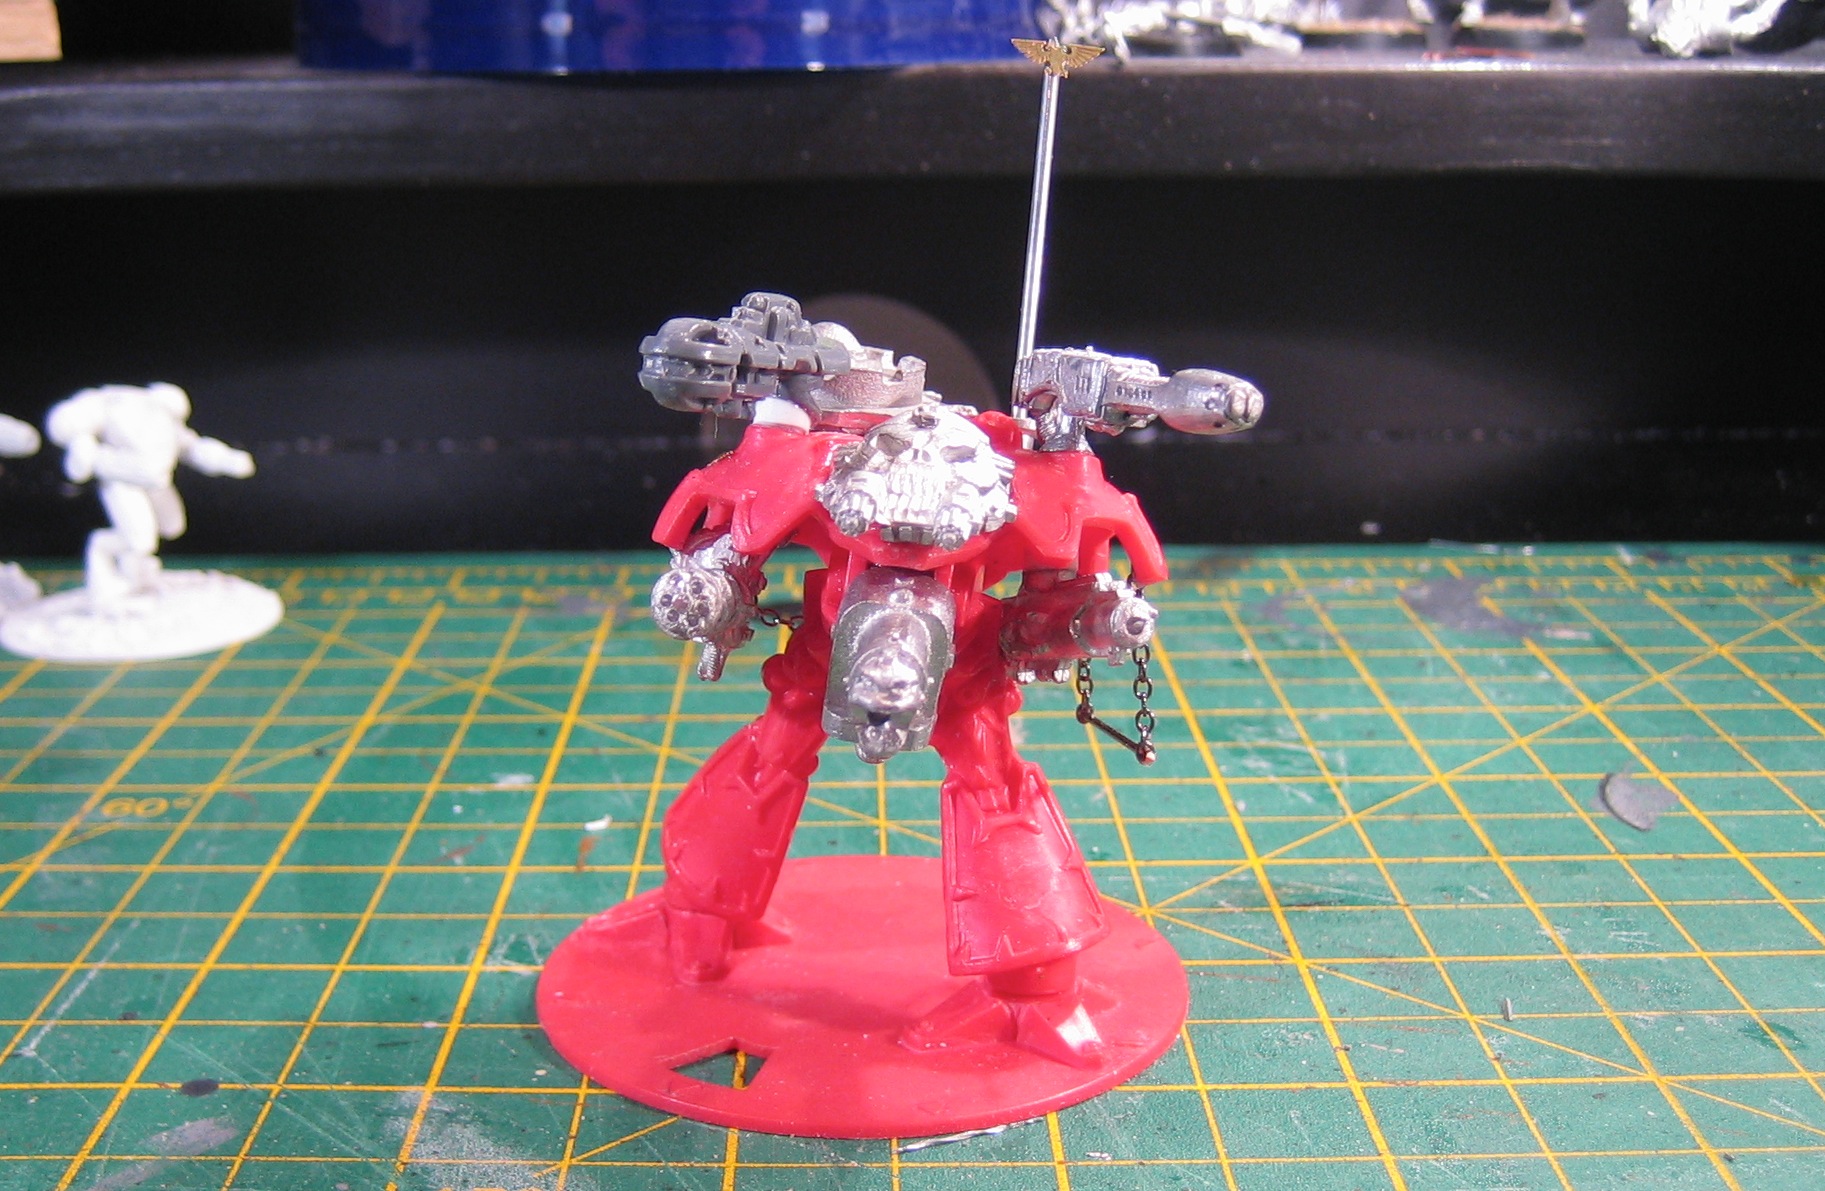
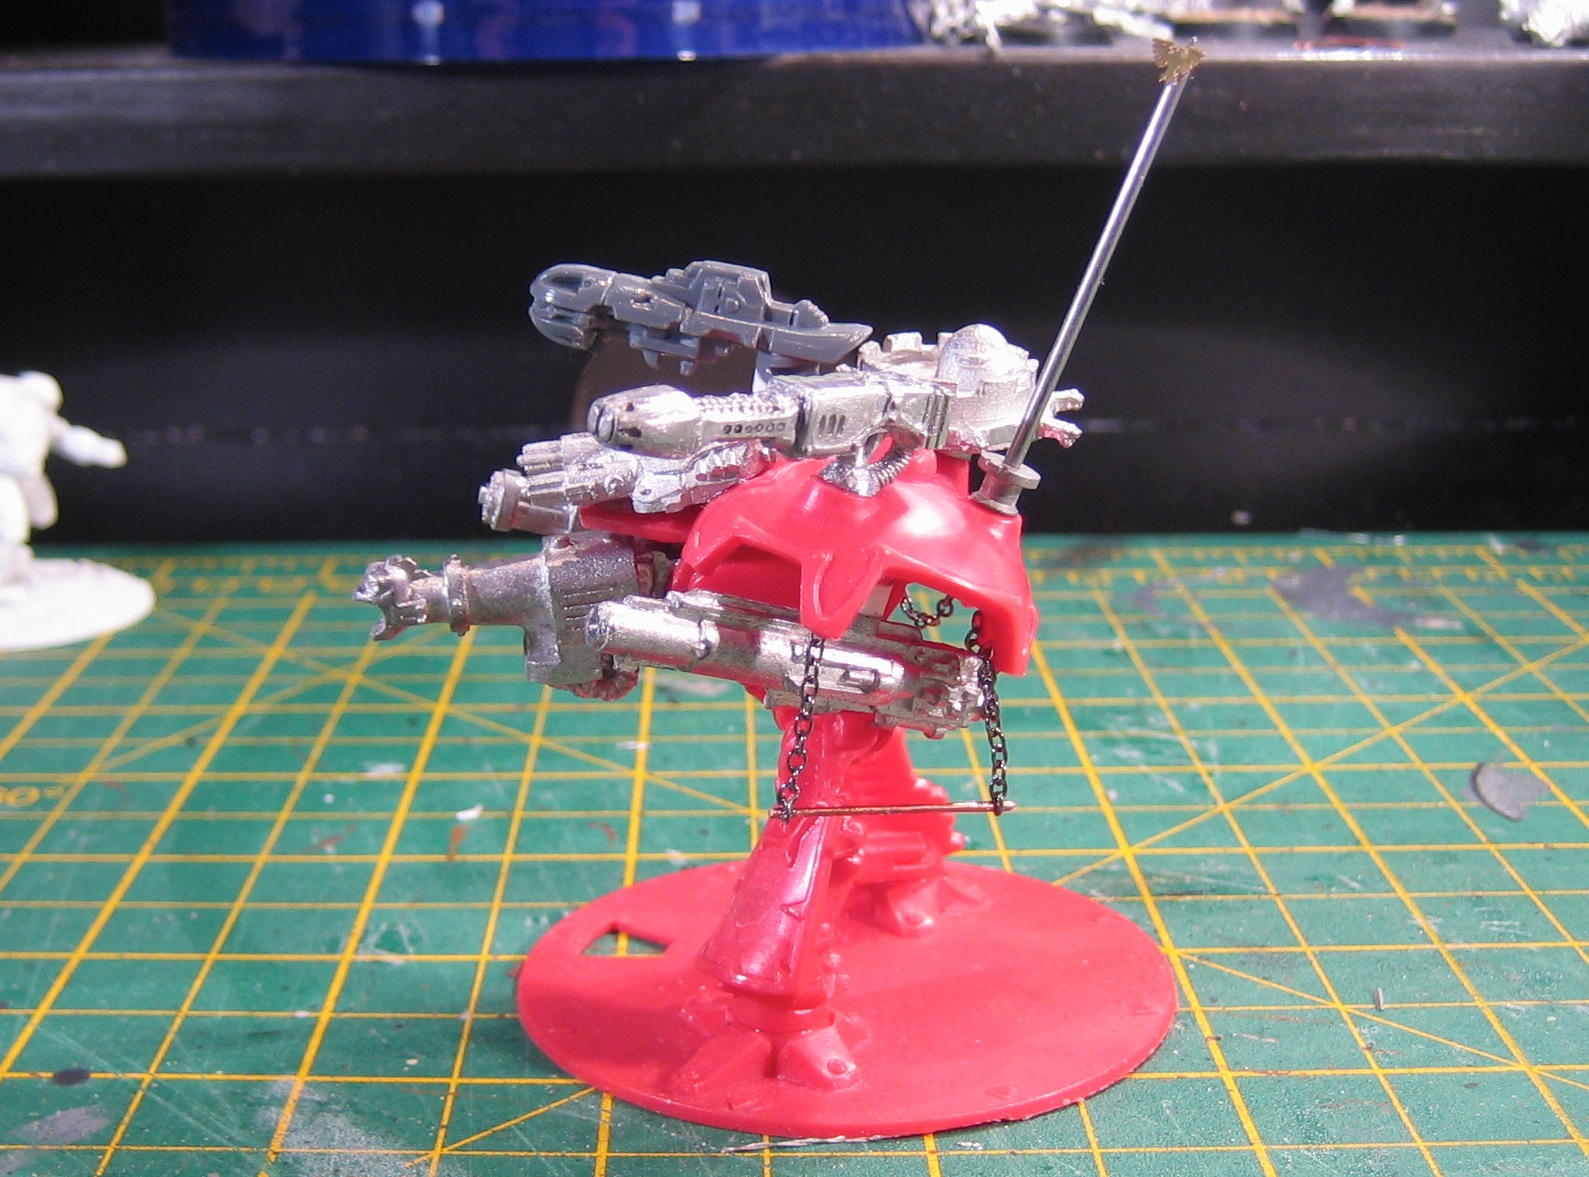
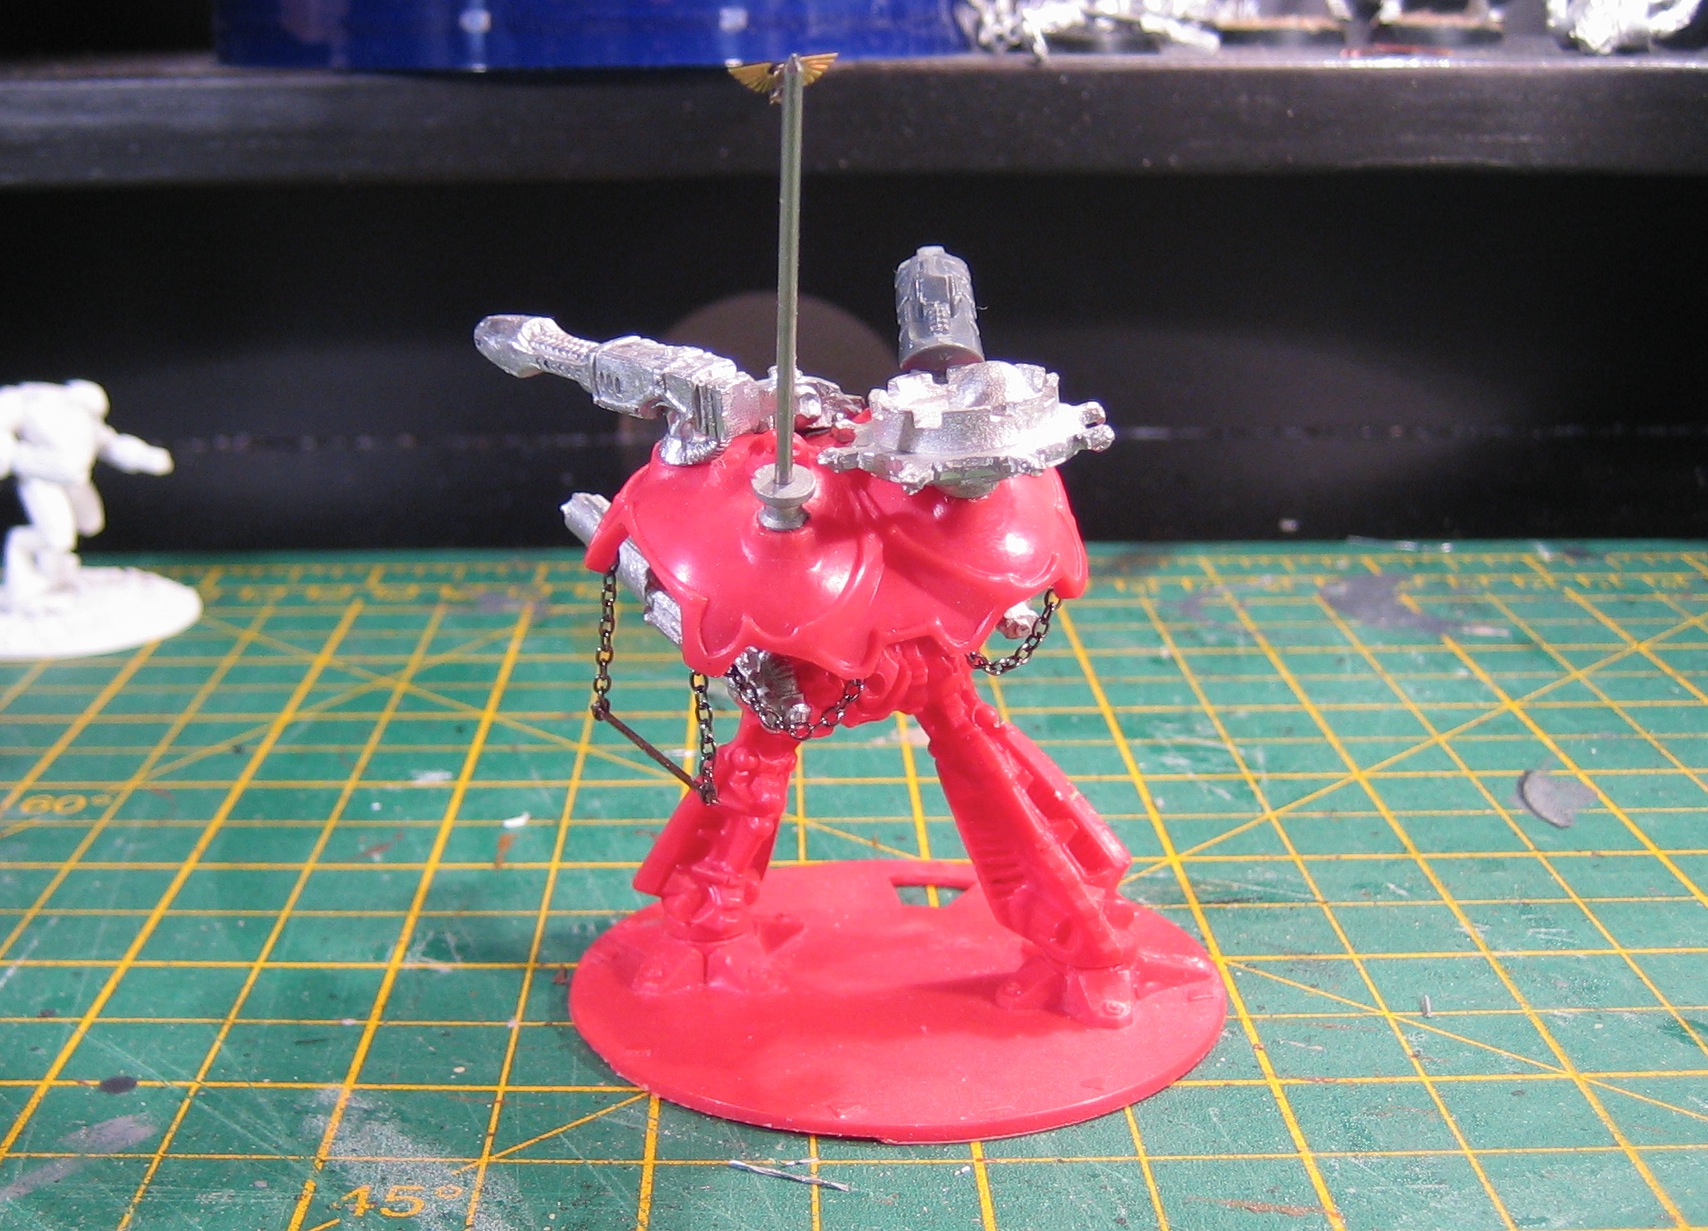
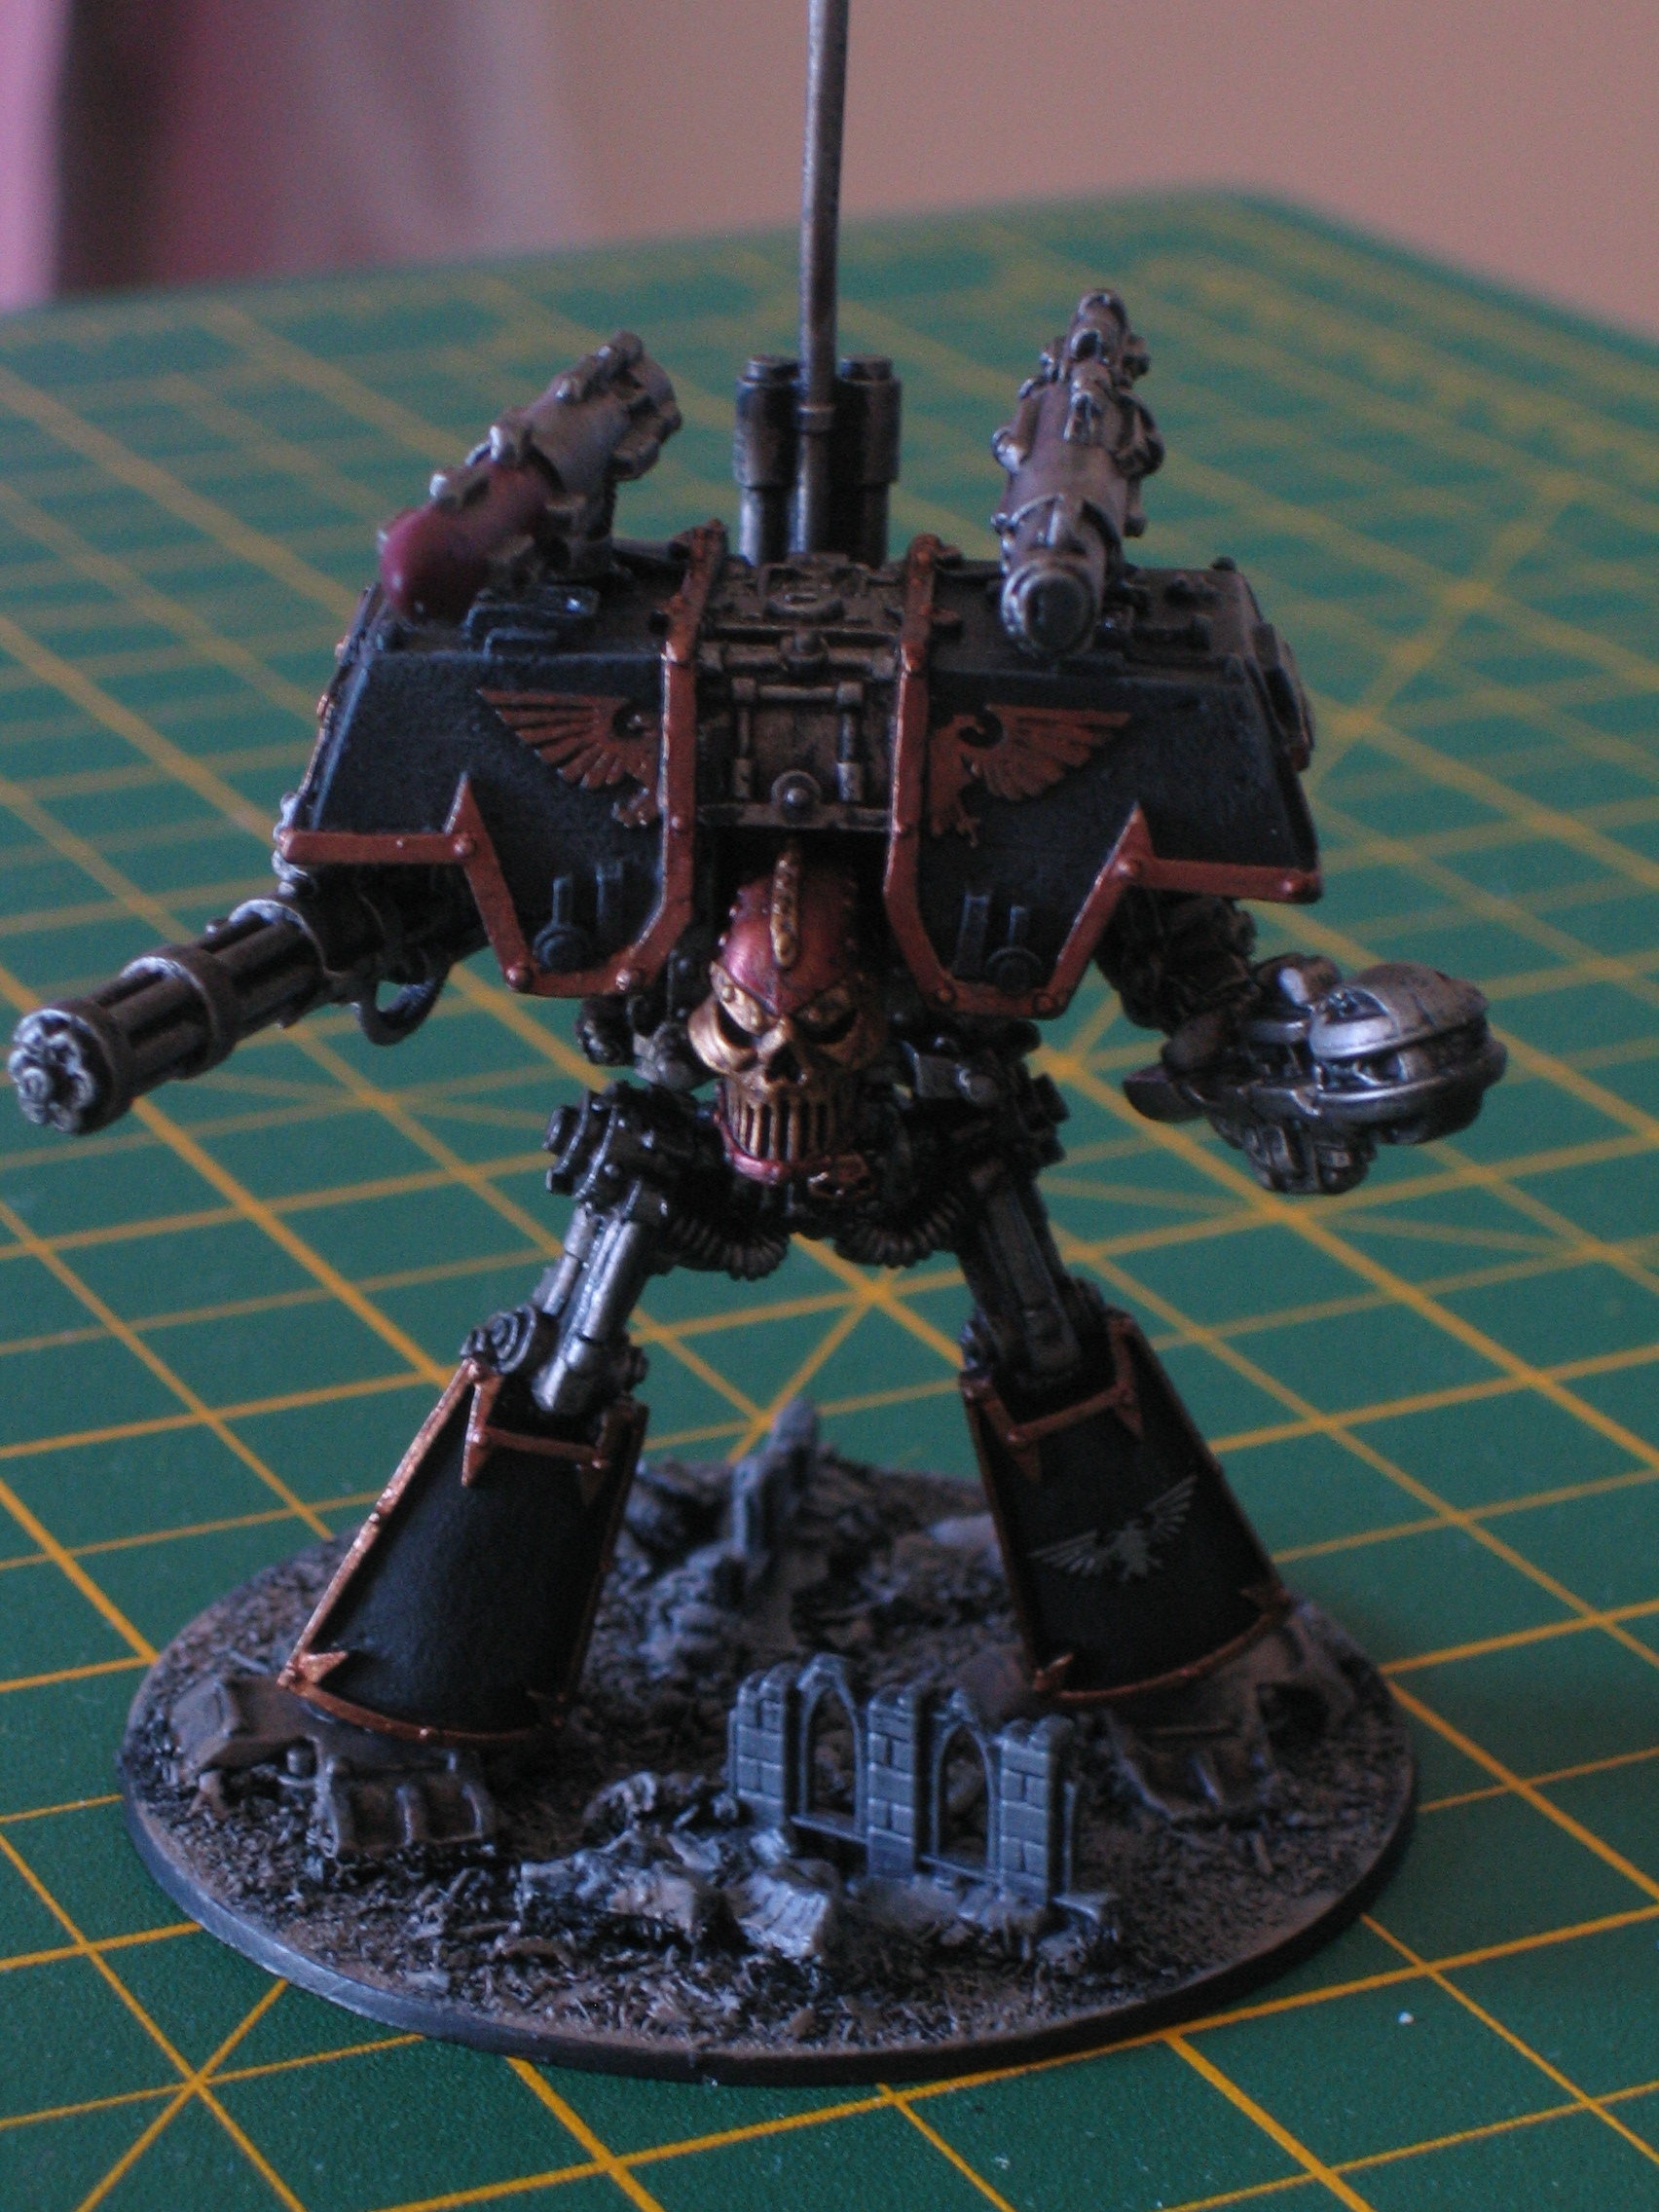
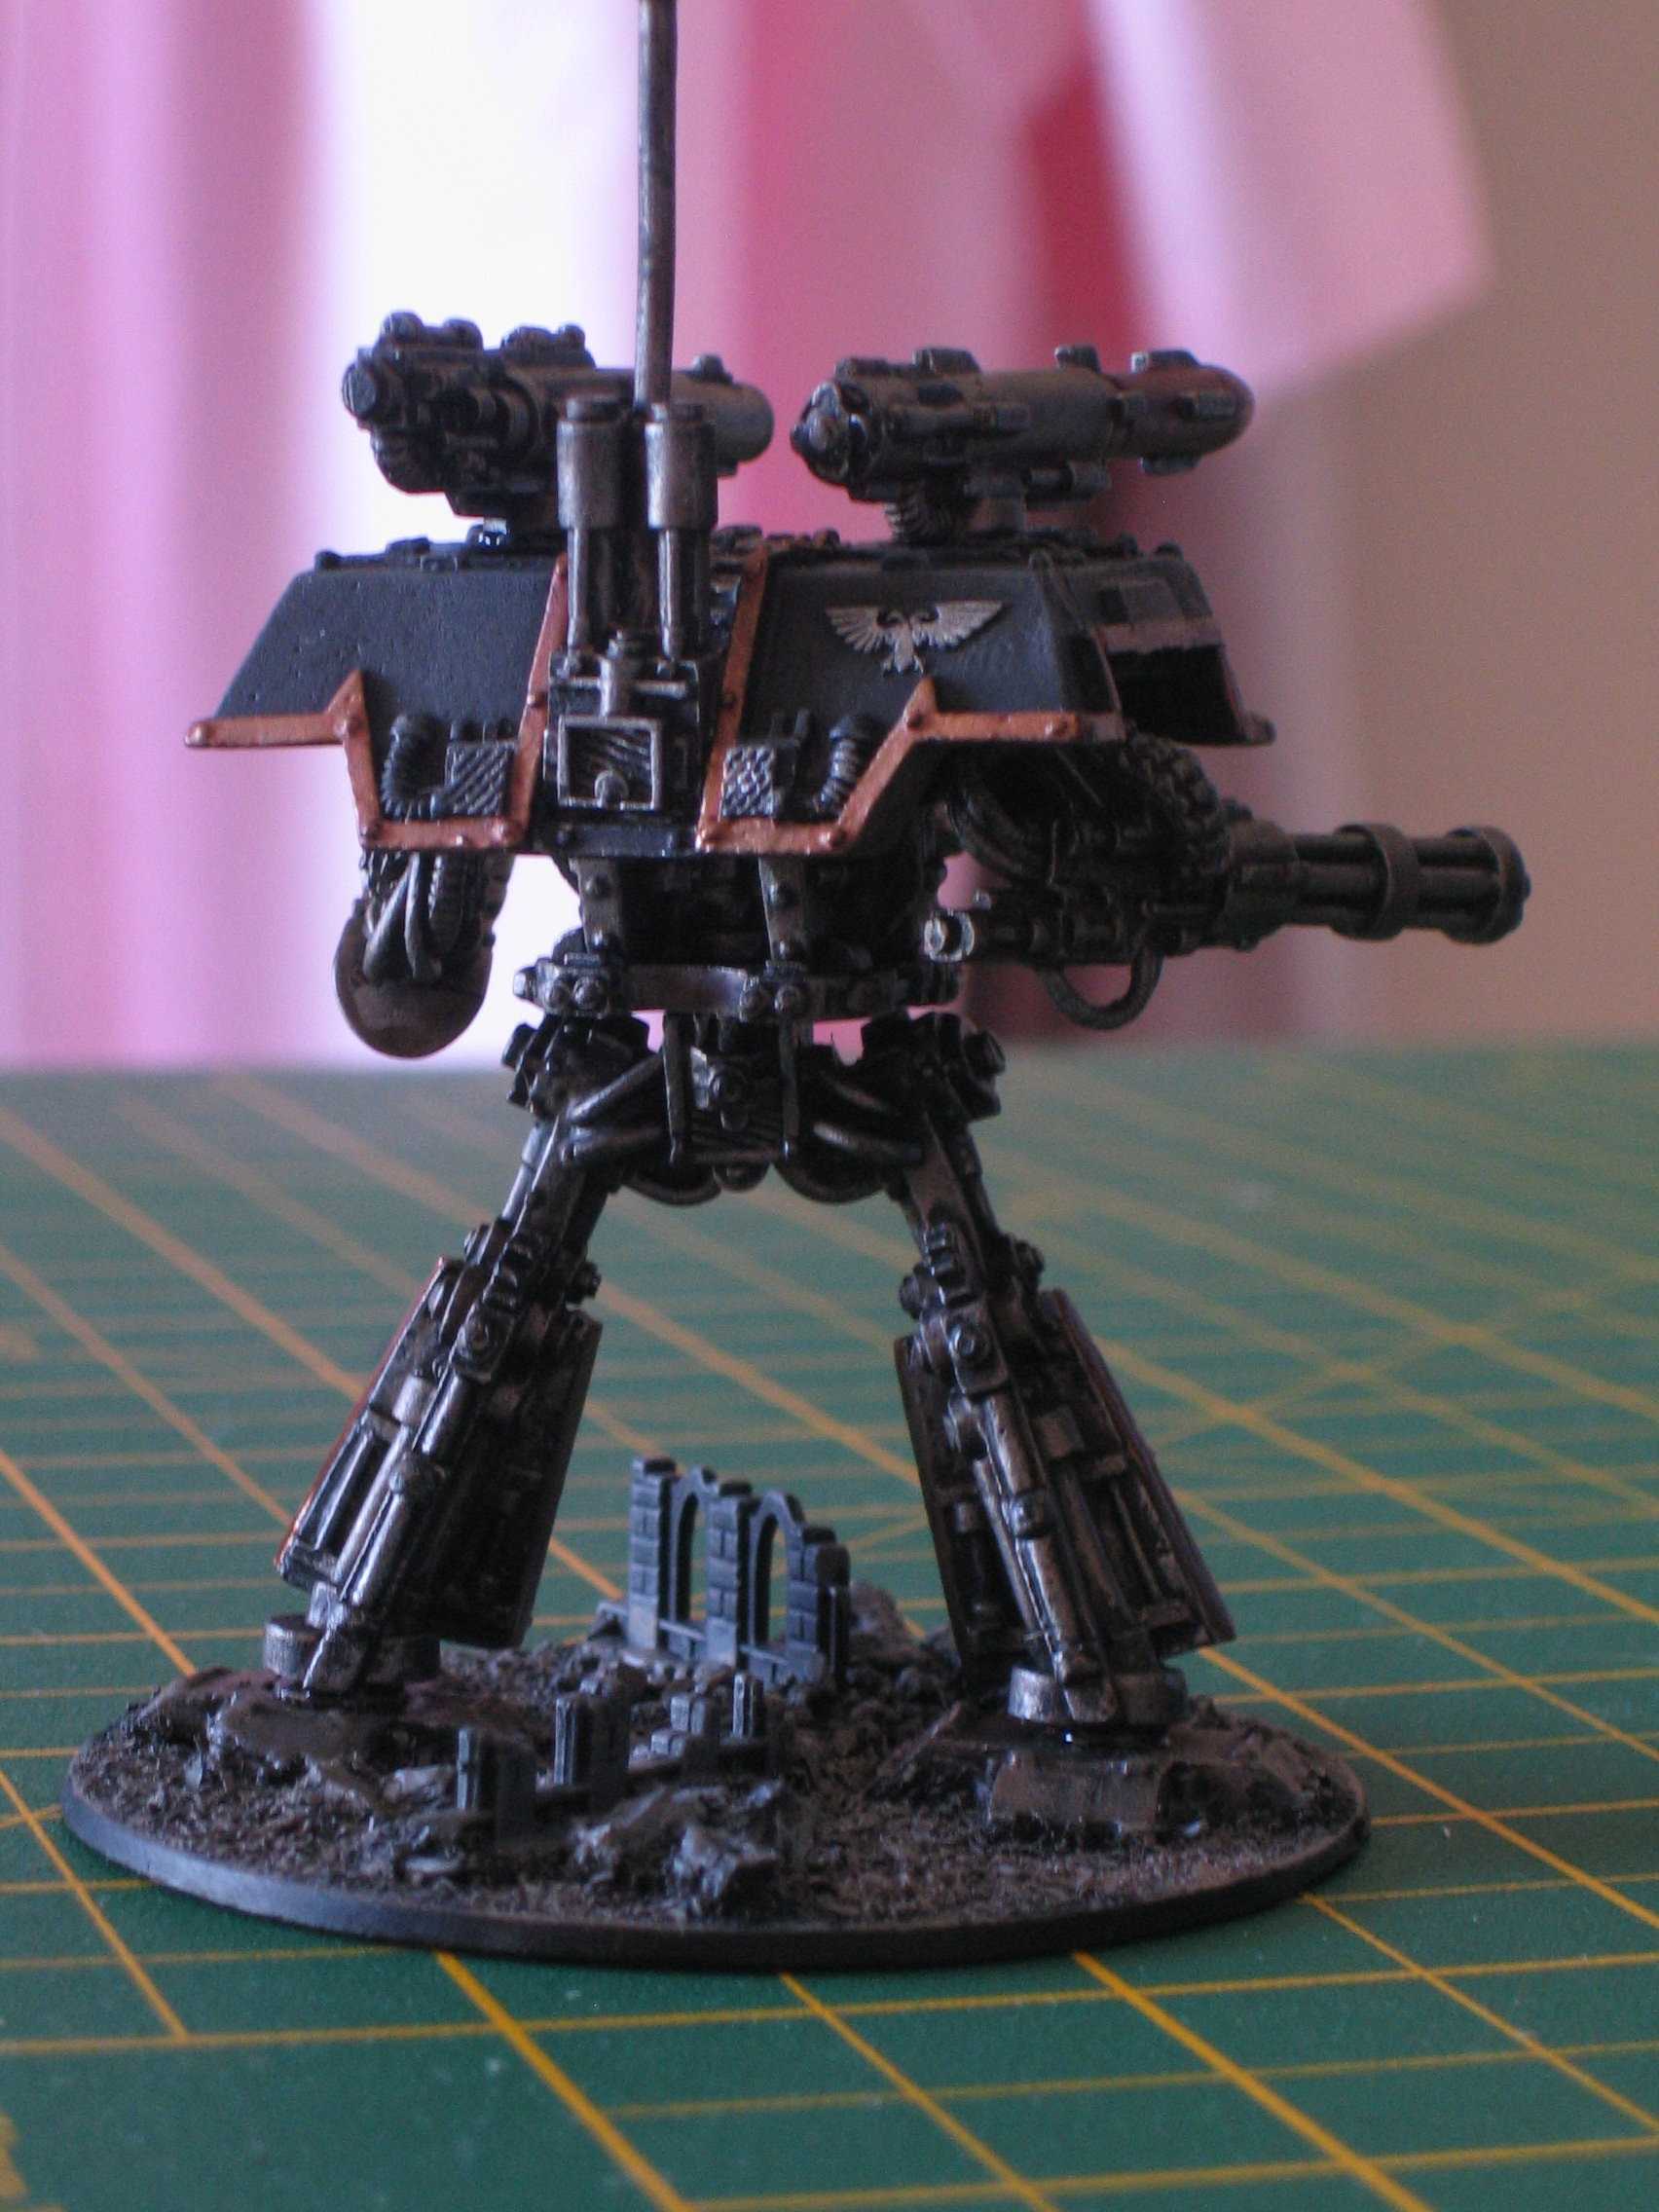
"Over-the-top" Warlord Titan Finished

I replaced the normal Warlord head with a Deathstrike Cannon, which (in 2nd Edition Space Marine and NetEpic) halves the Titan's movement to 8cm. I mounted a Edenite Reaper Turrent from Exodus Wars at the front of the carapace to give it a face: this counts as an additional weapon (a Vulcan Mega-Bolter), at the expense of weakened armour. The arm weapons are from a Mark II Warlord.
More pictures below.
The Plans of Mice and Men...
Now I'm forced to consider my options. Should I redesign the board so the city doesn't cover it entirely? Should I not glue the road sections down so I can create smaller urban areas a la carte? Should I use them to create a 15mm town instead?
Cityboard: The End Of The Beginning
Progress was slow: I wasn't entirely happy with the design, and didn't want to commit materials to something I wasn't 100% sure of. So last year I was very happy to discover S6 Engineering and their small-scale (6, 10 and 15mm) road system. very quickly I junked my old design and began planning a new system, mounted on 18mm MDF boards.
I've just recently started laying out the city. Here are some photos of the initial design:


The road and junction sections will be glued to the board and will be permanent. The block sections will be removable; each one will have a different building or terrain piece mounted on it, so that while the basic layout won't change, the city will be different for each game. This also means that we can replace destroyed buildings with ruins.
One thing I'm quite pleased about is an idea I had to put a small piece of plasticard under the block sections: this will raise them slightly above the roads, creating a raised pavement which is quite effective (and also makes the plates easier to remove):

The design has two "hard edges" where the roads end, and two "soft edges" with junctions that stick out over the edge of the board. I will be putting a defensible city wall along the hard edges: if another board is placed next to these edges, then they will be interesting terrain features, but if not, then the walls will prevent the city just stopping, which looks a bit weird. The soft edges will allow for another board to be linked in to the city on those edges, so we can have a sprawling metropolis over several board sections, which will be pretty awesome!
The current plan is to spray the road sections with Rust-oleum Aged Iron Textured Spray, as recommended by Robin of Gruntz fame. You can see the 15mm board he created using the S6 system in this video:
More to follow.
Over-the-top Warlord Titan
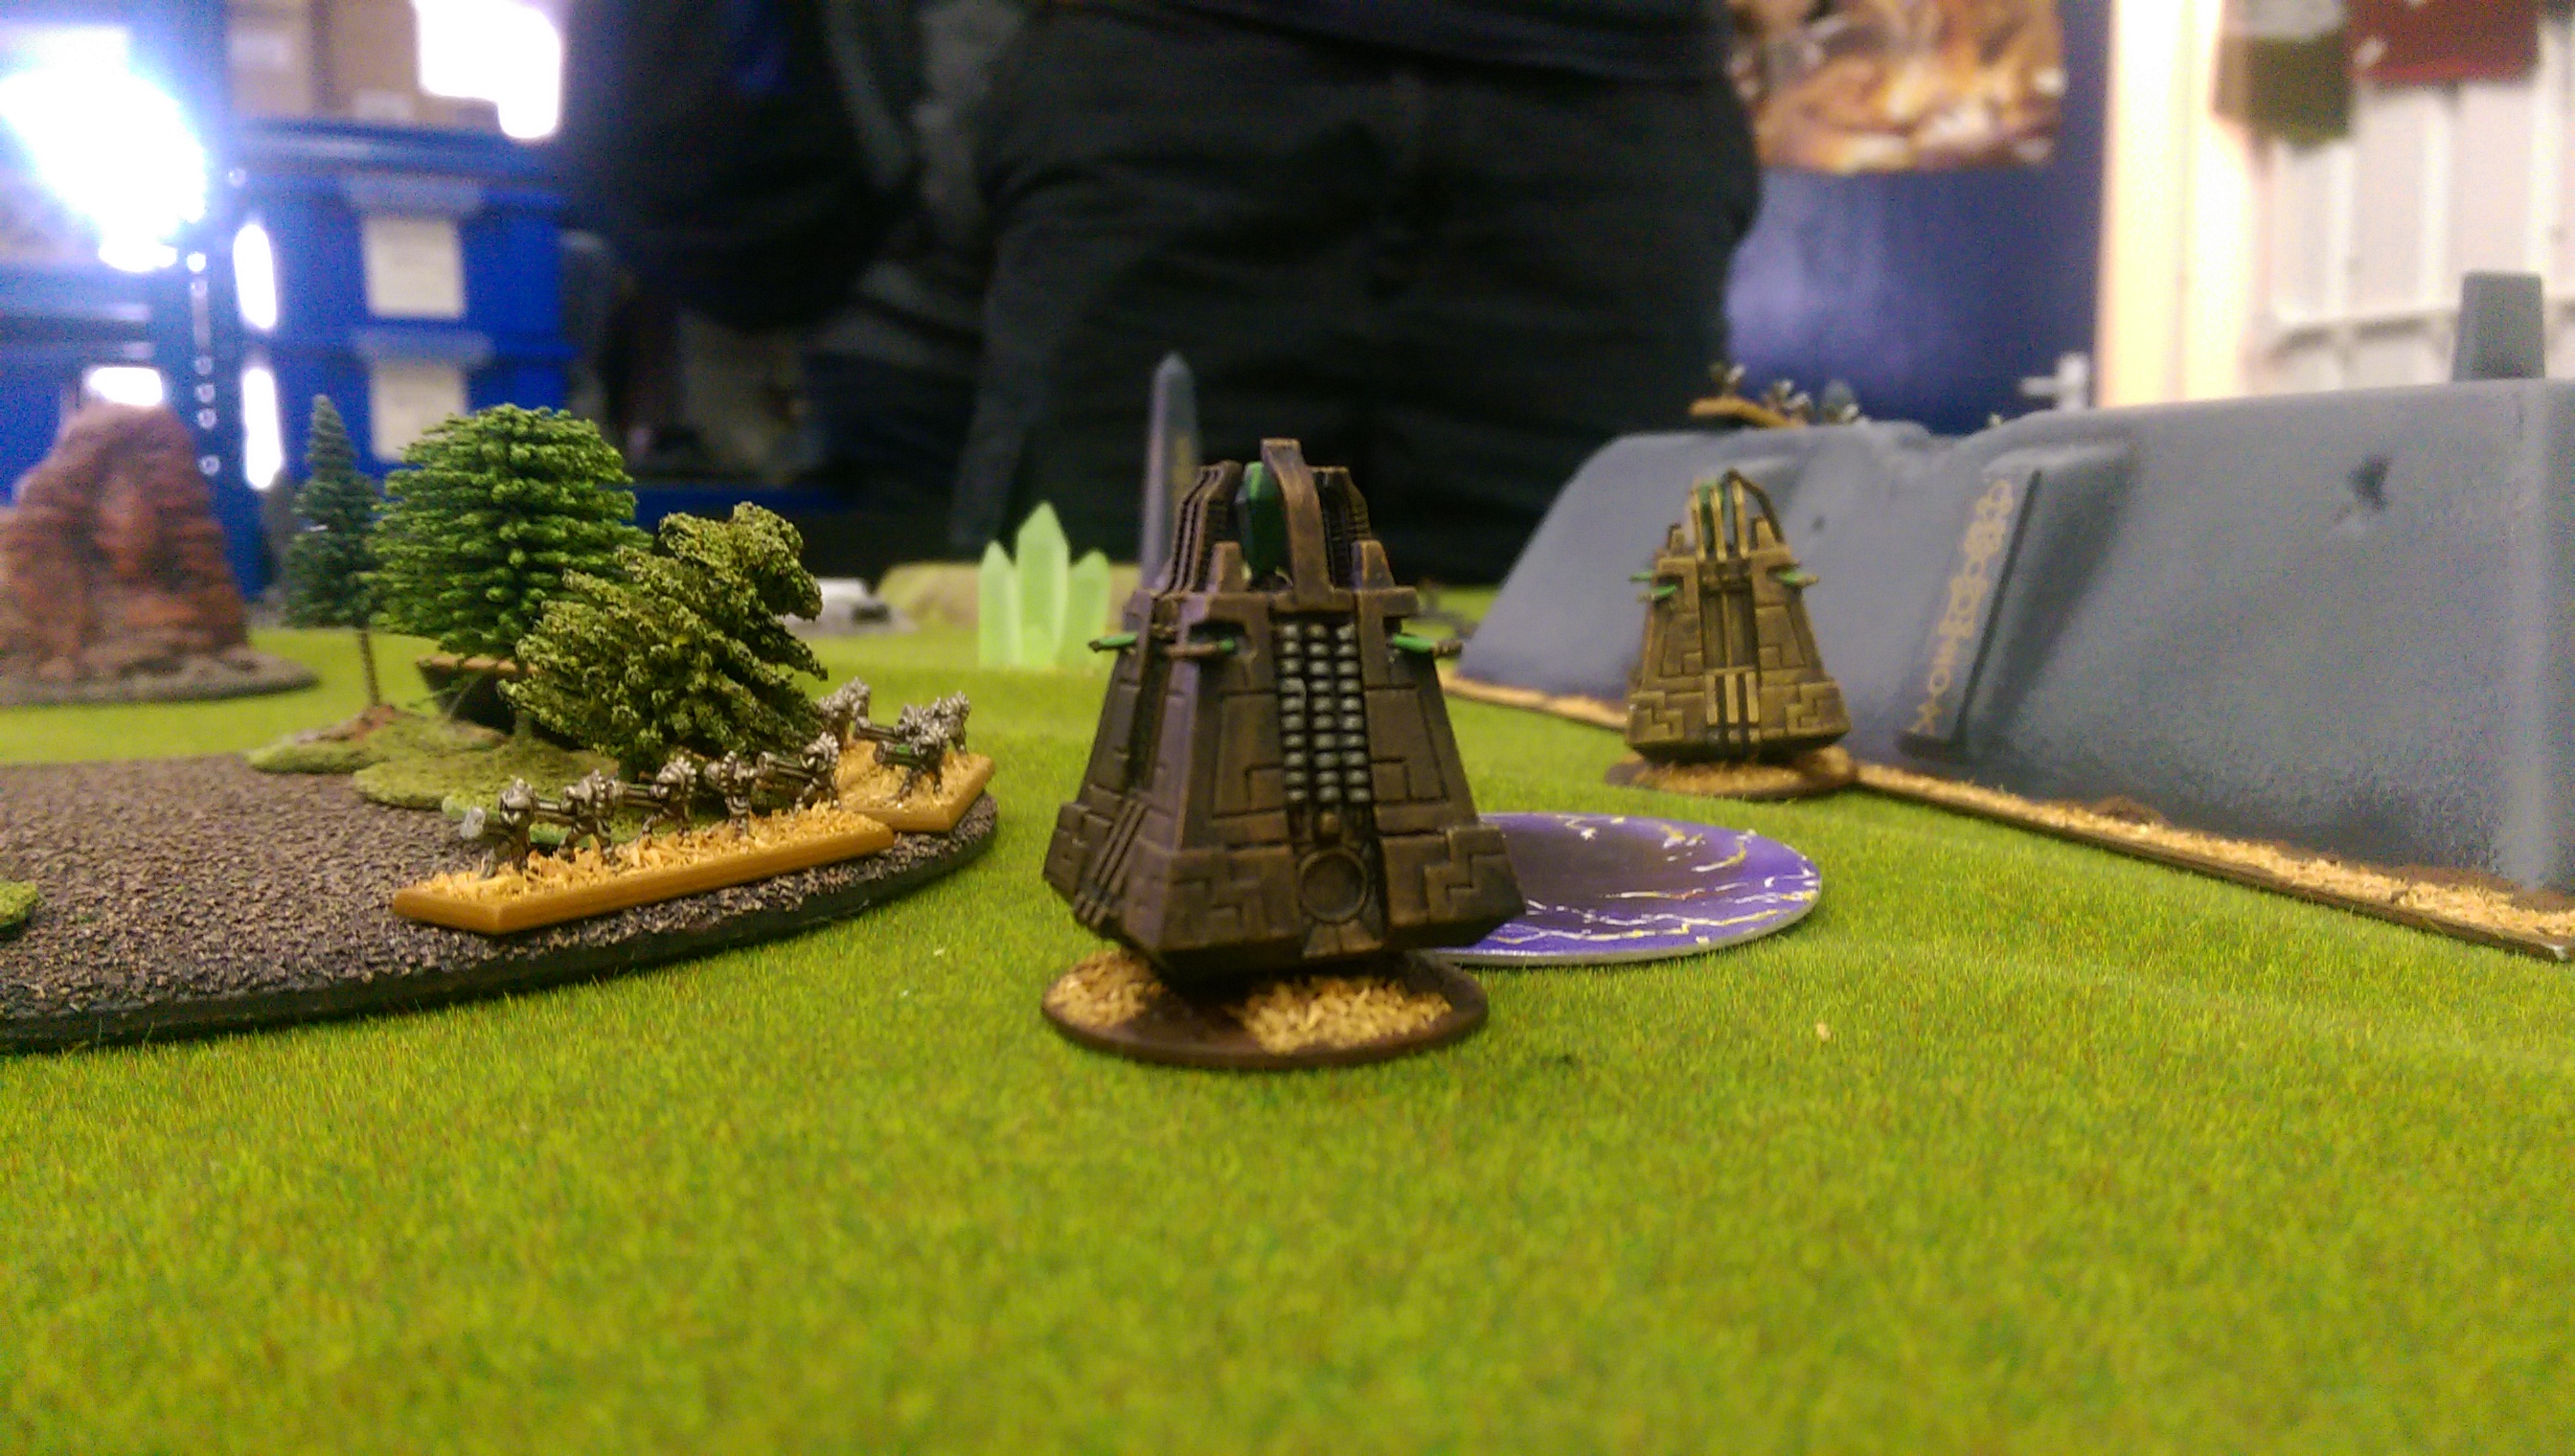
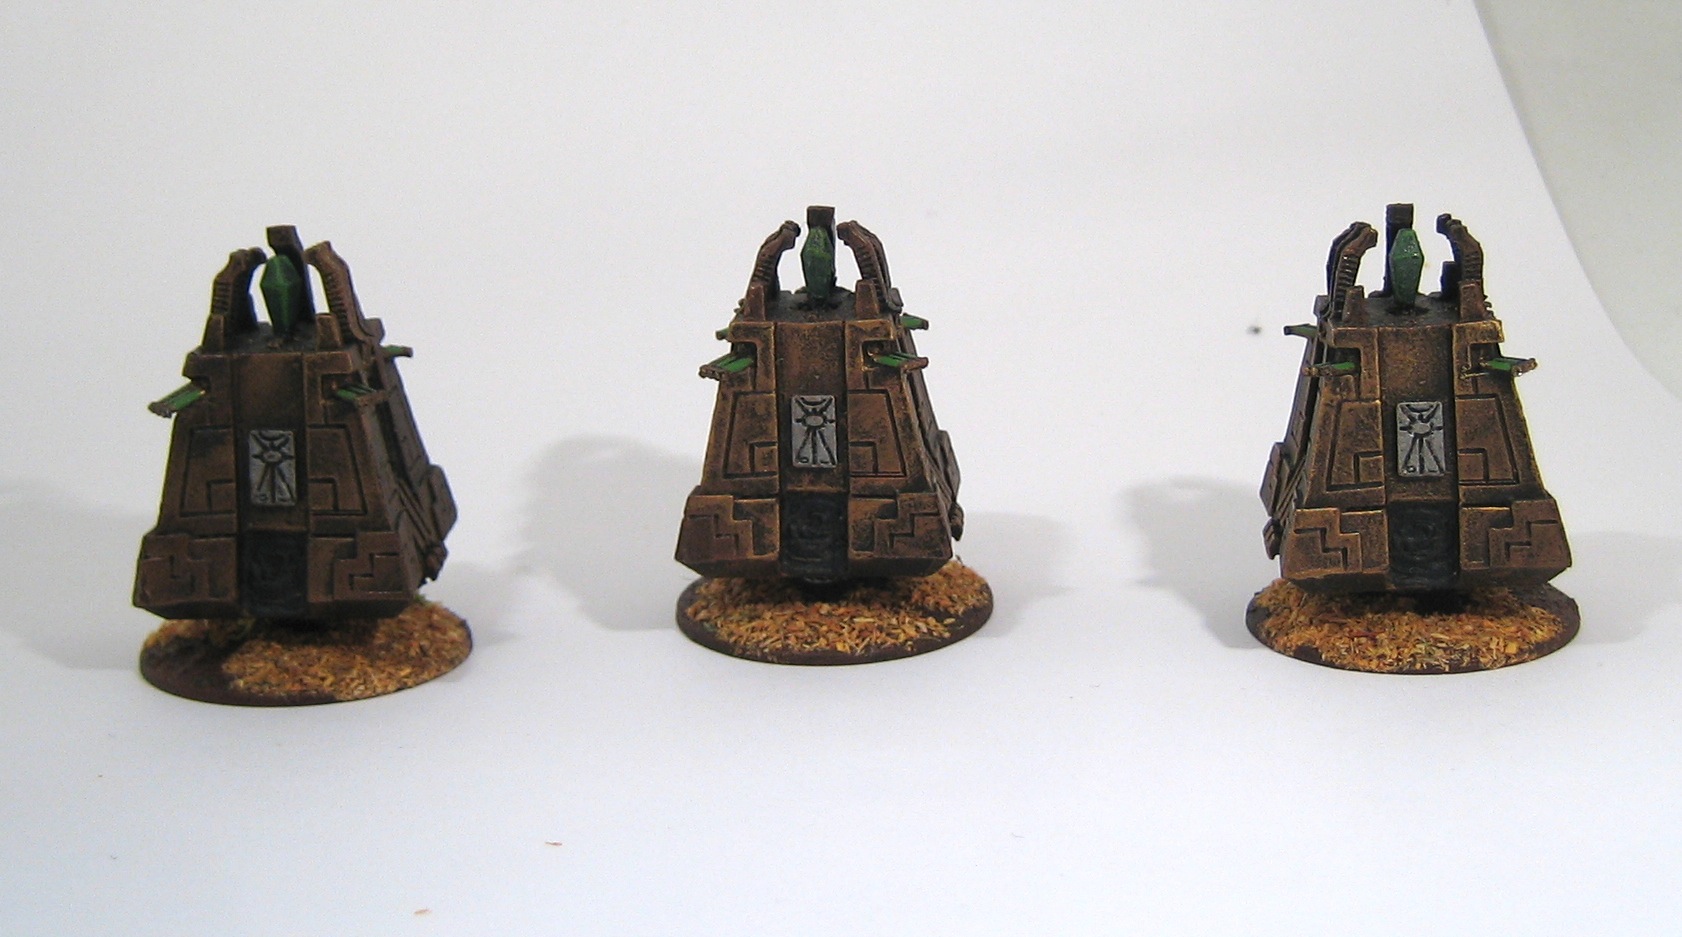
Epic Necron Tomb Structure Finished
First up is the large tomb structure that I've featured in the last two posts. It was initially sprayed black. I tried a number of different techniques to give it an aged stone appearance, including stippling and airbrushing, and I even got out my old airbrush to give that a try! In the end I used an old bath sponge to apply successively lighter shades of gray. Then I just needed to texture and flock the base and apply some decals from Games Workshop's Necron Transfer Sheet.


At Cavalier last year I picked up some resin Egyptian obelisks. I necron-ified them by filling in the hieroglyphic writing on the sides, and then sanding them smooth. They got the same paint job as the Necropolis, and some decals as well:


Next up is an Exodus Wars Khazari Droid Controller painted up to look like a Necron Abattoir (I previewed this miniature in a post last year:


I met Tom Webb of Steel Crown at Salute earlier this month and he's a very nice chap. Go buy his stuff!
Lastly there's the board I used to take these photos with. This is one of six Ziterdes modular gaming table modules that I bought a few years ago and use for Epic games. They were originally painted using car body sprays, but I've never been very keen on the shiny finish that they picked up, so I made up a texture paint using brown craft paint, aquatic sand and PVA glue (similar to the "concoction" used by Beasts Of War), which gives a nice flat muddy finish, and is flexible as well. I then applied some of the same flock I use on my Epic necron model's bases.

Large-scale Epic Necron Structure

The original piece is a 28mm scale defensive wall, so I cut out a square of plasticard and placed it on top of some balsa wood supports that I glued to the inside of the walls.
The roof is a bit featureless, so a while back I started making a huge great obelisk to sit on top, but I think it might be a little over-the-top:

What do you think?
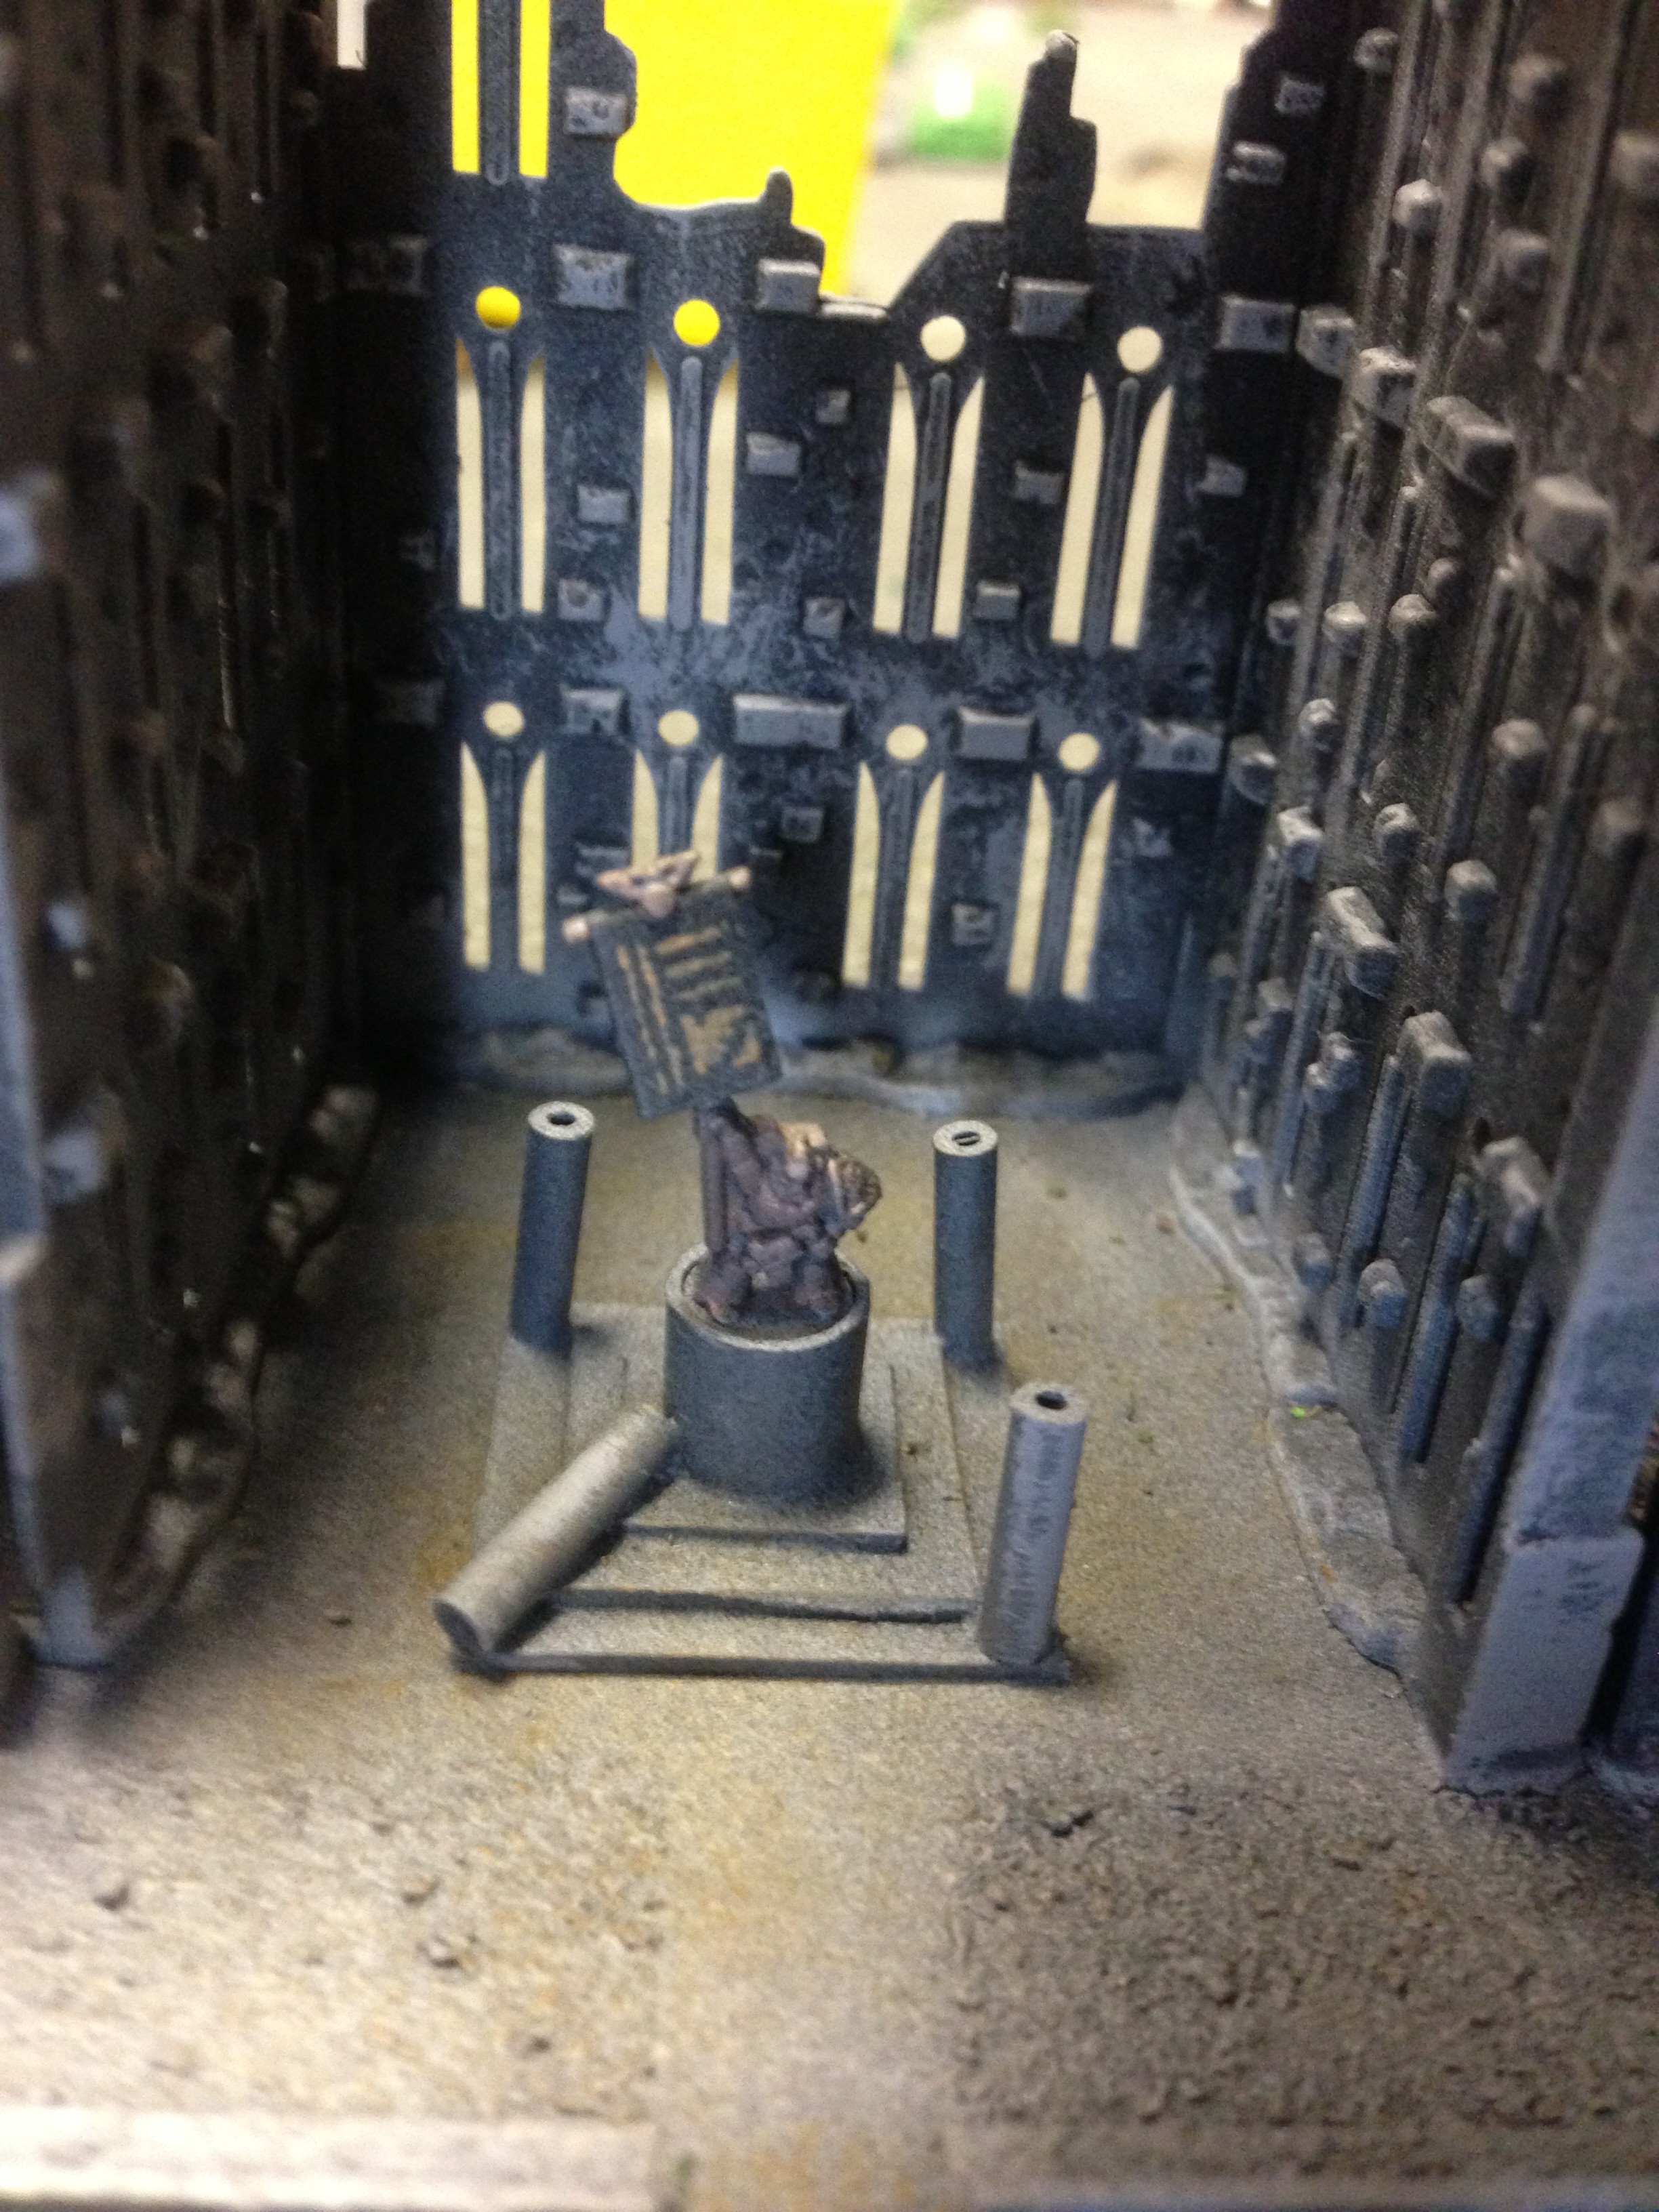
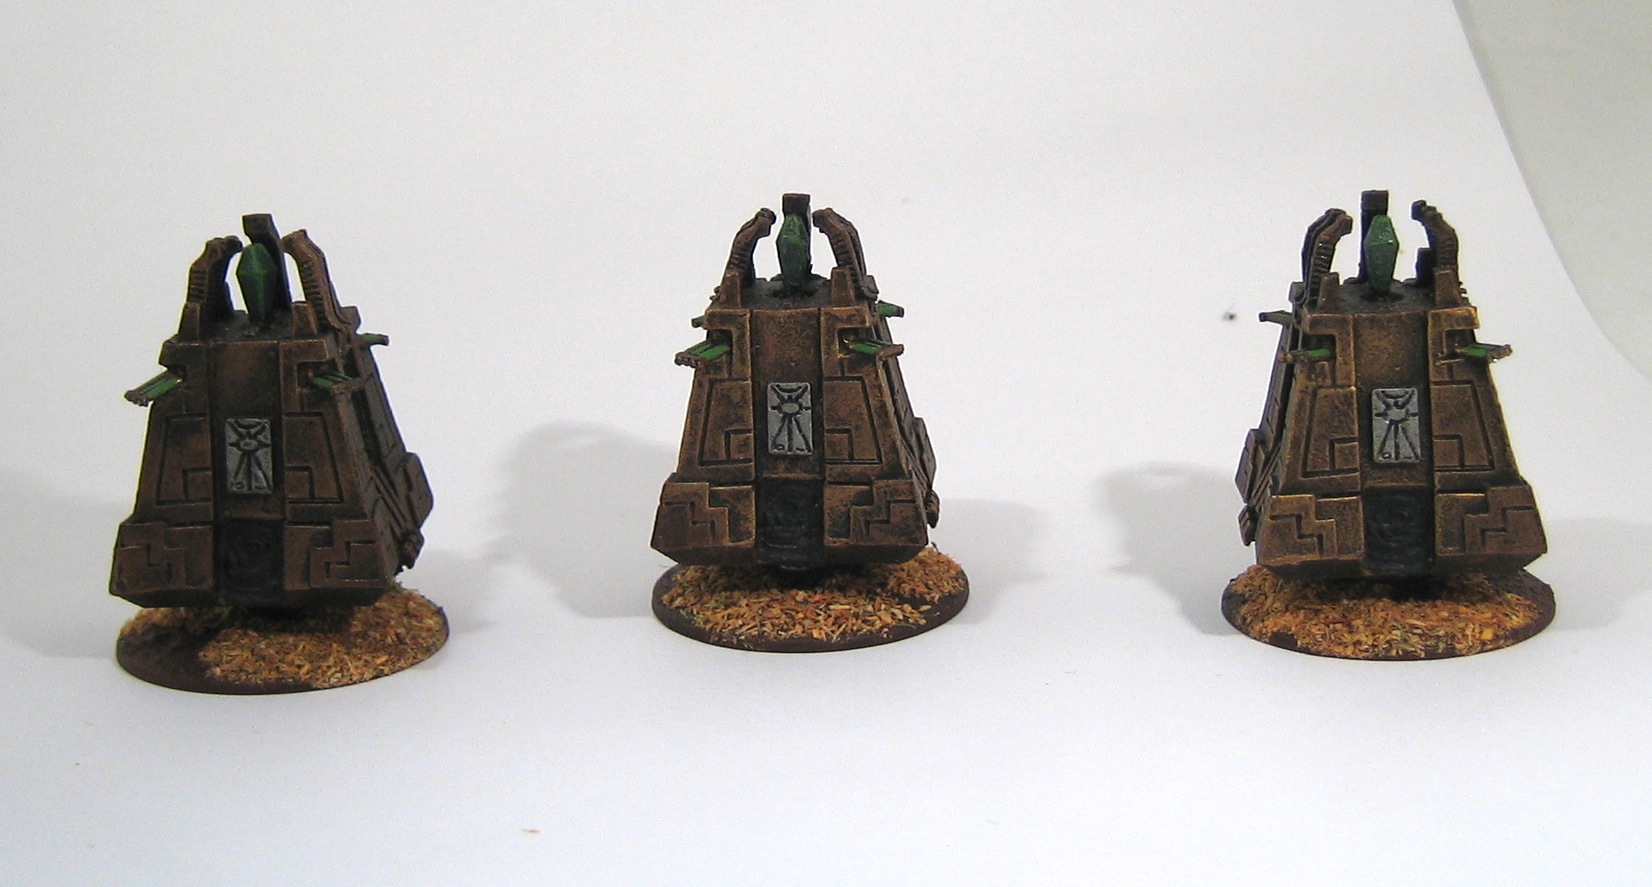
Epic Necron Summoning Cores

I wrote some rules (for the NetEpic Necron codex here), which you can download from this link.
Epic Necron Terrain Pieces

This is the method I came up with (it took a couple of attempts). First, the ingredients:
- 3mm plasticard
- 1mm or 0.5mm plasticard
- Liquid poly cement
- 5mm drill
- Razor saw
- Clothes pegs
The first thing to do is cut out two 15mm x 24mm rectangles from the 3mm plasticard. I decided to score on the design while they were still attached to the main sheet. You'll almost certainly want to use a razor saw to do this.

Then cut a 12mm x 22mm piece of 1mm or 0.5mm plasticard. This is a spacer that goes between the other two pieces, making a sort of sandwich. It's smaller than the other two pieces so that a gap shows. Glue them all together with liquid poly and use some clothes pegs to clamp them together.

Once the glue has set, use a 5mm drill to drill a hole through the middle. The hole should be 7.5mm from the top, and on the centre line. I drilled a pilot hole with a pin vise to make the drilling a bit easier.
Once you've drilled the hole, take your razor saw and cut grooves over where you've previous scored. If your razor saw is a thin one like mine, you may need to make two parallel cuts and carve out between them. A round file can be used to chamfer the edges of the grooves.
Mount on a 24mm base and you're done! Here's the finished piece.

Here's another terrain piece I made. You can get quite nice effects with just a few bits of plastic.


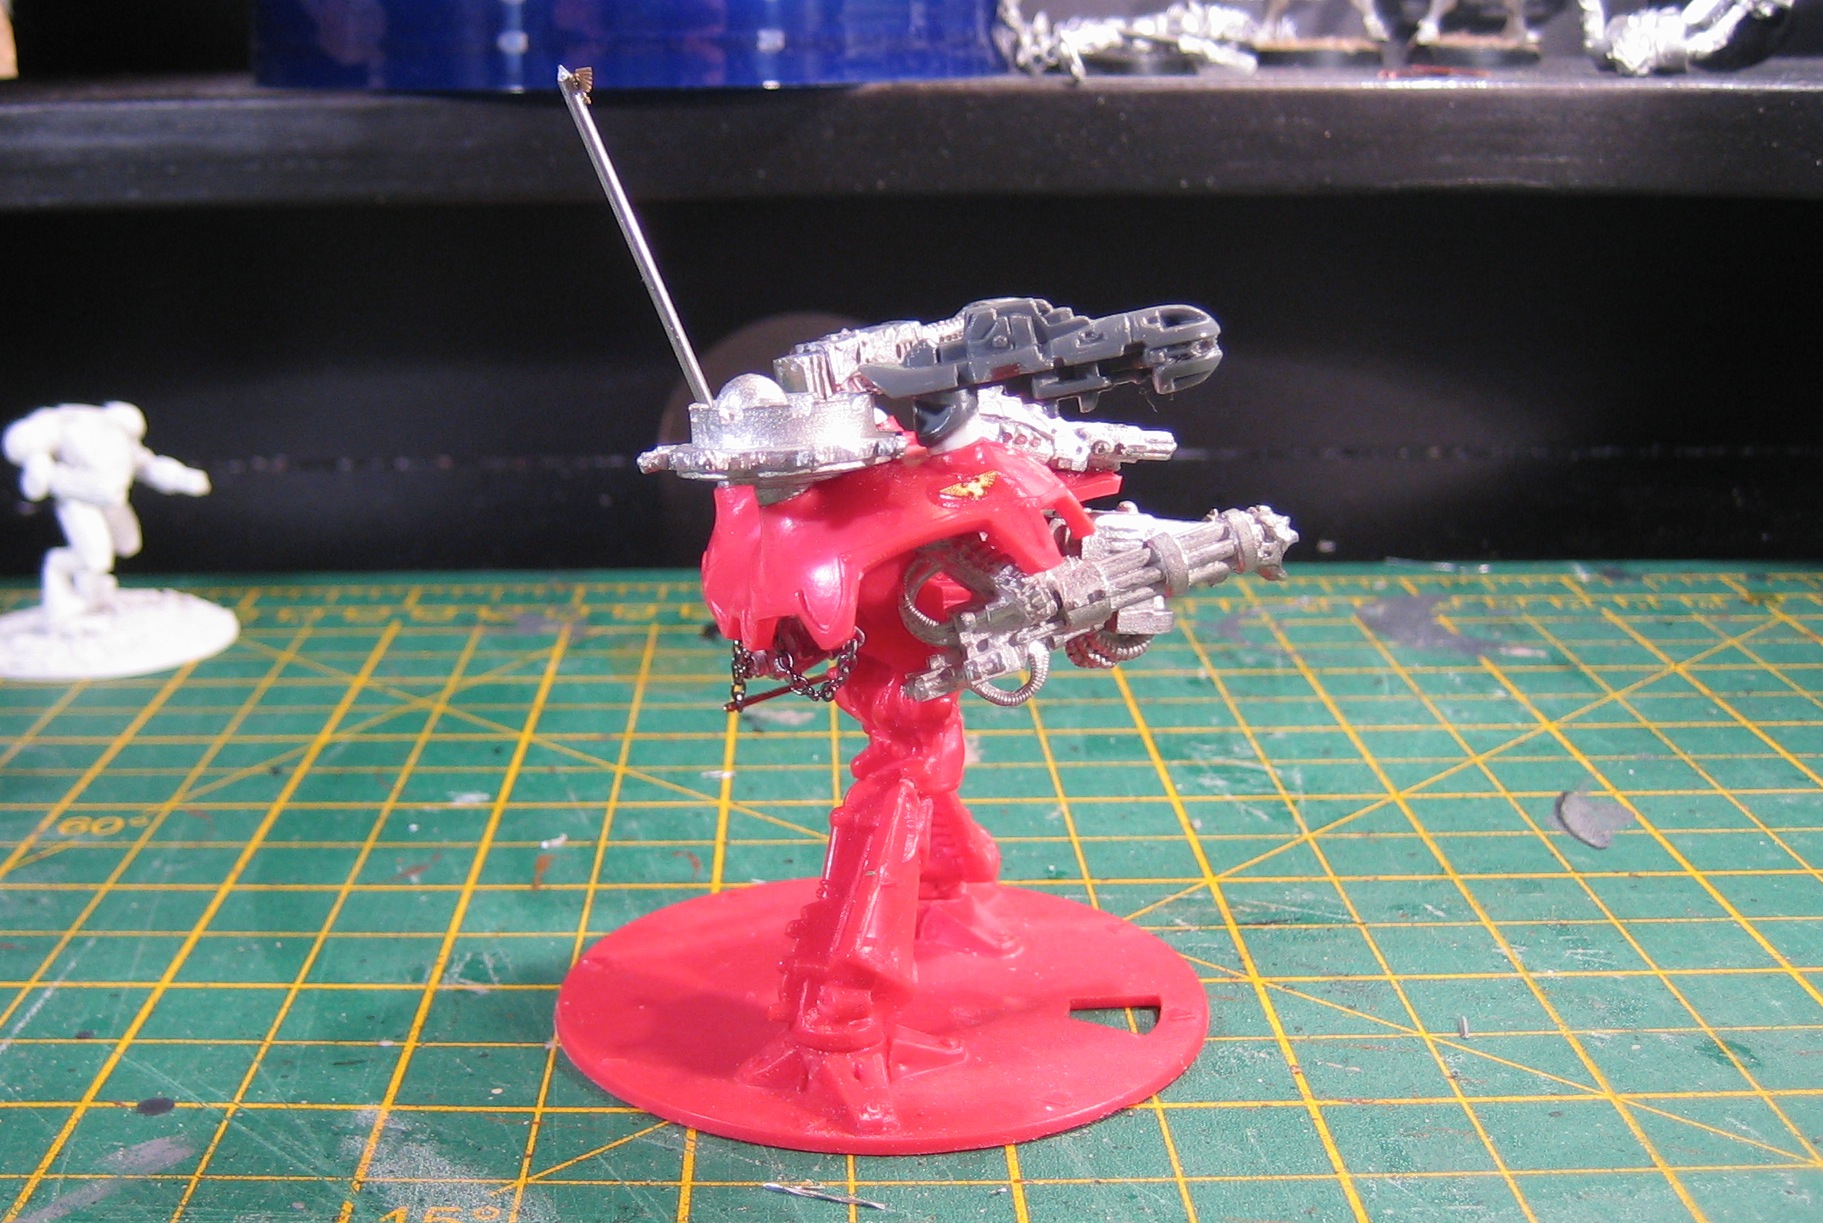
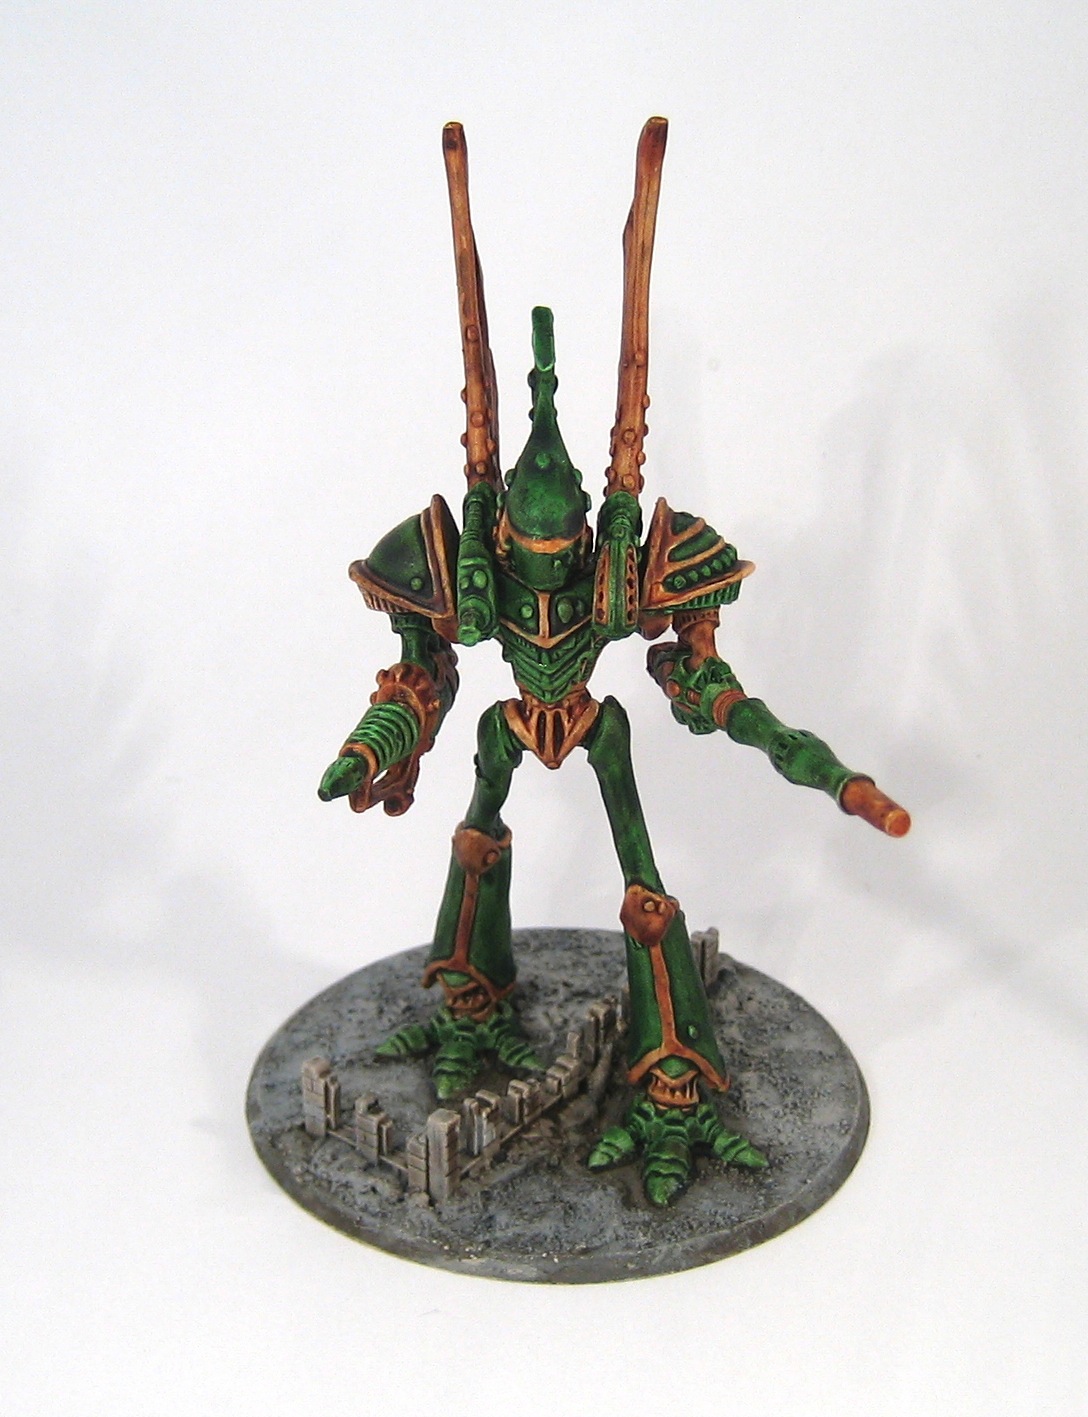
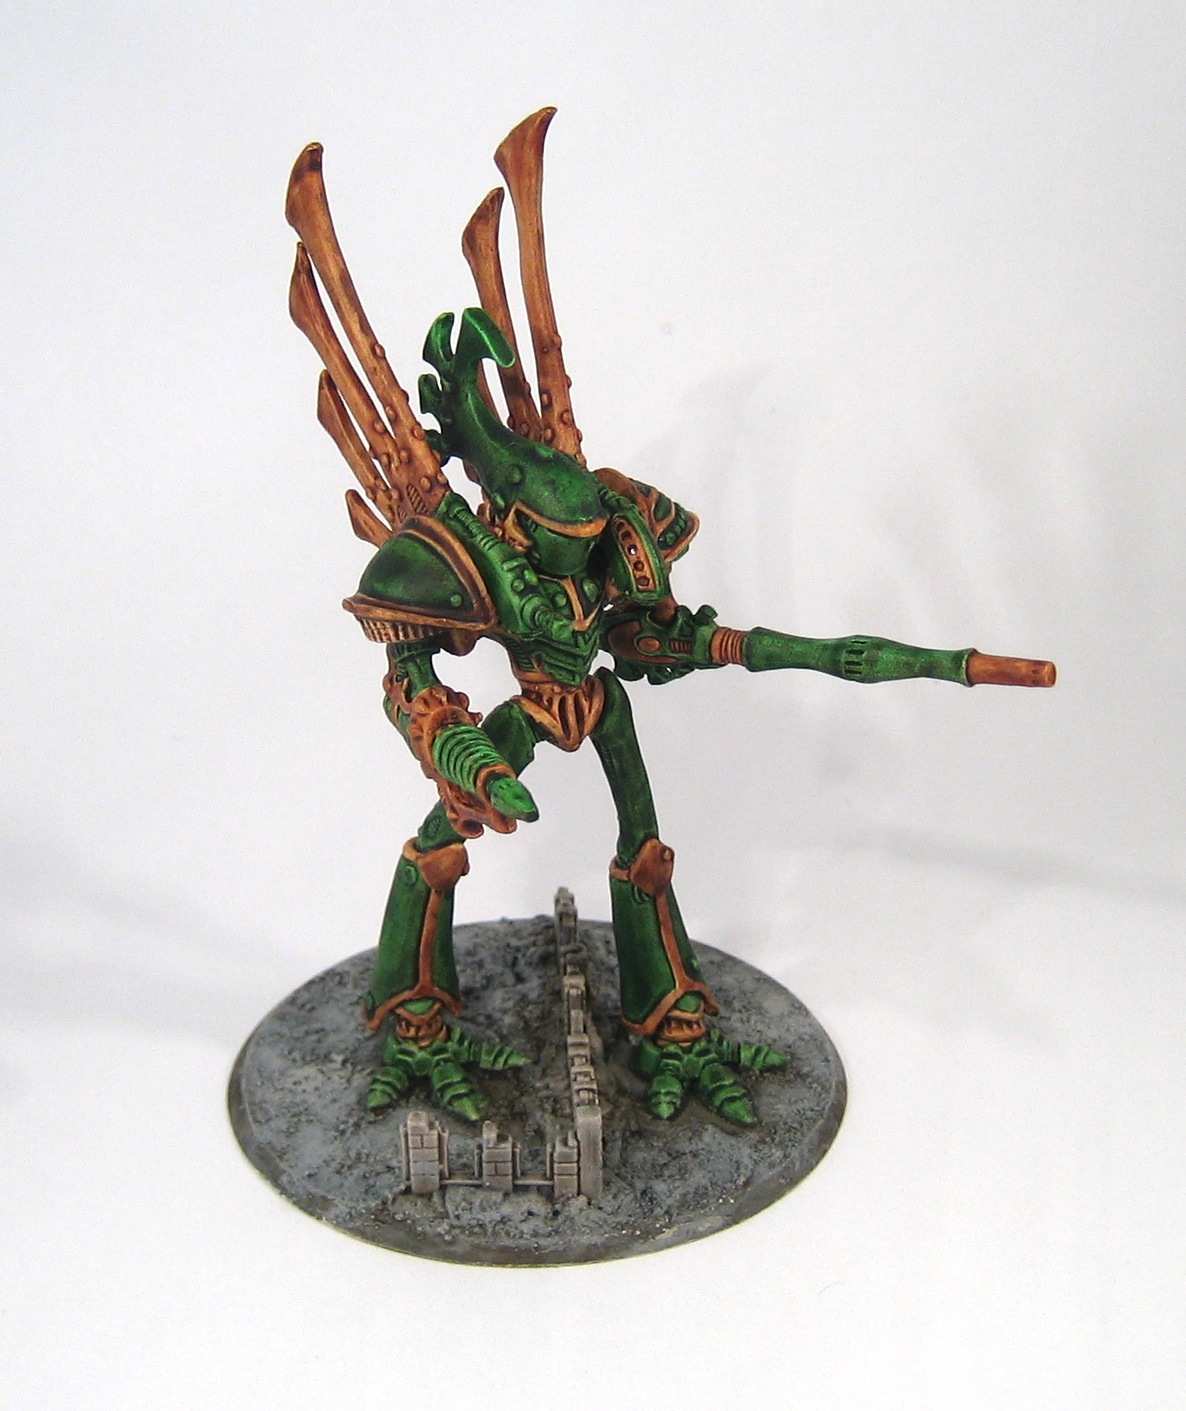
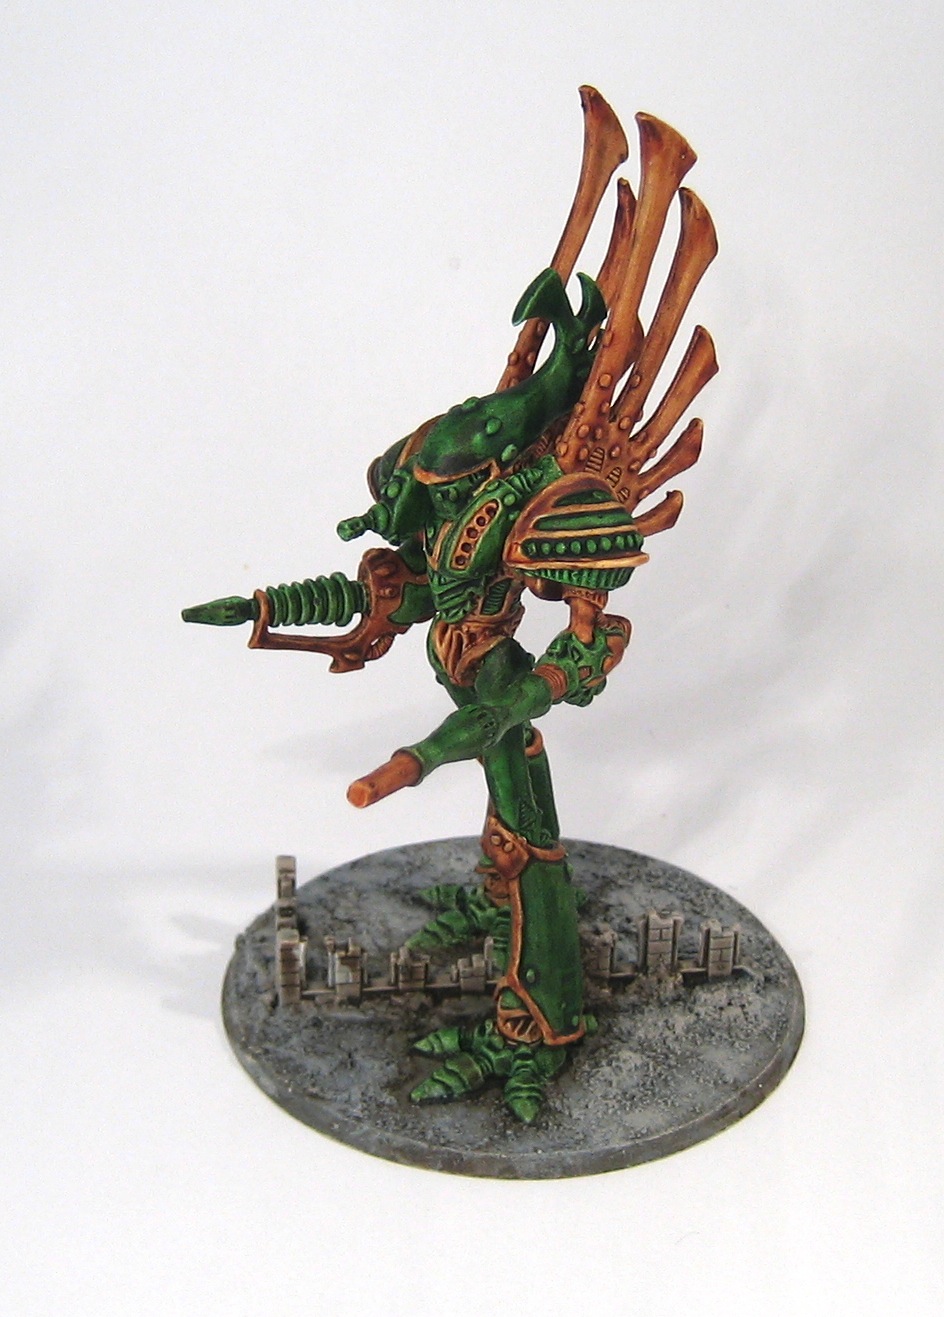
Eldar Phantom Titan
More Epic Necrons


2010, a year in gaming
2010 was a great year for me (in Real Life as well as in my Gaming Life): I feel that my painting and modelling skills have improved a great deal: in basing, in my use of washes, and in the techniques and tools I've learned to use. I have the great gaming blogosphere to thank for that: many of my favourite blogs are linked to in the links on the right.
I played a lot of Space Hulk in 2010: it's great for time-starved veterans like me and my friends. You can have a great gaming experience in a couple of hours, with none of the preparatory work required for a game like Epic.
I also managed to get my 15mm SF soldiers into battle, albeit only once, using a gaming system of my own devising. It's the first time I've ever written and used a set of gaming rules, and was a great experience. Hopefully I'll be able to get some more games in during 2011, and refine the rules, perhaps even publish them!
The thing I'm most pleased with this year has been the creation of an Epic Necron army. This is mainly thanks to the brilliant chaps on the Tactical Command forums: creative geniuses who have, purely for fun, created very impressive proxies for many of the Necron units. It's also due to the excellent miniatures produced by Steel Crown Productions for their Exodus Wars game: their Edenite miniatures are great quality and value, and are very good proxies.
The army isn't finished: I have some Wraiths to assemble and paint, some Obelisks that have been troublesome (they're resin and I didn't wash them before undercoating, so the paint's flaking off, grrh), and I need some more Monoliths, as I found out when I took the army out for a test game (the only game of Epic I managed this year). Playing against Squats, I was narrowly defeated because of the lack of fast close combat troops (ie Wraiths) and the need to keep the Monoliths in unit coherency. Having another group of them that is free to move around will give me more flexibility. I've also got another super-heavy monstrosity that still needs painting.
I've been meaning to take some photos of the complete army, and I finally managed to do it today. Here they are. I hope they inspire you!


Mk I Warlord

This is actually a repaint of a Titan I've had for many years: it took a bath in Dettol which stripped the paint off very nicely.
Obviously I have one more Titan to paint to go in the Battle Group. But I can't decide whether it should be a Mk I (like this one), Mk II (they're pretty rare but I have one) or Mk III (the modern "Lucius" pattern).
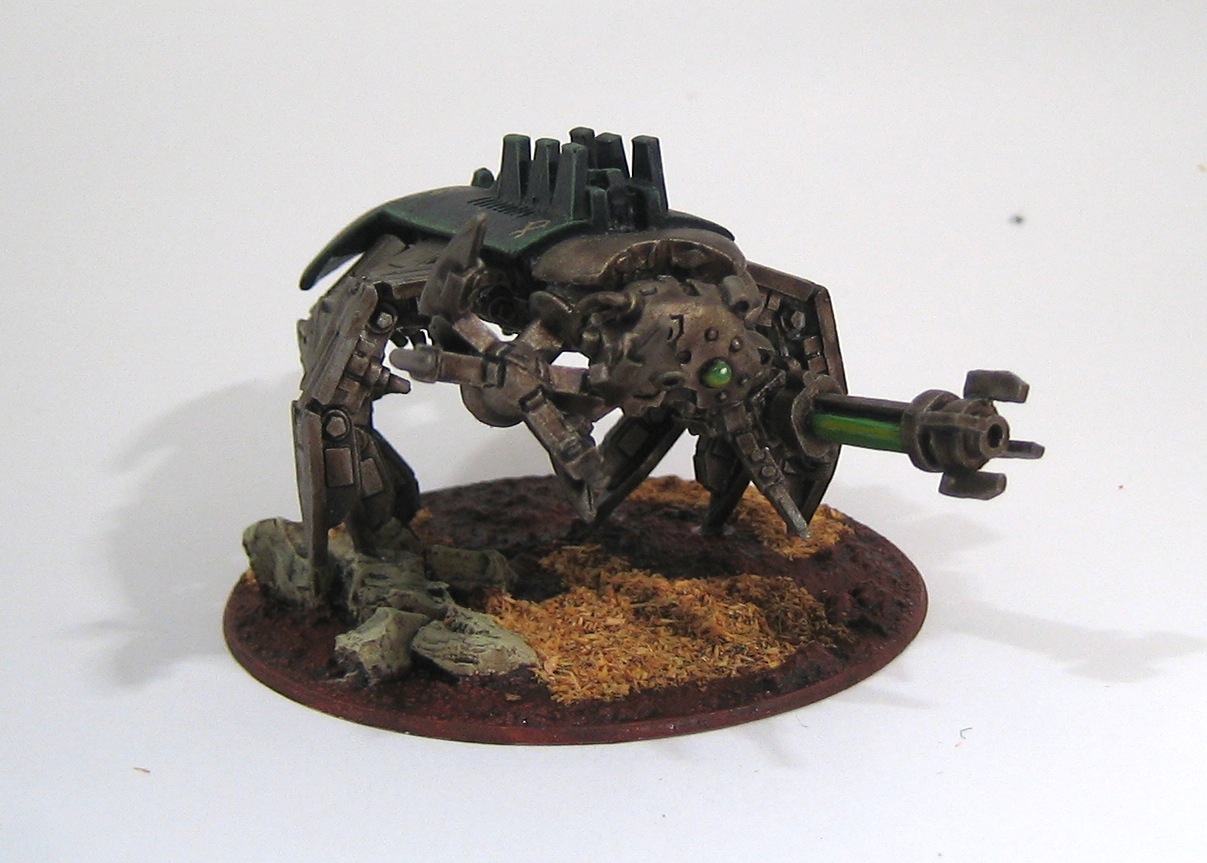
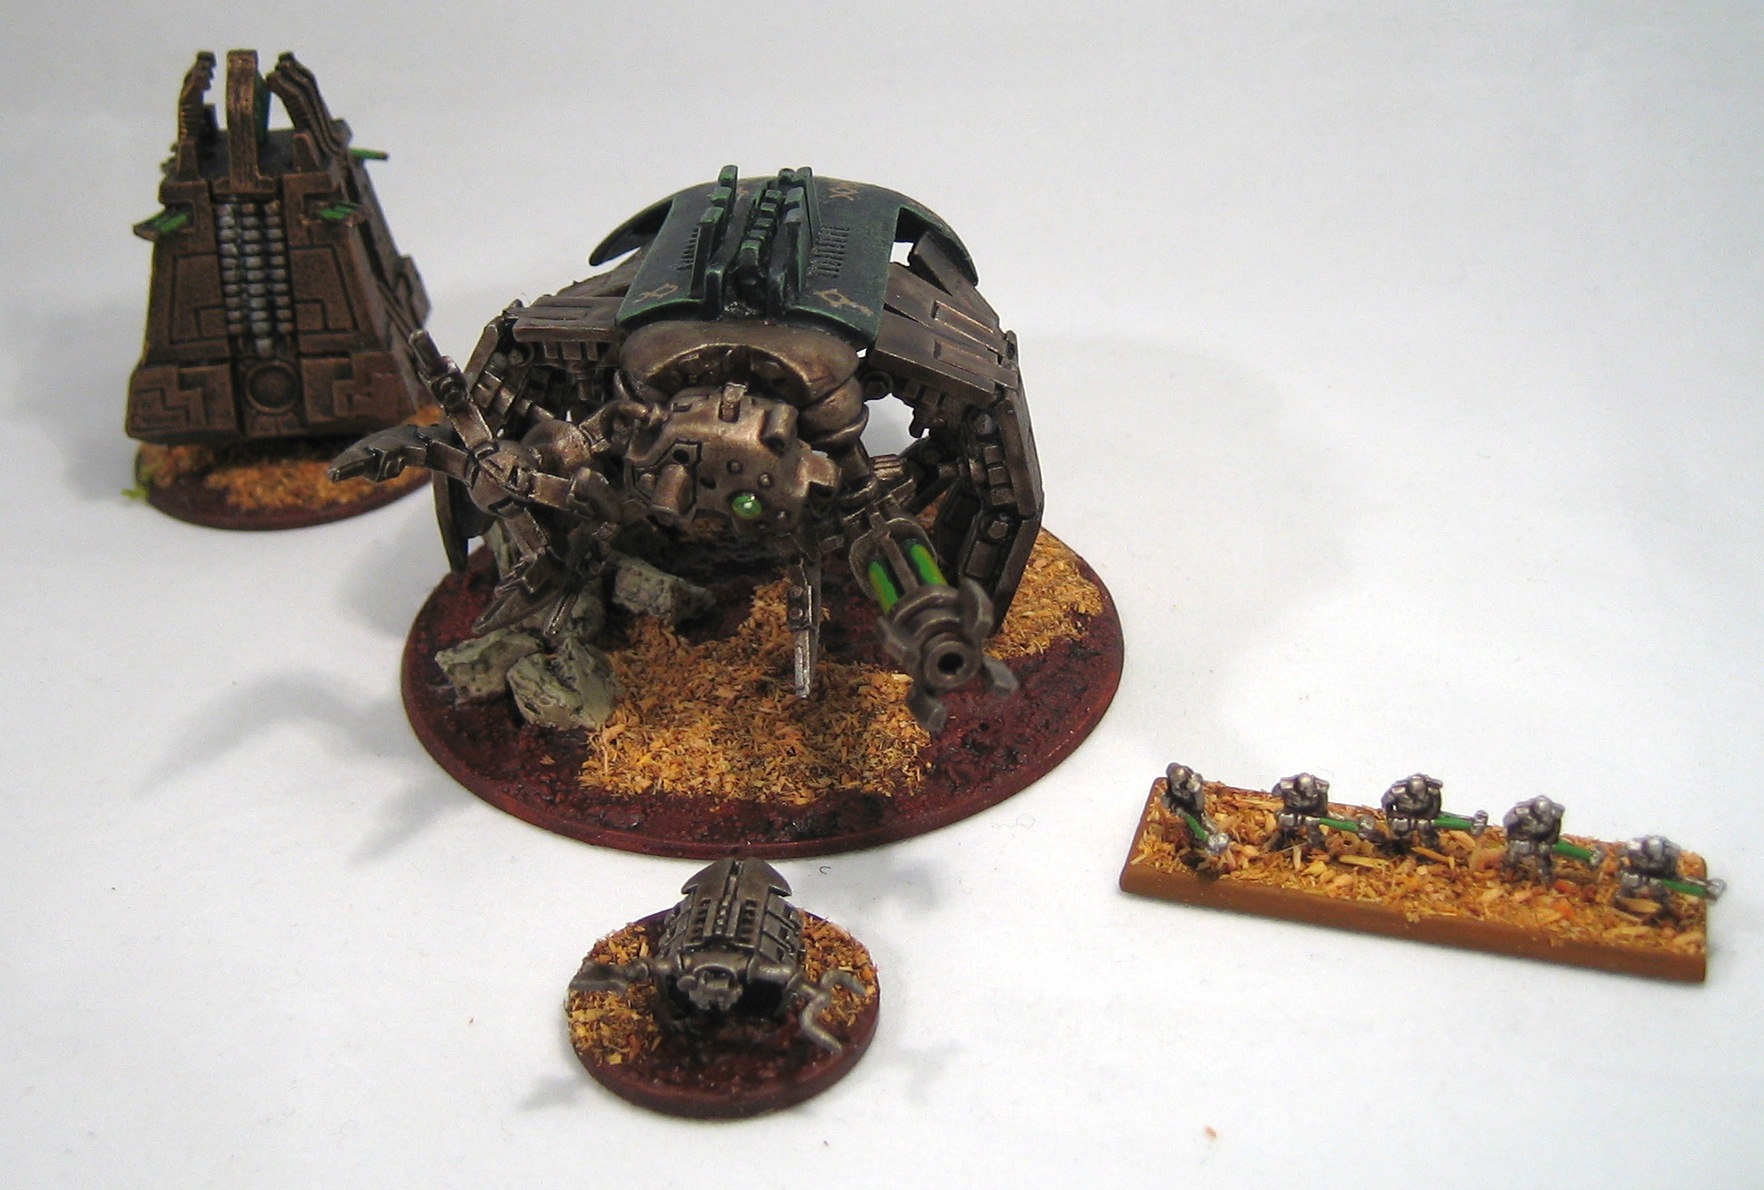
Epic Necron Tomb Stalker
Necrons don't use Titans per se, the closest thing to a Titan on the Necron Epic army list (a fan effort) is the Tomb Stalker, which is described as an oversized Tomb Spider. This makes it very easy to create one: all you do is take a 40k scale Tomb Spider and mess around with it a bit:
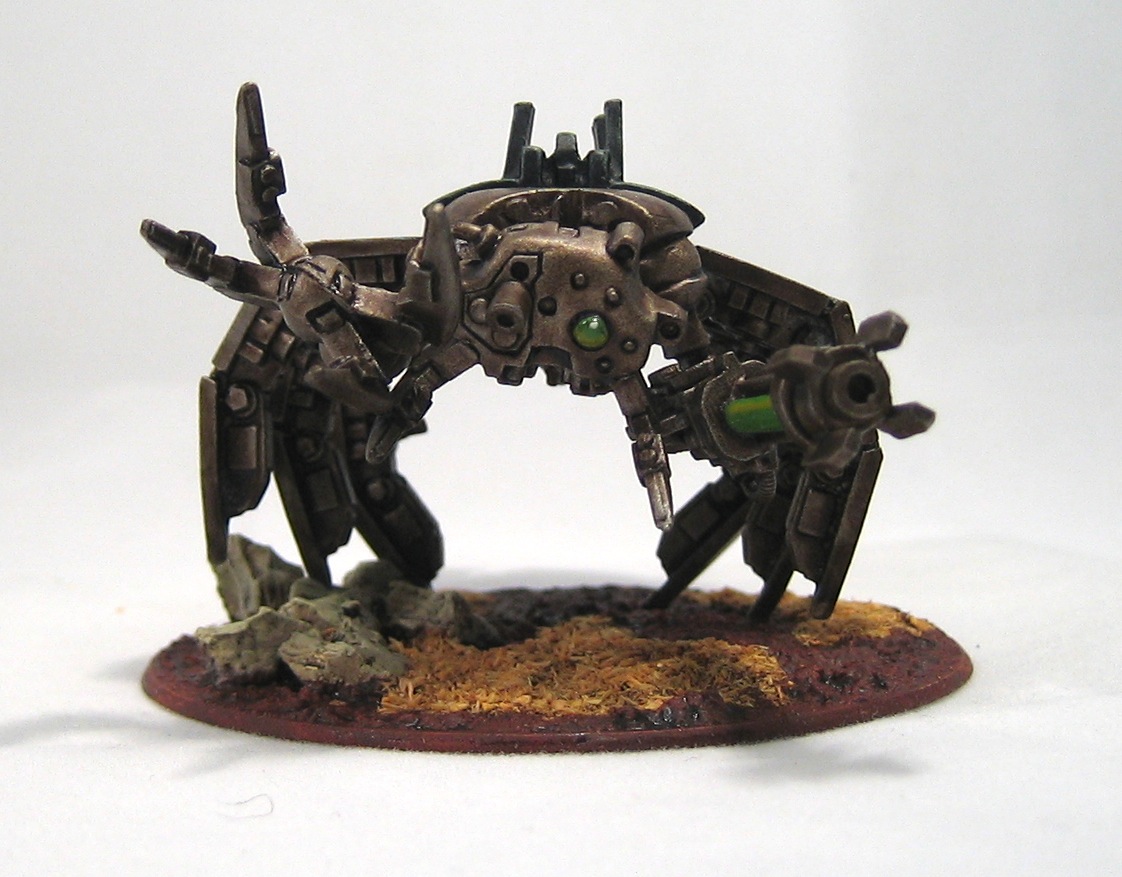
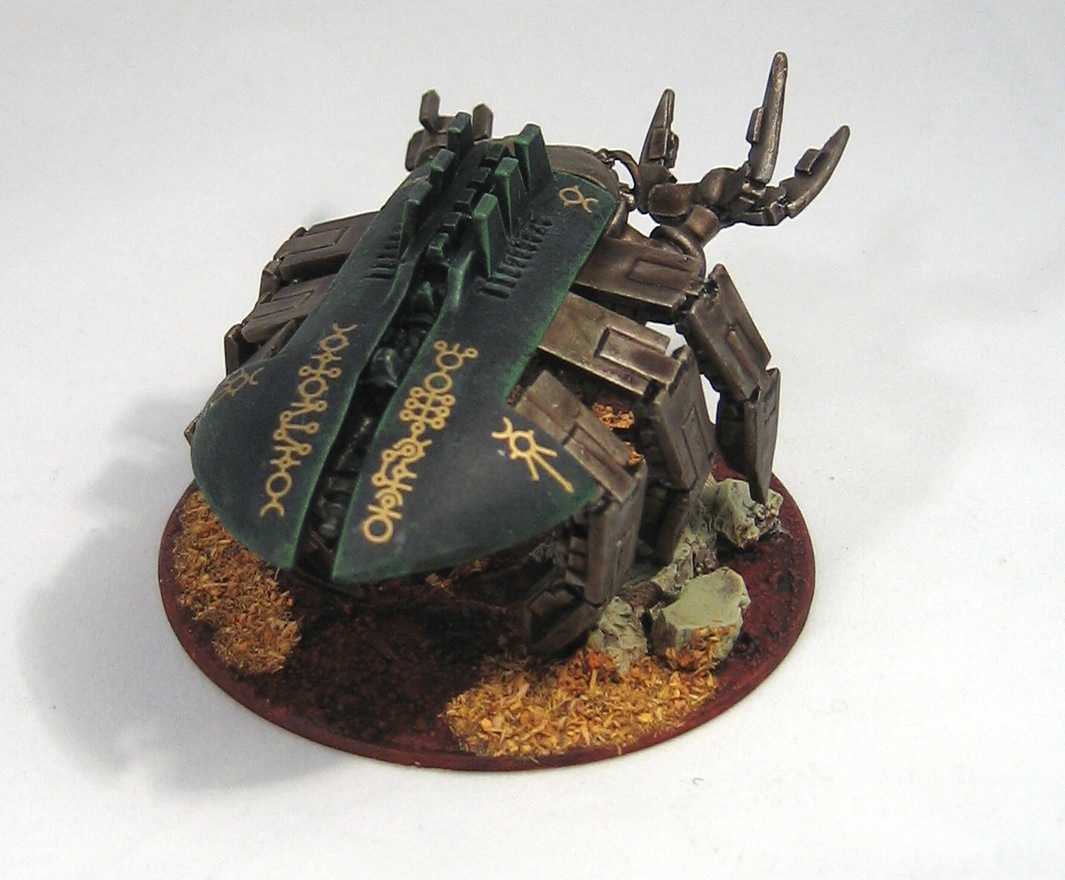
One of the things I've learned from painting this miniature is how to produce "seamless" decals: I've had some very bad experiences with decals in the past which has put me off using them. I decided to bite the bullet this time and am very pleased with the technique I came up with (which is probably worth a post of its own).
I have a few more miniatures to show you from my epic Necron army: keep 'em peeled!
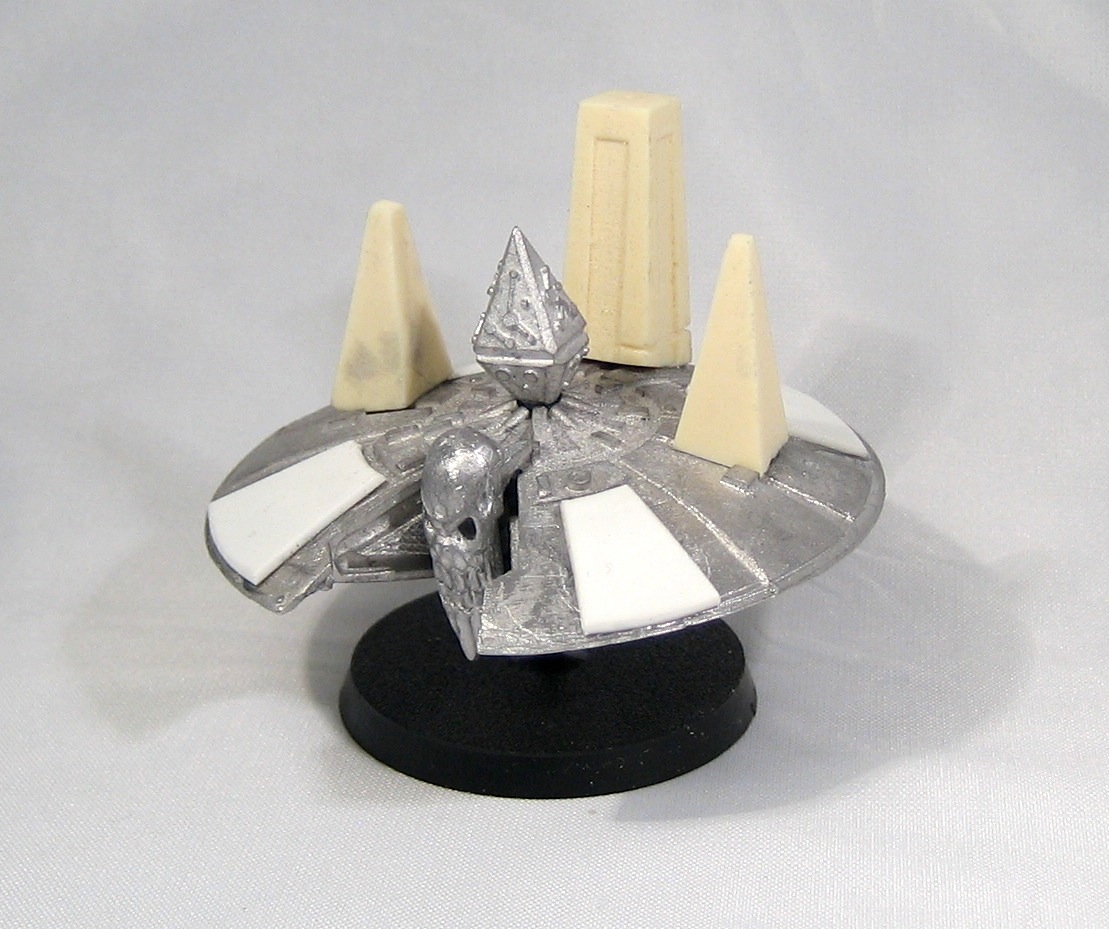
Work-In-Progress: Epic Scale Super-Heavy Monstrosity
Rebasing a Reaver Titan

I have quite a few Epic Titans: most of them (apart from notable exceptions) are quite old. Although my painting skill level hasn't really changed over the years, the amount of attention I pay to basing and terrain has; so while I'm happy with their paint jobs, I can't say I'm too pleased with their bases.
So a while back I took one of the first Reaver titans I'd ever painted (probably around 1995 or even older) and had a go at rebasing it. The titan was based on one of the old Adeptus Titanicus era bases (the ones with the void shield wheel), which I took my knife to. I trimmed the sides off, and filled in the window at the front with putty.
While at Salute I picked up some Basetex textured paint, so I gave the old base (which was just a bit of putty painted dark green), and then applied some static grass.
And yes, this titan does field three Vulcan Mega-Bolters!
Modular City Board, Pt 3
These old building were nice in that they fitted together with a nice tongue and groove on the back. But to go the extra mile, I've been using putty to fill the gaps between two glued-together buildings.

The filler I'm using is Revell's "plasto". Unlike green stuff, which has the consistency of chewing gum, this stuff is more like car body filler, or cement, and it's applied in the same way: squeeze a dollop out of the tube onto the relevant area, then use a spreader to shape it, and then file smooth once it's dried.

The finished surface of the affected areas will be visibly different from the rest of the building, so I will probably end up applying a thin coat of the filler to the roof and sides of the buildings, just to keep it consistent.
Modular City Board, Pt 2

You can probably work out how this was made: I used balsa wood to create the walls (I manually mitred the ends so that they'd make nice corners. I used cocktail sticks to create the posts, and used 28mm razor wire rolled around a paint brush handle to create the barbed wire around the top. The resin buildings come from Old Crow and Wargamer.pl.

These Forge World buildings (now sadly out of production) are very nice, but have a thick 4mm base which makes them look a bit weird as stand-alone buildings. Rather than trying to cut the base off (I did have a try with my trusty razor saw) I decided to build up around the base with 4 squares of 1mm plasticard, each 1cm smaller than the next, to create a set of stairs. Since the finished piece is too big to share a panel with anything else, I decided to put it on its own panel, at a diagonal angle. I might add some more detail in the empty space in the corners later on.
Modular City Board, Pt 1

I started with a large sheet of 0.5mm plasticard. This is hard to get but can be found from professional modelmaker's stockists, such as the 4D Modelshop in London, where I got mine.
The system is intended to be compatible with the Ziterdes modular gaming table that I use for all the games I play. This means that I had to cut the sheet to be 600mm square: when it's finished, I will mount the sheet on a piece of MDF or similar to raise it to the same height as the Ziterdes boards.
My plan is to have a simple grid system, with square blocks that can be moved around as required. Indivudual terrain pieces such as buildings will be mounted onto inserts that sit in holes cut into the sheet. This gives the impression of a raised pavement, and also hides the joins, making the whole thing look like it's a single piece.
After cutting the sheet to size, I cut four 200mm x 200mm squares out, leaving a 50mm border around the edge and 100mm gap between each hole (the roads are 100mm wide: not very realistic but they need to be big enough for titans and other super-heavies to maneuvre!). This means that if two boards are placed next to each other, there will always be a 100mm gap between each terrain piece.
Having cut out the four holes, I now have four 200mm x 200mm pieces of plasticard, which will form the base of each terrain piece:

More to follow!
Mk II Warlord
Following on from my article on casting a titan foot using green stuff, here's the finished miniature:


The photos are a little pink, thanks to the shirt in the background. But a nice piece I think. The Plasma Cannon on the left arm was attached to the mounting taken from the original chain saw. A little green stuff around the joint made it seemless. I used Citadel's washes to give the metallic parts a dirty, heavy industrial feel. This miniature is a companion to the warmonger titan I recently finished.
I now have most of the materials I need to start on this year's summer project: a modular city system that integrates with the Ziterdes modular gaming board system that I use. Stay tuned!
Casting a Titan foot using Green Stuff
I've been trying to get my hands on an old-style Mark II Warlord Titan for quite a while. This miniature, made for only a couple of years from 1995, is the "transitional form" that links the old-school "beetleback" warlord titans from Adeptus Titanicus to the current Mk. III "Lucius" pattern Warlord titan, and I've always really liked the design.
I was finally able to get hold of one from eBay, and for a pretty good price. Unfortunately, the reason was that one of the titan's feet was missing. Ever the optimist, I decided to turn this problem into an opportunity, and have a go at making a duplicte of the foot using Green Stuff (aka kneadatite, basically two-part epoxy putty optimised for miniature modelling).
The first step was to take the foot piece that I did have and glue it very lightly to a piece of plasticard. I used a very small amount of superglue, as I wanted to be able to separate the foot from the card:

Then I made up a large chunk of Green Stuff — more than I probably needed, but that's better than not having enough — and covered up the foot. It's important to push down firmly when applying the Green Stuff, as you don't want creases, voids or bubbles. I applied the Green Stuff a small piece at a time, slowly building it up so that it covered the entire foot:

I waited a couple of days to give the Green Stuff plenty of time to cure. Then I removed the plasticard backing to expose the original, embedded in the Green Stuff mould:

The conventional wisdom is that you should use a "mould releasing agent" to prevent the Green Stuff from sticking to the original, but I'm a physicist, and I had a more elegant solution: heat. When heated, different materials undergo thermal expansion at different rates, so all I did was run it under the hot tap: the Green Stuff and the lead original expanded at different rates, and the foot just popped out:

The next step is to make up another load of Green Stuff, from which the casting would be made. Since I'm using the same material as the mould, I can't use my heat trick to remove the casted piece from the mould, I had to use a release agent this time: once I'd made up the Green Stuff and rolled it into a ball, I dipped it into some olive oil, and pressed it down into the mould:

After leaving it for a few hours to cure, I was able to remove the cast from the mould very easily:

I waited overnight for the Green Stuff to harden, and after giving it a good clean to remove the oil, I then used my trusty razor saw to remove the foot from the rest of the Green Stuff, and hey presto:

All it needs now is some cleaning up and trimming, and it's ready for painting.
It Is Among Us...

More photos (done properly with a decent camera with a macro lens and tripod) to follow. This picture doesn't really do it justice: I think this is the best miniature I've ever produced.
I'm still working on a name, and accepting suggestions!
Warmonger Update #8: Painting the base
I had to wait a few days, but finally the weather has cleared up enough to allow me to start undercoating the various parts of the Warmonger titan. I decided to go for the "low hanging fruit" first and made a start on the base:

The base was sprayed black, and then drybrushed with several shades of grey, getting progressively lighter almost up to pure white. To distiguish the ground surface from the building rubble, I drybrushed it with a mix of black and tan to give it a muddier colour.
I have made quite good progress on the main body of the titan, but I think I'll hold off on posting more updates until the "reveal" when it's all finished. Then you will be able to see it in all its glory :)
One More Thing
Now's your chance to help me: this beastie needs a name. Something impressive, menacing, powerful, and preferably in Imperial Gothic (or Latin, if you prefer). Any suggestions?
Warmonger Update #7: Building a Base
I decided that I want the Warmonger to have a base to stand on: it doesn't really need one thanks to its enormous bastion feet, but I think it nicely finishes off a model.
I cut a 50mm x 100mm rectangle of 5mm polystyrene sheet, using the razor saw, which makes doing dead-straight precision cuts a doddle. Then I rounded the edges with a file. this gave me a solid foundation for the base.

I decided to go for an "urban warzone" style base, so I used some offcuts from the amazing (but now out of production) Epic buildings sprues, and a bit of finely chopped cork and gravel to create some rubble. Finally, I painted superglue onto the base and dipped it into some fine sawdust, being careful not to go over the outlines of the titan's feet, which I drew onto the base with pencil.
In one corner, I sculpted a crater from "green stuff" (epoxy putty), which I finished up with a space marine figure lying face down. When the base is finished, I'll use some water-effect liquid to make it look like he's lying face down in a puddle.
I've taken this week off as holiday, and getting on with painting the Warmonger is my main priority for this week, so expect more updates soon!
Warmonger Update #6: Installing the Radar dish, first assembly
It's taken me a few weeks to find something suitable to serve as a radar dish for the tower of the Warmonger. My first thought was to use the radar dish from the Ordinatus Golgotha, but I wasn't about to ruin a rare (and extremely cheesy) miniature just to scratch an itch.
I decided to consult the wizened battle-brothers of Warseer and ask for their advice: a number of excellent suggestions were made, such as the radar dish from the 40k-scale Whirlwind, but then I got a PM from my new best friend yabbadabba offering me — you guessed it — a radar dish from an Ordinatus!
The piece arrived in the post this afternoon, and I decided to waste no more time and to install it on the titan:

The mounting is made from an old Warlord titan extension arm and the base of one of the Hydra platforms that I used for the AA guns. Looks pretty damn good, if you ask me.
What's, that? Did I hear you correctly? Did you say that you want me to zoom out? OK, then:

Again?

If that's whet your whistle, you can see a bunch more pictures below.

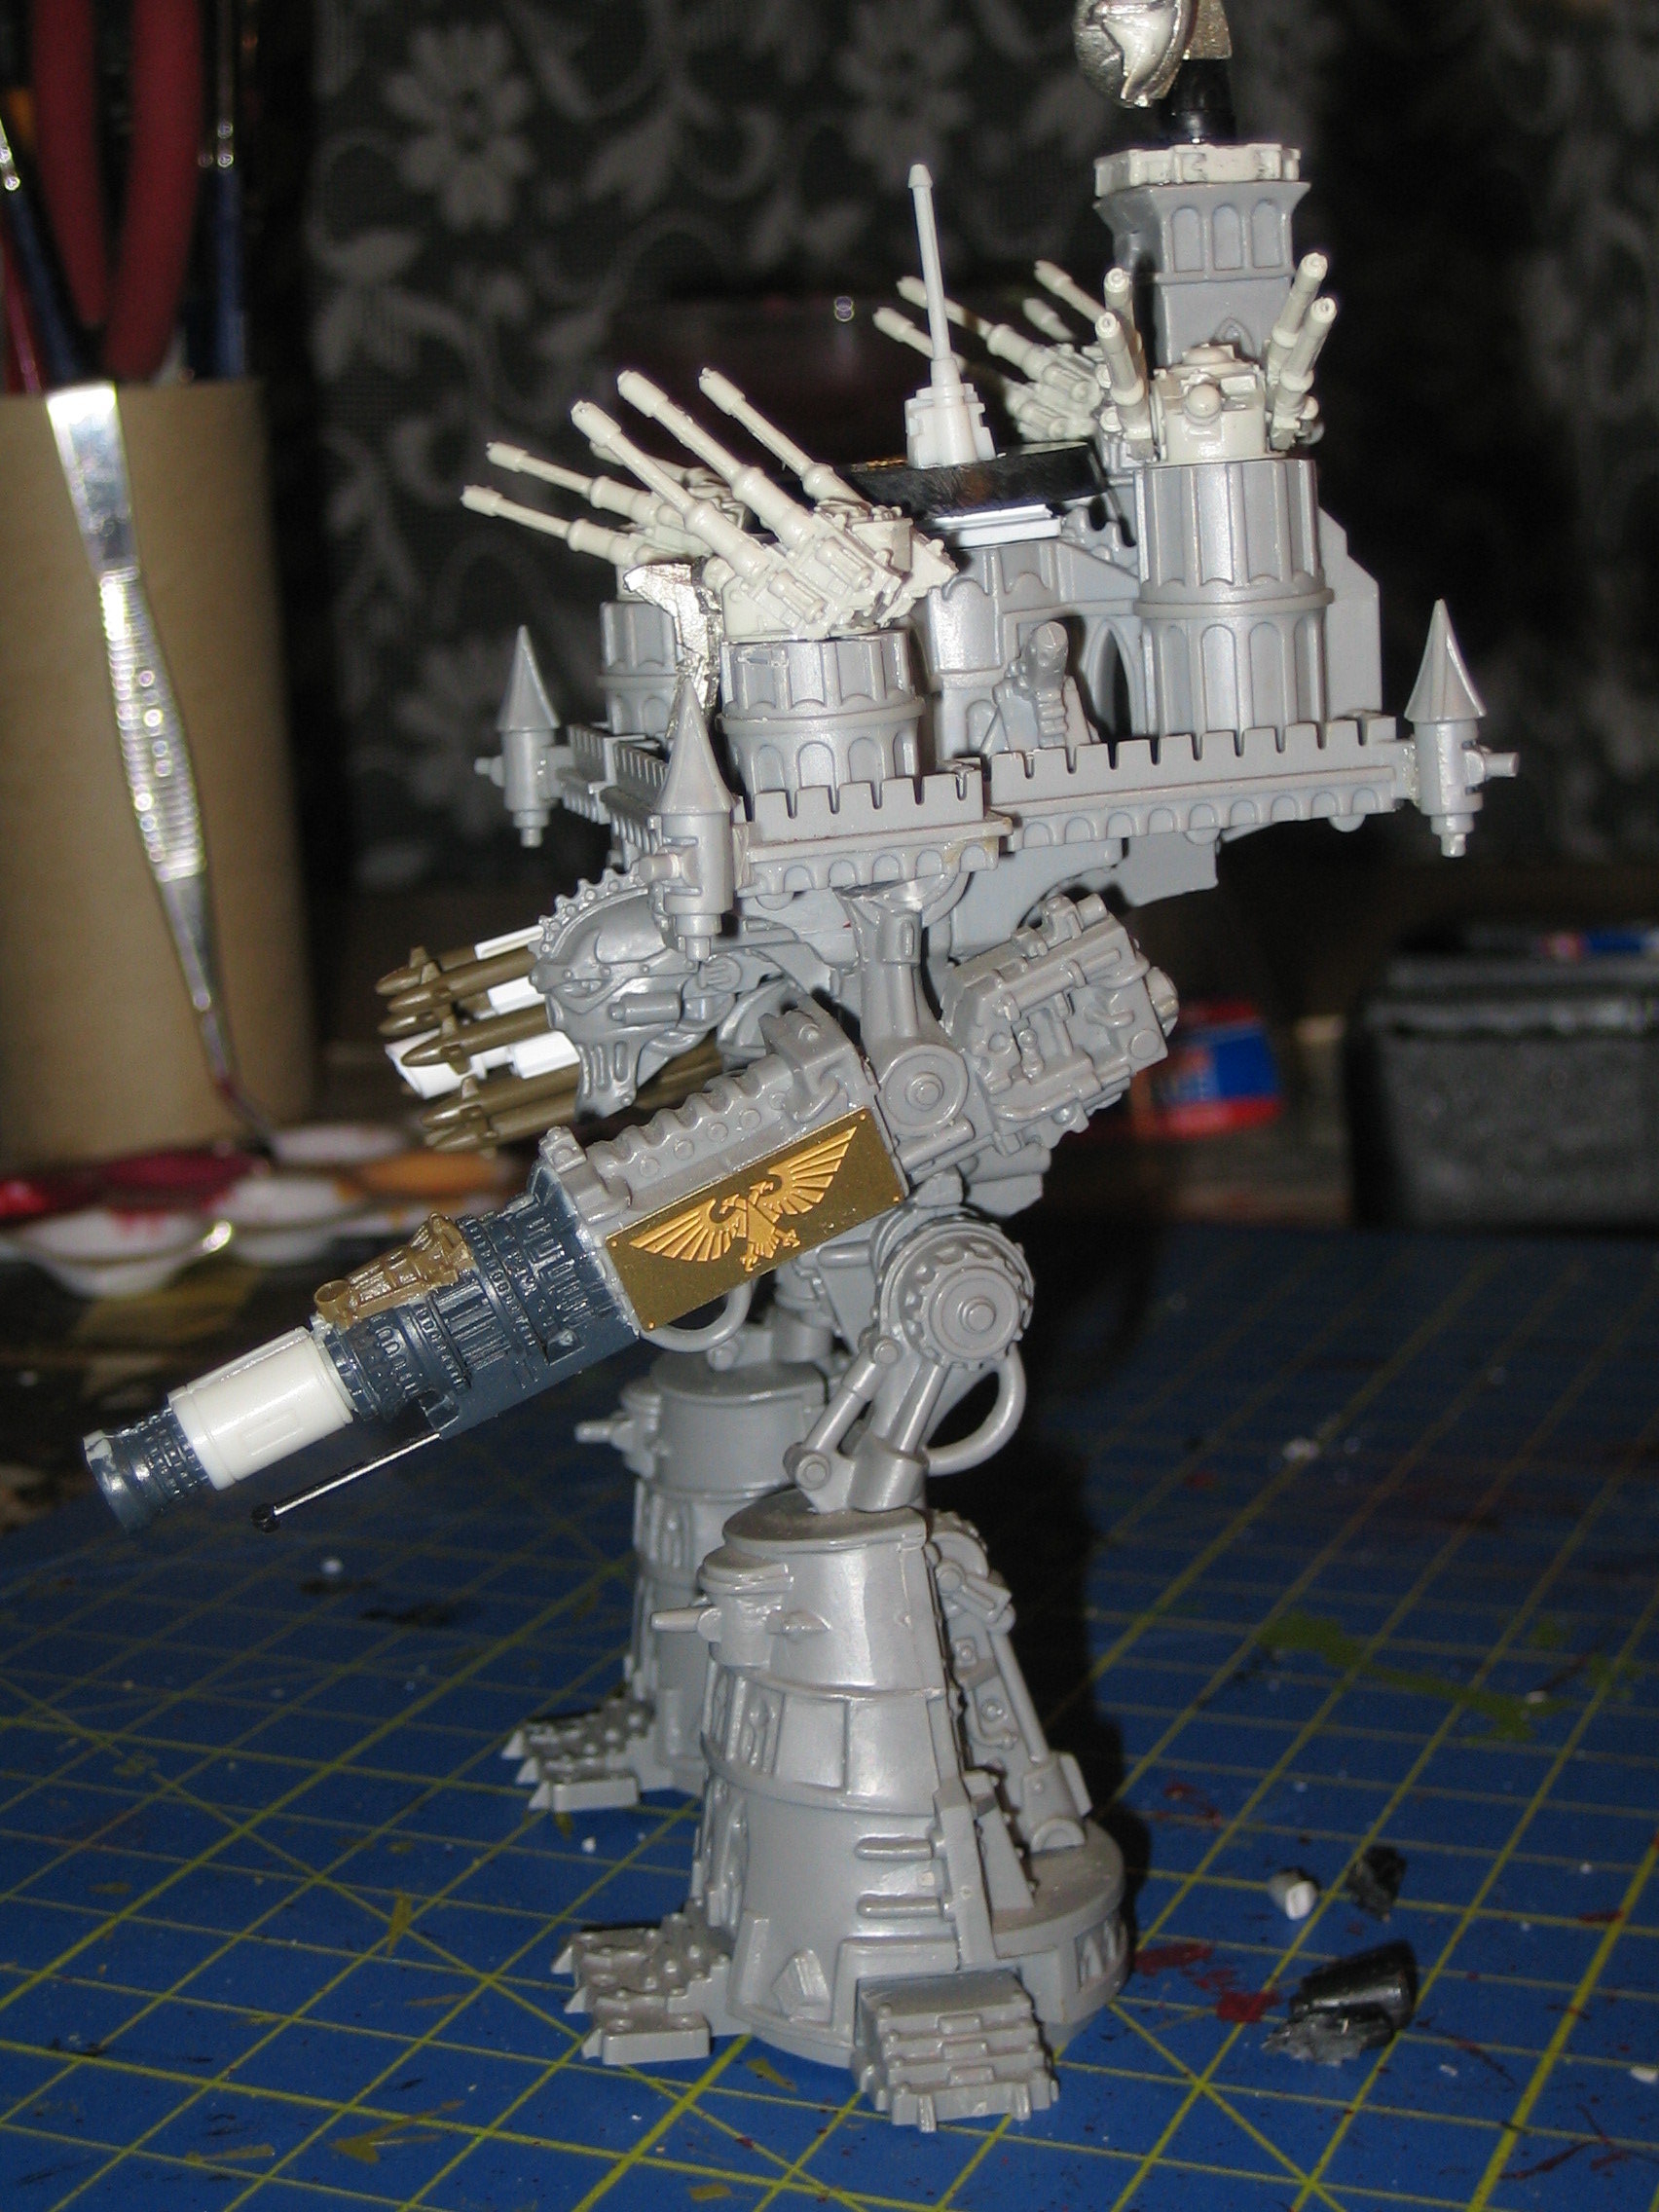

Warmonger Update #5: Test fitting the Hydra turrets
As predicted, the Hydra turrets from Forgeworld were waiting on my desk upon my arrival from Paris, so I wasted no time in prepping them. Here's a photo of what they look like when mounted on the fortress of the titan:

Rather awesome, I think. The resin barrels of the AA guns are extremely delicate and I'm sure it wouldn't take much to break them, so I'm glad I have a couple of spares left over to provide replacements for the inevitable breakages.
I also ordered some small link chain that I will attach to the underside of the fortress and to the main weapons to provide things to hang banners from. After that, I just have to fill all the gaps with putty and find something to serve as a radar antenna on the tower, and I'm ready to get painting!
Warmonger Update #4: Building the Landing Pad
I'm still waiting for Forge World to dispatch the hydras that will form the AA-platforms on the towers of the fortress, so I've been making progress on the other pieces of the titan. I'm still working out where to get the radar dish for the rear tower, that will replace the defence laser: if anyone has a suggestion, I'd be pleased to hear it. Scratch-building is always an option, but it'll never look as good as converting something else.
The landing pad for the spotter aircraft has turned out pretty well: as I am sure you can see, it's a standard GW slottabase, sanded smooth, with an etched brass aquila and another piece of the ARC starfighter to serve as an antenna.

I'm catching a Eurostar tomorrow morning to go to Paris for the 32nd International ICANN meeting, and I'm staying for the weekend to visit with a friend, so hopefully by the time I get back, the hydras will have arrived, and I can put the finishing touches to the titan. I'm really itching to paint it!
Warmonger Update #3: Building the Doomstrike Missile Launcher
As promised, here's the doomstrike missile battery which is the secondary weapons loadout for the Warmonger titan:

The missiles came from a model kit of an AH-64D Apache Longbow helicopter, which carries eight AGM-114 Hellfire missiles. The missiles in the kit were just about the right size for the Warmonger titan.
I attached two missiles to the top and bottom of a small piece of styrene I-bar, and then used another piece to attach them to a piece of tubing: my intention is for this to become the barrel of an additional weapon: one that can't be used if you use one or more of the missiles in the same turn. The end of the tube is slightly mitred to make it look like the muzzle of a cannon.</p
I then mounted the entire assembly onto the breech of the Hellstorm cannon (once again, the razor saw made short work of would have been a difficult job — removing the barrel of the Hellstorm). A small rectangle of plasticard and an etched brass imperial finished off the job.
This week I decided to just order the Hydra turrets that I will use for the AA guns on the towers: once they arrive, I will only have the landing pad and the radar dish to build before I can start making the final preparations for painting! There is still a lot of filing and putty work to do to fill the gaps left by the previous owner, but once that's done, I can give the thing an undercoat.
More updates next week, hopefully!
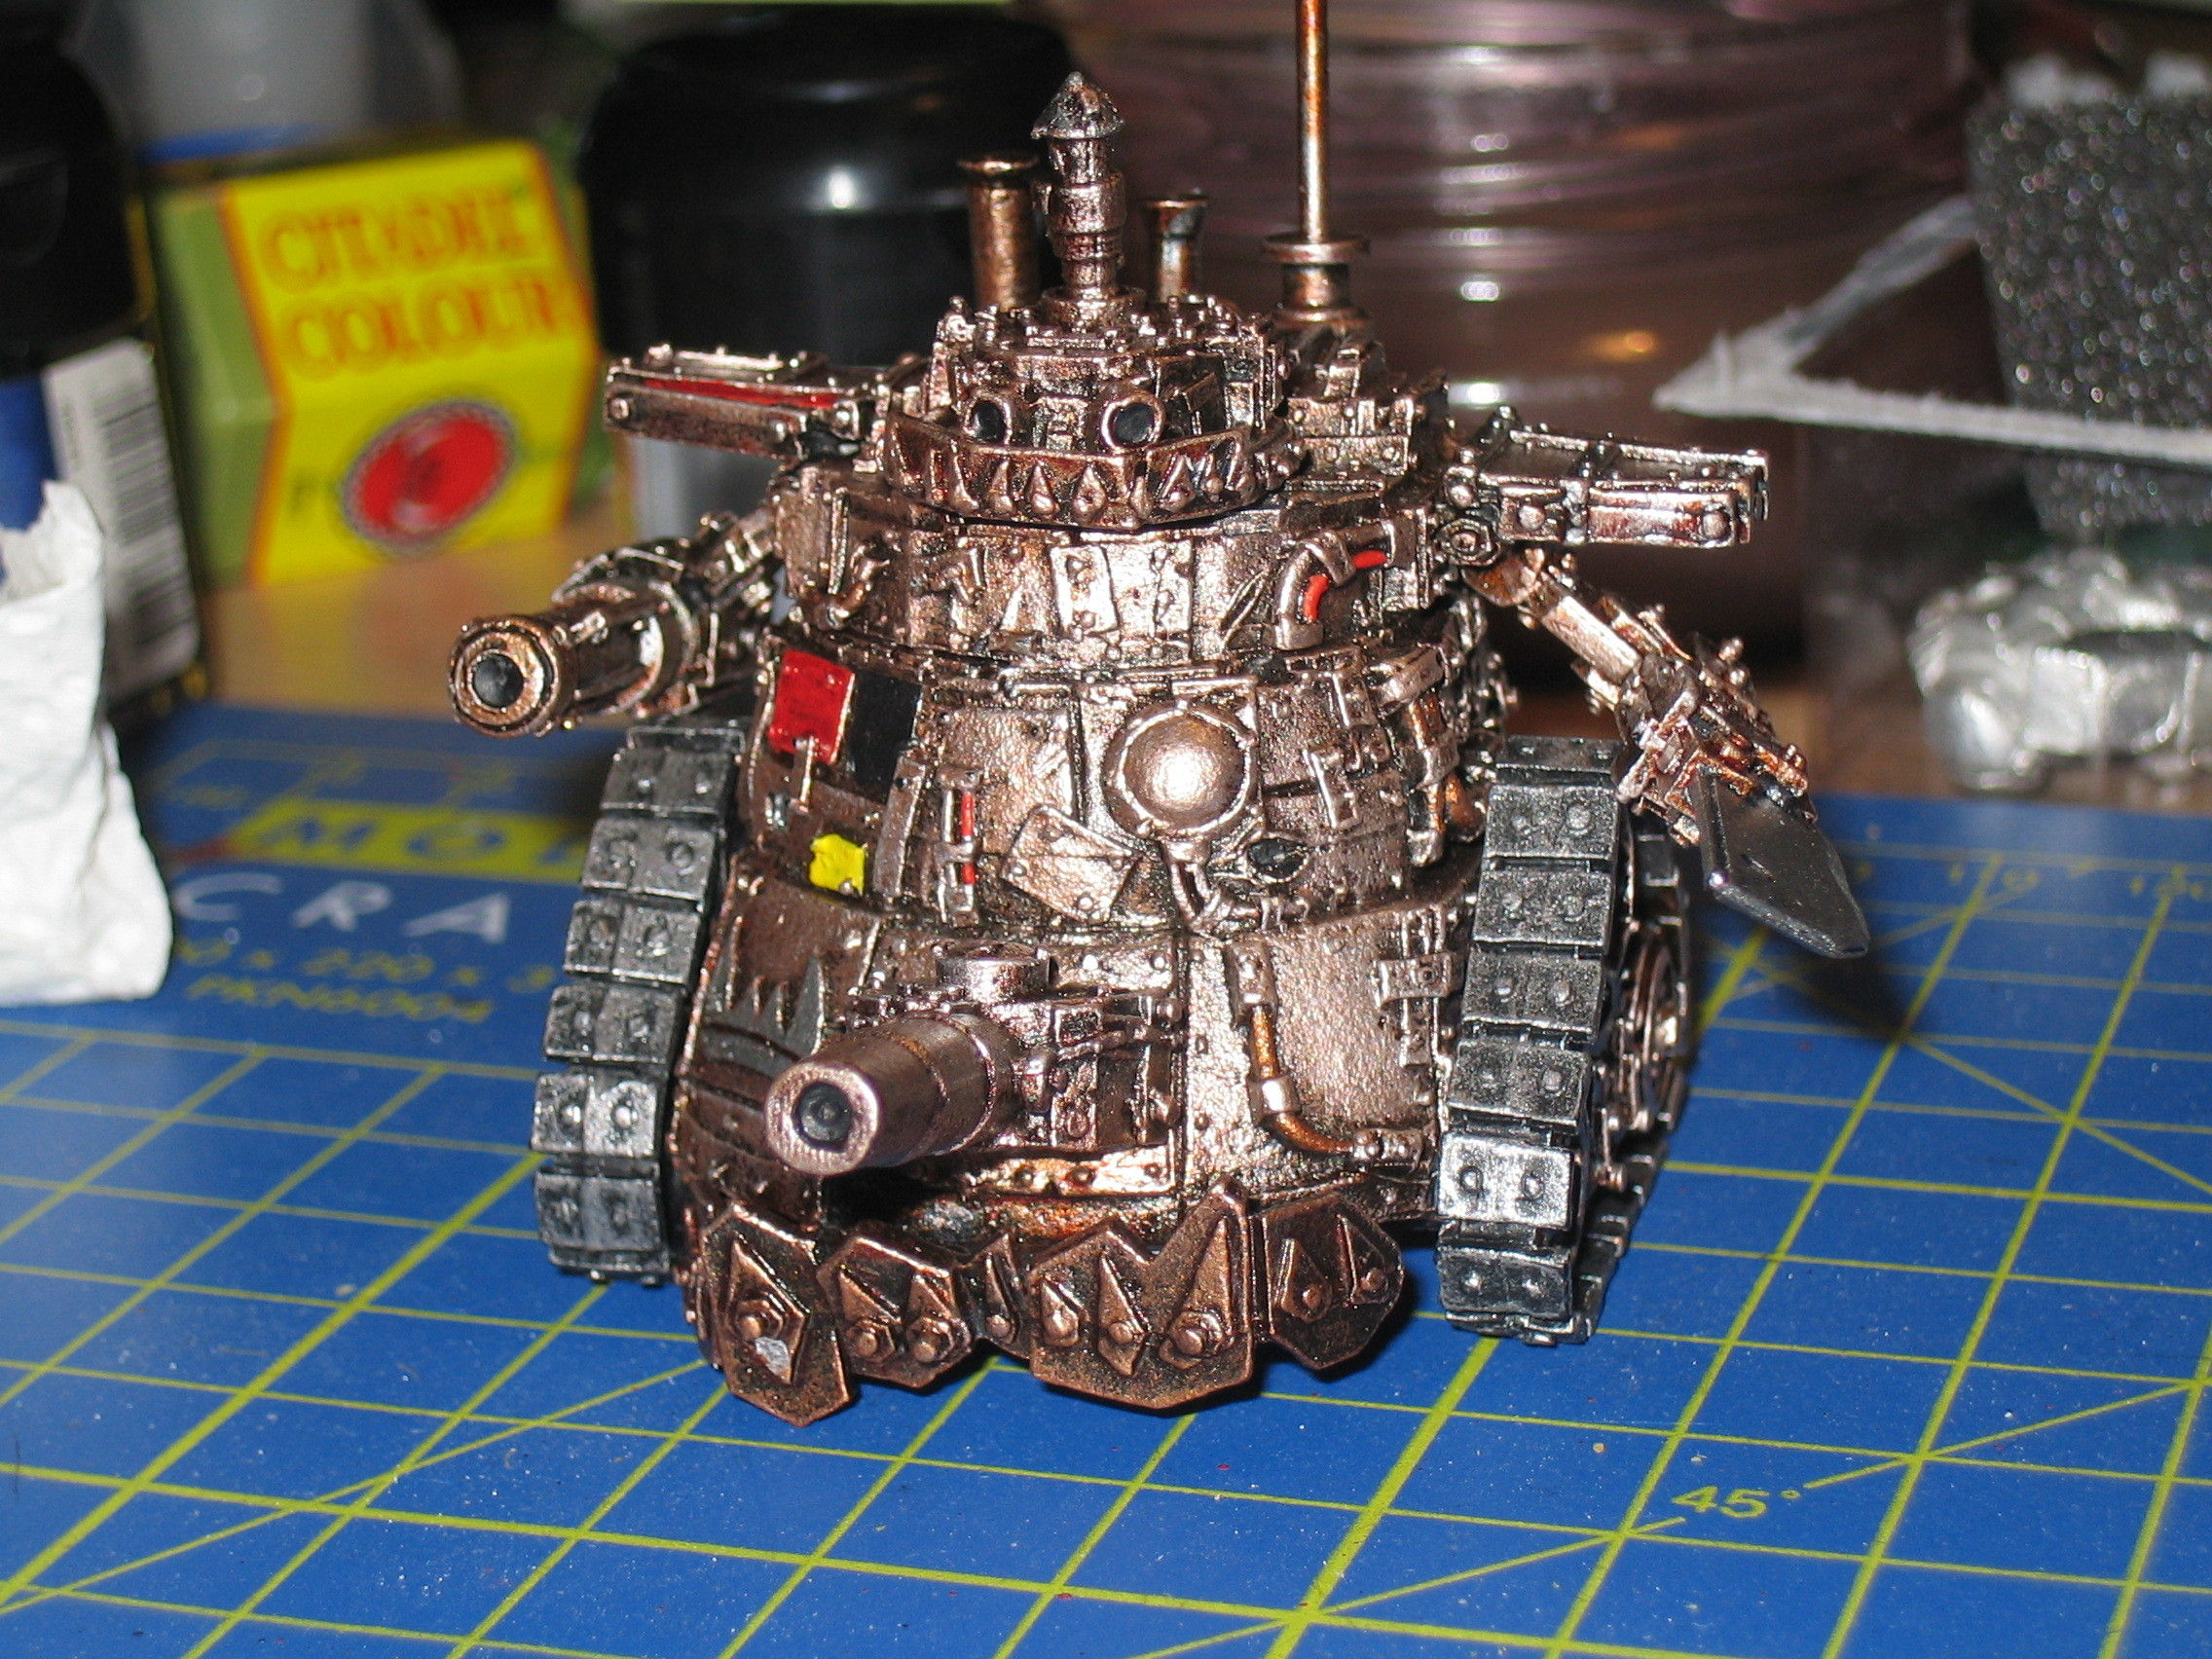
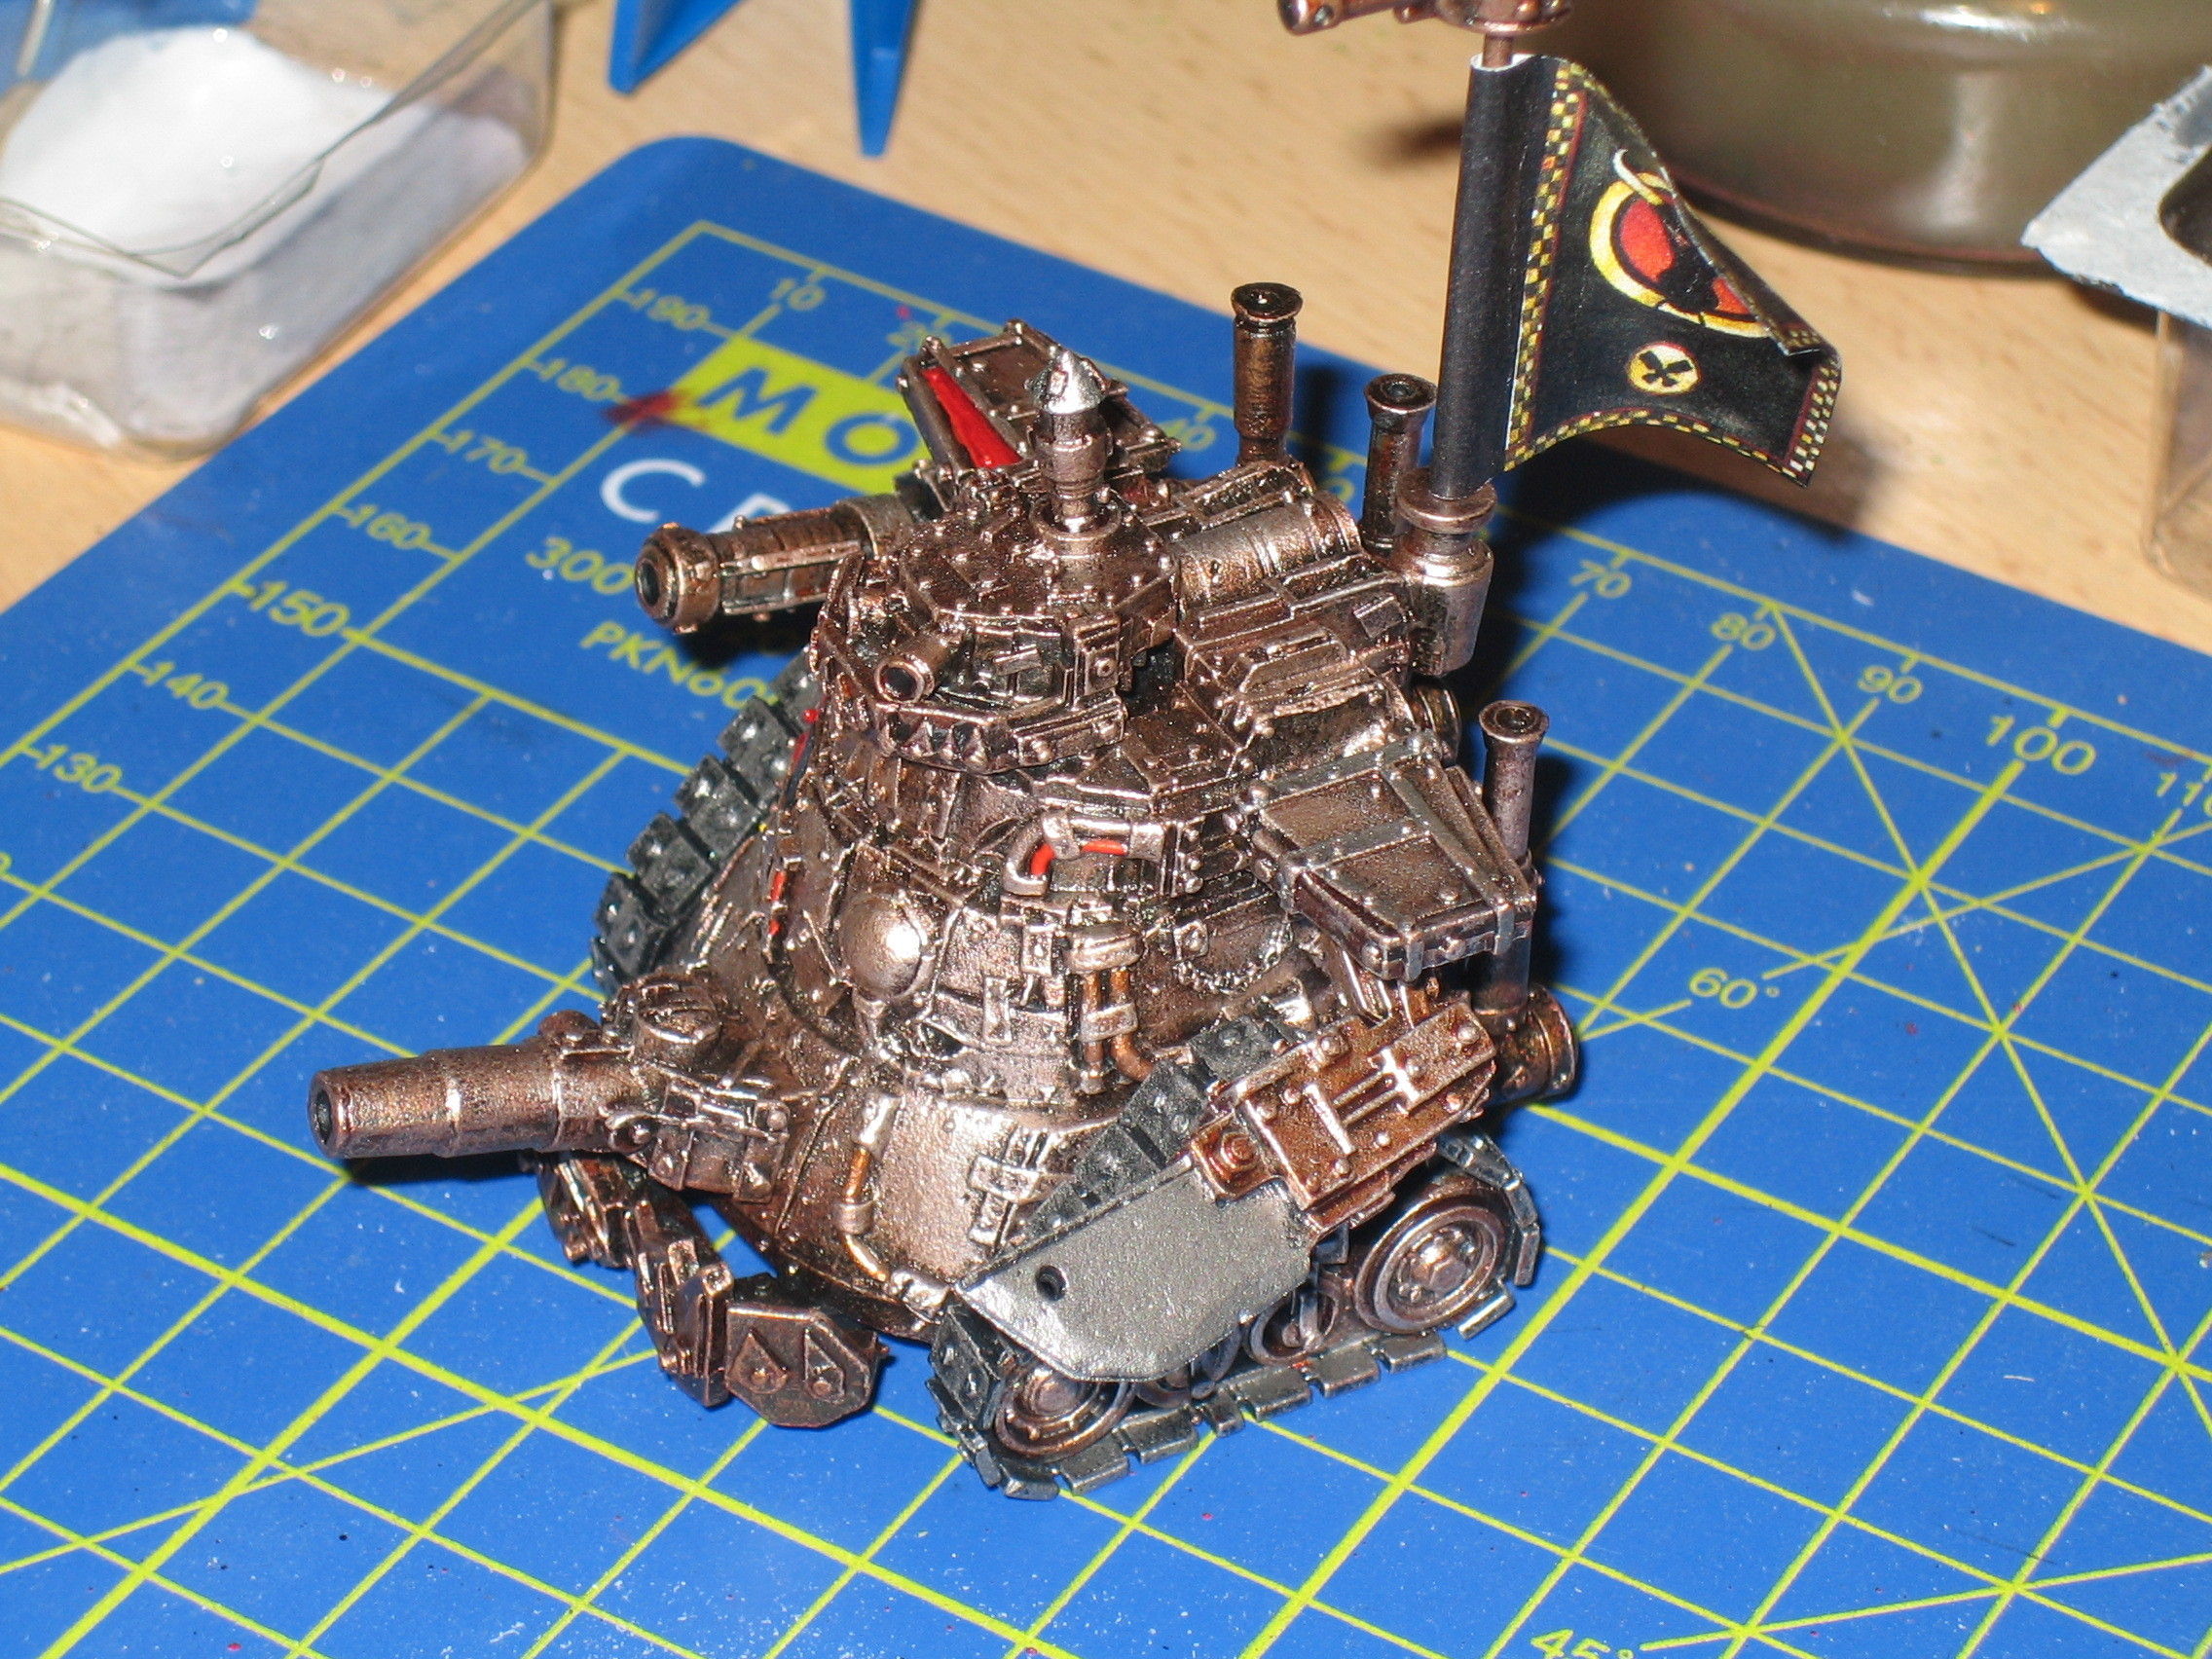
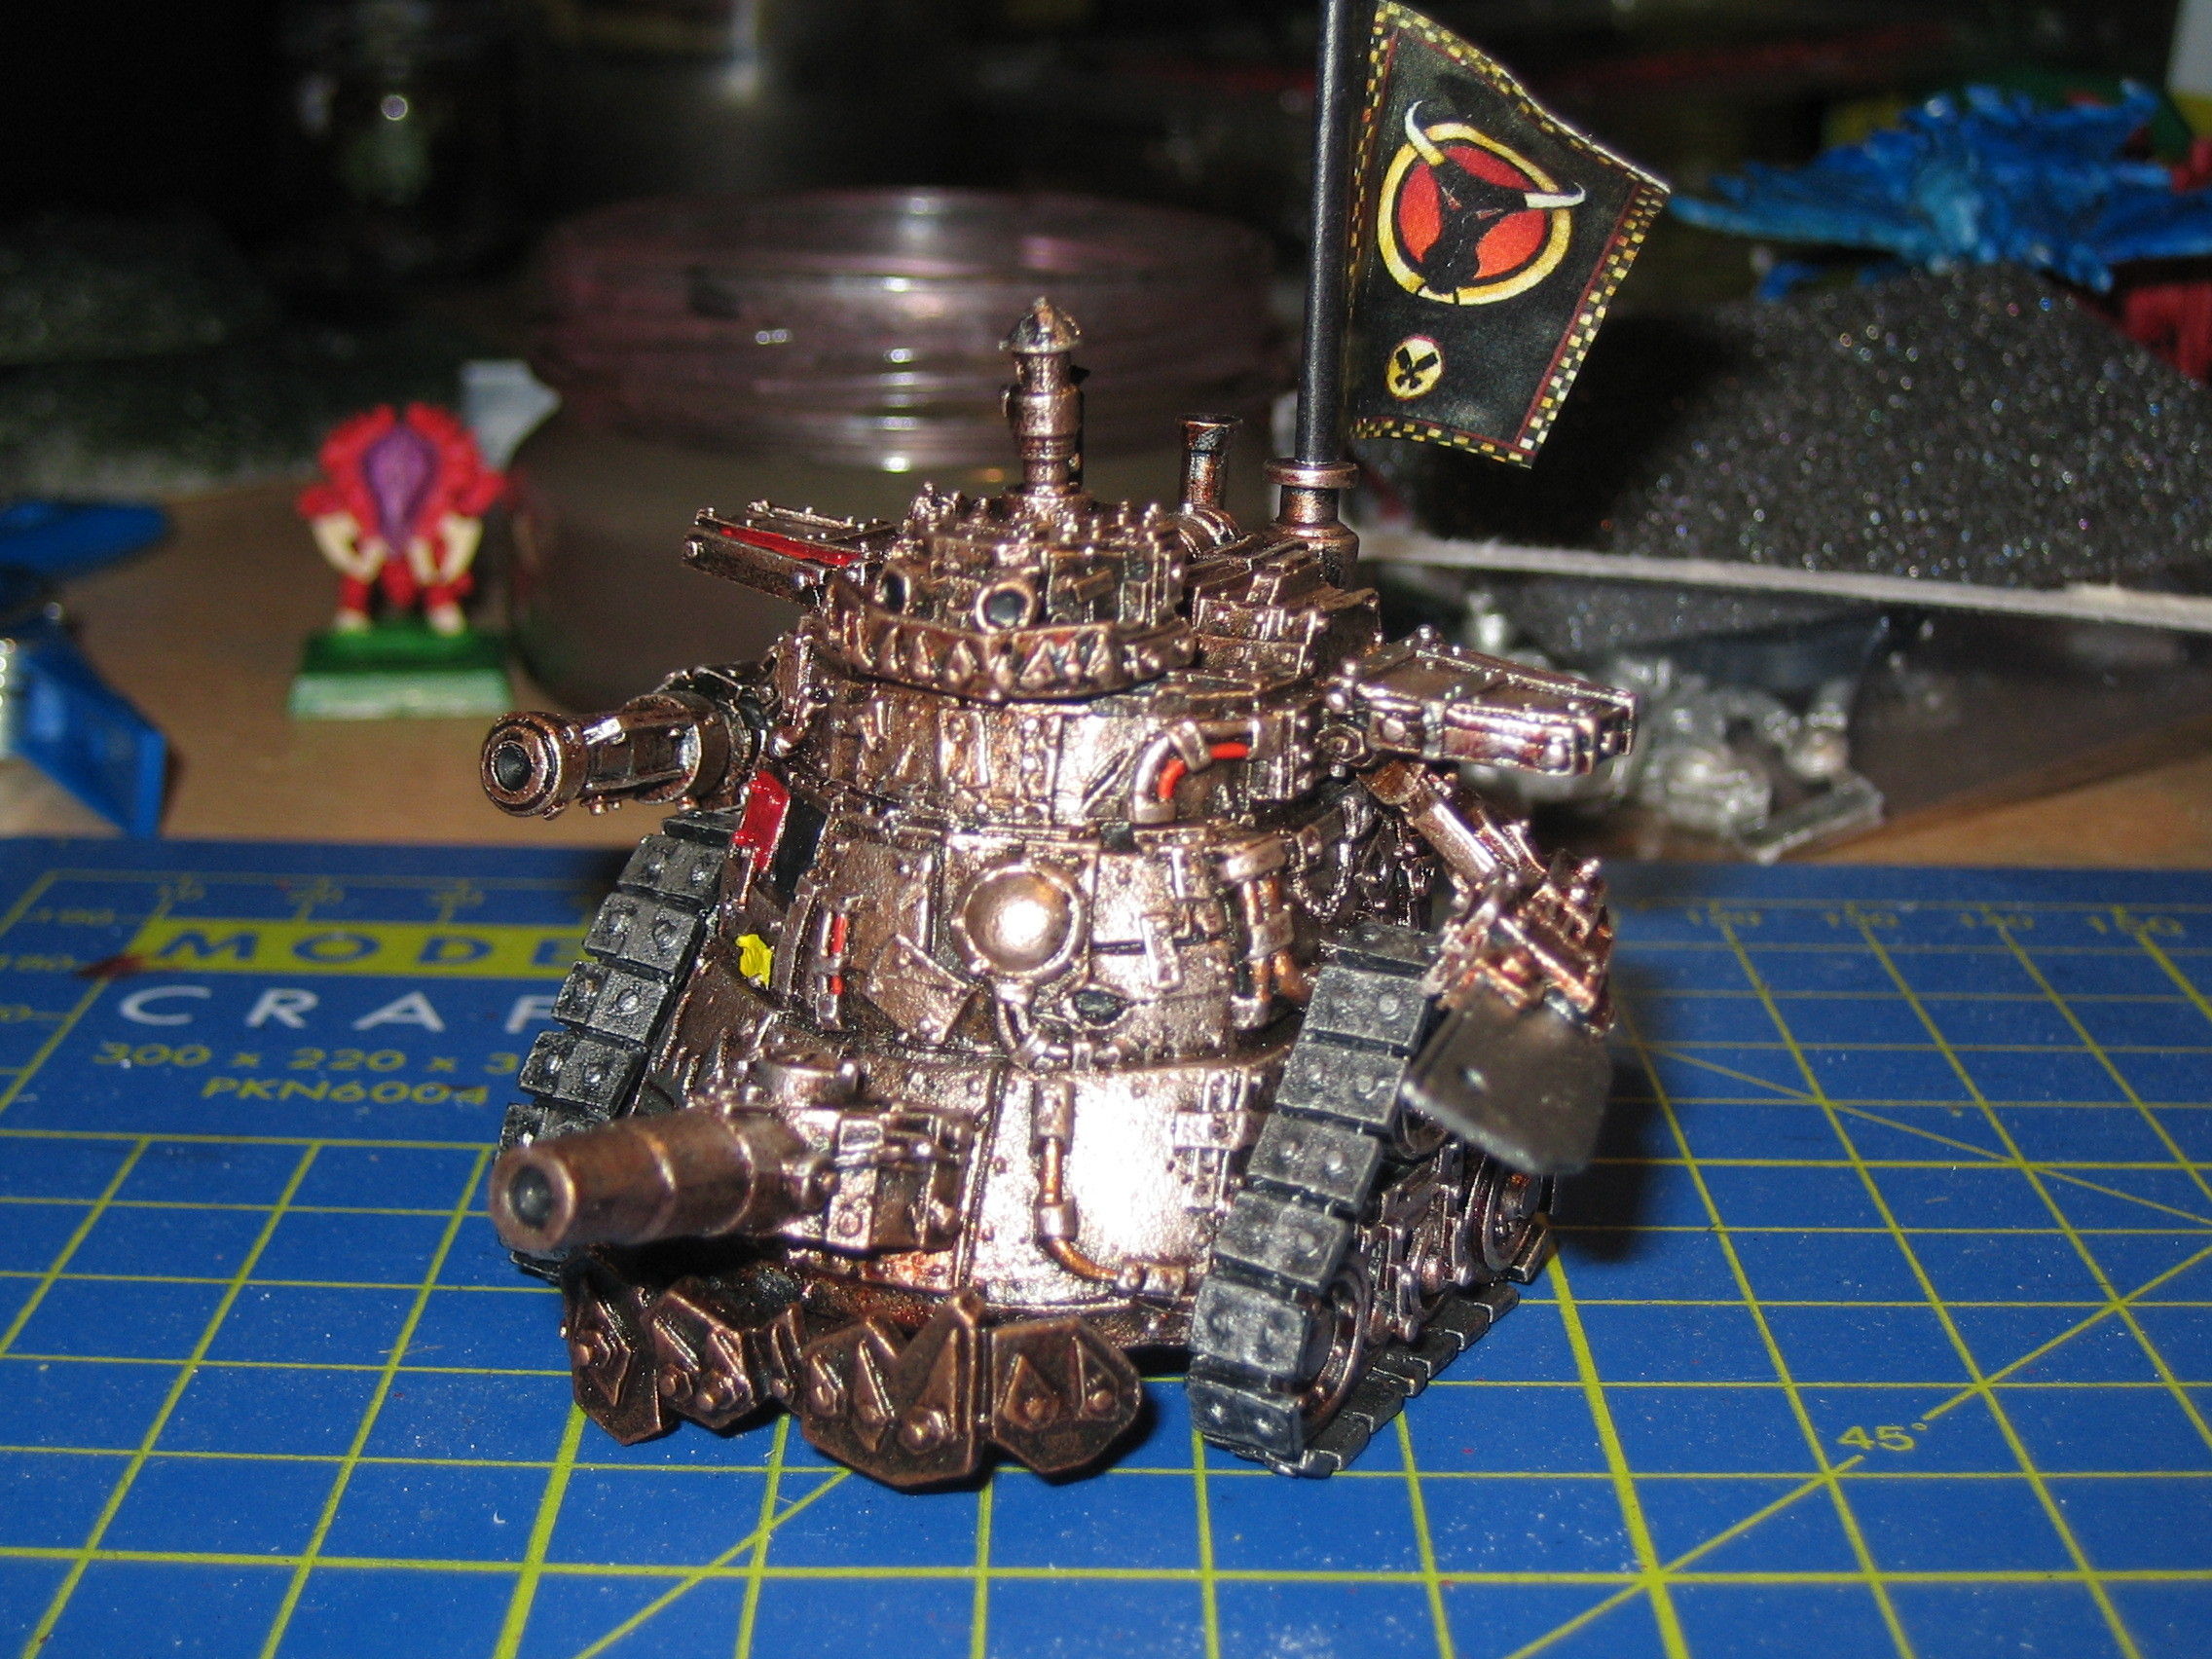
Step-by-step: Feral Ork Steam Gargant
Last year I decided that for a friend's birthday I'd paint him a Gargant. He already has a couple of each of the main types of Ork gargants, so for it to be special, it had to be something new.
The Feral Ork Steam Gargant seemed to fit the bill - a nice model, reasonable price, but
most importantly Well Orky!

After the parts were sanded, filed, trimmed, washed and prepped, the main body of the Gargant
was assembled using superglue. The weapons and tracks weren't attached to make them easier to
paint: instead, I glued them to cocktail sticks so that they could be held without touching the paint.

I also made a slight customisation, by adding a combined banner pole/observation tower, attached to the back of the miniature. The pole is an old aluminium "blind" rivet: I keep a bunch of them because the joint at the base makes them look great as banner poles. At the top of the pole is a plastic
turret from an unfinished Mega Gargant.
I drilled out the barrels of the guns and the flues of the smokestacks: it's a simple job but it adds that touch of professionalism.

I took one look at where the the Gut-Buster cannon was supposed to be mounted and realised that it wouldn't last very long if it was just glued, so I drilled holes in the two parts and used a small
piece of cocktail stick as a dowel to attach them to each other.

Next, everything was given a nice, even coat of Chaos Black undercoat. I normally do it in two stages: I try to cover 80% of the miniature in the first coat, then I take it inside so that I can see
where I've missed (bright sunlight can obscure the thin patches), and then take it out to cover the remaining 20% in the second coat.

Once the undercoat was dry I gave the whole miniature a heavy dry-brushing with Bolt Gun Metal. The intention here isn't to give it a light coat - when it's done it almost looks like it's gone back to
bare metal. But the black undercoat shows through in the crevices and depressions, which is what we really want.

Then I gave the main chassis a coat of chestnut ink wash. I startedout with a 75% solution but quickly realised that it was better to use pure in wash instead. I also washed the wheels and suspension on
the tracks, but left the treads untouched. I gave the same treatment to the weapons, leaving the blade of the Choppa in Bolt Gun Metal.

The next stage is to dry-brush the miniature with several shades of Grazen Brass mixed with Mithril Silver, going from almost pure brass to almost pure silver. This is the pay-off really - all the
previous work is really in preparation for this moment, when the intended effect finally shows through. Then I painted in the essential details, colouring a few panels in bright red and yellow to
indicate that they'd been patched up from other machines, and painting the piping in red or brass.

Finally, the Gargant can be assembled: I needed to sand off some of the paint to give the superglue good metal surfaces to bond to. And it's done! The only remaining task was to use a colour laser printer to produce a banner for the banner
pole, and attach it using PVA to glue the two sides of the baner together (I also touched up the edges of the banner with black).
Here are some pictures of the finished miniature:

NetEpic Gold due September!
The heroic Peter Ramos, co-ordinator for the NetEpic project (an open source work-alike of the hugely popular but now all-but-abandoned Epic, Games Workshop's 6mm SF gaming system) has posted to the NetEpic mailing list about NetEpic Gold, a professionally produced version of the NetEpic rules:
I have recently made arrangements with a couple of groups of people who
will make the layout for NetEpic Gold. These are pros in these endeavours
and I am actually paying them out of my own pocket to see this to
completion.
This is the whole deal. A full colored rulebook, templates, counters and
cards. Everything you'd expect from a commercial game you'd buy, but as [is]
our custom, available for free!
We have a tentative date of September for its release. Suffice to say
that this IS the year you all finally get NetEpic Gold in your hands.
I have assembled a crew to edit, modify and proofread the books as they
get to me.
Once a more or less finalized version gets made I will upload them to
the files section for members use and additional feedback.
NetEpic Gold is a goal of more than a decade's evolution. The times is
almost upon us to see it come to reality.
This is an amazing achievement: I can't think of any other community-driven, non-commercial rules system lasting as long, or being as successful as NetEpic has proven. It's a shame that Games Workshop's IP policy means that NetEpic Gold can't be released in print form (although of course I fully support and understand their policy). I am considering making a private donation to Peter to reimburse him for the expense he's gone to, who's with me?
Warmonger Update #2: Building the Vengeance Cannon
This afternoon I went down to my local HobbyCraft store and had a very successful trip: I picked up a couple of model kits in a clearance sale that should help me build the Warmonger's primary weapons: the battery of eight deathstrike missiles, and the vengeance cannon.
One of the kits was a simple snap-fit model of the ARC Starfighter from the Star Wars movies. The engine pods attached to the barrel of the plasma annihilator make an exceedingly evil-looking weapon:

I also found a kit of an Apache helicopter that has the right number of missiles to make up the deathstrike battery: I'm scratchbuilding the mount for this weapon from plastic tubing and I-bar: but I'll save that for a future update :)
So far I'm really impressed with the razor saw: it makes a whole range of very delicate cuts very simple indeed. I recommend you get yourself one.
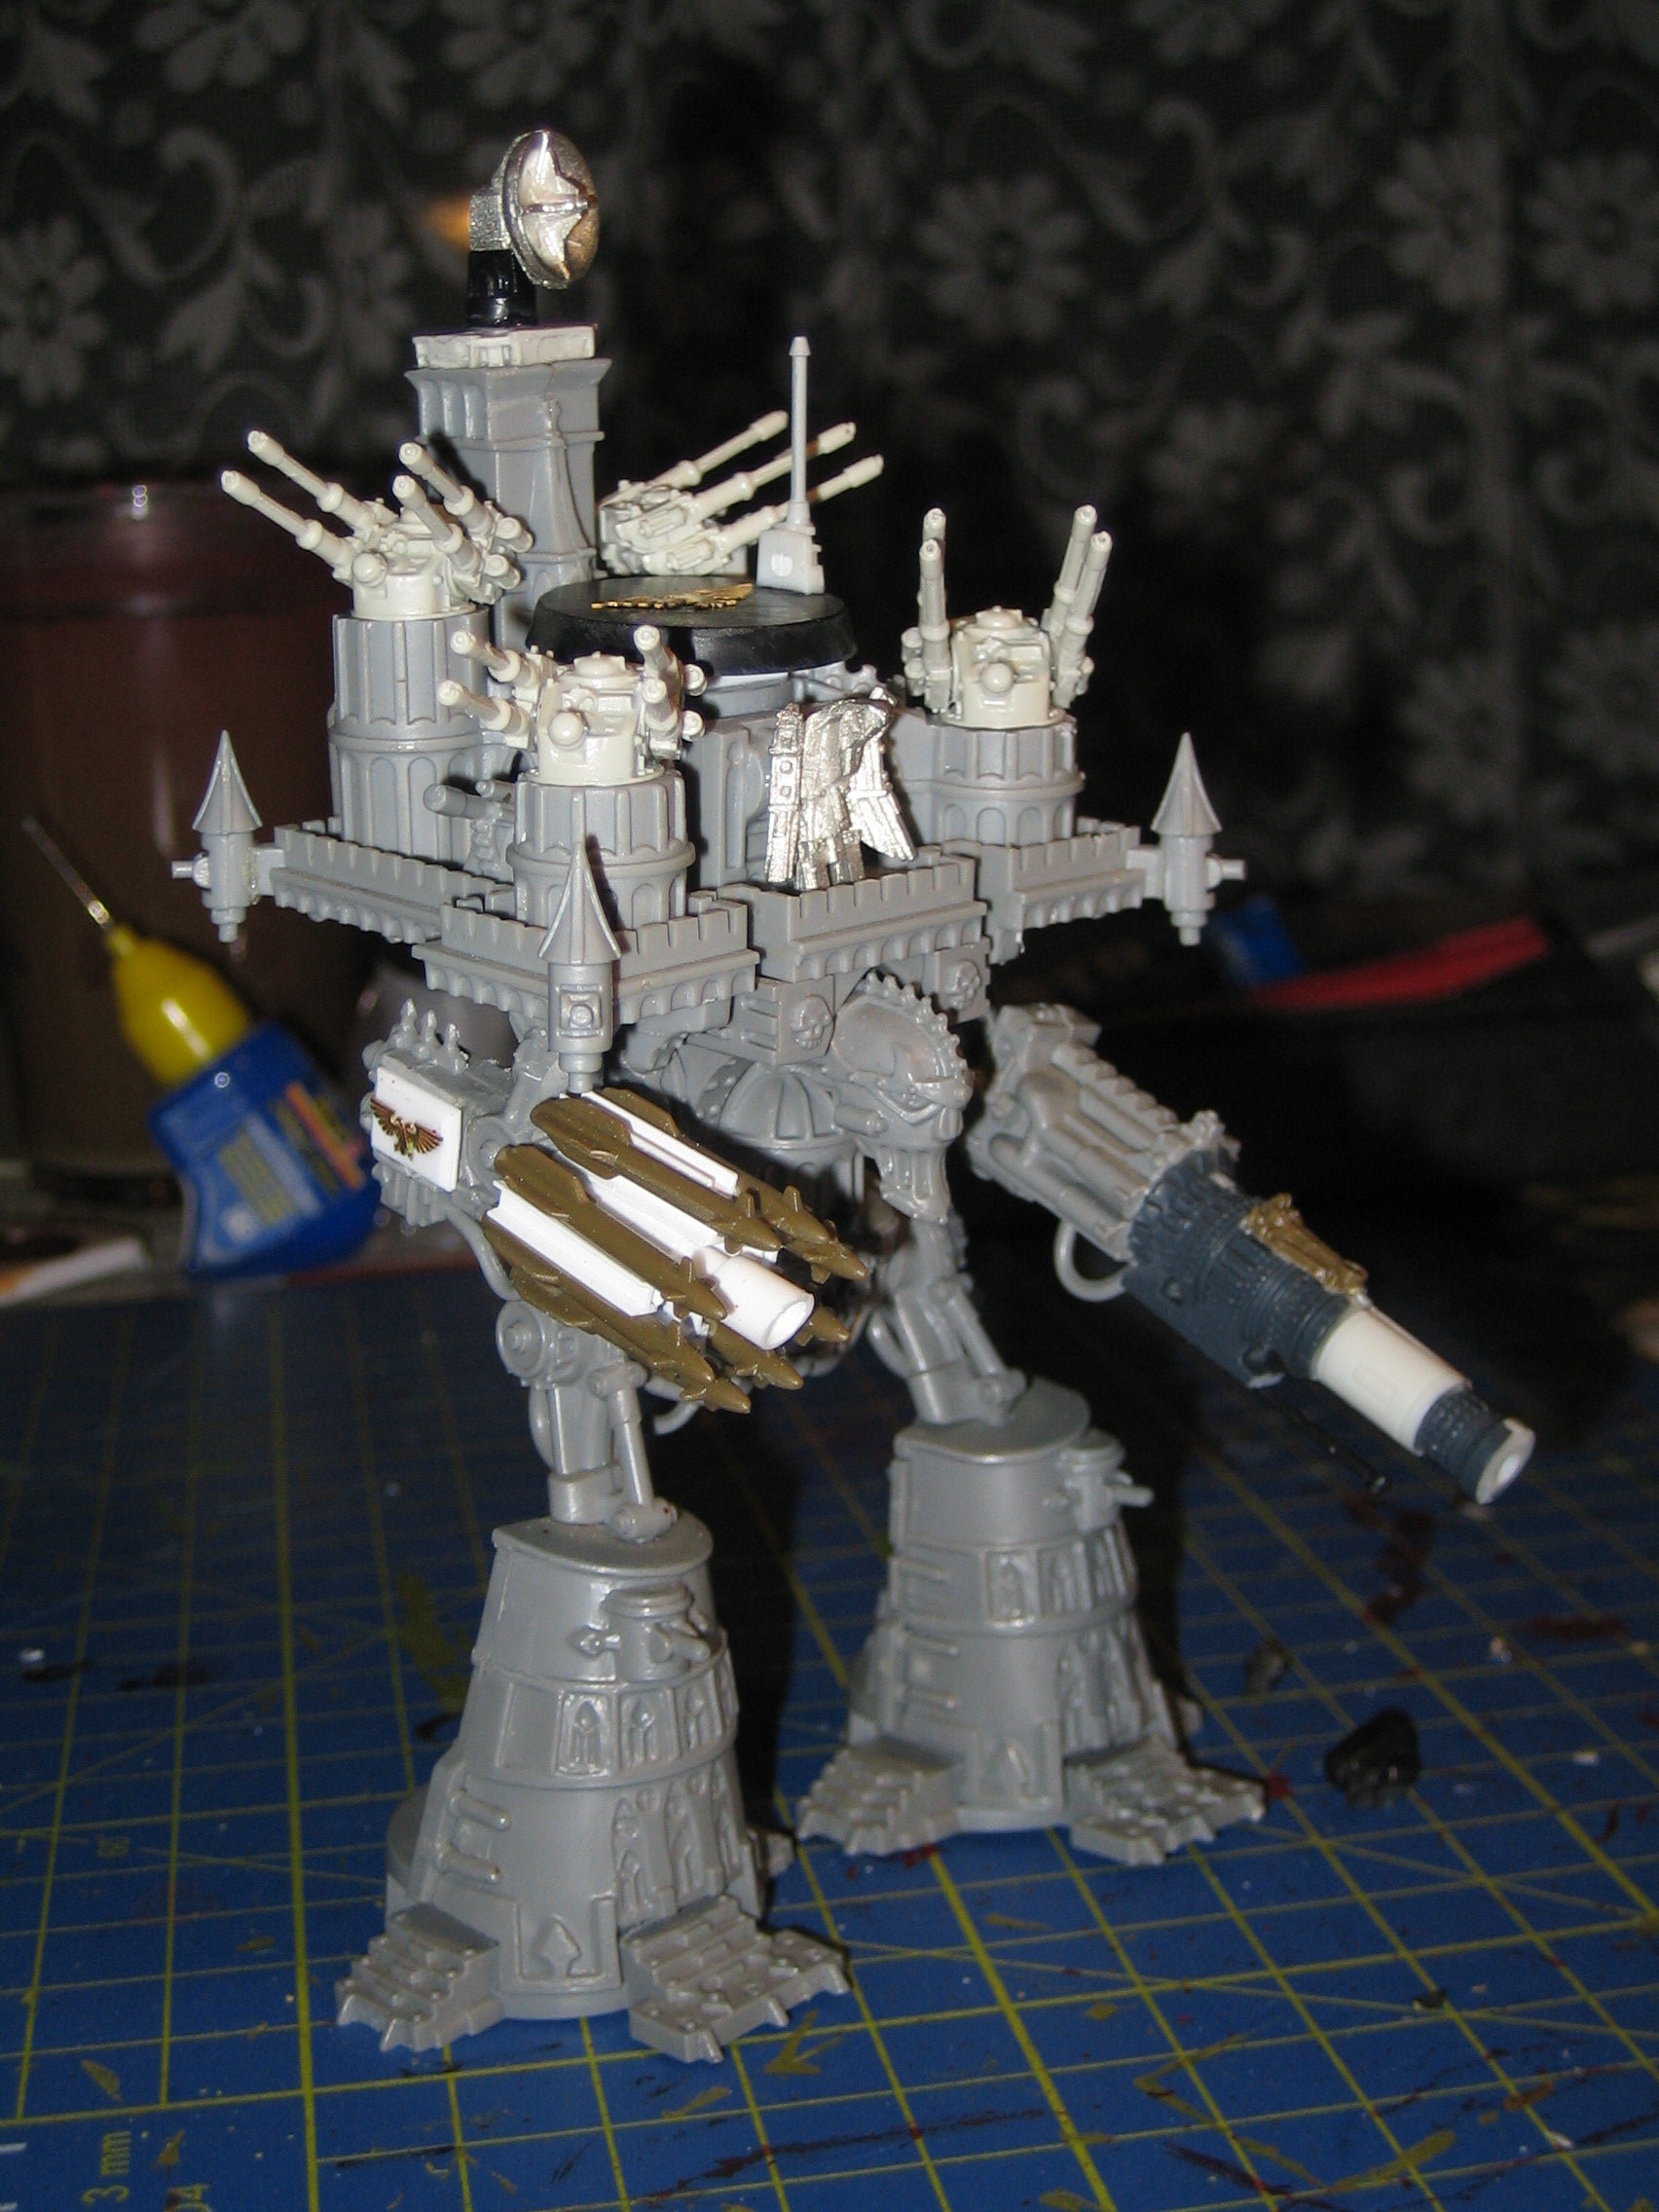
Warmonger Update #1: Dismantling the Imperator
This saturday morning I found myself in the unusual situation of being awake before noon and not hung over, so I made the most of the time and picked up the razor saw that I talked about in my last post. Once I'd taken a look at it I realised that it would be narrow enough to do what I needed it to do.
So I took it home and it made pretty short work of the carcass of the Imperator:

The various components came apart pretty easily, so I can now start filling in the gaps left by the previous owner, doing various customisations, and building the components that turn the Imperator into a Warmonger.
Whereas the Imperator has the tower guns mounted on the upper fortress, the Warmonger fields four anti-aircraft guns. I'm thinking about using the turrets from the Forgeworld Hydra platforms: unfortunately they only come in multiples of three, so my choices are either to try to sweet-talk Mail Order into letting me have the bits that I need, or buying two sets and selling the spares on eBay. But I think that if I can't do the former, I might try to scratchbuild the AA guns instead.
The first piece of customisation I did was to remove the Main Battery at the front of the fortress and replaced it with an imperial eagle taken from a Battlefleet Gothic ship. I think that it will make a nice centerpiece to that part of the titan.
I also had the chance to put the finishing touches to the troop stands that will form the final three companies of my space marine chapter, here they are, waiting to be undercoated:

What you see here is two companies (18 stands + HQ in Space Marine 2nd edn. and NetEpic) of tactical troops (one company in Mark VI "corvus" armour and one in Mark VII "Eagle" armour) and two detachments of scouts (I already have another detachment of scouts that are base coated). Once these stands are painted, I will have a full space marine chapter: ten infantry companies, including a full Terminator company (that's 20 stands, not just three 20-man detachments) and the aforementioned scout company. When that's done, I'll be posting photos, so stay tuned!
I'm quite pleased with the way the scout company HQ turned out, here's a picture:

To make the scout standard-bearer, I removed the blade and pommel of his combat knife, and then filed a narrow groove through his enclosed fist. I used a tailor's pin to make the banner pole (anything else would have been too thick): the imperial eagle at the top is taken from the Forgeworld etched brass sheet.
My Summer Project
This week an item arrived in the post that is going to be a sort of summer project for me:

When I told my friends that I had acquired this choice item, they all had the same reaction:
not another one!
because, you see, I already have a fully operational Imperator class battle titan. Behold the "Fearsome Engine", Machinator Formidabilis:

(By the way, if the above image looks familiar, it's because the Wikipedia article on titans uses photos I took of some of my titans.)
The reason for their consternation is that Machinator Formidabilis has, in the ten years since its commission into the Legio Pantera (my titan legion, the Black Panther Legion), never even come close to being destroyed: not once. Even a massed rank of Gargants with their ultra-cheesy, shield-stripping, automatic-hit-on-the-legs GutBuster Cannon, has not managed to do it serious harm. So the thought of another indestructible castle robot on the battlefield fills them with dread.
Tempting though the thought is of fielding a 4,500 point army consisting of just two titans, that is not my plan: over the course of this summer, and described in depth on this nerdy gaming blog, I will be taking the above artifact and attempting to do what Christian Salling did and convert it into a Warmonger: a cousin of the Imperator, with a lower points cost, and a specialisation for long-range firepower and anti-aircraft support. Games Workshop used to produce a conversion kit, but they're as hard to find as an honest politician, so I will probably end up scratchbuilding the bits that I need.
Stay tuned for updates!