All posts in "legio-pantera"
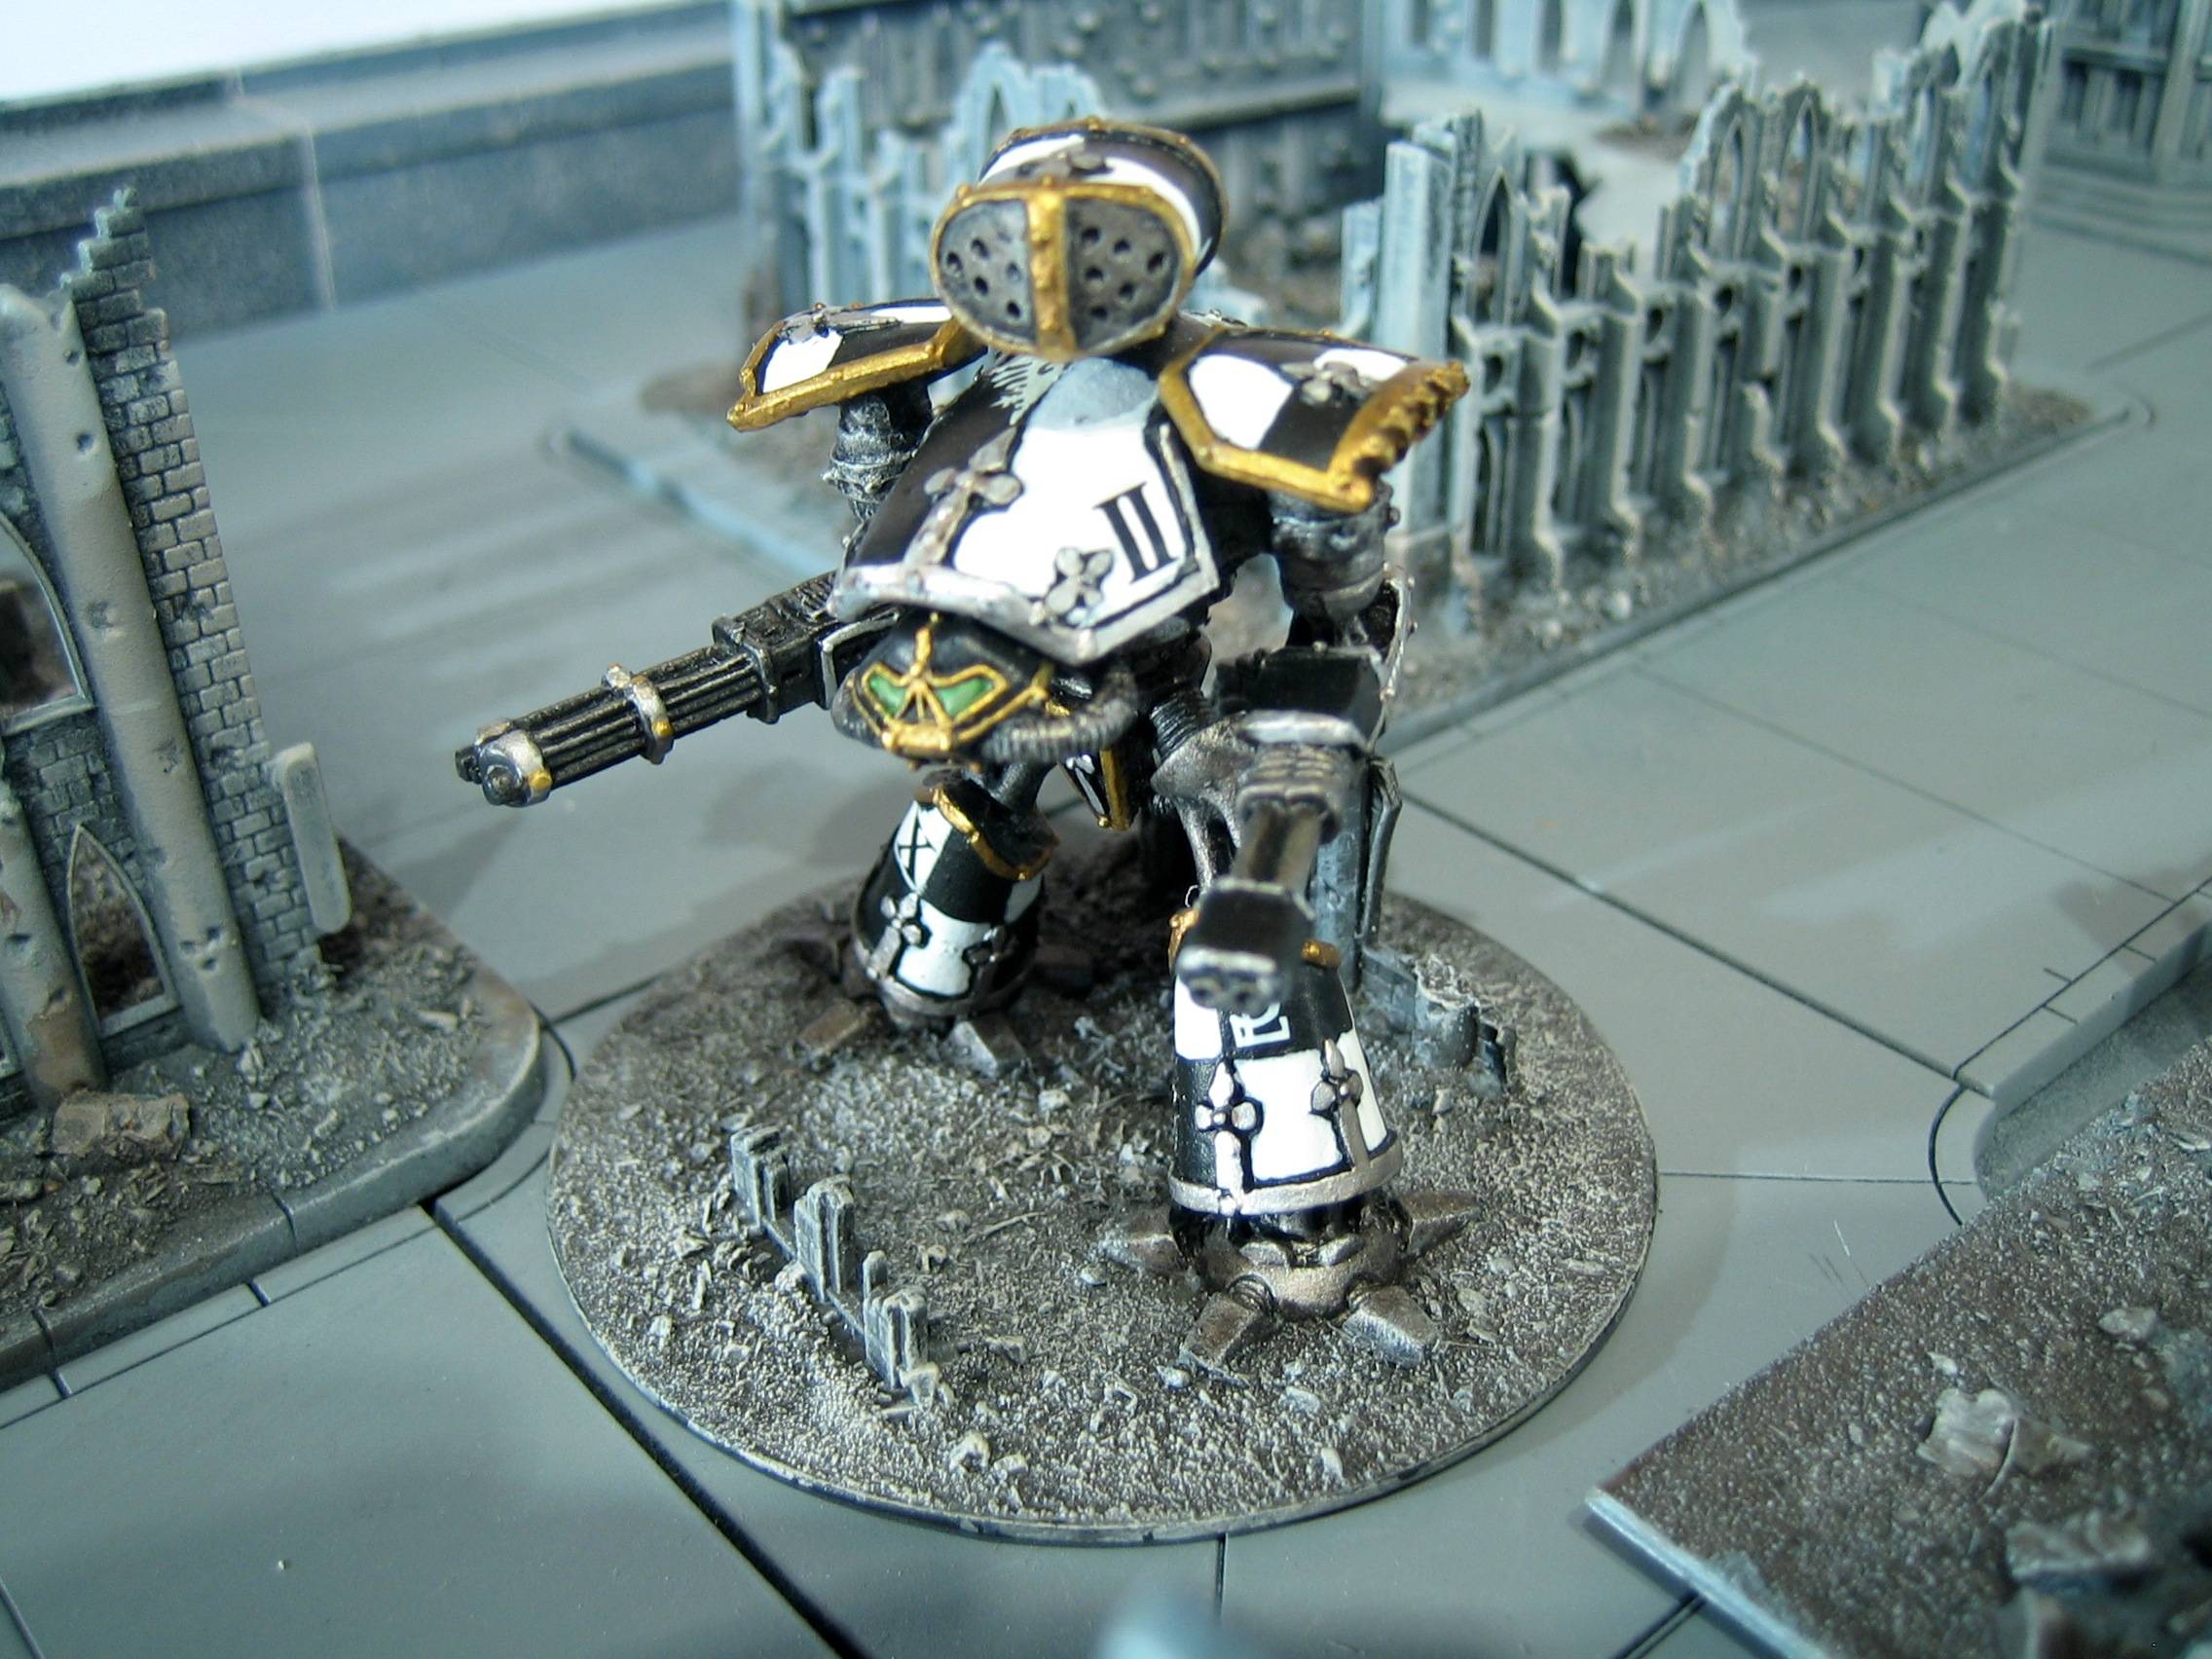
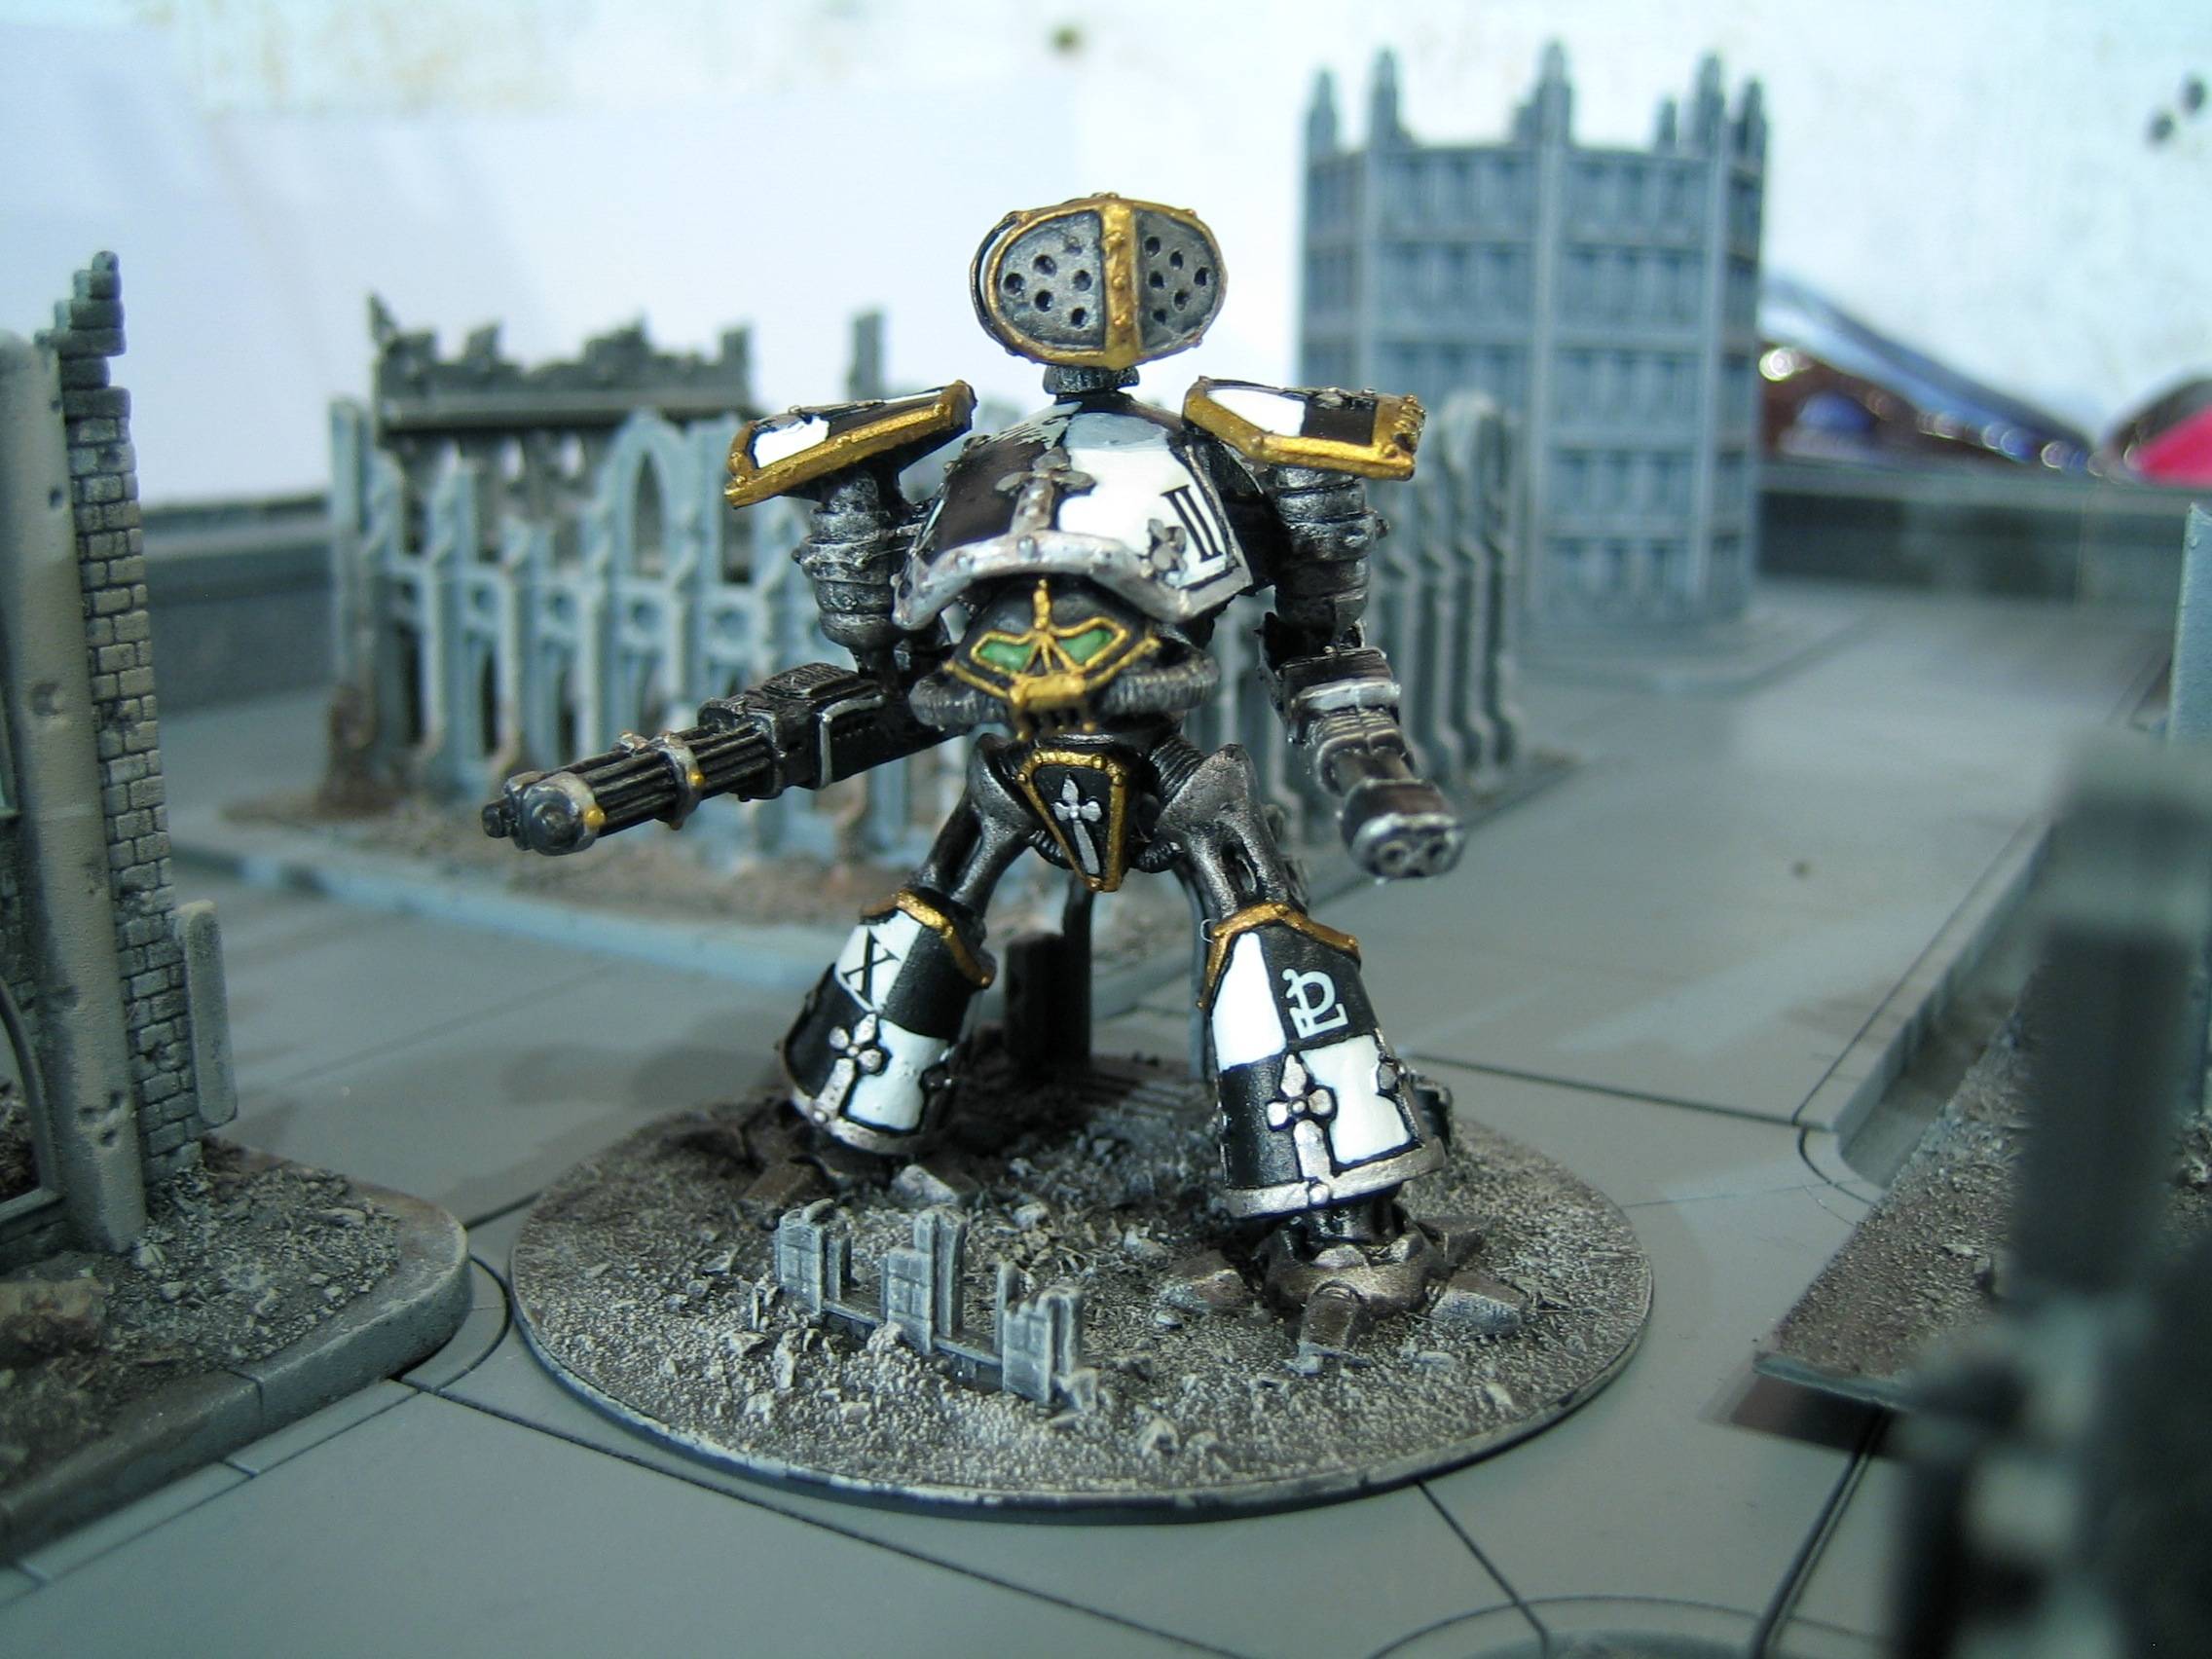
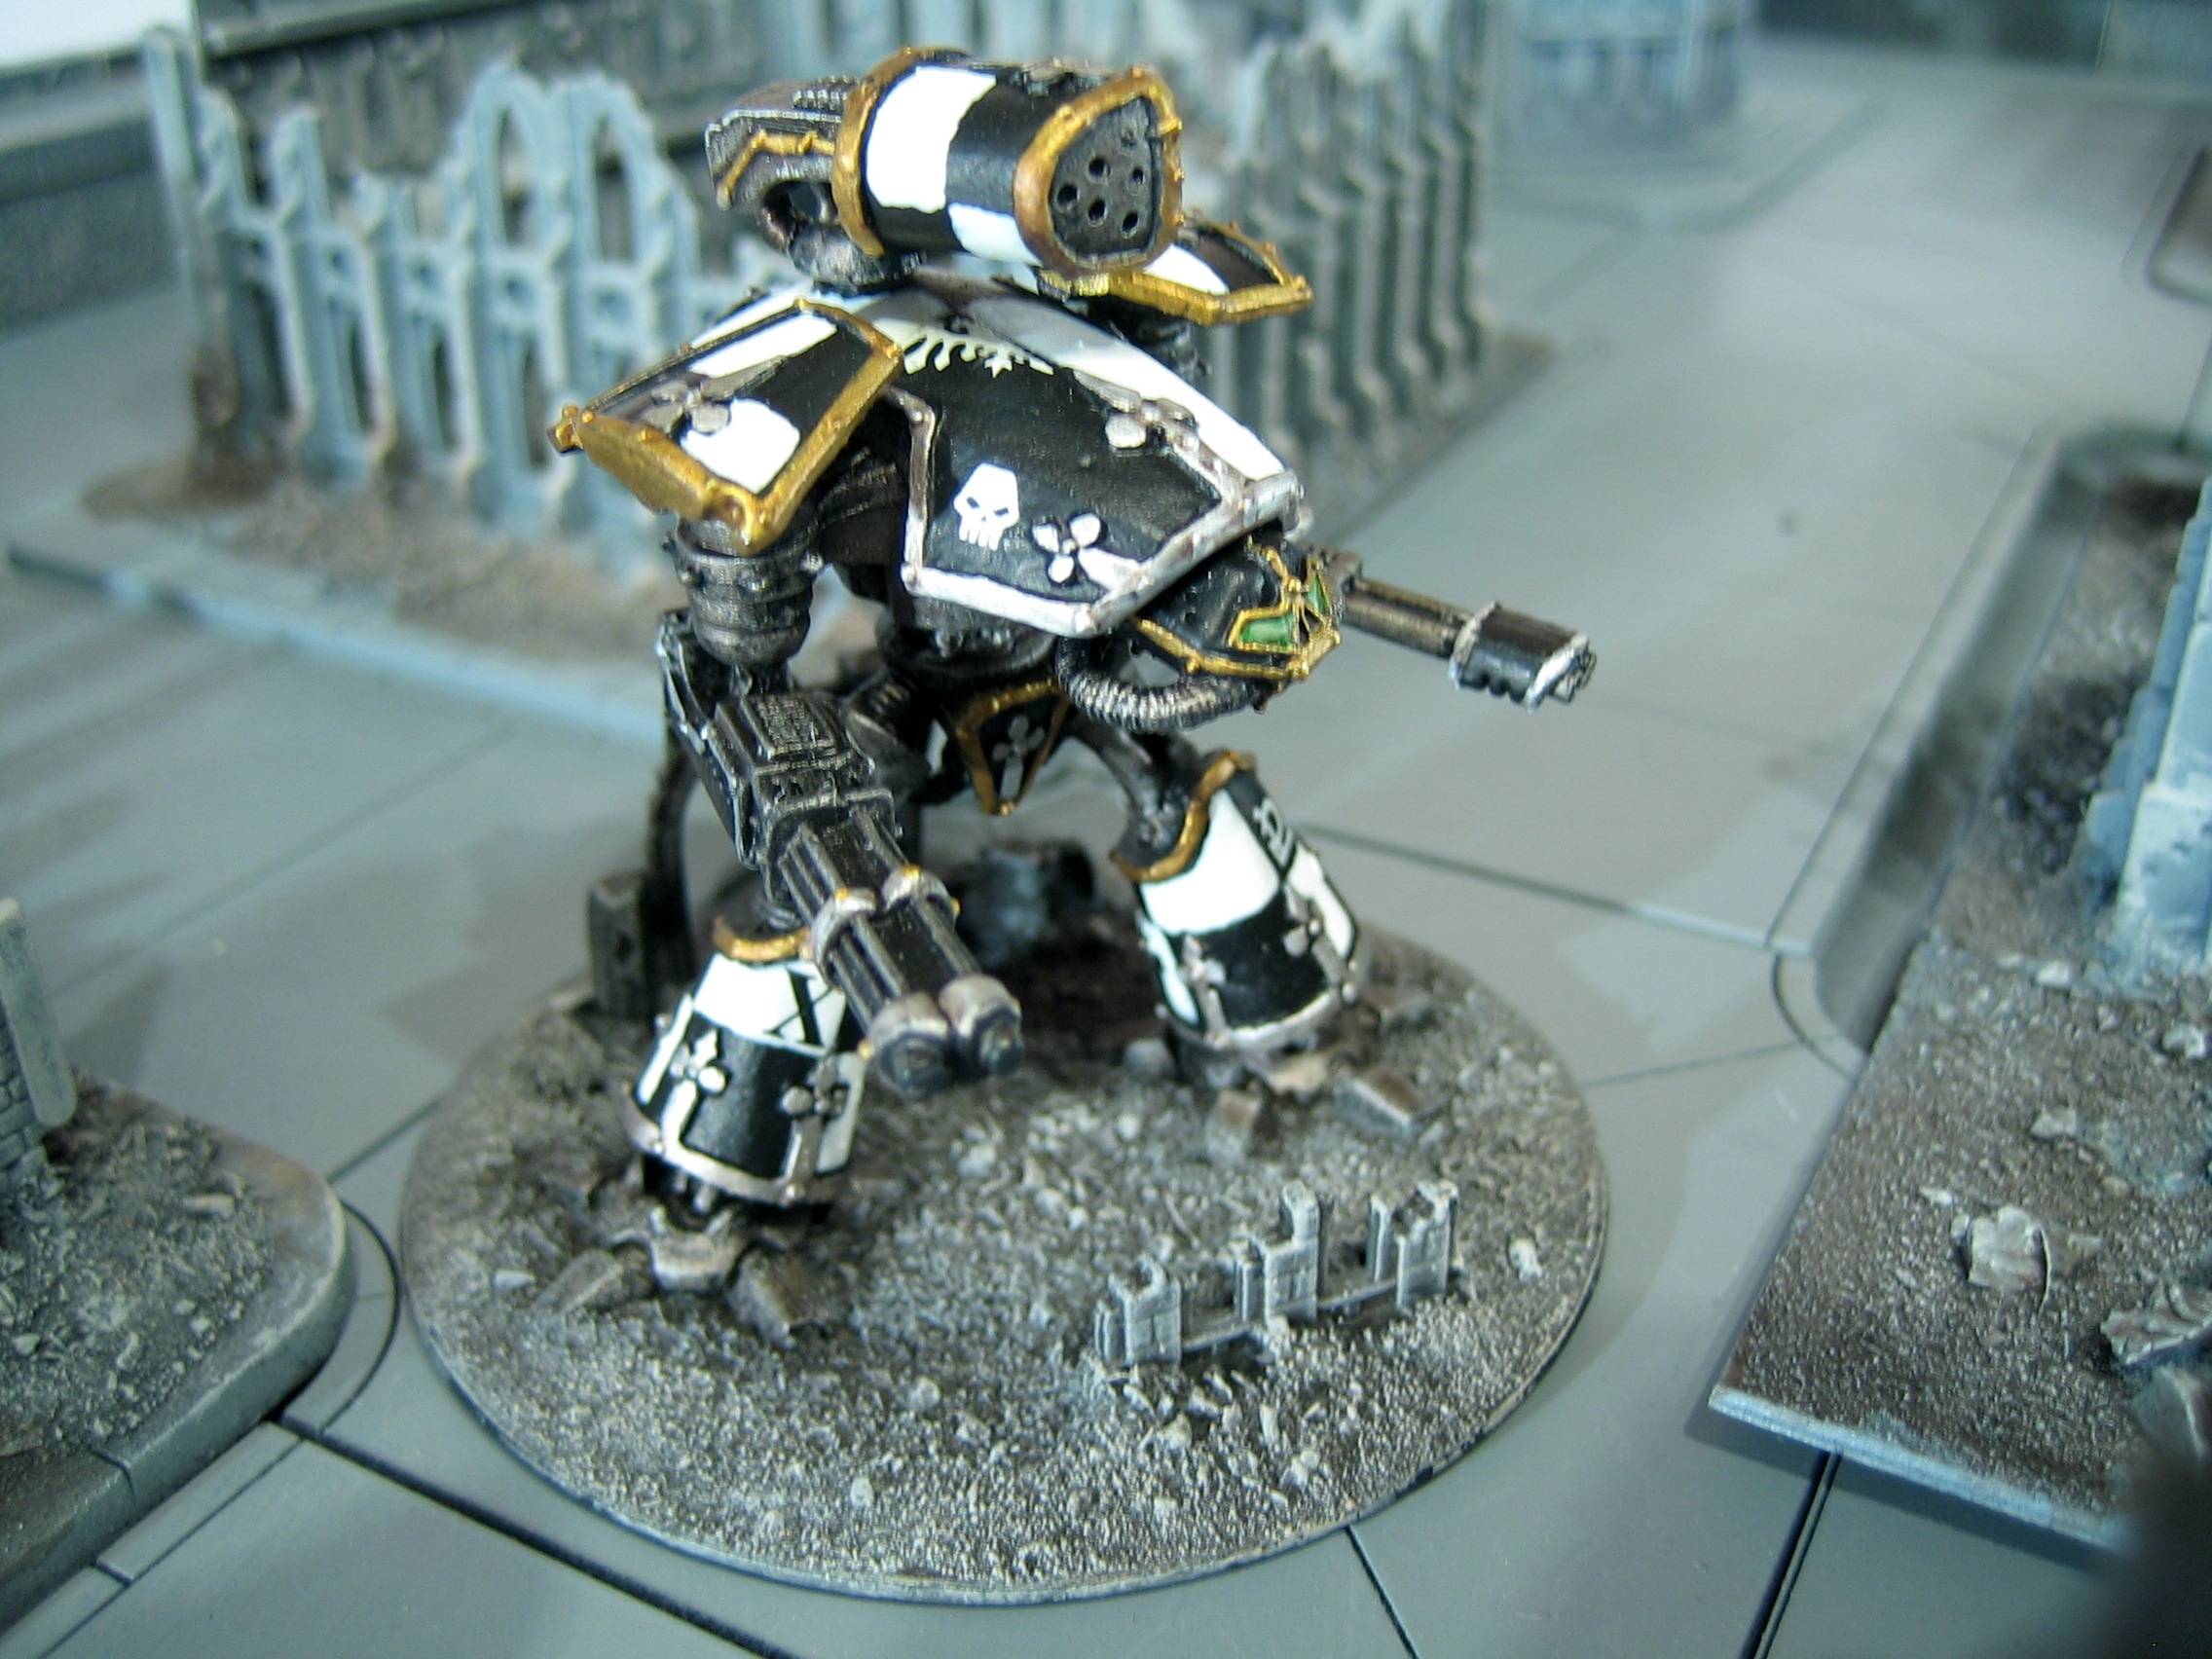
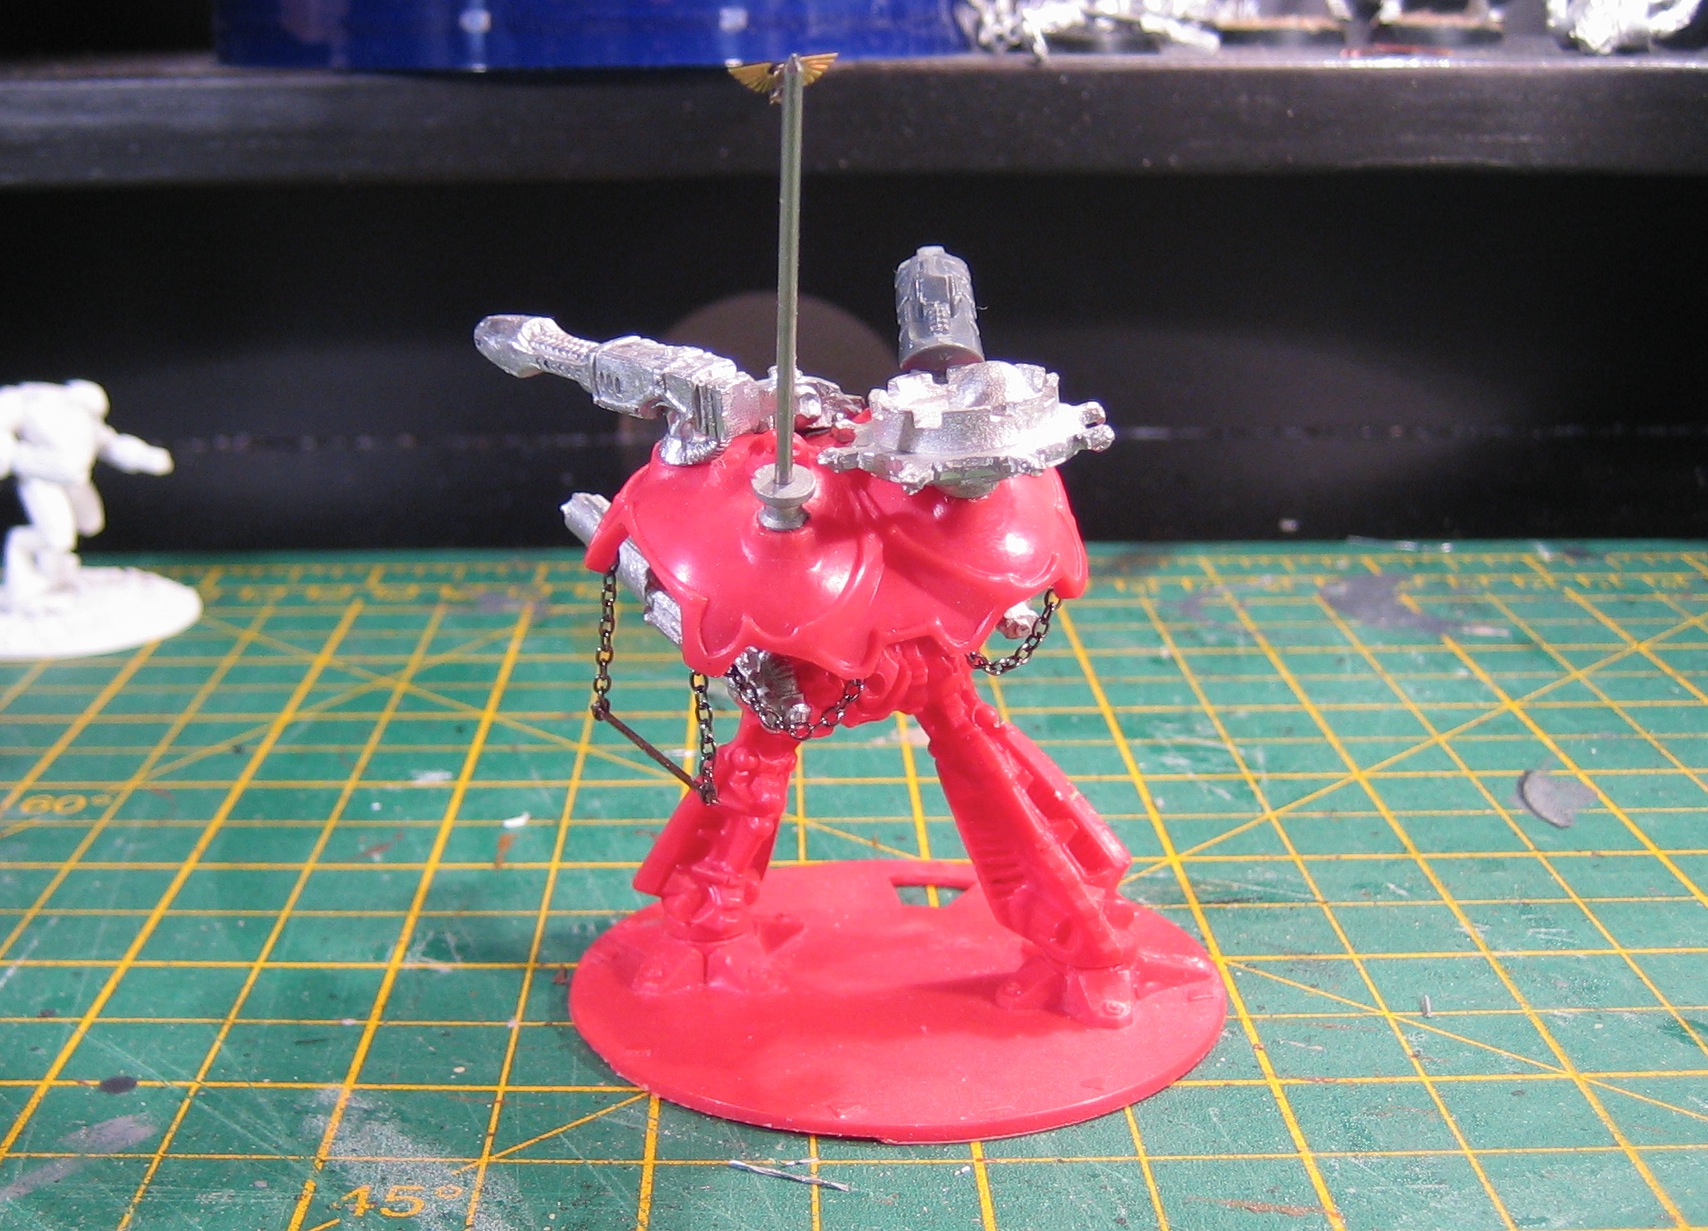
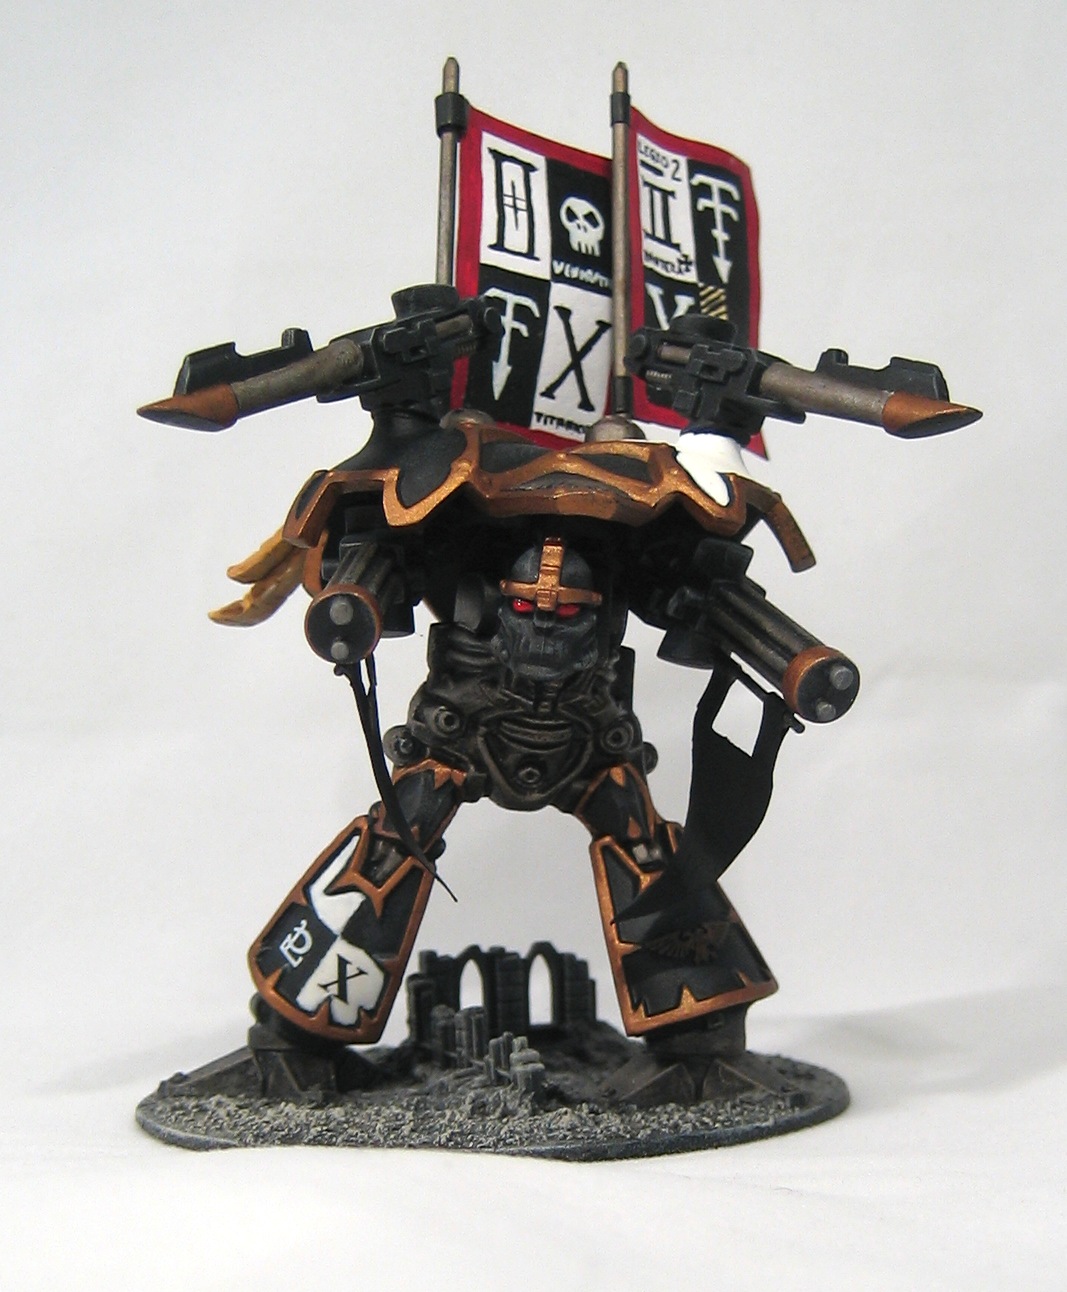
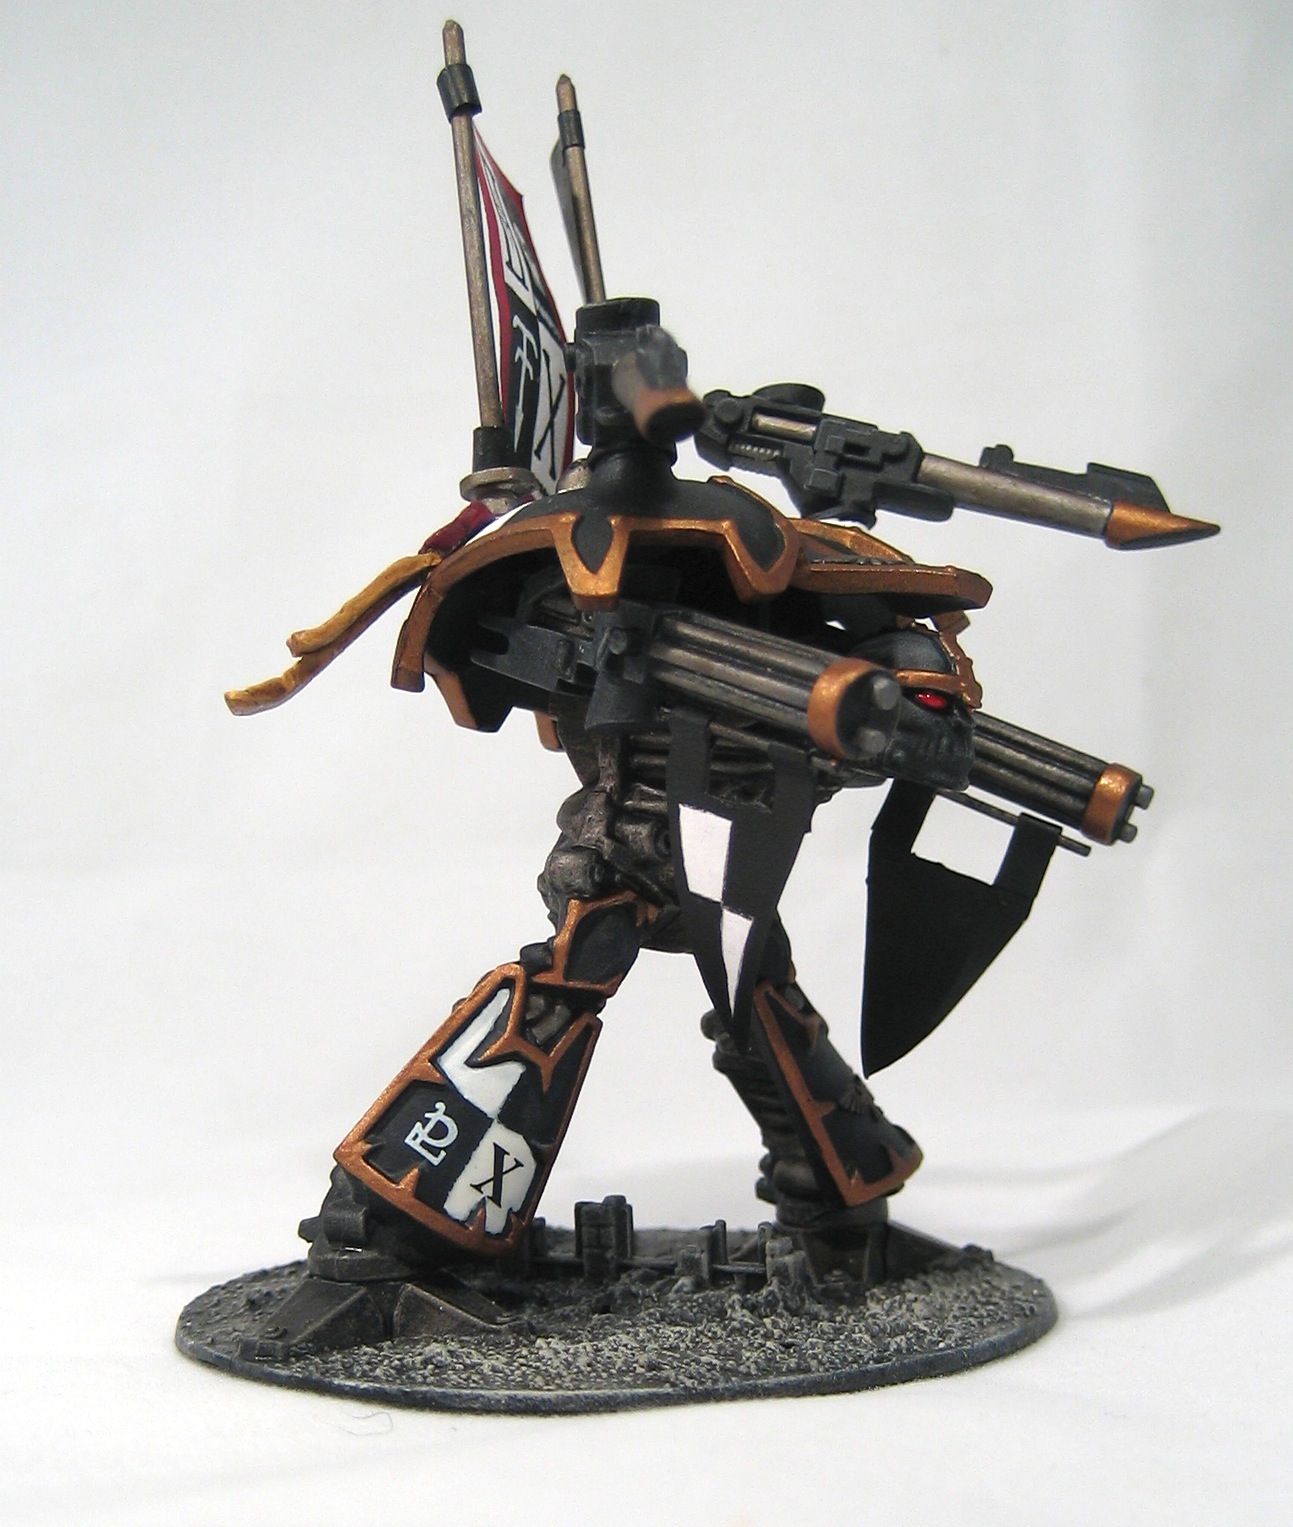
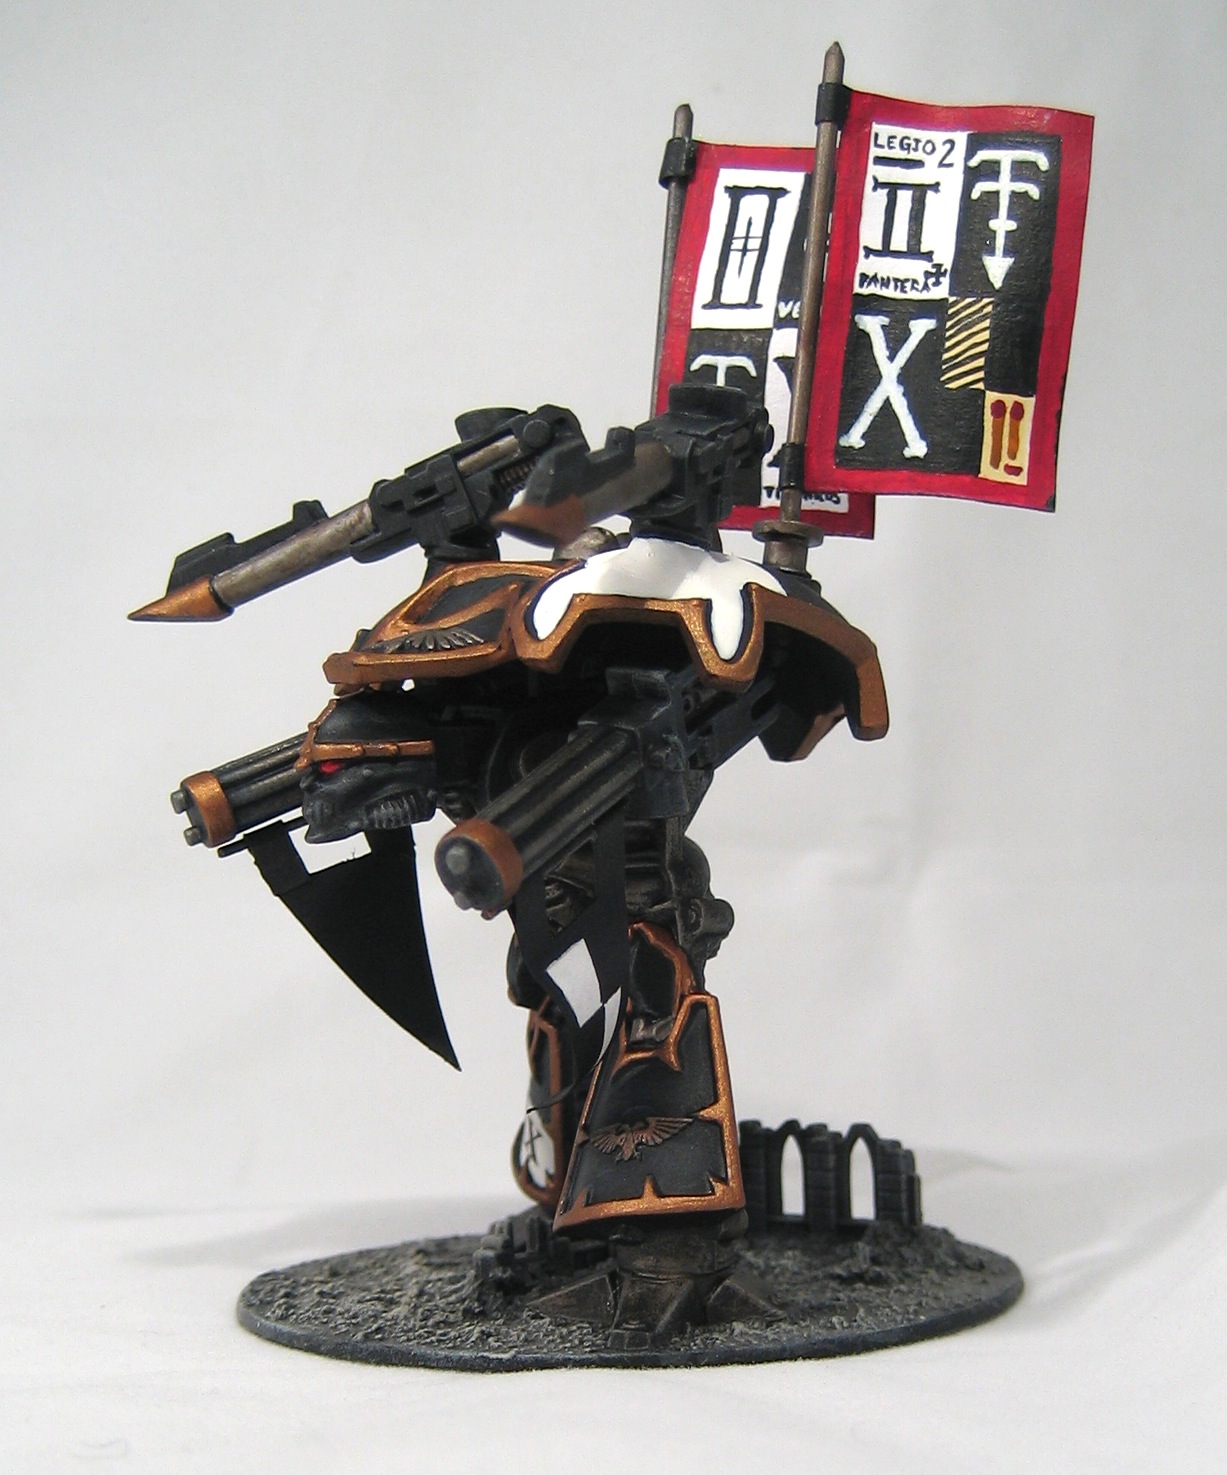
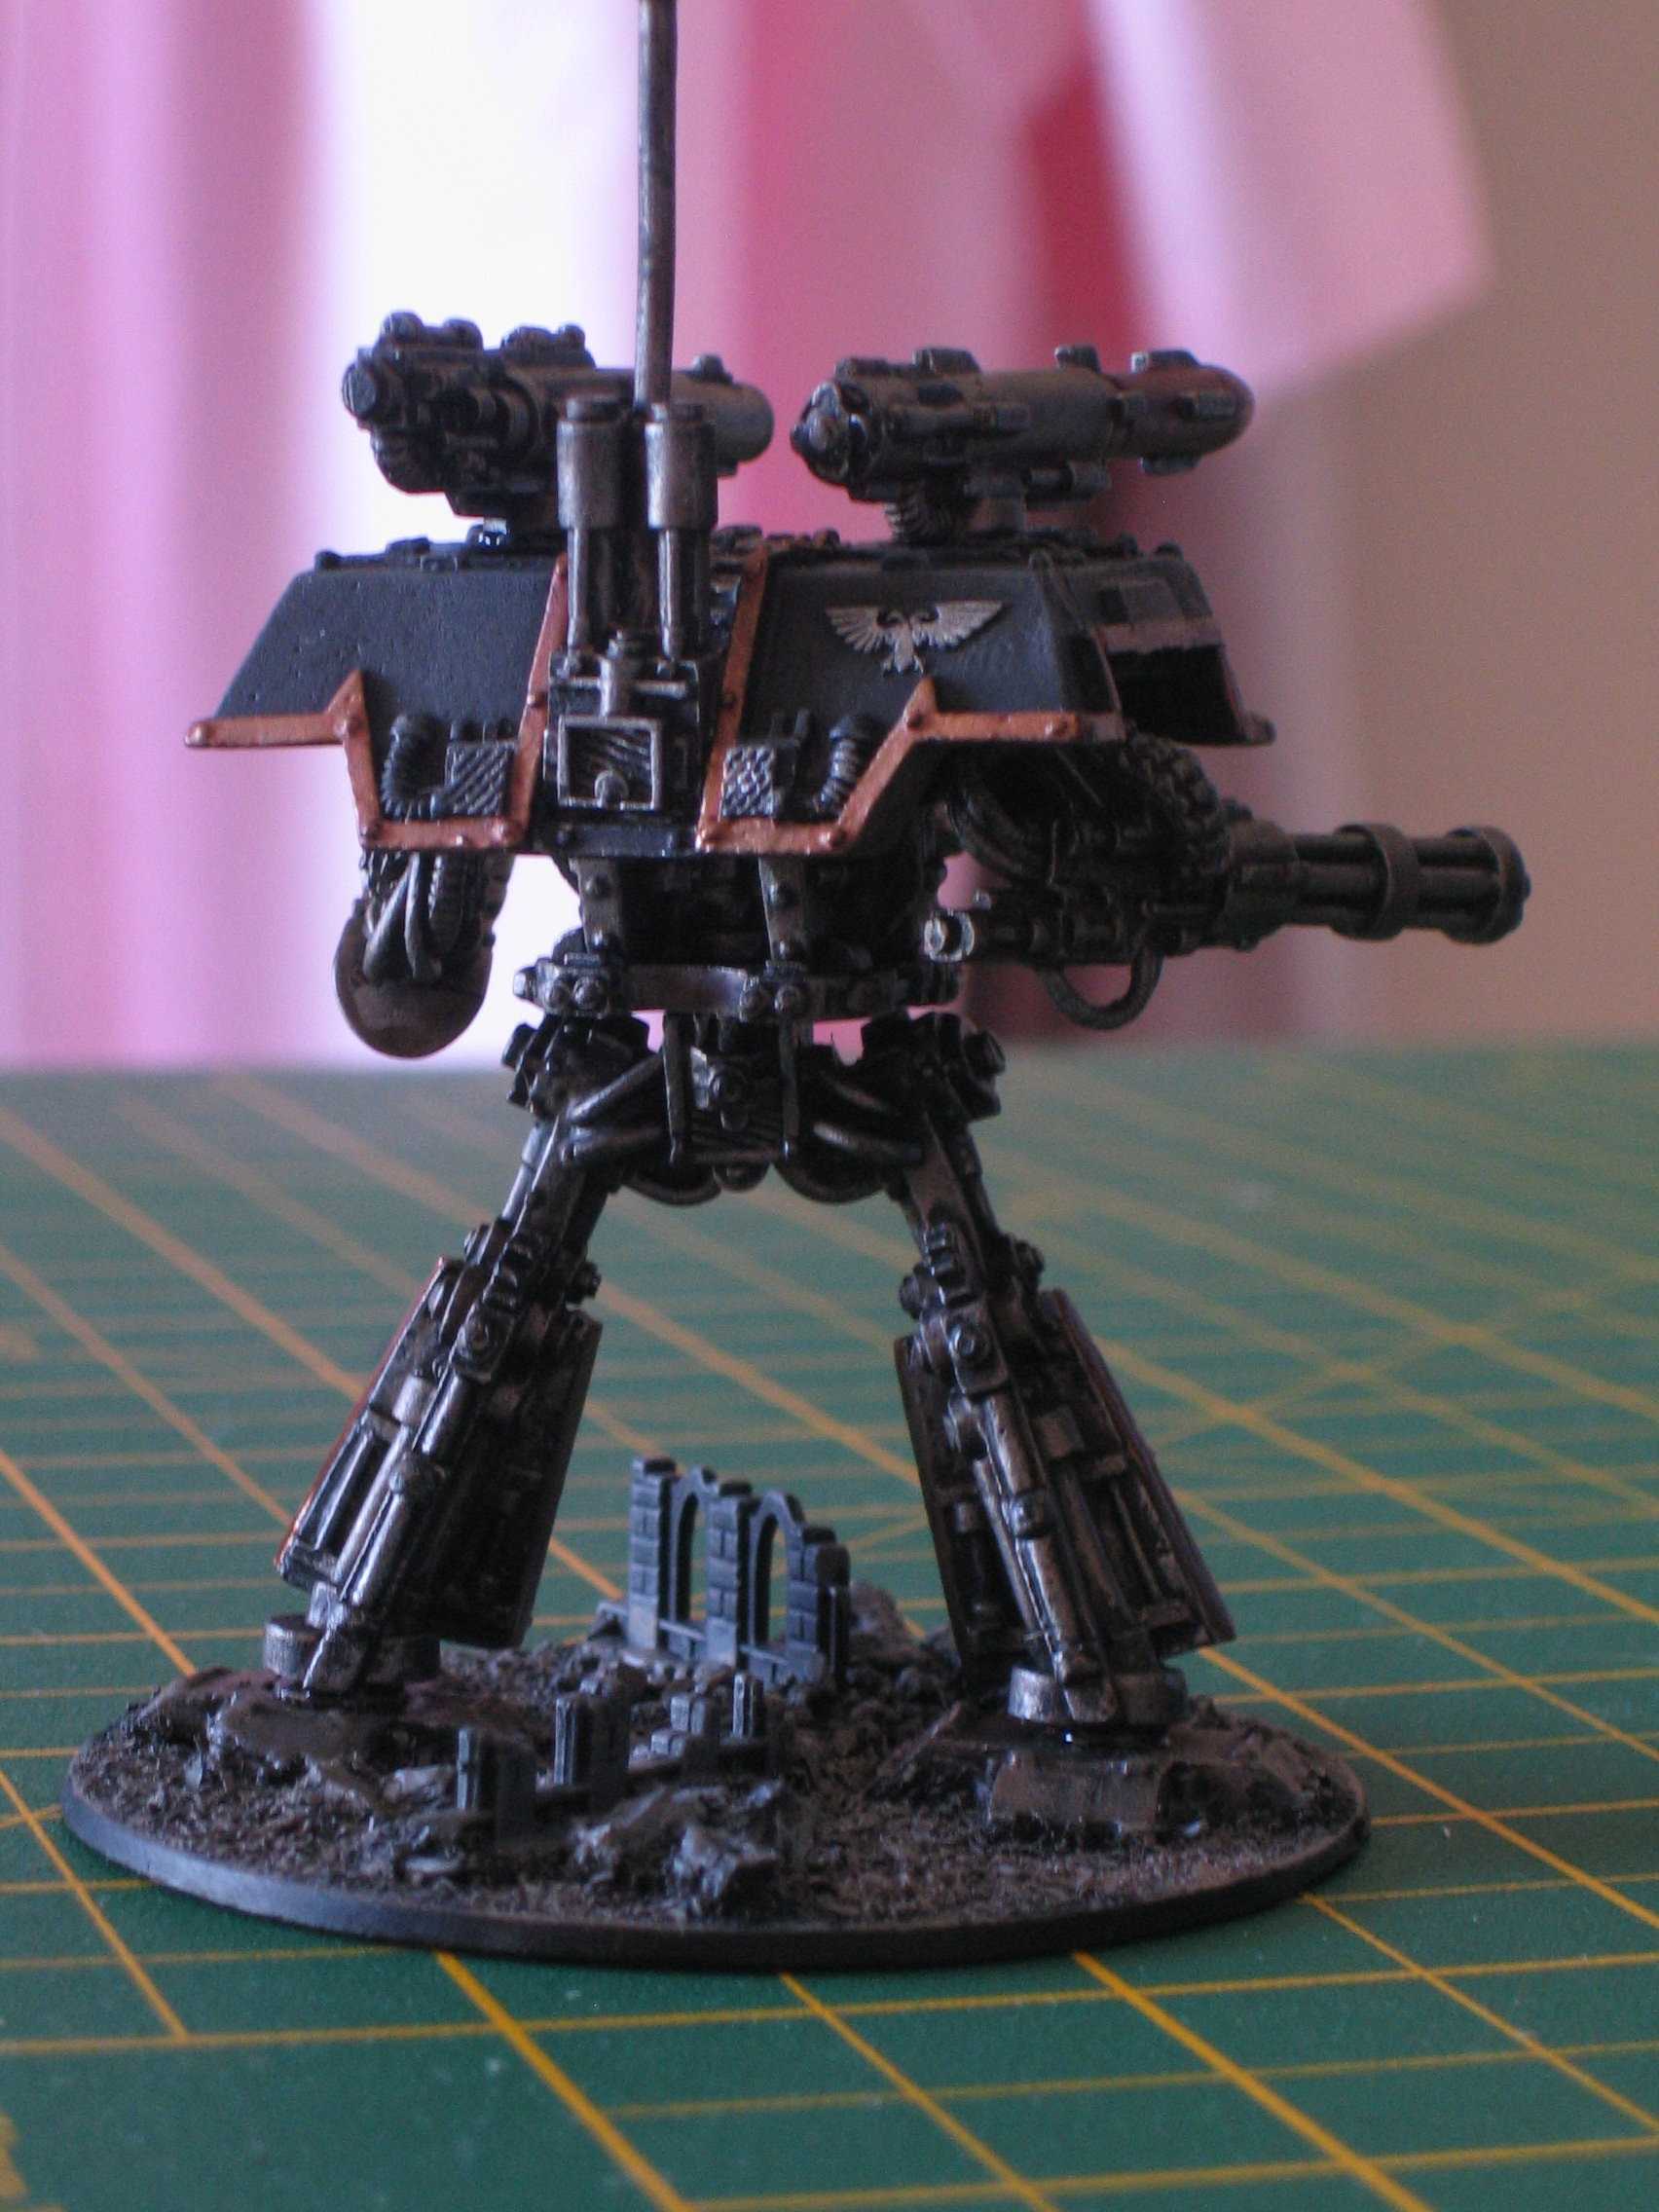
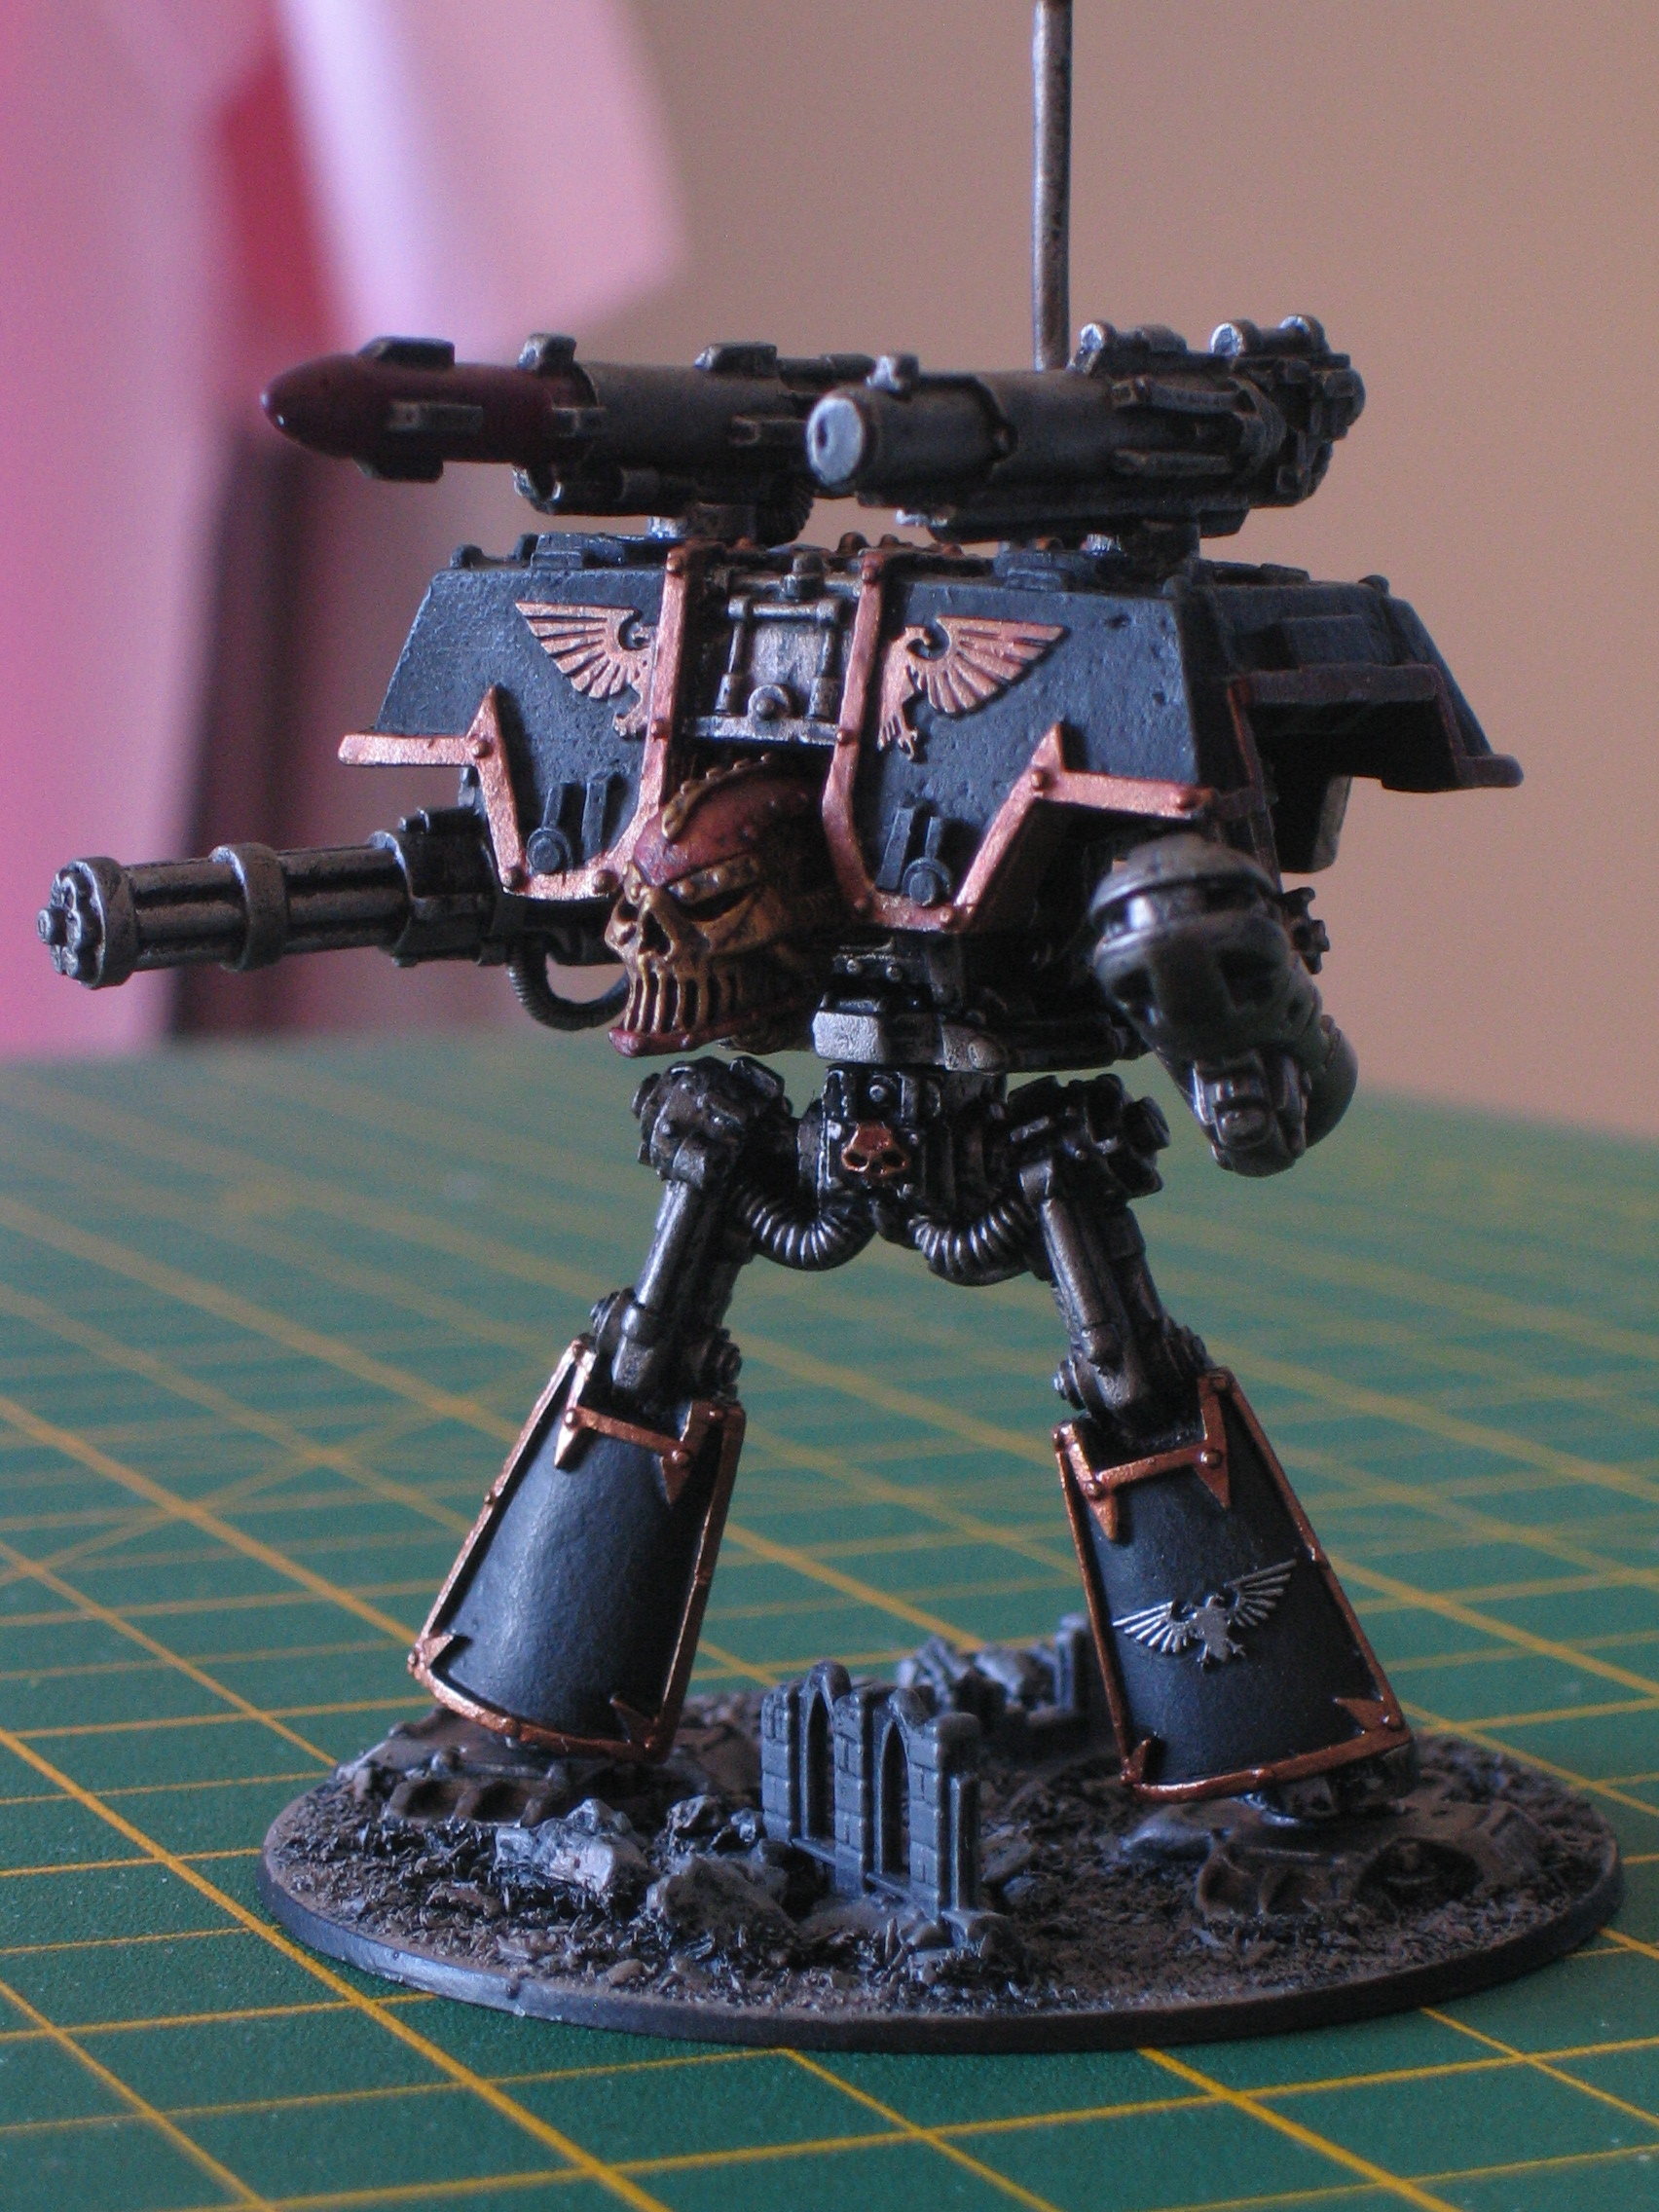
Legio Pantera Custodian Titan
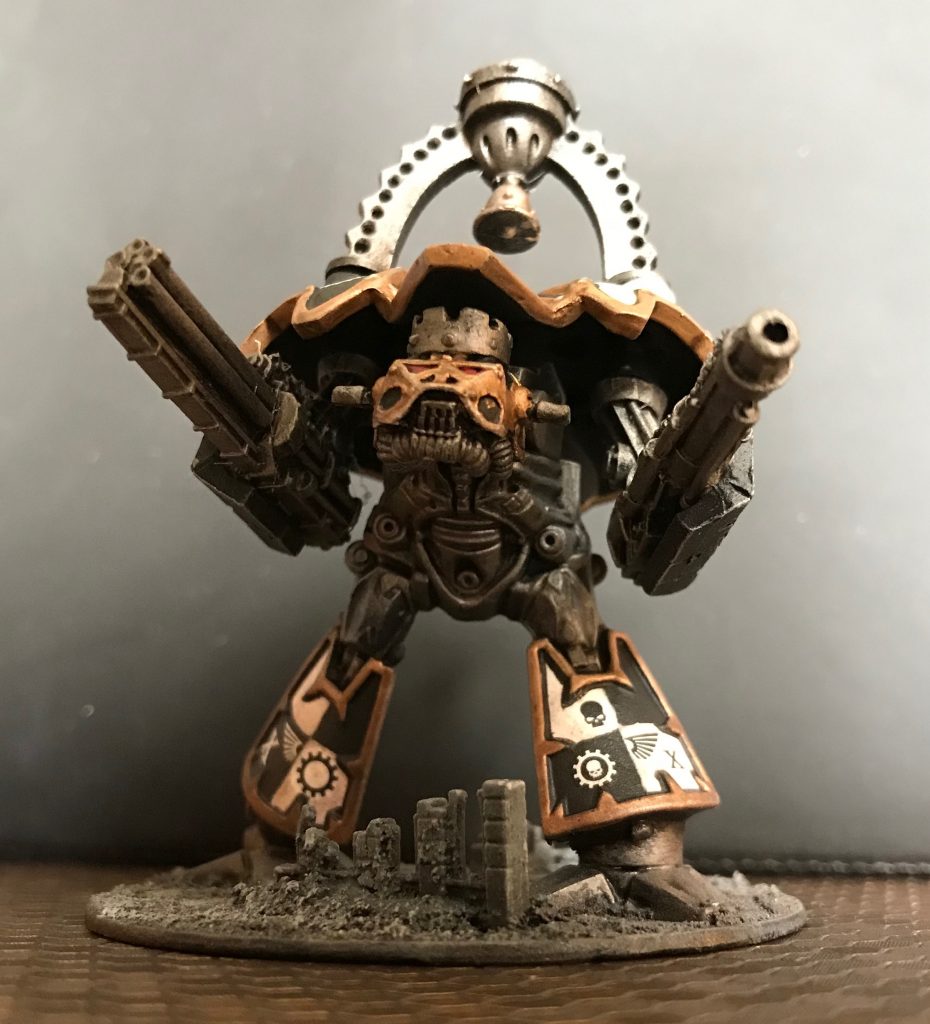
My copy of the new version of Adeptus Titanicus should arrive today, but that hasn't stopped me from continuing to paint classic Epic titans! Here is a rather esoteric one: a Custodian Titan. Each titan legion has a single Custodian titan, which replaces its carapace weapons with a Devotional Bell, built from sacred Terran metals and annointed with drop of the Emperor's blood. The bell acts as a mobile shrine for the Imperial Cult and a rallying point on the battlefield. The presence of a Custodian Titan in a battle is a complete anathema to daemonic intrusions into the material universe as it directly extends the Emperor's will and spirit to his mortal followers.
As well as its Devotional Bell, this titan also has a Command Head and Carapace multi-lasers, and its arm weapons are Lucius-pattern weapons from the Mk III Warlord Titan.
More pictures below.
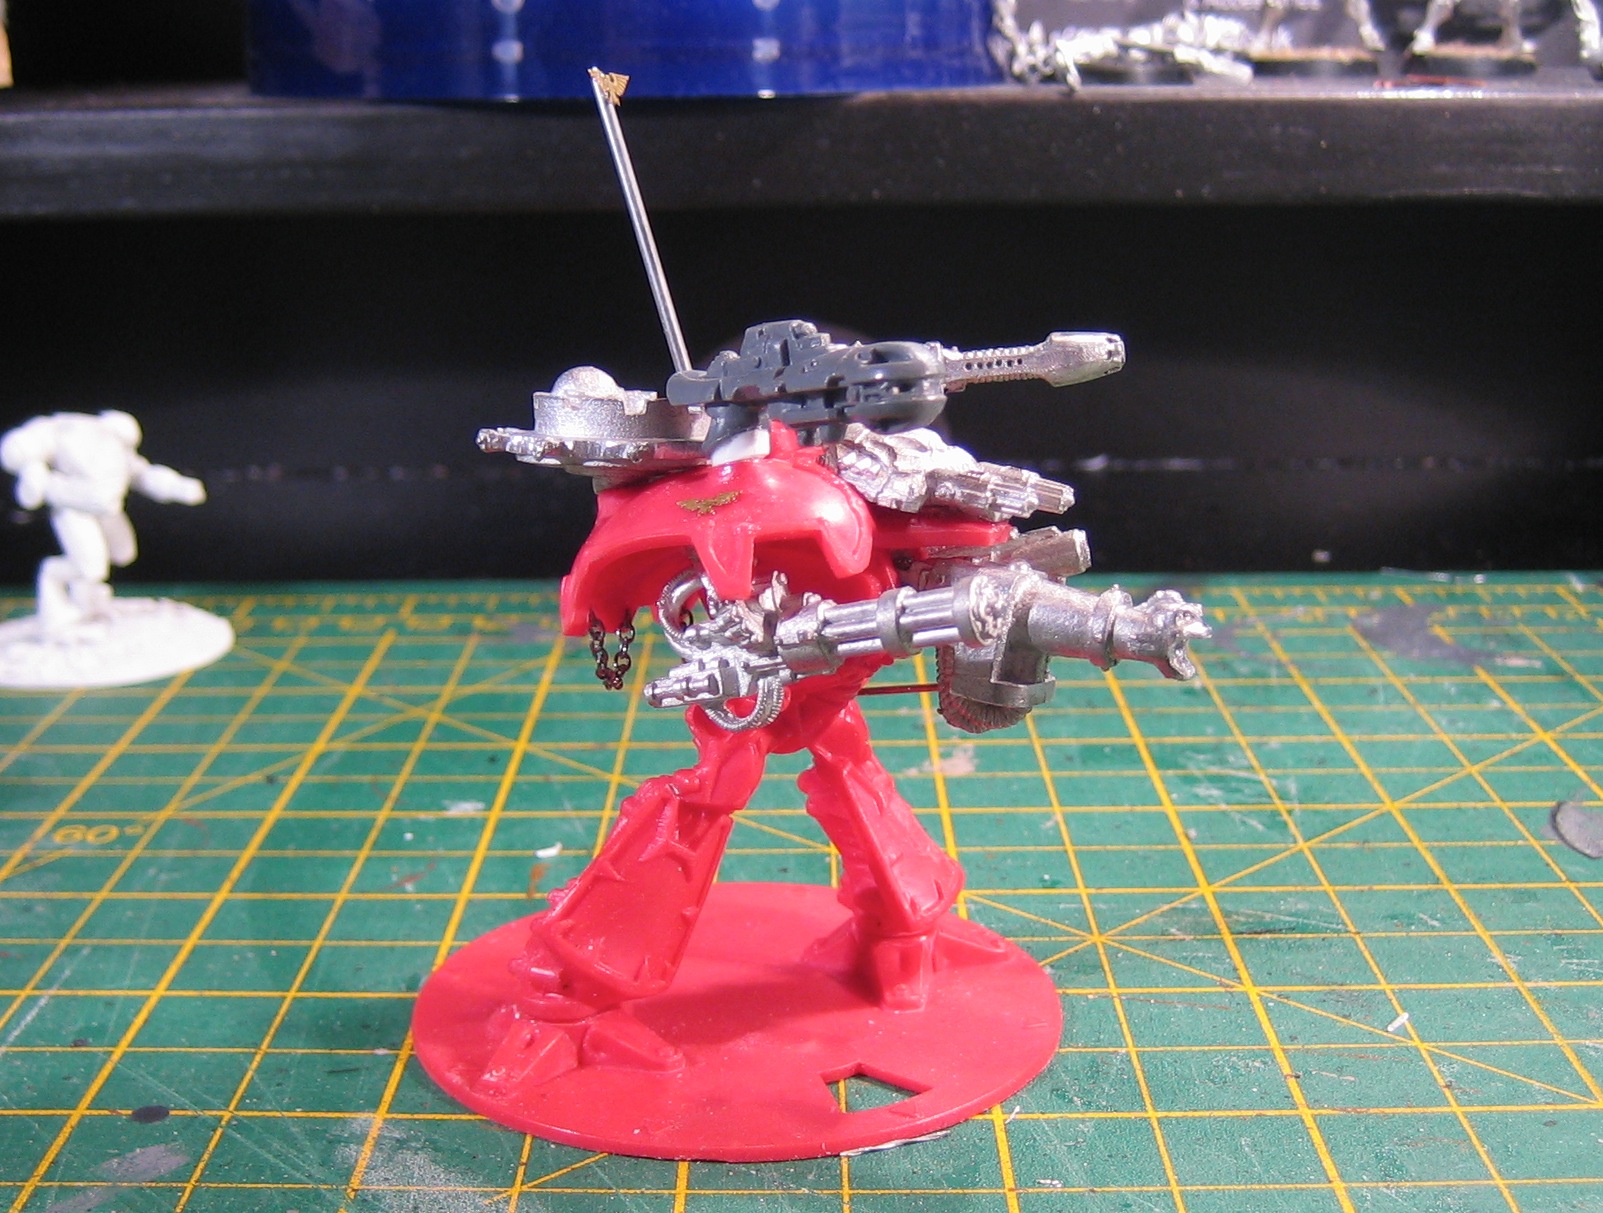
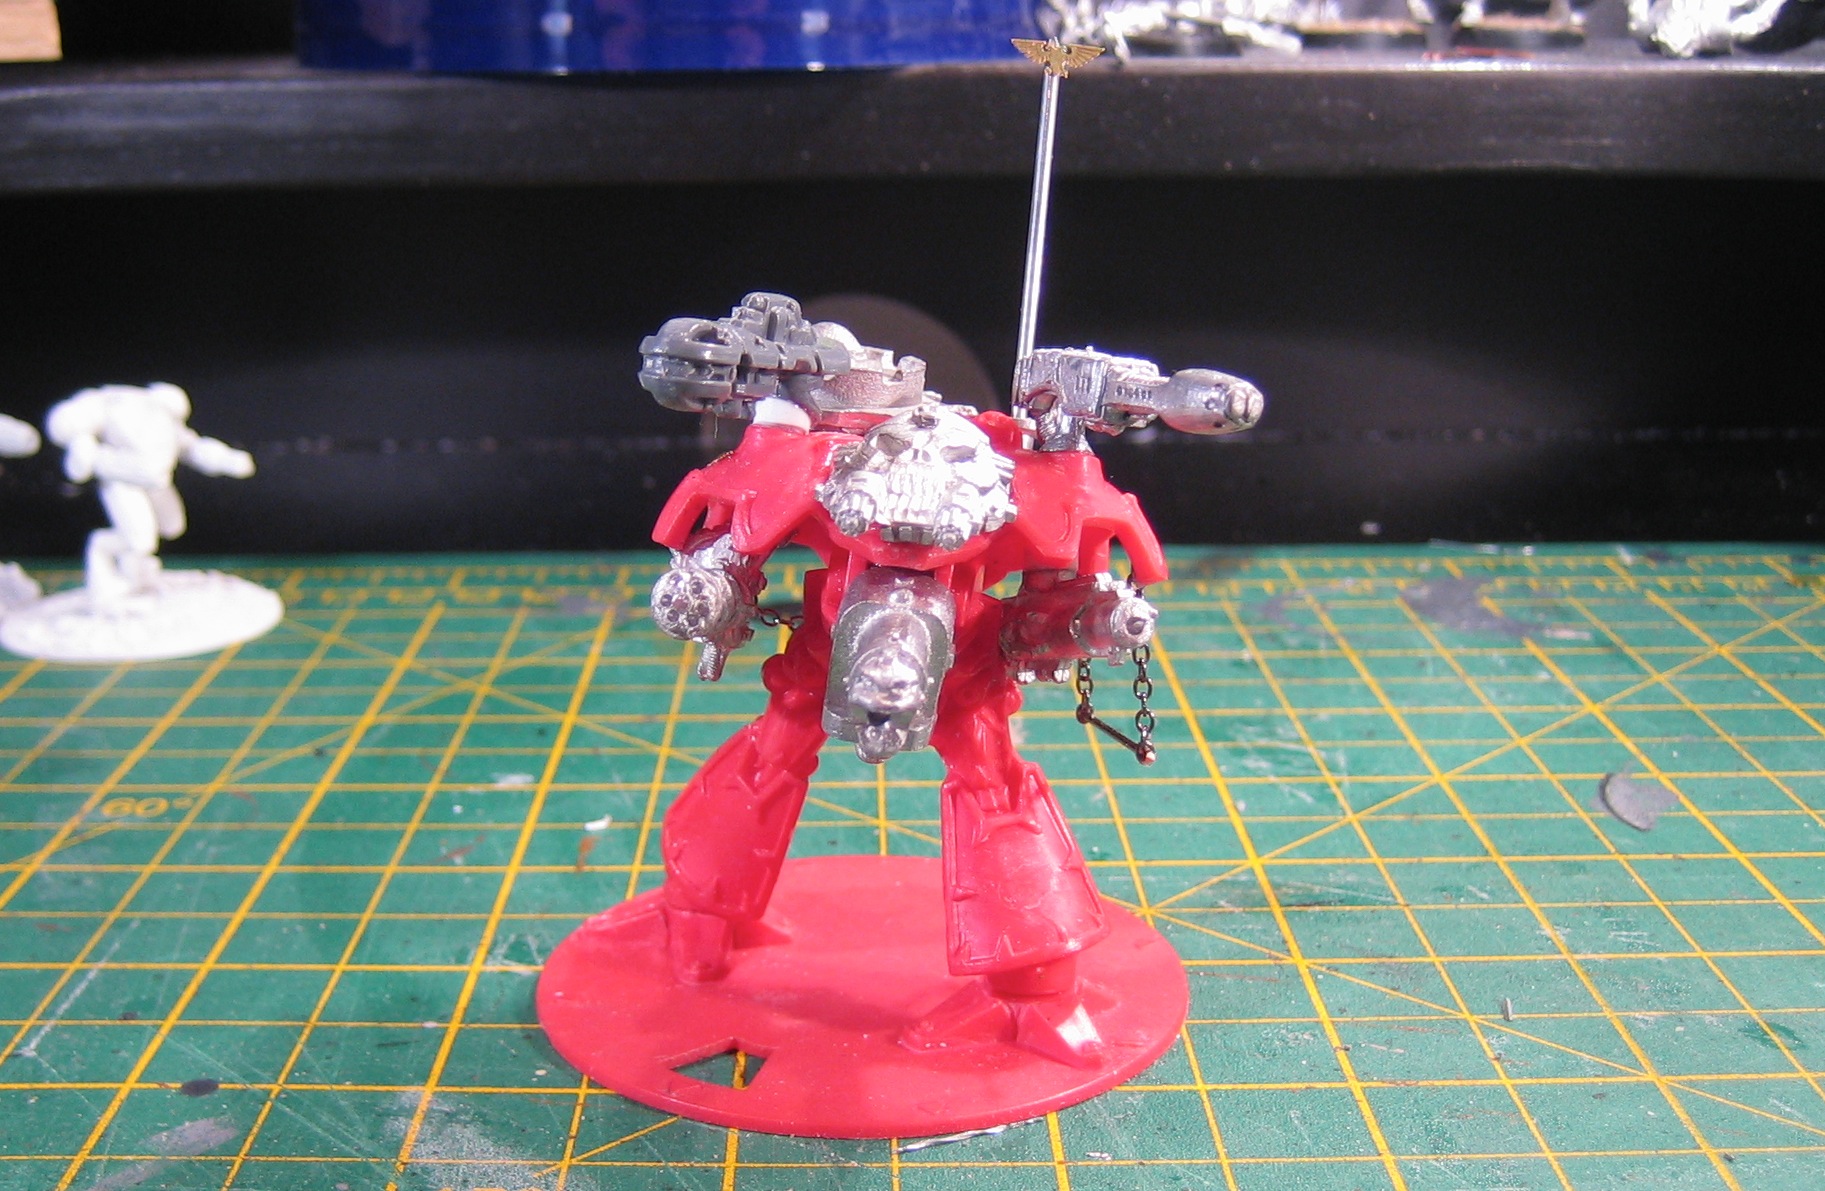
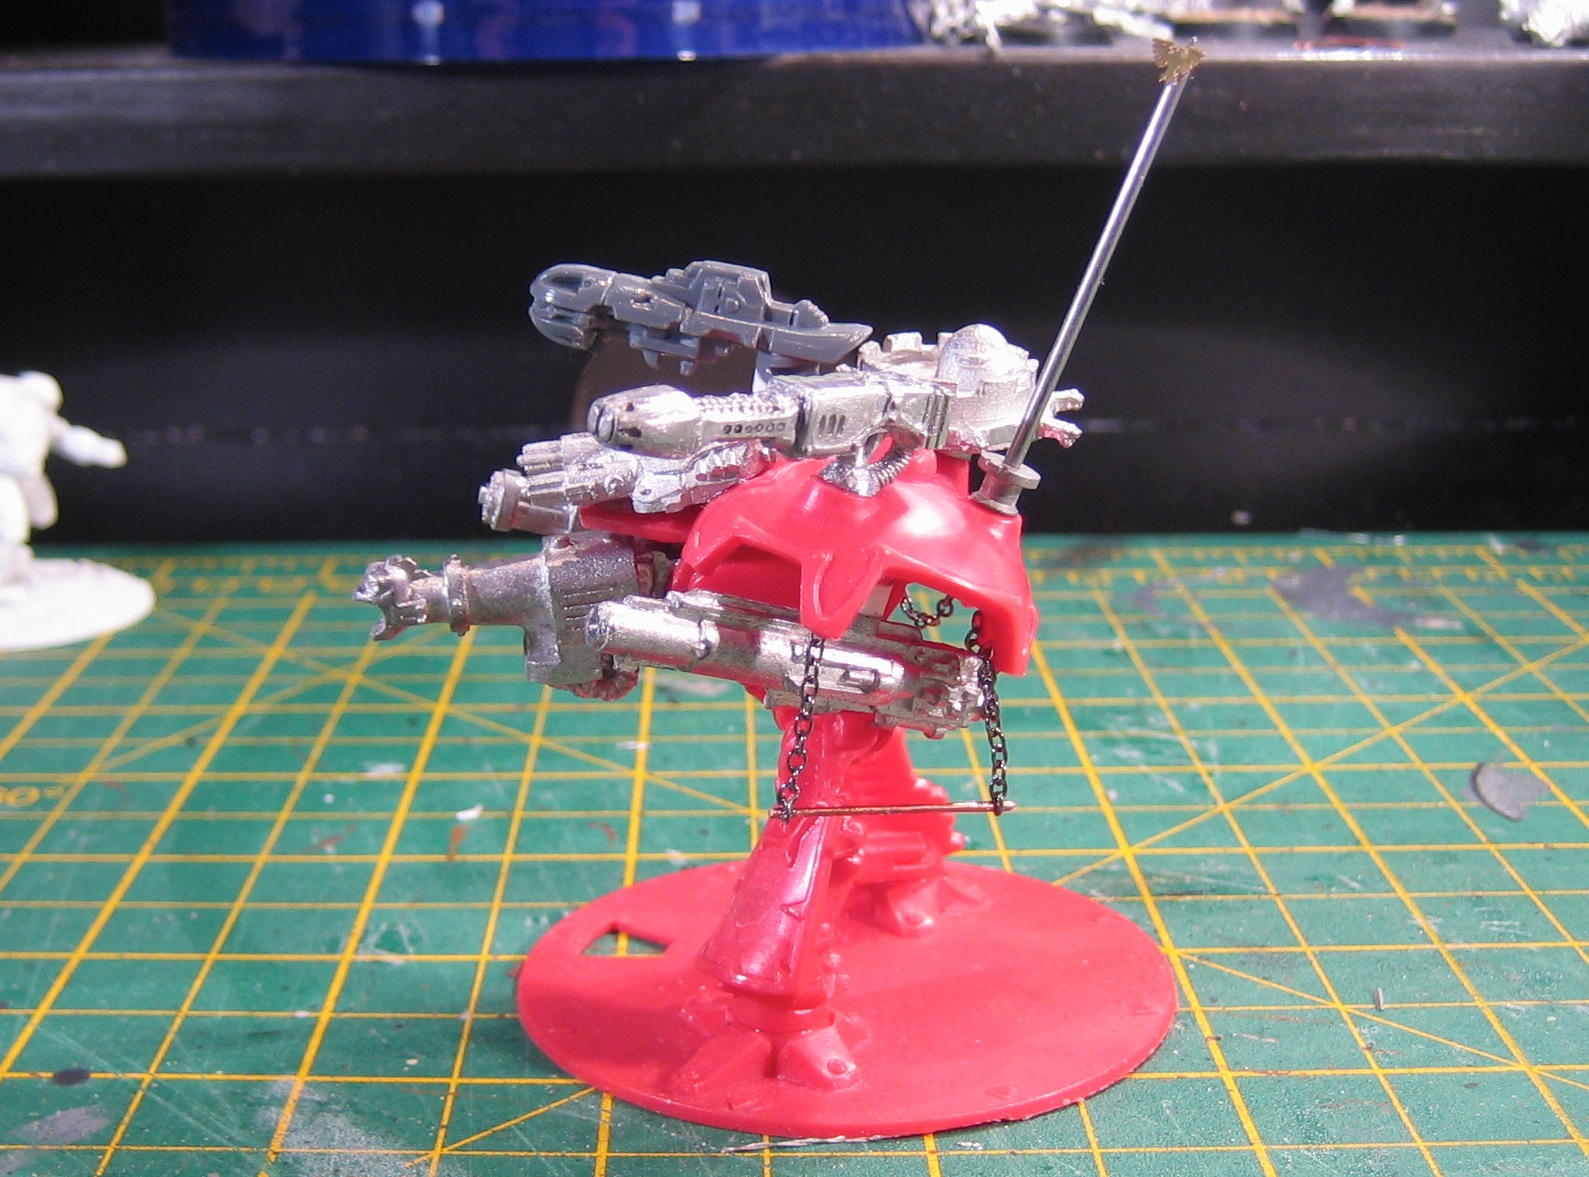
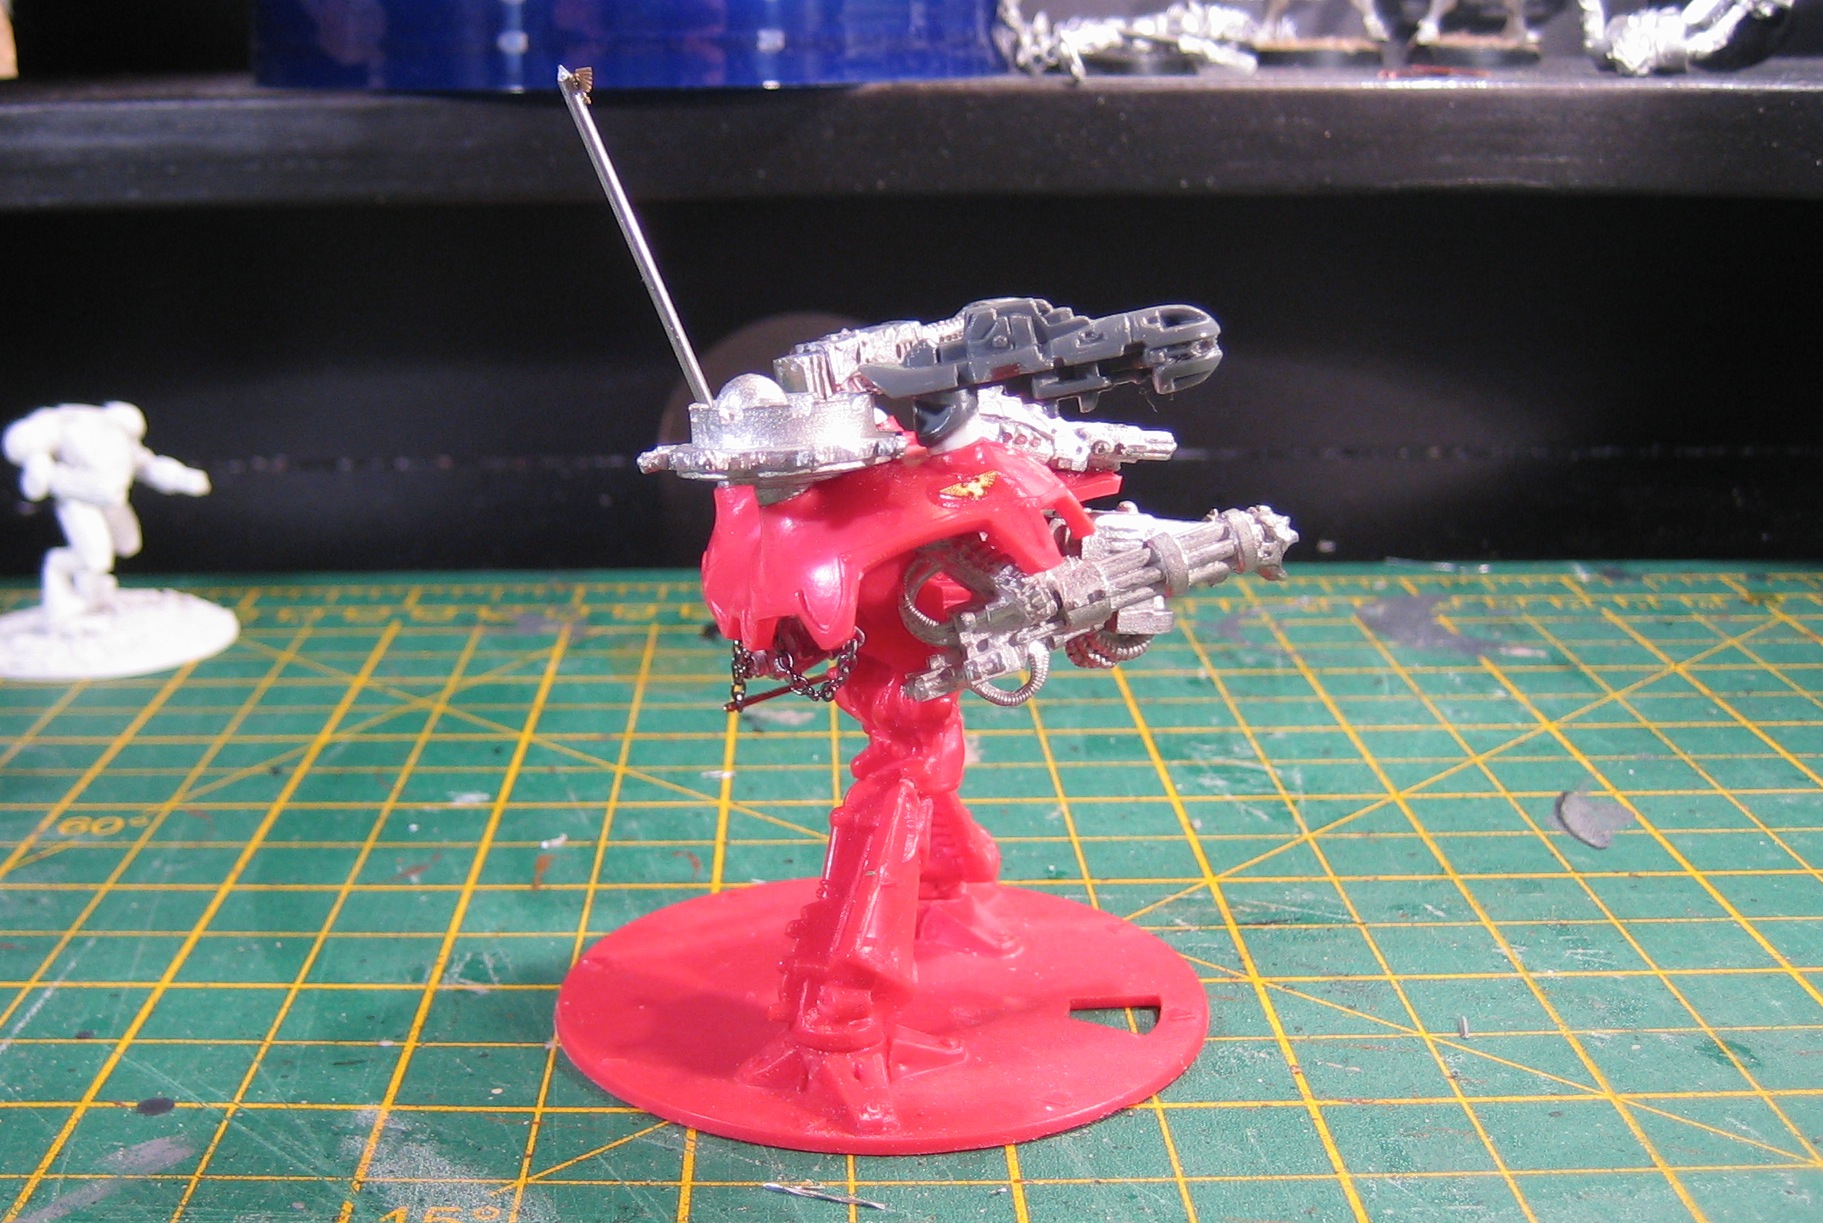
The Milk Float, Completed

Here's the completed Mk II Warlord "Milk Float" titan I mentioned previously. The right arm weapon is the improved Melta Cannon.
More pictures below the fold.
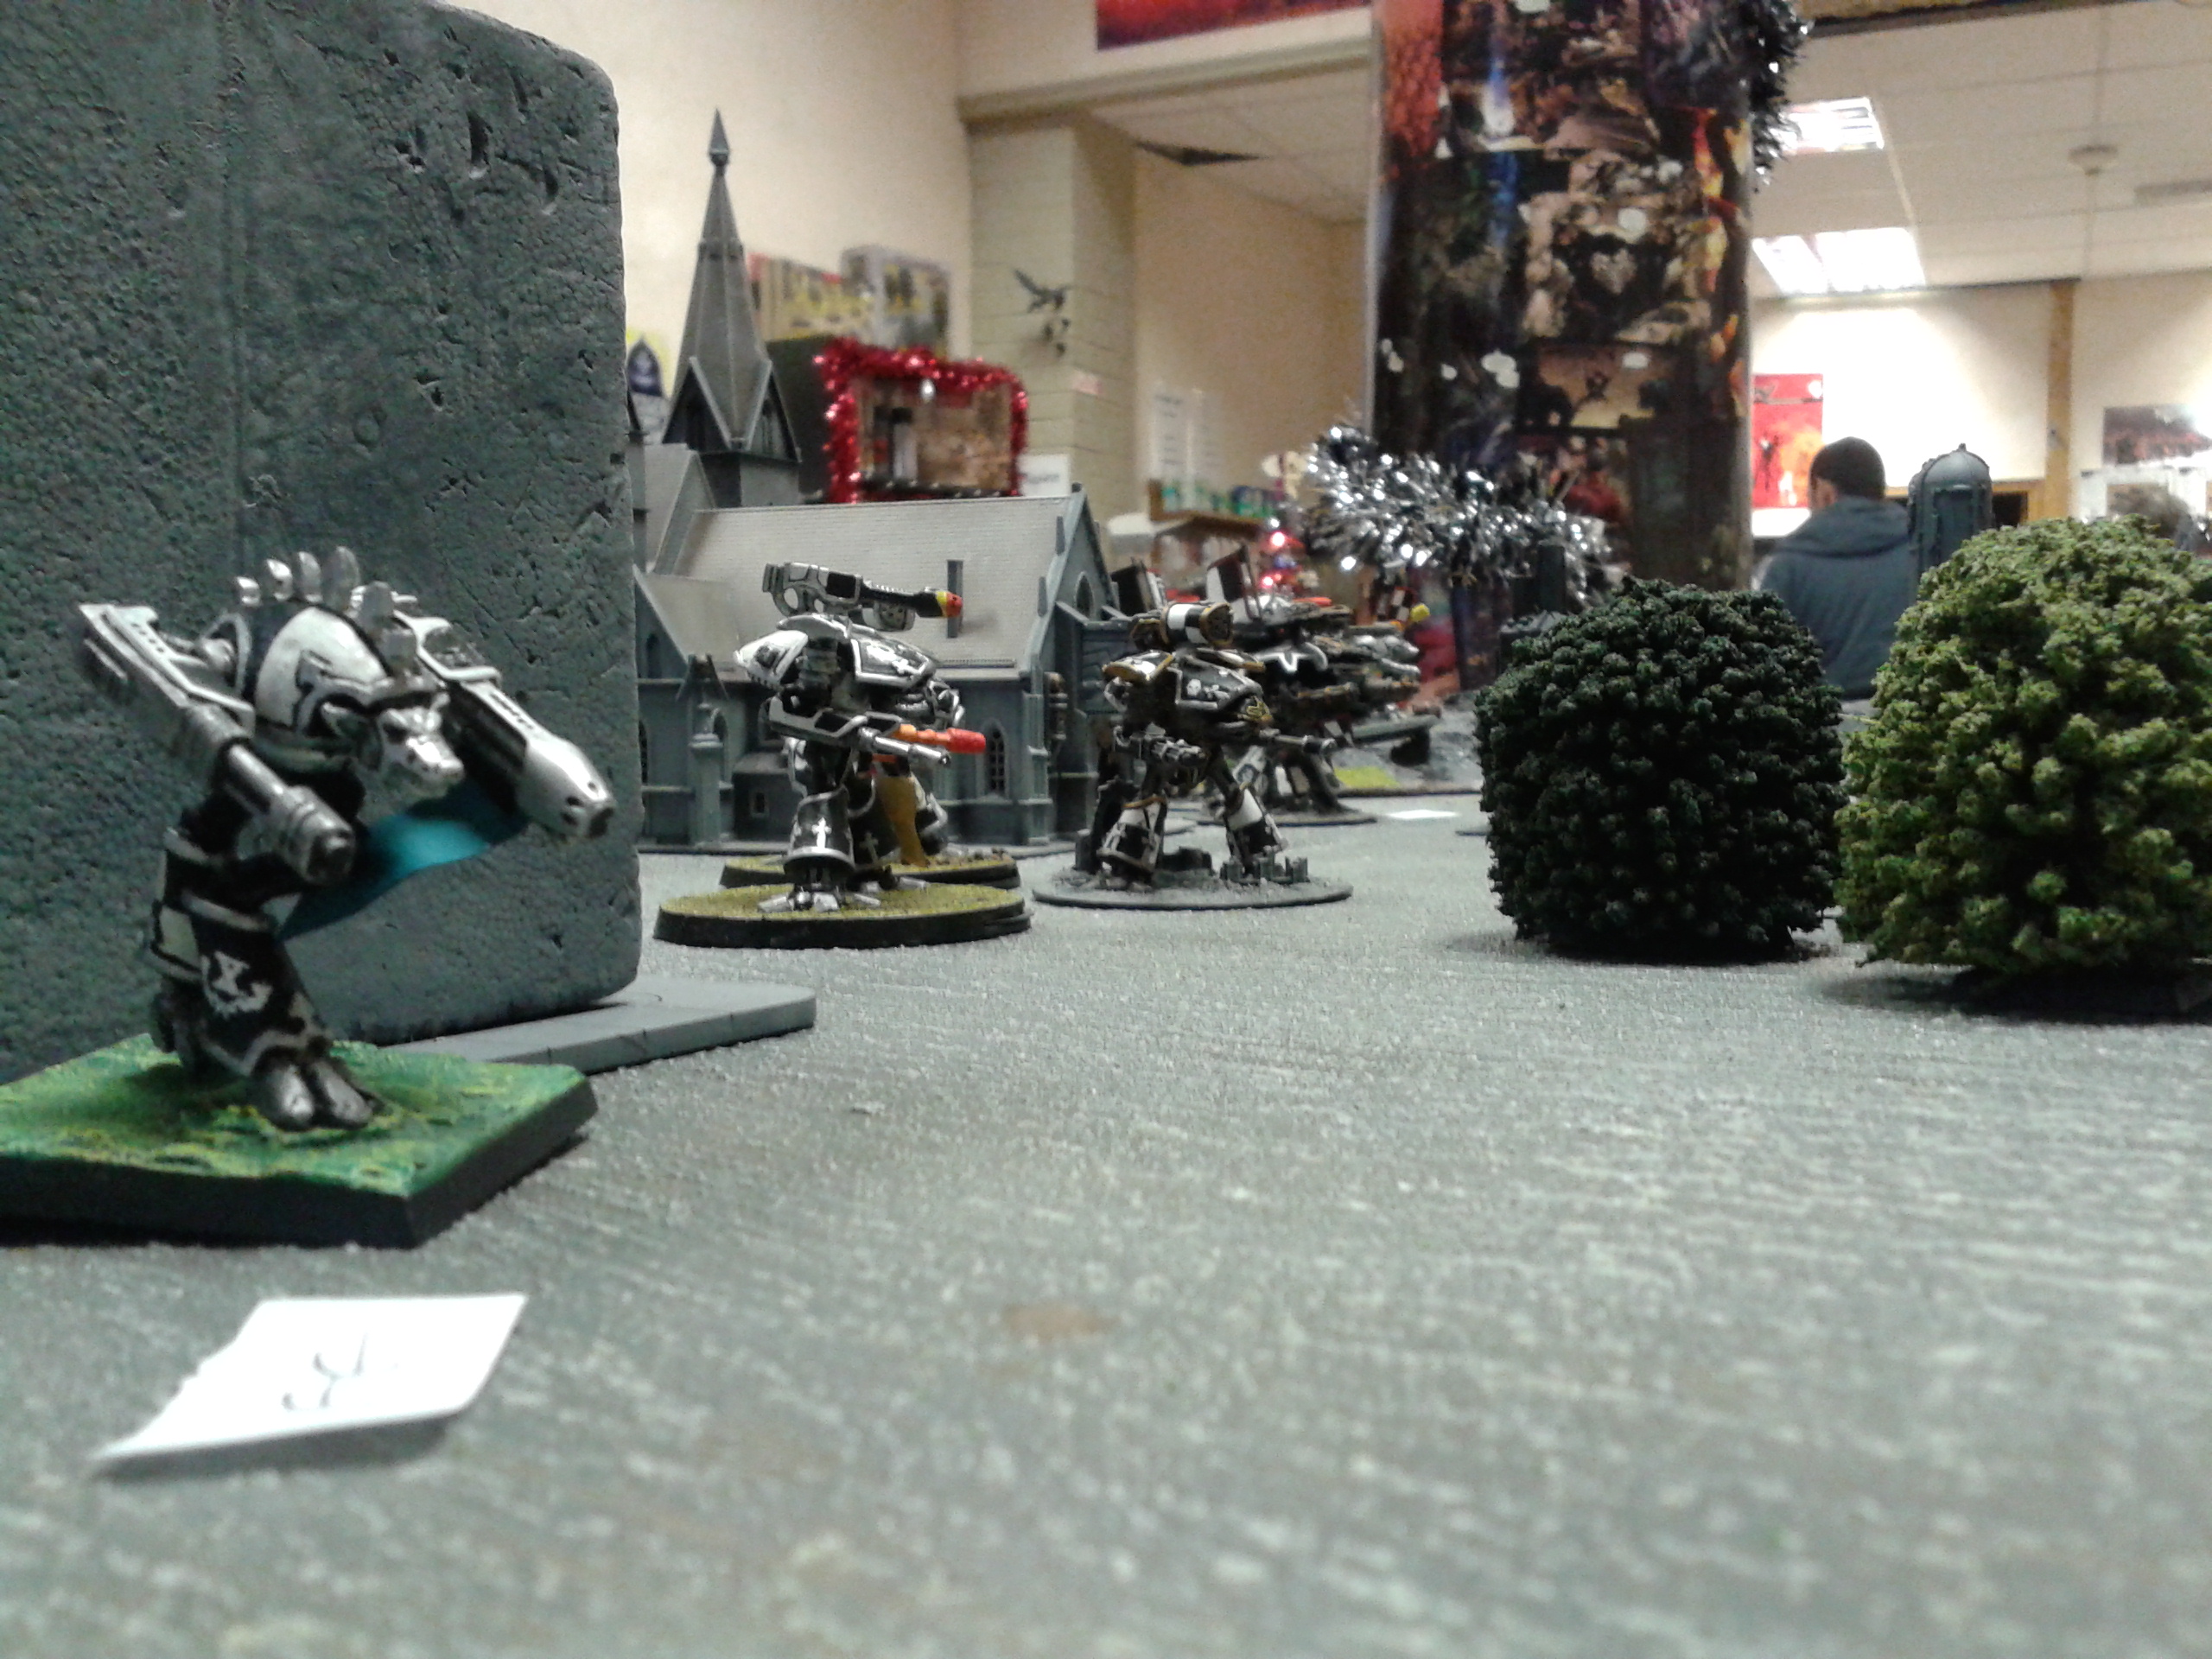
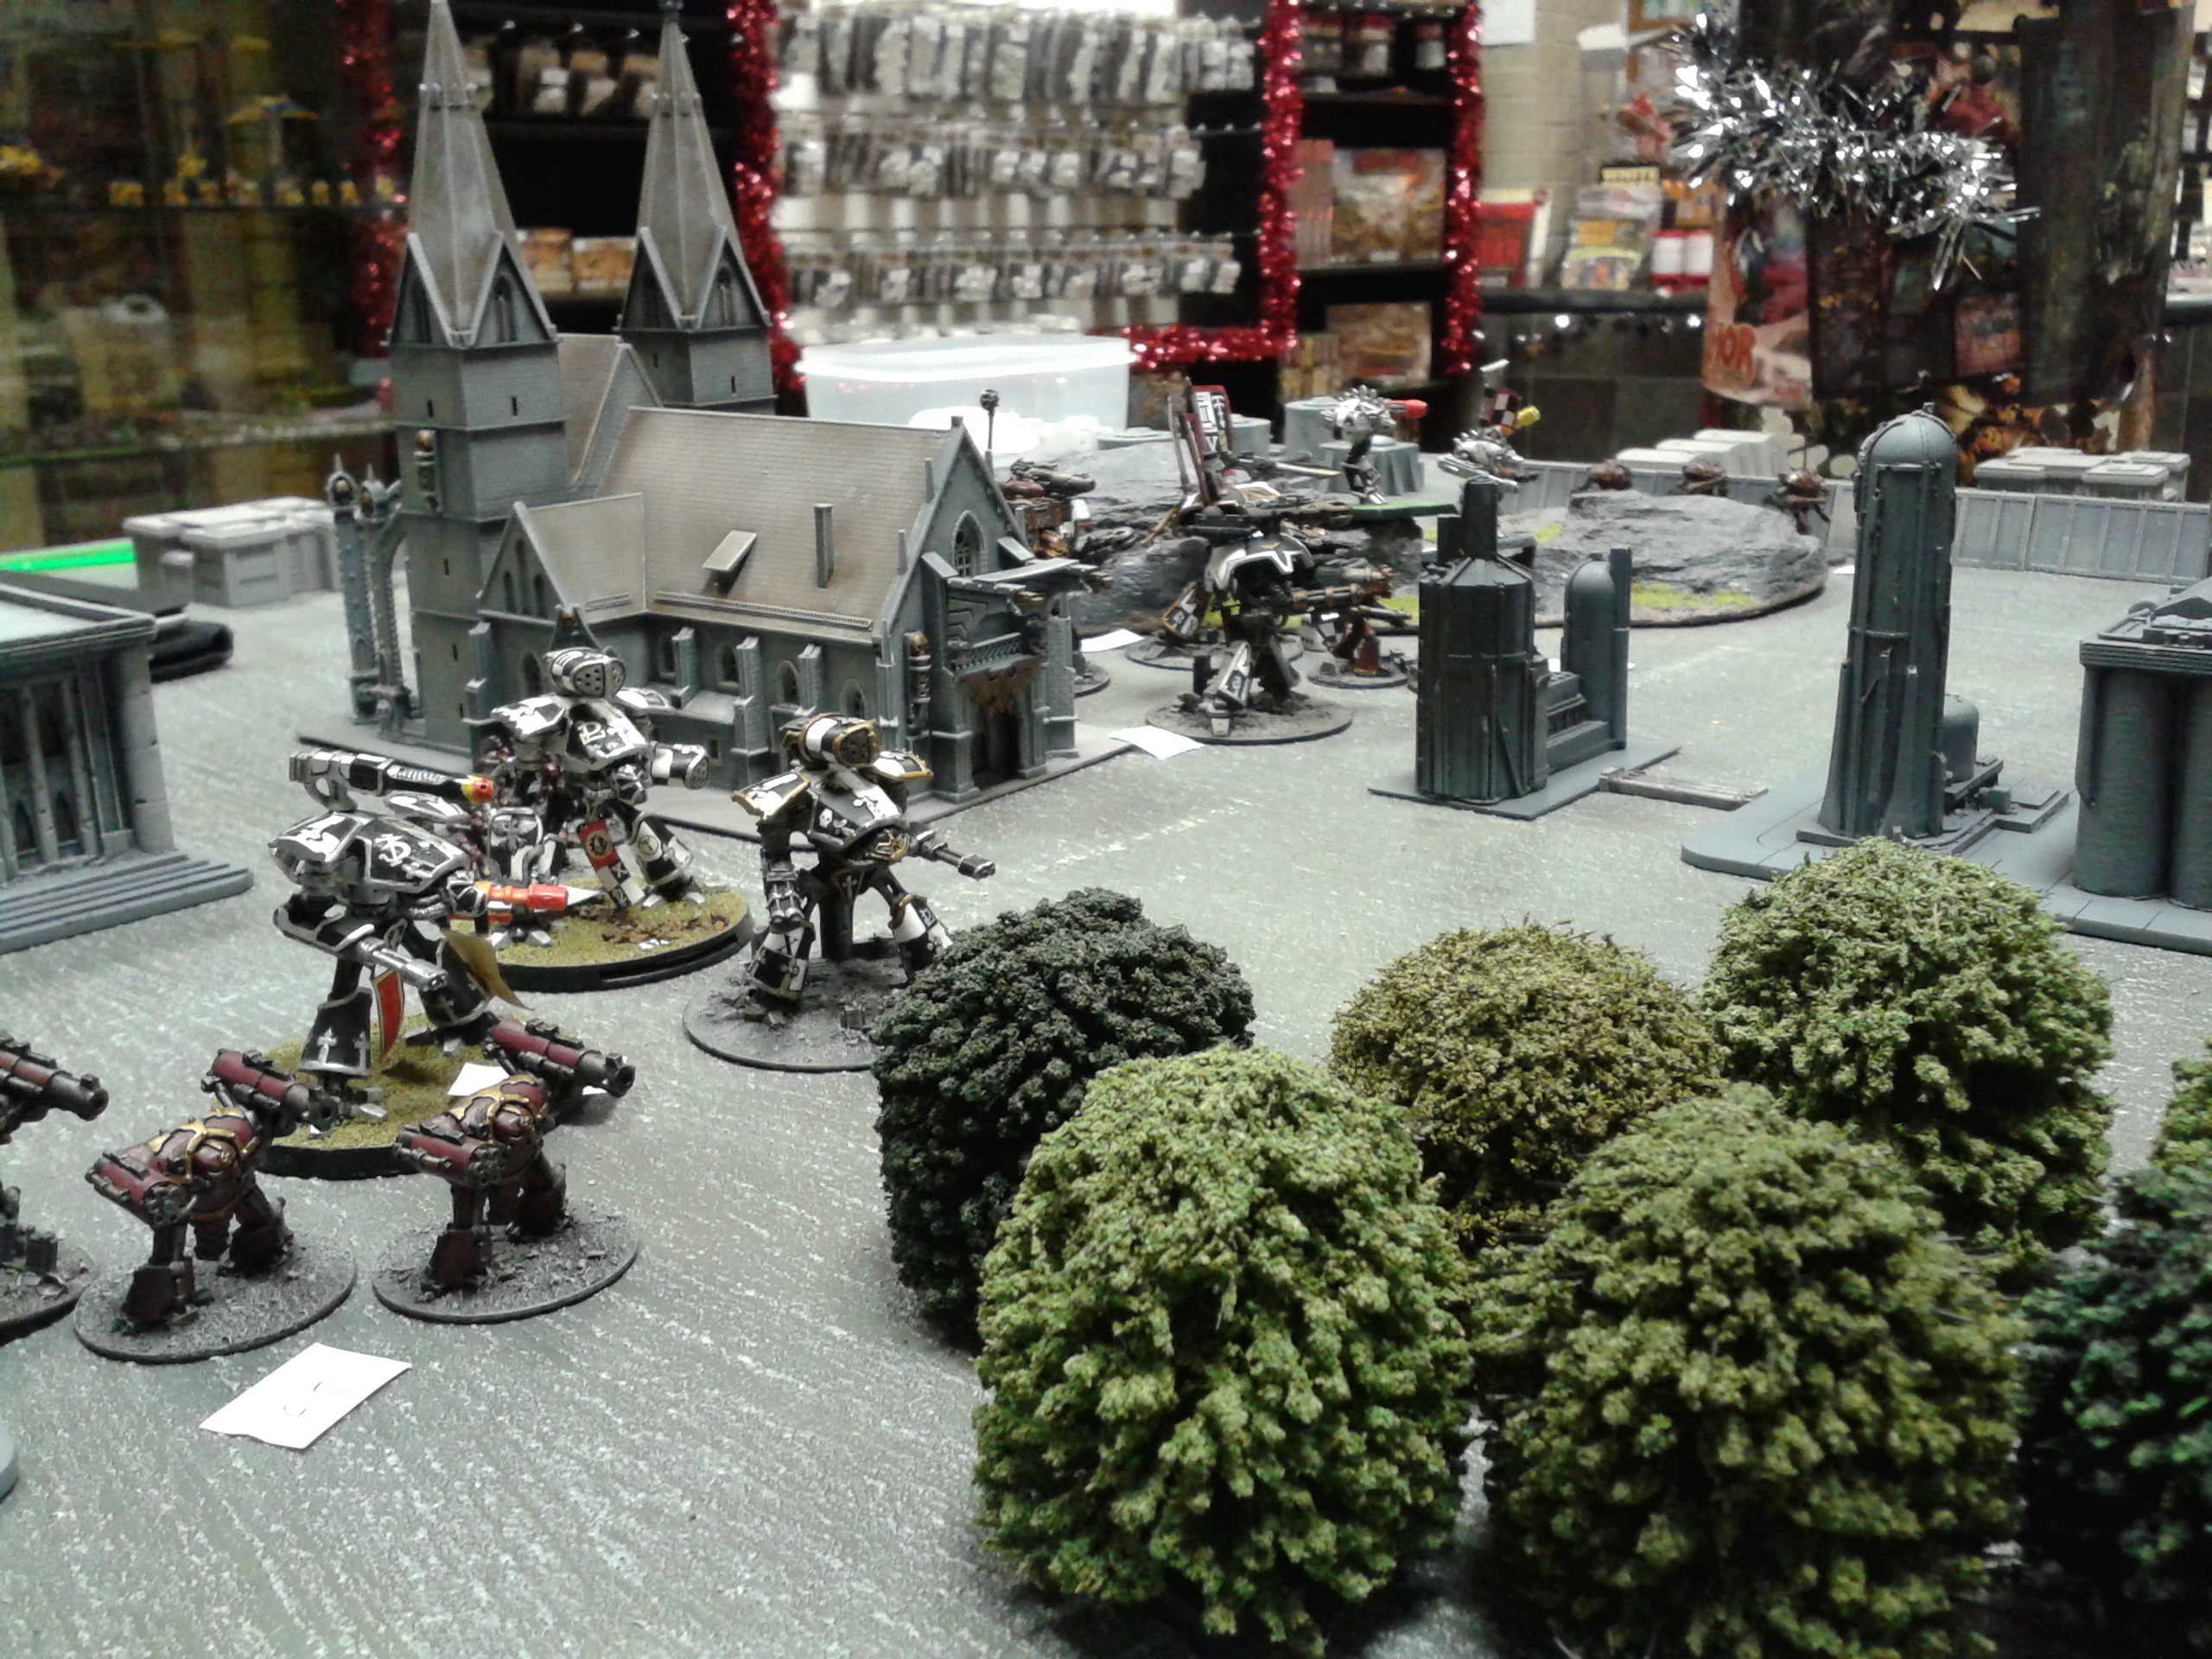
Epic Battle Report: The Author (et al) vs Dan Abnett
Last weekend, No Mans Land had a grand re-opening in its new location in a swanky shopping arcade, and Dan came along to sign books, answer questions from the gathered throng, and throw some dice and push some models around a table.
Dan played two games of Epic - one versus me, and then another (which I GMd) against Darren (also known as The Burning Beard), another store regular, using the NetEpic rules, slightly modified to suit small Adeptus Titanicus games.
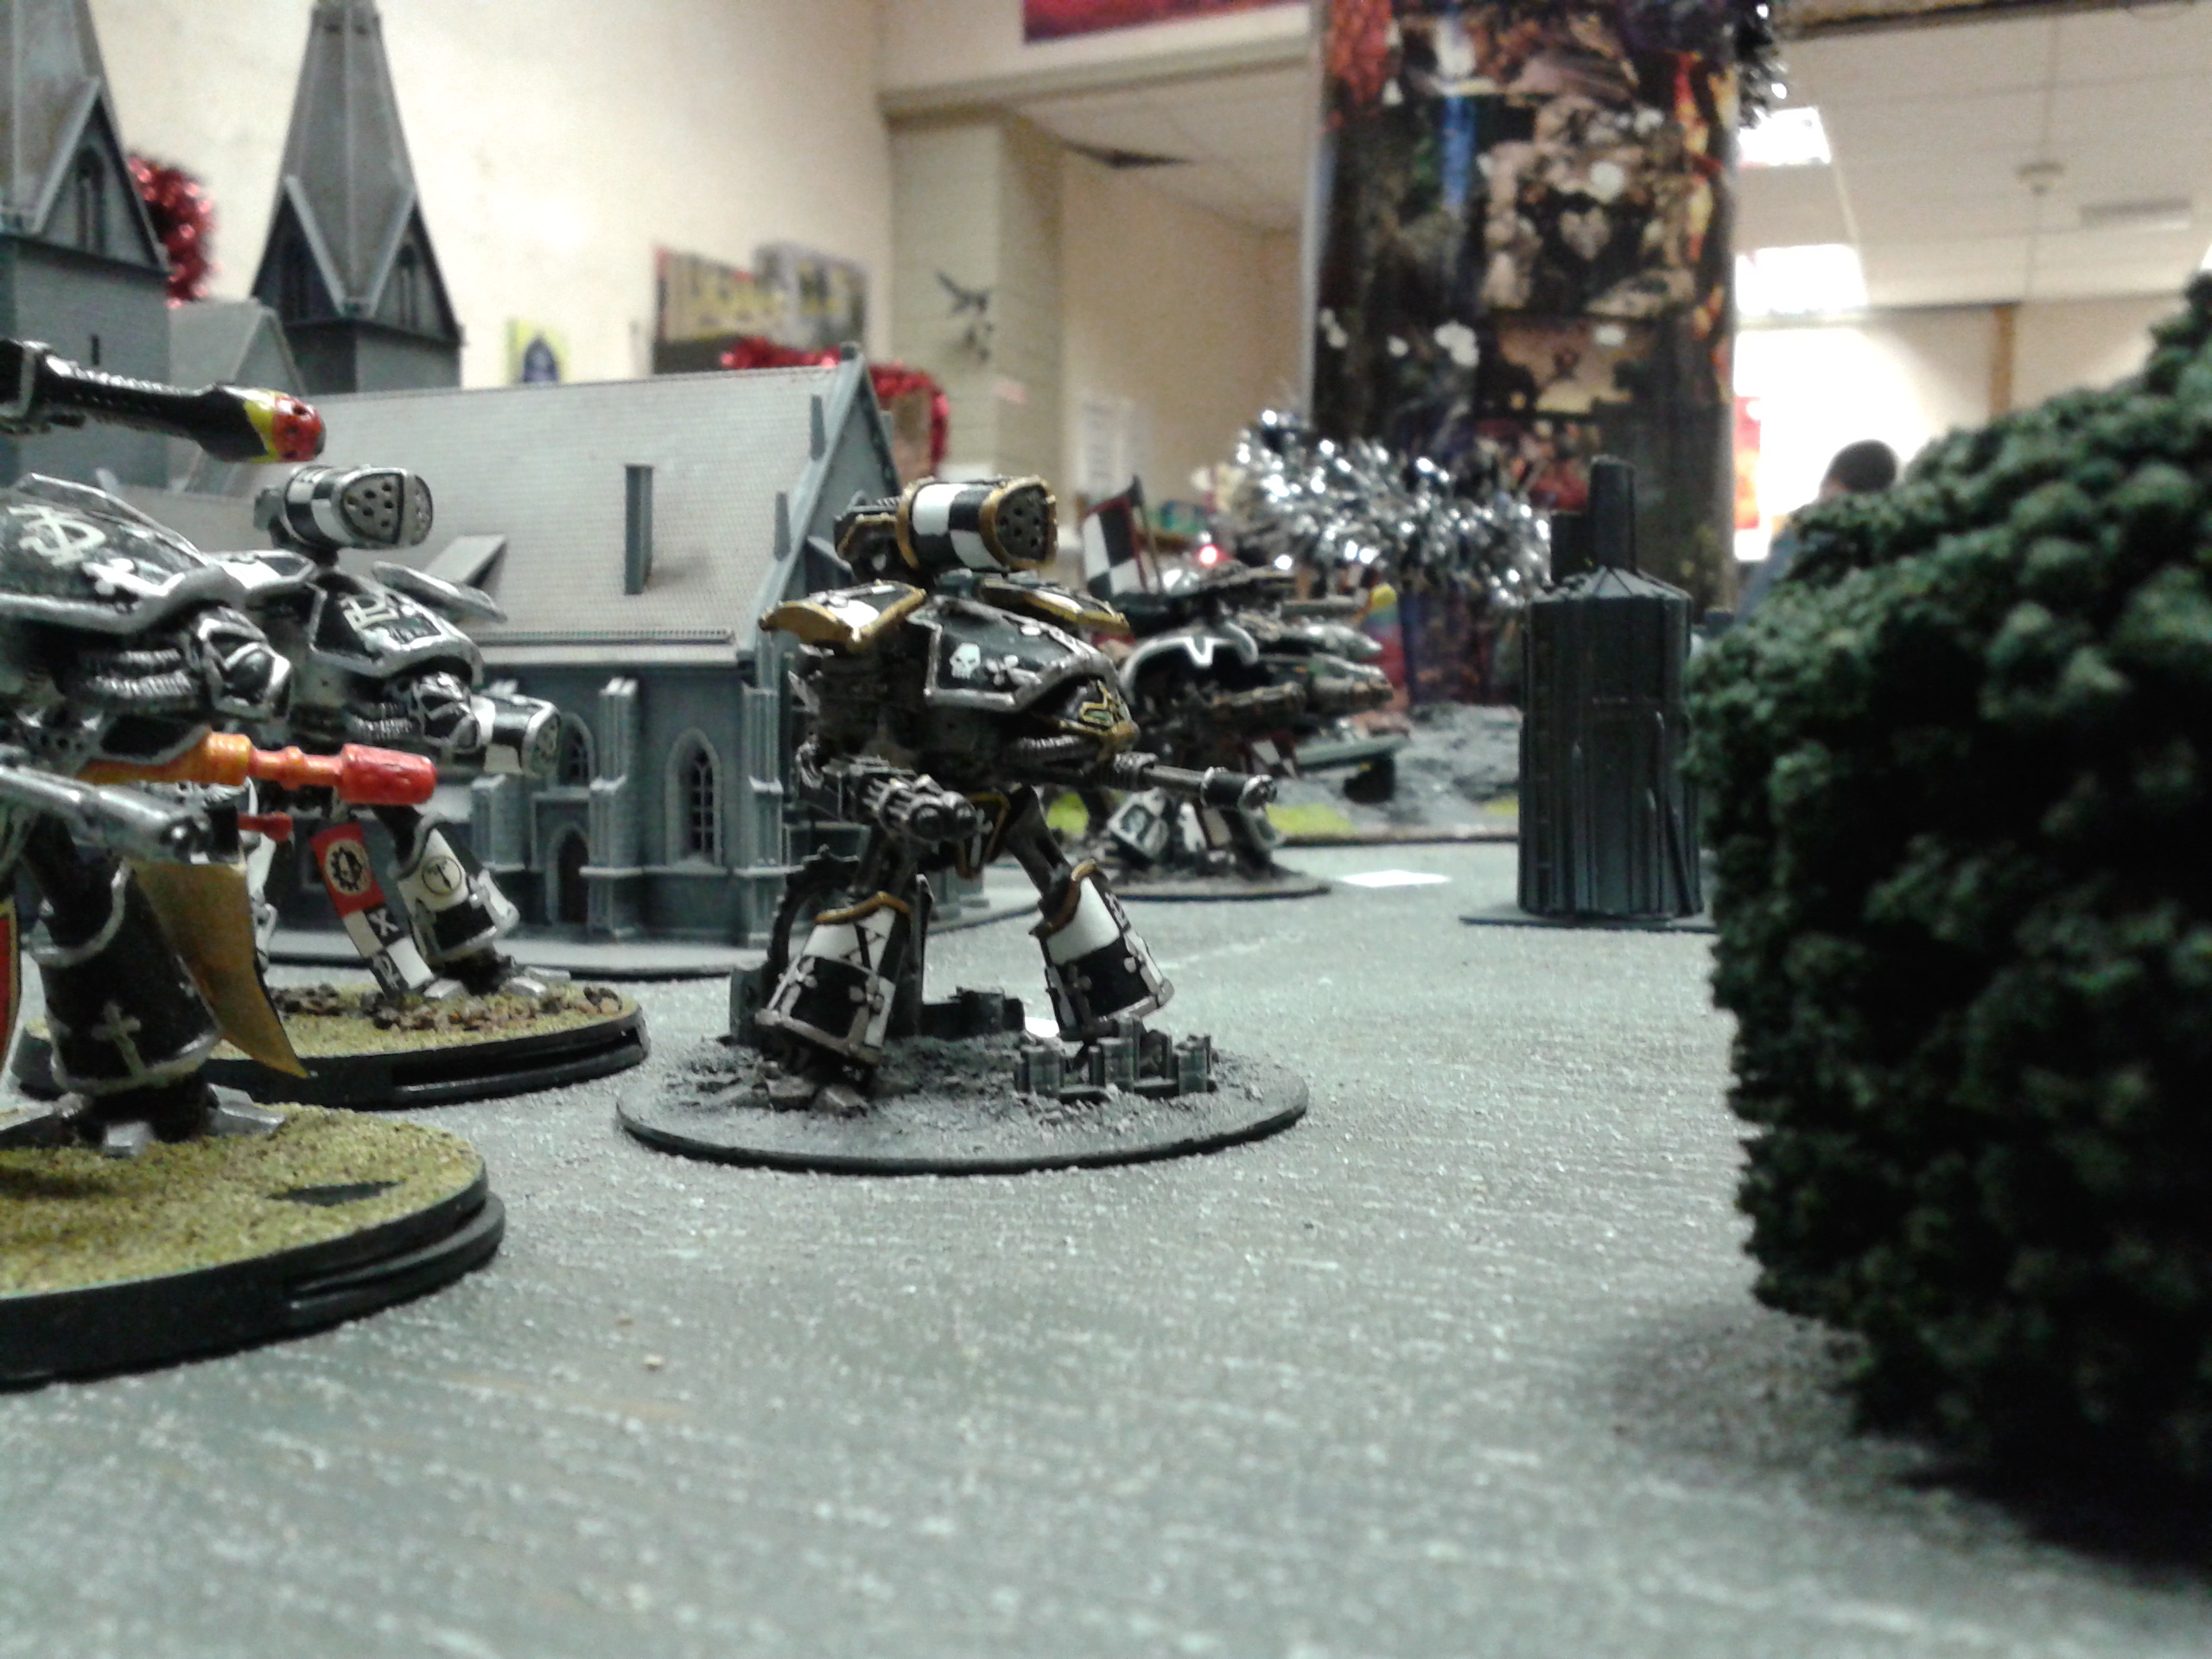
In the first game, we took one Warlord, Reaver and Warhound each and squared up against each other. I was able to knock out his Reaver in the first turn. My Warhound survived a strafe from his Warlord and ended up in close combat with the Dan's Warhound. Meanwhile, our Warlords went toe-to-toe with almost identical loadouts: my titan had twin Gatling Blasters, A Quake Cannon and a Volcano Cannon, Dan's had twin Gatling Blasters and twin Volcano Cannon. Dan's only mistake was moving his titan when could have stood still; that meant that I could open up on him in First Fire before he could hit me (he'd won initiative). My Gatlings and Quake Cannon stripped his remaining shields, and the Volcano Cannon dealt the final blow.
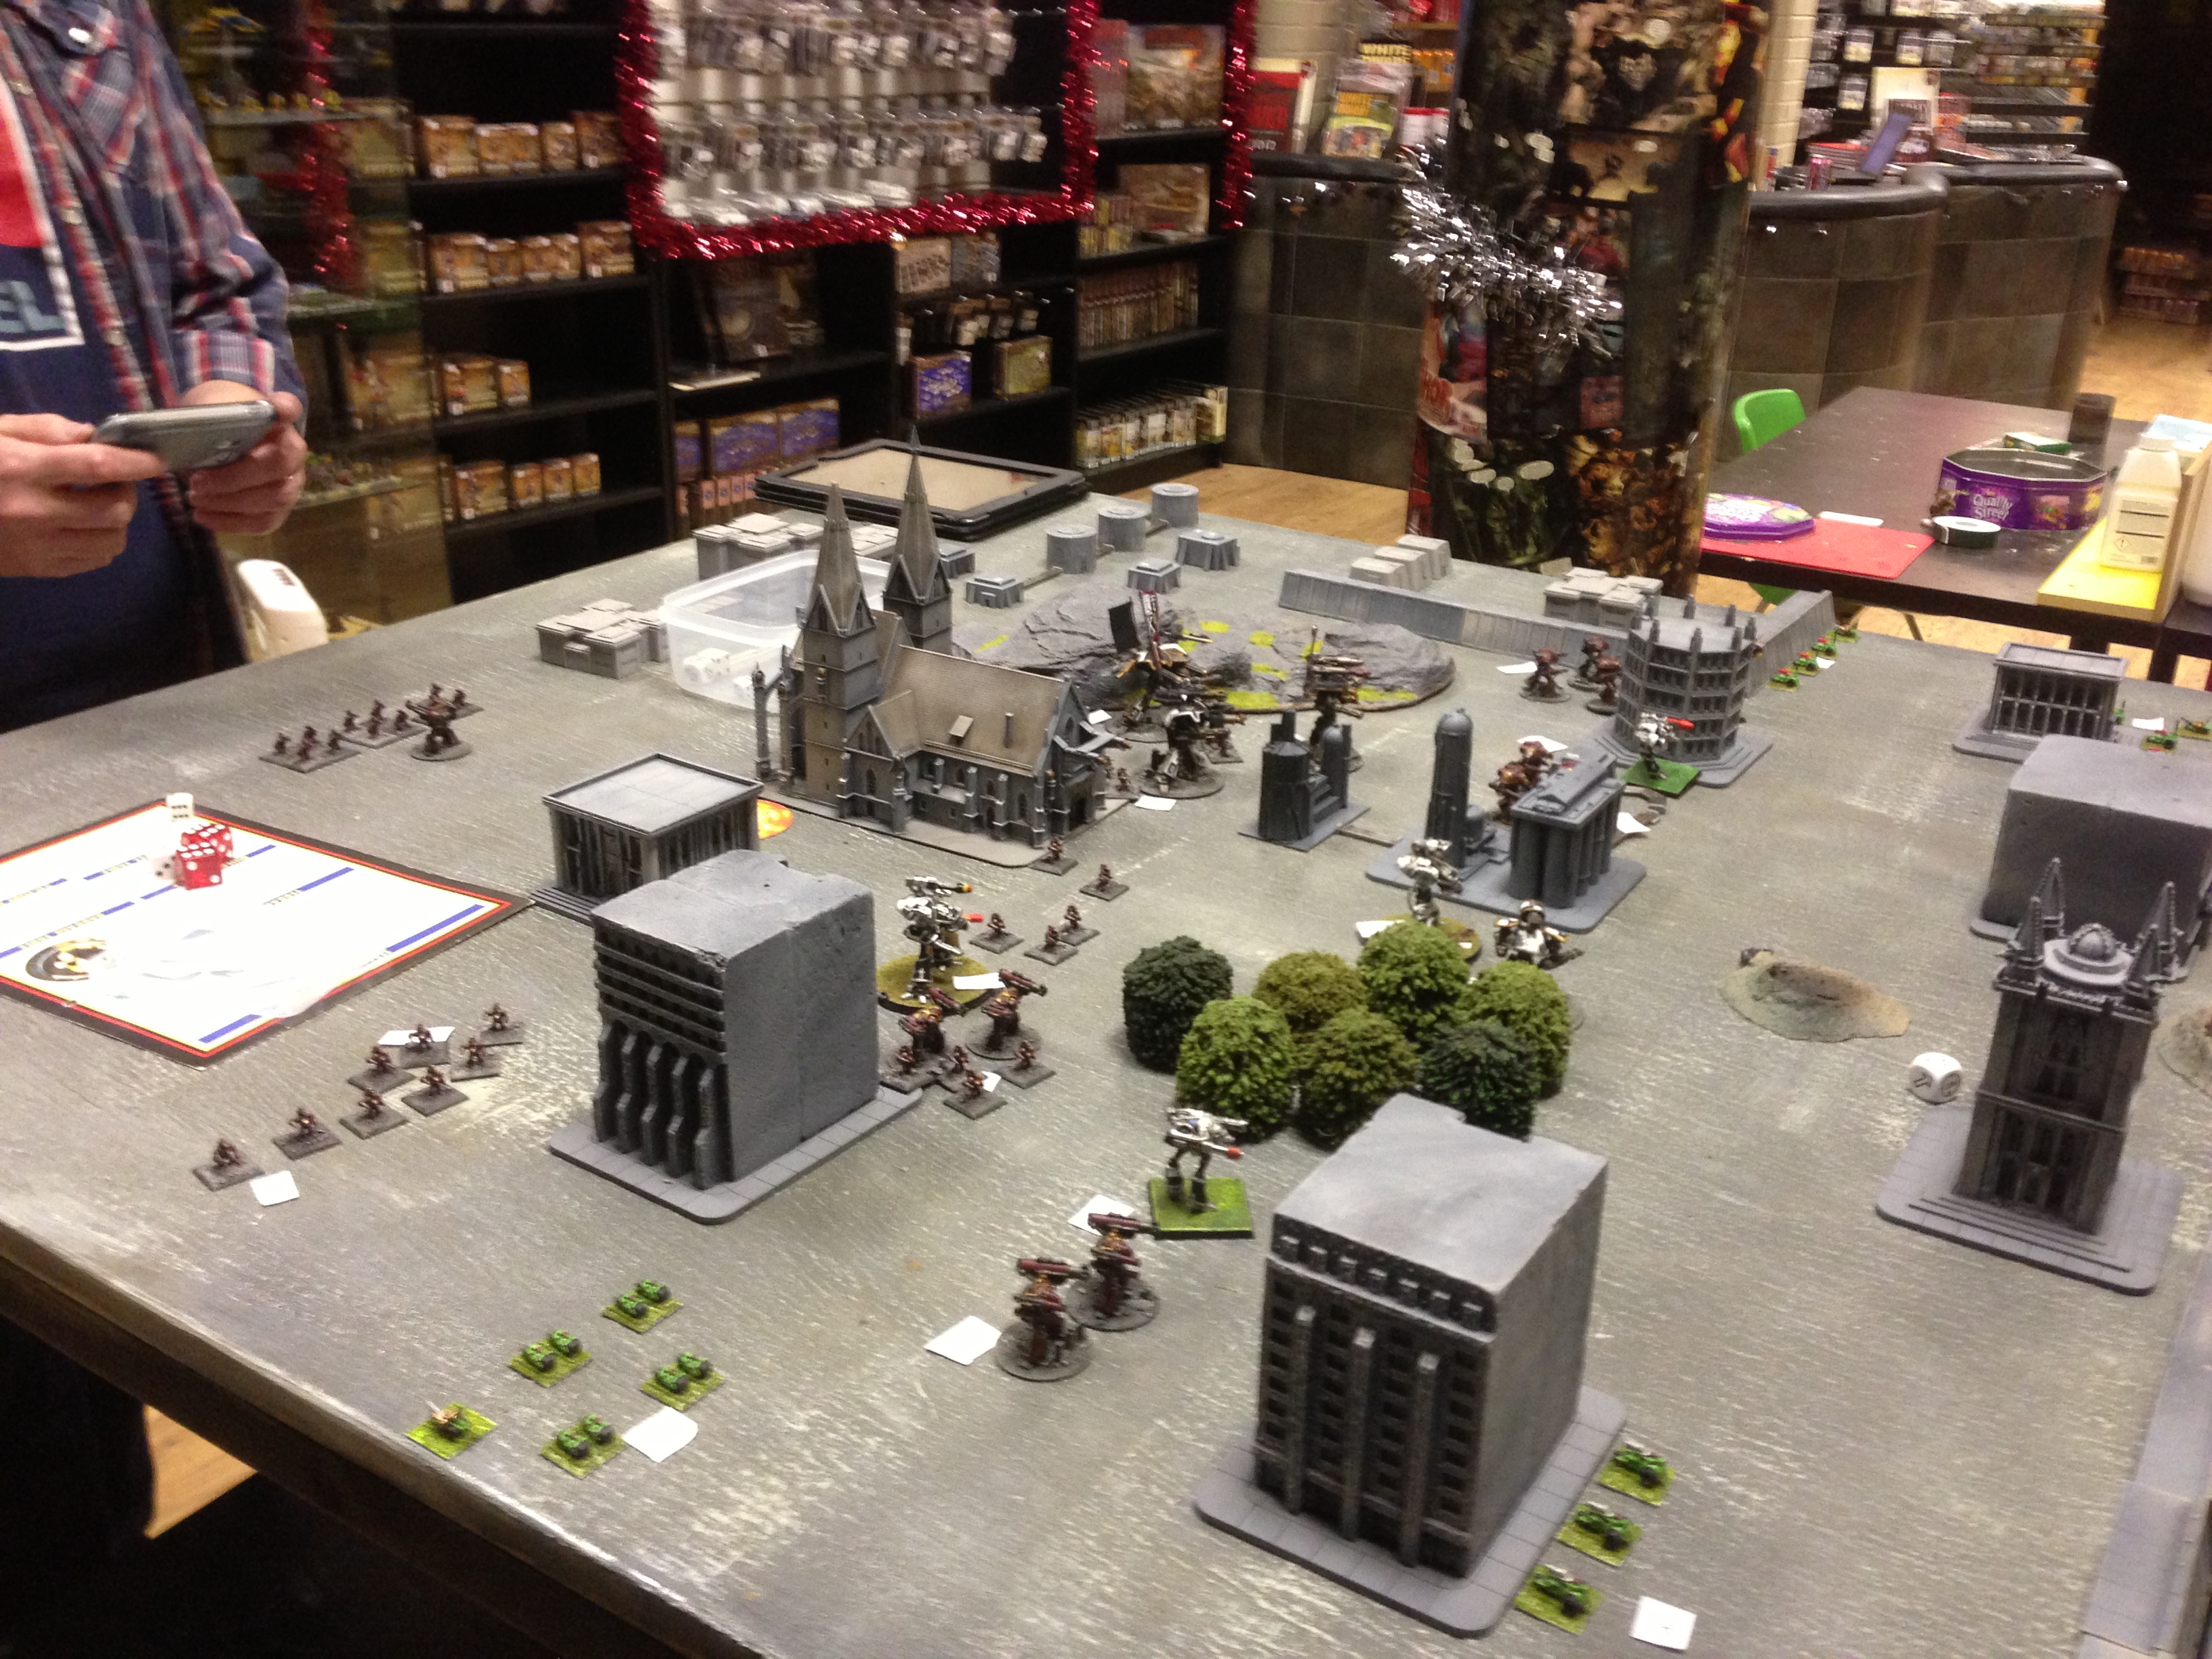
For his second game, Dan wanted to do something a bit different, and decided that he wanted to take out my Imperator, Machinator Formidabilis ("Fearsome Engine" in Low Gothic), against a pack of four Warlords, commanded by Darren.
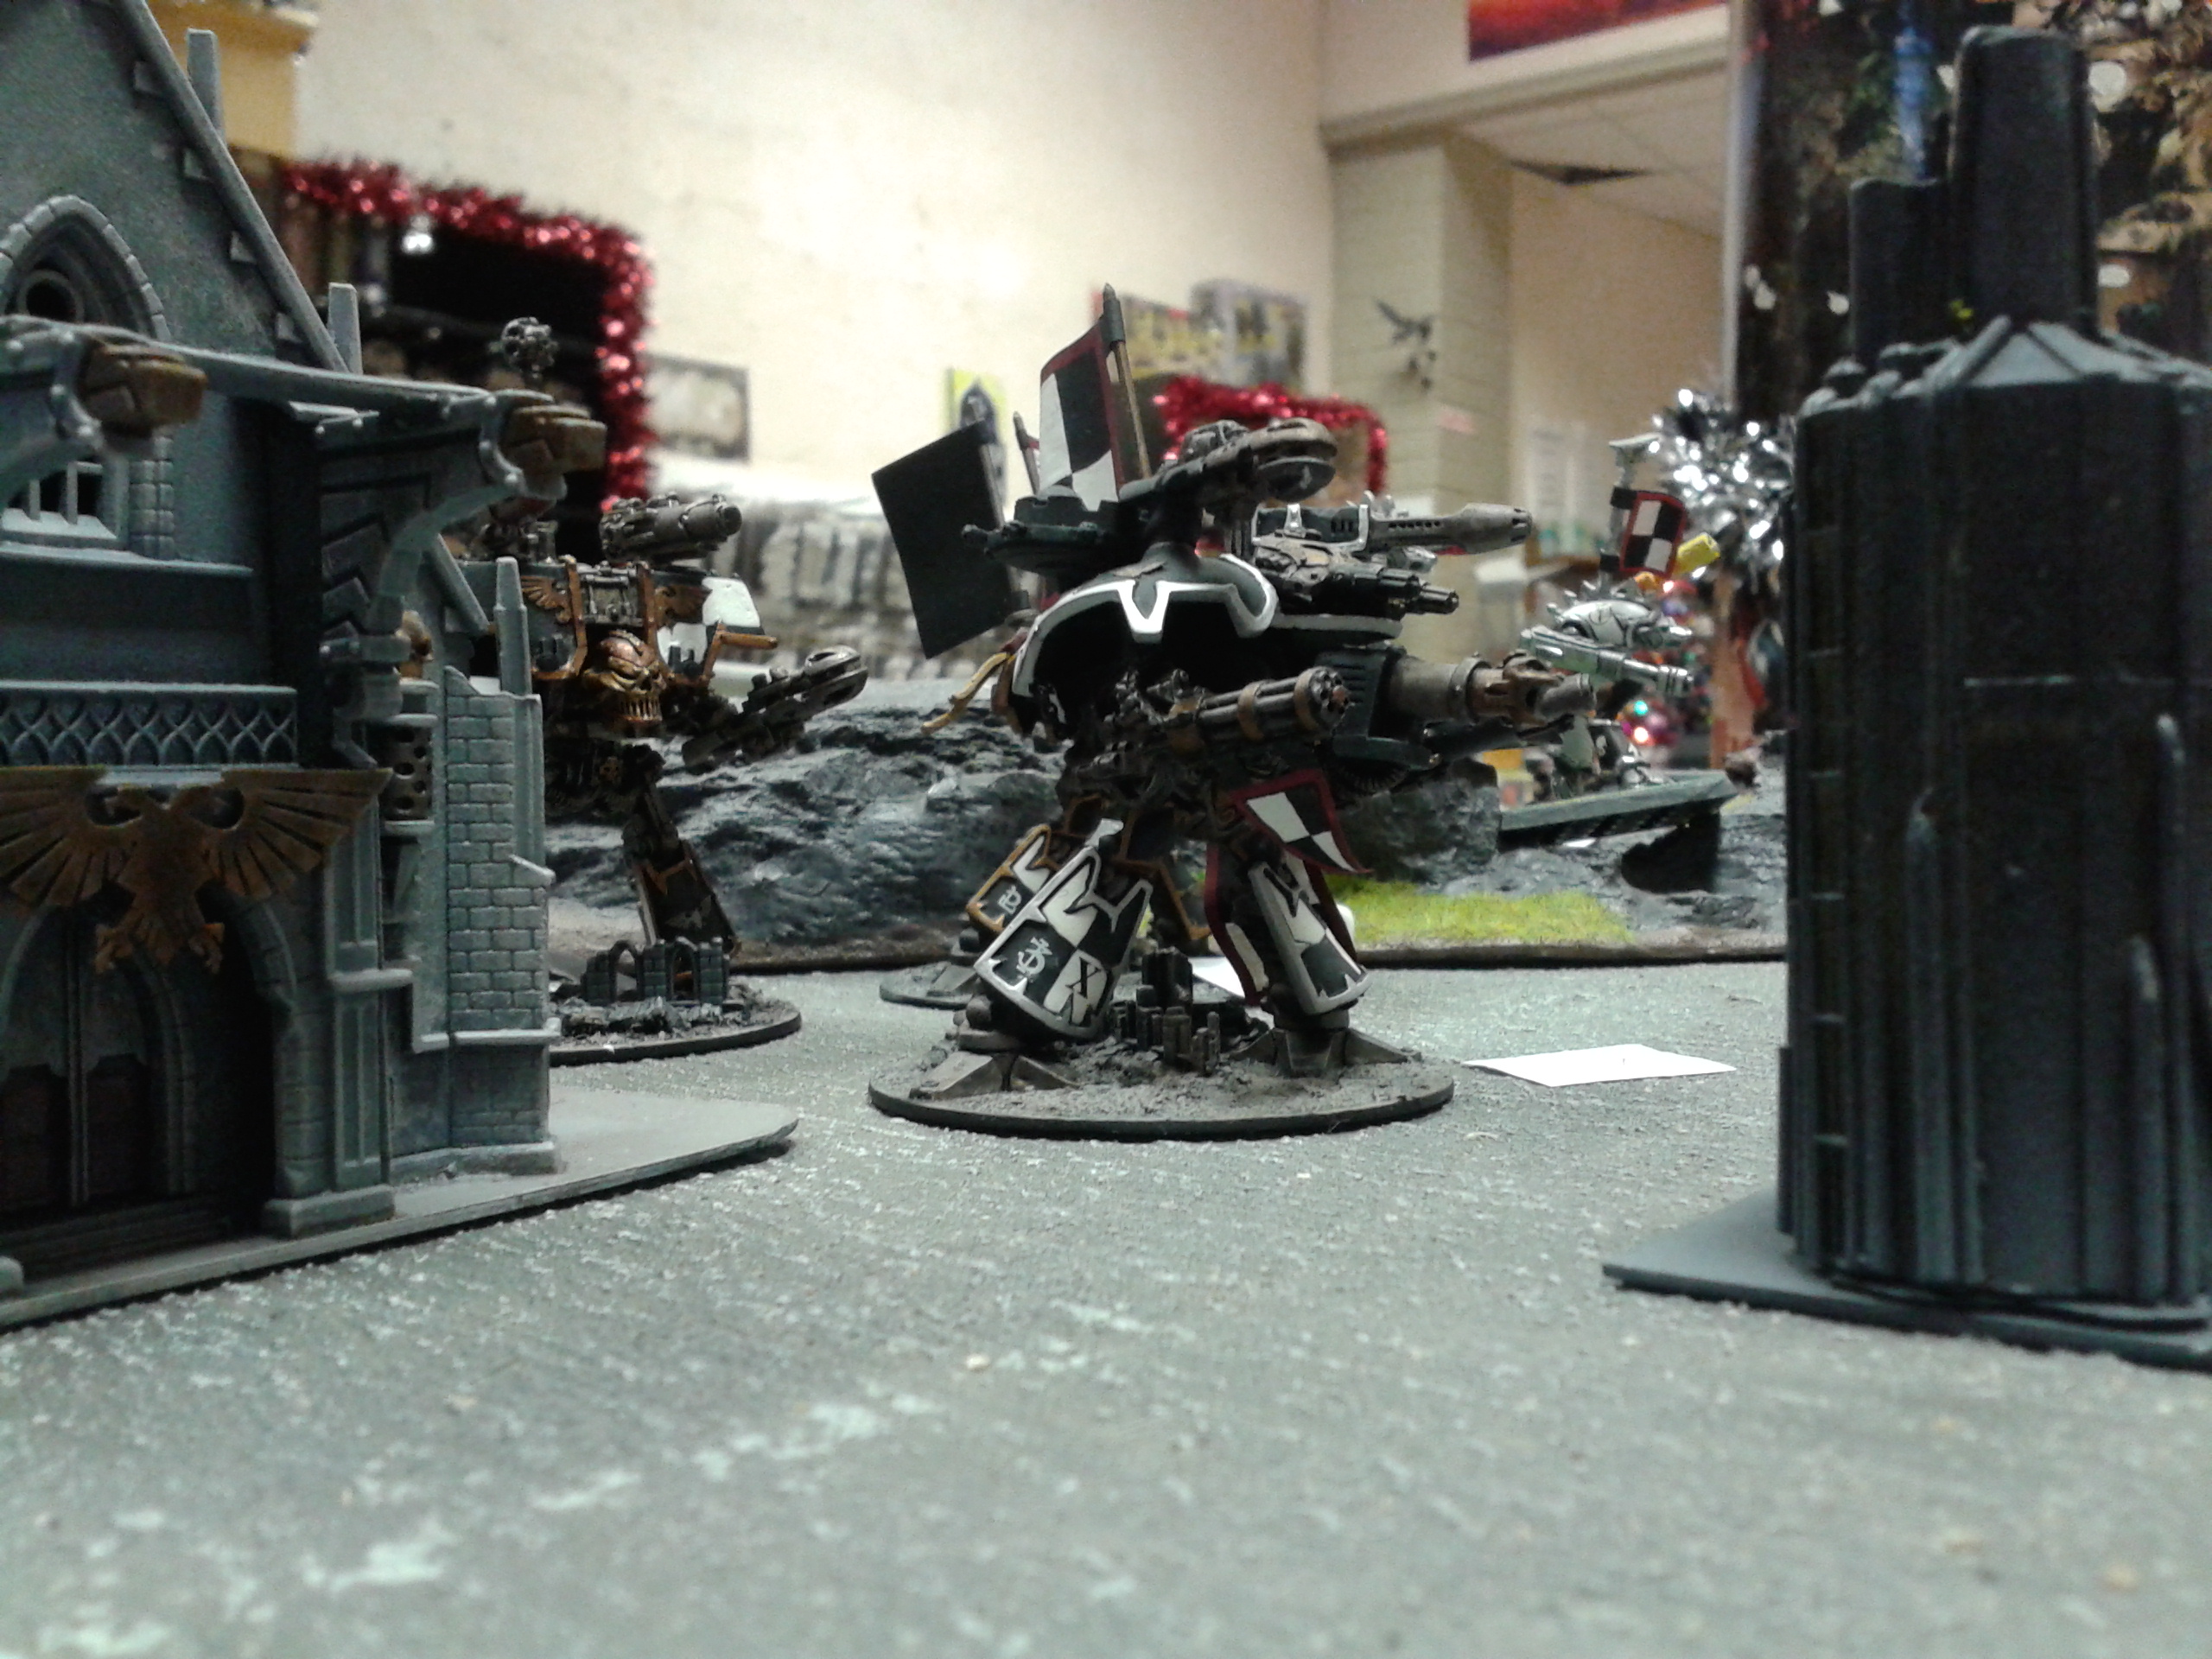
The game began, and the Imperator stood and watched (and saved up plasma in its reactor) as the Warlords approached.
But calamity! In a well co-ordinated (and unexpected) surprise attack, all four Warlords pounced at once, stripping the Imperator's shields and starting to do damage! First a gun tower was knocked out, then a sensorium. Just when it seemed that the Machinator was going to survive the turn without any serious damage, a deflected shot took out the coupling on the left arm, and the mighty Plasma Annihilator came crashing to the ground!
With Machinator's most deadly weapon wrecked, and surrounded on all sides, there was little that Dan could do as the Warlords moved in for the kill. One of the Warlords was reduced to slag by the defence laser, but in the same turn, a shot from the rear penetrated the plasma reactor, and KABOOM! For the first time in twenty years of combat, my beloved Machinator Formidabilis was destroyed in a mighty conflagration.
Despite the ignominious defeat of an ancient and noble God-engine, great fun was had by all, and No Mans Land had a fitting and enjoyable (if rather chilly) re-opening.
On Warlord Titans, and Hyperbole
 Here's the last #Epic Beetleback Warlord Titan that I will ever paint (I hope)
I immediately regretted the above sentence, because I know that it isn't true: I am pretty sure that at some point in the future, I will repaint all the old Beetlebacks in my Titan Legion, using a different colour scheme so that I have two opposing forces to play against each other.
Even though this is the last Beetleback Warlord to emerge from my bits box, there's still the milk float Mk II warlord to paint, and a pair of Reavers. So don't expect the photos of stompy castle robots to dry up any time soon!
Improving a Melta Cannon
The Melta Cannon is fairly plain, but the version created for the Forge World Reaver Titan looks rather cool, so I thought I'd have a go at improving the stock version.

Apart from the arm, which I made from plastic rods of various sizes, there are three new additions. First is the piping on the back - this is from the arm of a 40K scale Necron Destroyer (the arm is discarded when you upgrade to a Heavy Destroyer). Second, I've added the muzzles from a Necron Immortal's Gauss Blaster to the front of the gun.
Finally, the underslung piping and housing is from the powerfist of a Space Marine Terminator.
Here's the Melta Cannon, attached to the main body of the Titan:

Here cometh the Milk Float!
I also raided my bits box, giving it a close combat head and a pair of Exodus Wars Edenite Reaper turrets as Vulcan Mega Bolters on the carapace. I'm still not sure what I'll be mounting on the right arm.
The new pose means that the feet are no longer flat on the base, so I built up a pile of rubble using pieces of cork to create a stable platform for the front foot. The rear foot is pinned to the base.
Click to embiggen.

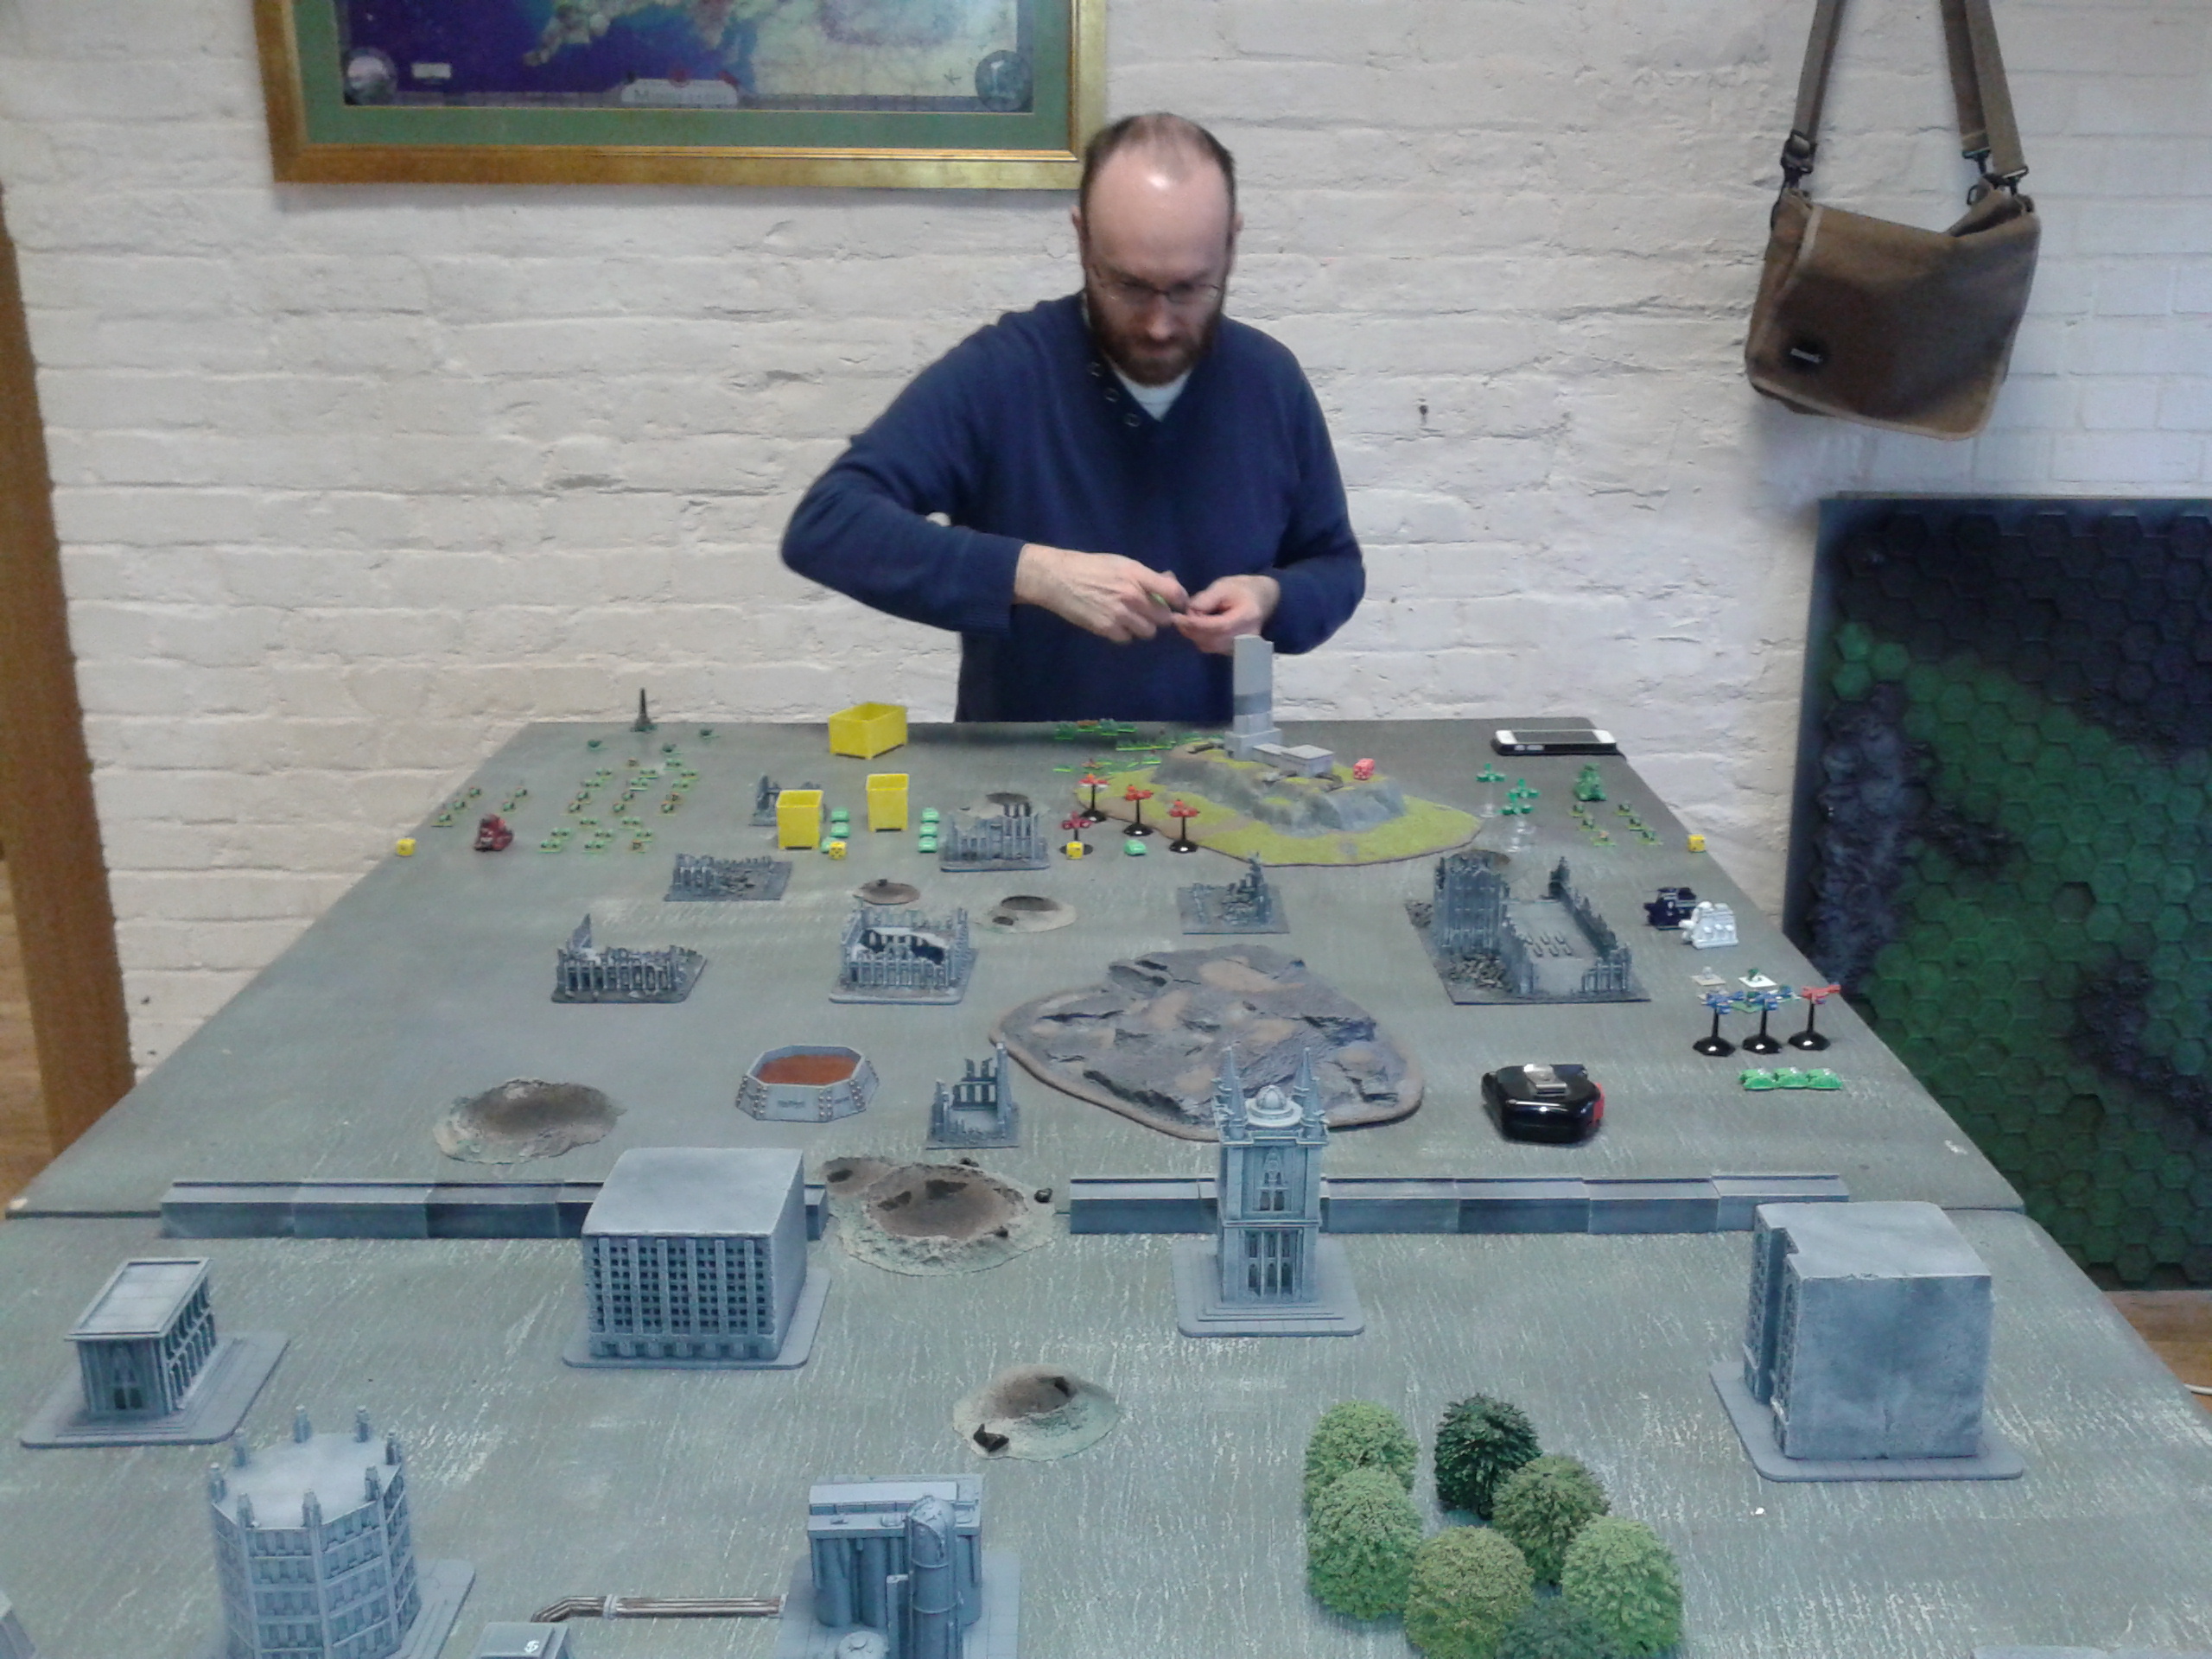
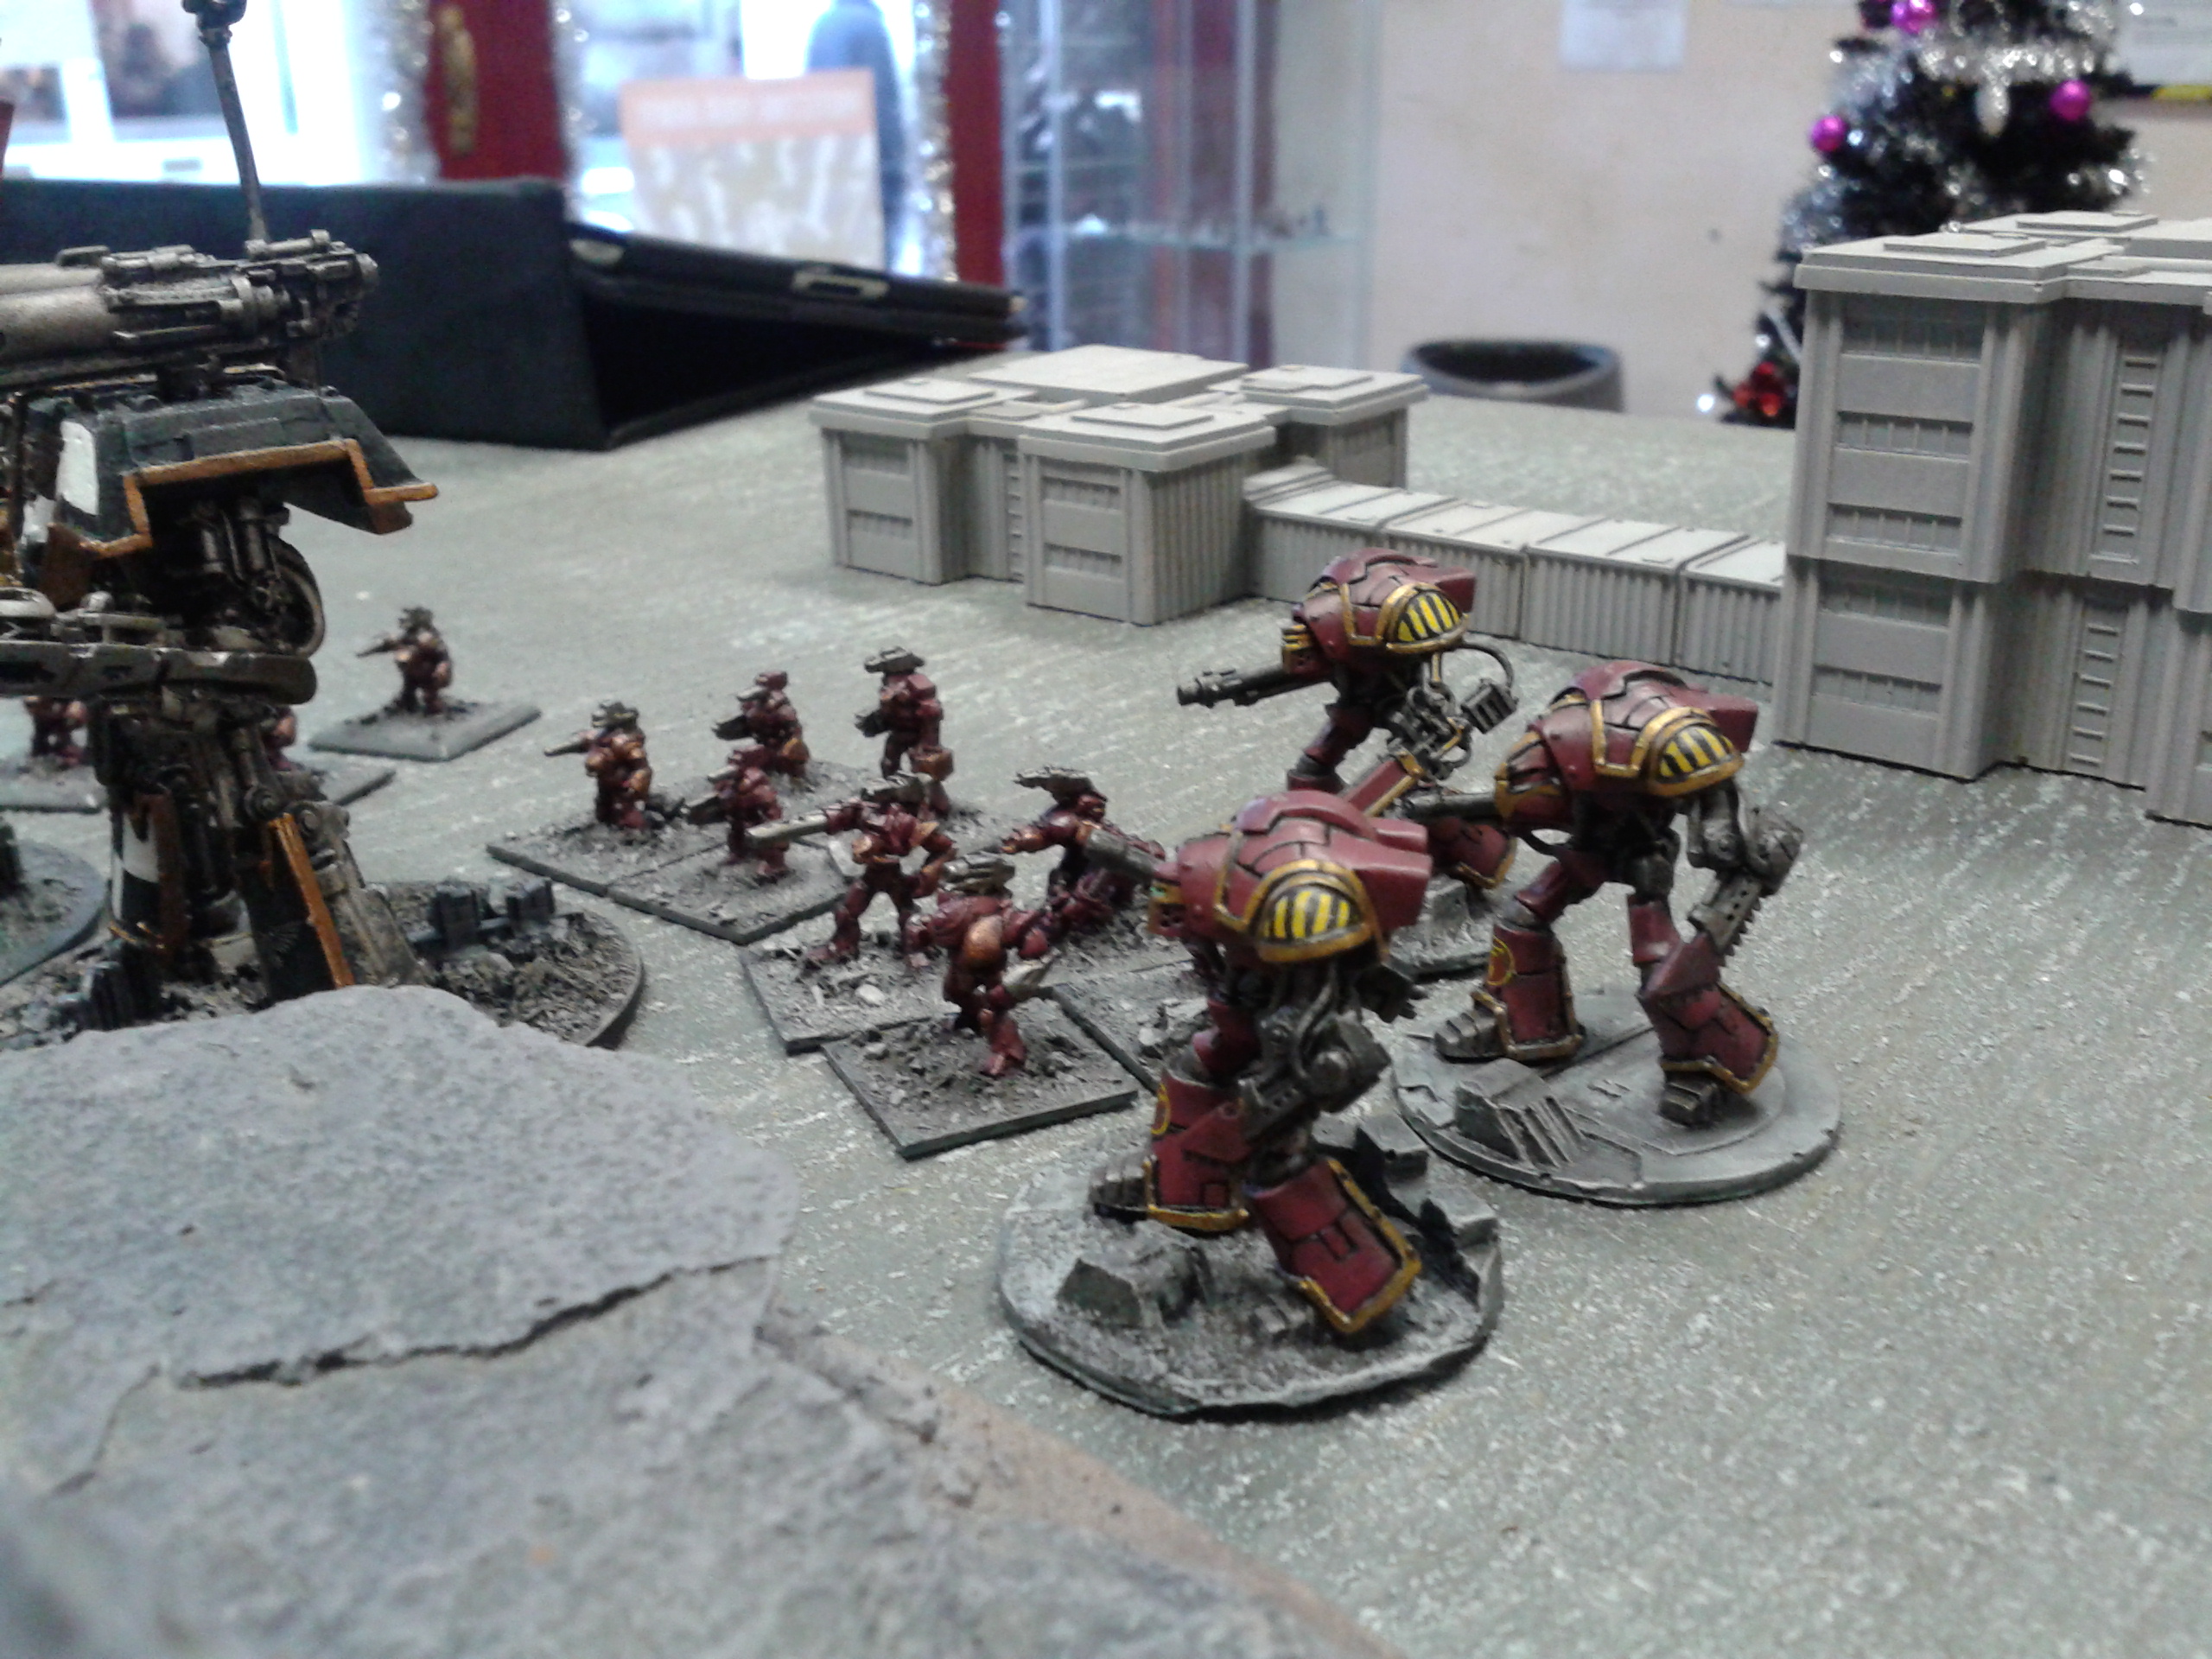
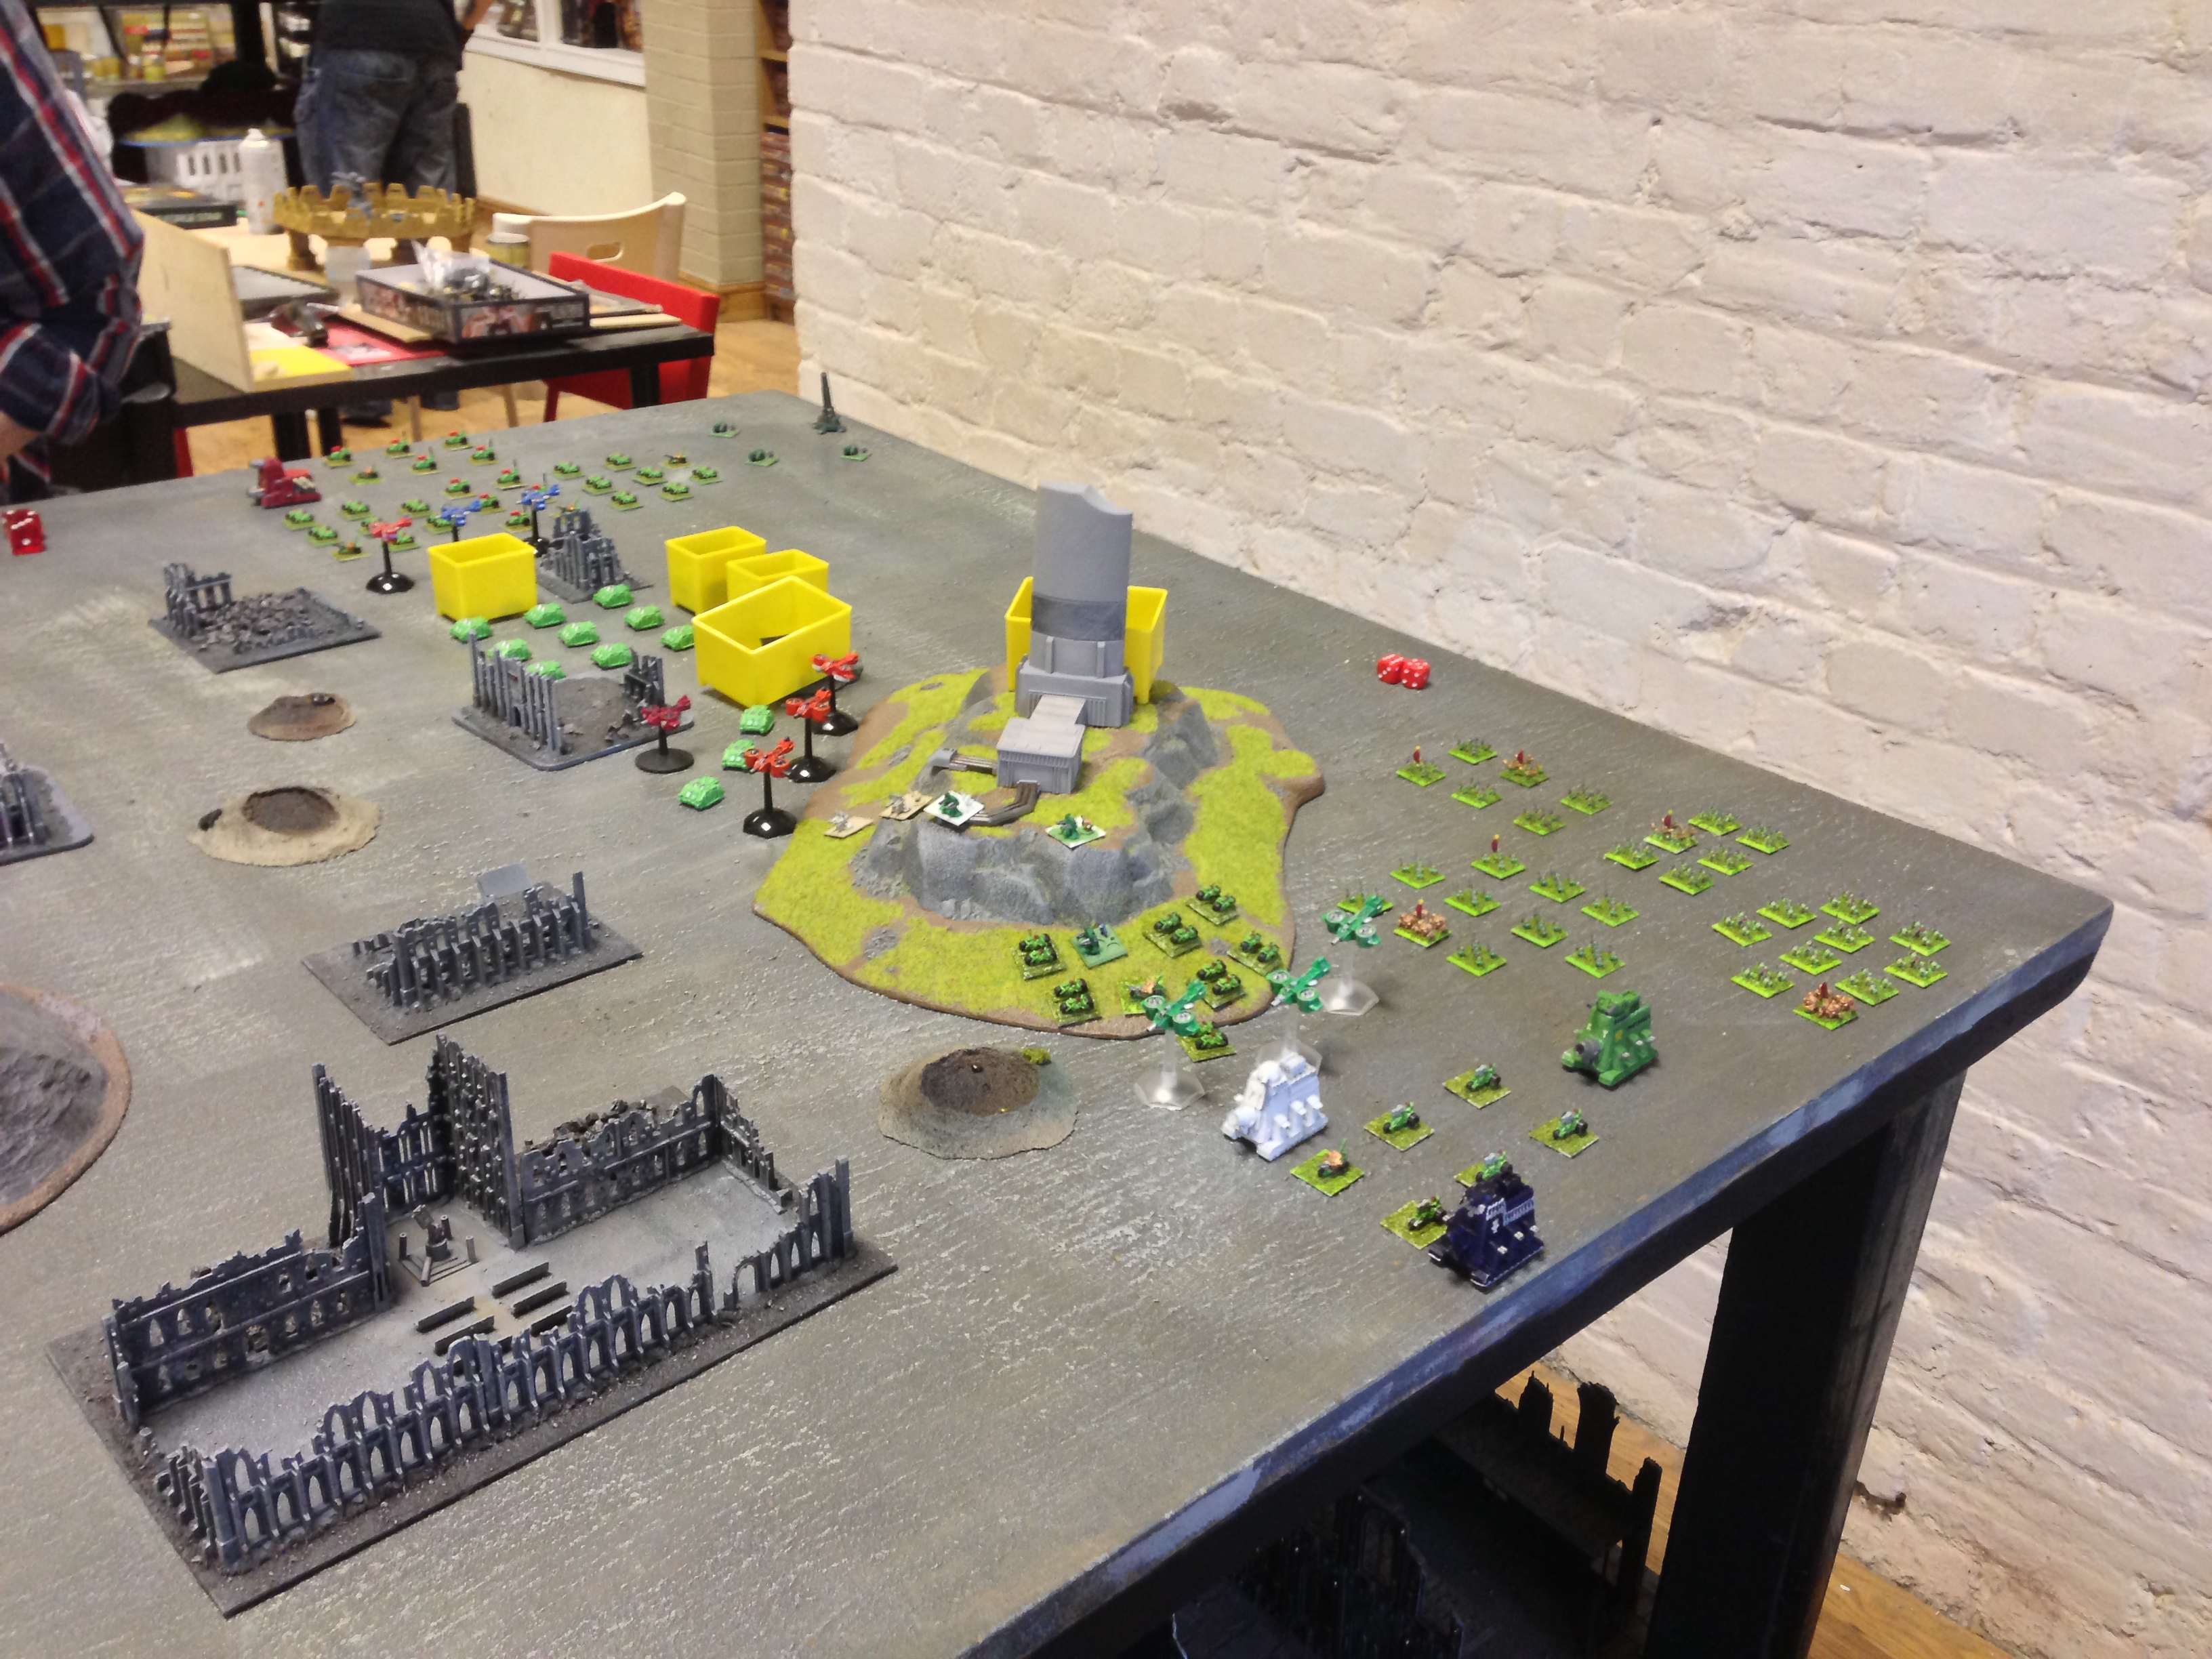
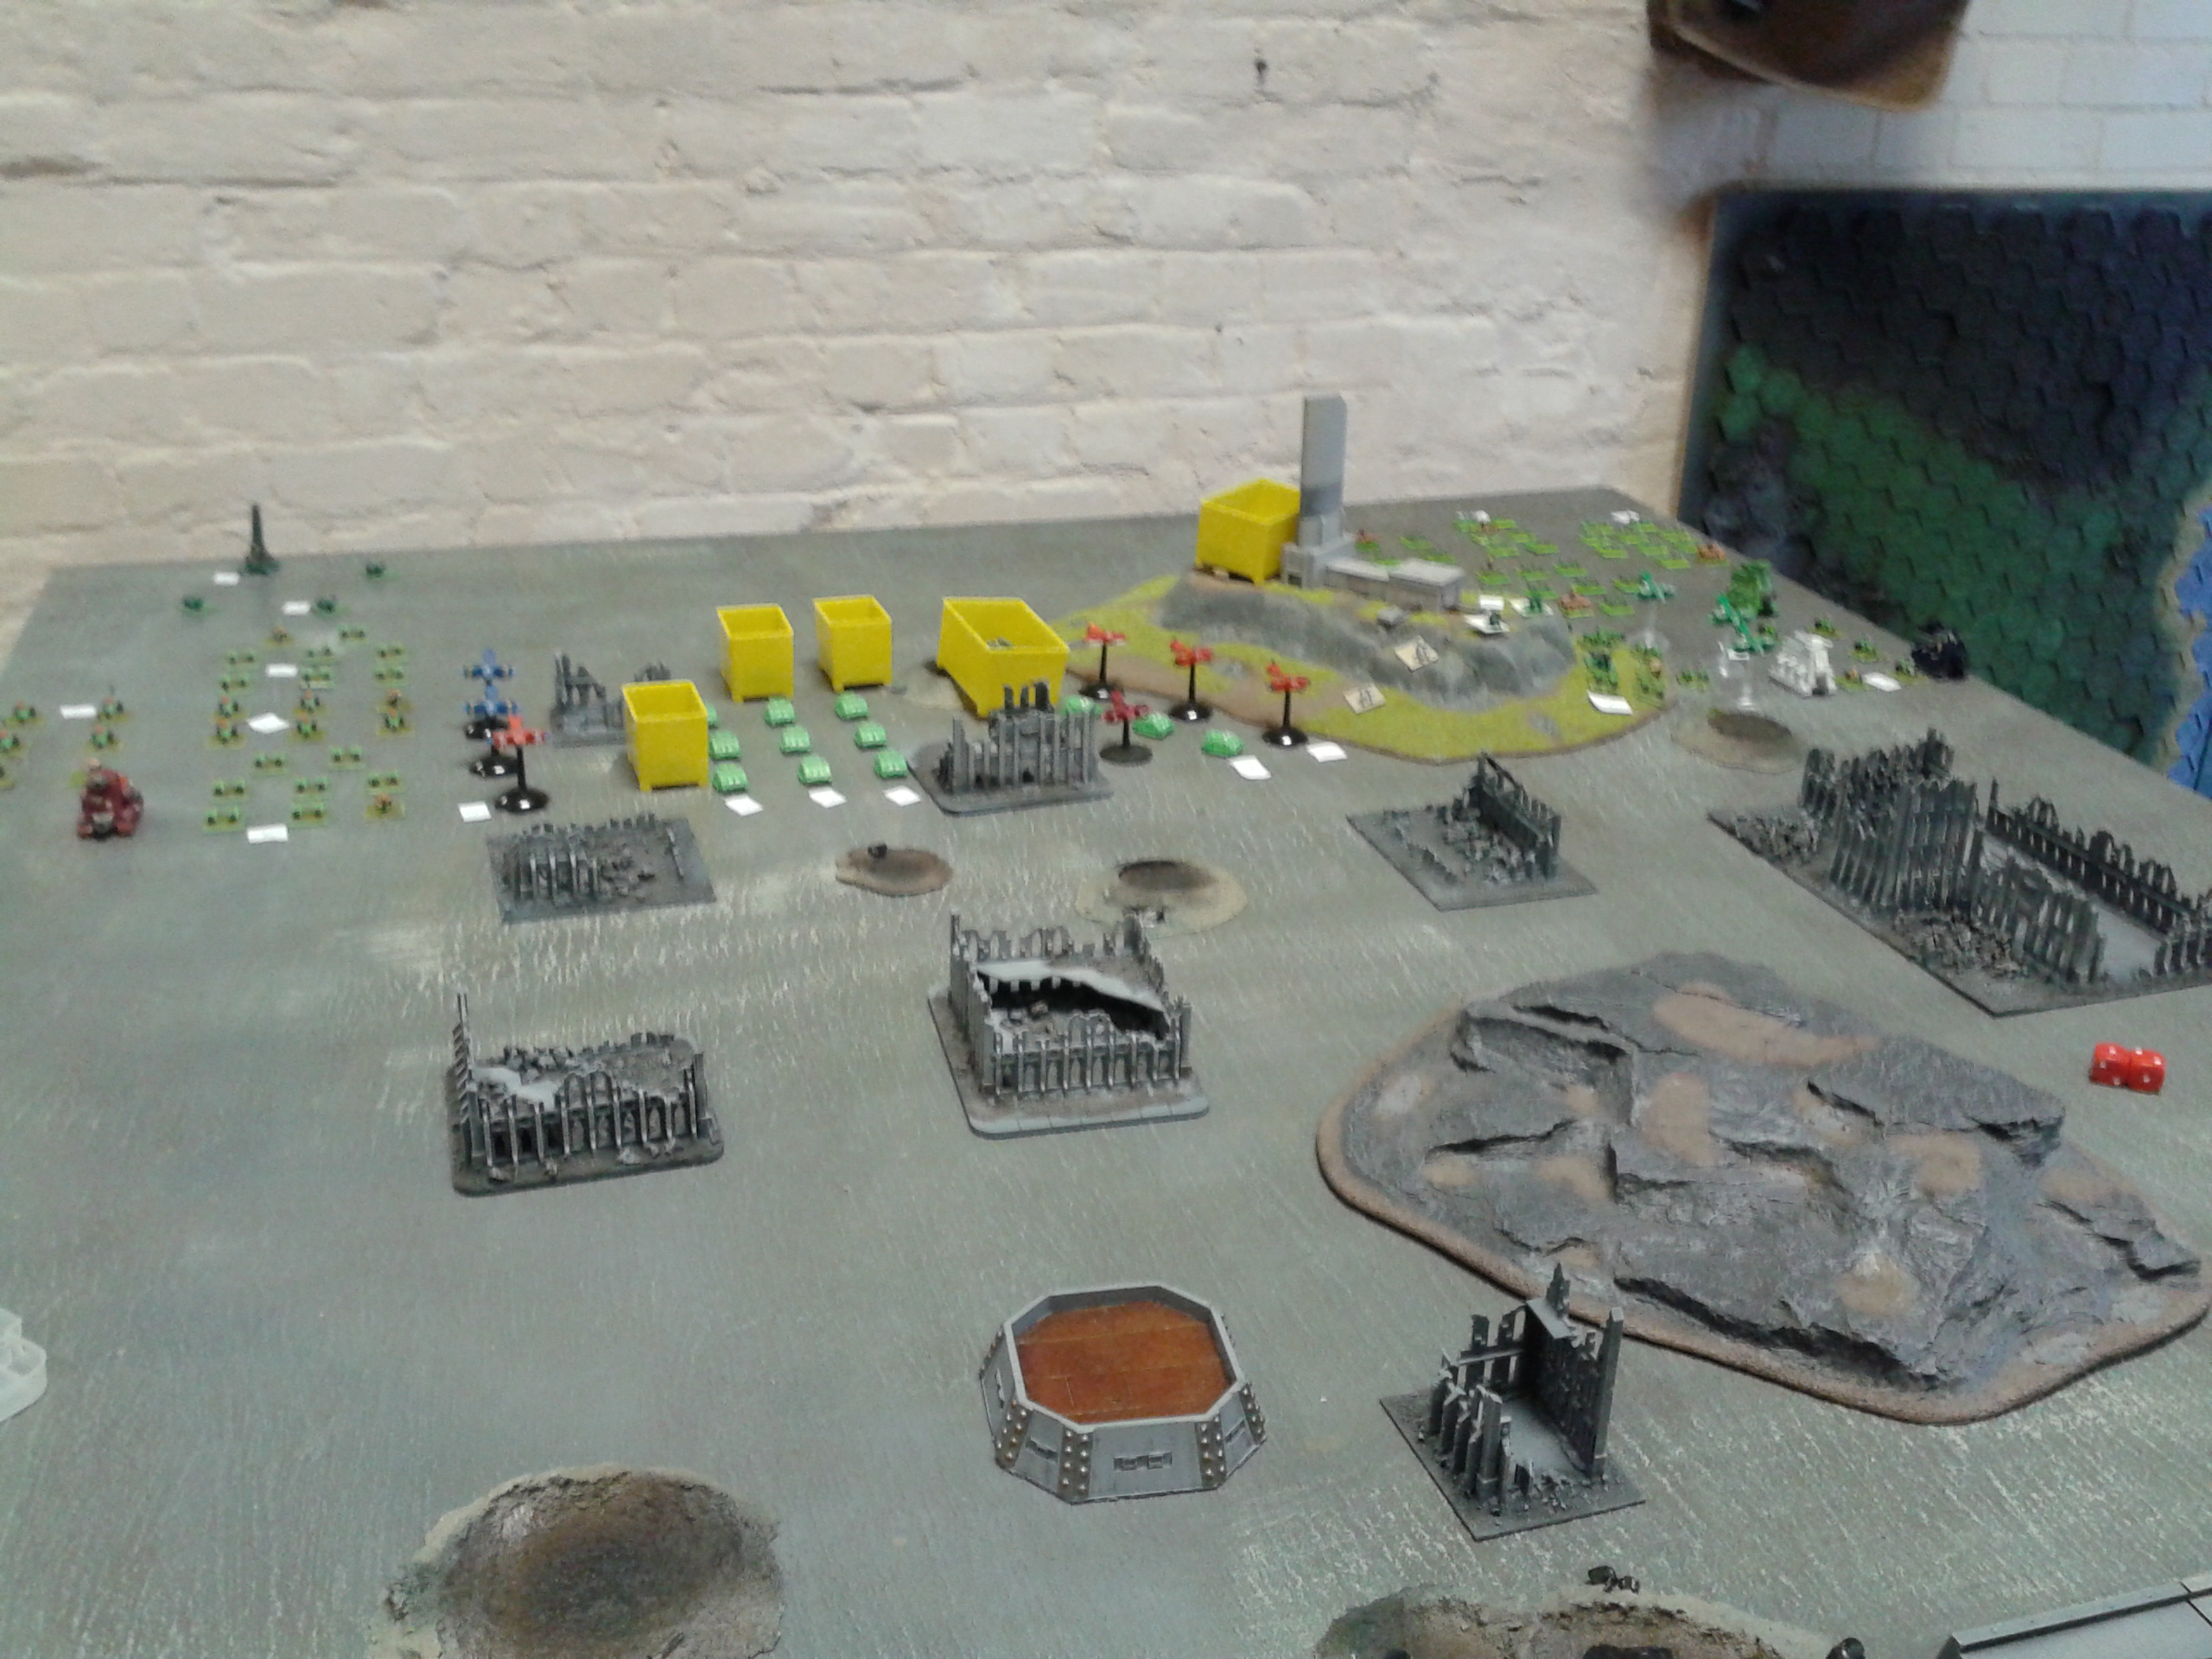
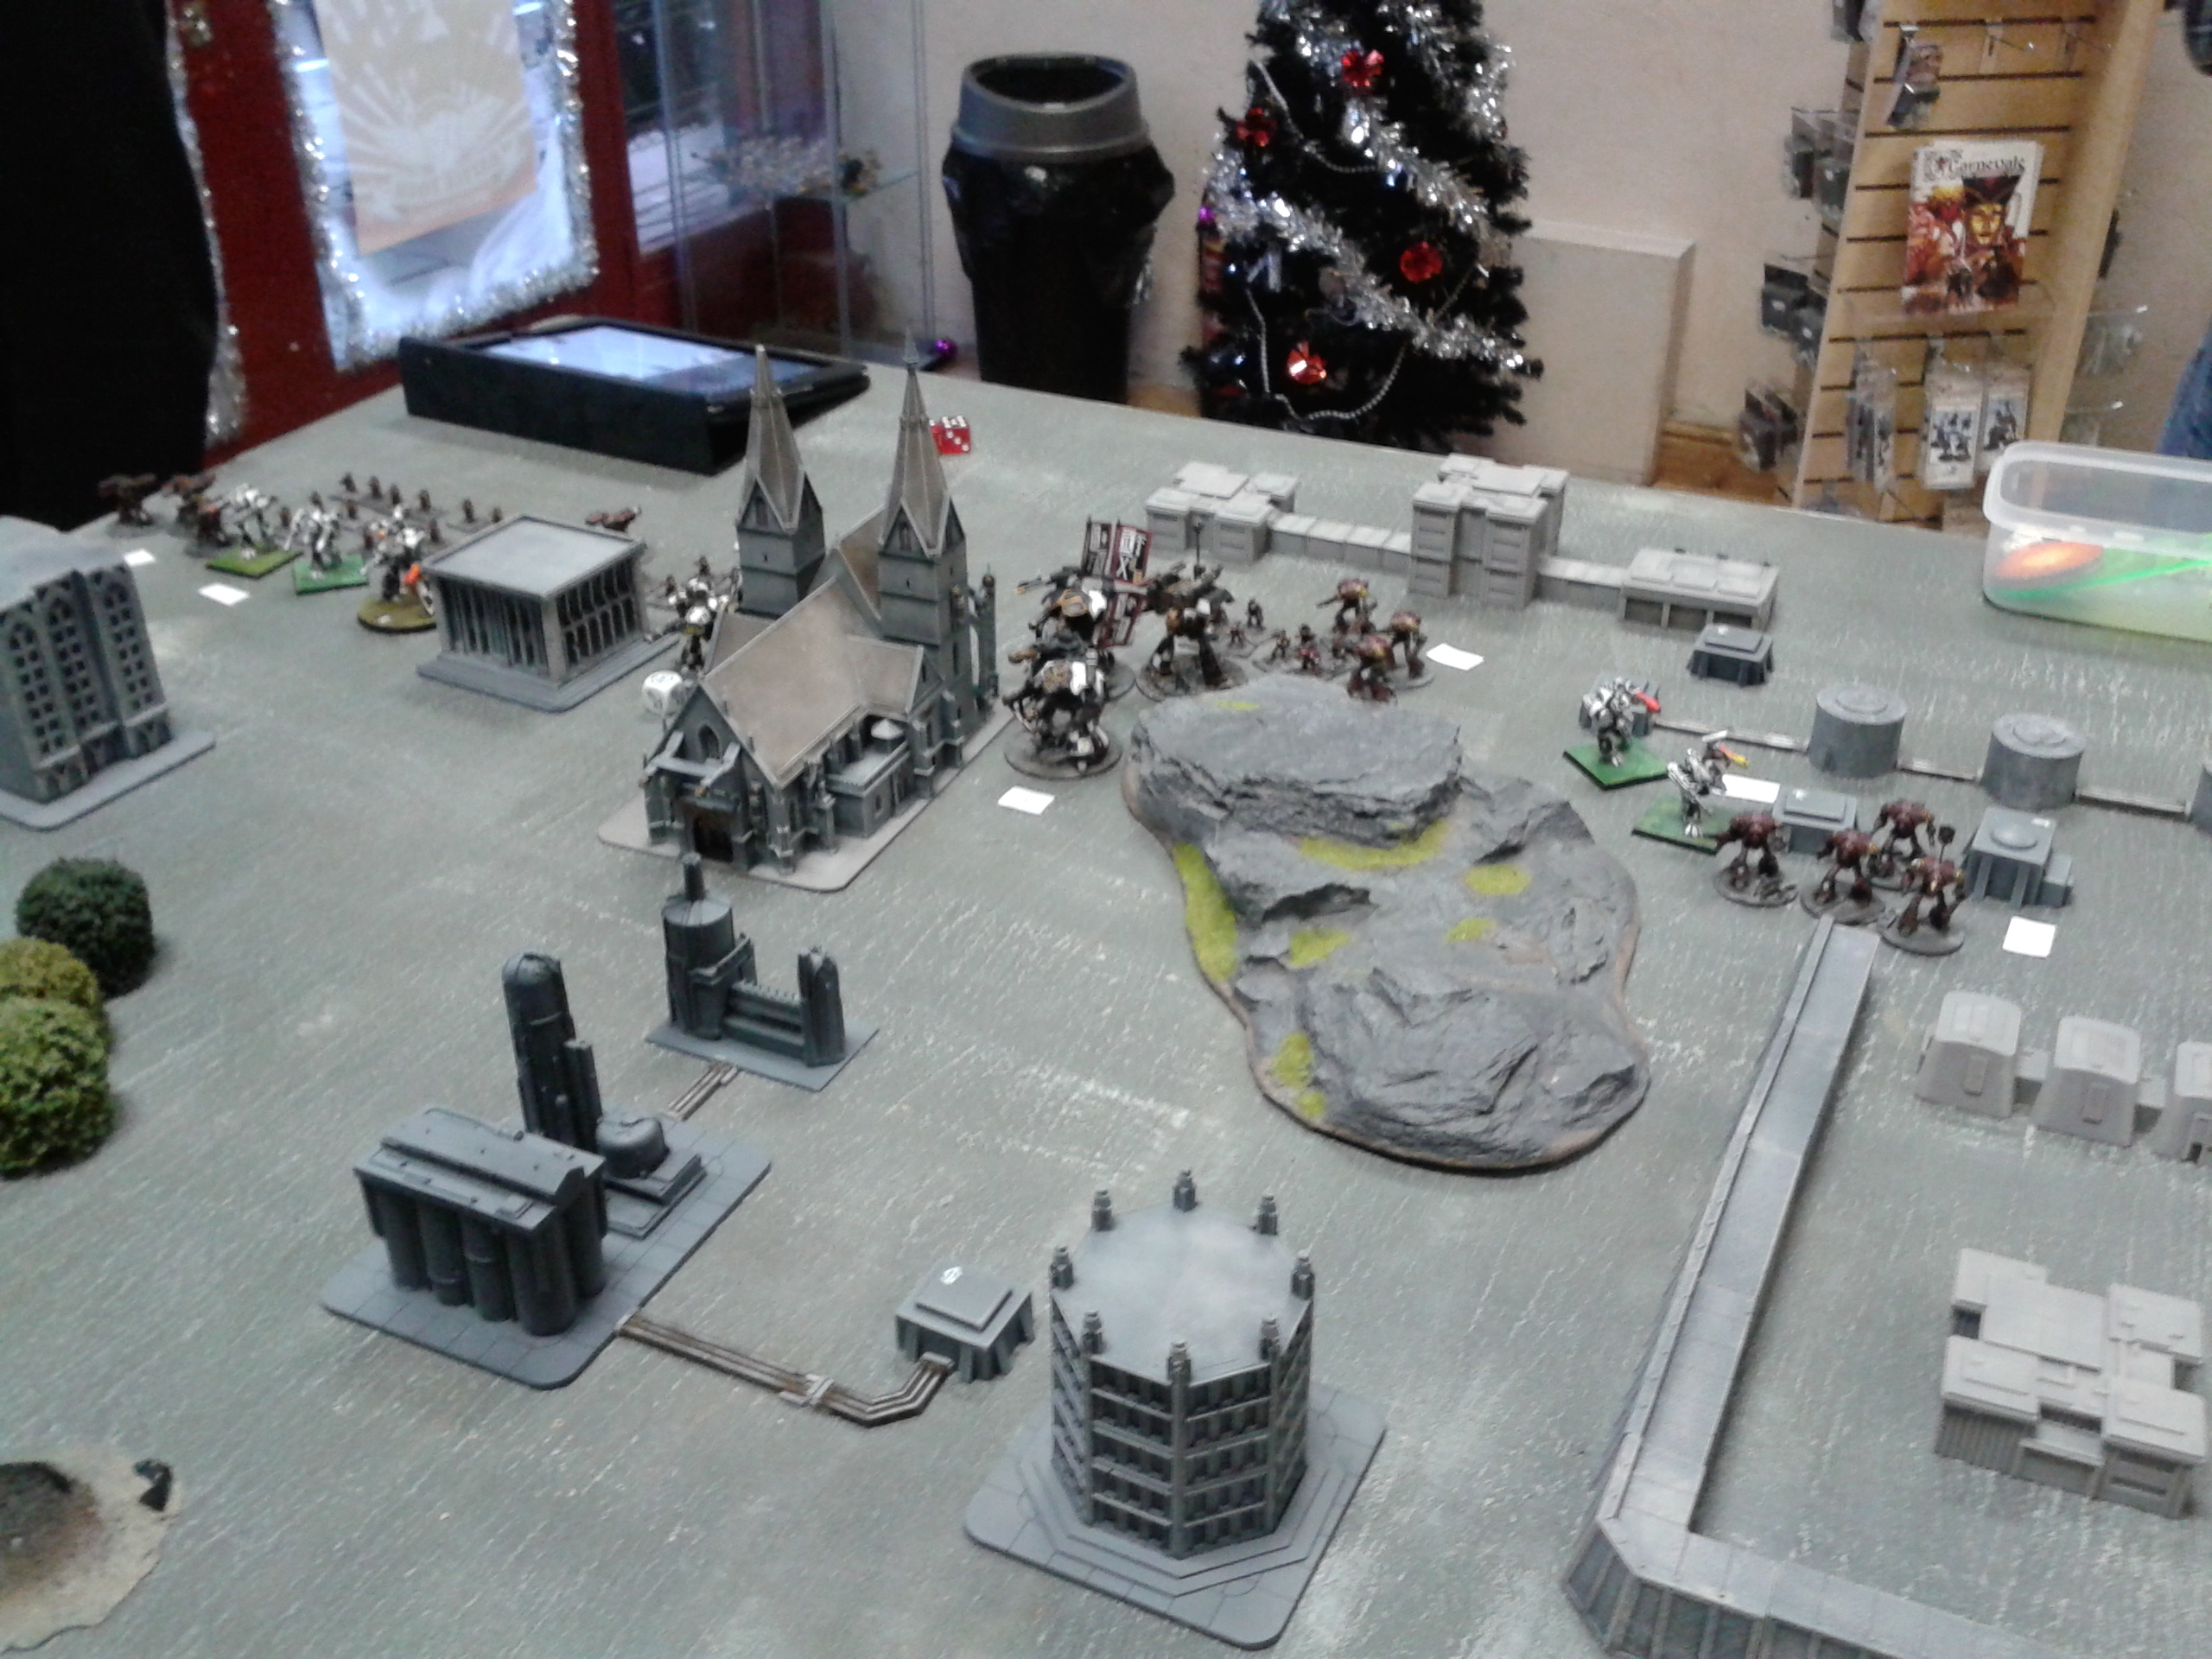
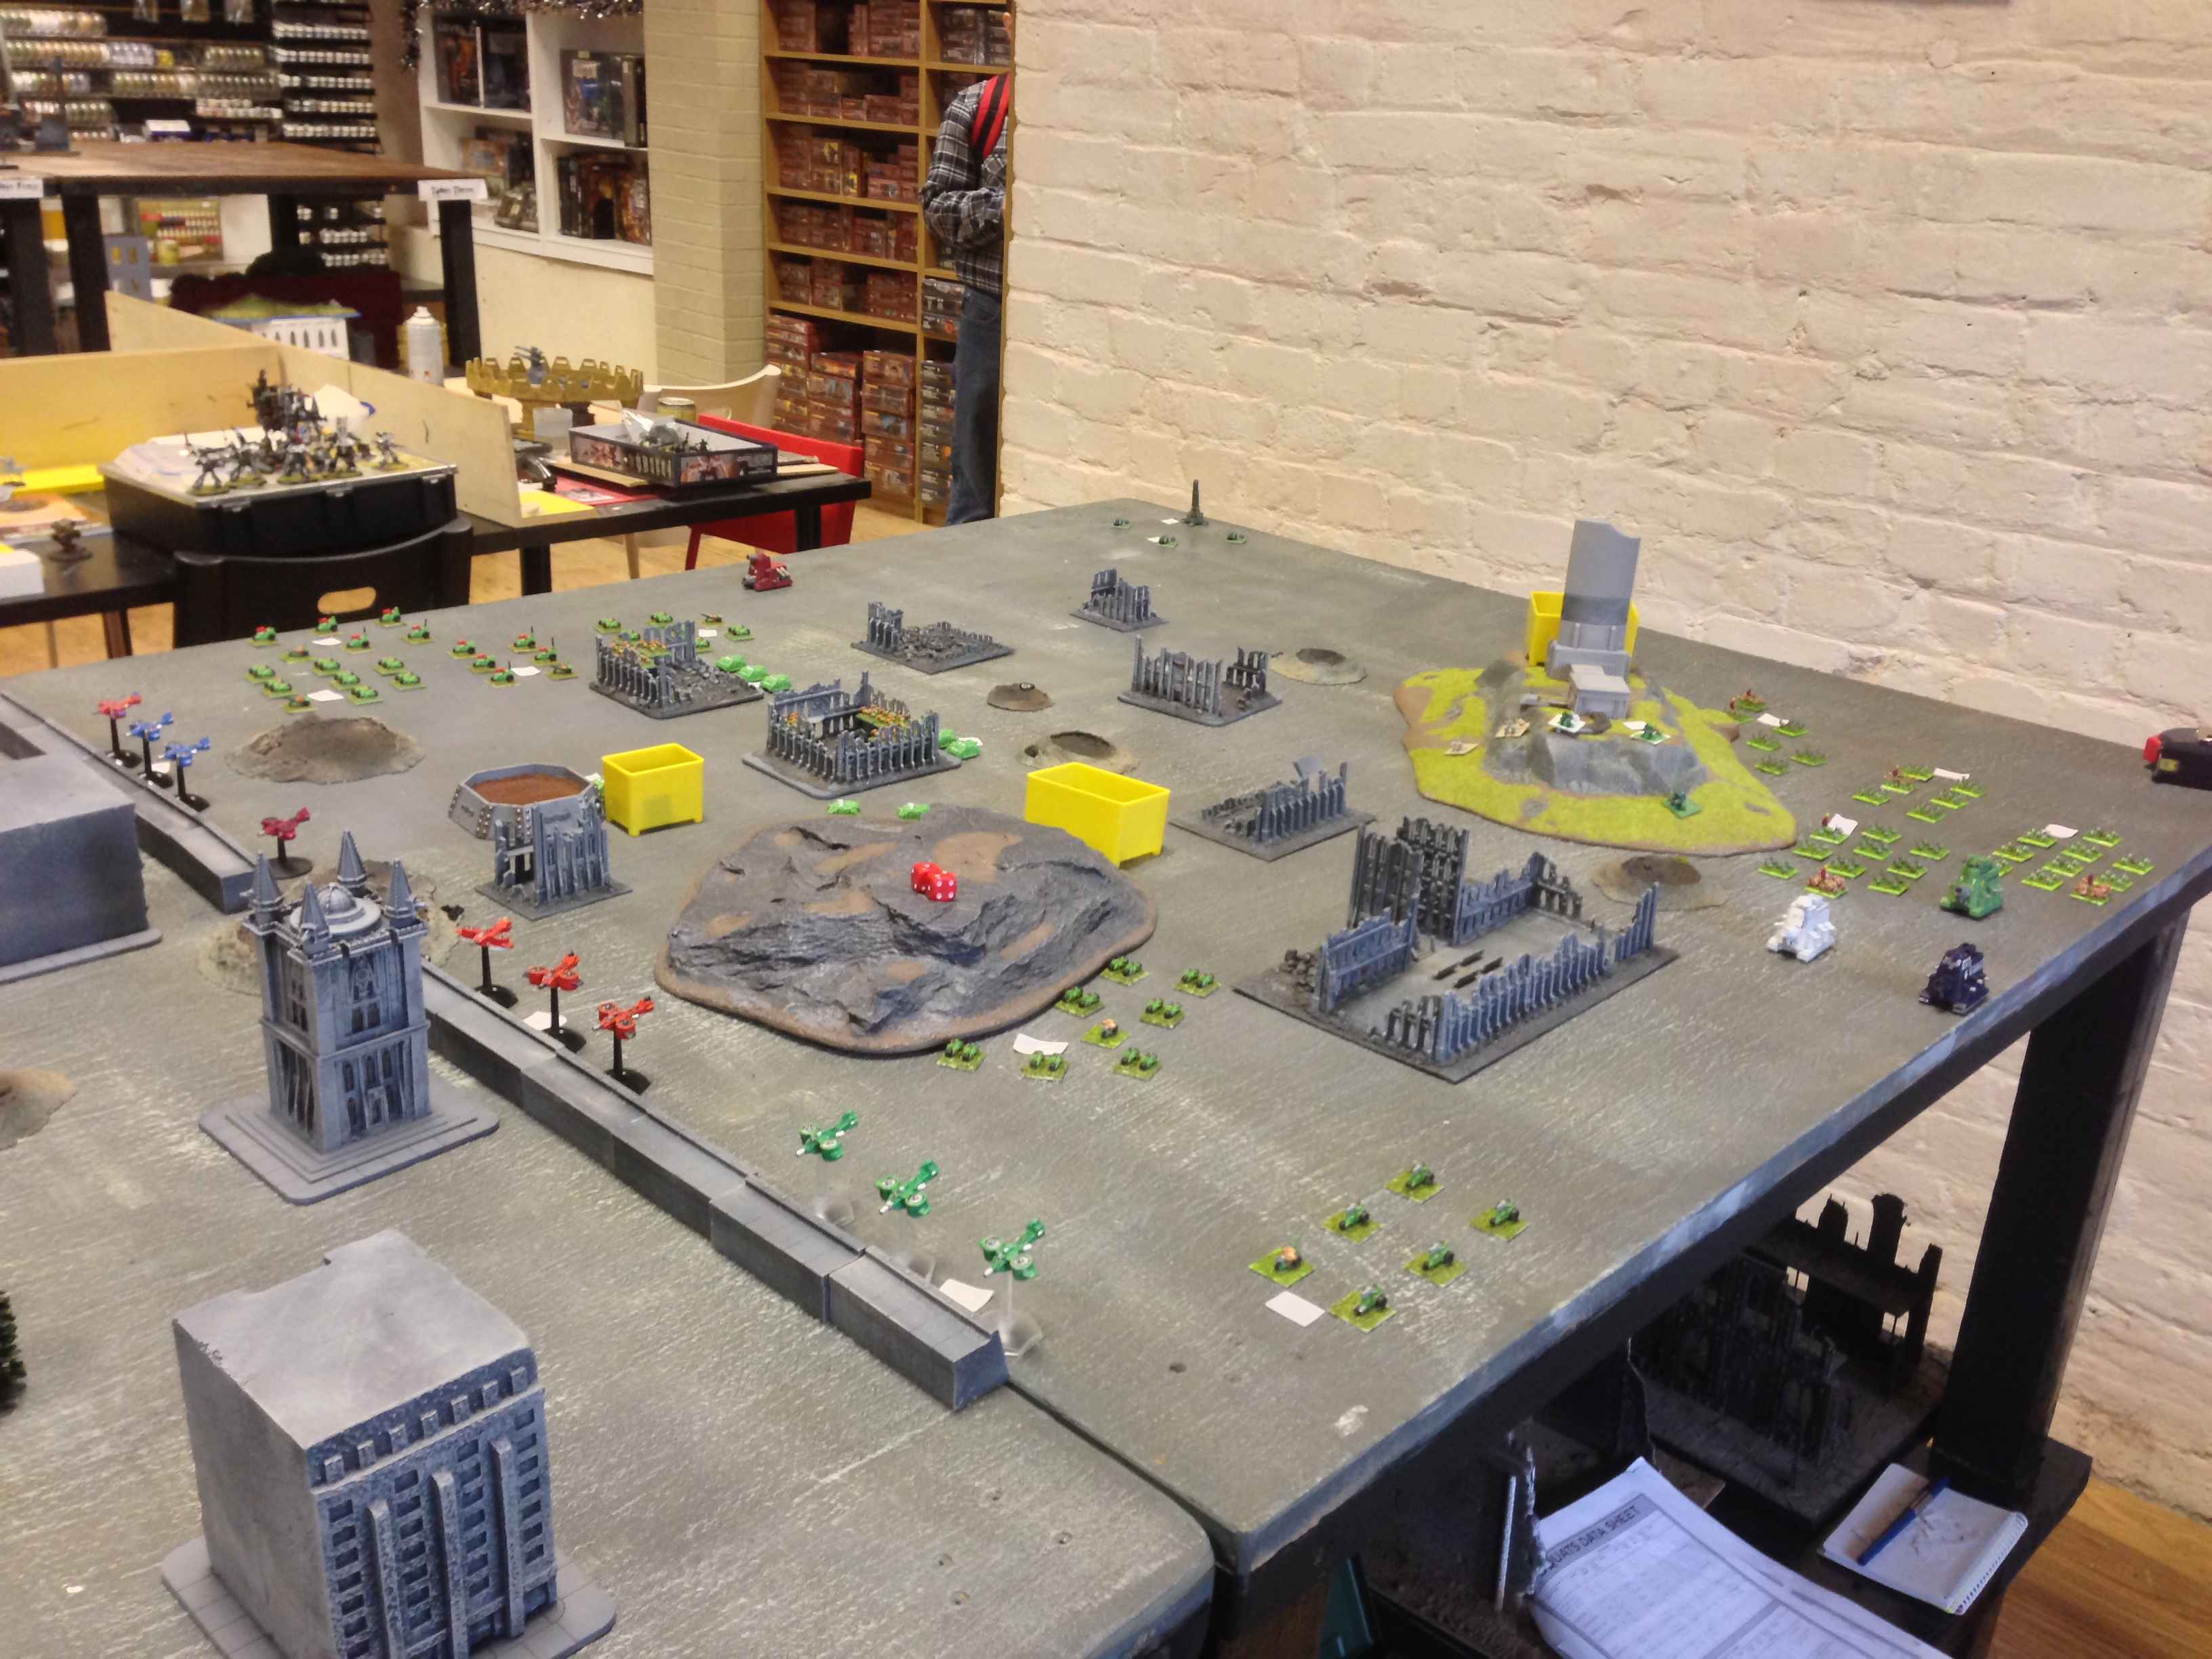
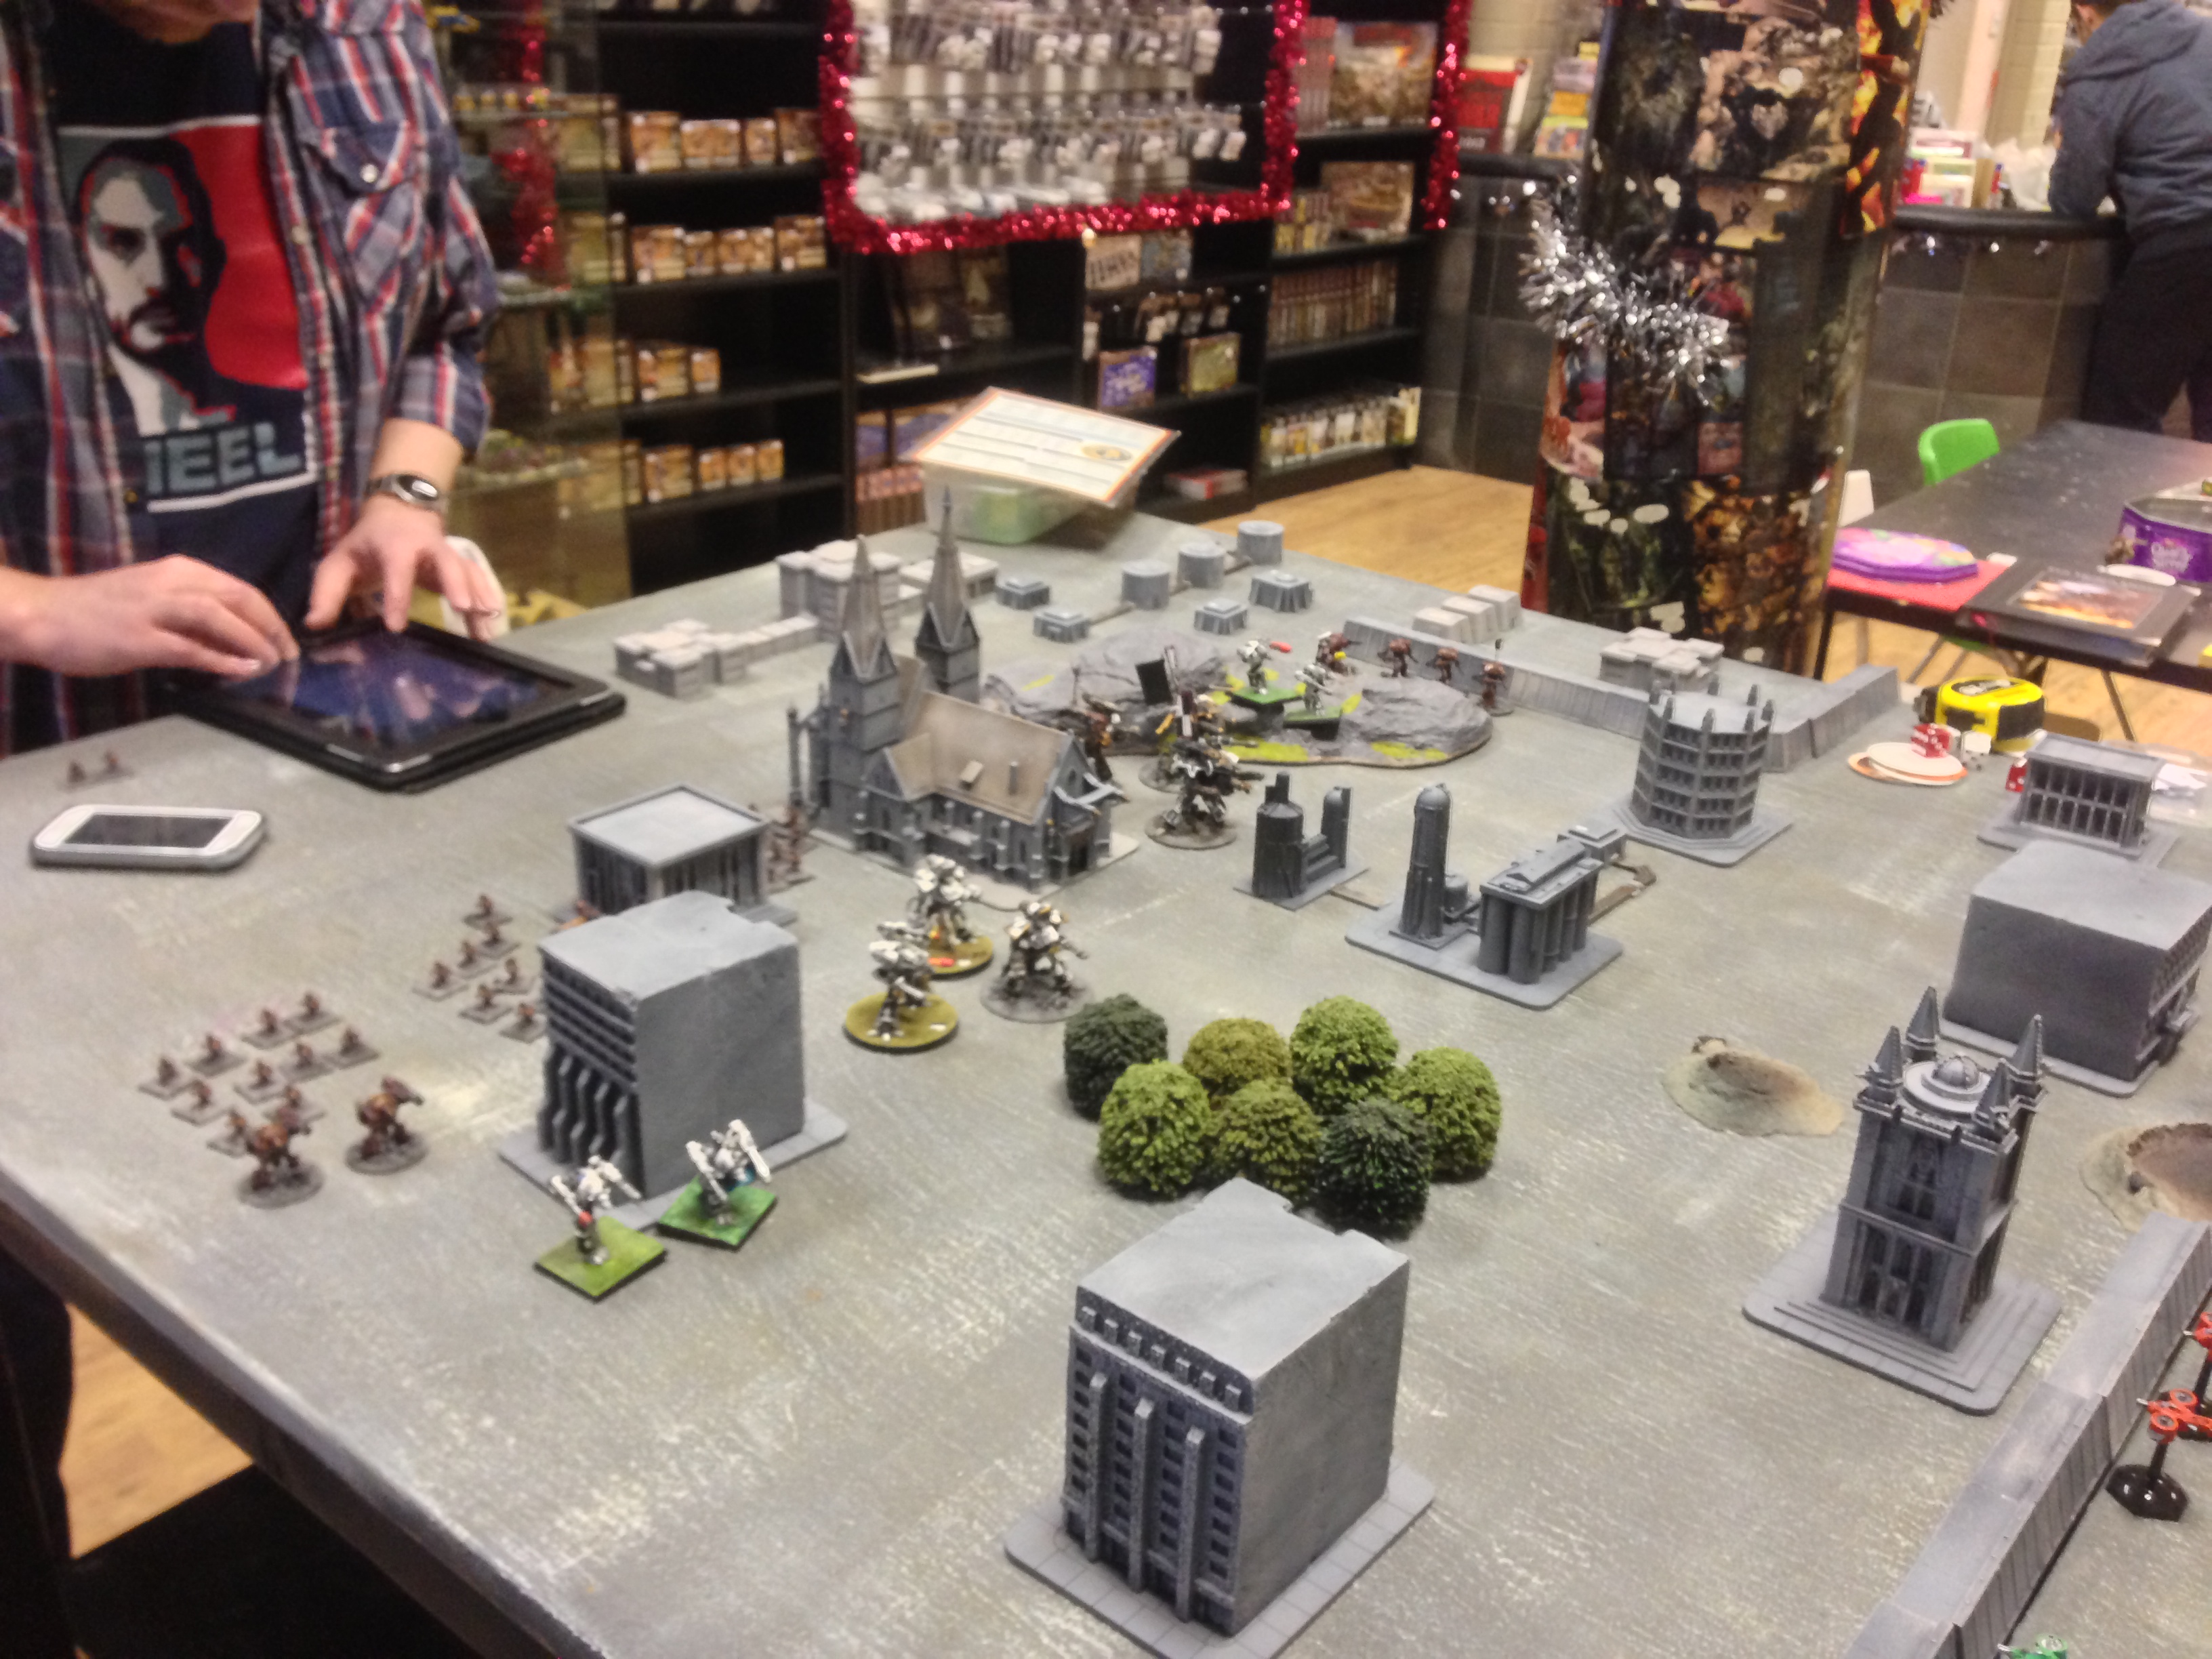
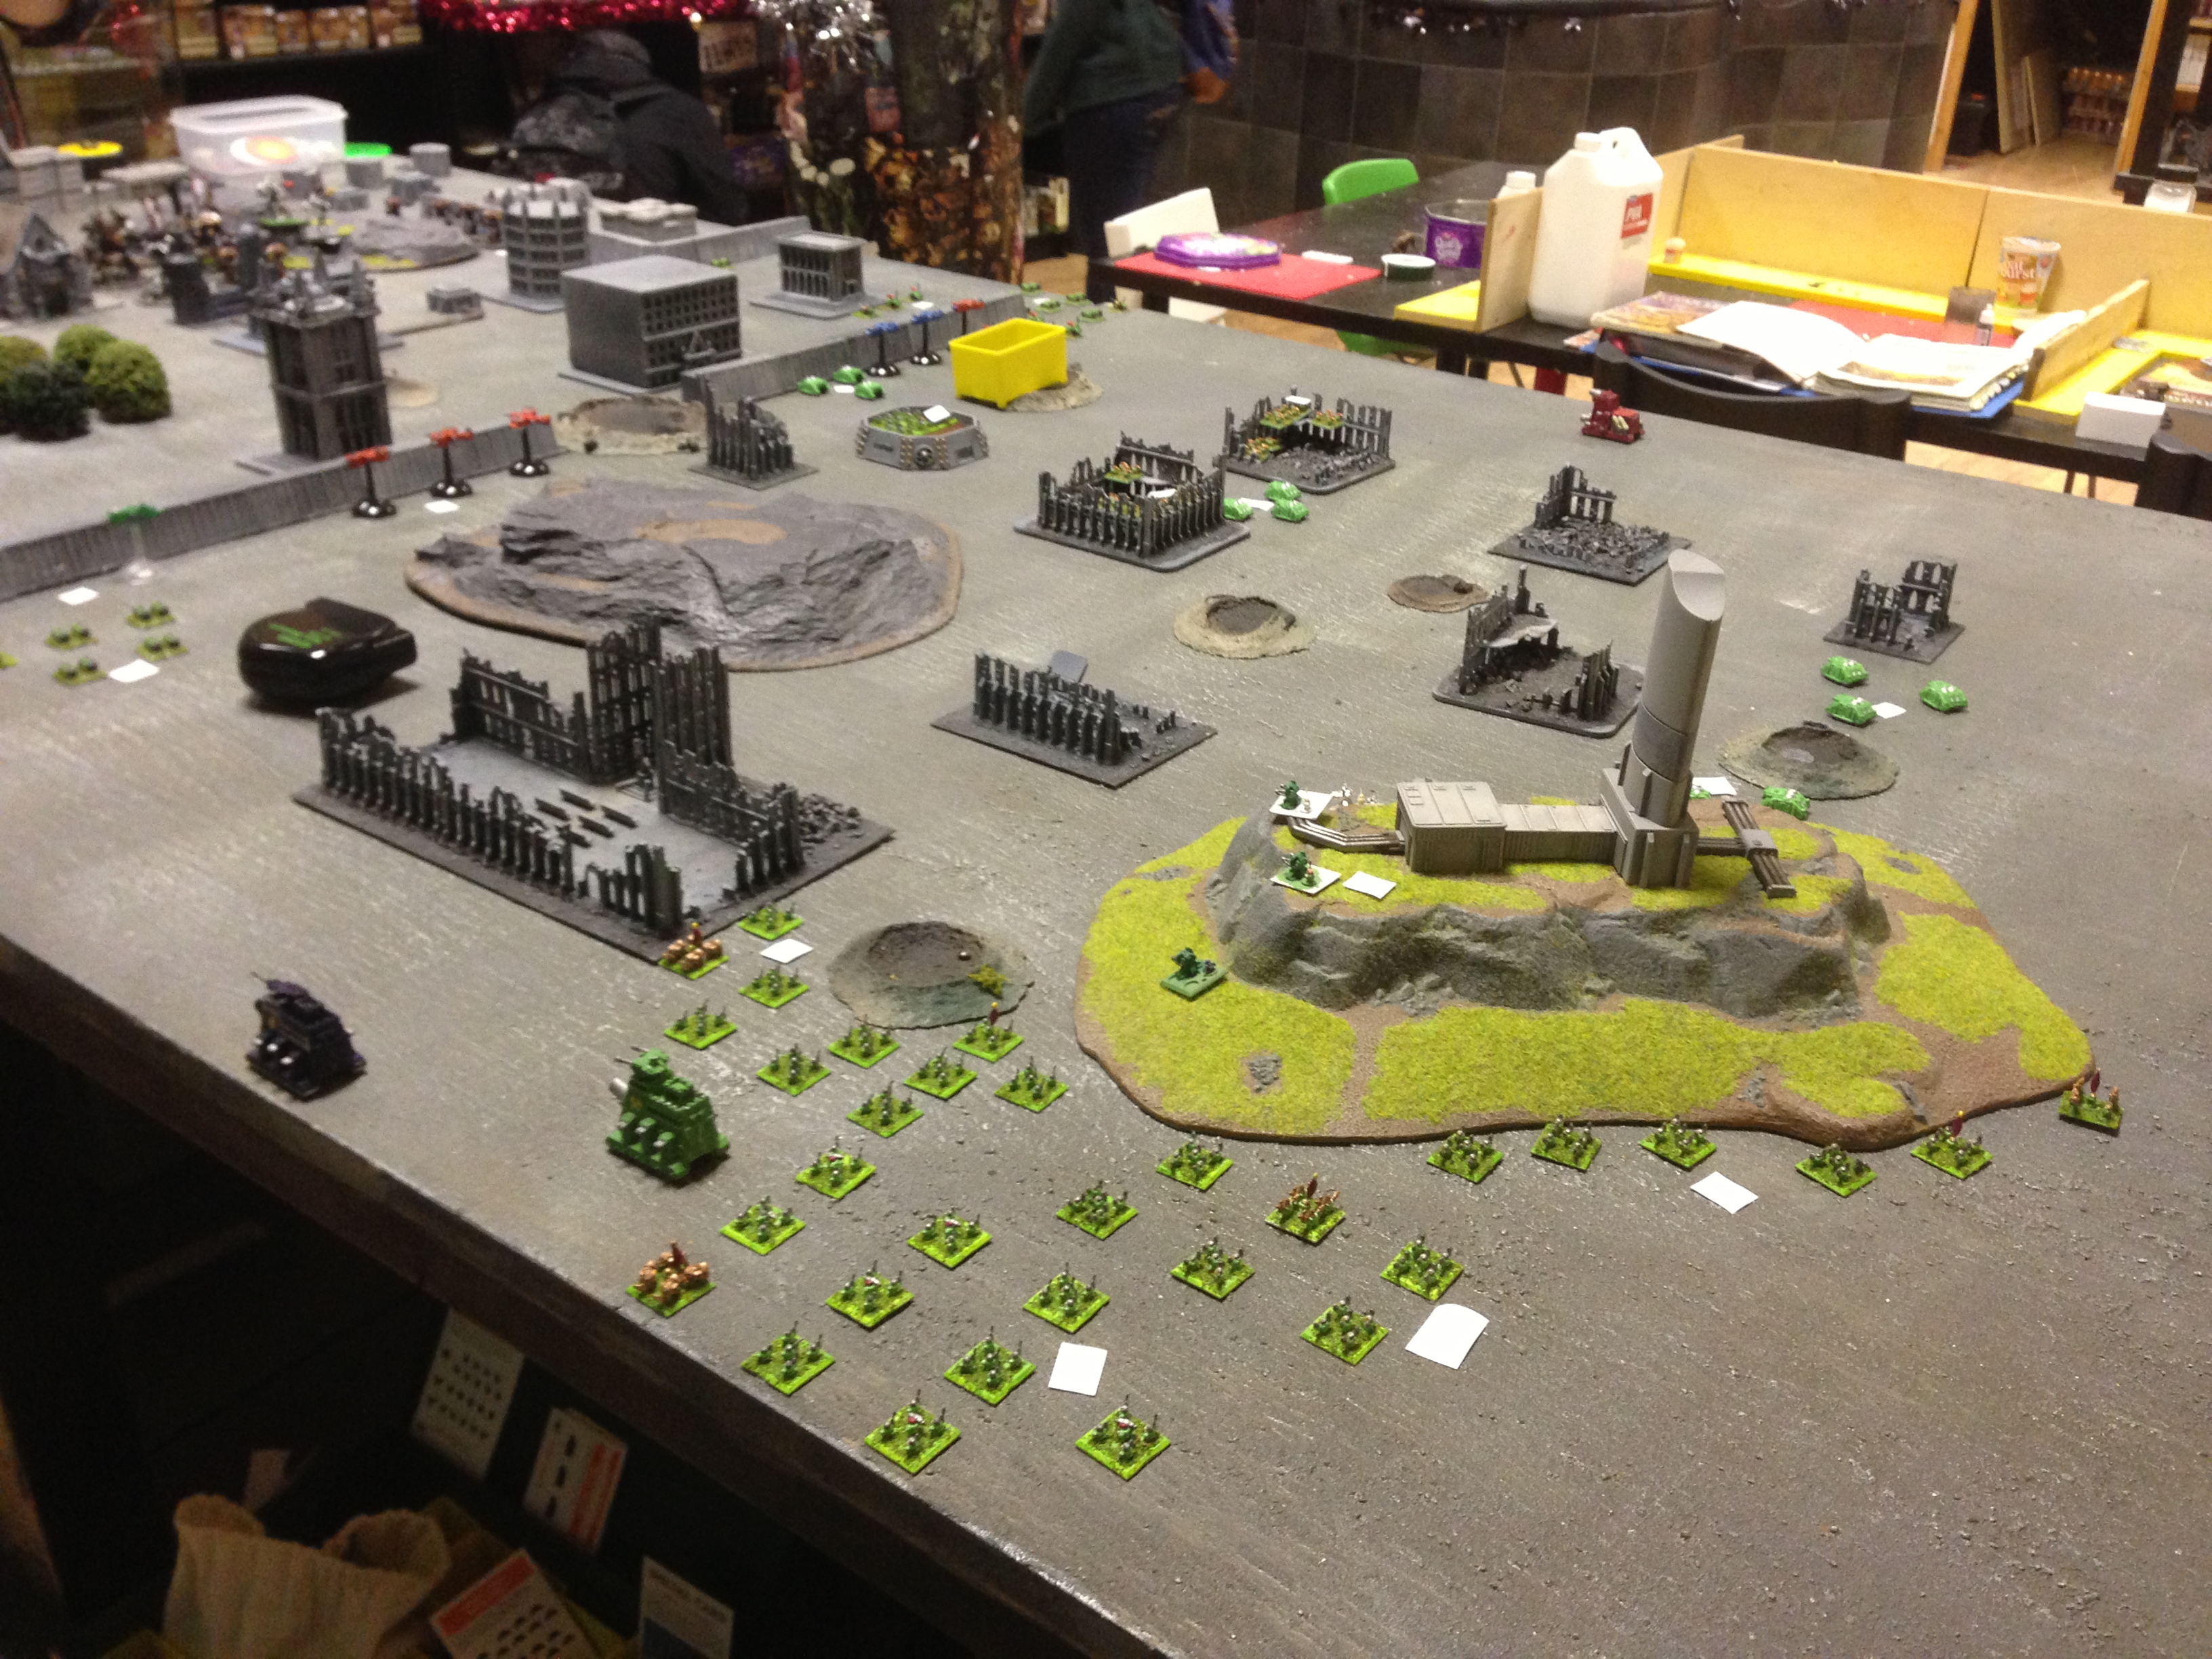
6,000 NetEpic Game: Adeptus Mechanicus vs Squats at No Mans Land
The battle was incredibly one-sided, as you can see from the live-tweet below. This was primarily due to the cheesy nature of my Adeptus Titanicus army, which included ten titans, combined with the relatively inflexible Squat army list which had been designed to deal with swarms of robots.
Here are the pics we took during the game:


http://twitter.com/J_Plays_Games/status/279700414771888128
http://twitter.com/J_Plays_Games/status/279945725251559424
http://twitter.com/J_Plays_Games/status/279949425684643841
http://twitter.com/J_Plays_Games/status/279953201028022273
http://twitter.com/J_Plays_Games/status/279969623863066625
http://twitter.com/StegTheDinosaur/status/279968899544539137
http://twitter.com/J_Plays_Games/status/279979574488612864
http://twitter.com/StegTheDinosaur/status/279995070256660480
Reaver Titan
Here are a few shots. You can also see this beastie in the background of my EpiComp submission.
The Epic reaver is Games Workshop's oldest model still in production, and this item does sort of show it: it's hard to guess how old the cast is (I bought it off eBay, so it could be two years or twenty years old), but the detail is pretty poor, and the flat surfaces are rather pitted.
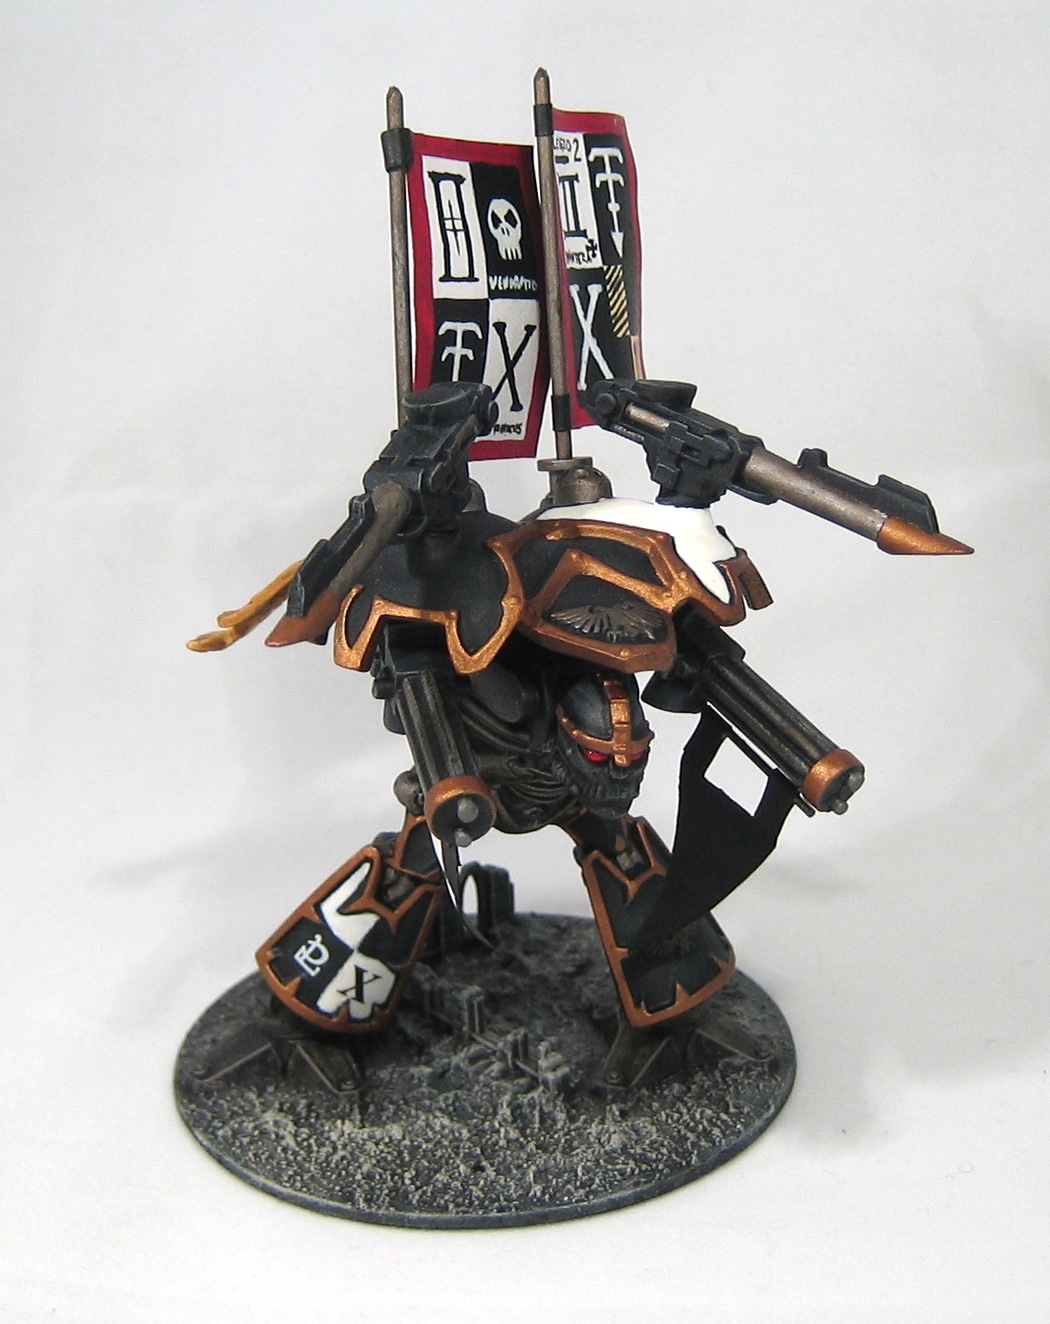
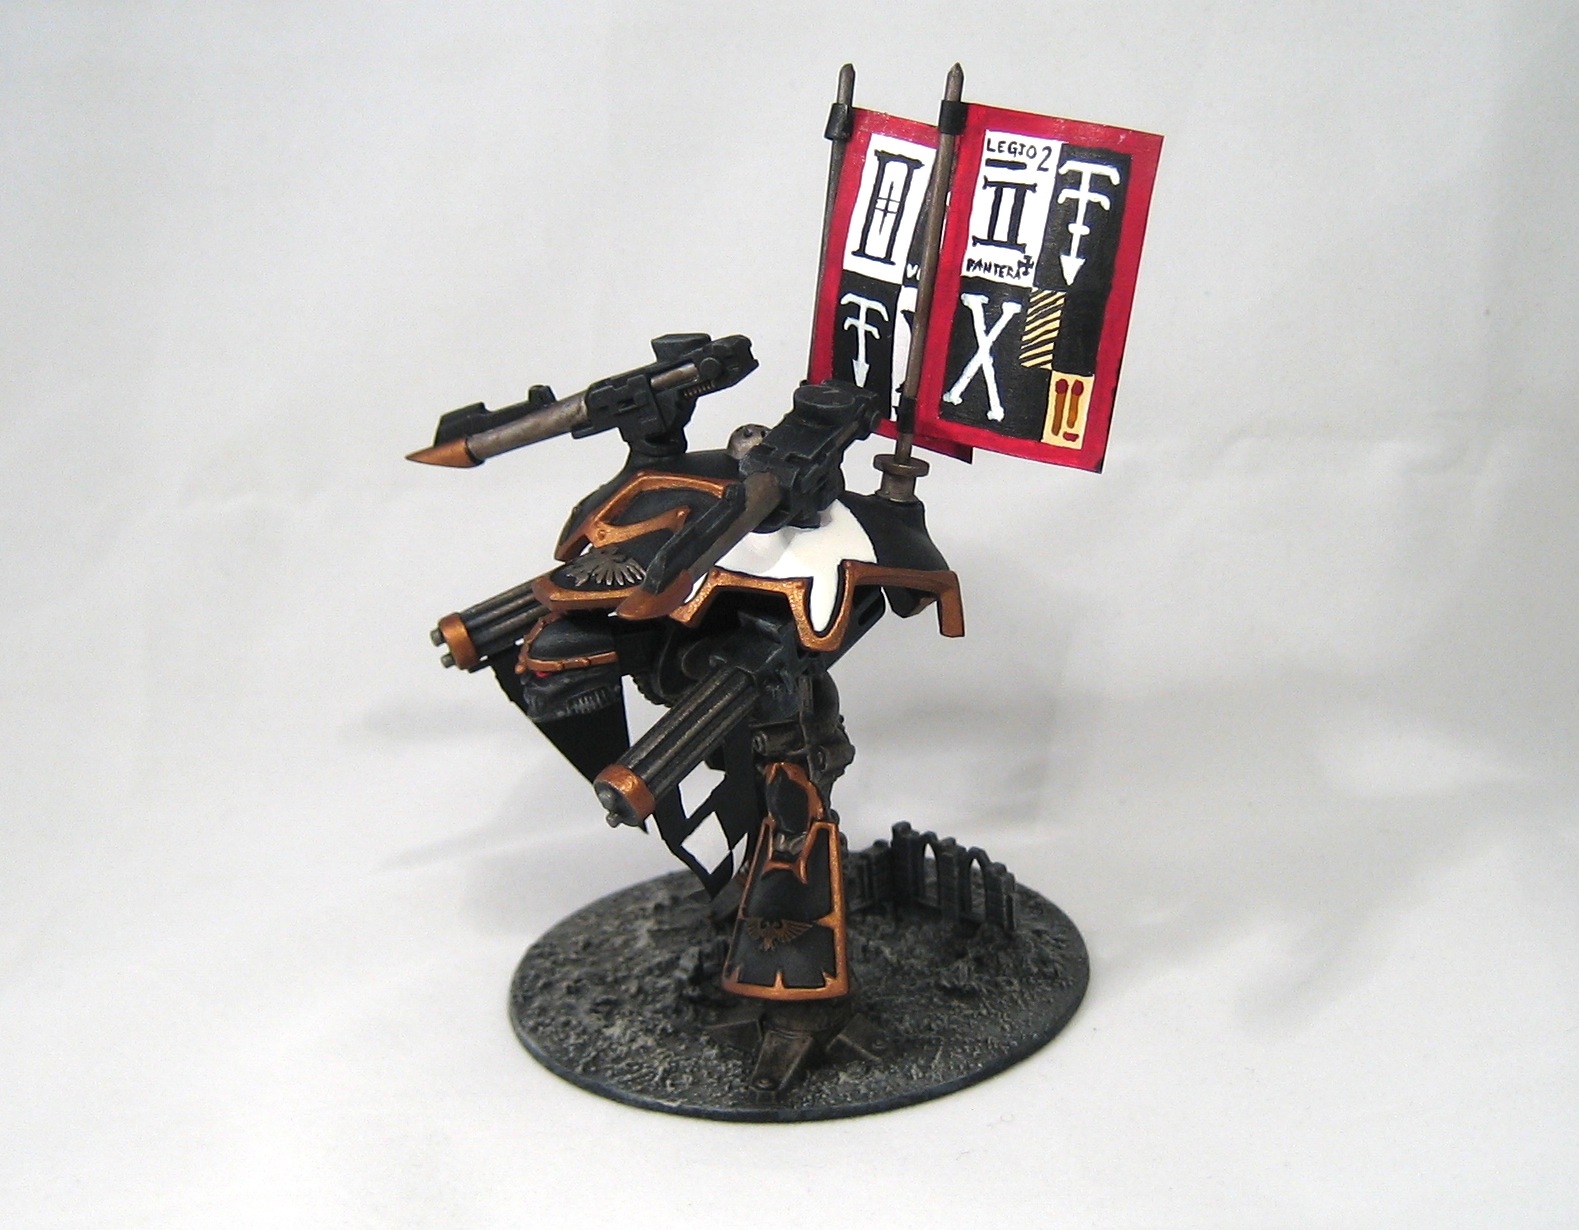
Colour-scheme wise, this guy is nothing new. He has the same black and white checked pattern I've used on all my titans (one day I'll do a big family shot so you can see them all), with the additional bronze edging that I've given to the "elite" titans (on the Warmonger side of the family).
This is the first Reaver I've painted since the mid-nineties, and I have two more to do to complete the second battlegroup. One thing I'll do differently next time is paint them in pieces and then assemble afterwards: there are a lot of fiddly bits!
"Over-the-top" Warlord Titan Finished

I replaced the normal Warlord head with a Deathstrike Cannon, which (in 2nd Edition Space Marine and NetEpic) halves the Titan's movement to 8cm. I mounted a Edenite Reaper Turrent from Exodus Wars at the front of the carapace to give it a face: this counts as an additional weapon (a Vulcan Mega-Bolter), at the expense of weakened armour. The arm weapons are from a Mark II Warlord.
More pictures below.
Over-the-top Warlord Titan
Mk I Warlord

This is actually a repaint of a Titan I've had for many years: it took a bath in Dettol which stripped the paint off very nicely.
Obviously I have one more Titan to paint to go in the Battle Group. But I can't decide whether it should be a Mk I (like this one), Mk II (they're pretty rare but I have one) or Mk III (the modern "Lucius" pattern).
Rebasing a Reaver Titan

I have quite a few Epic Titans: most of them (apart from notable exceptions) are quite old. Although my painting skill level hasn't really changed over the years, the amount of attention I pay to basing and terrain has; so while I'm happy with their paint jobs, I can't say I'm too pleased with their bases.
So a while back I took one of the first Reaver titans I'd ever painted (probably around 1995 or even older) and had a go at rebasing it. The titan was based on one of the old Adeptus Titanicus era bases (the ones with the void shield wheel), which I took my knife to. I trimmed the sides off, and filled in the window at the front with putty.
While at Salute I picked up some Basetex textured paint, so I gave the old base (which was just a bit of putty painted dark green), and then applied some static grass.
And yes, this titan does field three Vulcan Mega-Bolters!
Mk II Warlord
Following on from my article on casting a titan foot using green stuff, here's the finished miniature:


The photos are a little pink, thanks to the shirt in the background. But a nice piece I think. The Plasma Cannon on the left arm was attached to the mounting taken from the original chain saw. A little green stuff around the joint made it seemless. I used Citadel's washes to give the metallic parts a dirty, heavy industrial feel. This miniature is a companion to the warmonger titan I recently finished.
I now have most of the materials I need to start on this year's summer project: a modular city system that integrates with the Ziterdes modular gaming board system that I use. Stay tuned!
Casting a Titan foot using Green Stuff
I've been trying to get my hands on an old-style Mark II Warlord Titan for quite a while. This miniature, made for only a couple of years from 1995, is the "transitional form" that links the old-school "beetleback" warlord titans from Adeptus Titanicus to the current Mk. III "Lucius" pattern Warlord titan, and I've always really liked the design.
I was finally able to get hold of one from eBay, and for a pretty good price. Unfortunately, the reason was that one of the titan's feet was missing. Ever the optimist, I decided to turn this problem into an opportunity, and have a go at making a duplicte of the foot using Green Stuff (aka kneadatite, basically two-part epoxy putty optimised for miniature modelling).
The first step was to take the foot piece that I did have and glue it very lightly to a piece of plasticard. I used a very small amount of superglue, as I wanted to be able to separate the foot from the card:

Then I made up a large chunk of Green Stuff — more than I probably needed, but that's better than not having enough — and covered up the foot. It's important to push down firmly when applying the Green Stuff, as you don't want creases, voids or bubbles. I applied the Green Stuff a small piece at a time, slowly building it up so that it covered the entire foot:

I waited a couple of days to give the Green Stuff plenty of time to cure. Then I removed the plasticard backing to expose the original, embedded in the Green Stuff mould:

The conventional wisdom is that you should use a "mould releasing agent" to prevent the Green Stuff from sticking to the original, but I'm a physicist, and I had a more elegant solution: heat. When heated, different materials undergo thermal expansion at different rates, so all I did was run it under the hot tap: the Green Stuff and the lead original expanded at different rates, and the foot just popped out:

The next step is to make up another load of Green Stuff, from which the casting would be made. Since I'm using the same material as the mould, I can't use my heat trick to remove the casted piece from the mould, I had to use a release agent this time: once I'd made up the Green Stuff and rolled it into a ball, I dipped it into some olive oil, and pressed it down into the mould:

After leaving it for a few hours to cure, I was able to remove the cast from the mould very easily:

I waited overnight for the Green Stuff to harden, and after giving it a good clean to remove the oil, I then used my trusty razor saw to remove the foot from the rest of the Green Stuff, and hey presto:

All it needs now is some cleaning up and trimming, and it's ready for painting.
It Is Among Us...

More photos (done properly with a decent camera with a macro lens and tripod) to follow. This picture doesn't really do it justice: I think this is the best miniature I've ever produced.
I'm still working on a name, and accepting suggestions!
Warmonger Update #8: Painting the base
I had to wait a few days, but finally the weather has cleared up enough to allow me to start undercoating the various parts of the Warmonger titan. I decided to go for the "low hanging fruit" first and made a start on the base:

The base was sprayed black, and then drybrushed with several shades of grey, getting progressively lighter almost up to pure white. To distiguish the ground surface from the building rubble, I drybrushed it with a mix of black and tan to give it a muddier colour.
I have made quite good progress on the main body of the titan, but I think I'll hold off on posting more updates until the "reveal" when it's all finished. Then you will be able to see it in all its glory :)
One More Thing
Now's your chance to help me: this beastie needs a name. Something impressive, menacing, powerful, and preferably in Imperial Gothic (or Latin, if you prefer). Any suggestions?
Warmonger Update #7: Building a Base
I decided that I want the Warmonger to have a base to stand on: it doesn't really need one thanks to its enormous bastion feet, but I think it nicely finishes off a model.
I cut a 50mm x 100mm rectangle of 5mm polystyrene sheet, using the razor saw, which makes doing dead-straight precision cuts a doddle. Then I rounded the edges with a file. this gave me a solid foundation for the base.

I decided to go for an "urban warzone" style base, so I used some offcuts from the amazing (but now out of production) Epic buildings sprues, and a bit of finely chopped cork and gravel to create some rubble. Finally, I painted superglue onto the base and dipped it into some fine sawdust, being careful not to go over the outlines of the titan's feet, which I drew onto the base with pencil.
In one corner, I sculpted a crater from "green stuff" (epoxy putty), which I finished up with a space marine figure lying face down. When the base is finished, I'll use some water-effect liquid to make it look like he's lying face down in a puddle.
I've taken this week off as holiday, and getting on with painting the Warmonger is my main priority for this week, so expect more updates soon!
Warmonger Update #6: Installing the Radar dish, first assembly
It's taken me a few weeks to find something suitable to serve as a radar dish for the tower of the Warmonger. My first thought was to use the radar dish from the Ordinatus Golgotha, but I wasn't about to ruin a rare (and extremely cheesy) miniature just to scratch an itch.
I decided to consult the wizened battle-brothers of Warseer and ask for their advice: a number of excellent suggestions were made, such as the radar dish from the 40k-scale Whirlwind, but then I got a PM from my new best friend yabbadabba offering me — you guessed it — a radar dish from an Ordinatus!
The piece arrived in the post this afternoon, and I decided to waste no more time and to install it on the titan:

The mounting is made from an old Warlord titan extension arm and the base of one of the Hydra platforms that I used for the AA guns. Looks pretty damn good, if you ask me.
What's, that? Did I hear you correctly? Did you say that you want me to zoom out? OK, then:

Again?

If that's whet your whistle, you can see a bunch more pictures below.


Warmonger Update #5: Test fitting the Hydra turrets
As predicted, the Hydra turrets from Forgeworld were waiting on my desk upon my arrival from Paris, so I wasted no time in prepping them. Here's a photo of what they look like when mounted on the fortress of the titan:

Rather awesome, I think. The resin barrels of the AA guns are extremely delicate and I'm sure it wouldn't take much to break them, so I'm glad I have a couple of spares left over to provide replacements for the inevitable breakages.
I also ordered some small link chain that I will attach to the underside of the fortress and to the main weapons to provide things to hang banners from. After that, I just have to fill all the gaps with putty and find something to serve as a radar antenna on the tower, and I'm ready to get painting!
Warmonger Update #4: Building the Landing Pad
I'm still waiting for Forge World to dispatch the hydras that will form the AA-platforms on the towers of the fortress, so I've been making progress on the other pieces of the titan. I'm still working out where to get the radar dish for the rear tower, that will replace the defence laser: if anyone has a suggestion, I'd be pleased to hear it. Scratch-building is always an option, but it'll never look as good as converting something else.
The landing pad for the spotter aircraft has turned out pretty well: as I am sure you can see, it's a standard GW slottabase, sanded smooth, with an etched brass aquila and another piece of the ARC starfighter to serve as an antenna.

I'm catching a Eurostar tomorrow morning to go to Paris for the 32nd International ICANN meeting, and I'm staying for the weekend to visit with a friend, so hopefully by the time I get back, the hydras will have arrived, and I can put the finishing touches to the titan. I'm really itching to paint it!
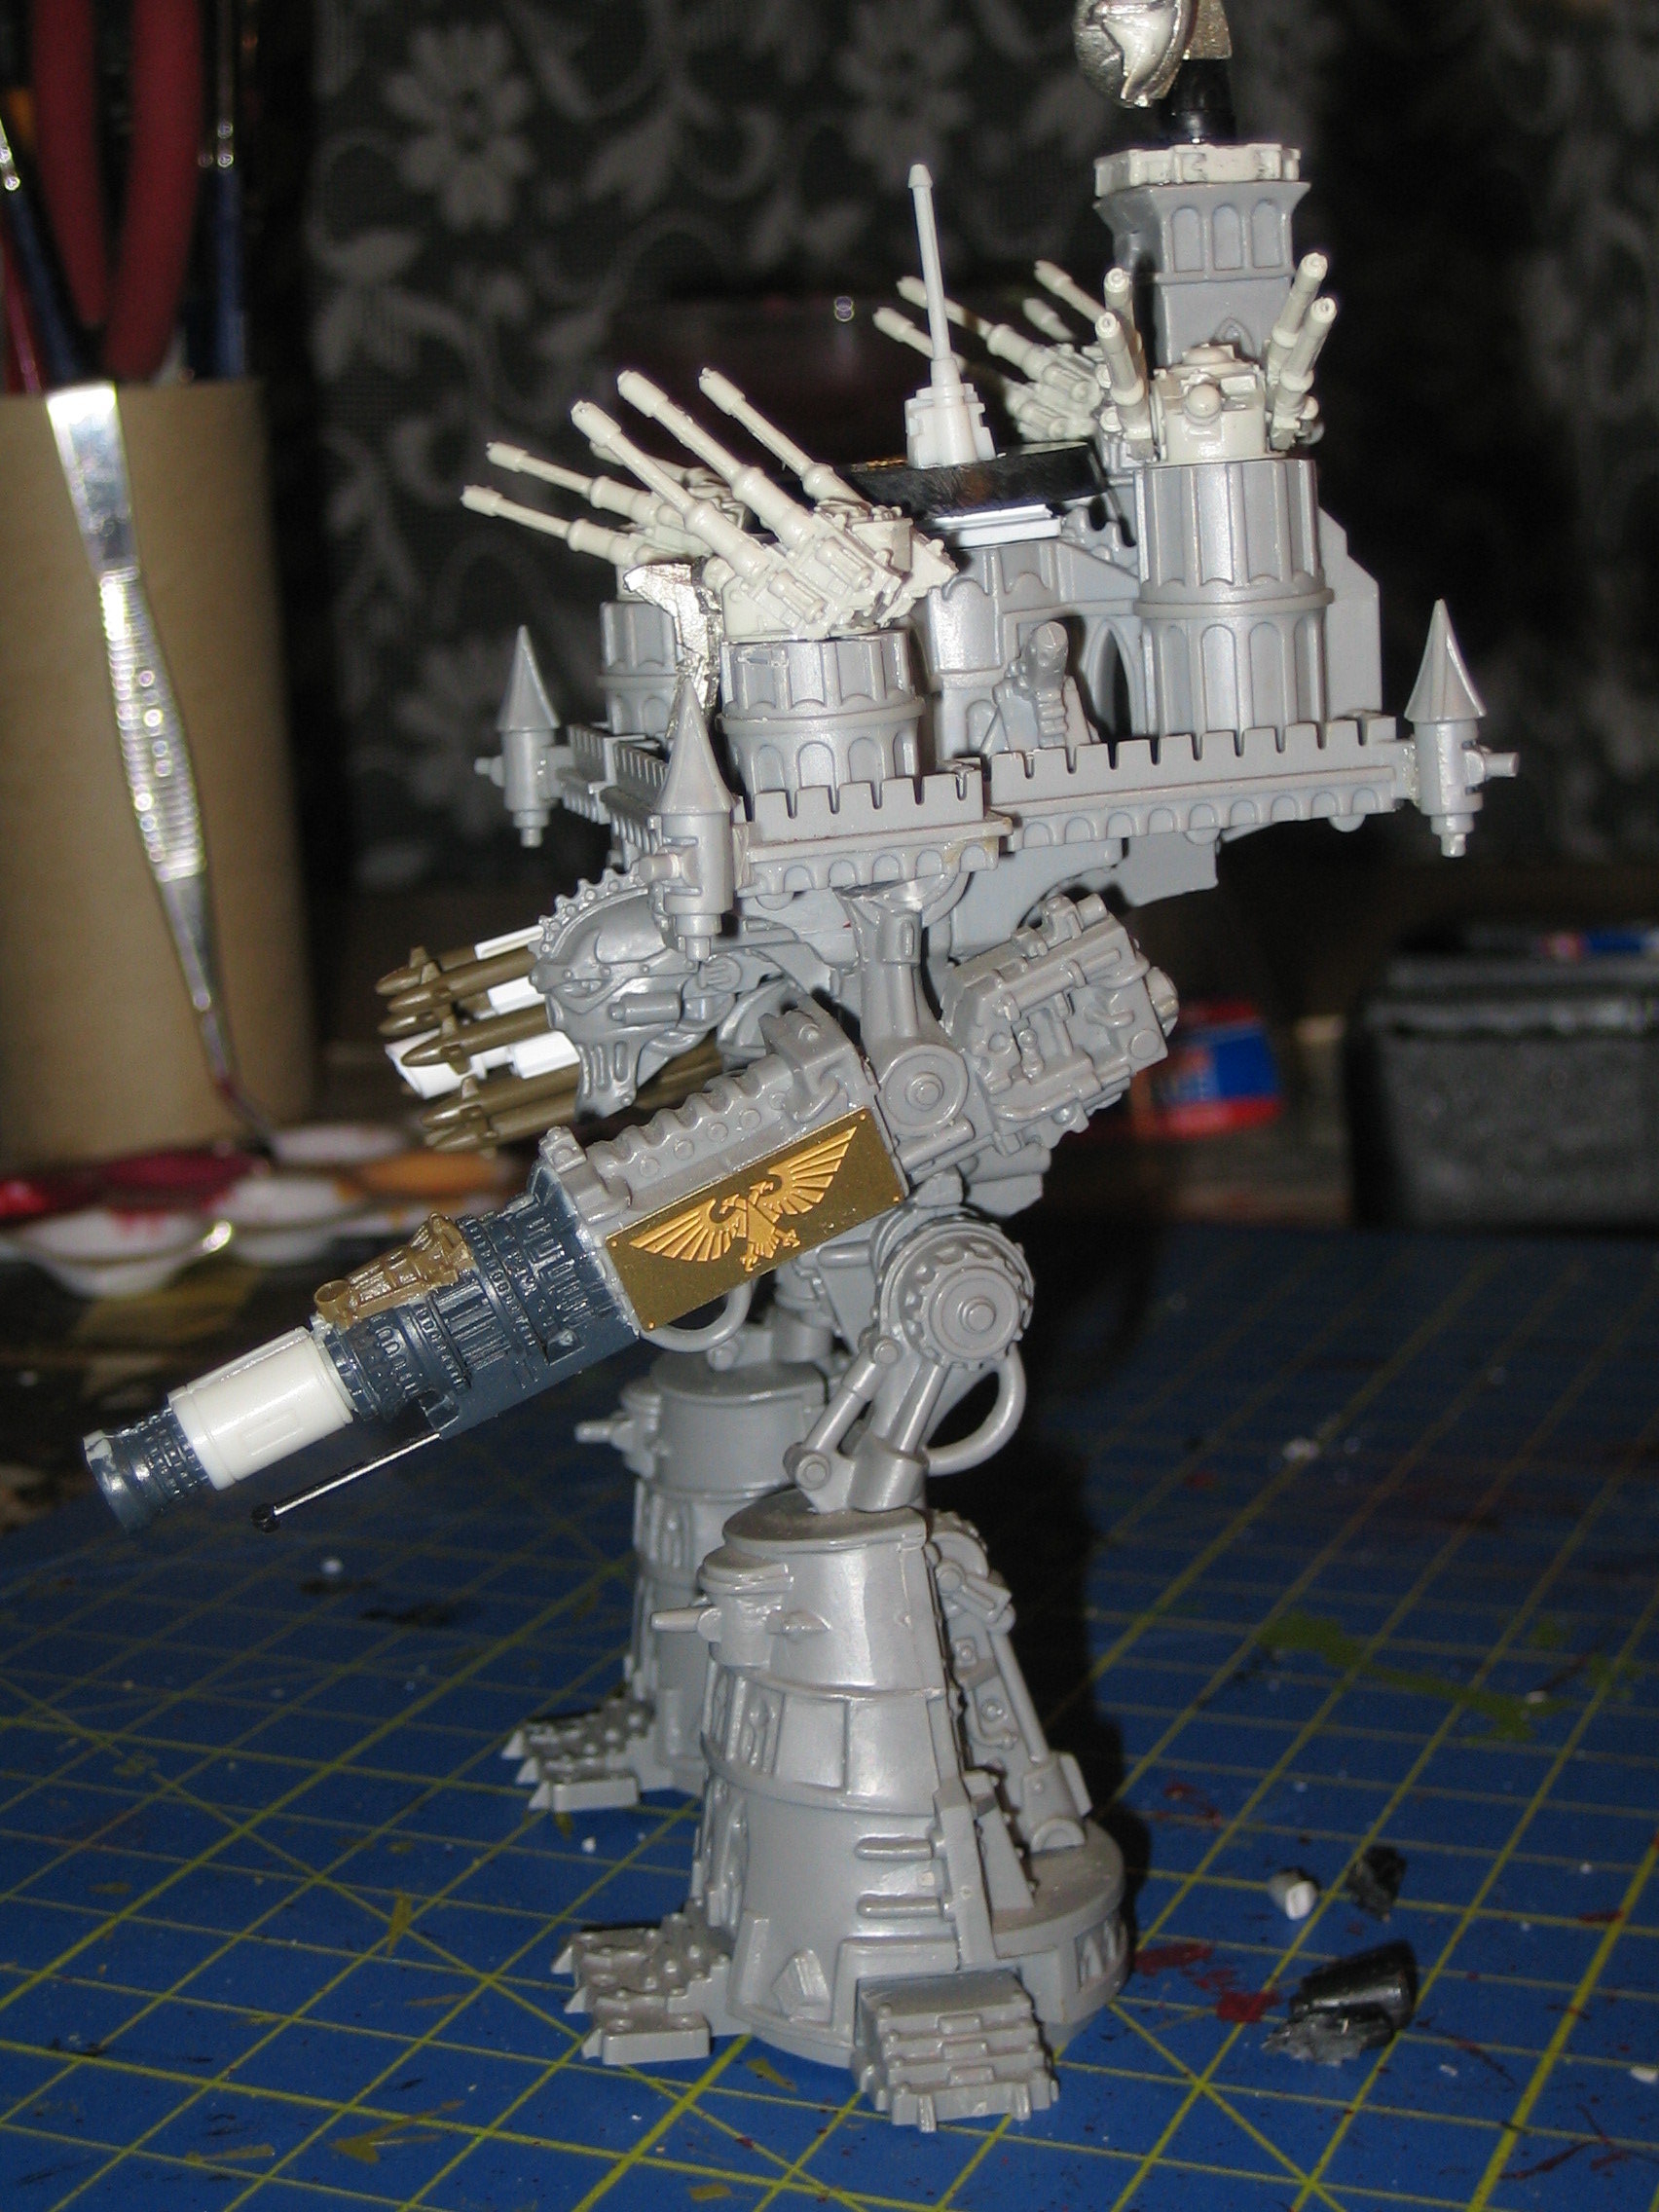
Warmonger Update #3: Building the Doomstrike Missile Launcher
As promised, here's the doomstrike missile battery which is the secondary weapons loadout for the Warmonger titan:

The missiles came from a model kit of an AH-64D Apache Longbow helicopter, which carries eight AGM-114 Hellfire missiles. The missiles in the kit were just about the right size for the Warmonger titan.
I attached two missiles to the top and bottom of a small piece of styrene I-bar, and then used another piece to attach them to a piece of tubing: my intention is for this to become the barrel of an additional weapon: one that can't be used if you use one or more of the missiles in the same turn. The end of the tube is slightly mitred to make it look like the muzzle of a cannon.</p
I then mounted the entire assembly onto the breech of the Hellstorm cannon (once again, the razor saw made short work of would have been a difficult job — removing the barrel of the Hellstorm). A small rectangle of plasticard and an etched brass imperial finished off the job.
This week I decided to just order the Hydra turrets that I will use for the AA guns on the towers: once they arrive, I will only have the landing pad and the radar dish to build before I can start making the final preparations for painting! There is still a lot of filing and putty work to do to fill the gaps left by the previous owner, but once that's done, I can give the thing an undercoat.
More updates next week, hopefully!
Warmonger Update #2: Building the Vengeance Cannon
This afternoon I went down to my local HobbyCraft store and had a very successful trip: I picked up a couple of model kits in a clearance sale that should help me build the Warmonger's primary weapons: the battery of eight deathstrike missiles, and the vengeance cannon.
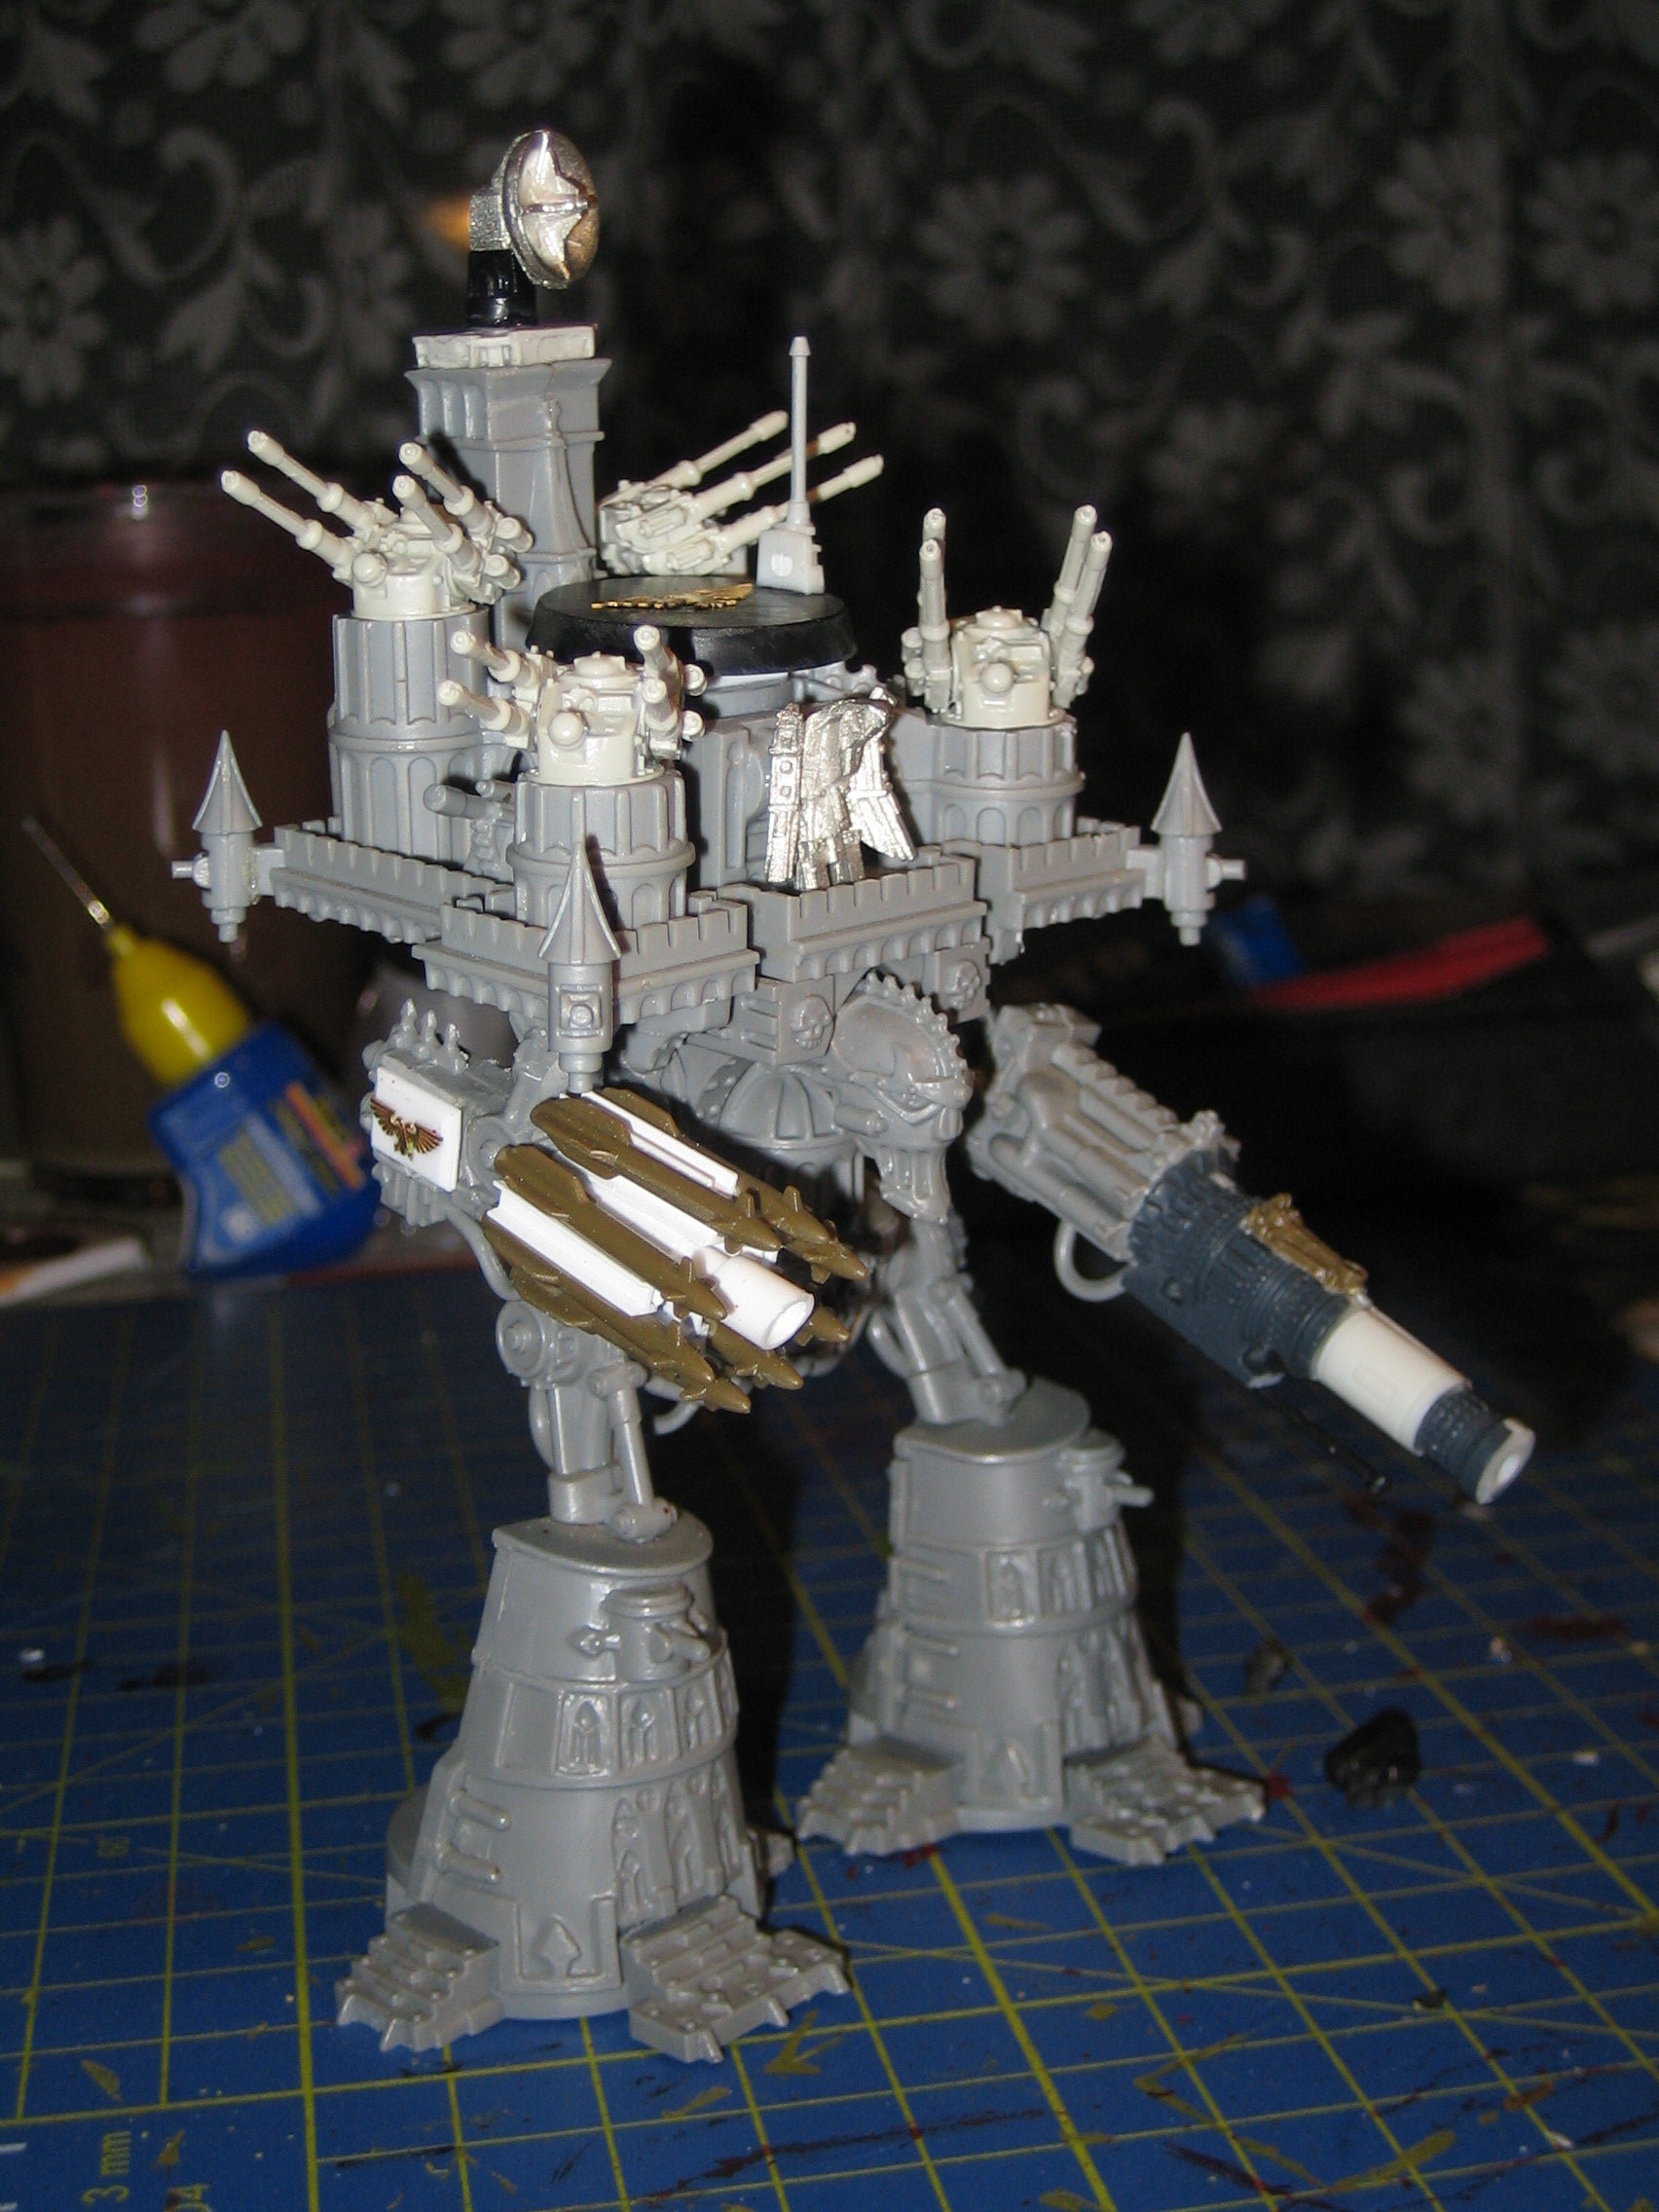
One of the kits was a simple snap-fit model of the ARC Starfighter from the Star Wars movies. The engine pods attached to the barrel of the plasma annihilator make an exceedingly evil-looking weapon:

I also found a kit of an Apache helicopter that has the right number of missiles to make up the deathstrike battery: I'm scratchbuilding the mount for this weapon from plastic tubing and I-bar: but I'll save that for a future update :)
So far I'm really impressed with the razor saw: it makes a whole range of very delicate cuts very simple indeed. I recommend you get yourself one.
Warmonger Update #1: Dismantling the Imperator
This saturday morning I found myself in the unusual situation of being awake before noon and not hung over, so I made the most of the time and picked up the razor saw that I talked about in my last post. Once I'd taken a look at it I realised that it would be narrow enough to do what I needed it to do.
So I took it home and it made pretty short work of the carcass of the Imperator:

The various components came apart pretty easily, so I can now start filling in the gaps left by the previous owner, doing various customisations, and building the components that turn the Imperator into a Warmonger.
Whereas the Imperator has the tower guns mounted on the upper fortress, the Warmonger fields four anti-aircraft guns. I'm thinking about using the turrets from the Forgeworld Hydra platforms: unfortunately they only come in multiples of three, so my choices are either to try to sweet-talk Mail Order into letting me have the bits that I need, or buying two sets and selling the spares on eBay. But I think that if I can't do the former, I might try to scratchbuild the AA guns instead.
The first piece of customisation I did was to remove the Main Battery at the front of the fortress and replaced it with an imperial eagle taken from a Battlefleet Gothic ship. I think that it will make a nice centerpiece to that part of the titan.
I also had the chance to put the finishing touches to the troop stands that will form the final three companies of my space marine chapter, here they are, waiting to be undercoated:

What you see here is two companies (18 stands + HQ in Space Marine 2nd edn. and NetEpic) of tactical troops (one company in Mark VI "corvus" armour and one in Mark VII "Eagle" armour) and two detachments of scouts (I already have another detachment of scouts that are base coated). Once these stands are painted, I will have a full space marine chapter: ten infantry companies, including a full Terminator company (that's 20 stands, not just three 20-man detachments) and the aforementioned scout company. When that's done, I'll be posting photos, so stay tuned!
I'm quite pleased with the way the scout company HQ turned out, here's a picture:

To make the scout standard-bearer, I removed the blade and pommel of his combat knife, and then filed a narrow groove through his enclosed fist. I used a tailor's pin to make the banner pole (anything else would have been too thick): the imperial eagle at the top is taken from the Forgeworld etched brass sheet.
My Summer Project
This week an item arrived in the post that is going to be a sort of summer project for me:

When I told my friends that I had acquired this choice item, they all had the same reaction:
not another one!
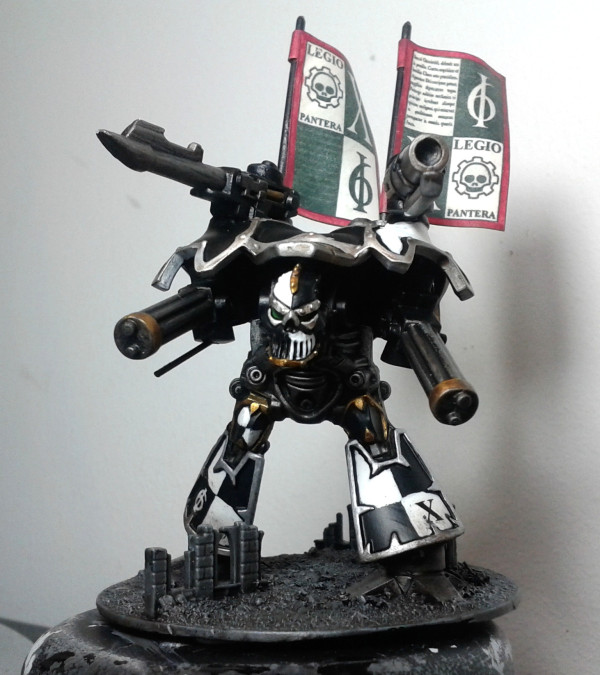
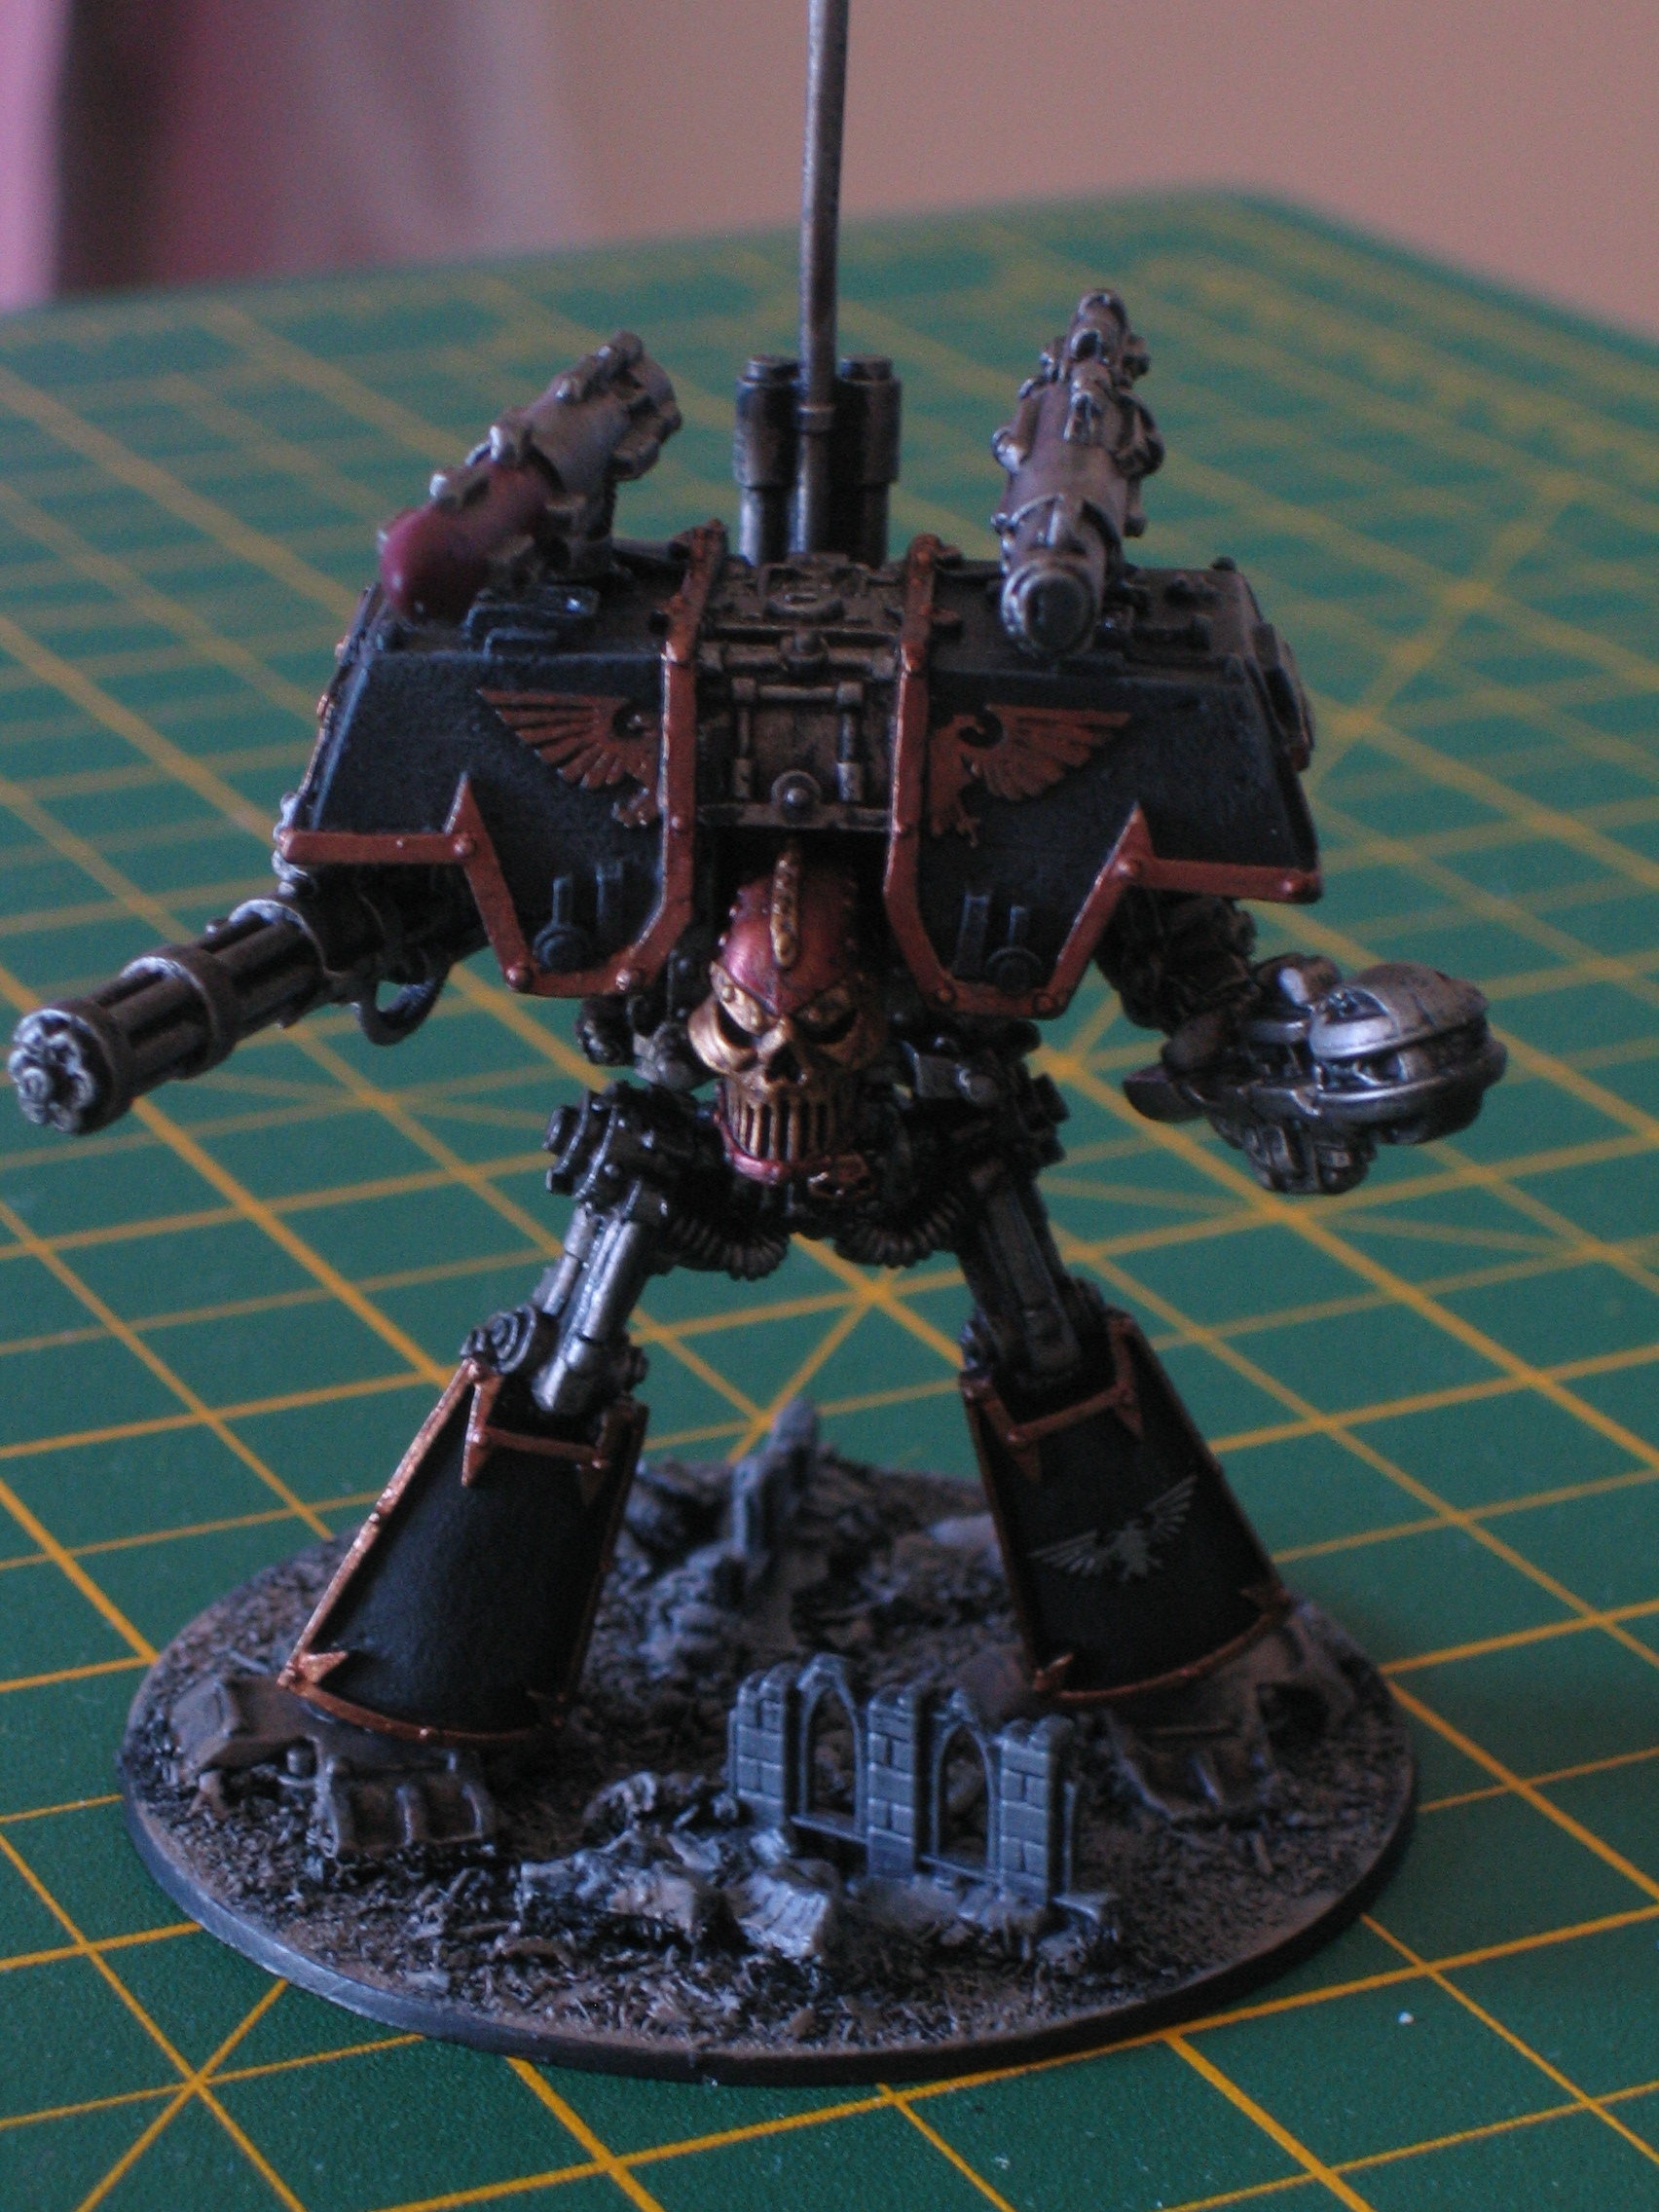
because, you see, I already have a fully operational Imperator class battle titan. Behold the "Fearsome Engine", Machinator Formidabilis:

(By the way, if the above image looks familiar, it's because the Wikipedia article on titans uses photos I took of some of my titans.)
The reason for their consternation is that Machinator Formidabilis has, in the ten years since its commission into the Legio Pantera (my titan legion, the Black Panther Legion), never even come close to being destroyed: not once. Even a massed rank of Gargants with their ultra-cheesy, shield-stripping, automatic-hit-on-the-legs GutBuster Cannon, has not managed to do it serious harm. So the thought of another indestructible castle robot on the battlefield fills them with dread.
Tempting though the thought is of fielding a 4,500 point army consisting of just two titans, that is not my plan: over the course of this summer, and described in depth on this nerdy gaming blog, I will be taking the above artifact and attempting to do what Christian Salling did and convert it into a Warmonger: a cousin of the Imperator, with a lower points cost, and a specialisation for long-range firepower and anti-aircraft support. Games Workshop used to produce a conversion kit, but they're as hard to find as an honest politician, so I will probably end up scratchbuilding the bits that I need.
Stay tuned for updates!