All posts in "40k"
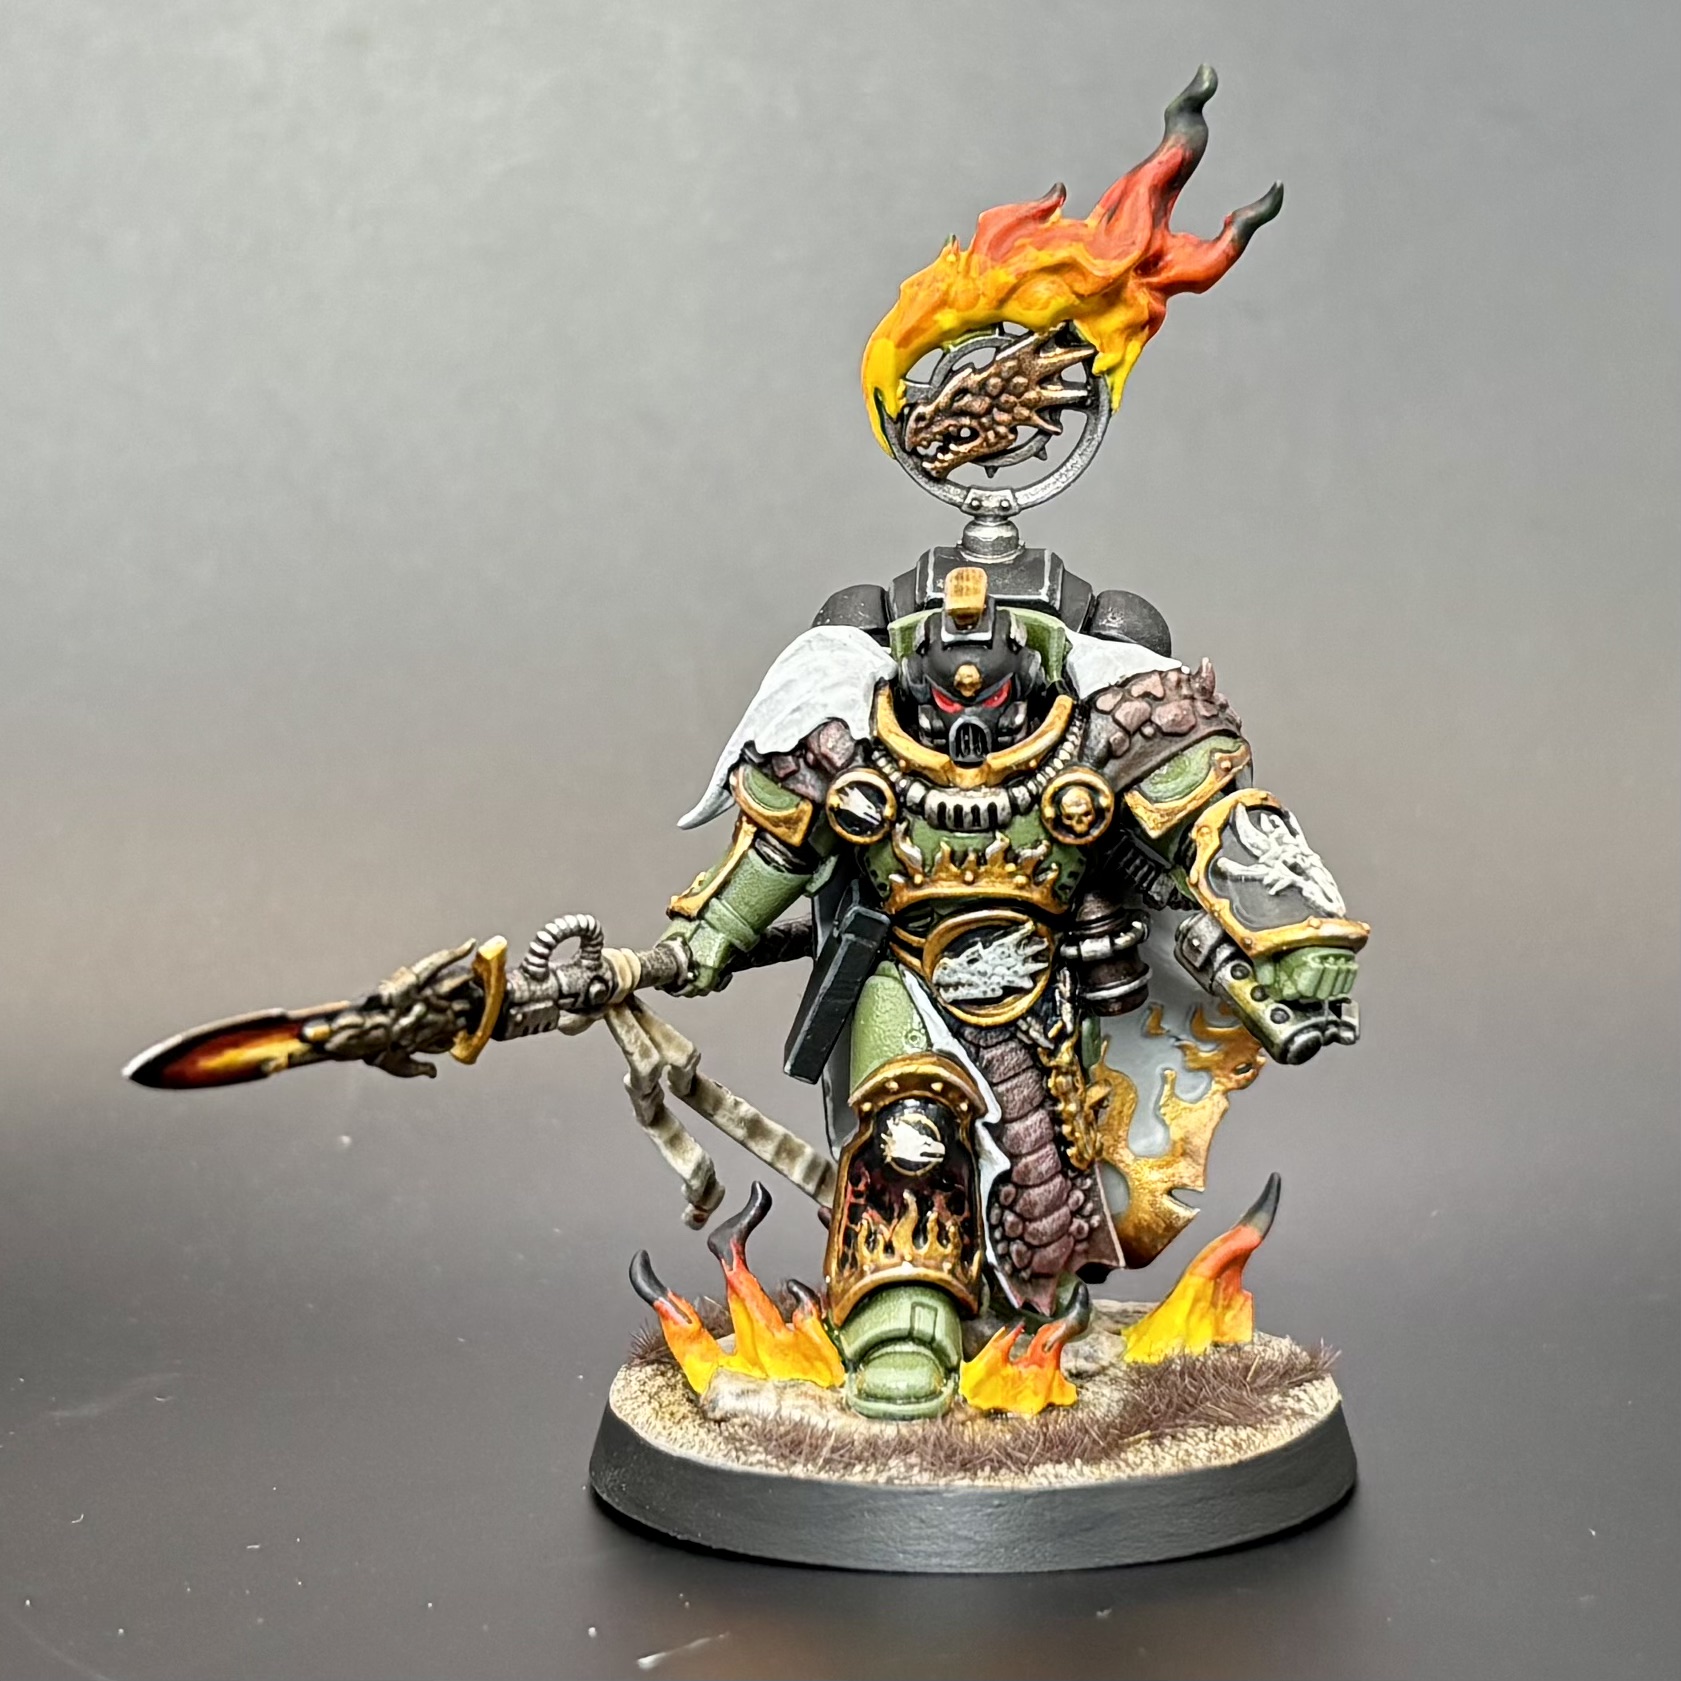
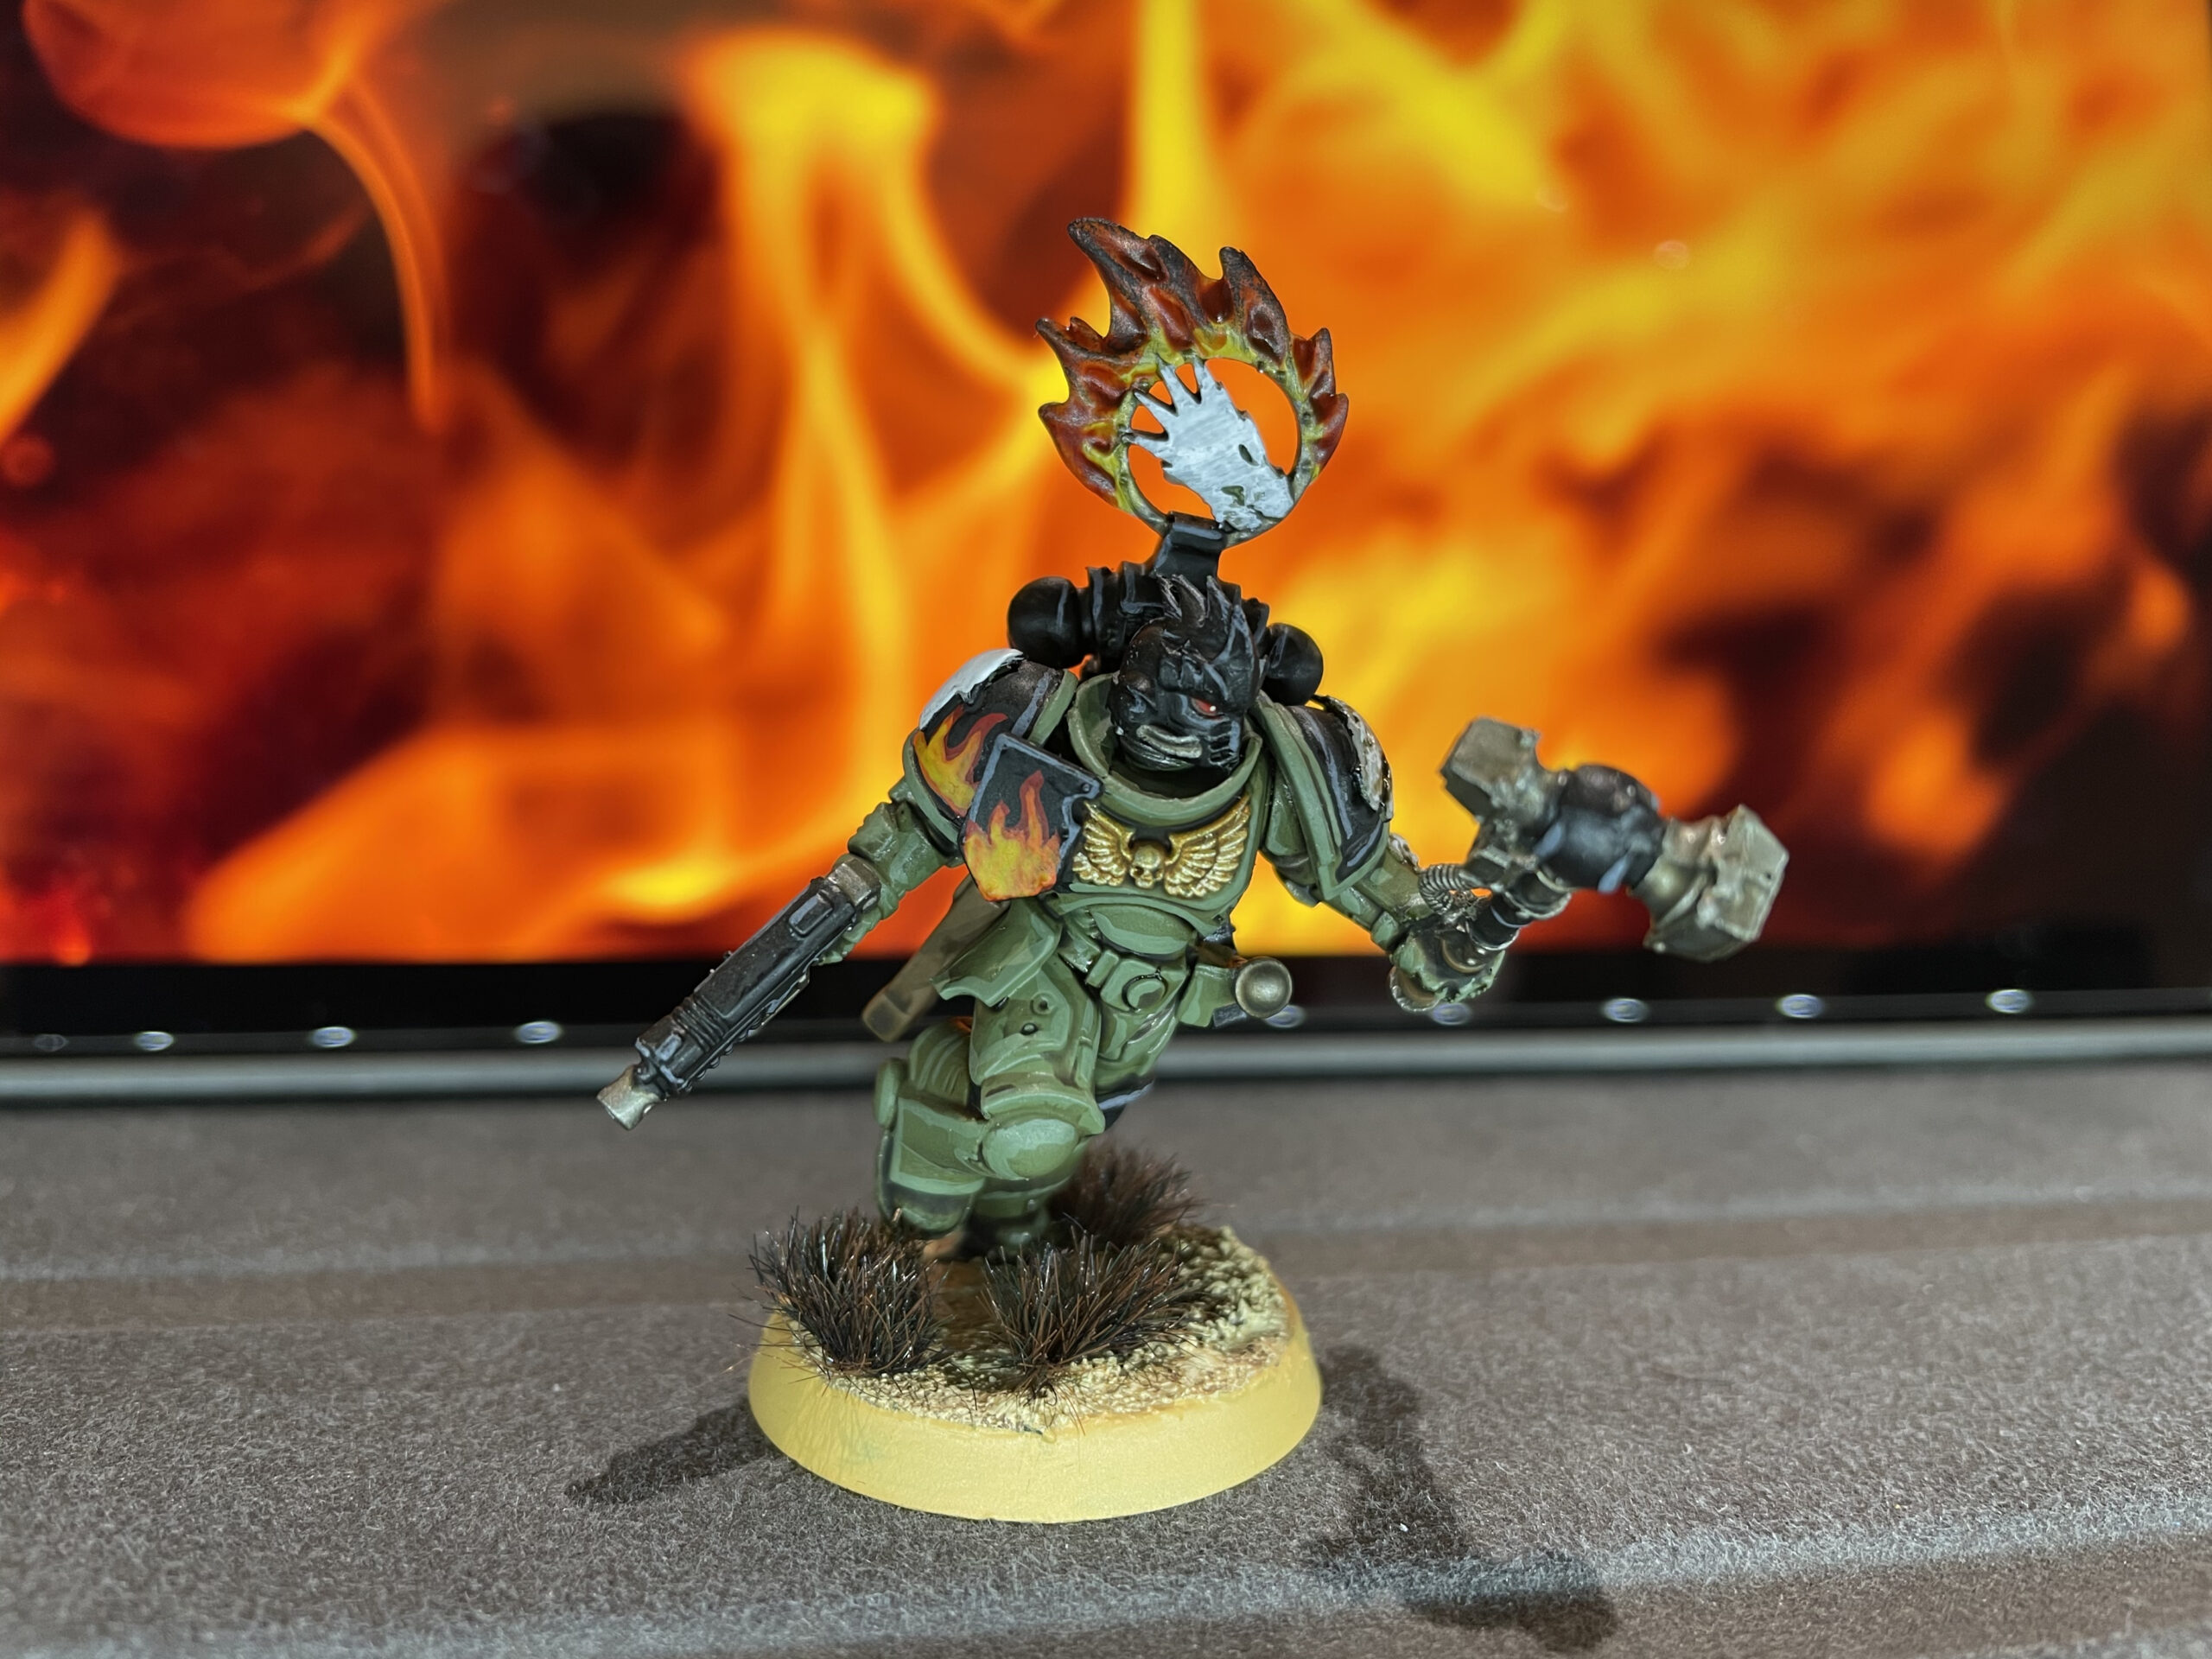
The Forgefather
At the moment, Legions Imperialis and BattleTech (plus the occasional game of Space Hulk or Gaslands) are absorbing all my hobby time and interest. For now, 40K, with its neverending treadmill of new editions and new codexes, and constant churn of “meta”, holds little appeal for me and most of my gaming friends. In fact, over the summer I actually put both my 40K armies (apart from my Reaver) into cold storage as they were just taking up space.
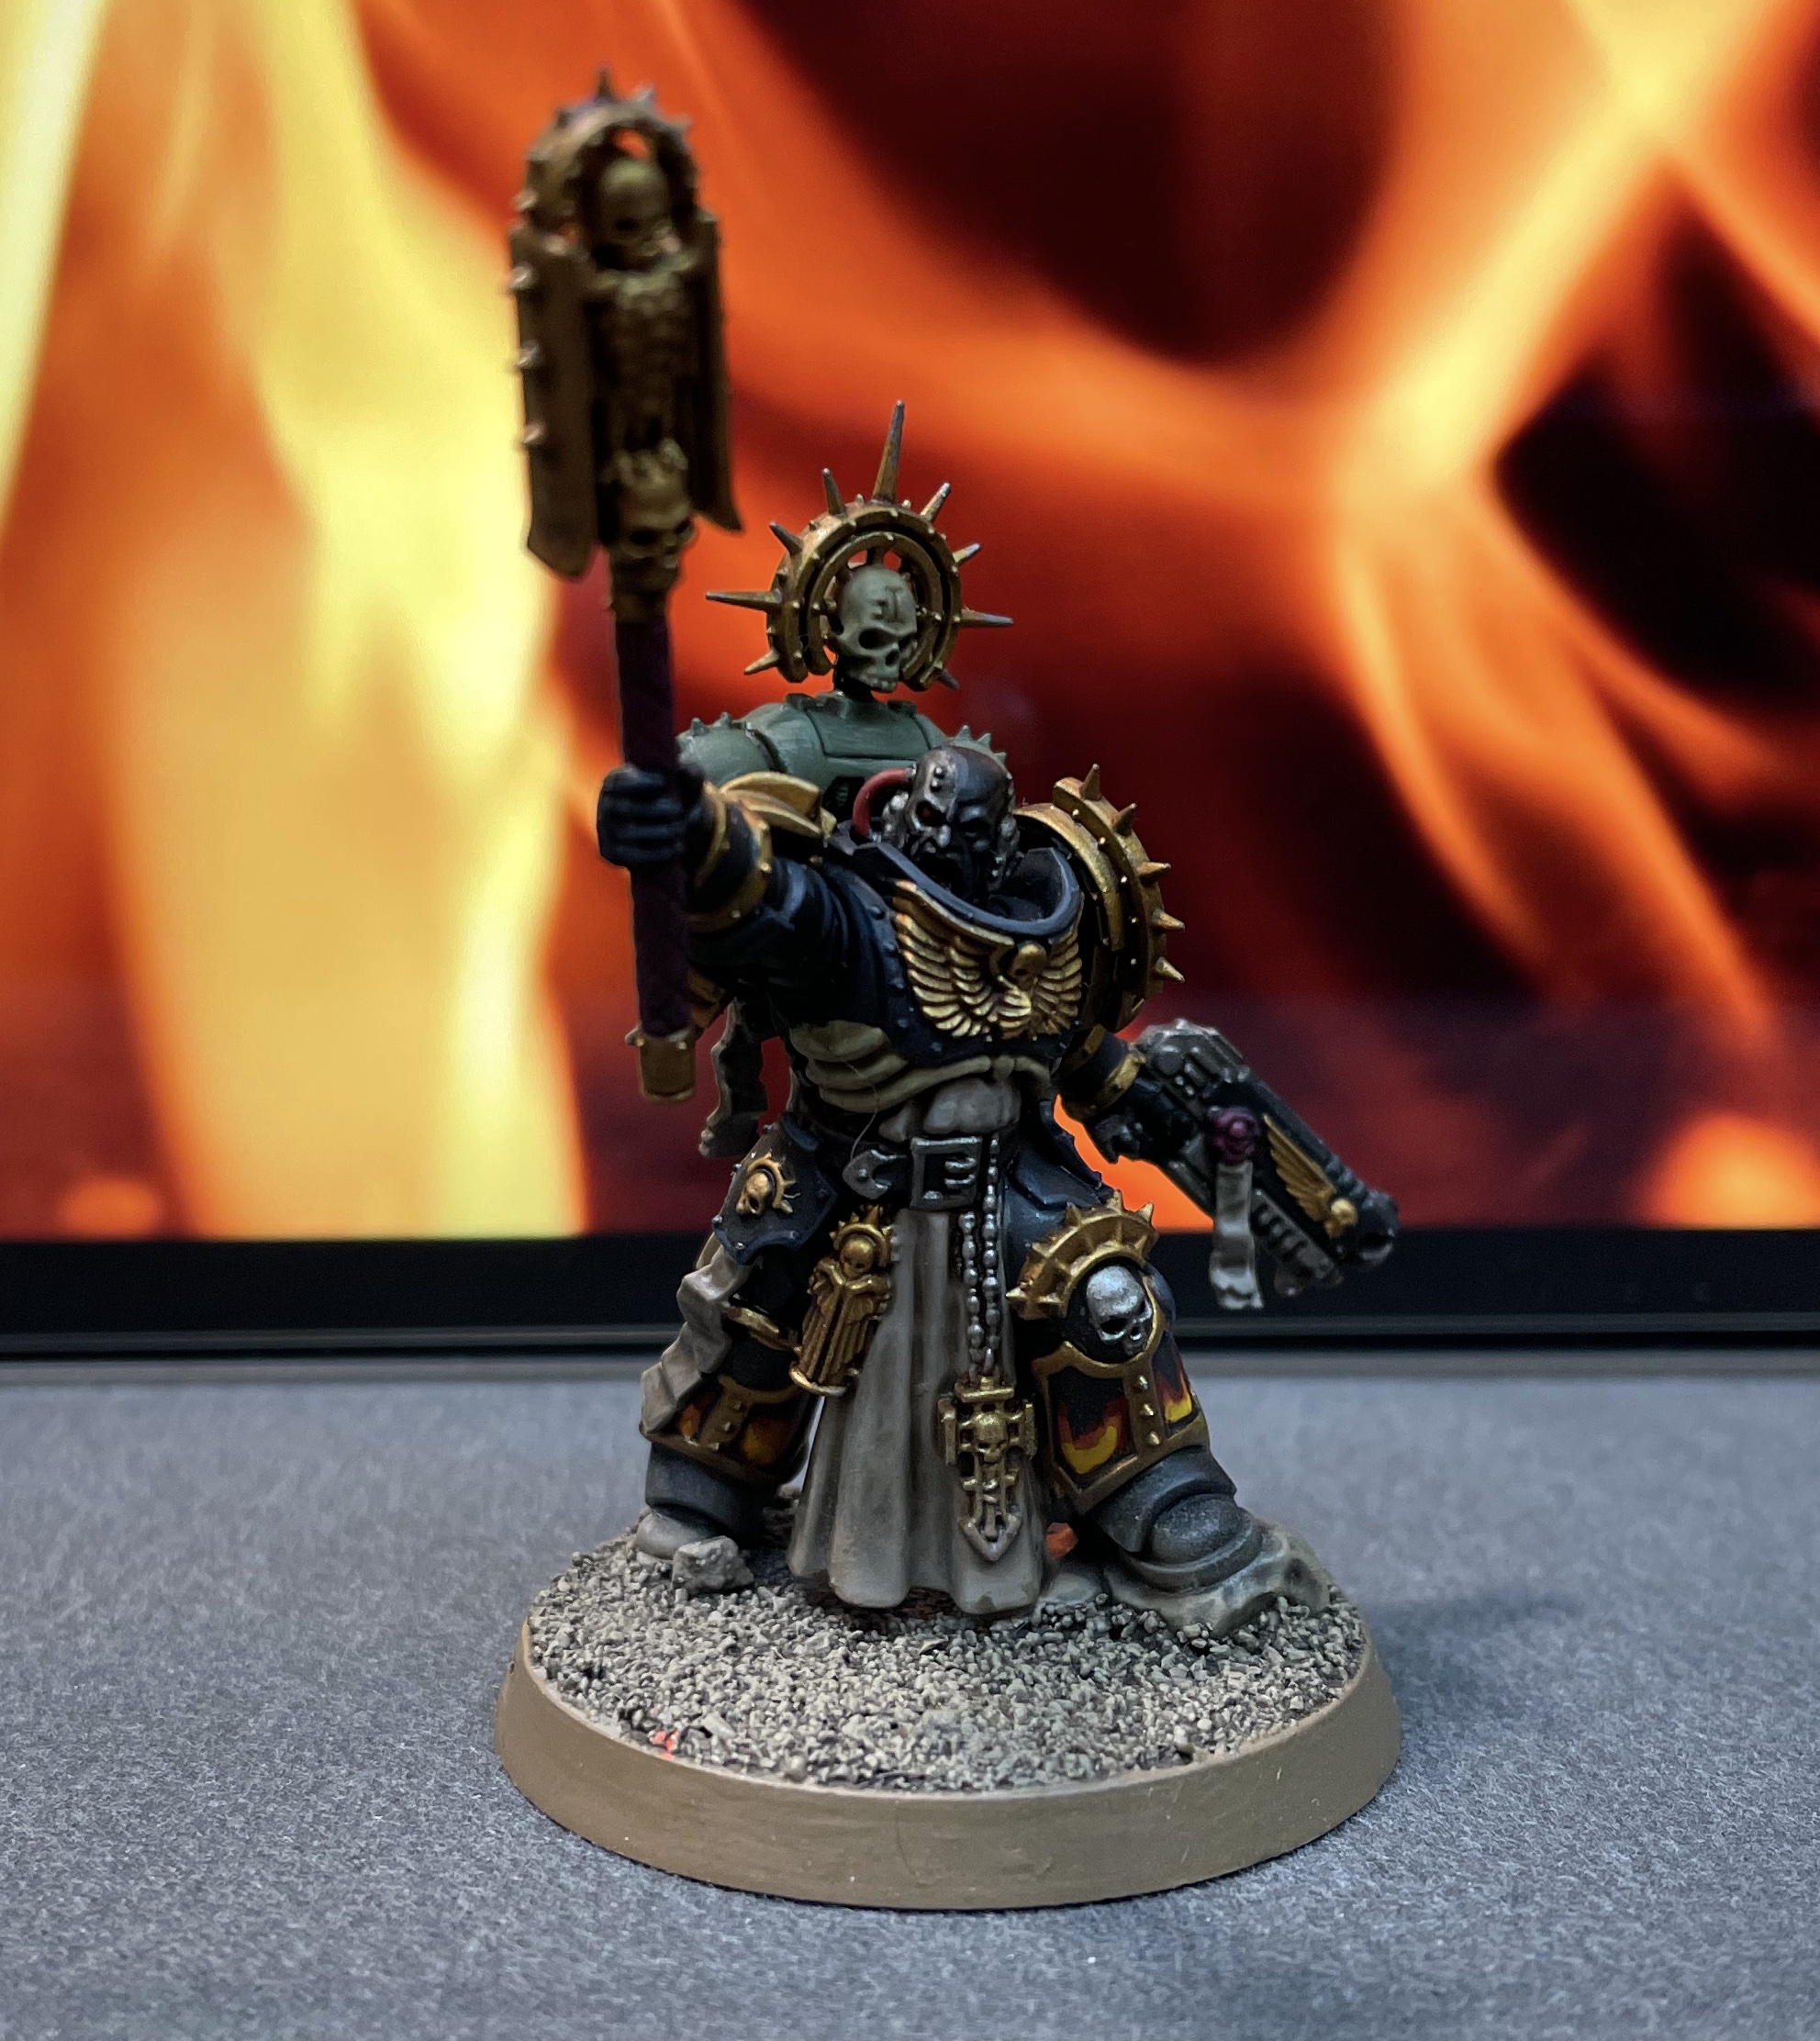
But when GW announced a new model for Vulkan He’stan, Forgefather of the Salamanders, I decided to pre-order it, firstly because I have never been very happy with the version I painted more than a decade ago, but also to give myself a palate cleanser after more than 18 months of only painting 8mm miniatures.
As he is a figurehead character for the Salamanders army, I decided to put a bit more than the usual amount of effort into him, and I am quite pleased with how he’s turned out. Definitely an improvment on what I was able to achieve back in 2014!
More pictures below the fold.
Vulkan Reforged, Immortal Primarch of the Salamanders

More pictures below the fold.
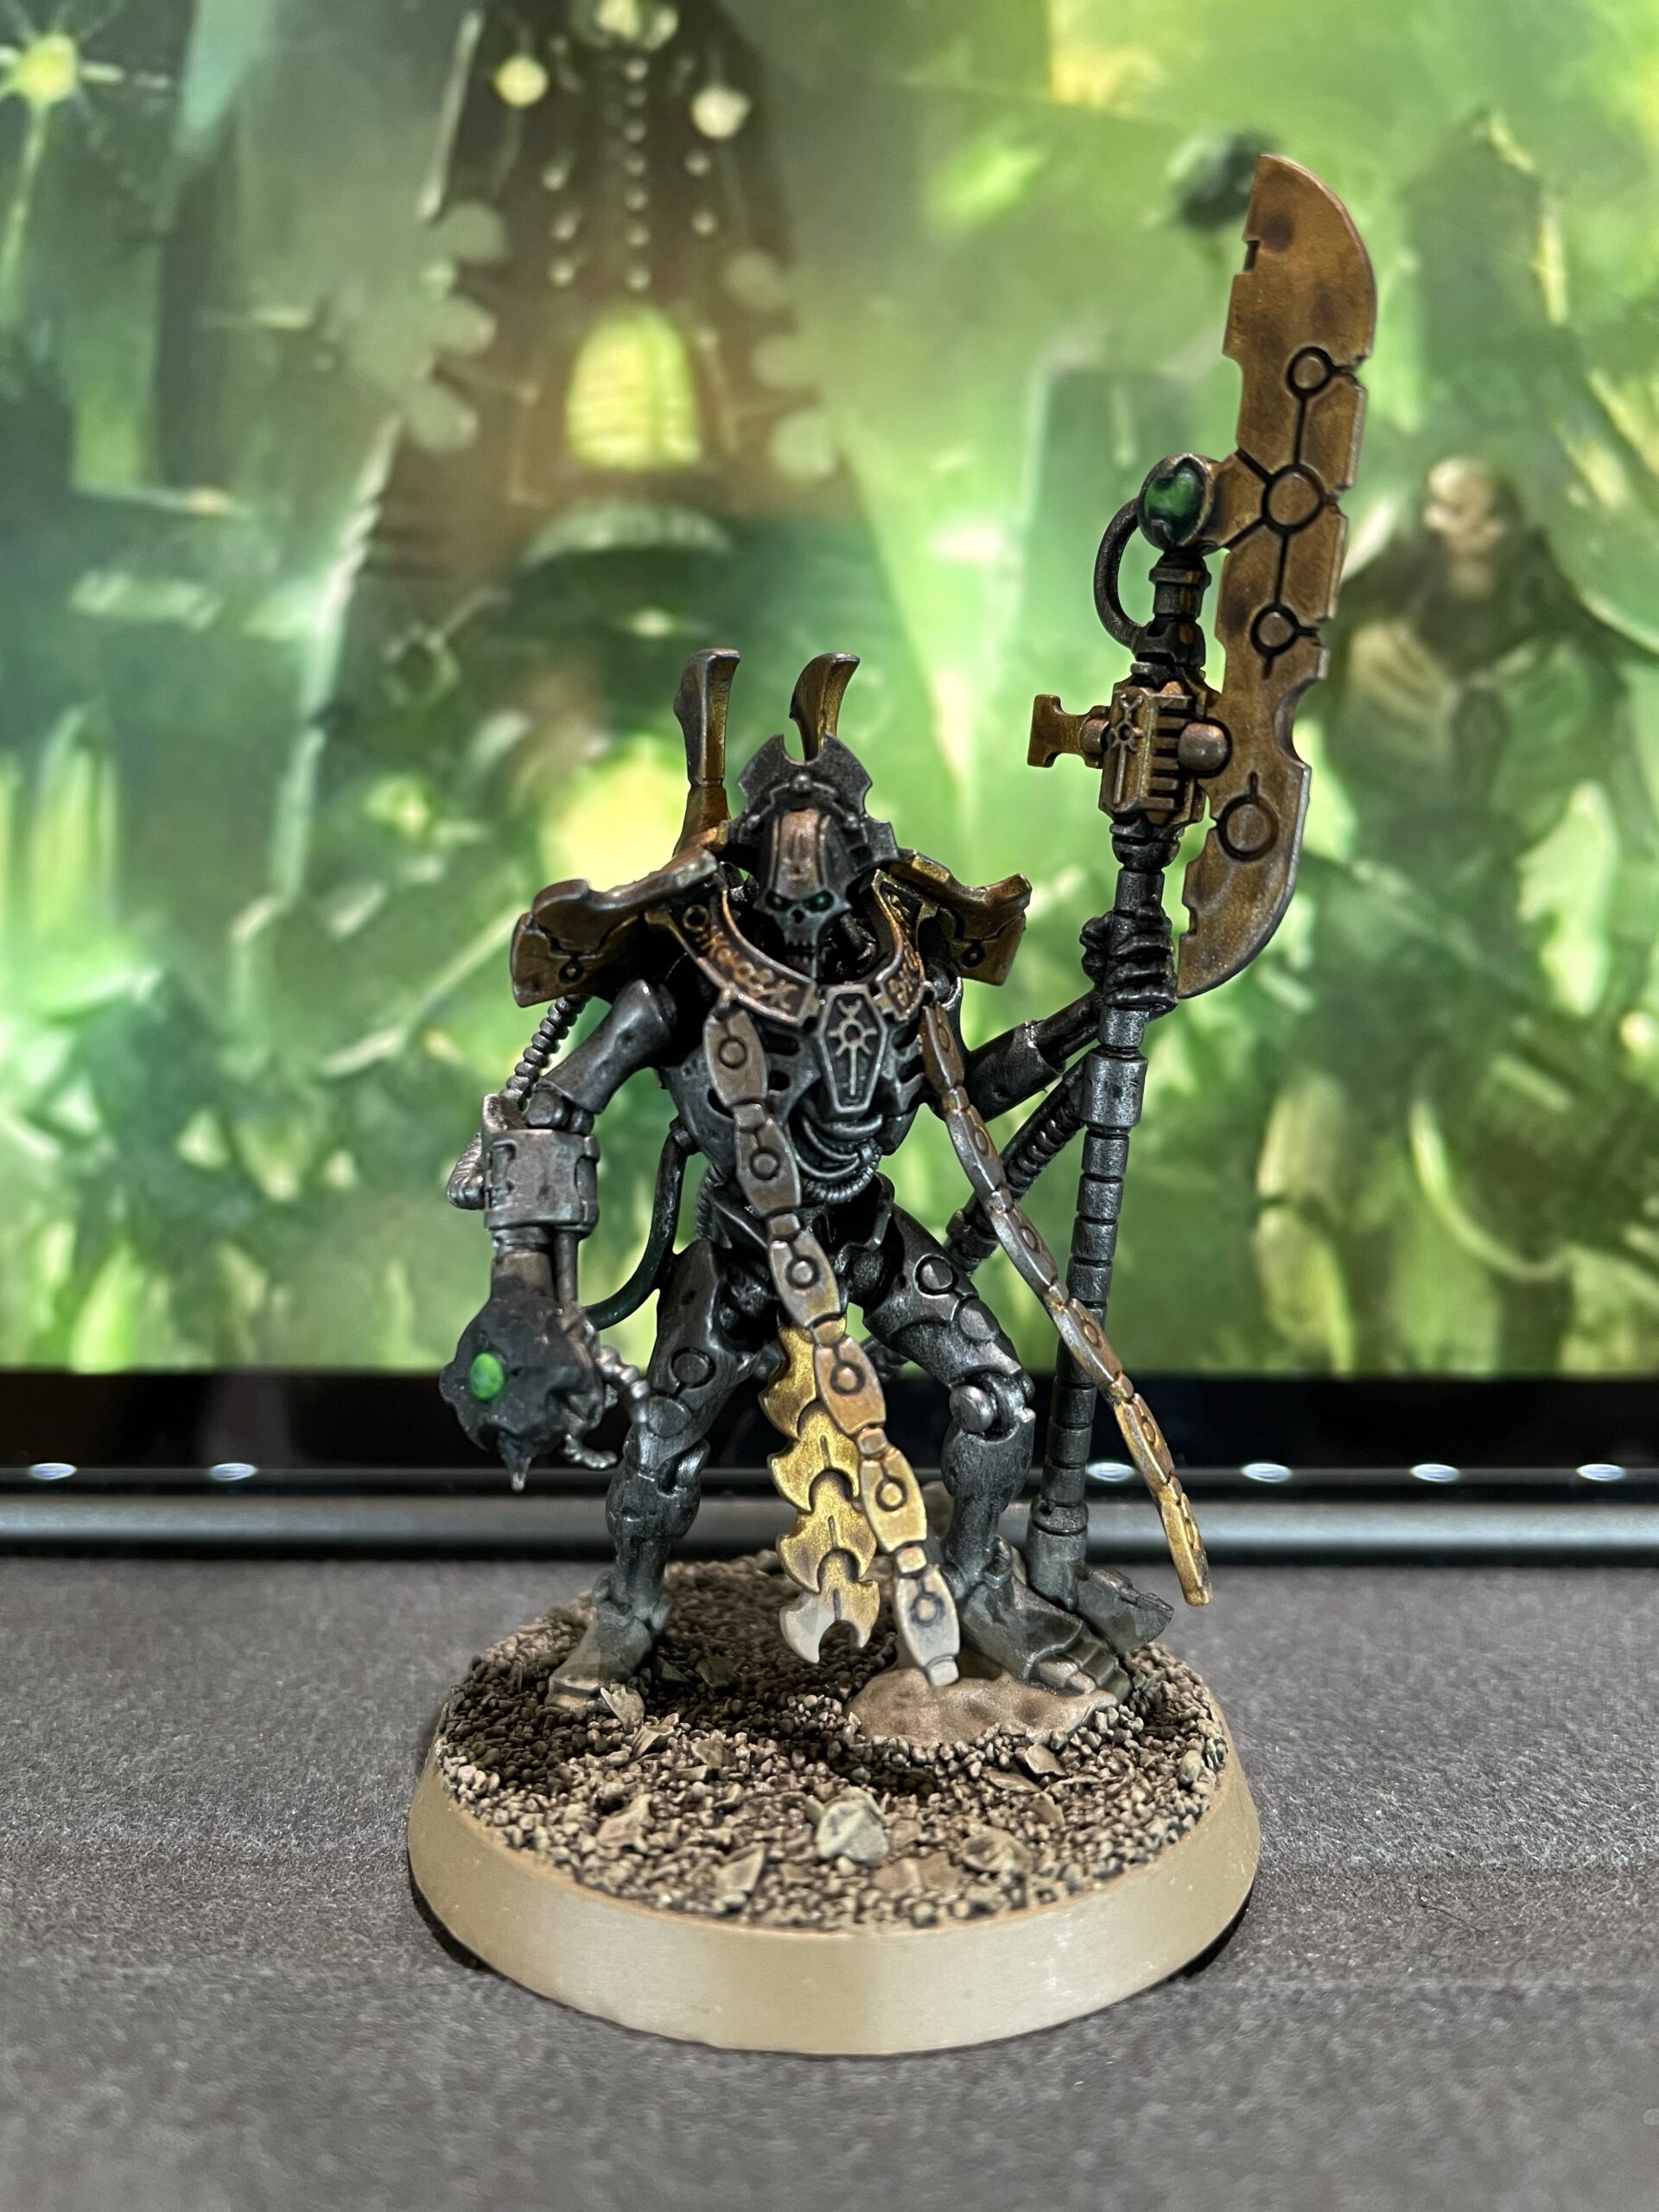
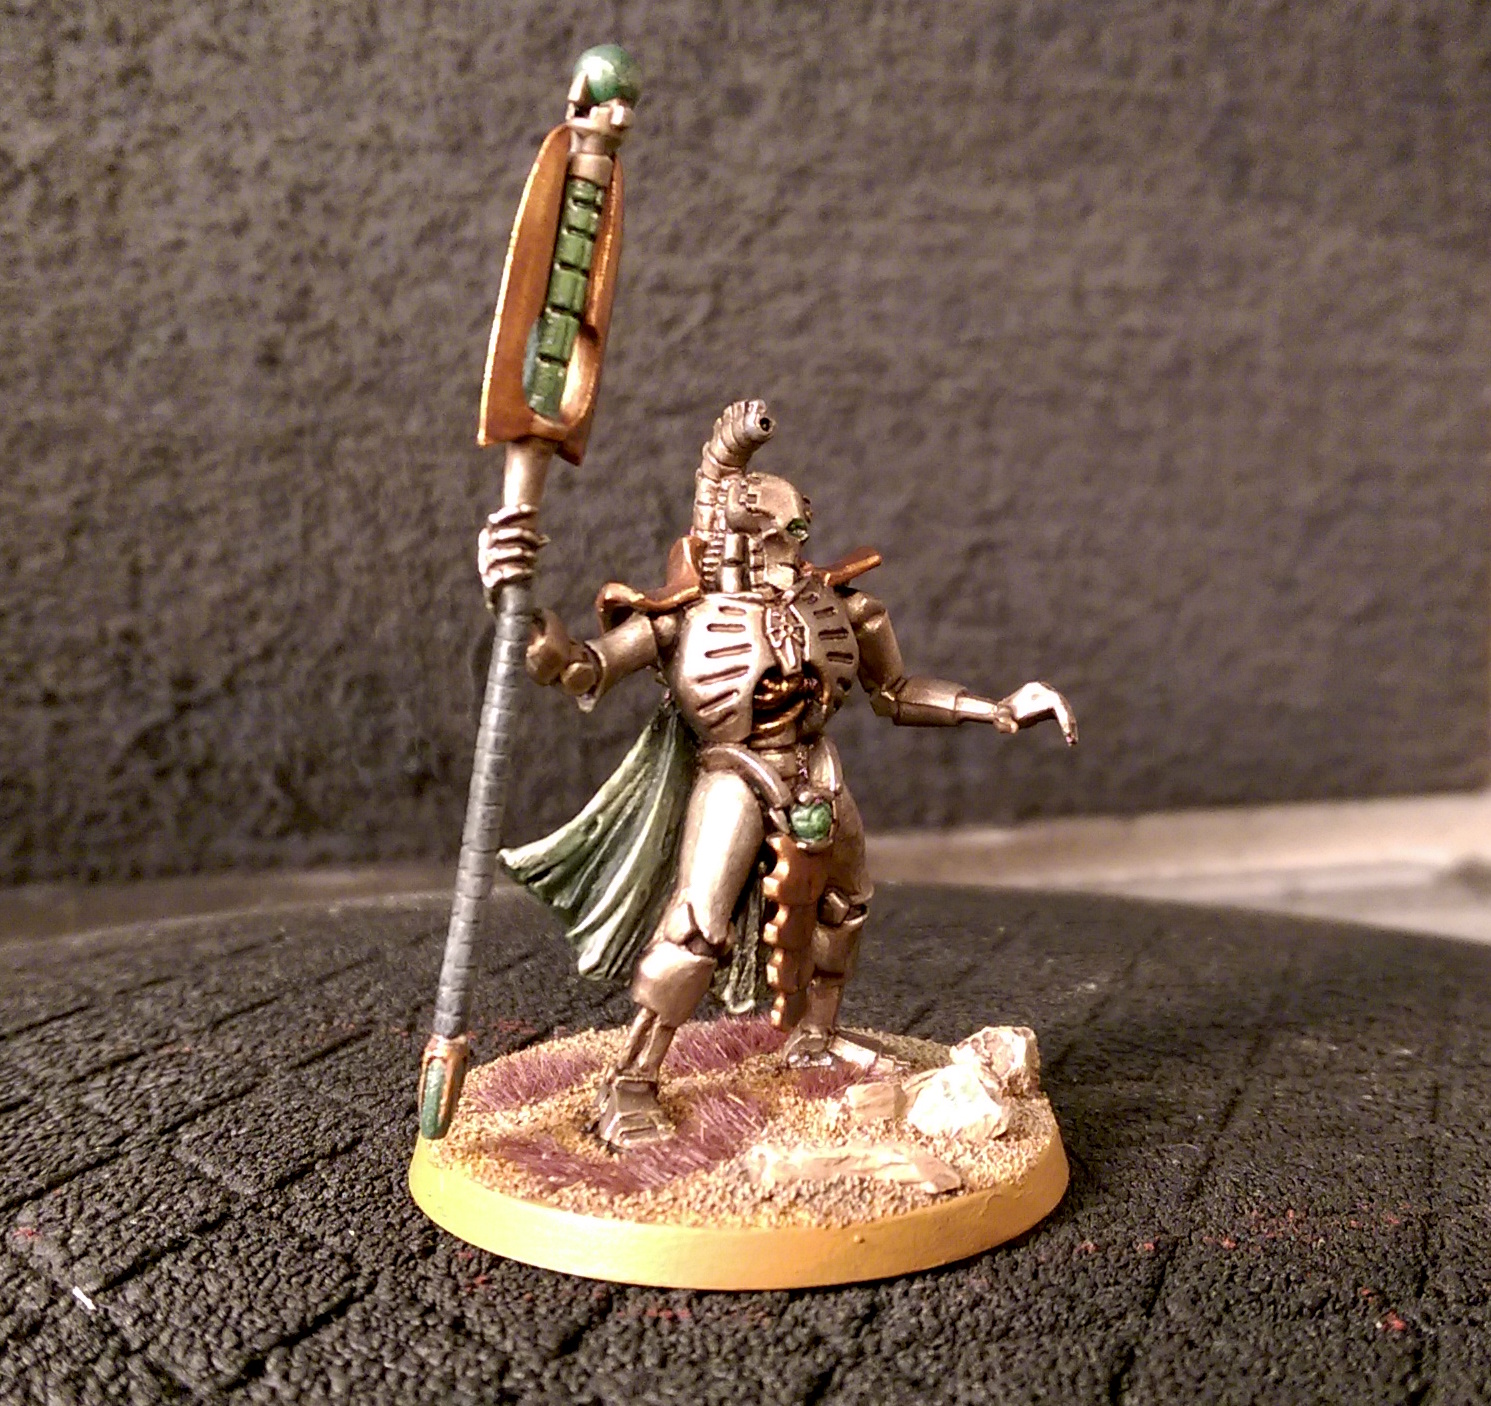
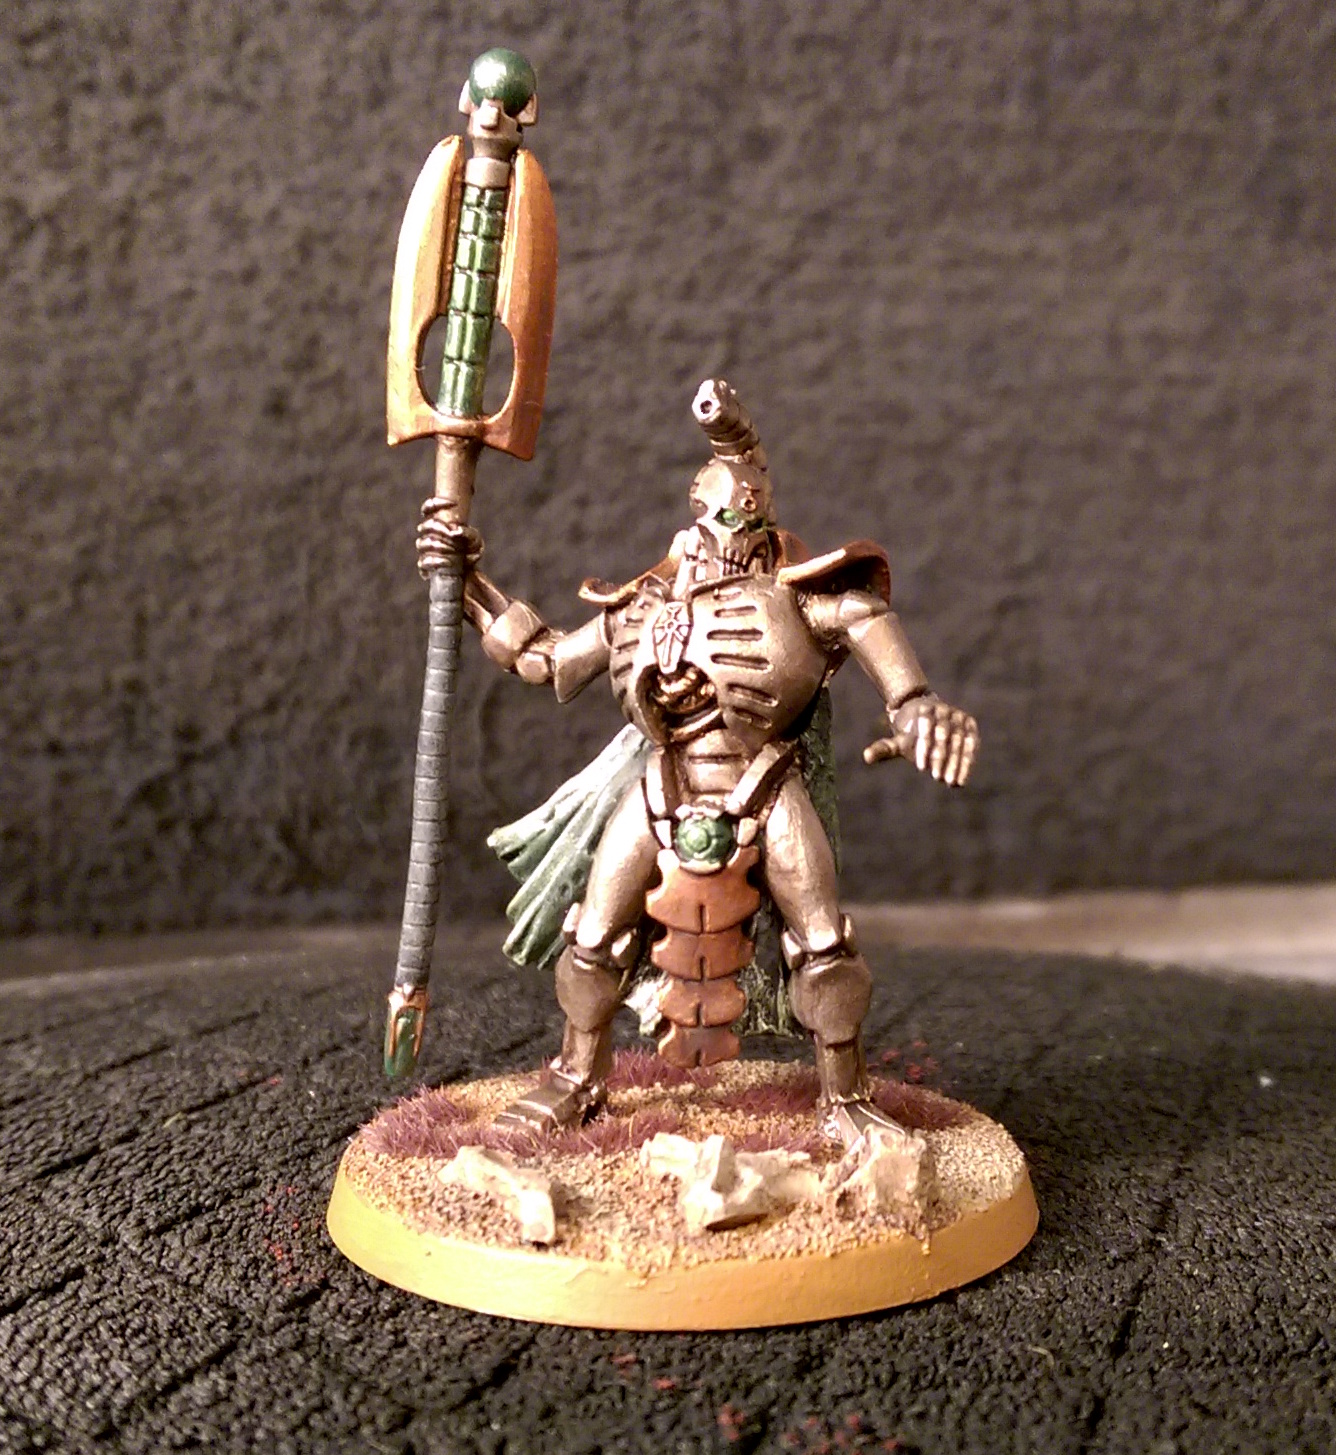
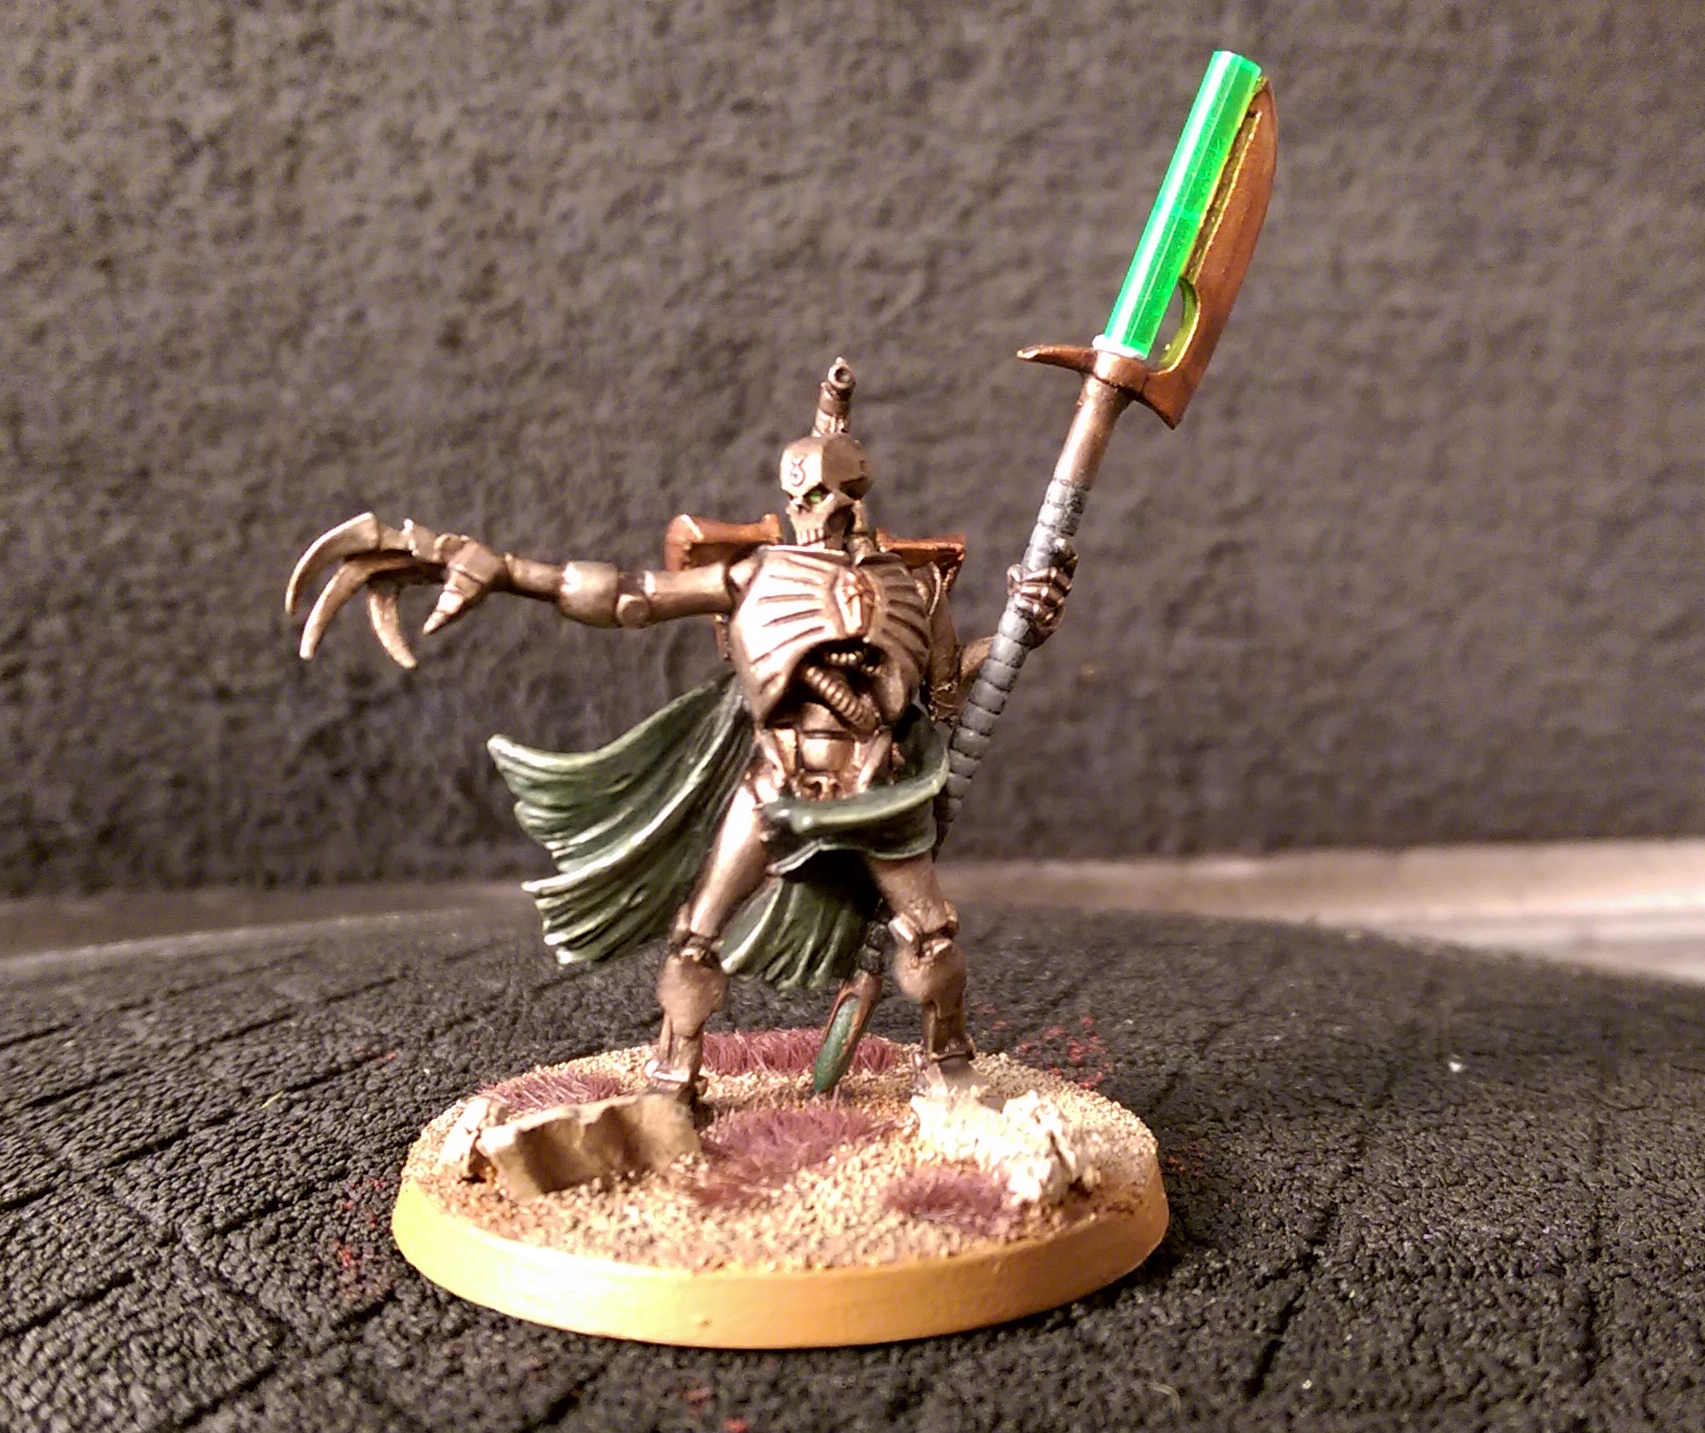
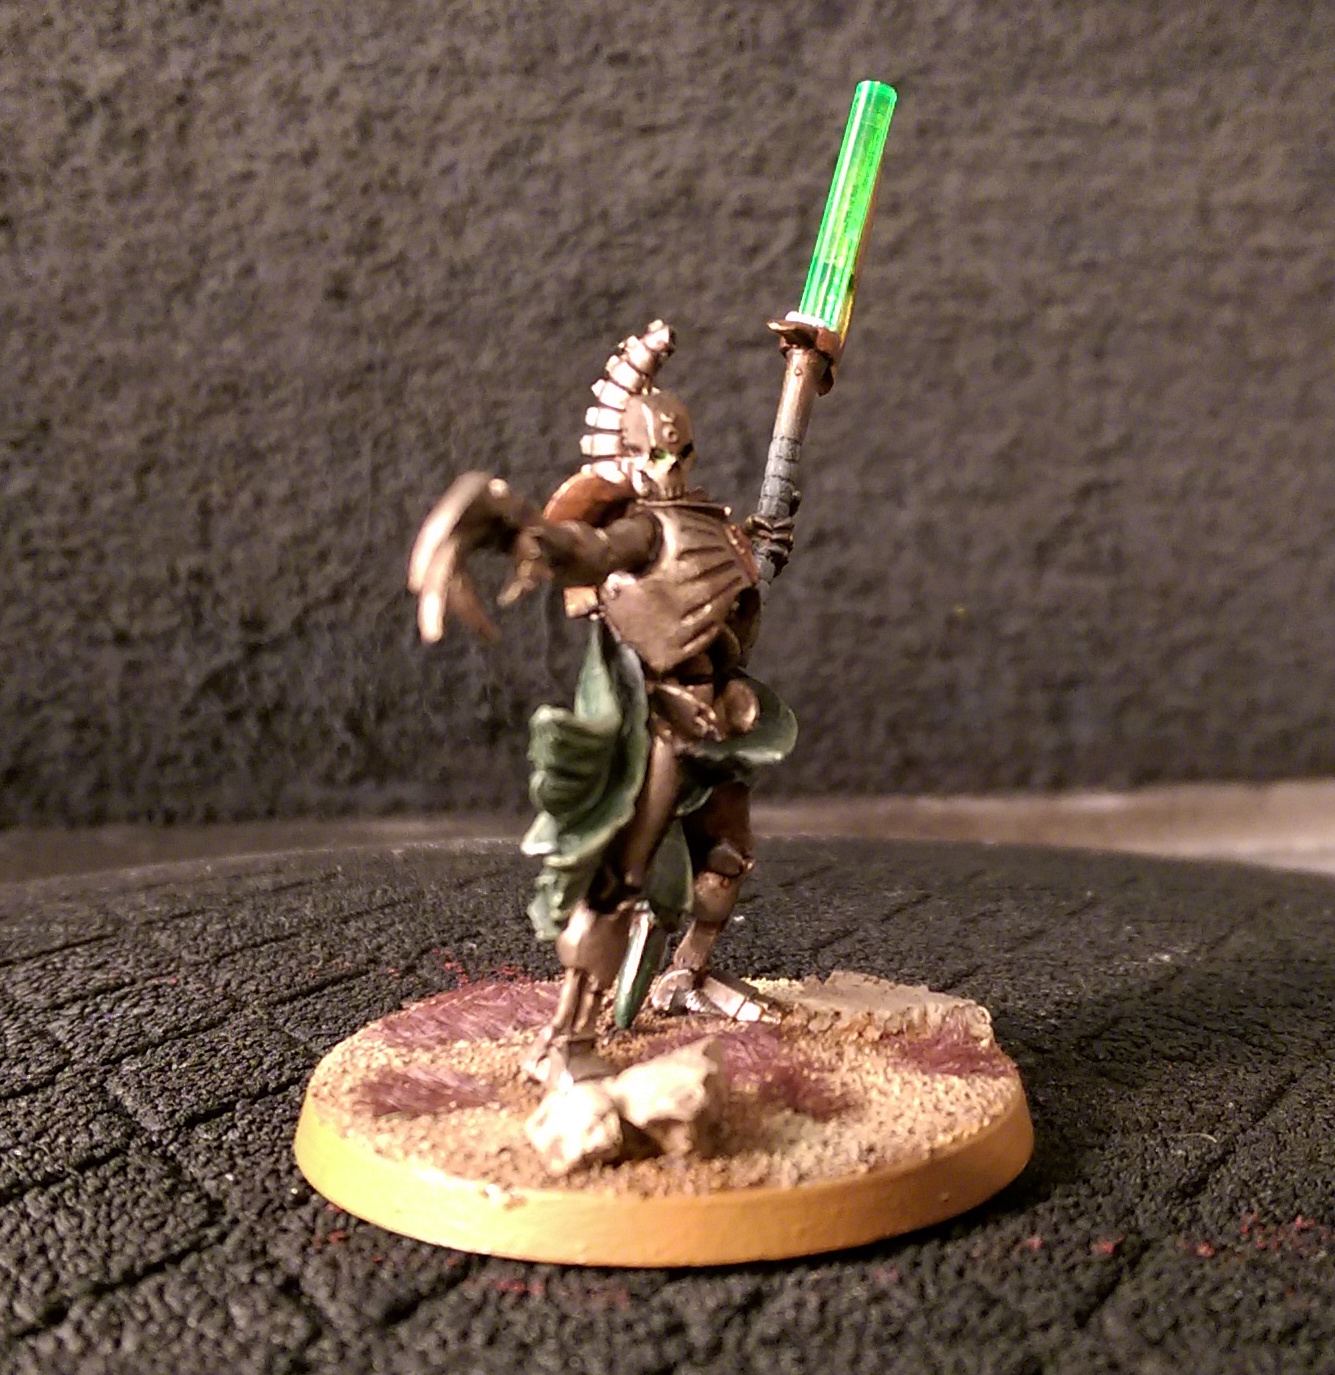
C'tan Shard of the Void Dragon
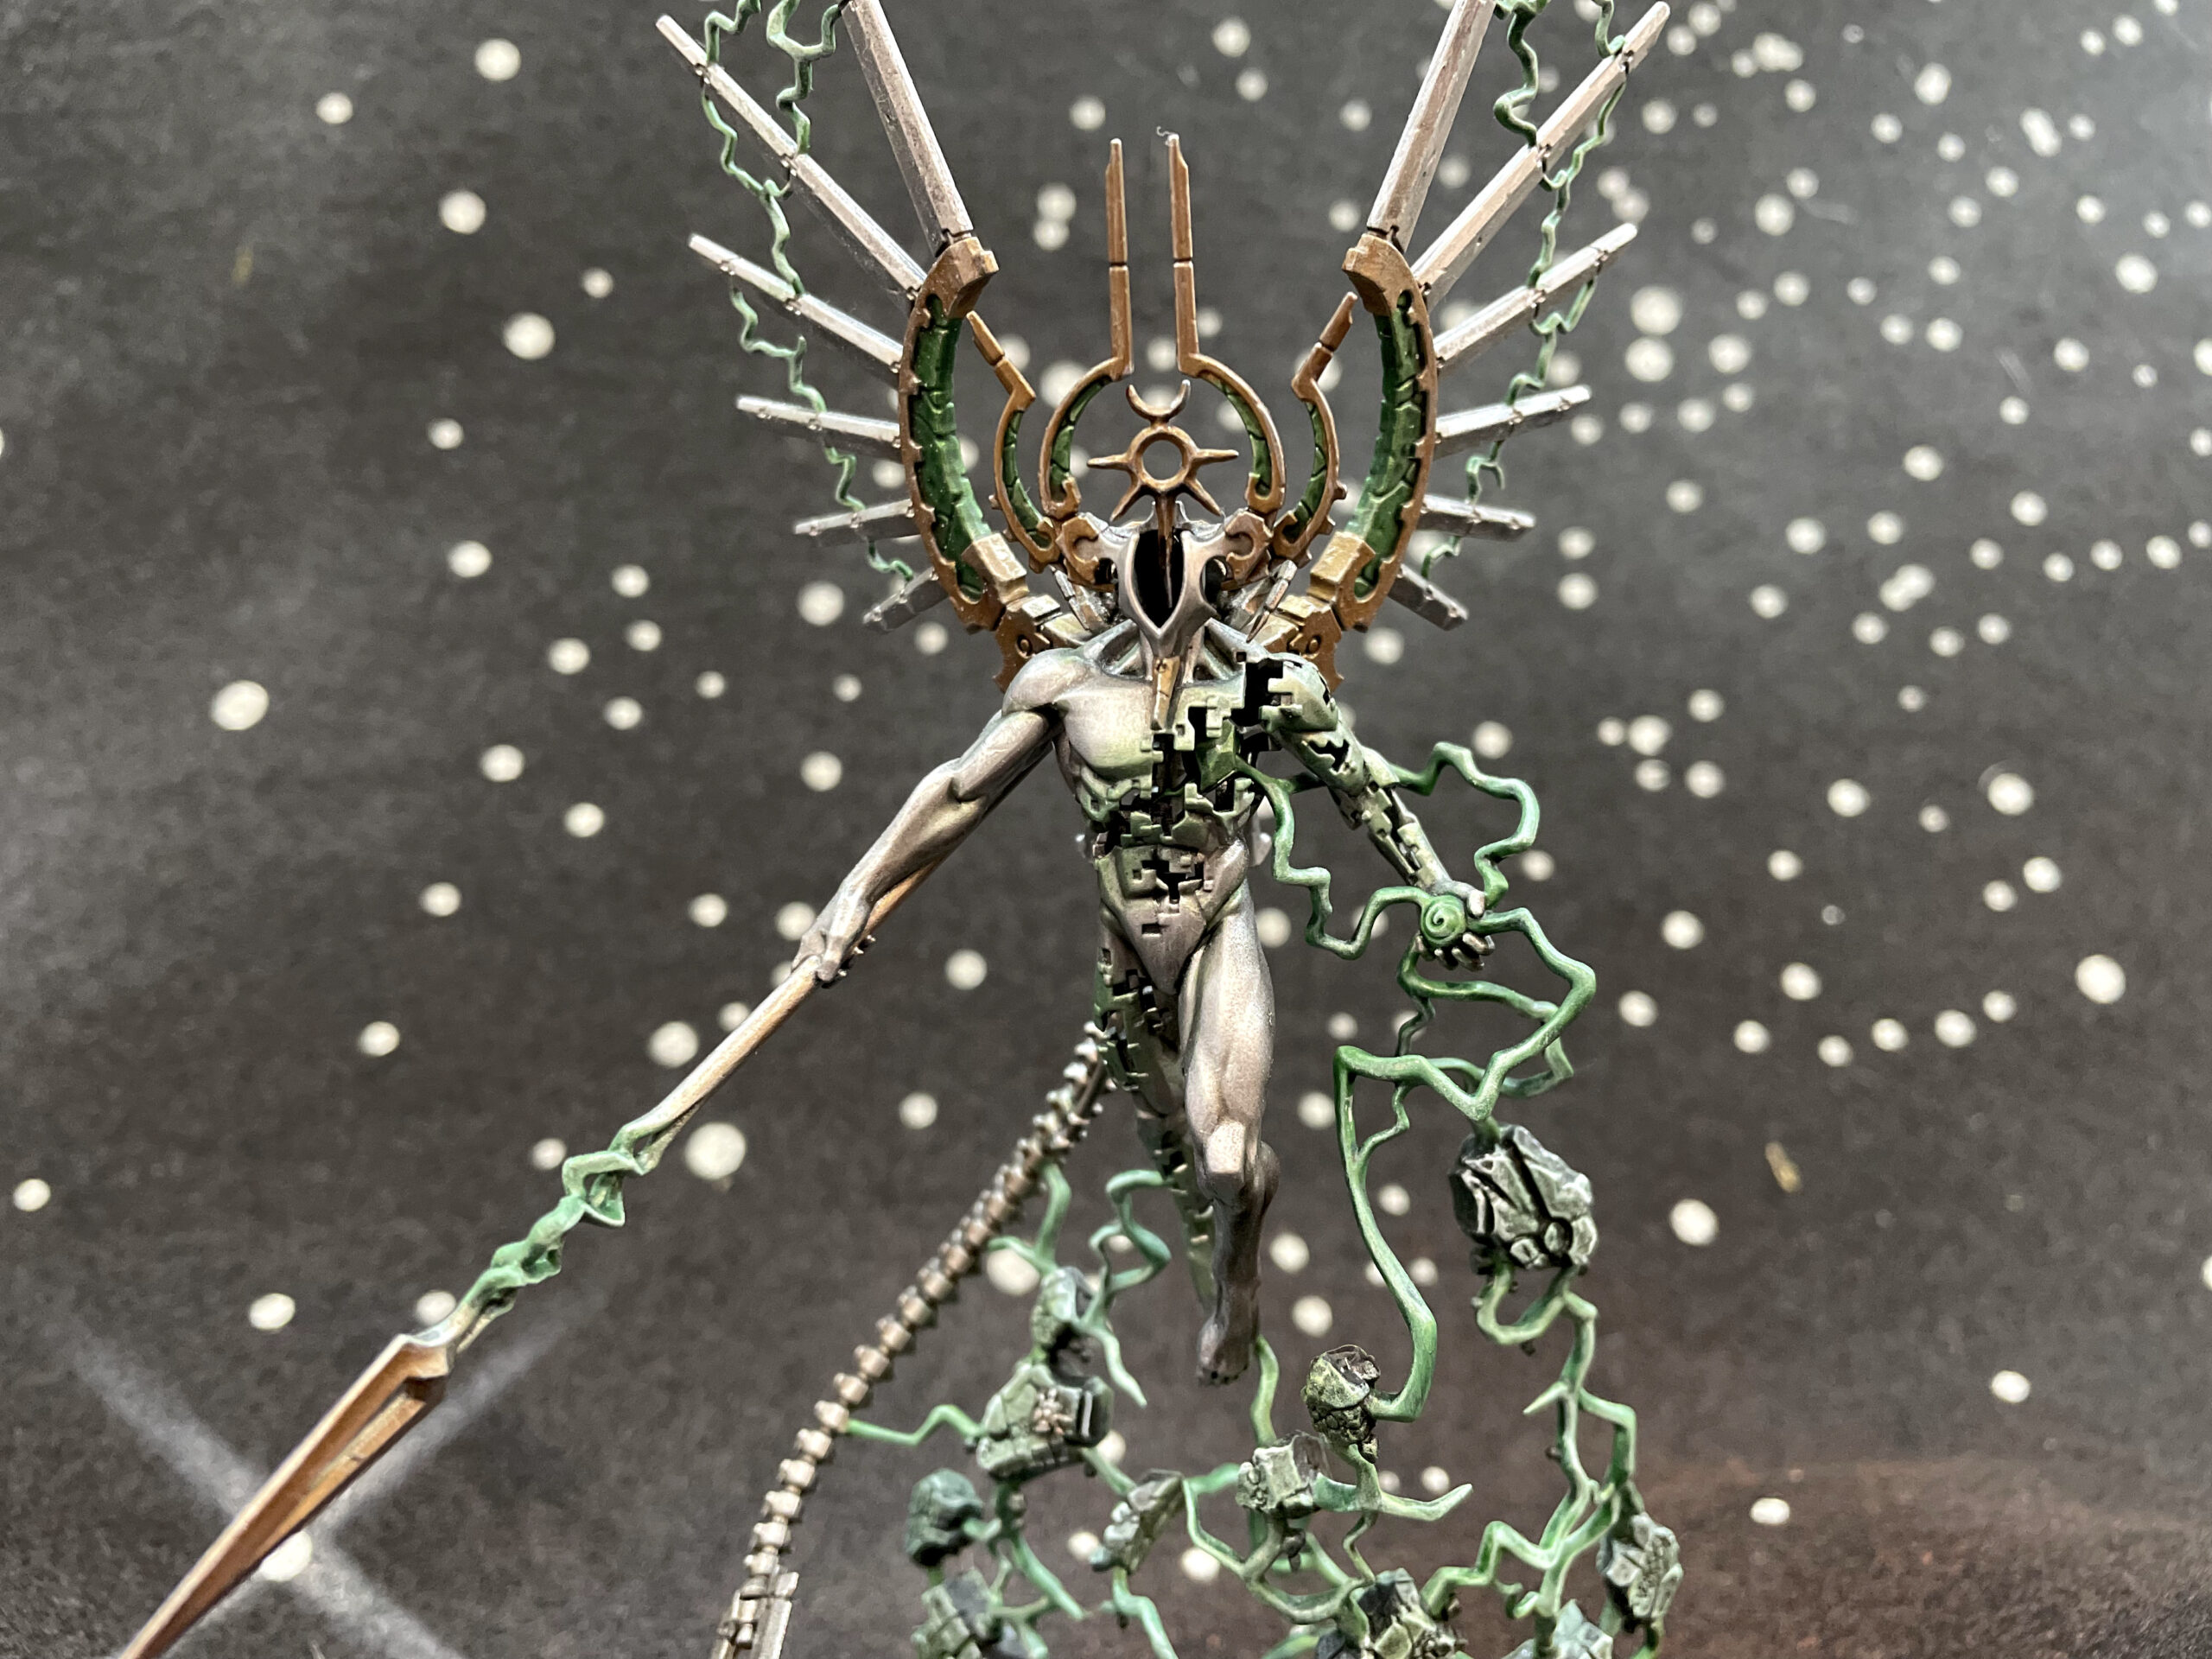
This is just an extraordinary model, and the perfect exemplar of just how damn good Games Workshop's designers have become at sculpting using modern techniques. This miniature literally could not have existed five years ago!
It was also surprisingly easy to paint to a level that I didn't think I'd achieve given the amount of effort I put in. It's not much more than a zenithal basecoat with a rattle can, some pin washes, and a bit of drybrushing.
More pictures below the fold.
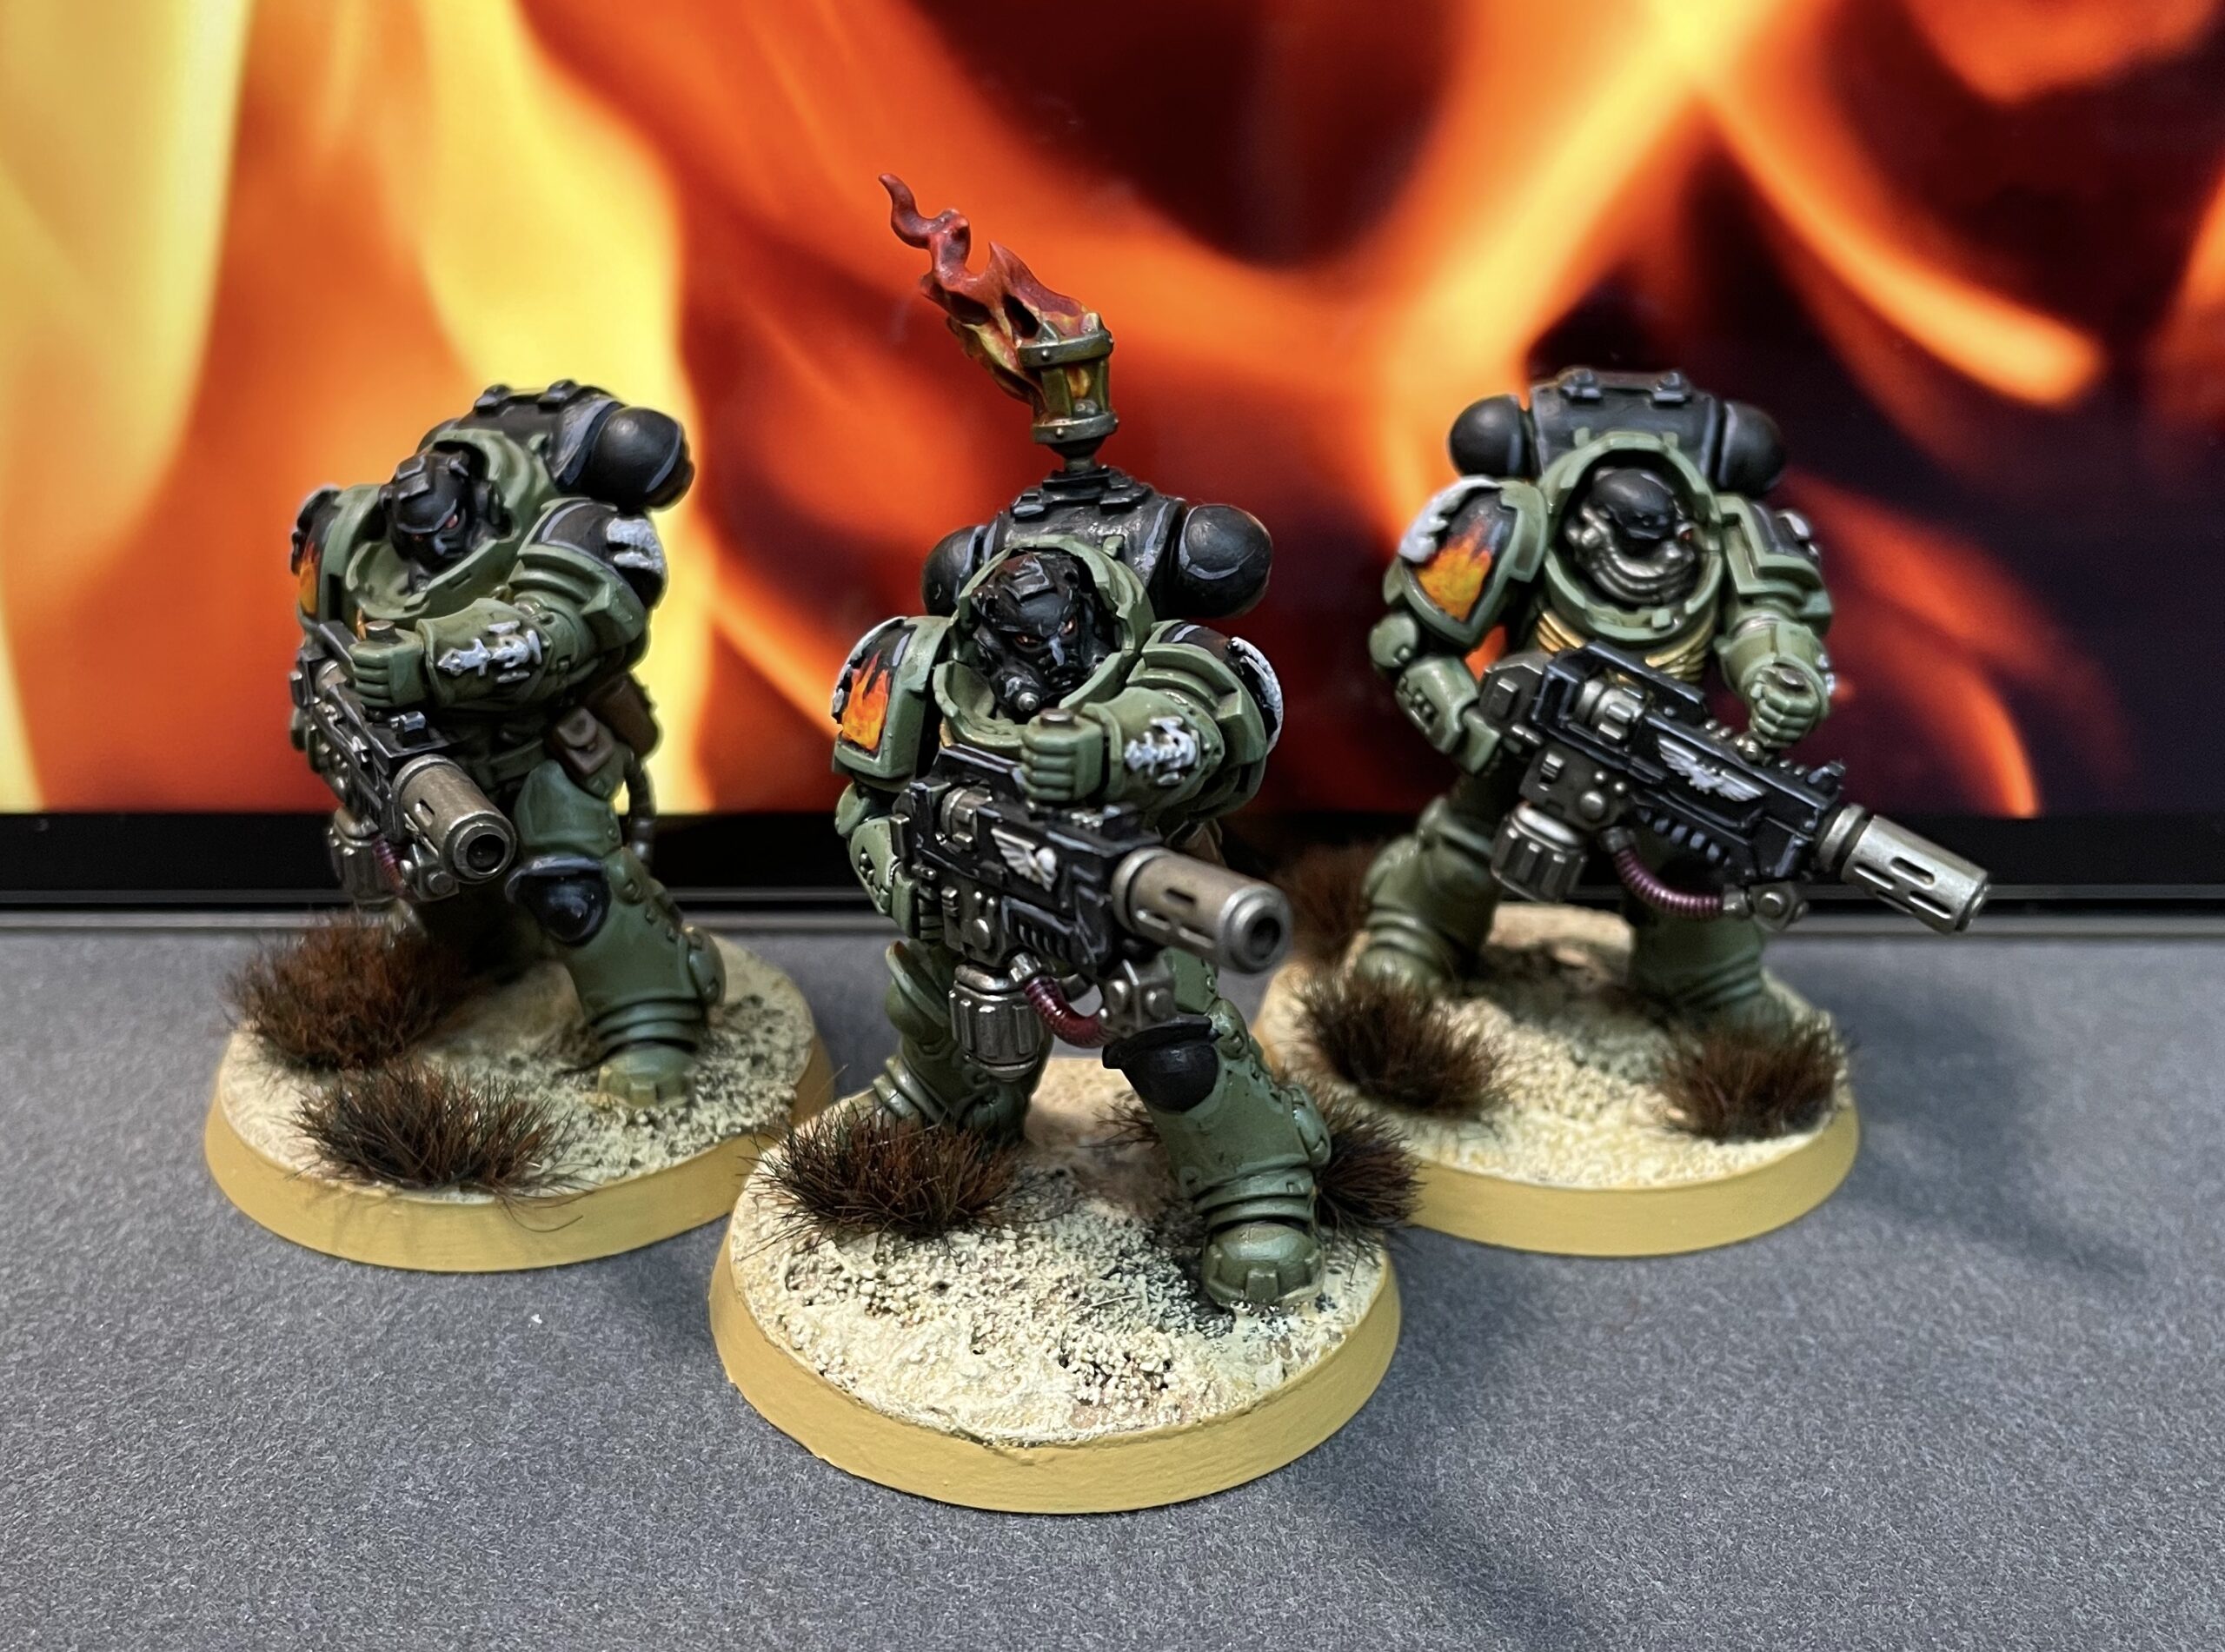
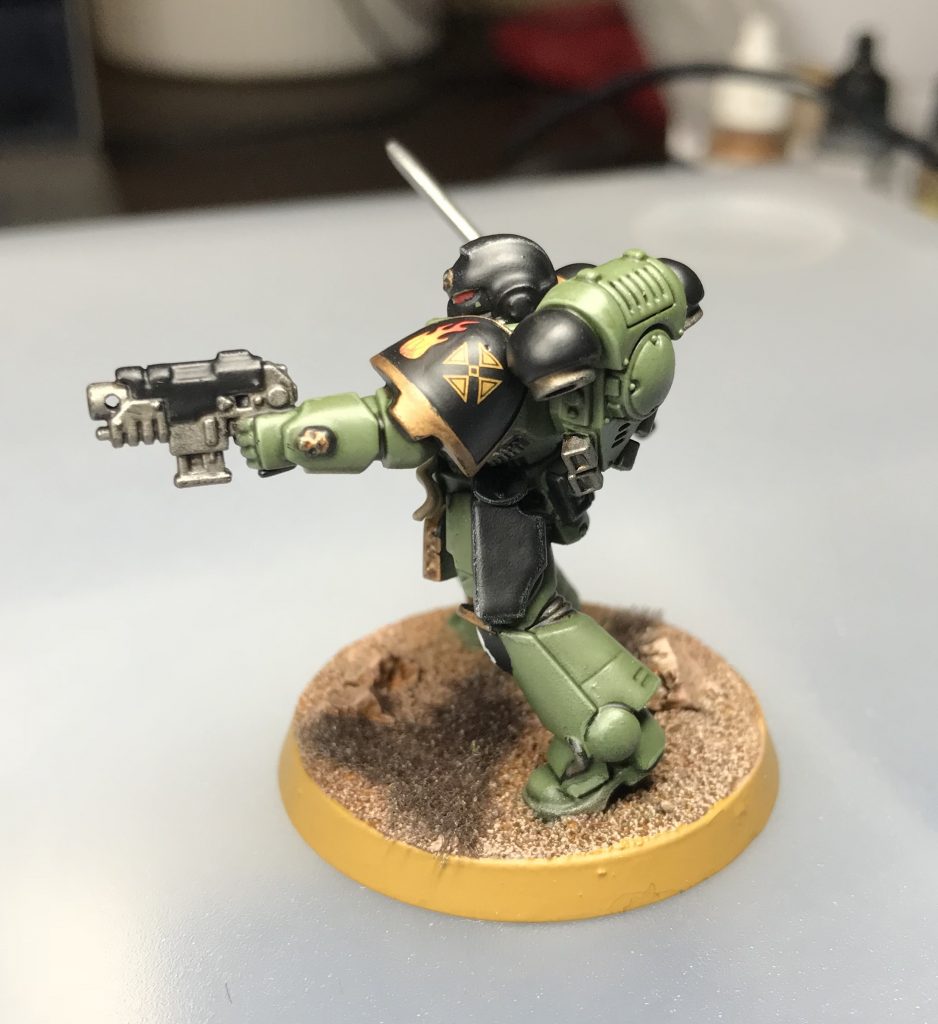
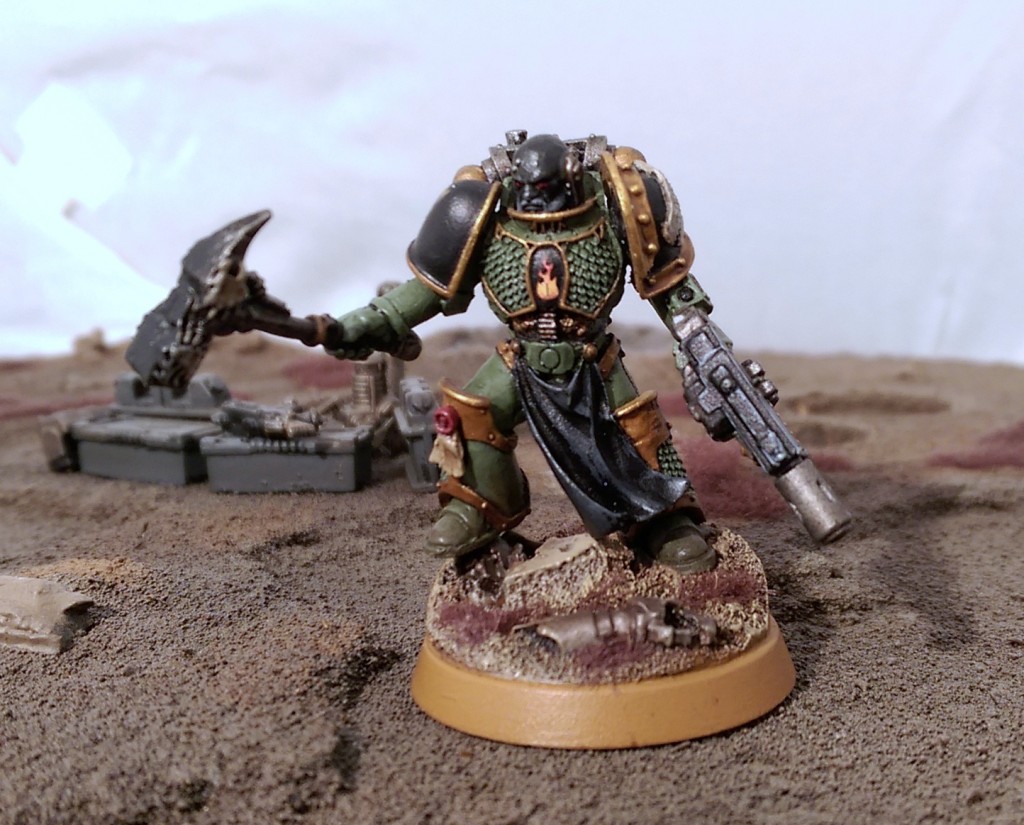
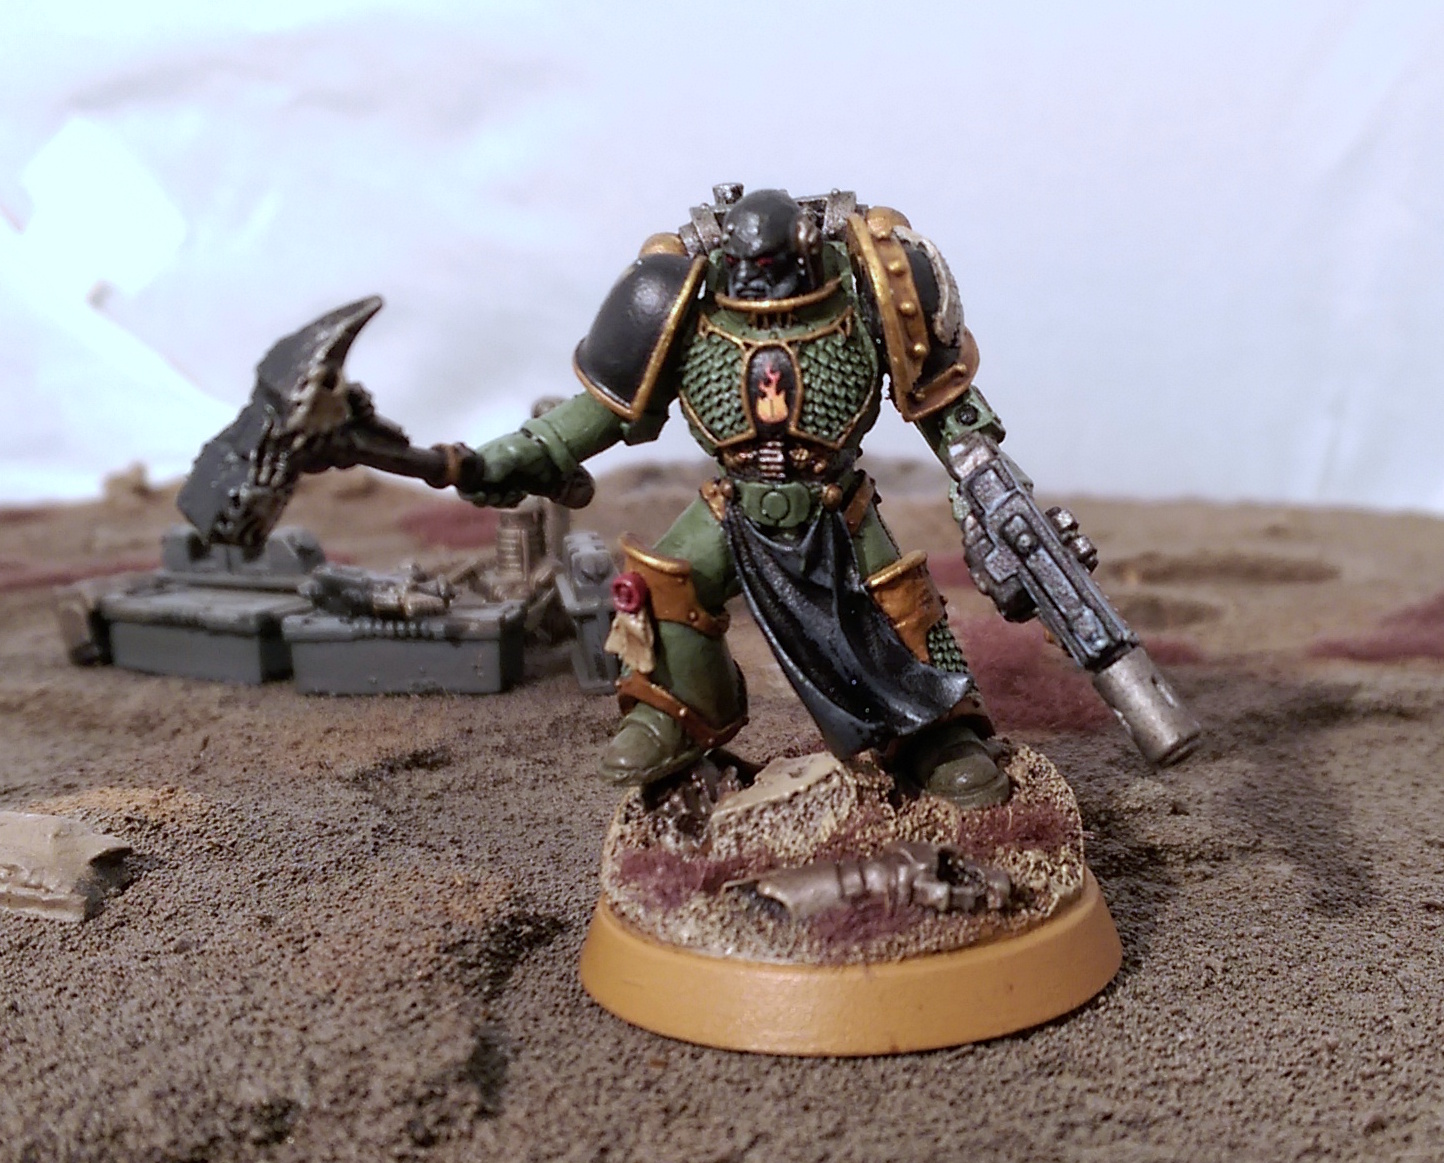
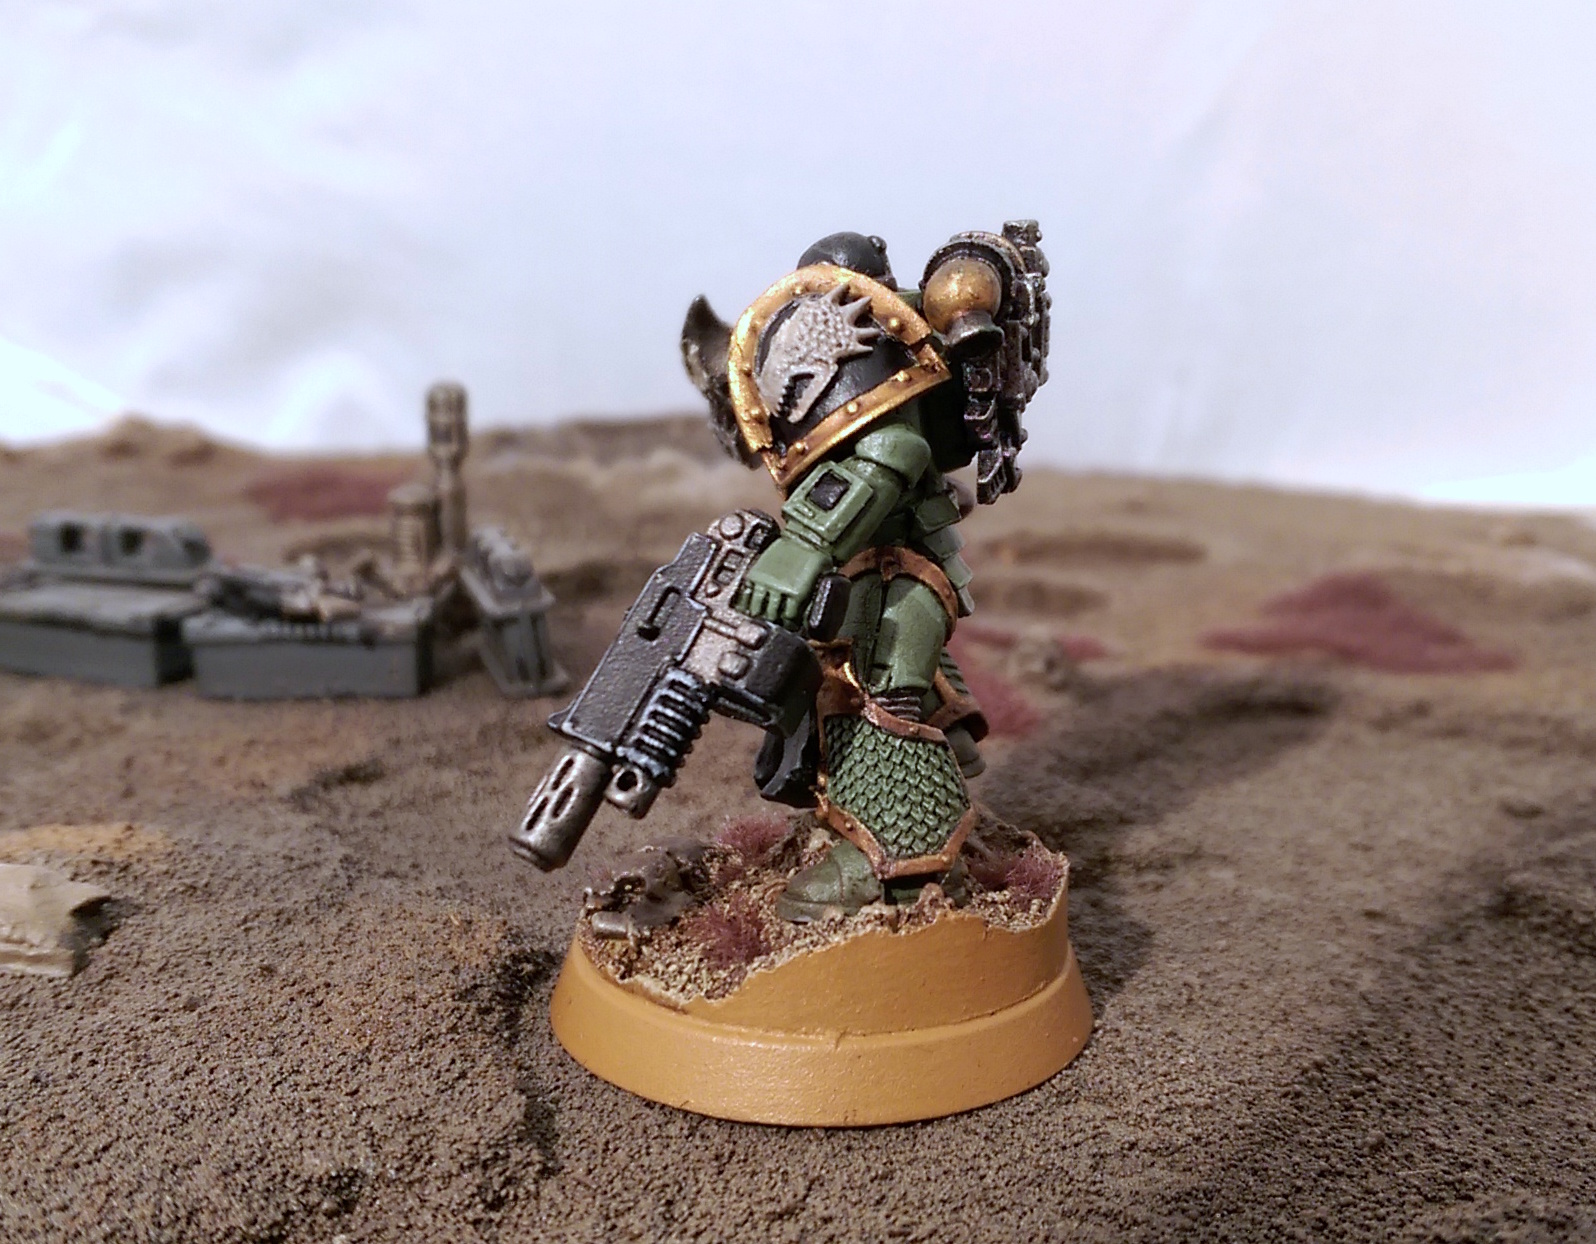
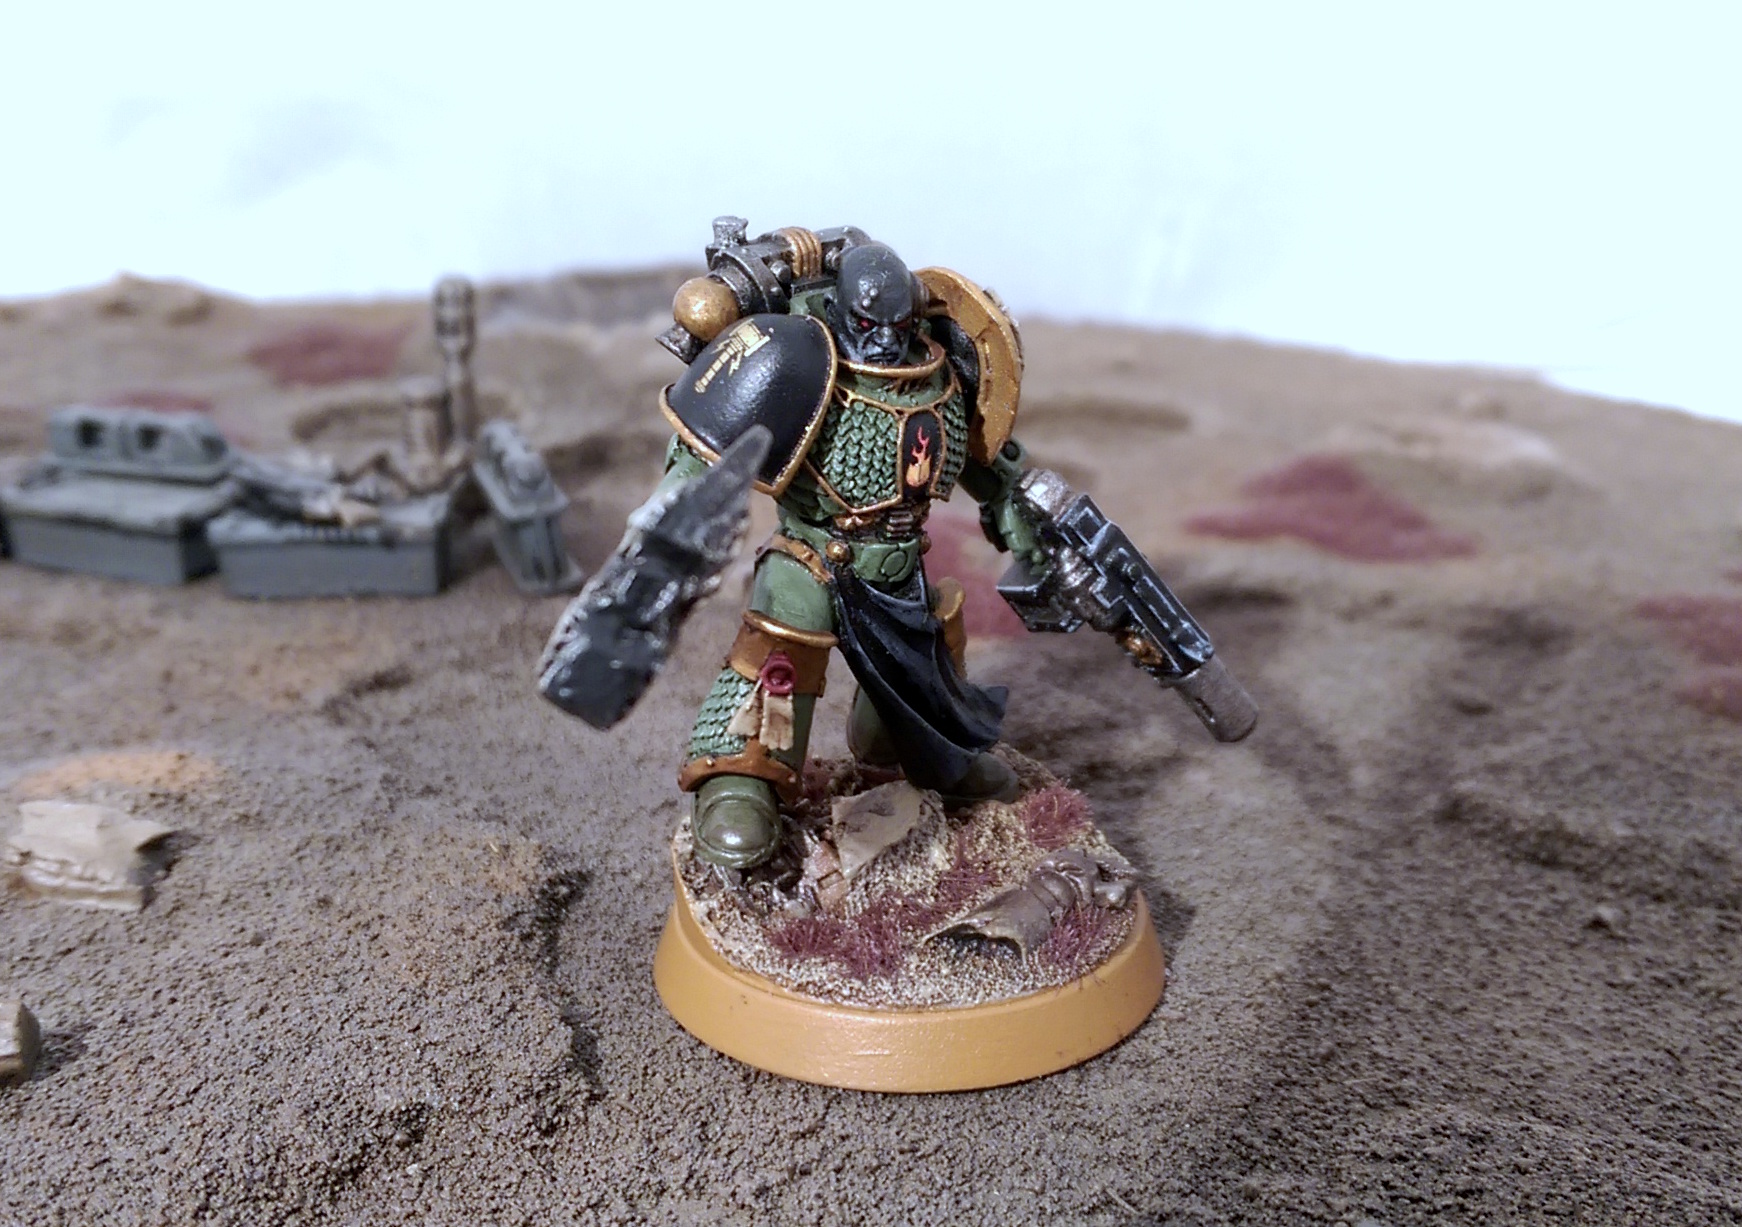
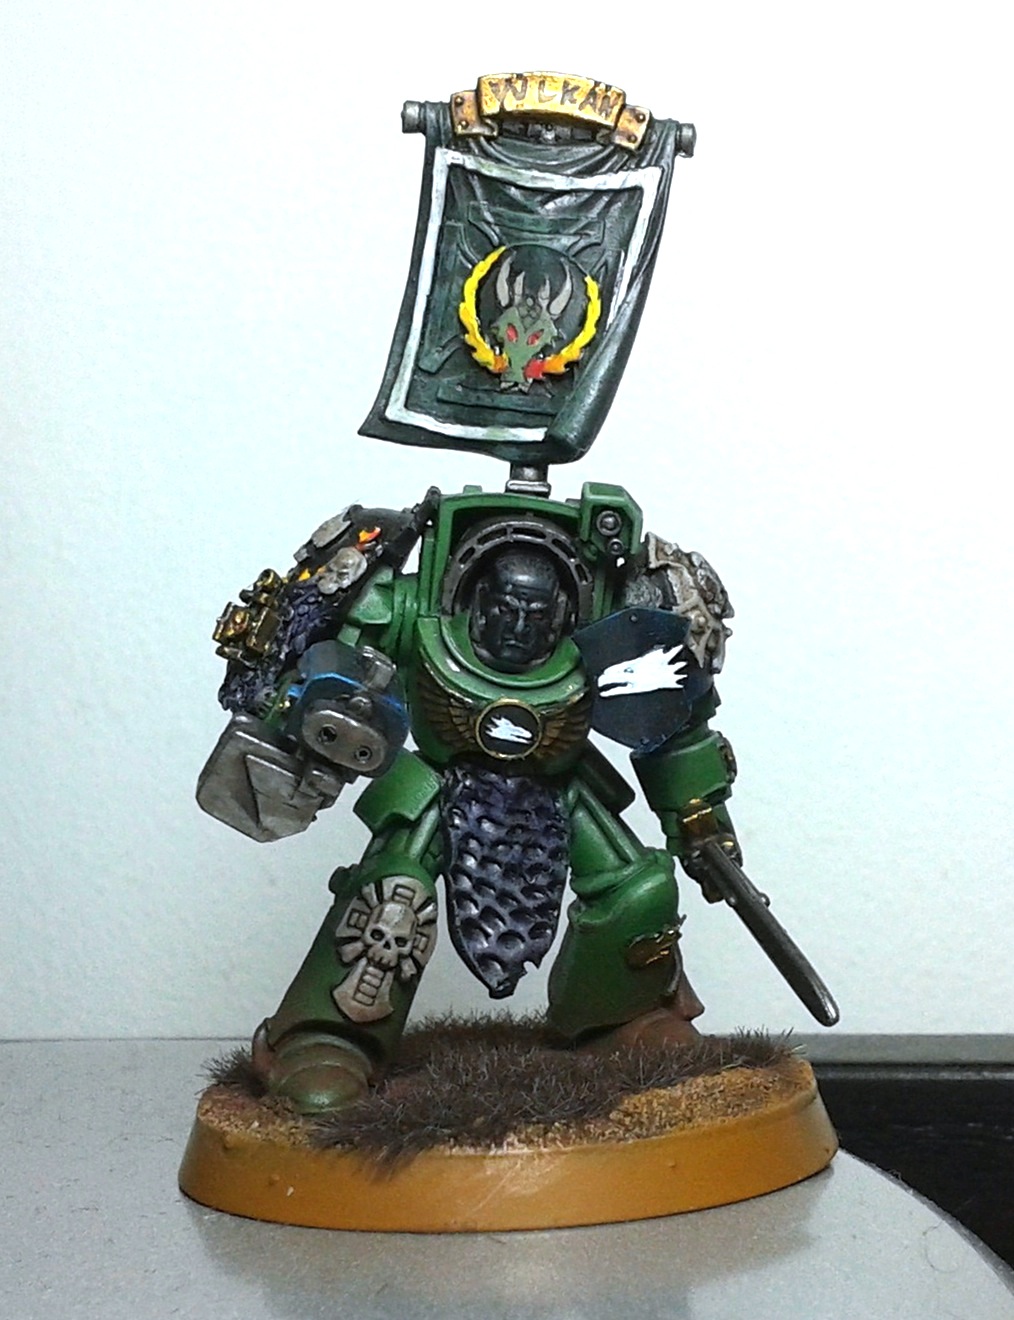
Salamanders Veteran Primaris Sergent Jo'van
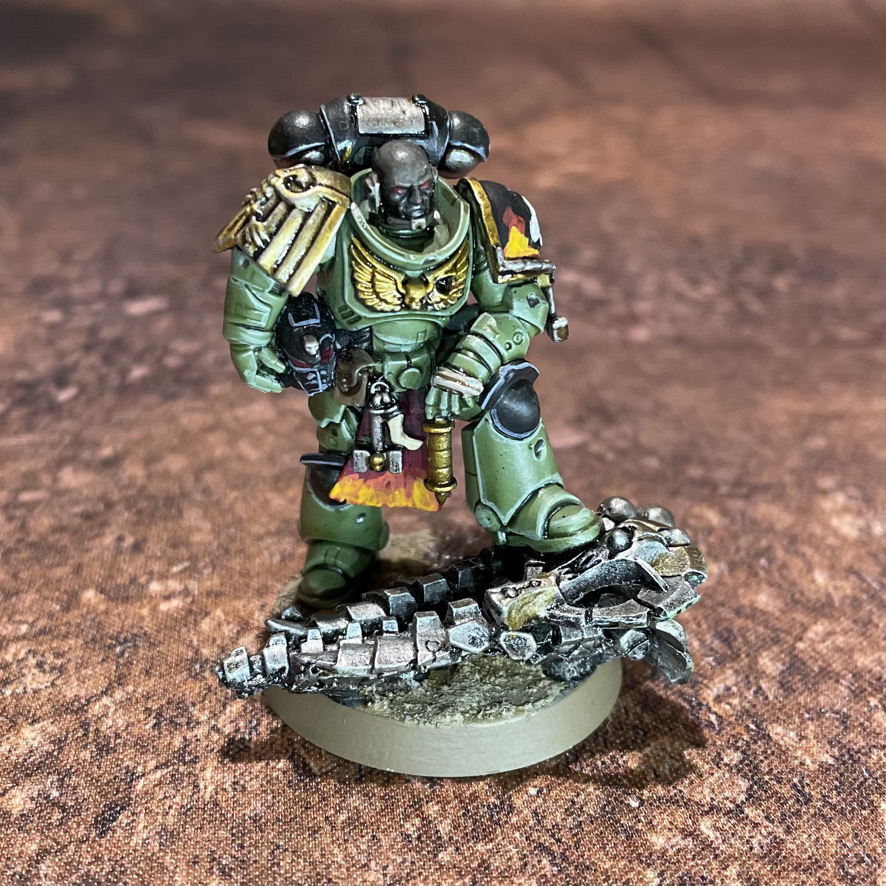
One of GW's special store anniversary models. A fantastic pose, which was nice and easy to customise with the Salamanders upgrade sprue. I think I finished this chap in a single sitting!
Primaris Captain & Judiciar by The Unrelenting Brush

These are the last of the Salamanders models painted for me by The Unrelenting Brush. As with some of the other models, I added decals and flames once I got the models back.
Salamanders Primaris Lieutenant by The Unrelenting Brush
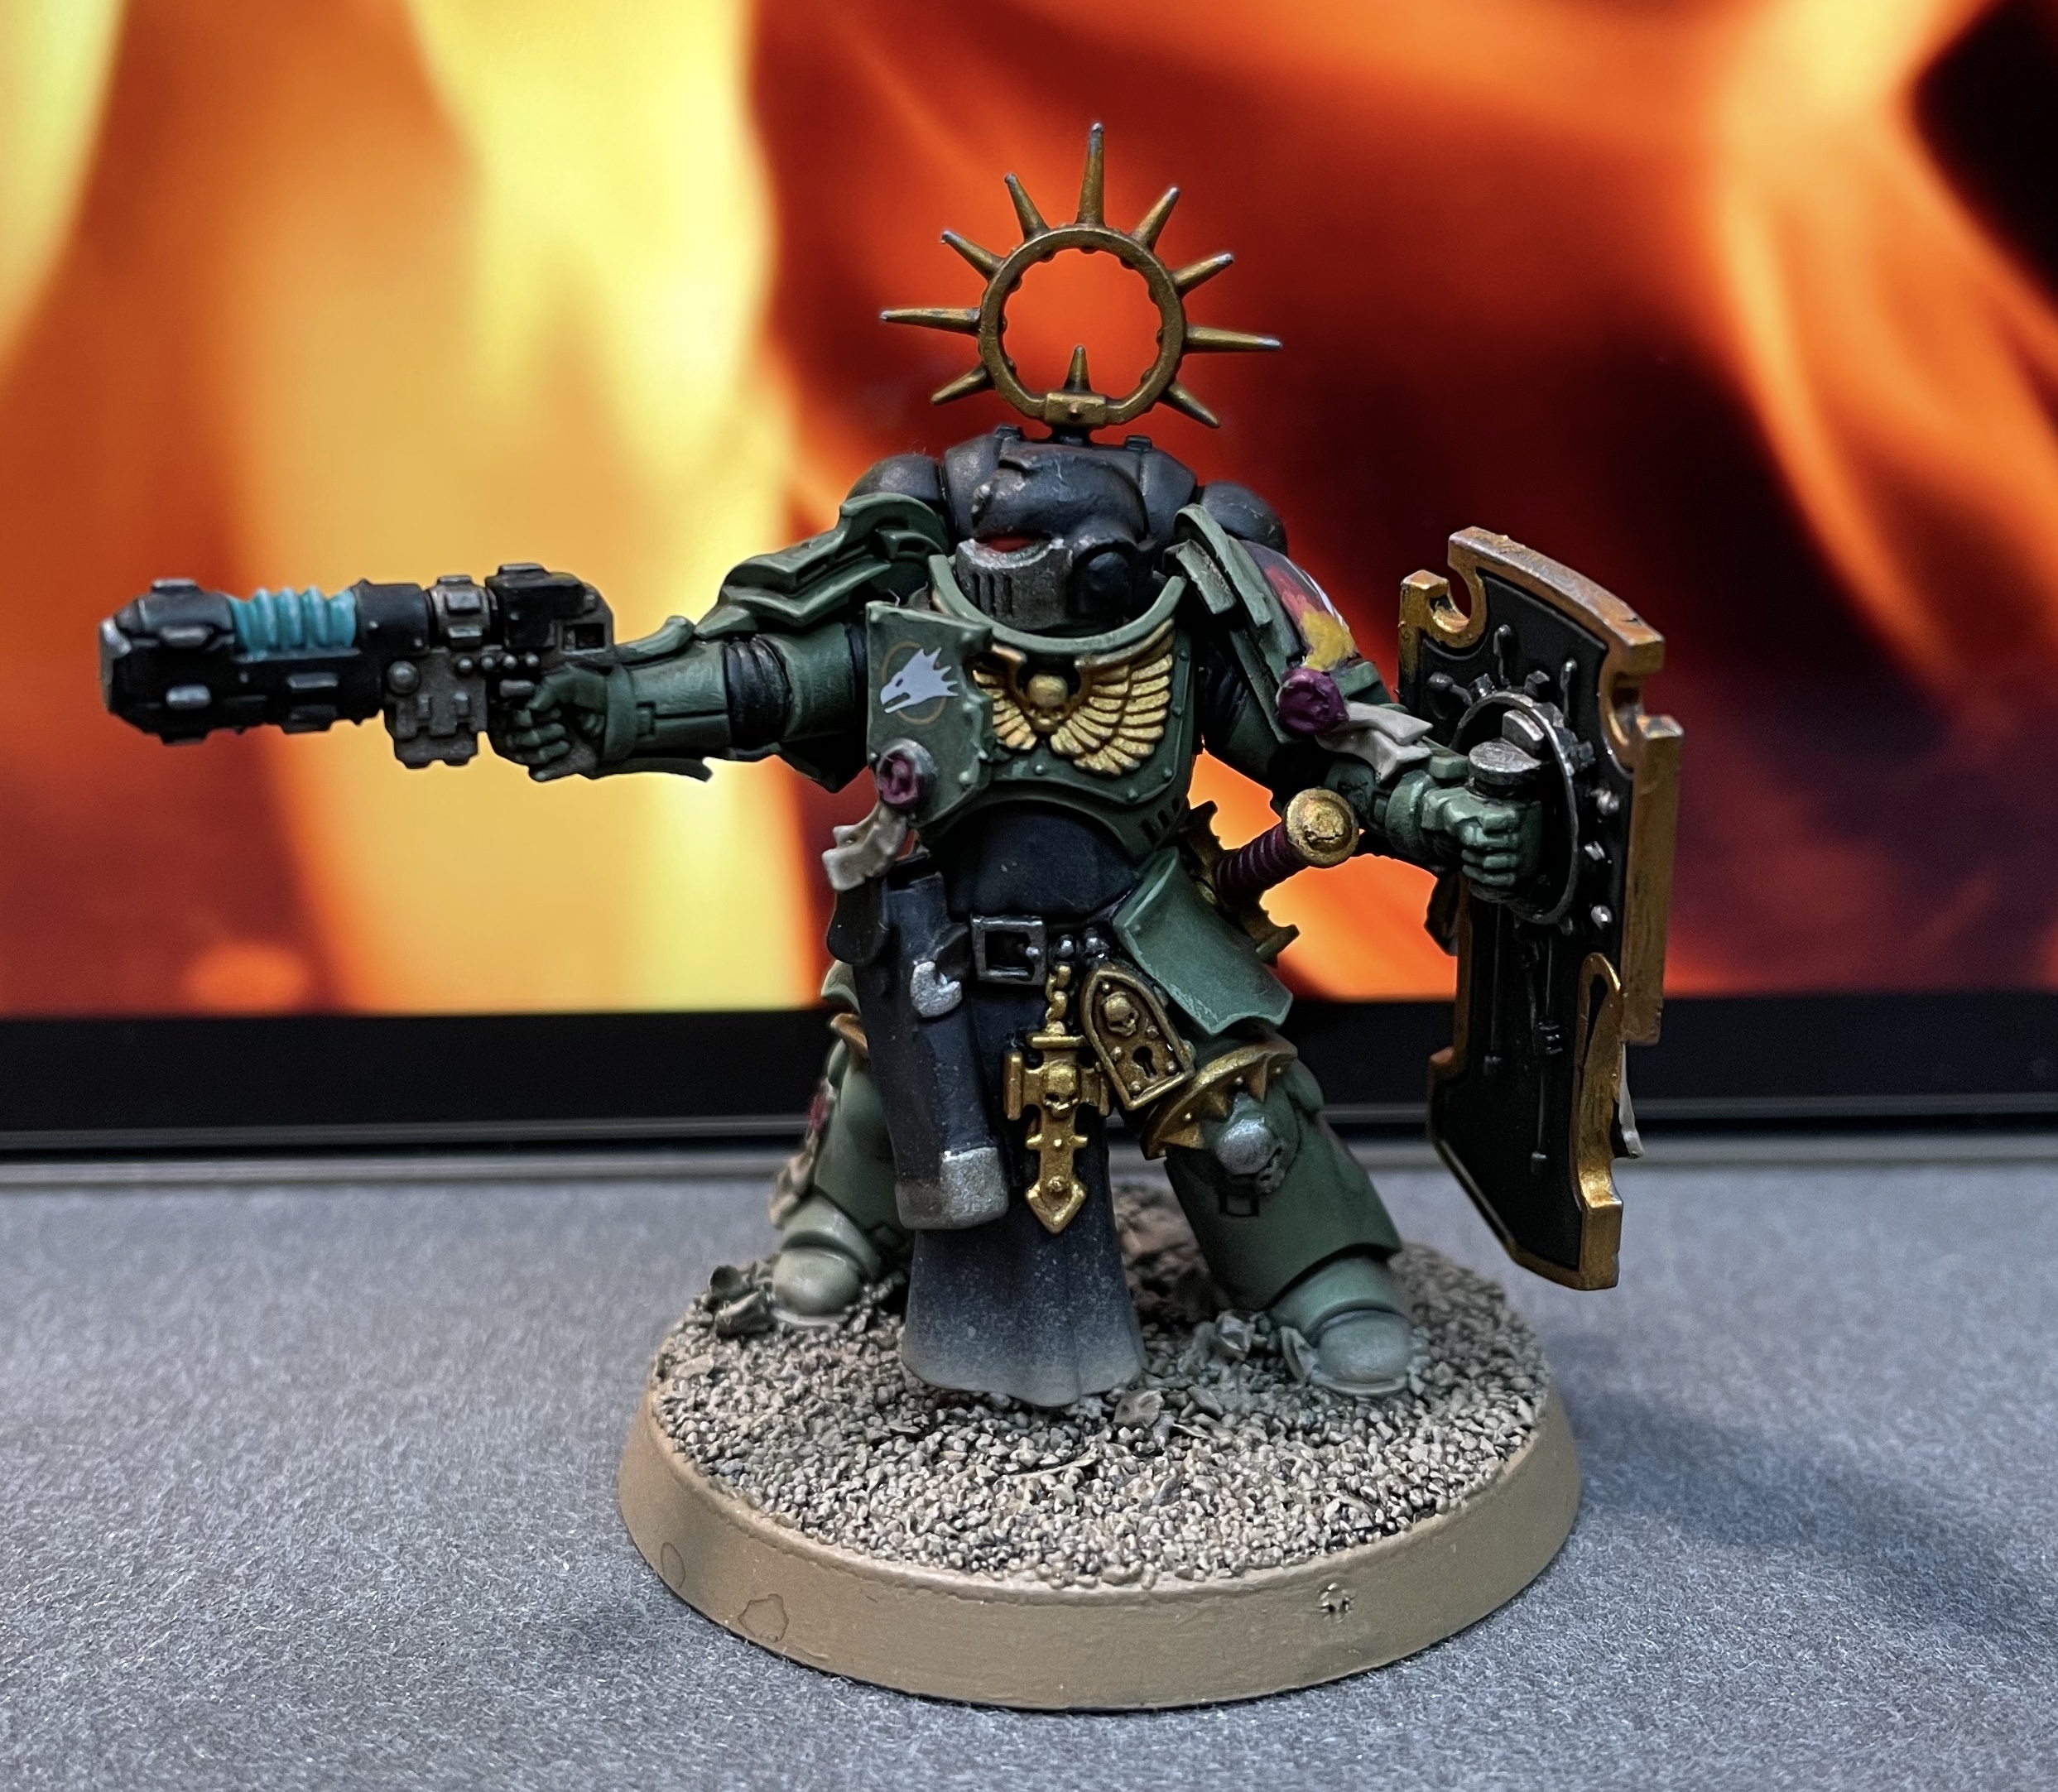
 The Unrelenting Brush did a great job of this model. I particularly love the flame effect on the shield. I added the flames on the shoulder pads and the decals after I got the model back.
Salamanders Bladeguard Veterans & Bladeguard Ancient
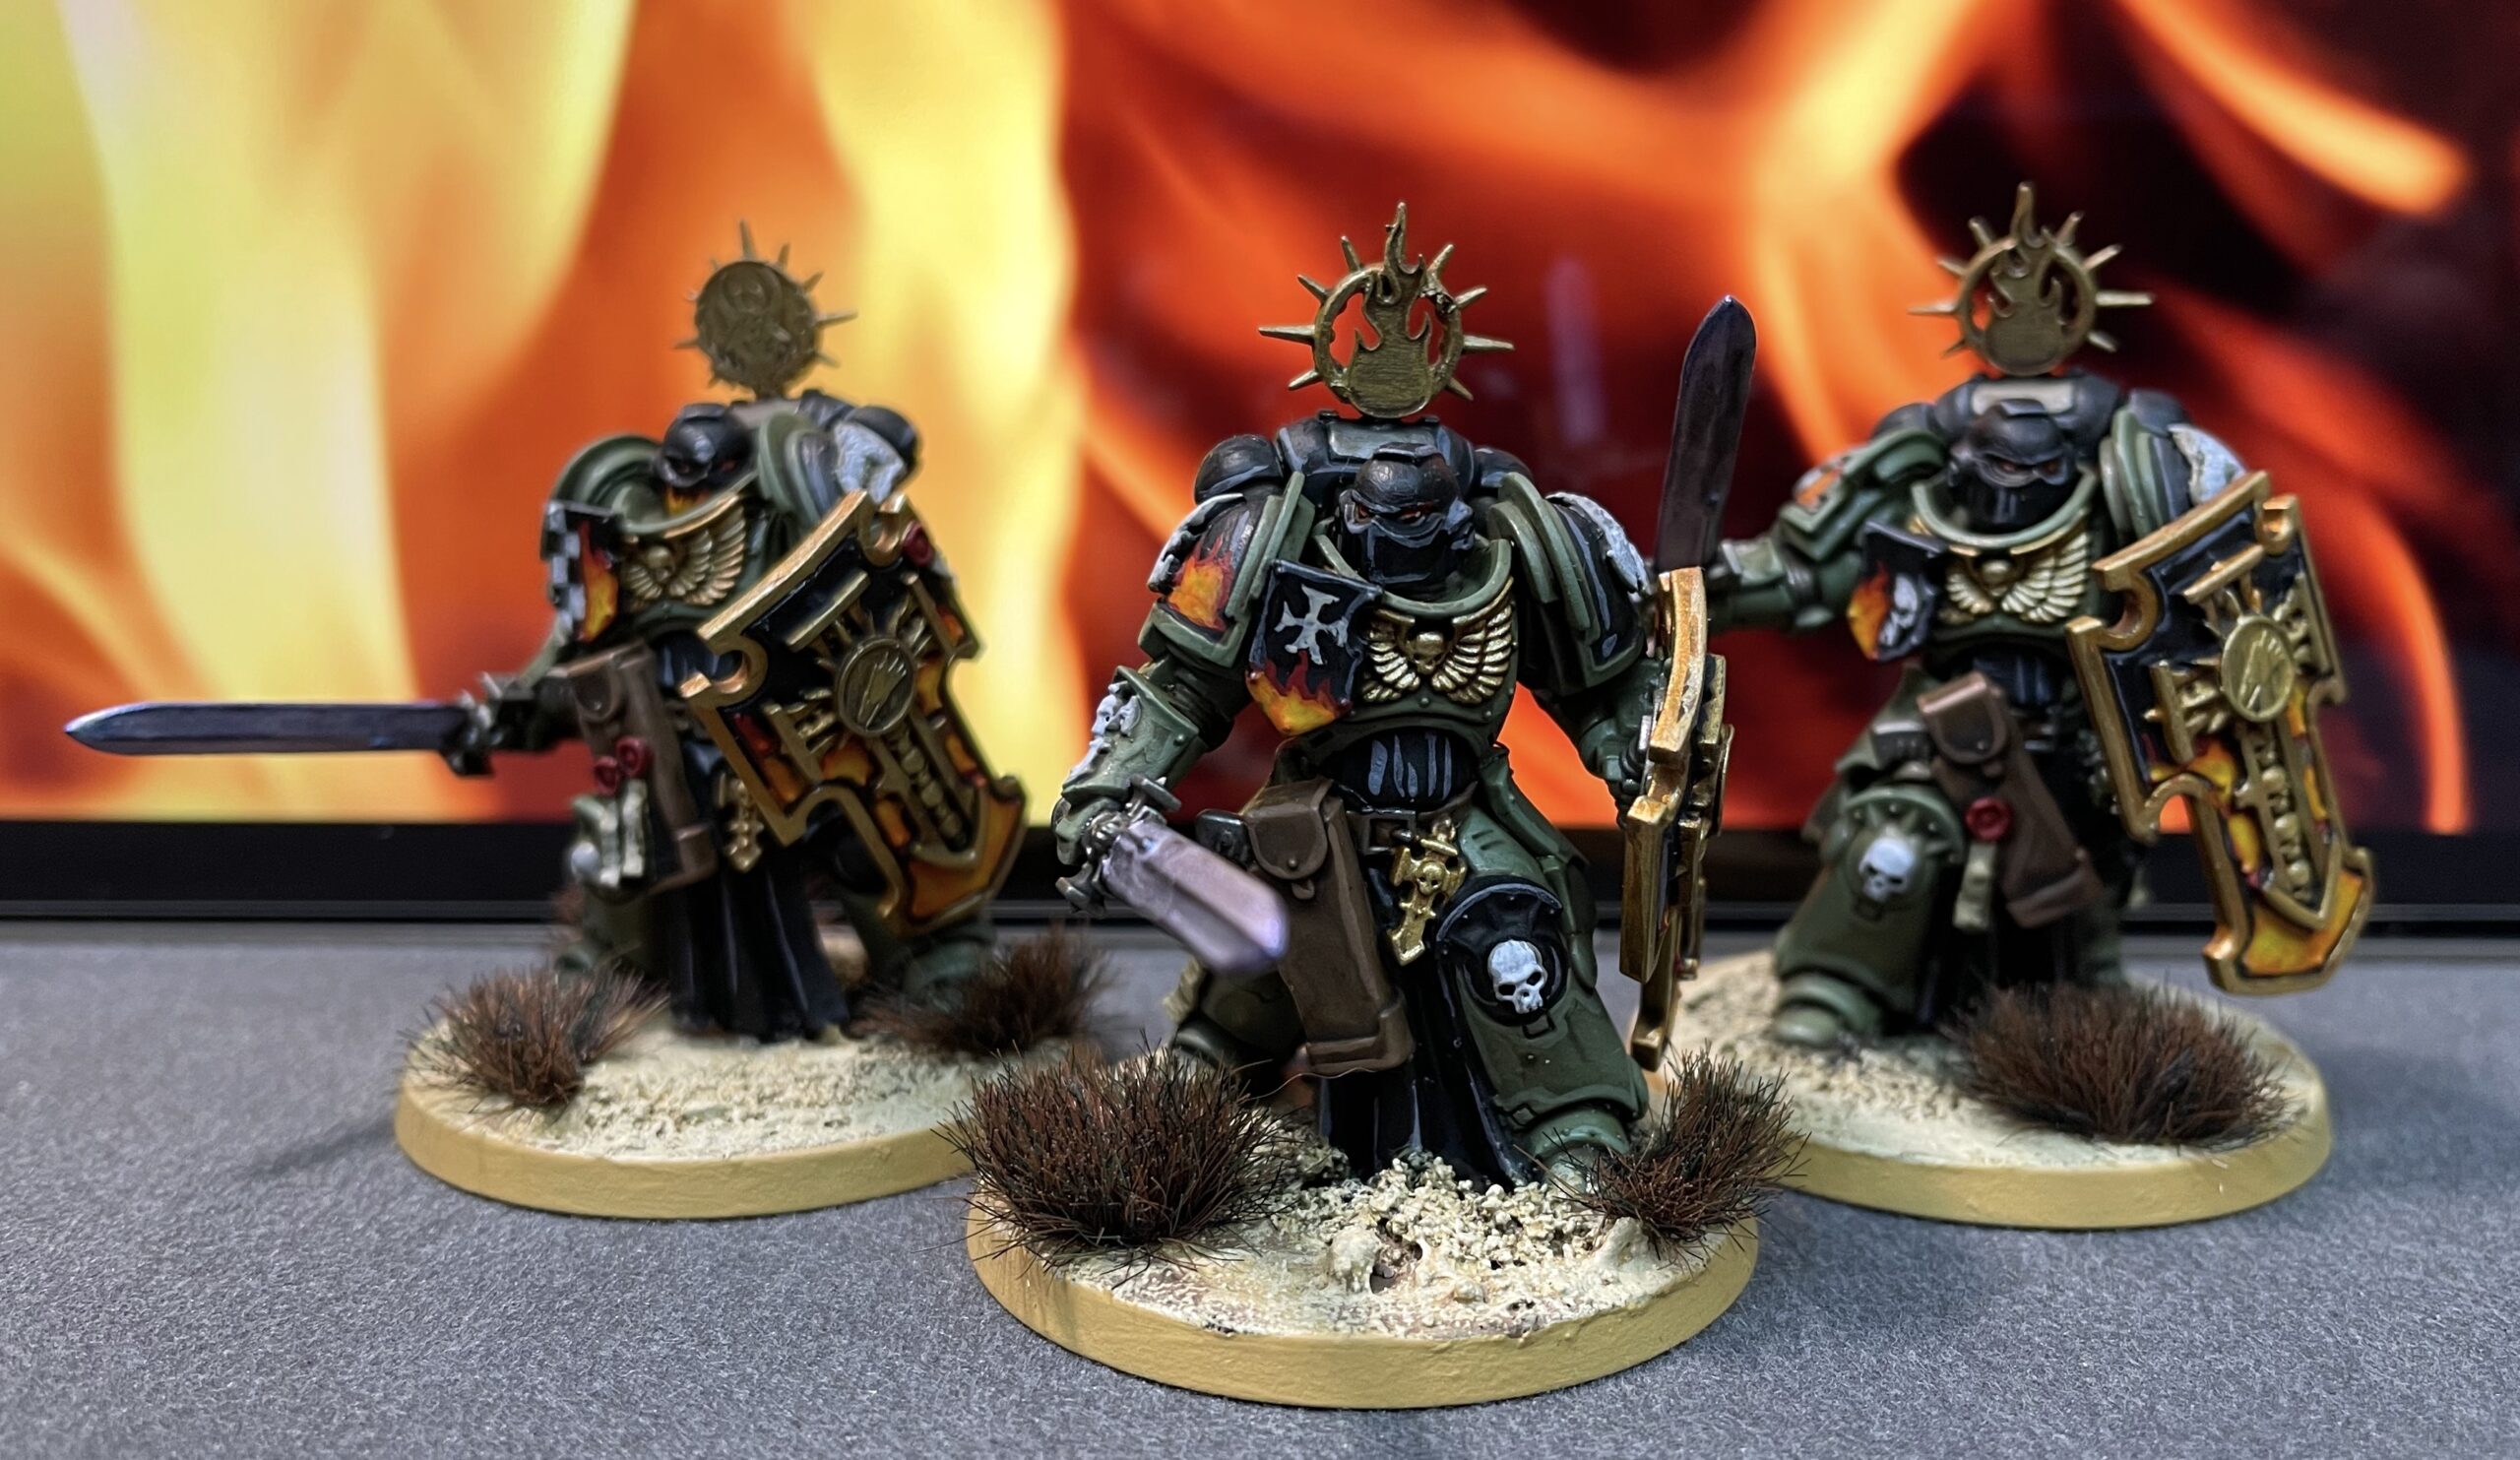
These Bladeguard Veterans were painted by Darren from Burning Beard Studios.

The Bladeguard Ancient was painted by The Unrelenting Brush. I added the flames and decal to the shoulder pad after I got it back.
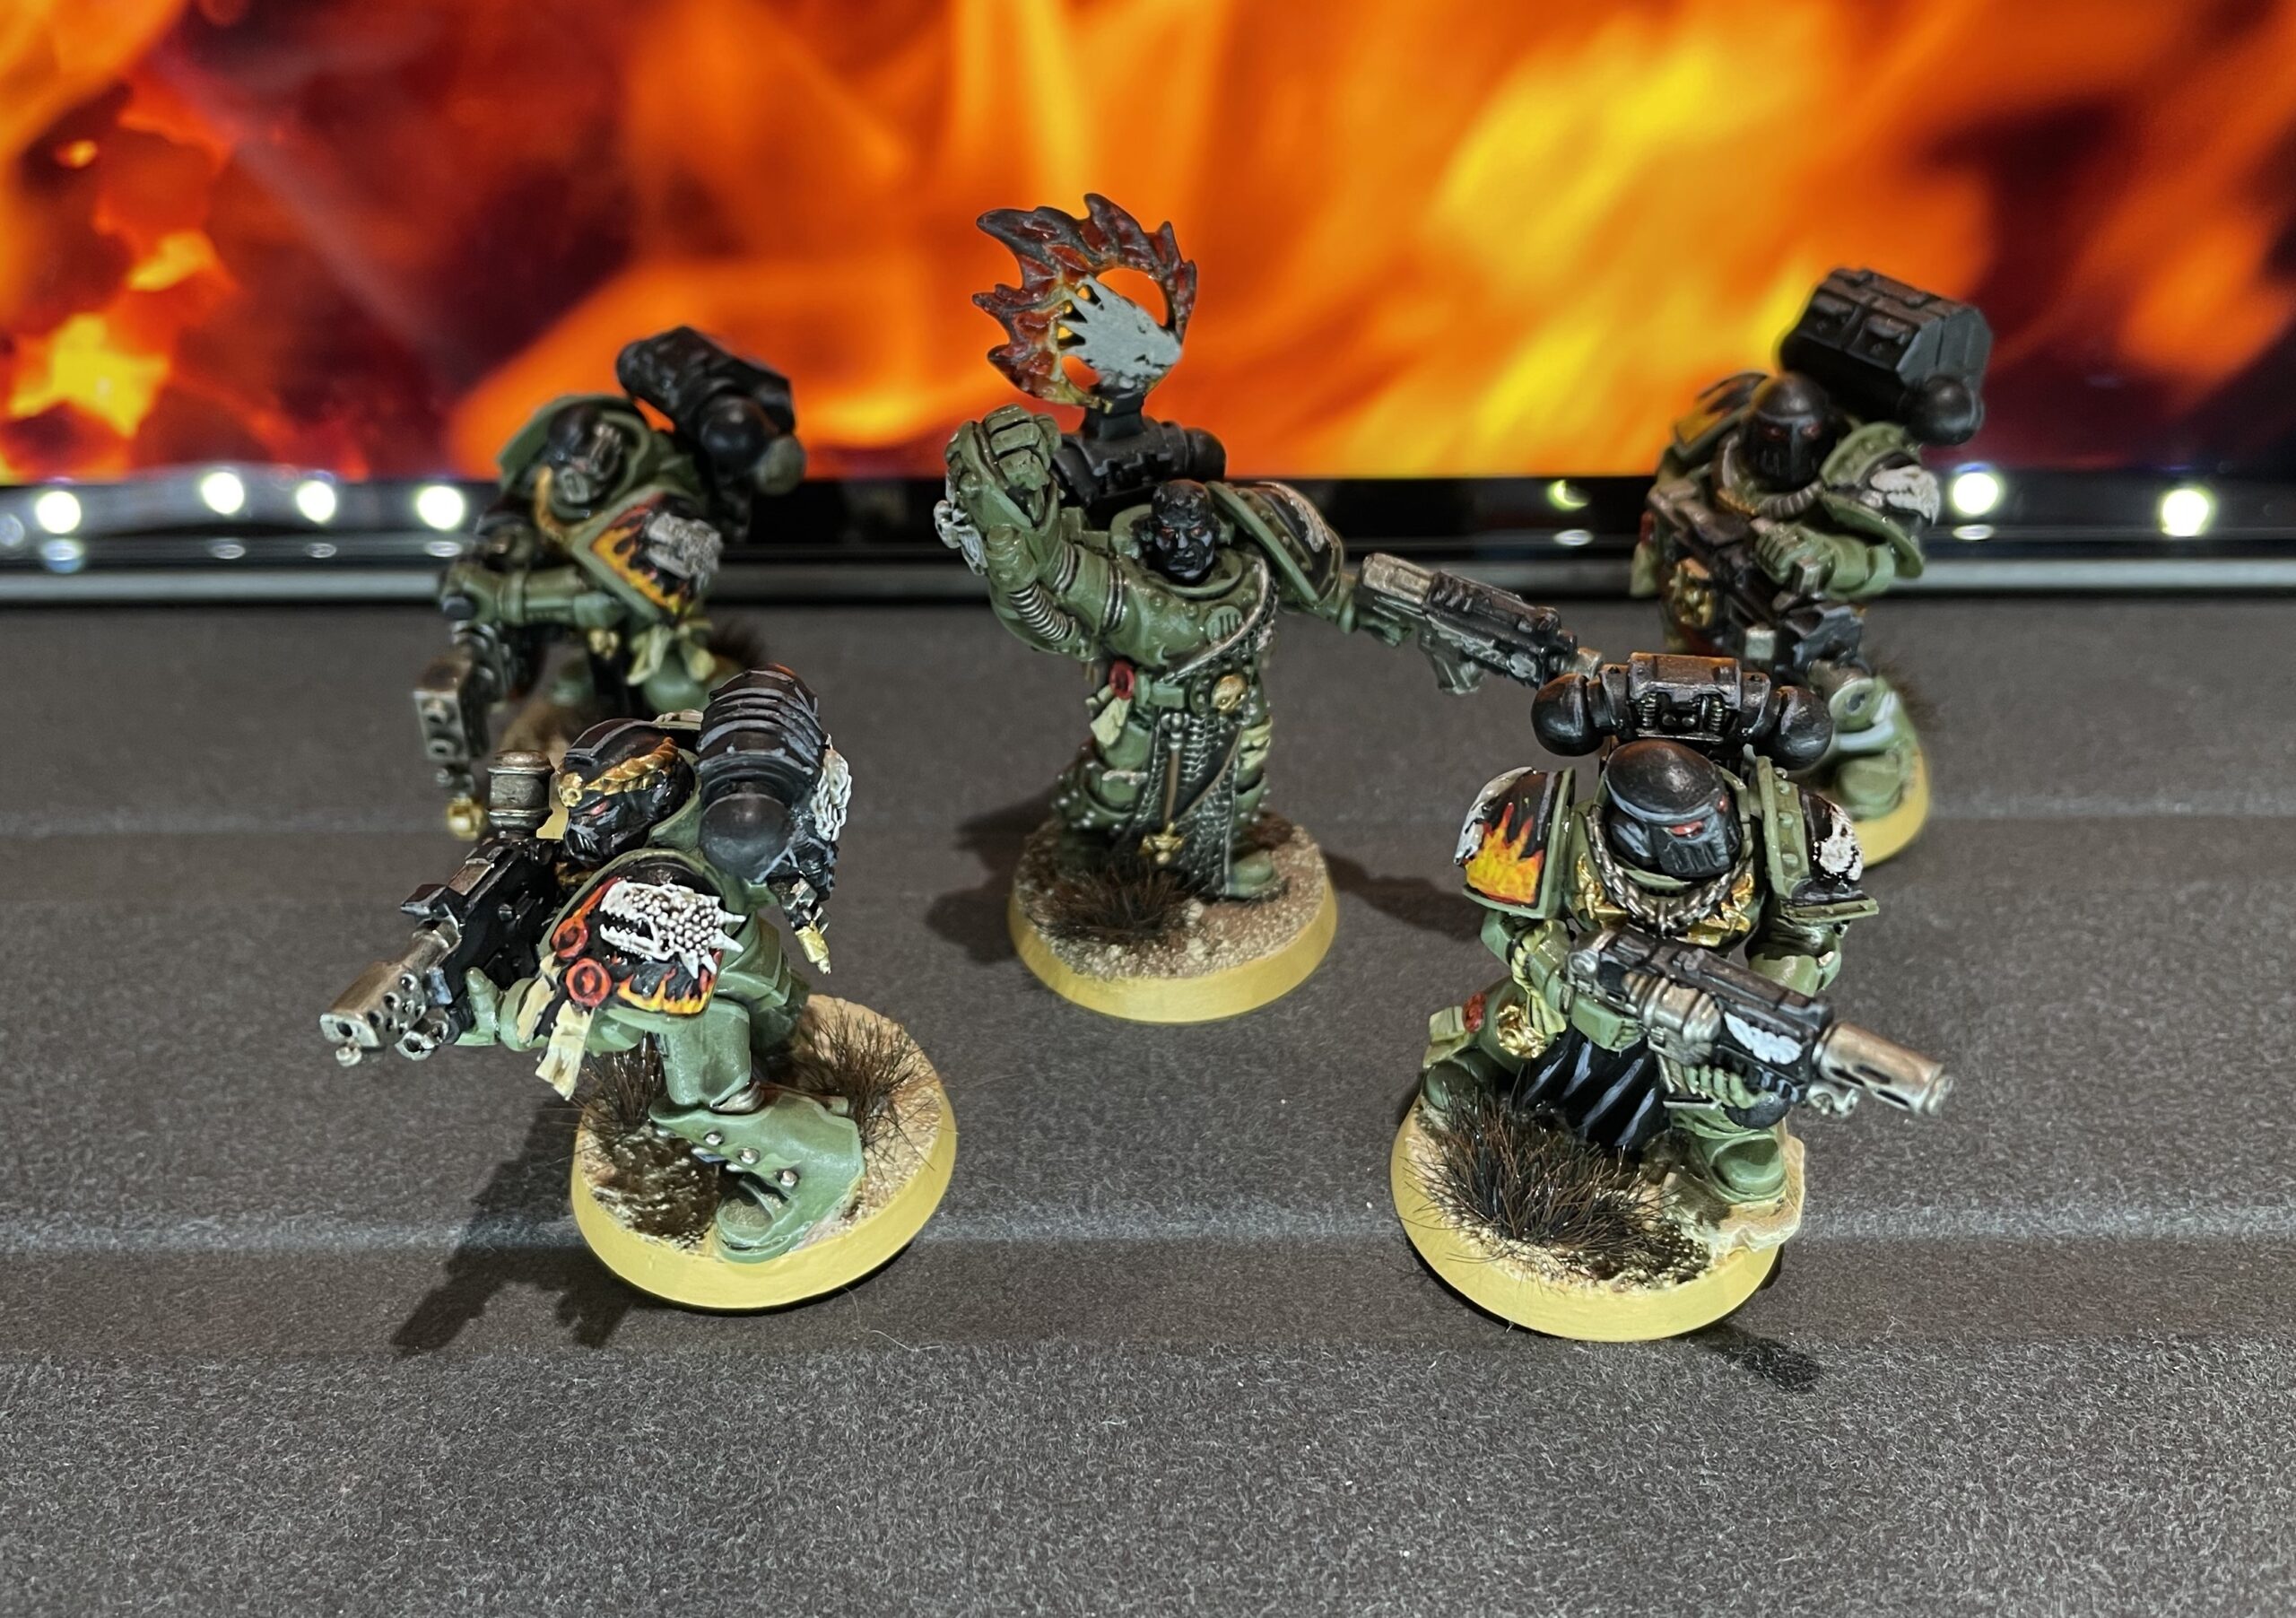
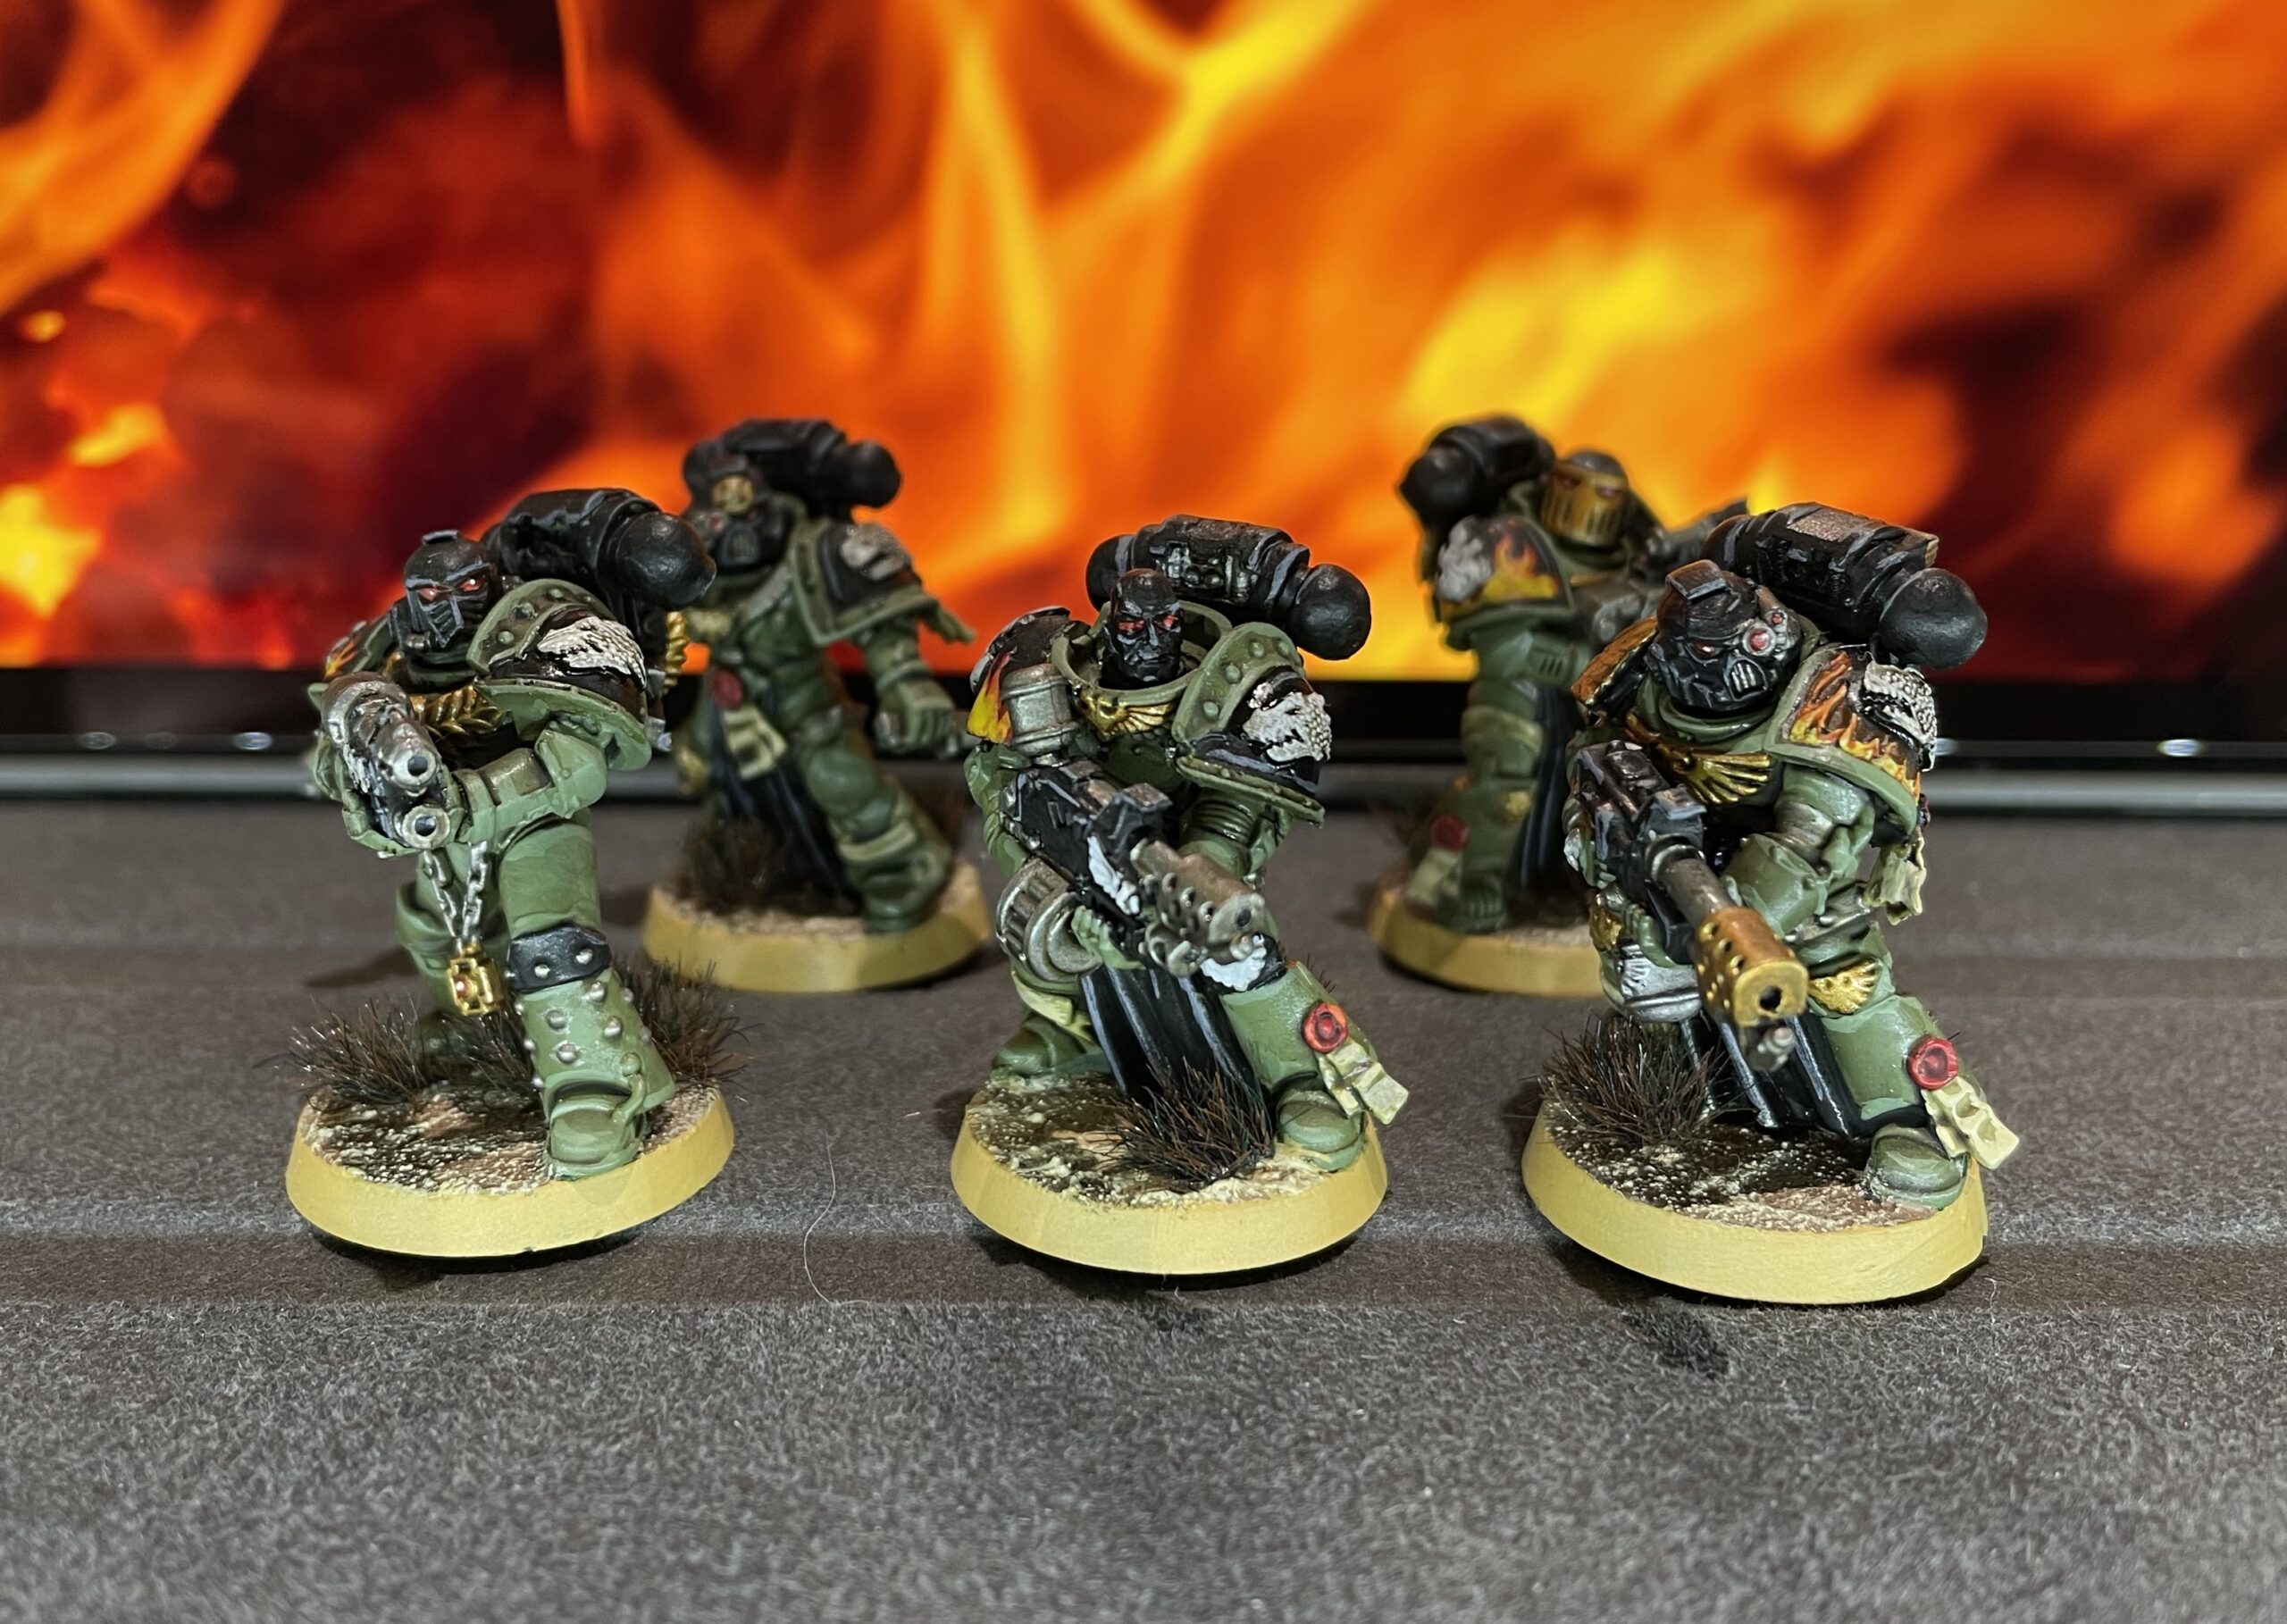
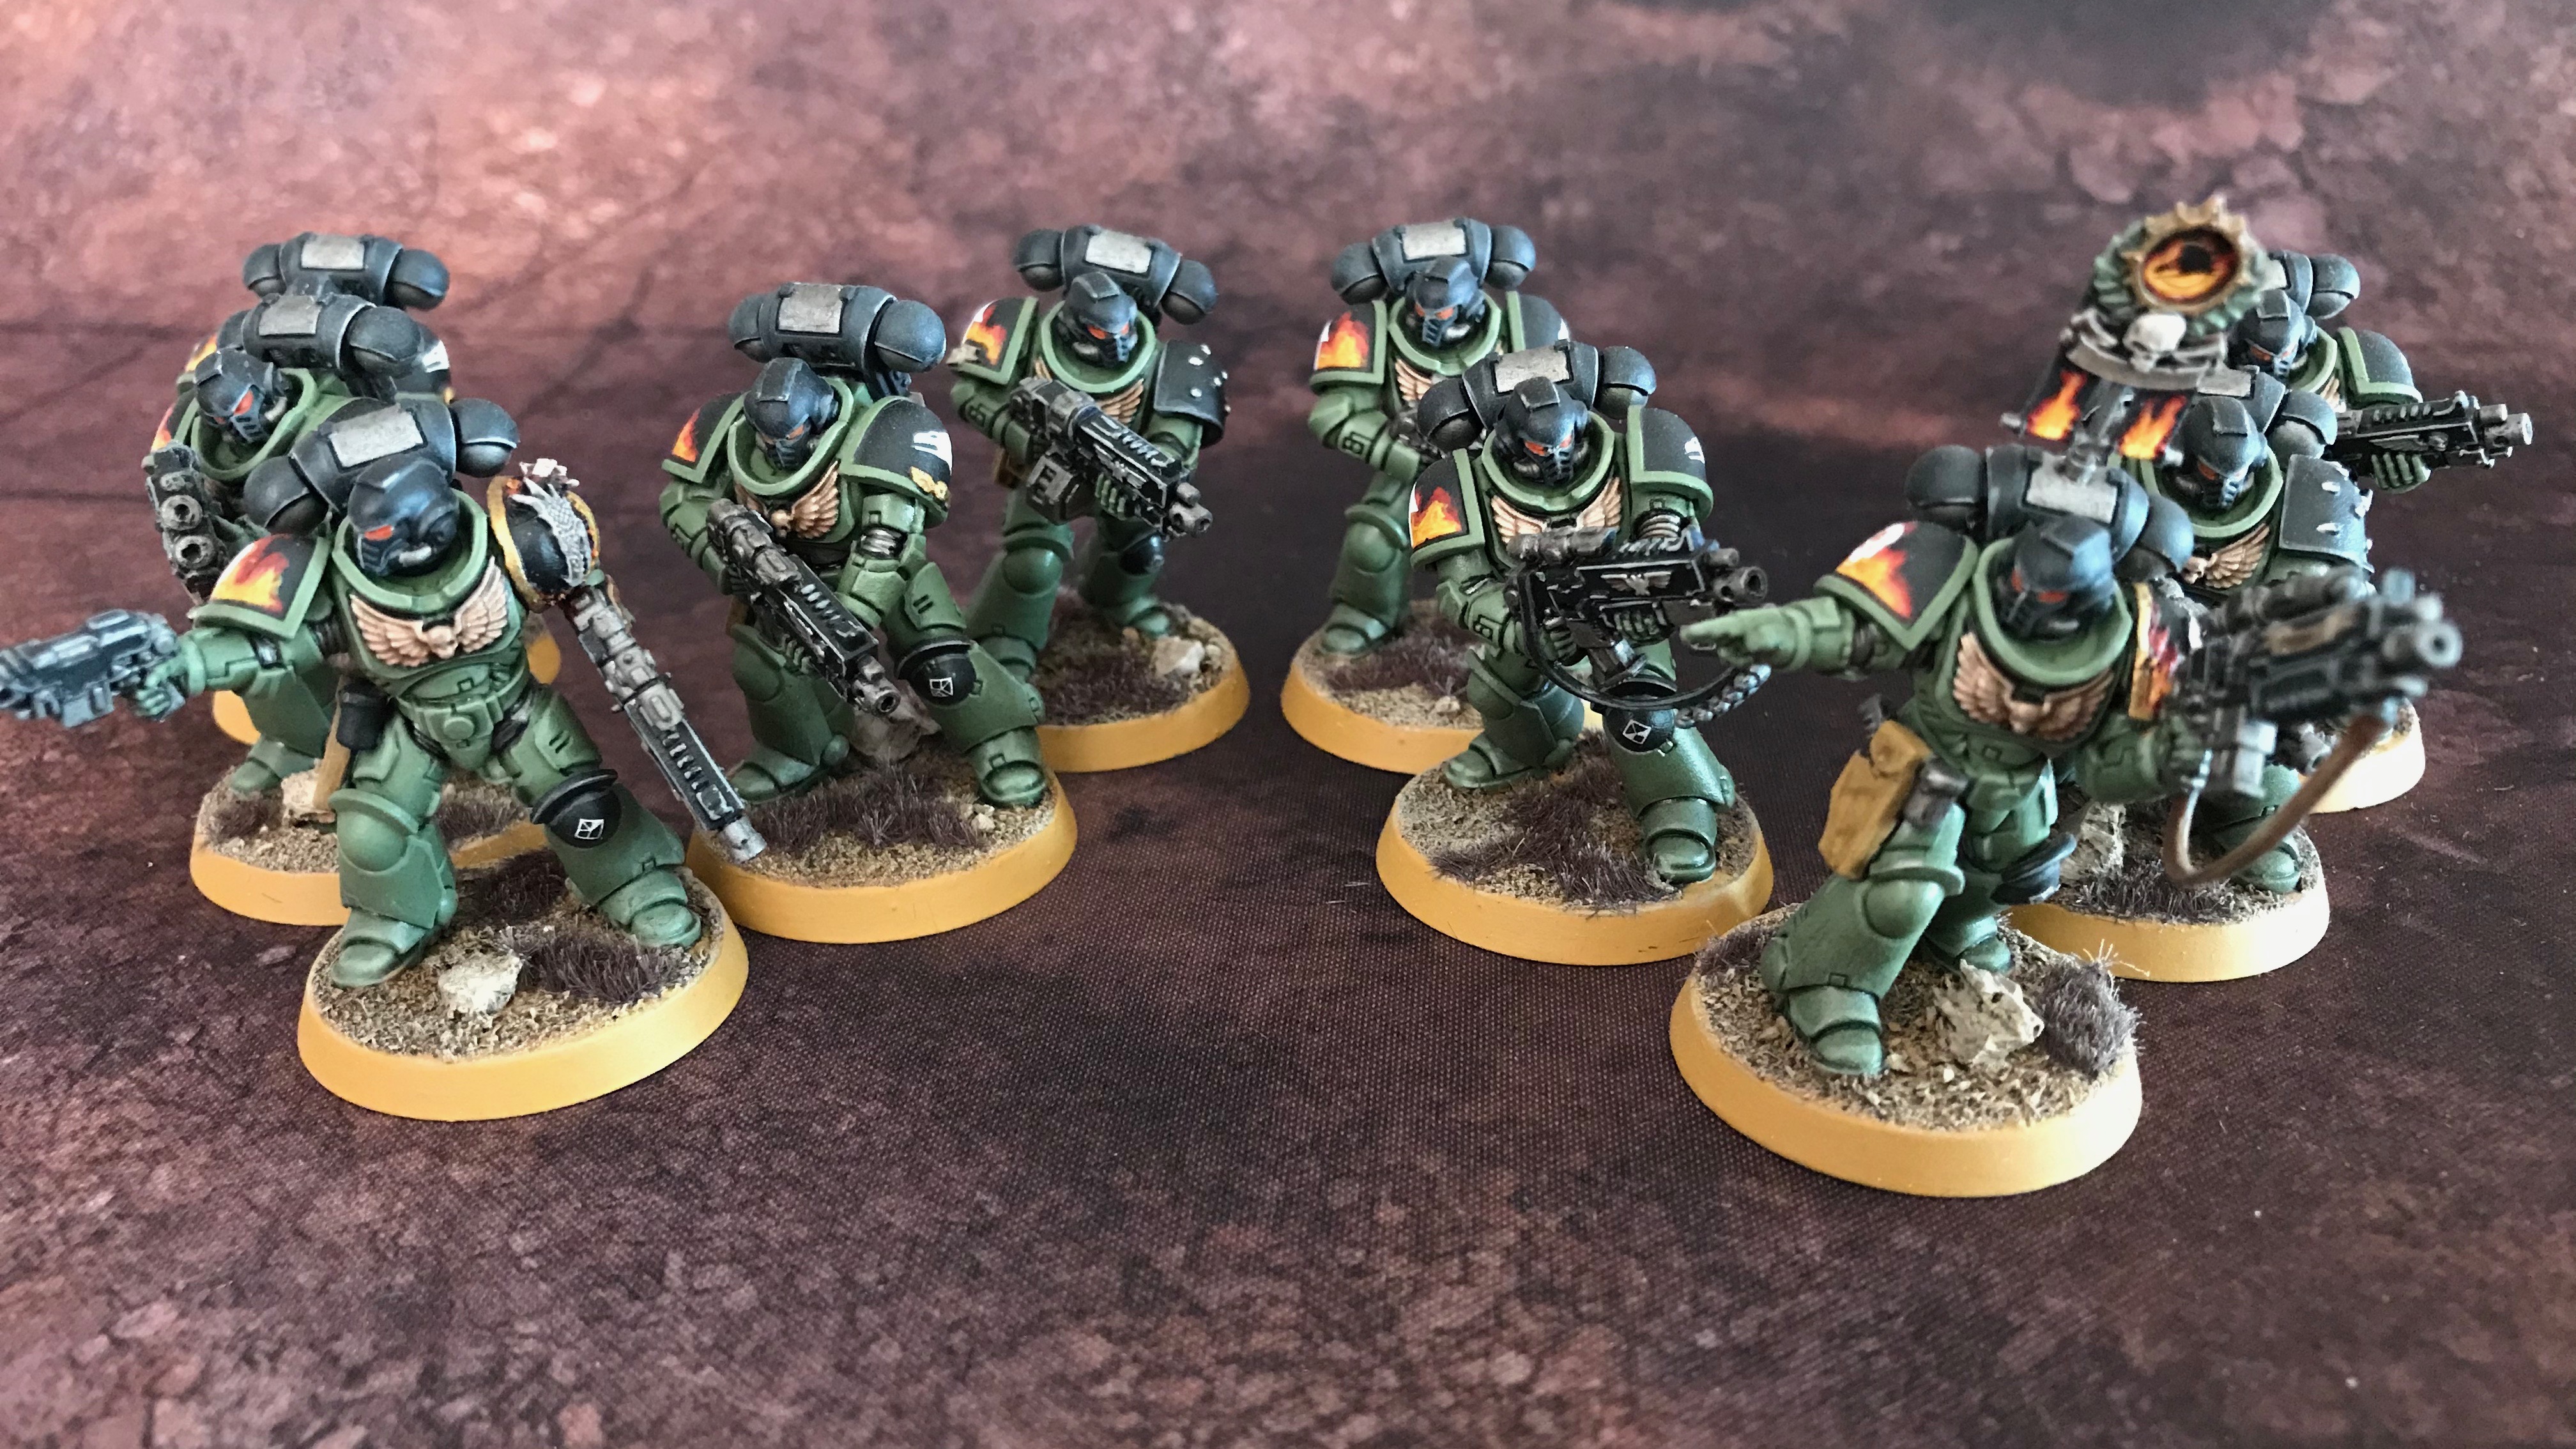
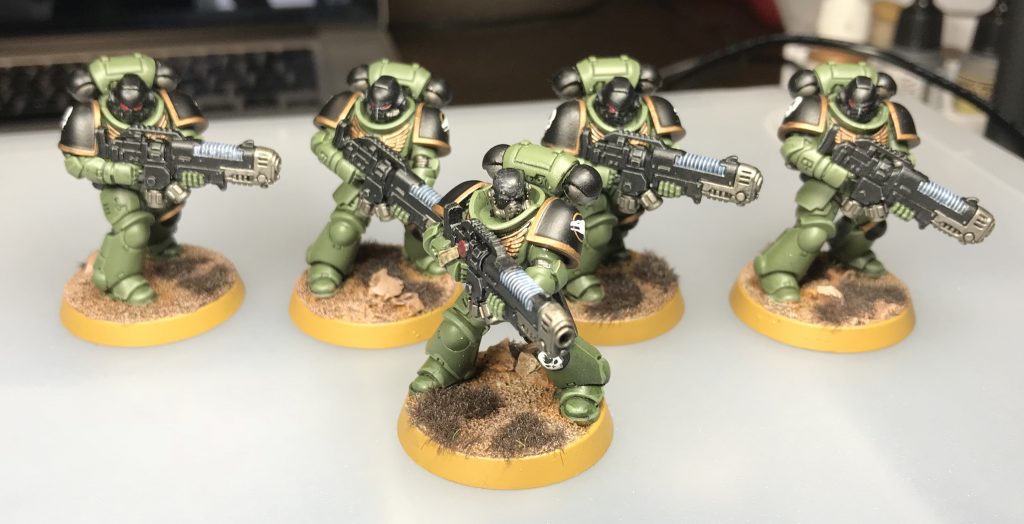
Salamanders Assault Intercessors painted by Burning Beard Studios
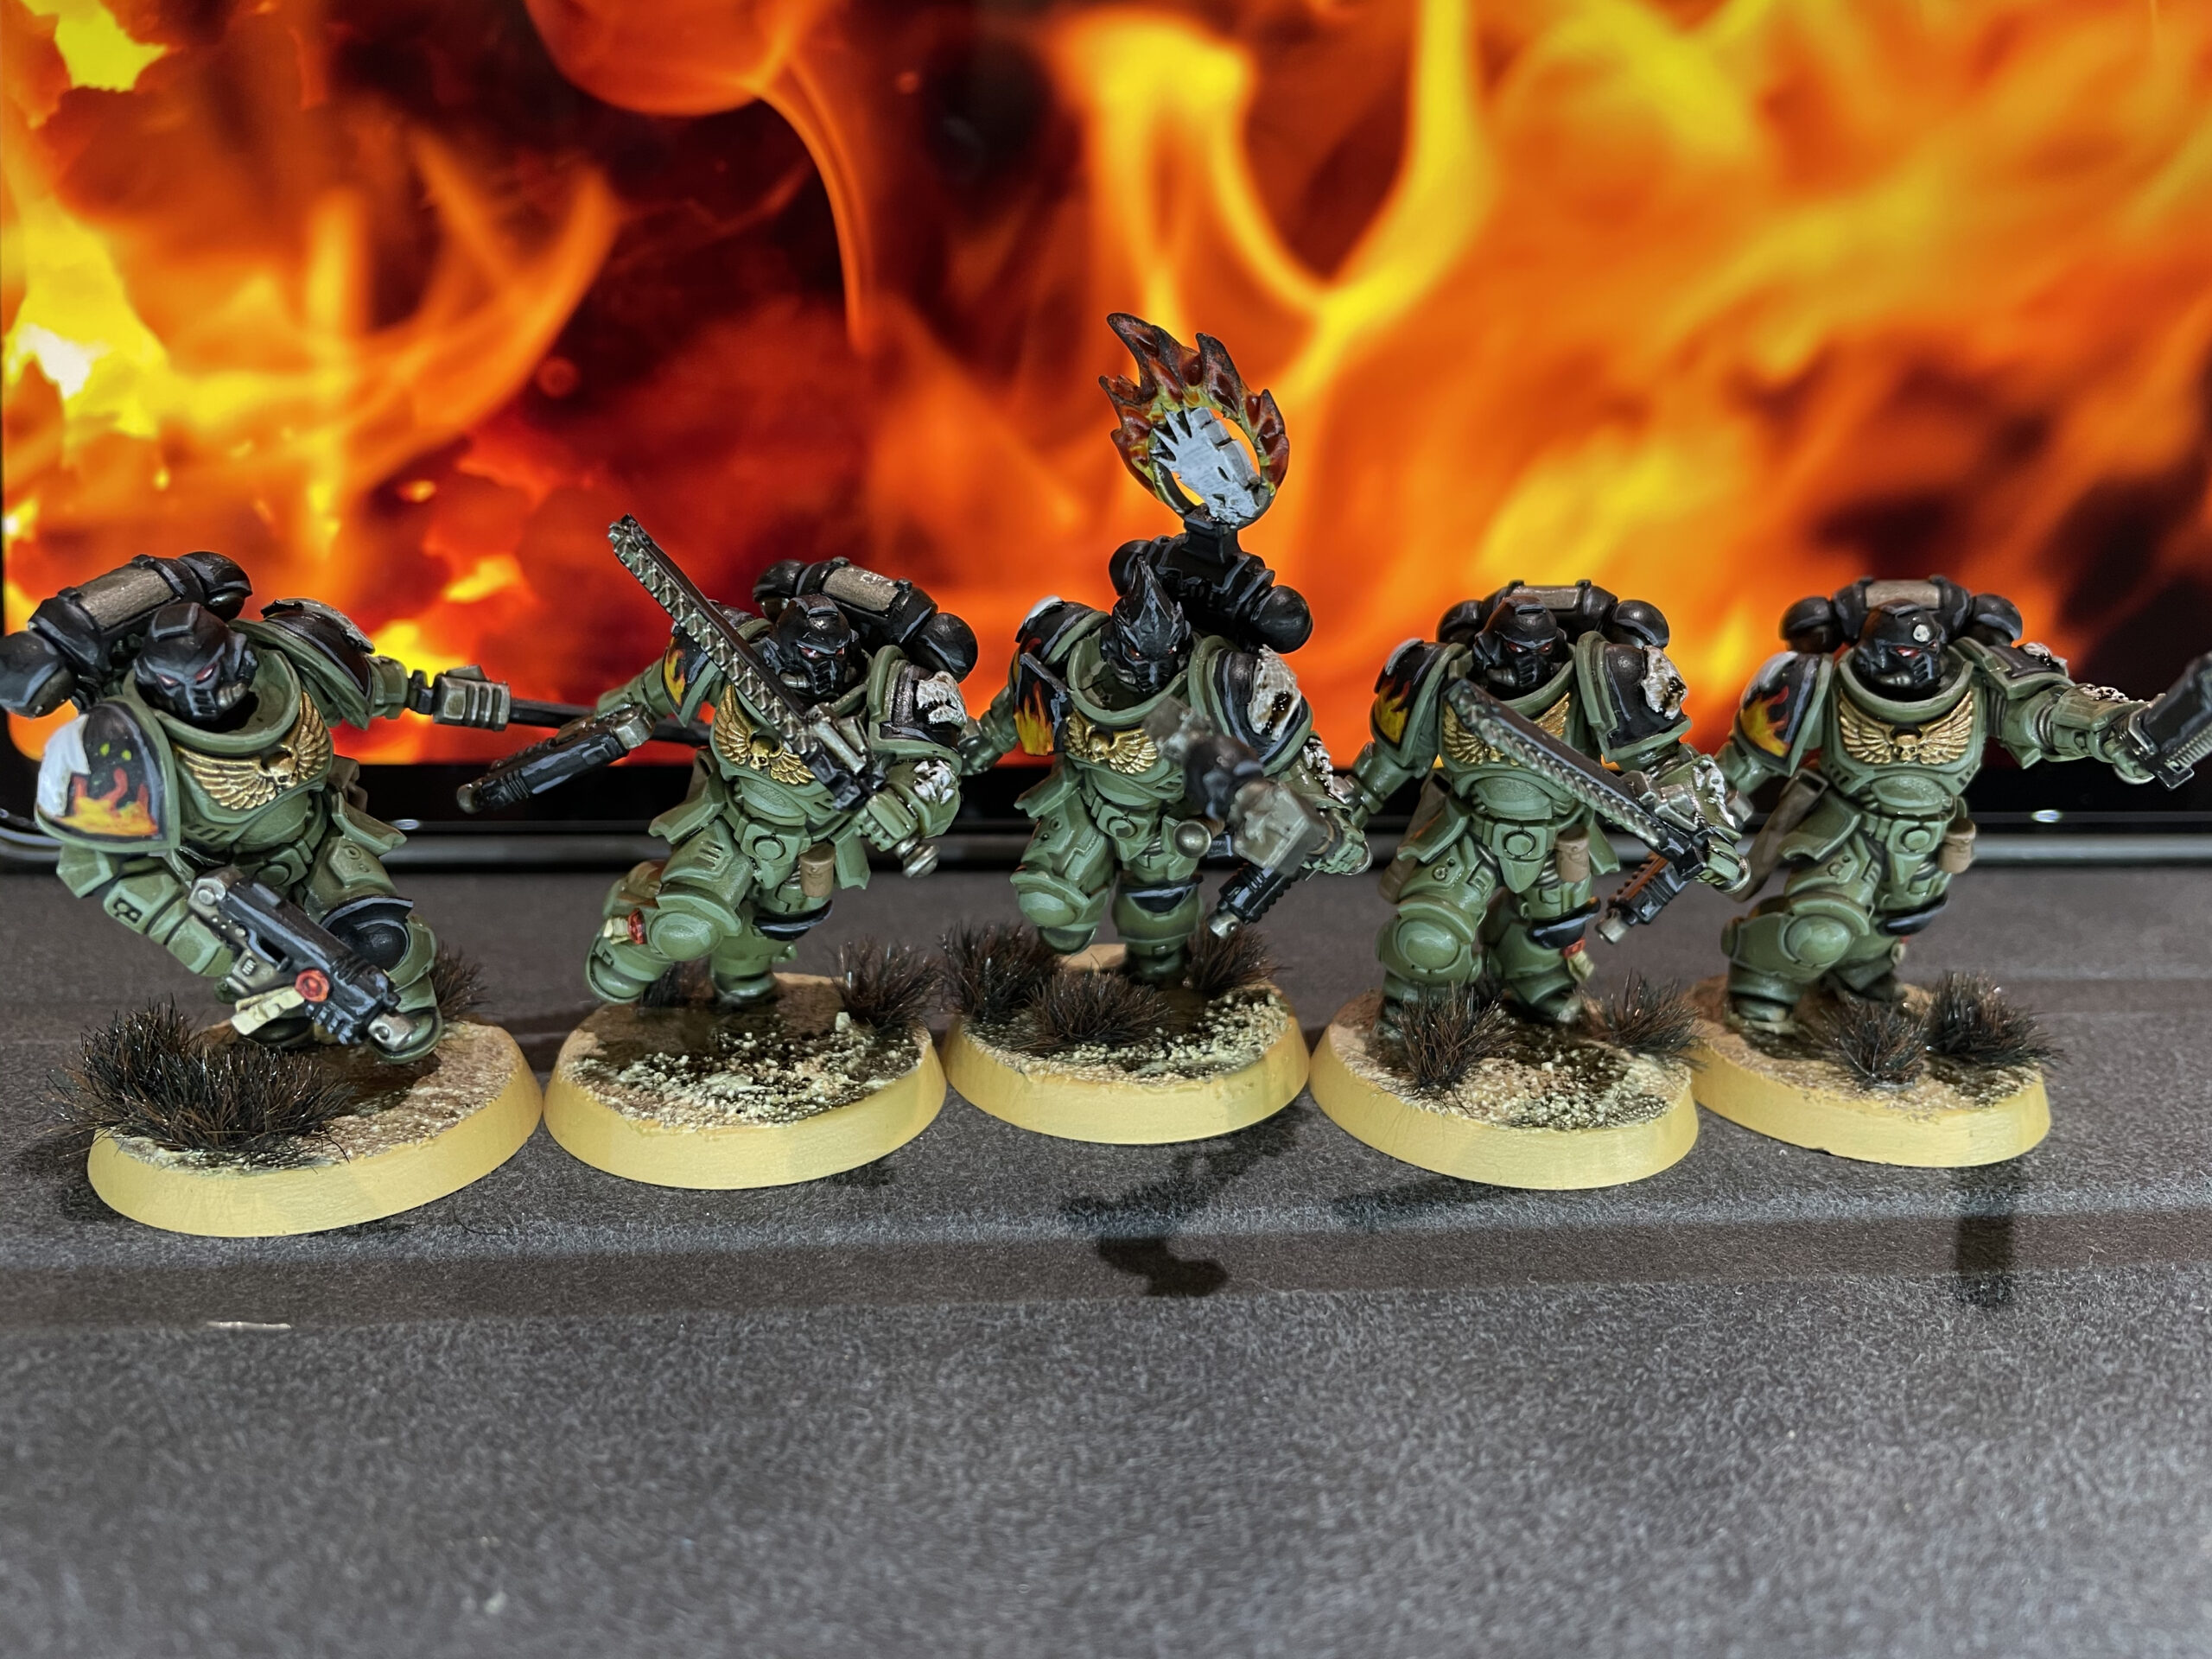
This is two five-man Assault Intercessors squads, painted by Darren of Burning Beard Studios. As with the other models he painted for me, he's added some 3D-printed accessories to make them distinctive. I really like the helmet on this sergeant:
Necron Overlord & Royal Warden by The Unrelenting Brush

Two of the characters from the Indomitus box set painted by The Unrelenting Brush. I have lots of Overlords but I really like this model - like the Royal Warden, it's a very macho pose, and a lot more intimidating than the other versions of this character.
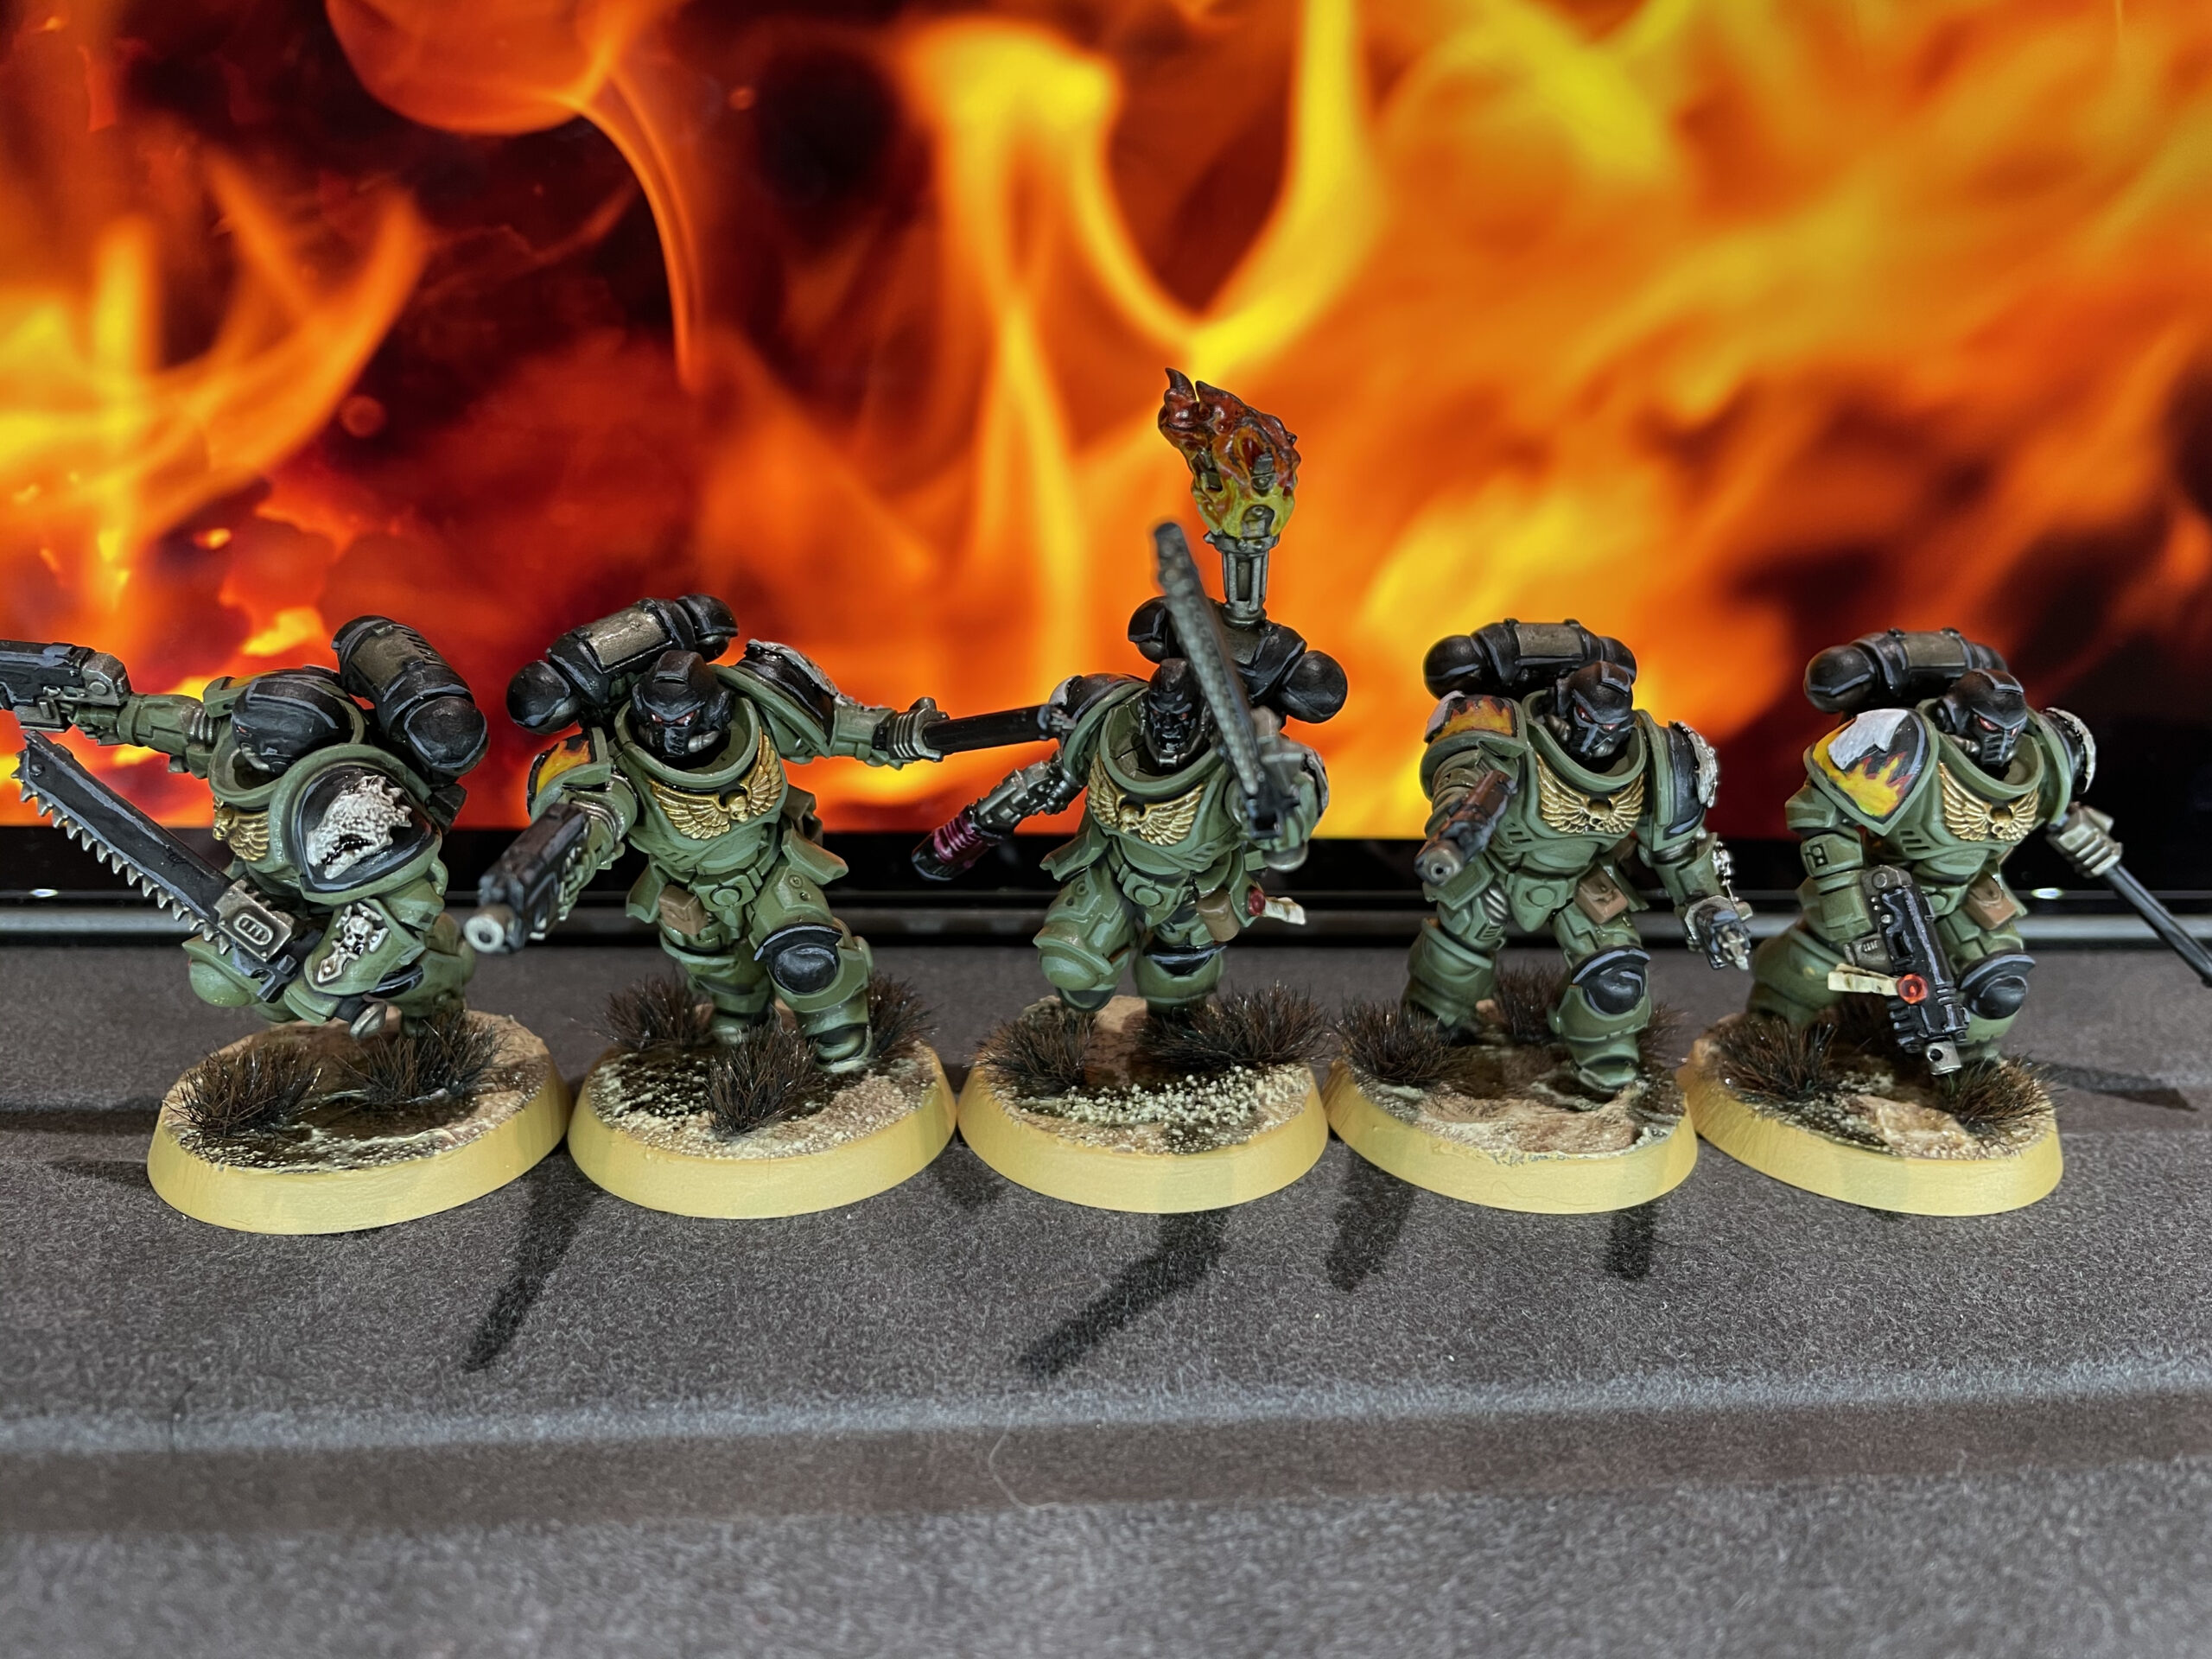
Salamanders Sternguard Squads by Burning Beard Studios
These models have been languishing in my "pile of shame" for no less than seven years, so I was very happy that Darren from Burning Beard Studios did such a good job on them. He added some 3D-printed bits to make them a unique squad.
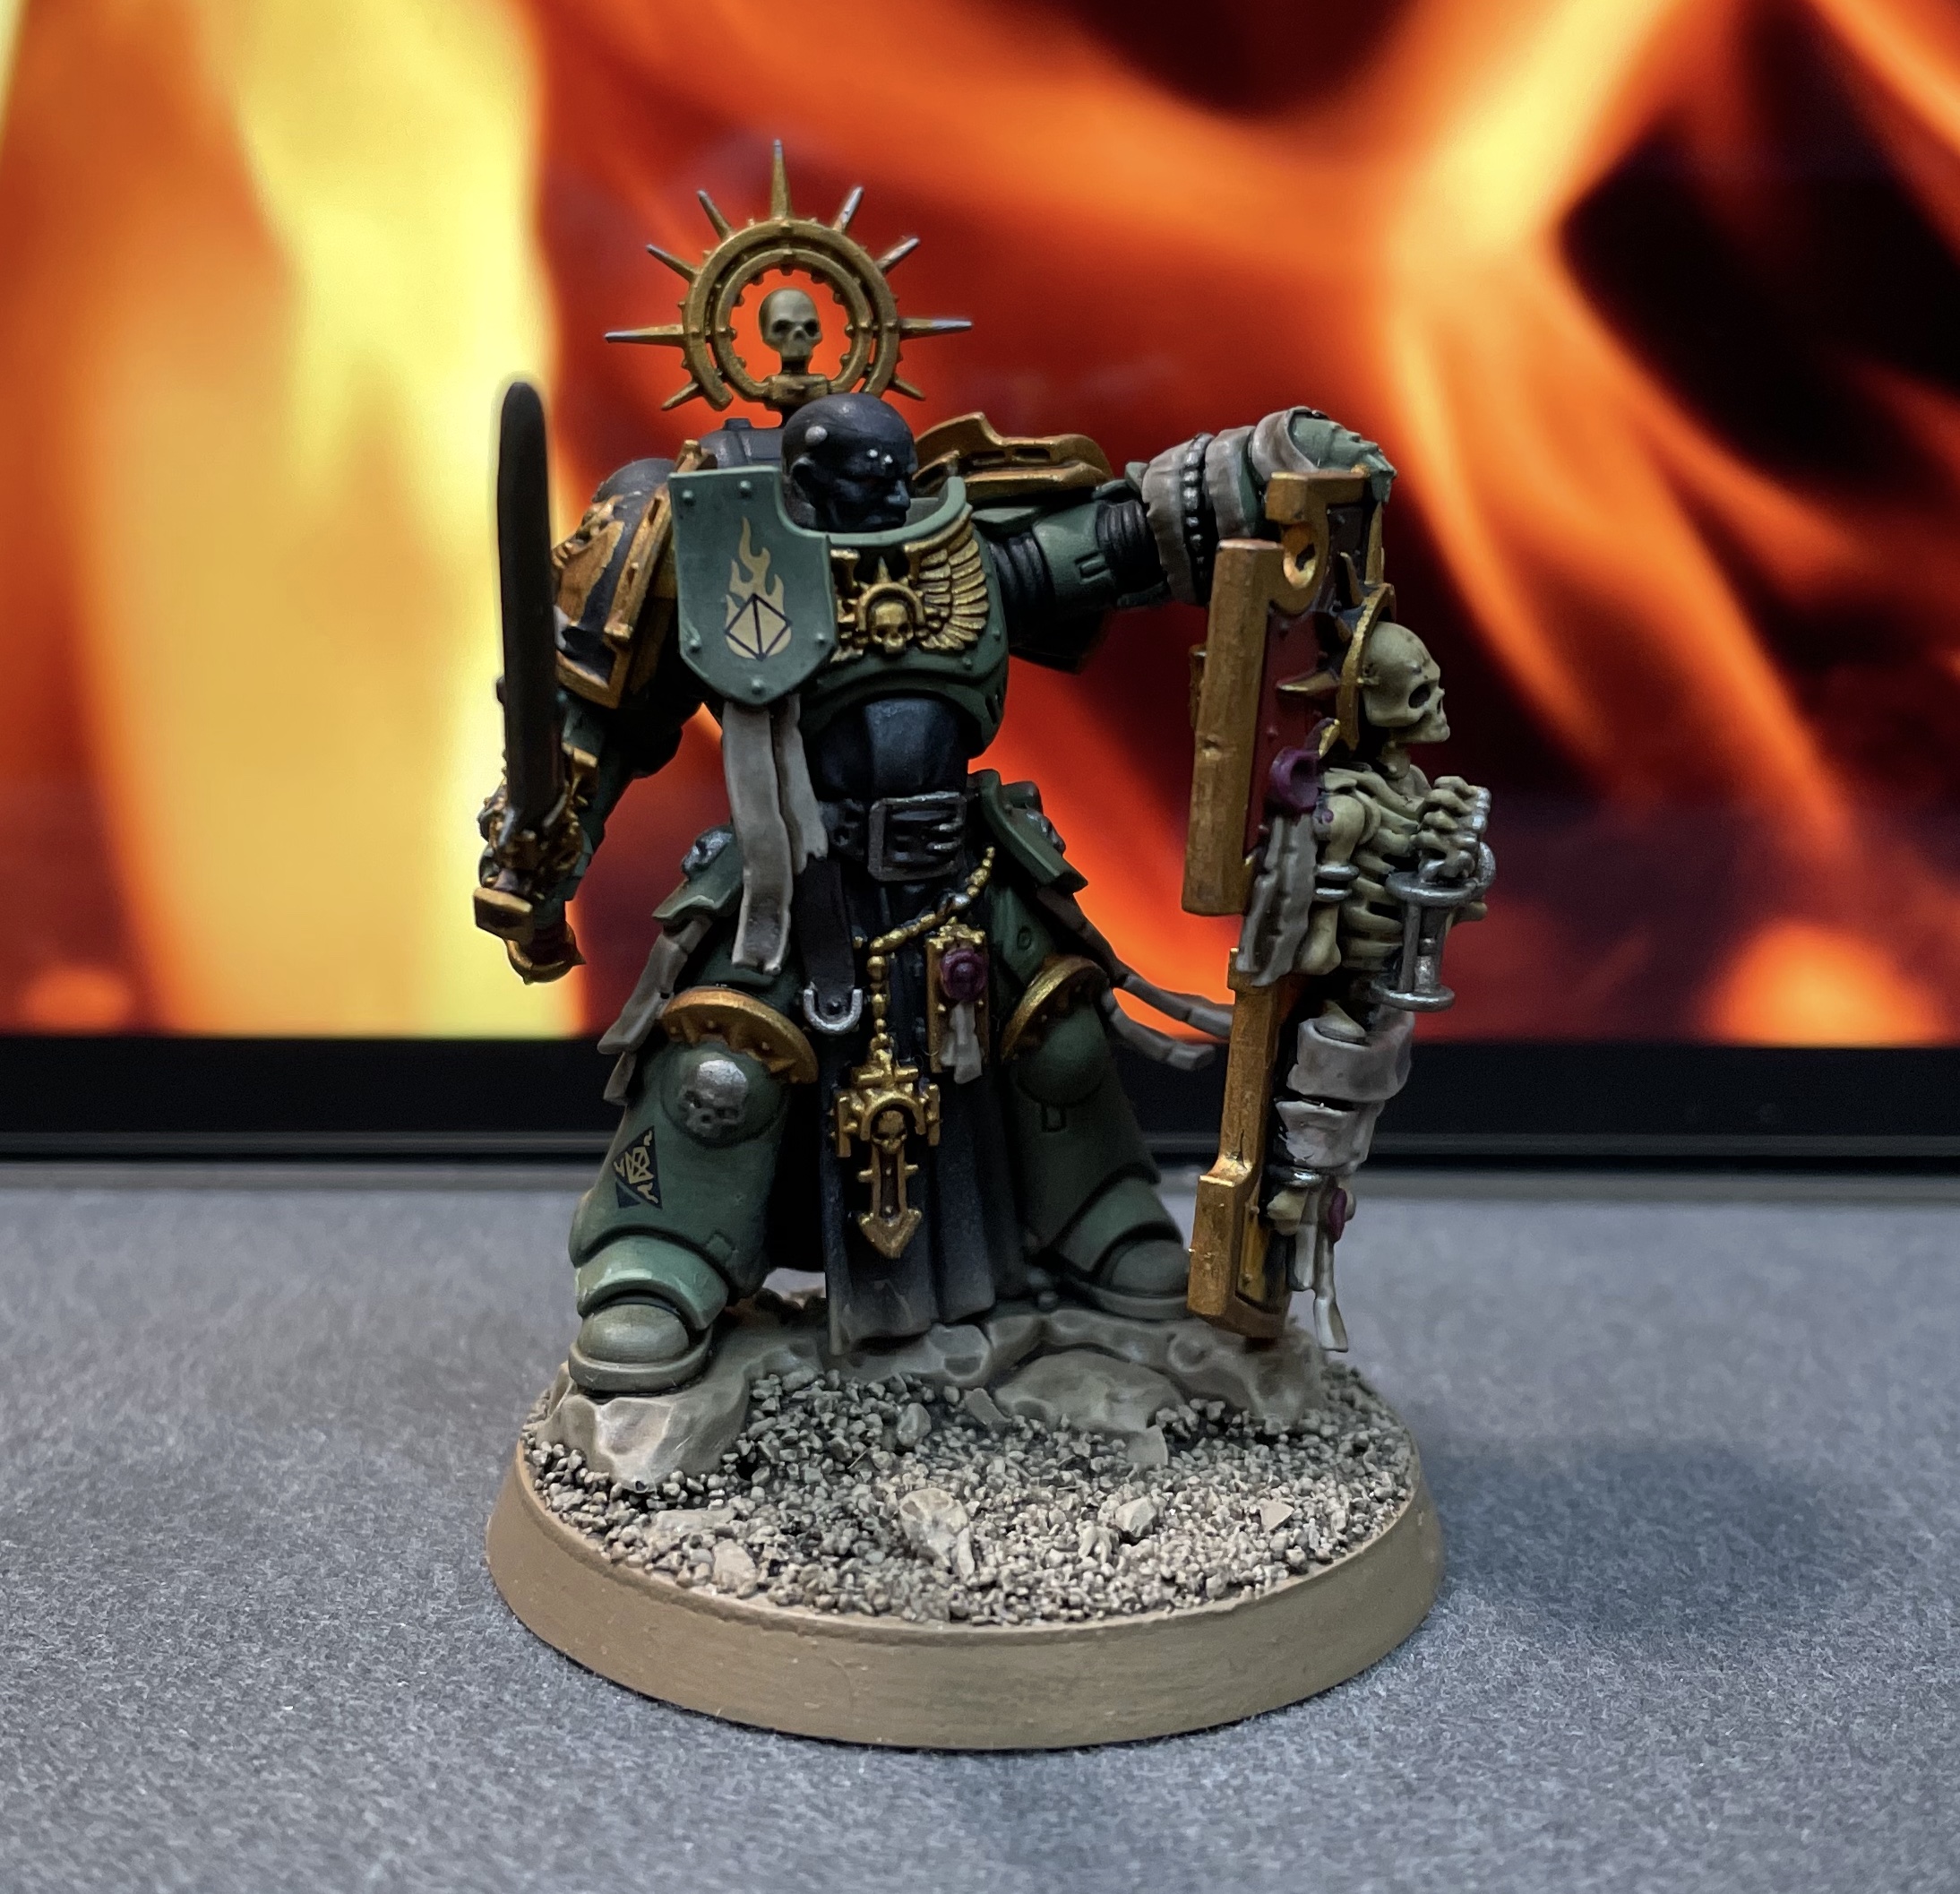
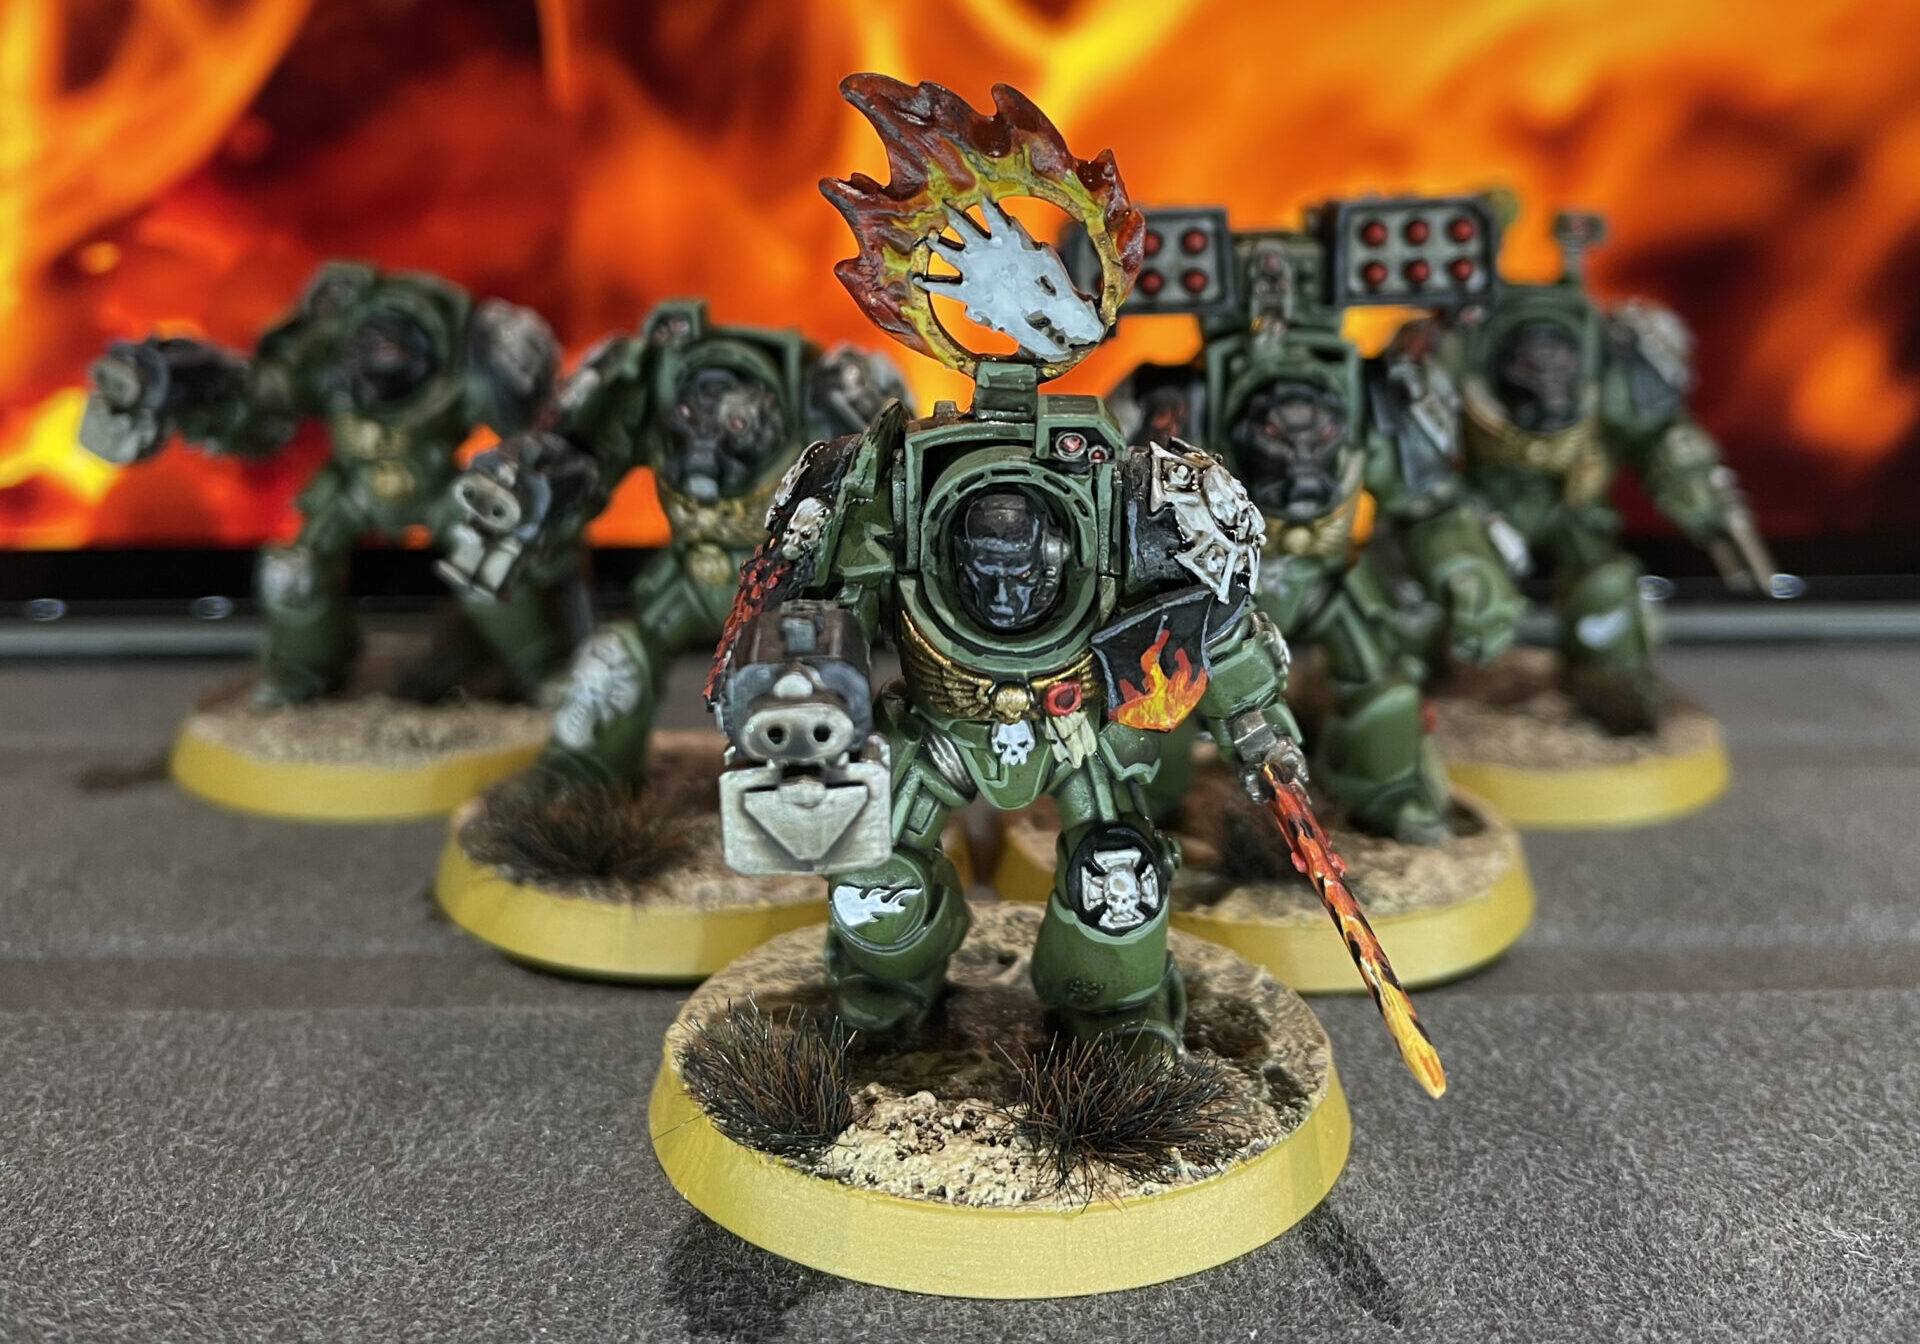
Primaris Chaplain by The Unrelenting Brush

This is such an awesome model! After I got it back from The Unrelenting Brush, I decided to add some flames to the armour panels (I also added the decals) which helps to tie it in with the rest of the army.
Salamanders Eradicators by Burning Beard Studios
Primaris Eradicators are a very Salamanders-esque unit, and I am definitely going to add more of these to my army. Another great paint job by Darren of Burning Beard Studios.
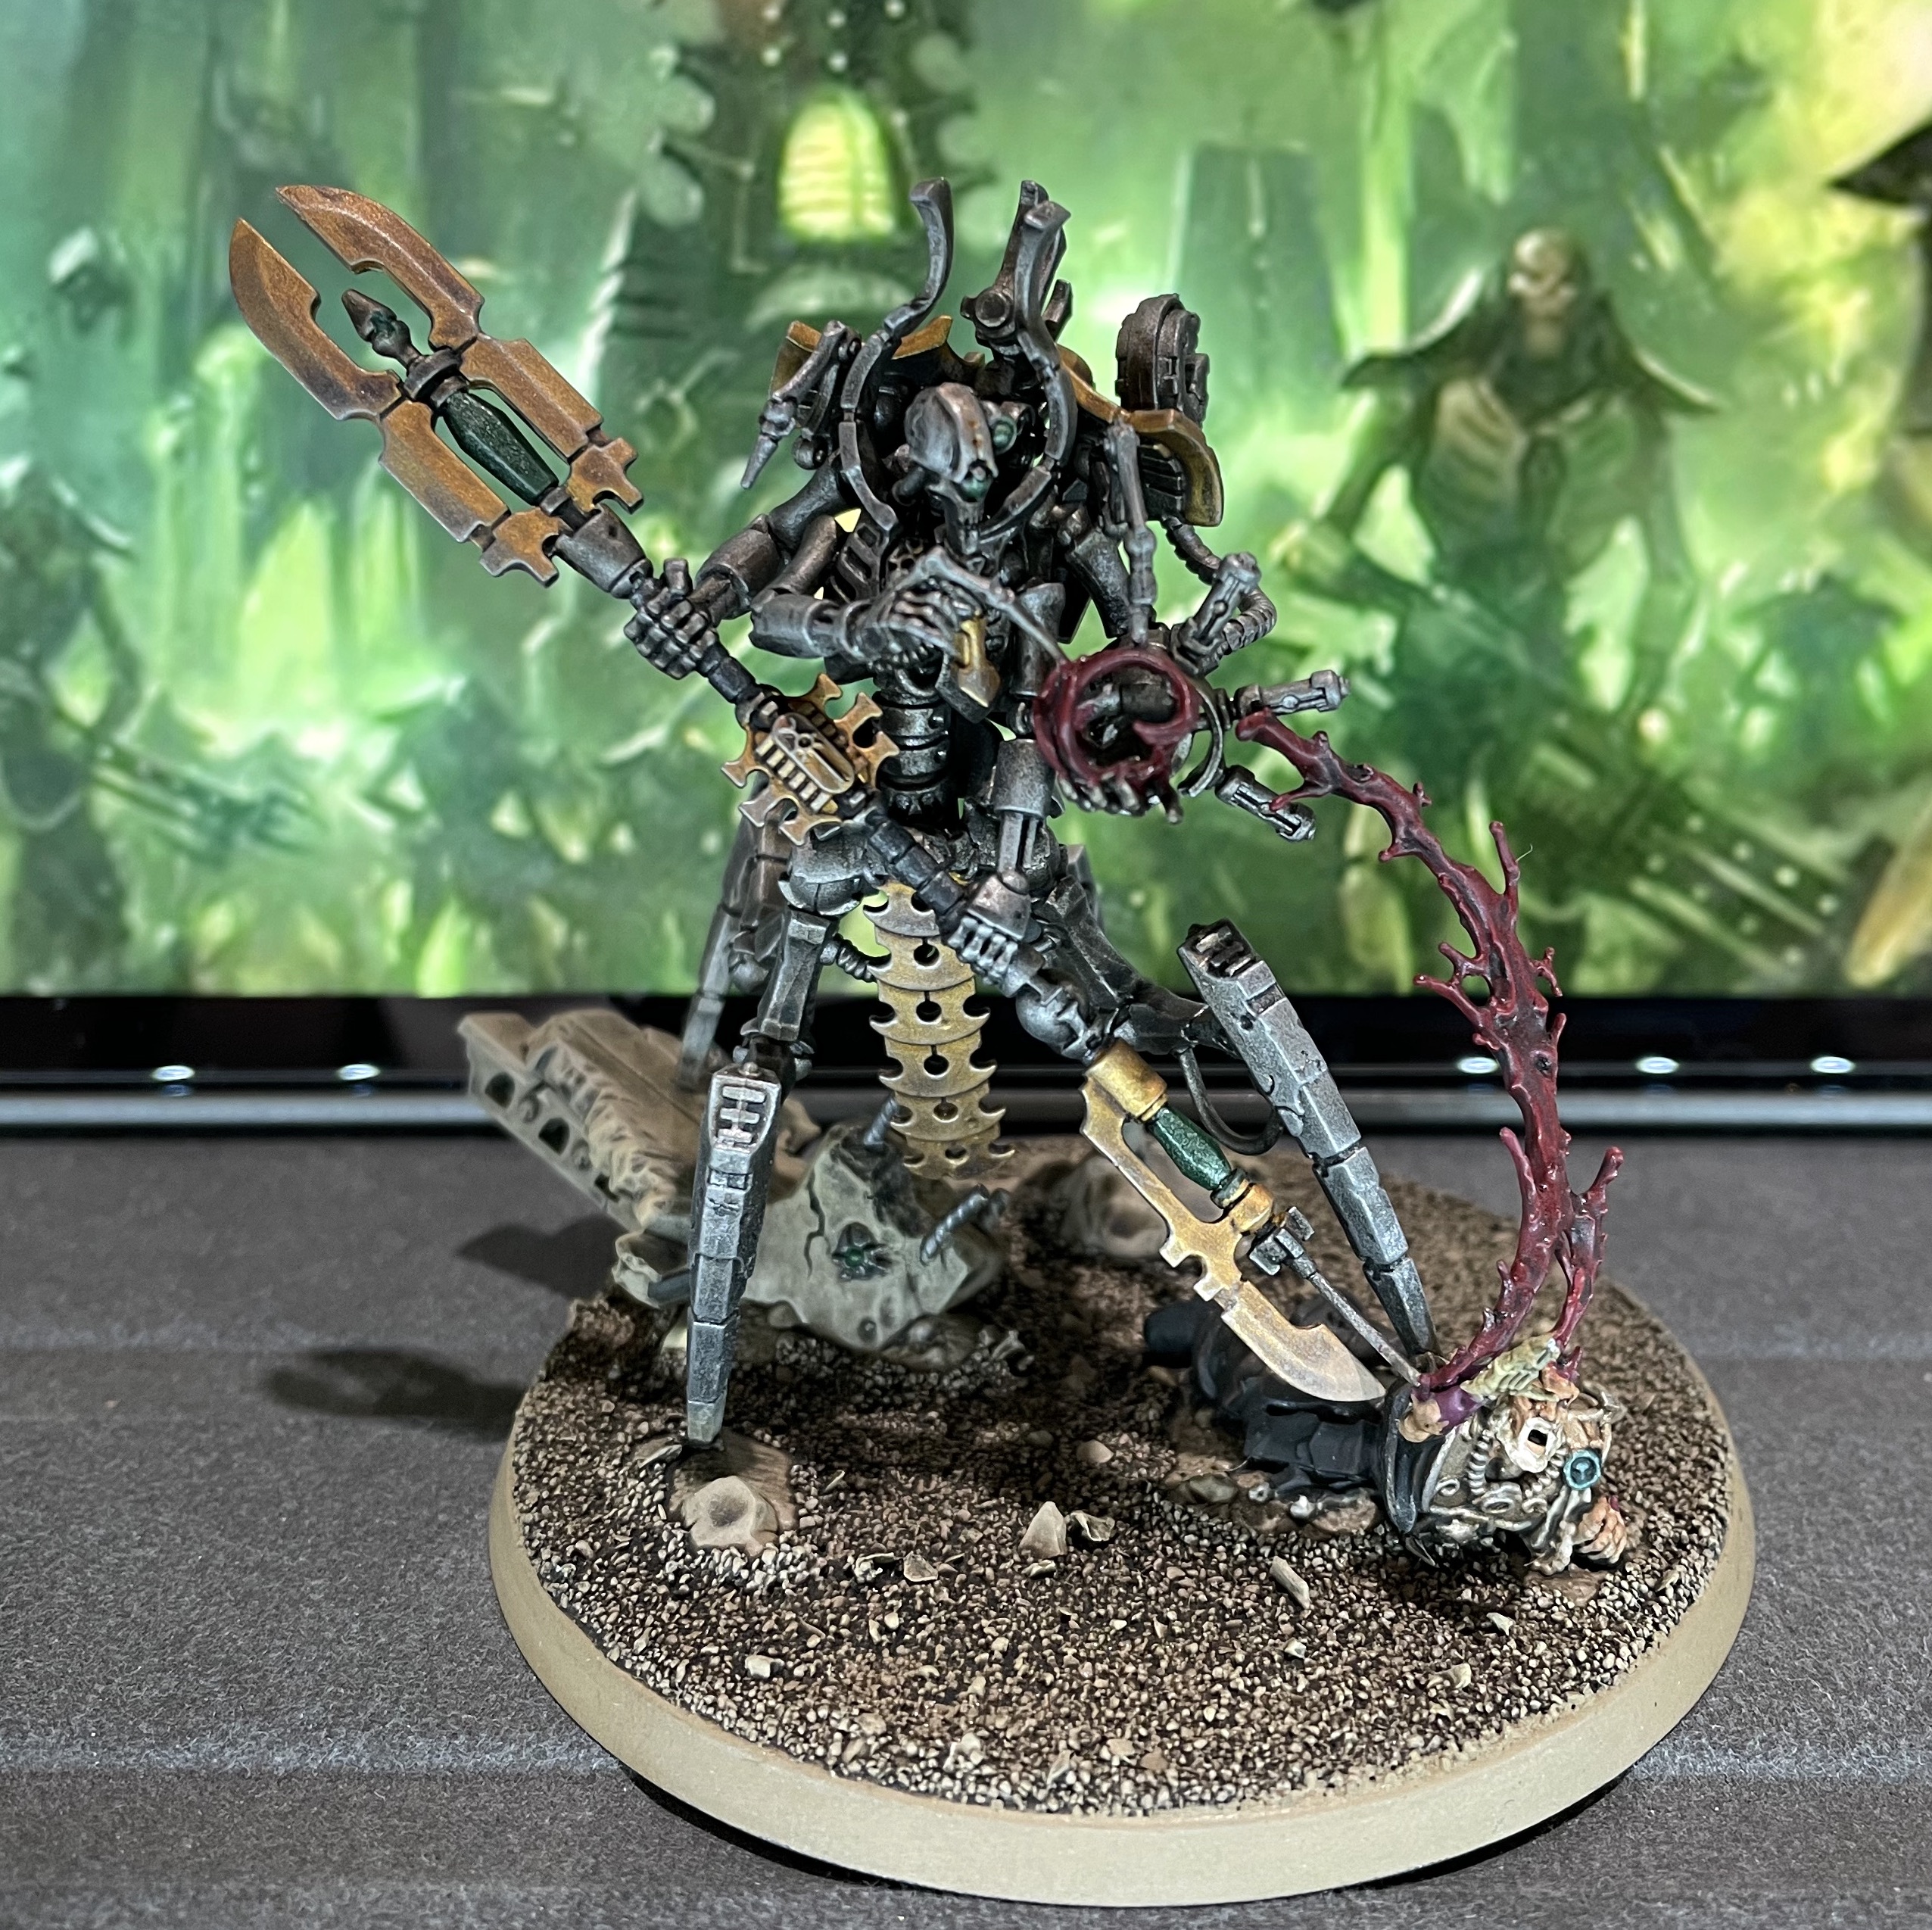
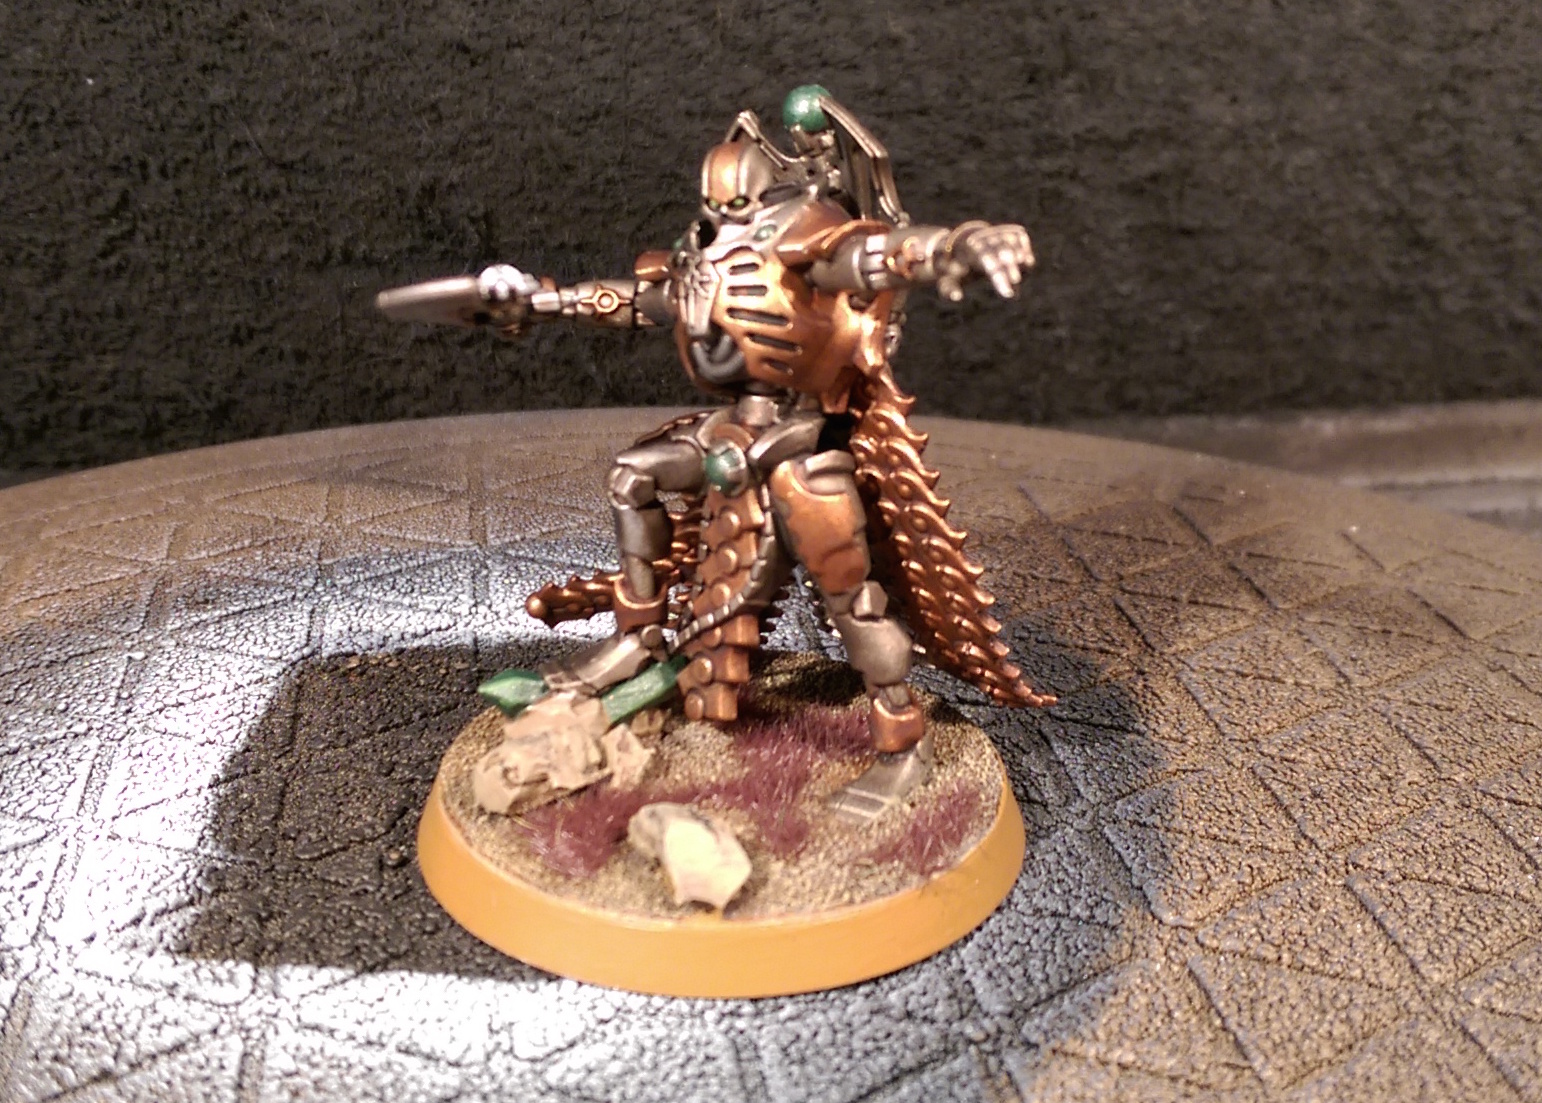
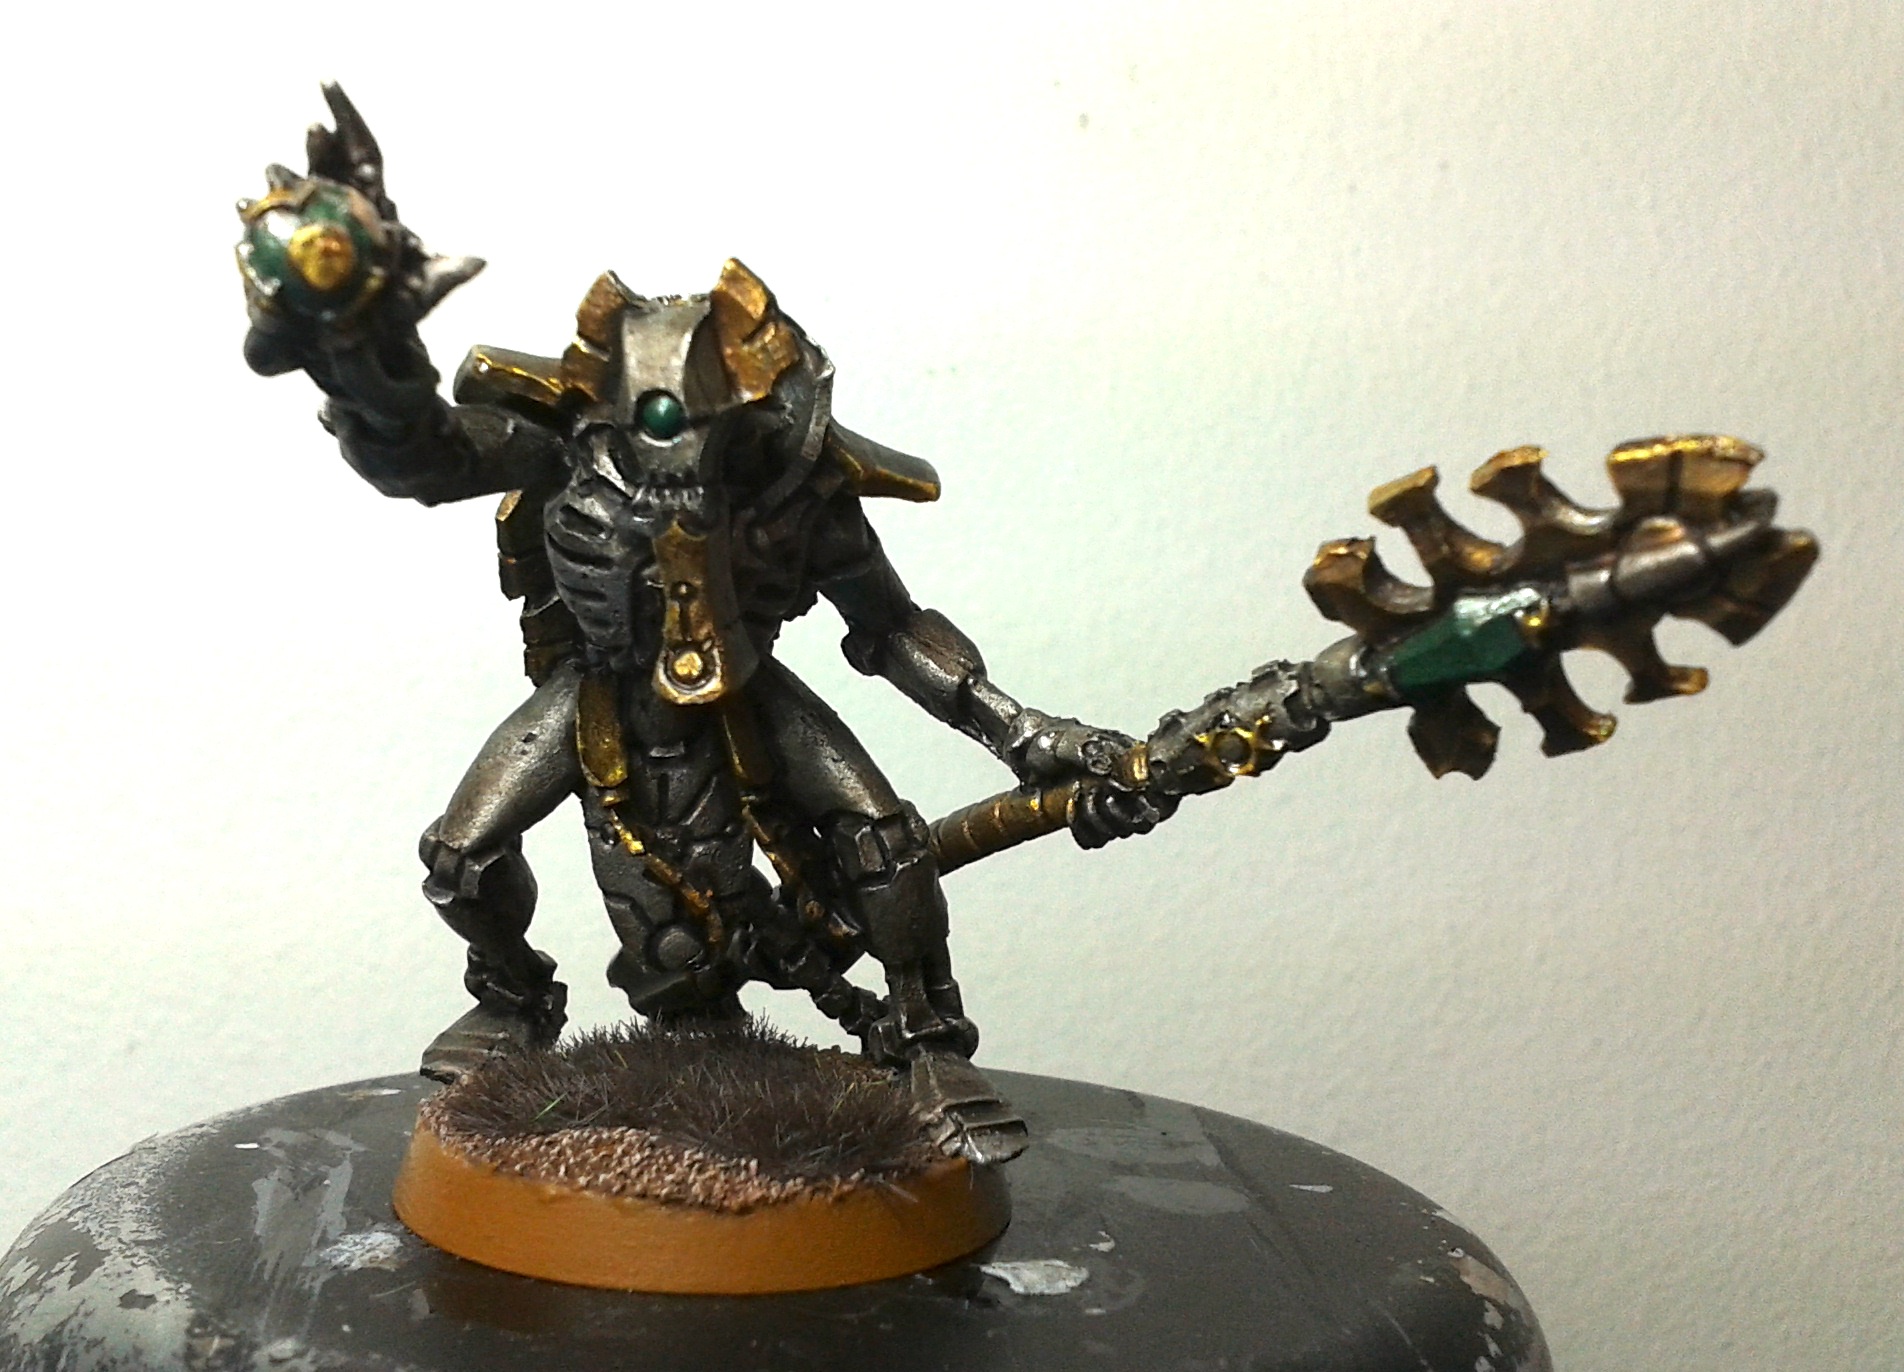
Necron Skorpekh Lord by The Unrelenting Brush
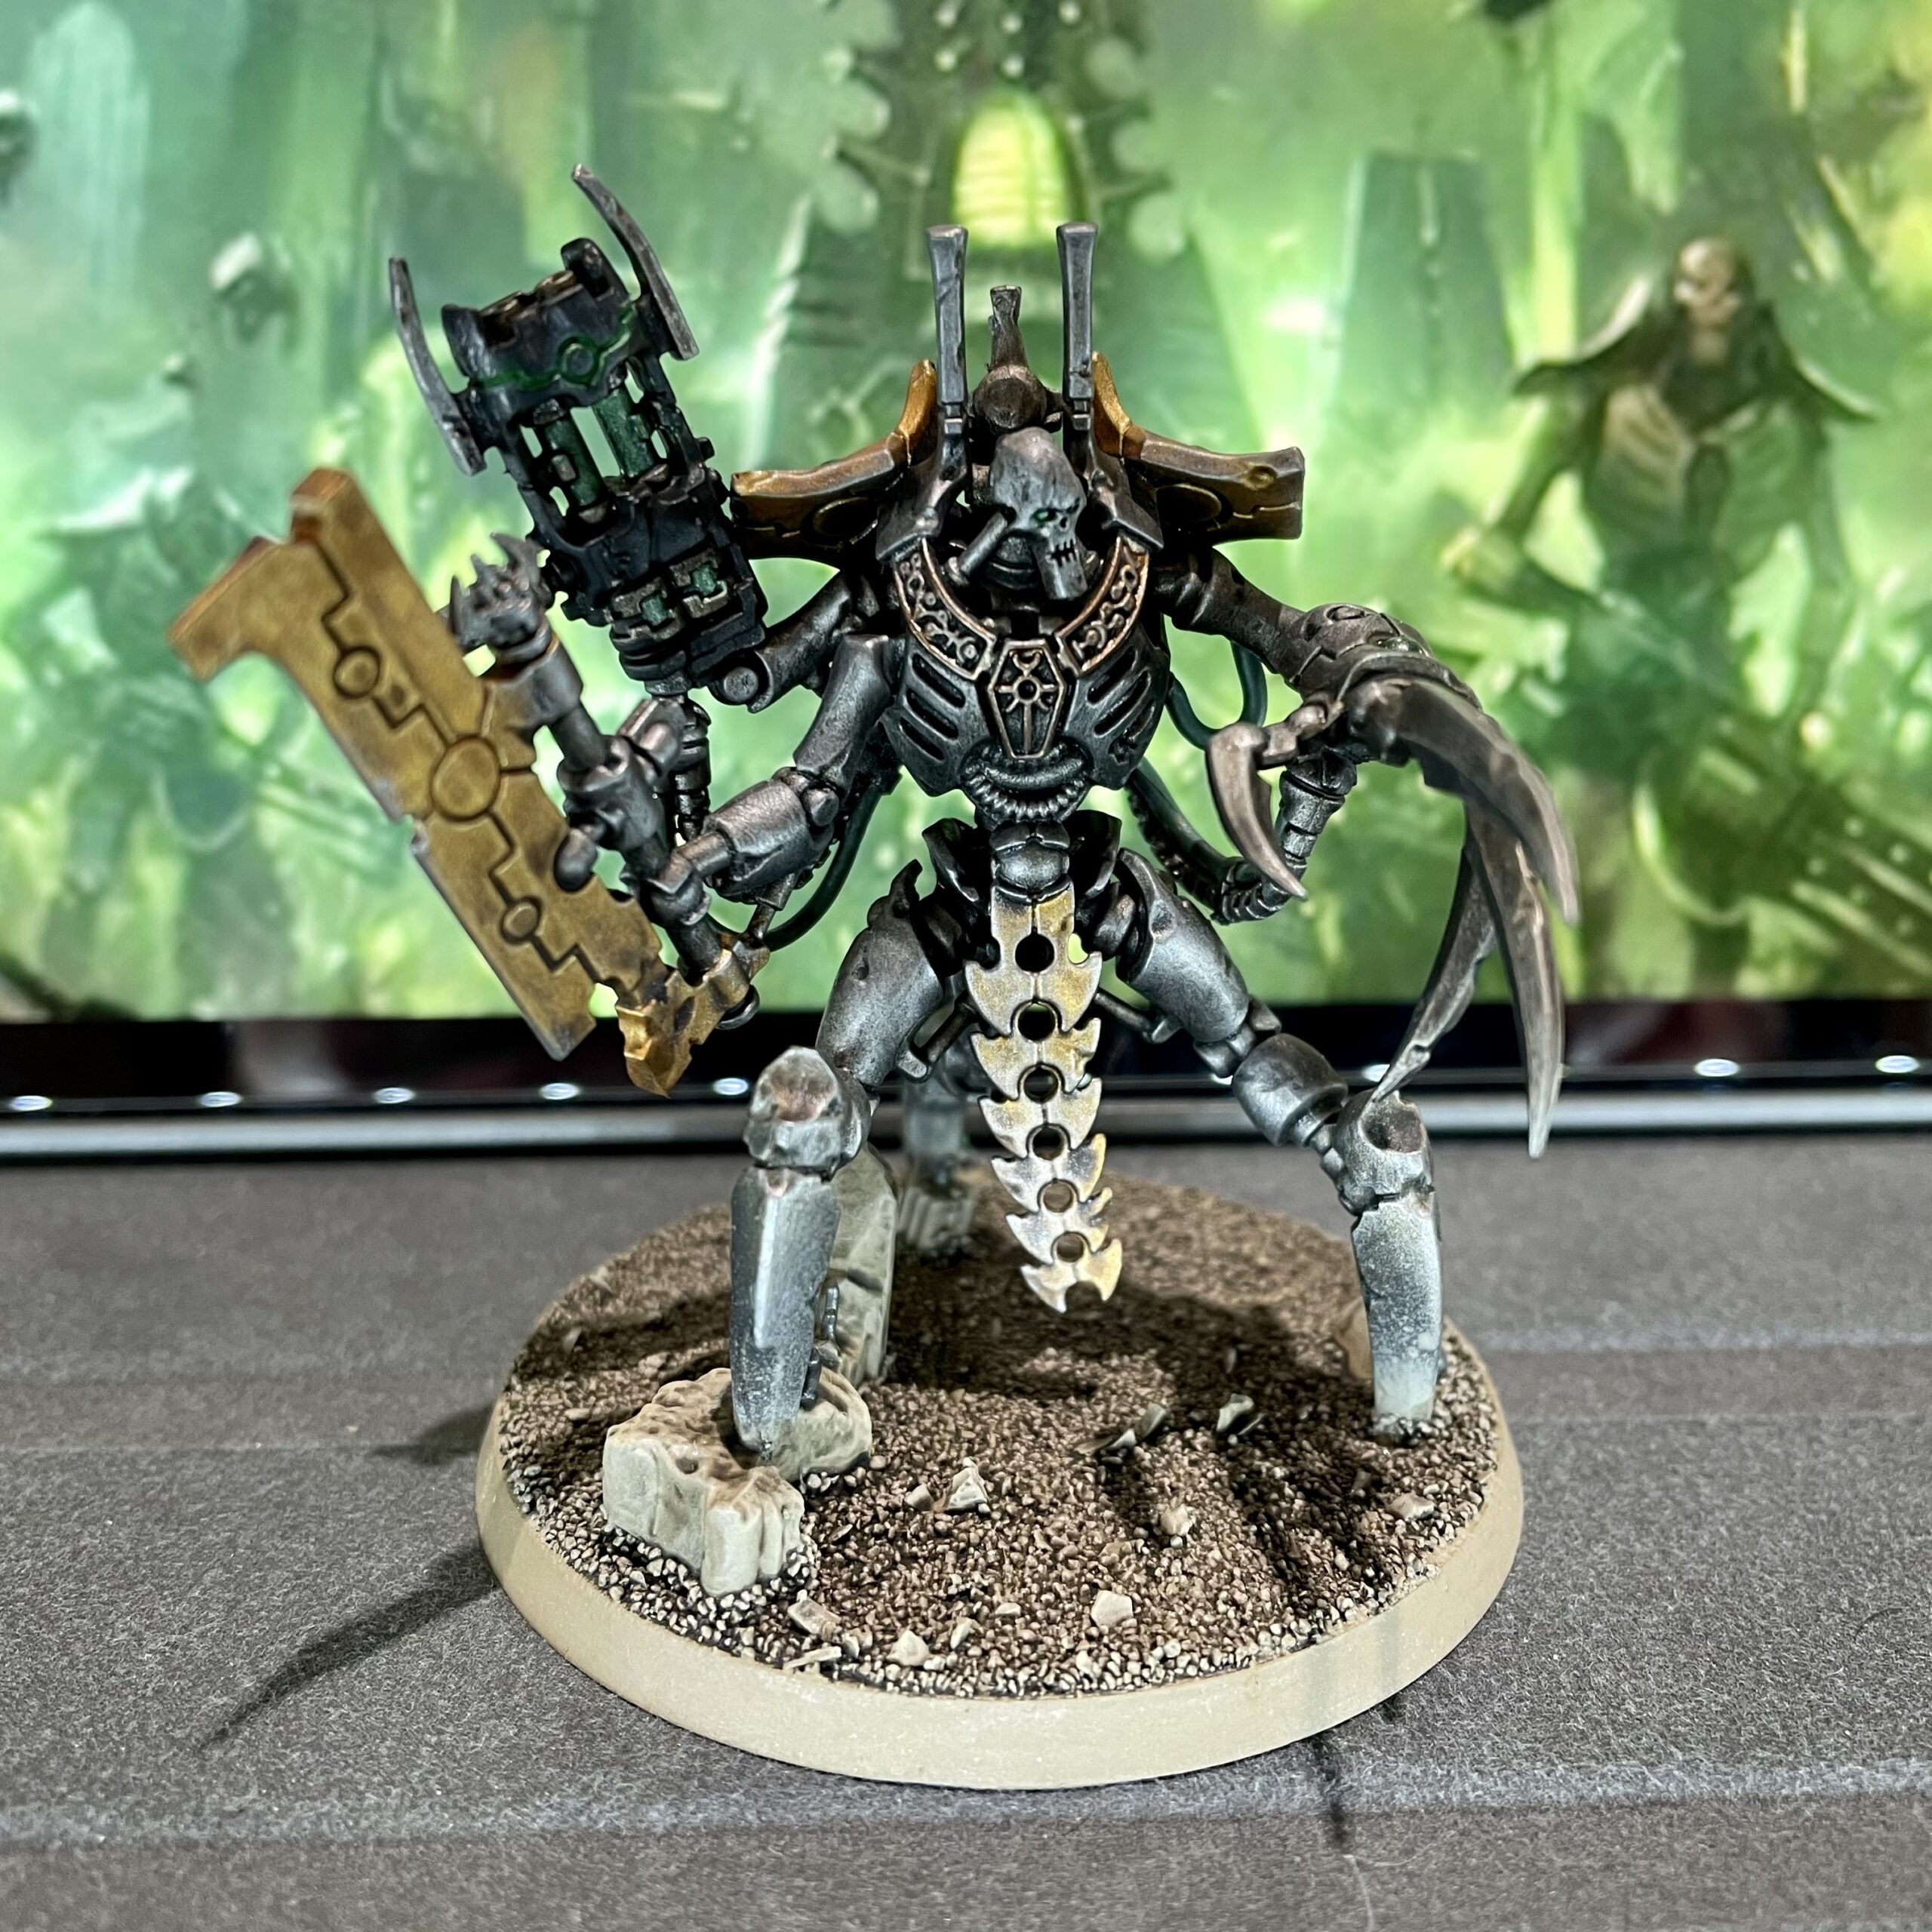
Another model from Indomitus, this time the Skorpekh Lord, as painted by The Unrelenting Brush. I love this model, possibly even more than I love Illuminor Szeras. It’s hefty in a way many necron models aren’t, while still being extremely necrony. Looking forward to getting it into the table!
Salamanders Outriders by Burning Beard Studios
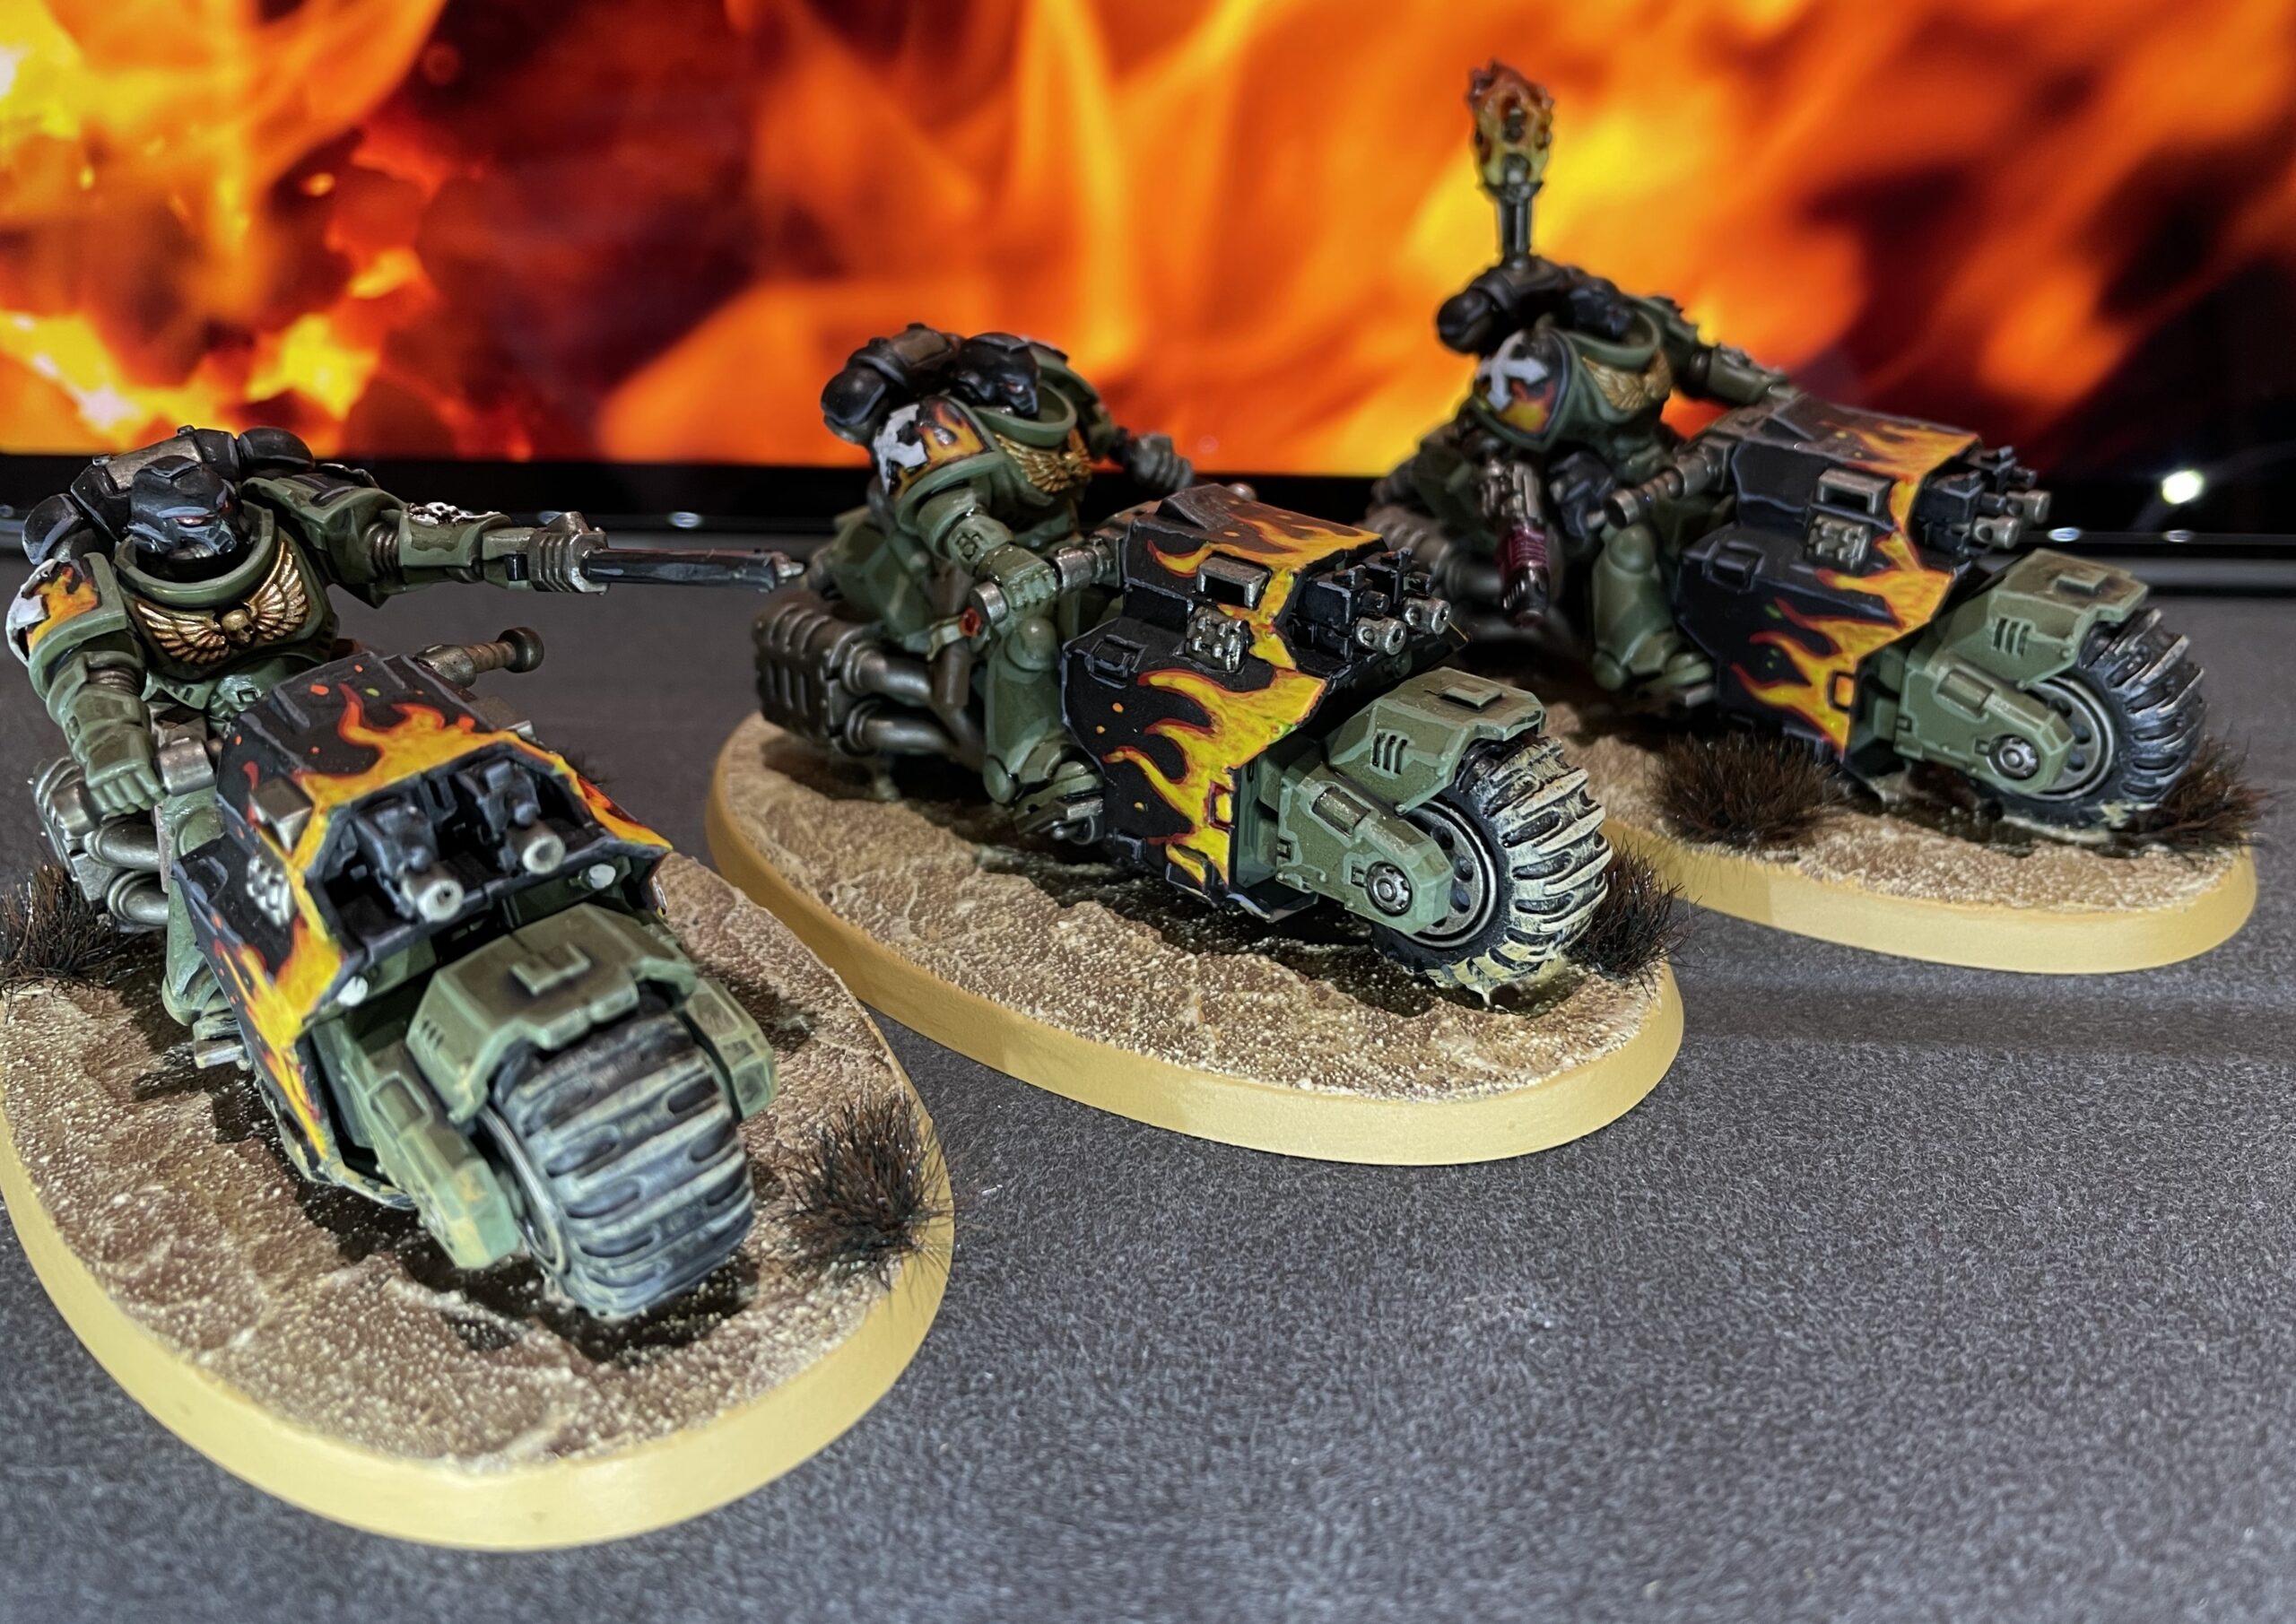
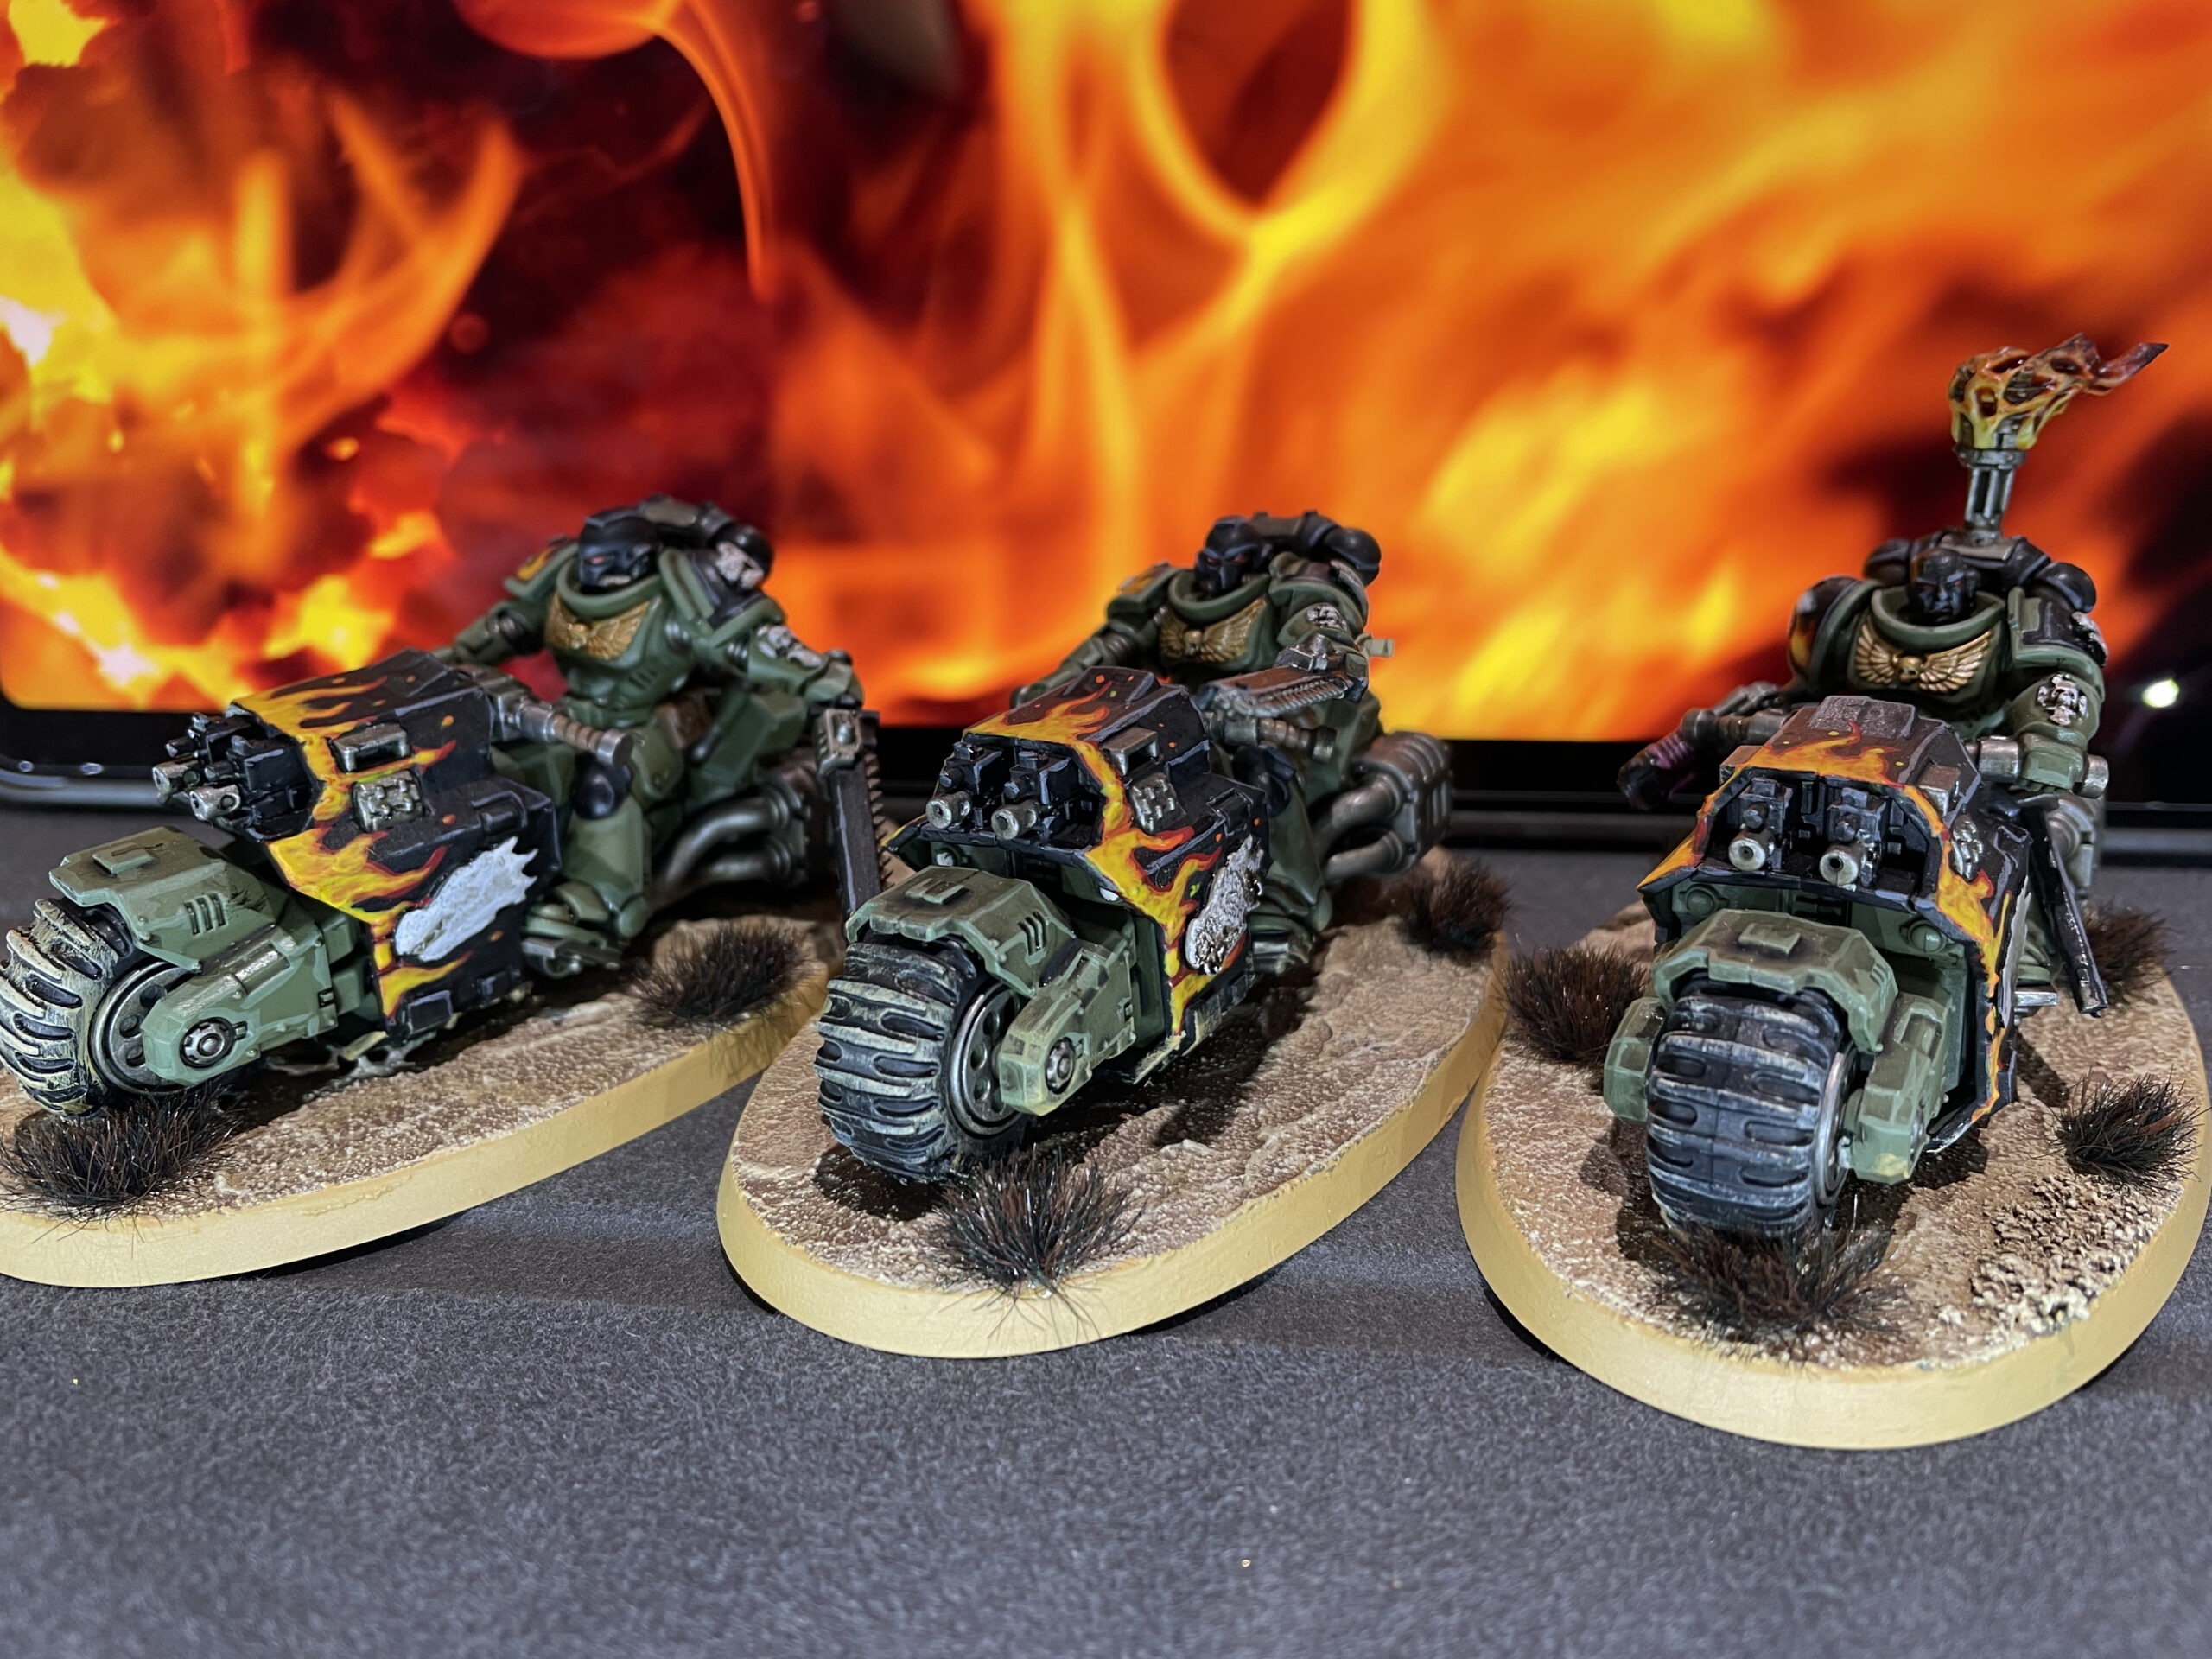
More models from the Indomitus box set, once again painted (and augmented with 3D-printed bits) by Darren of Burning Beard Studios. I love the flames on the main housing of the bike: it's not something I'd have considered painting, but it gives them a Ghost Rider vibe which works really well.
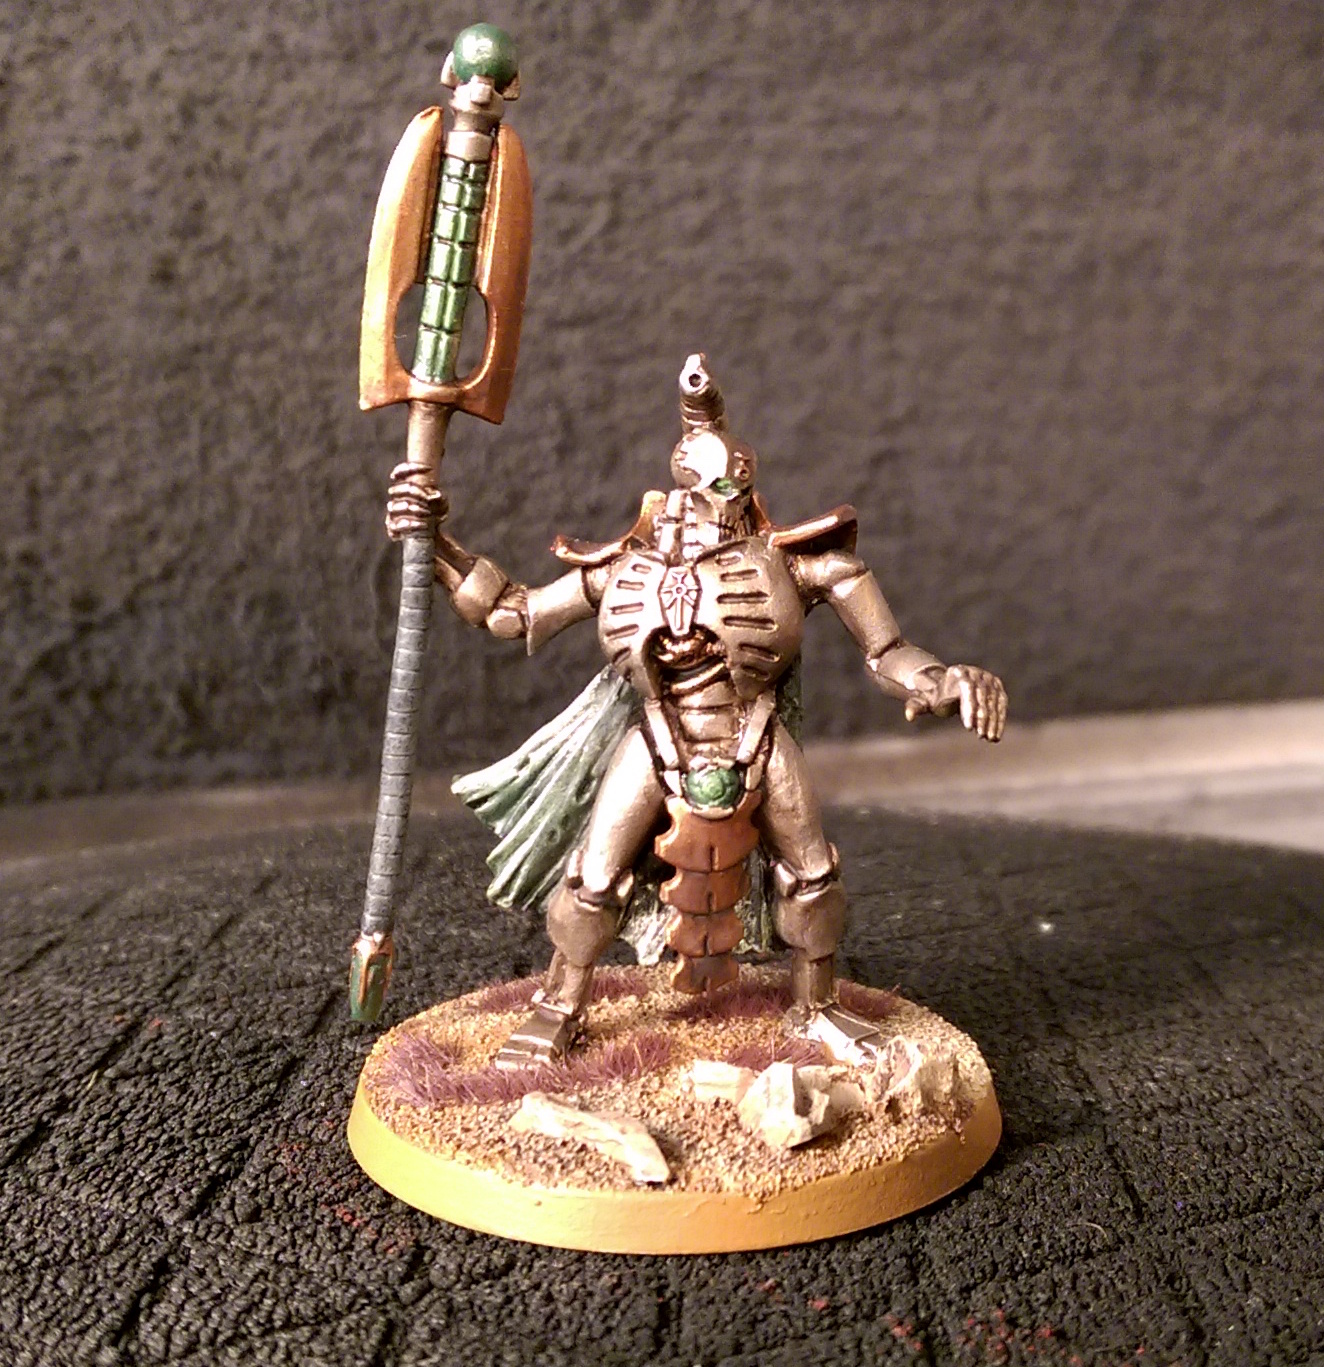
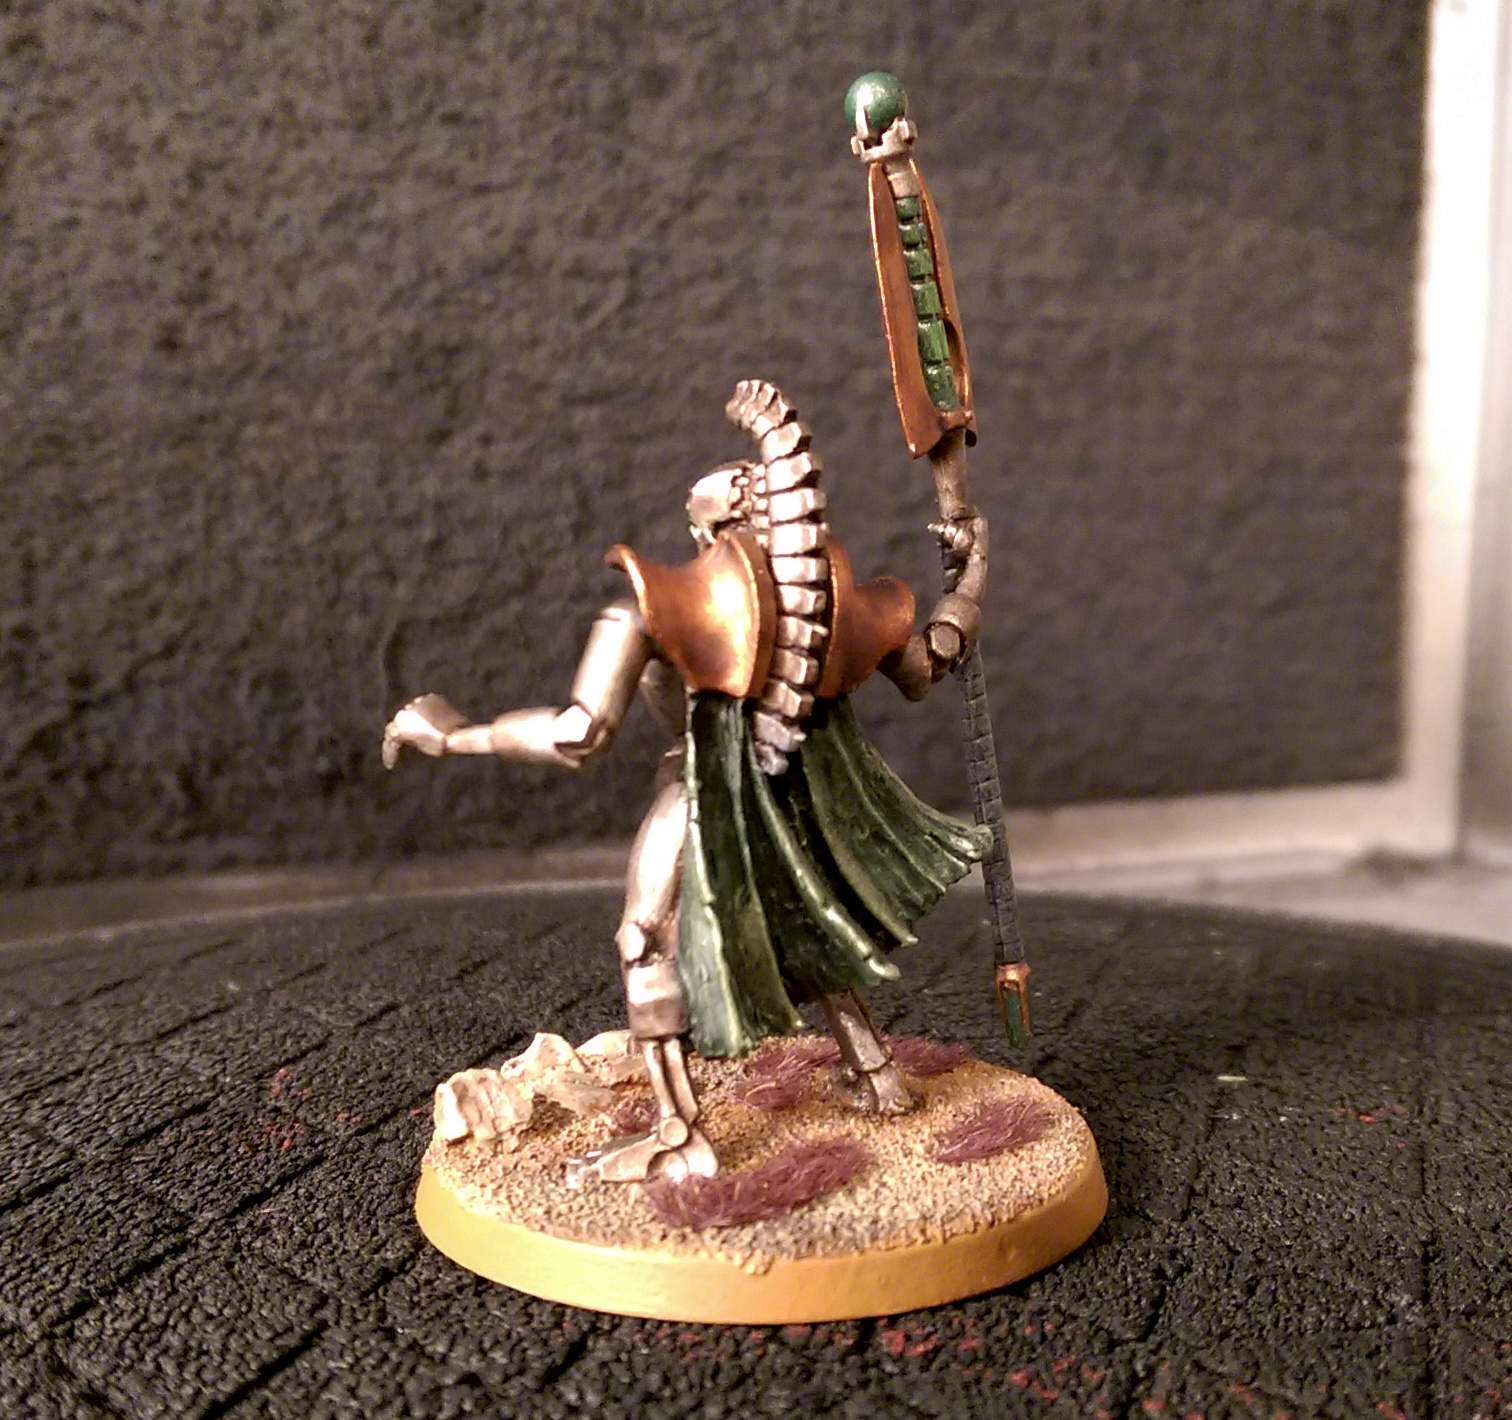
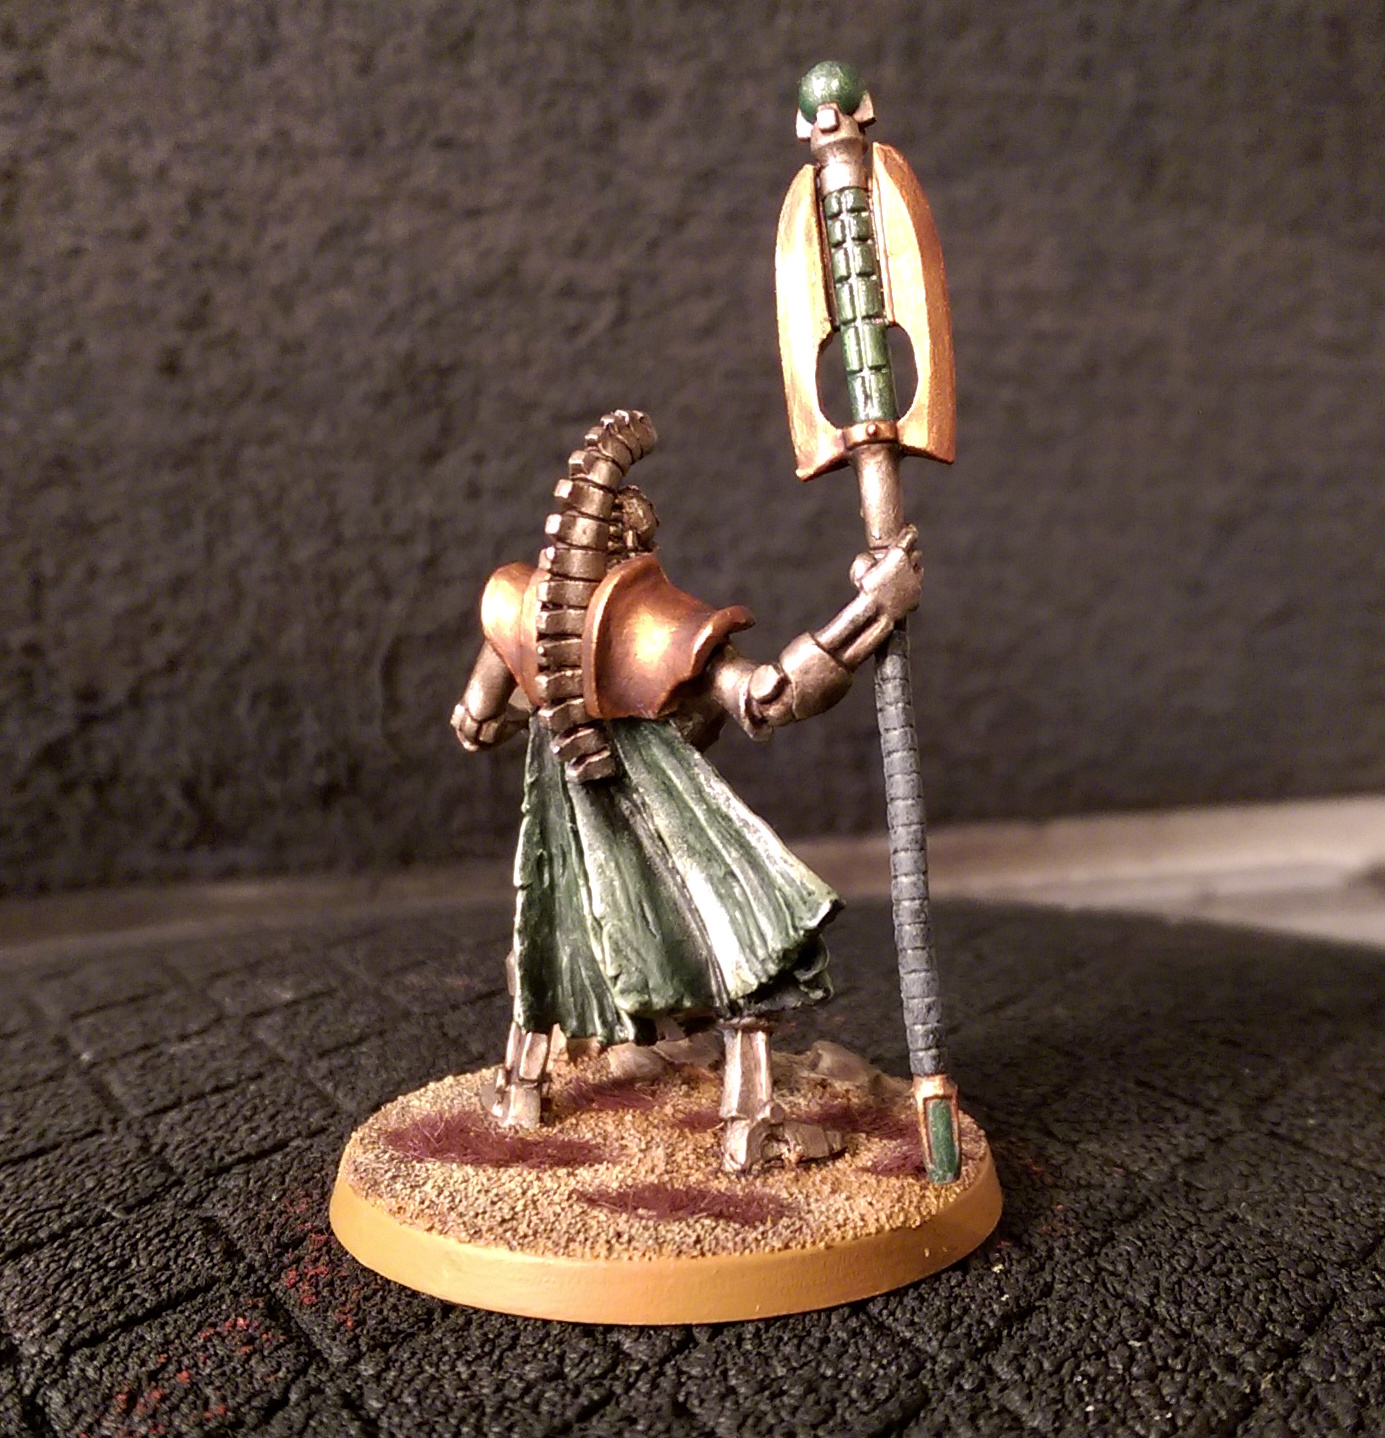
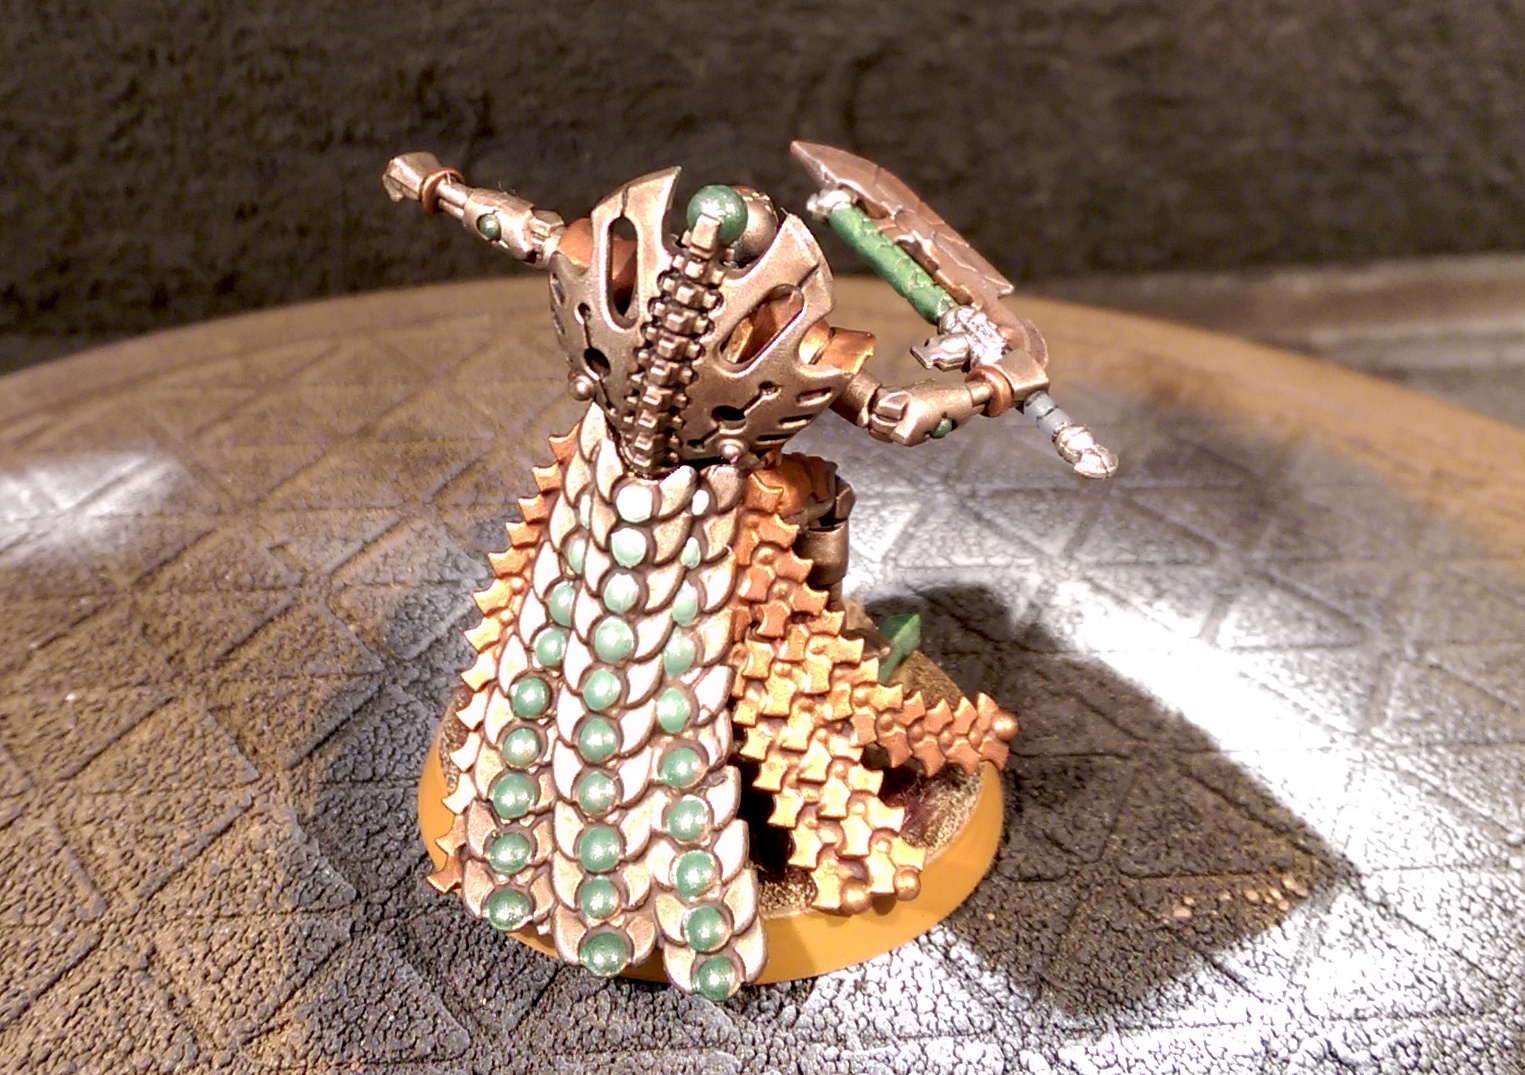
Illuminor Szeras by the Unrelenting Brush
The Illuminor Szeras is a truly spectacular model, and a substantial improvement on the old Finecast version. As with the Terminators in my last post, I outsourced the painting of this mini, this time to The Unrelenting Brush. Check out his website!
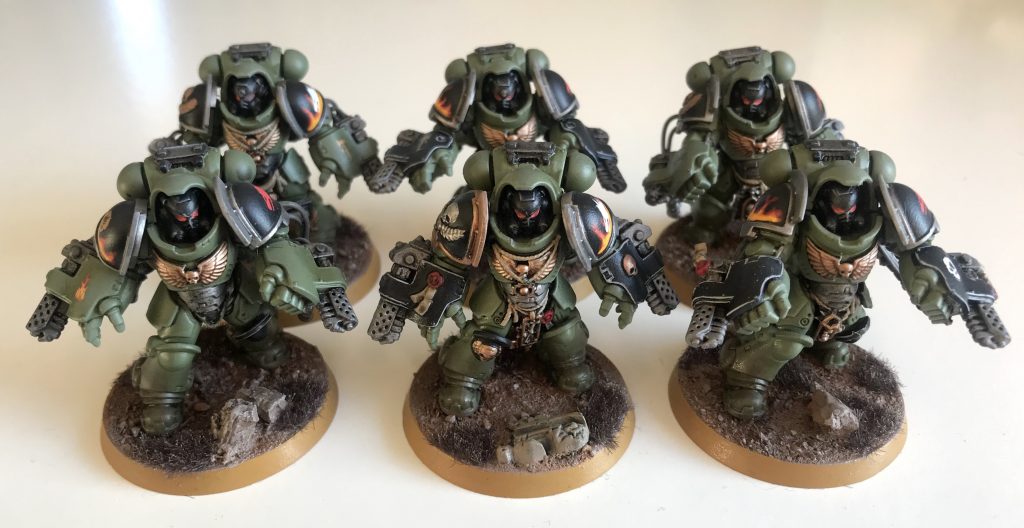
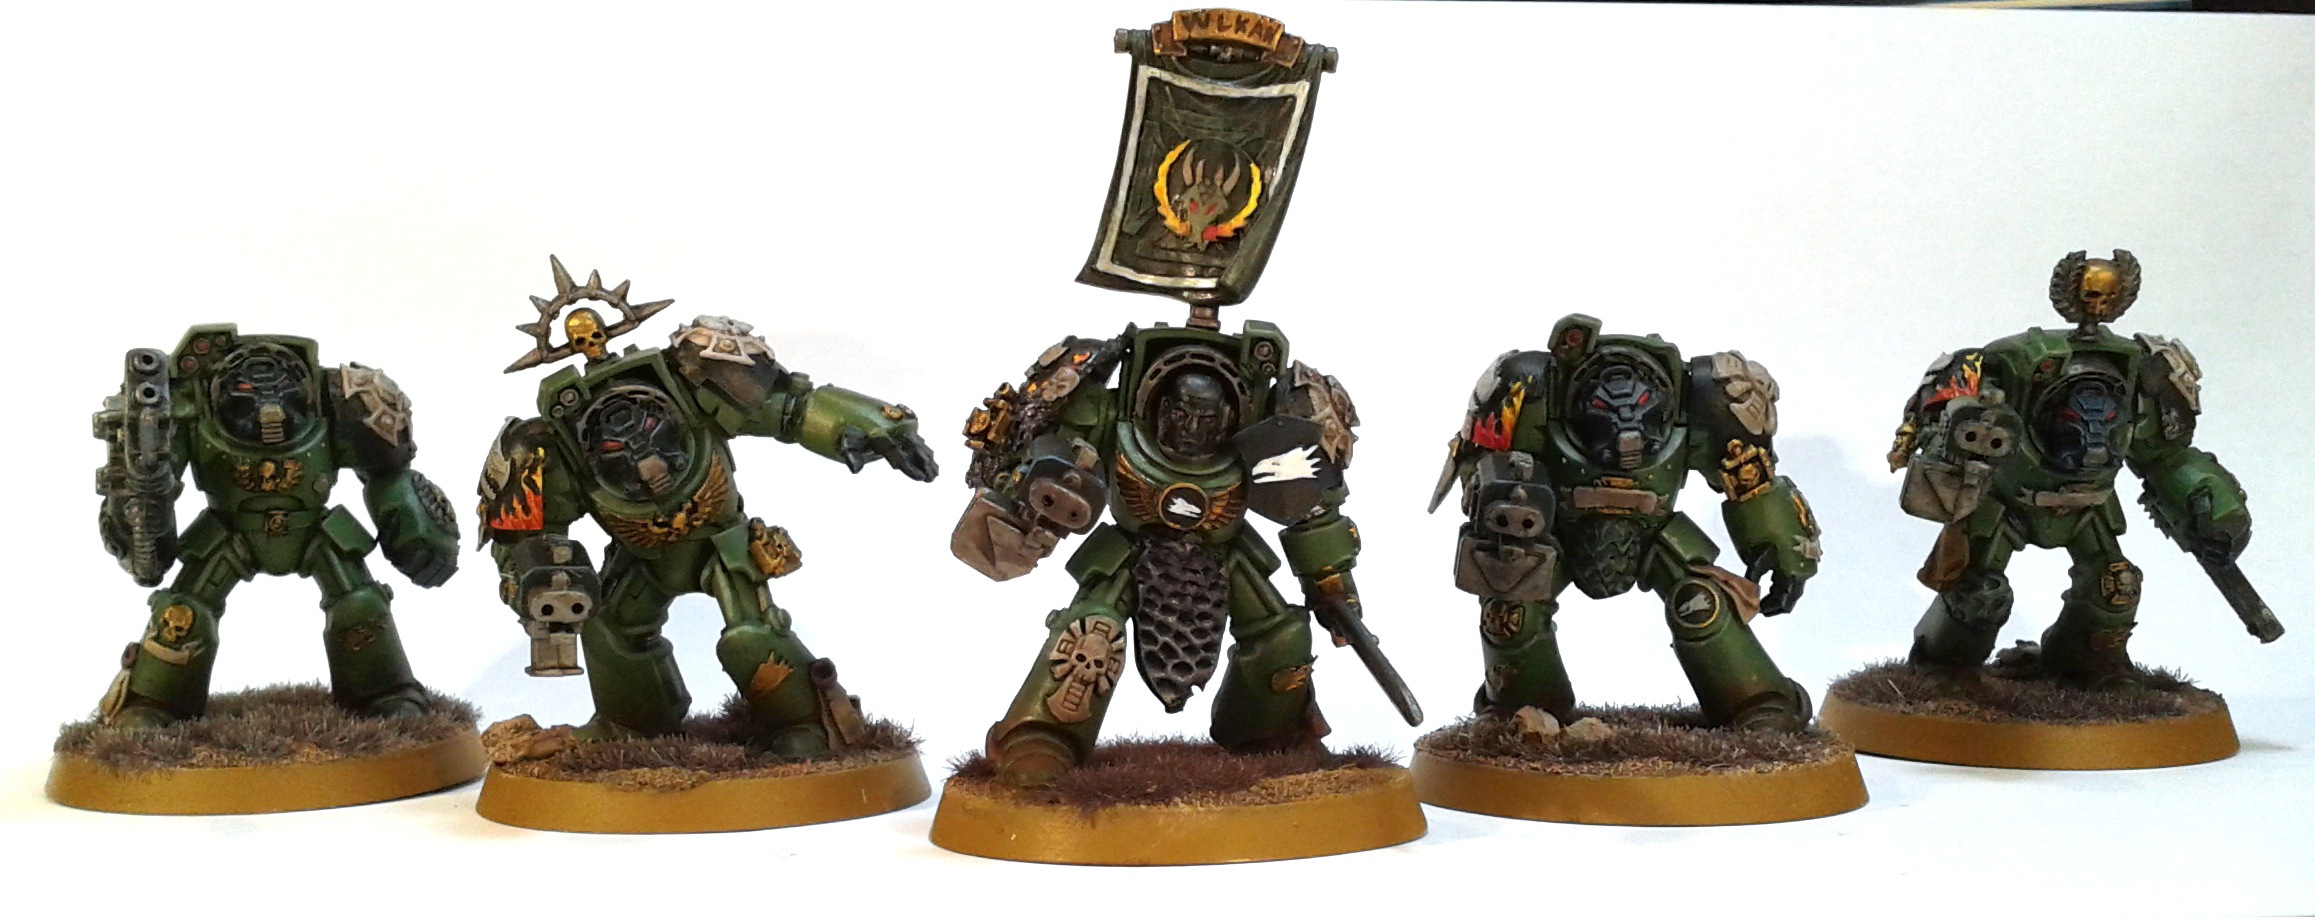
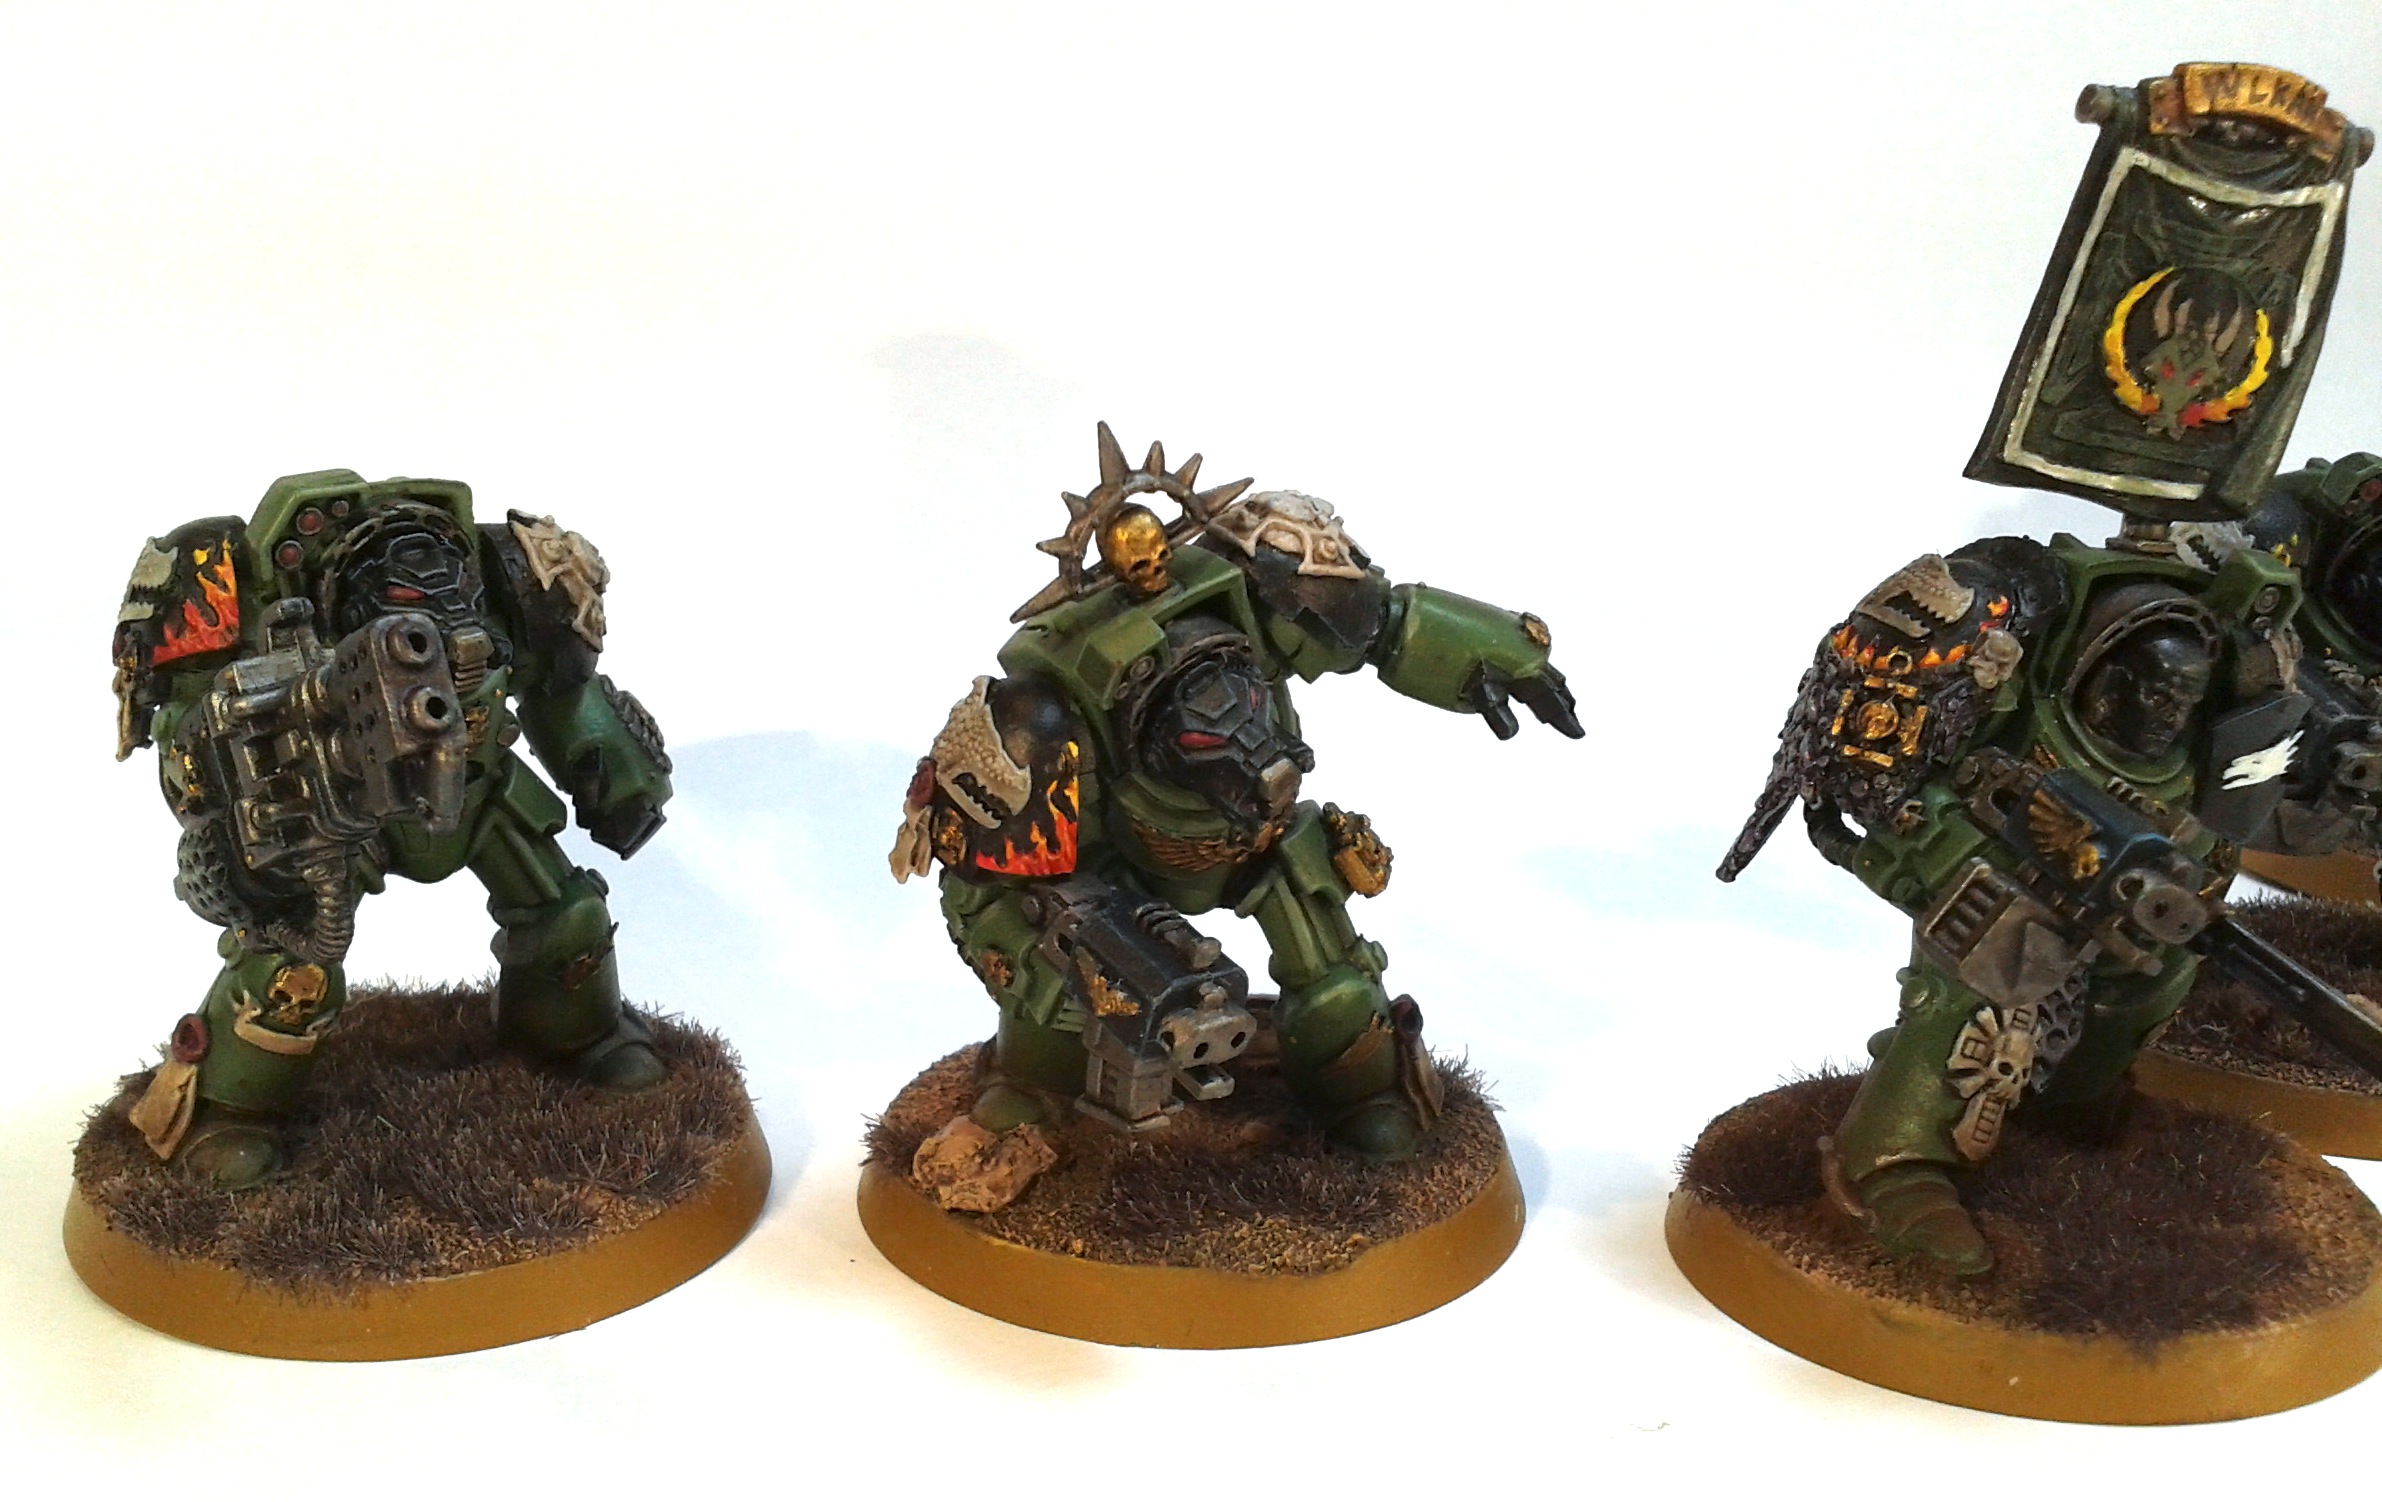
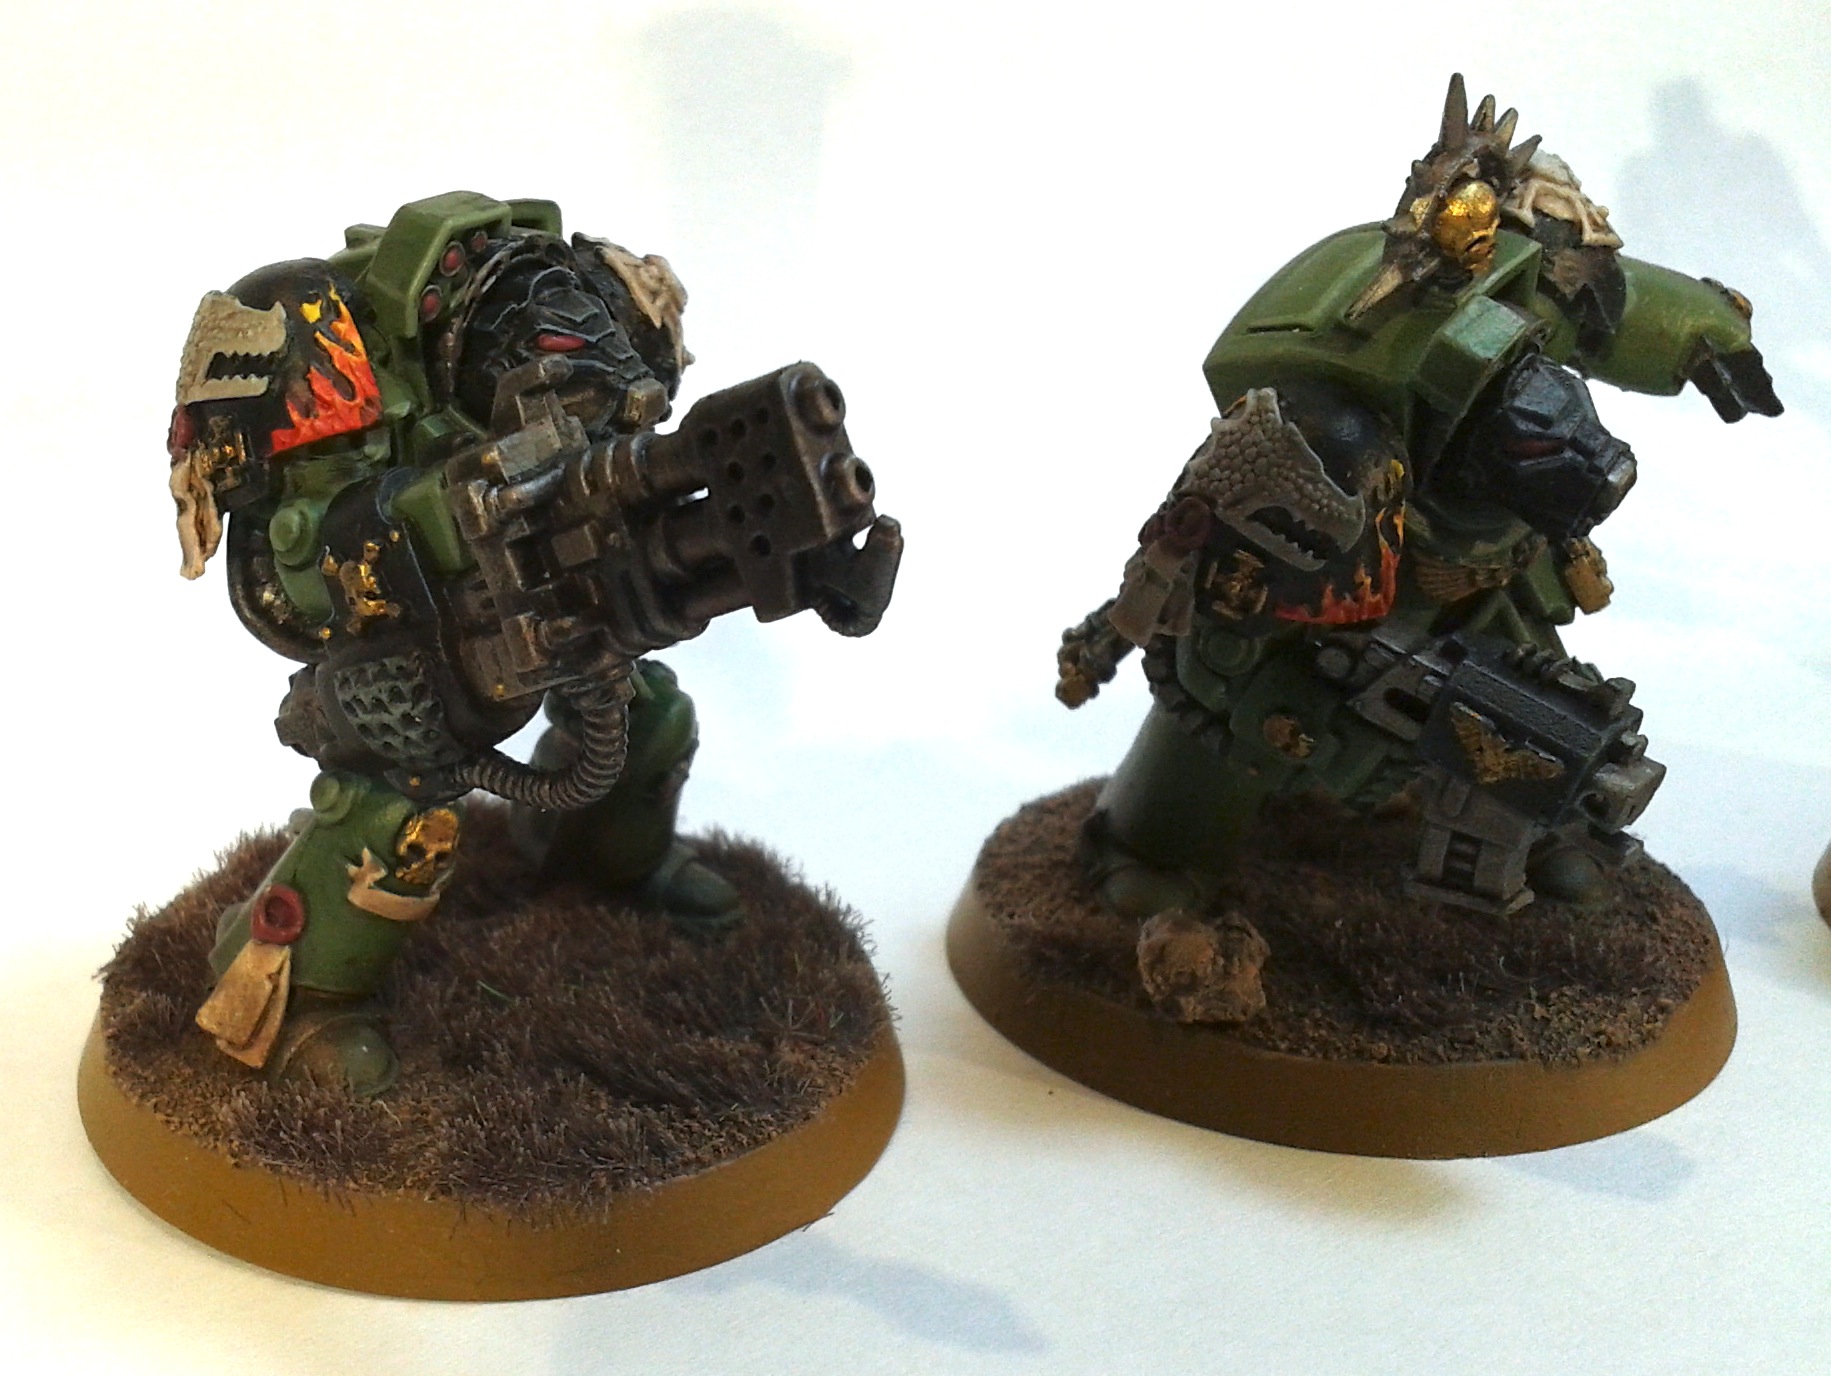
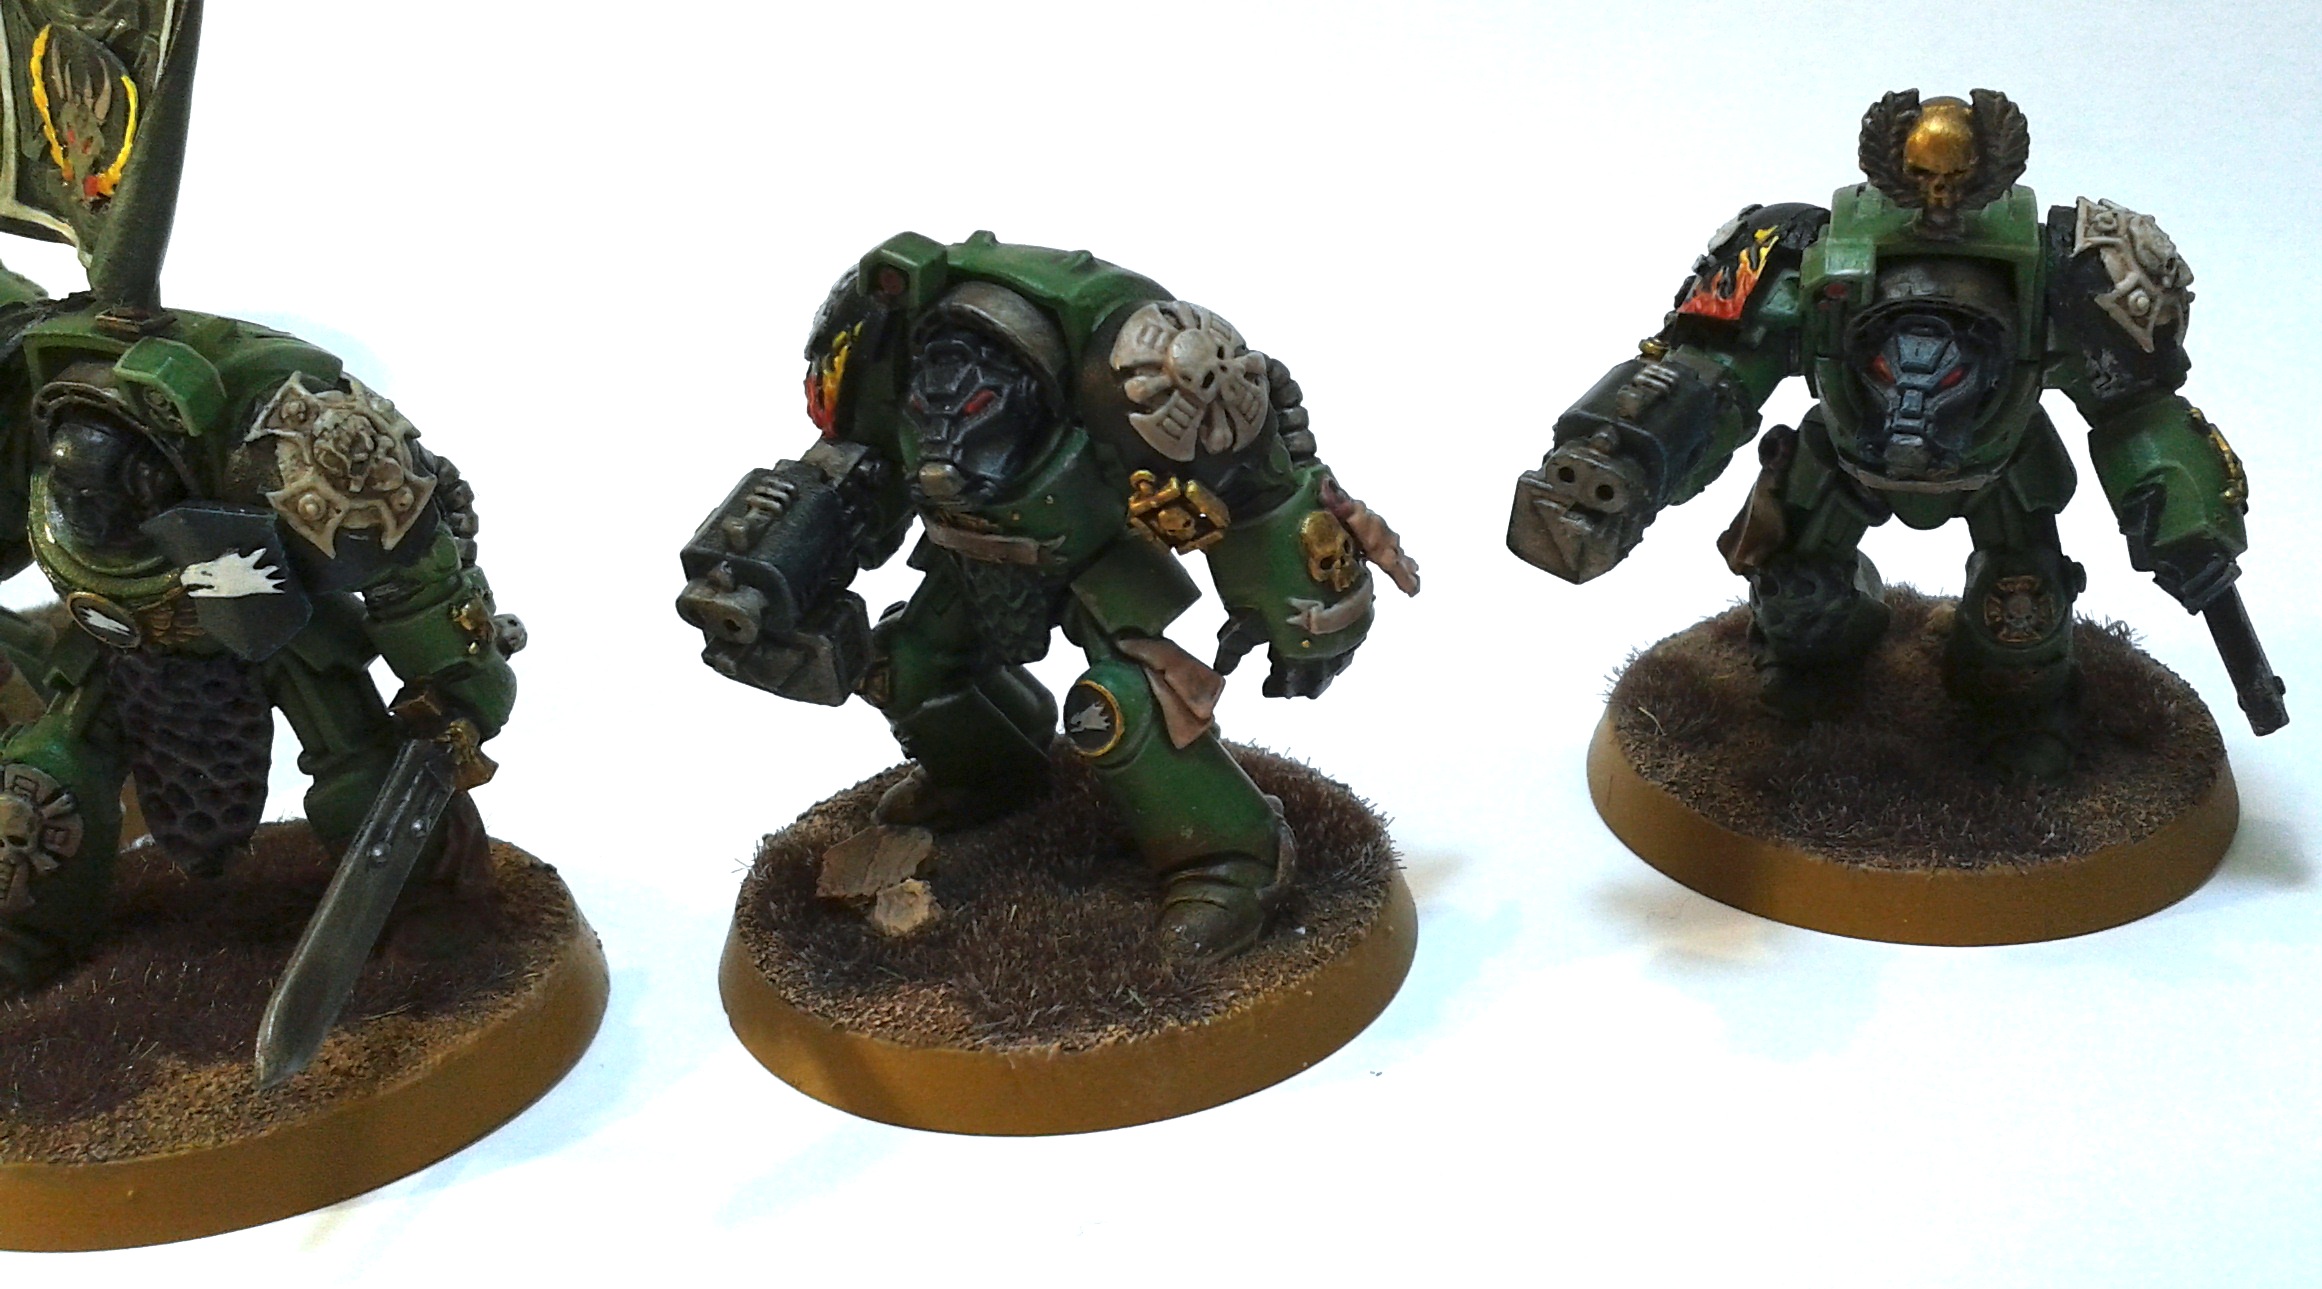
Salamanders Terminator Squad by Burning Beard Studios
At the end of last year, I came to the sad realisation that, due to the challenges of a change in job, moving to a new home, and the birth of my youngest child, all during a global pandemic, the amount of time I've been able to spend on the hobby had plummeted, and was unlikely to improve in the near future. And, to make things worse, I had been still been adding to my grey plastic pile of shame, meaning that my backlog had reached ridiculous proportions: it would have taken a decade of no new models to get it back to a reasonable size.
So I made the decision to (a) sell off a lot of the stuff I didn't think I'd miss, and (b) outsource the painting of the rest, so I found a couple of commission painters who could reproduce my colour scheme at a reasonable price.
Last week I received the first couple of batches of painted models, and will be posting pictures of each unit over the next couple of weeks.
The first is this squad of Salamanders Terminators, painted by Darren of Burning Beard Studios. He's done a fantastic job of matching my colour scheme for the Salamanders, and has augmented the models with some 3D printed accessories.
This squad will take its rightful place alongside the two other Terminator squads of the Firedrakes in my Salamanders army.
More pictures below the fold. If you're looking for an affordable and reliable painting service, I can thoroughly recommend Darren, so check out his website.
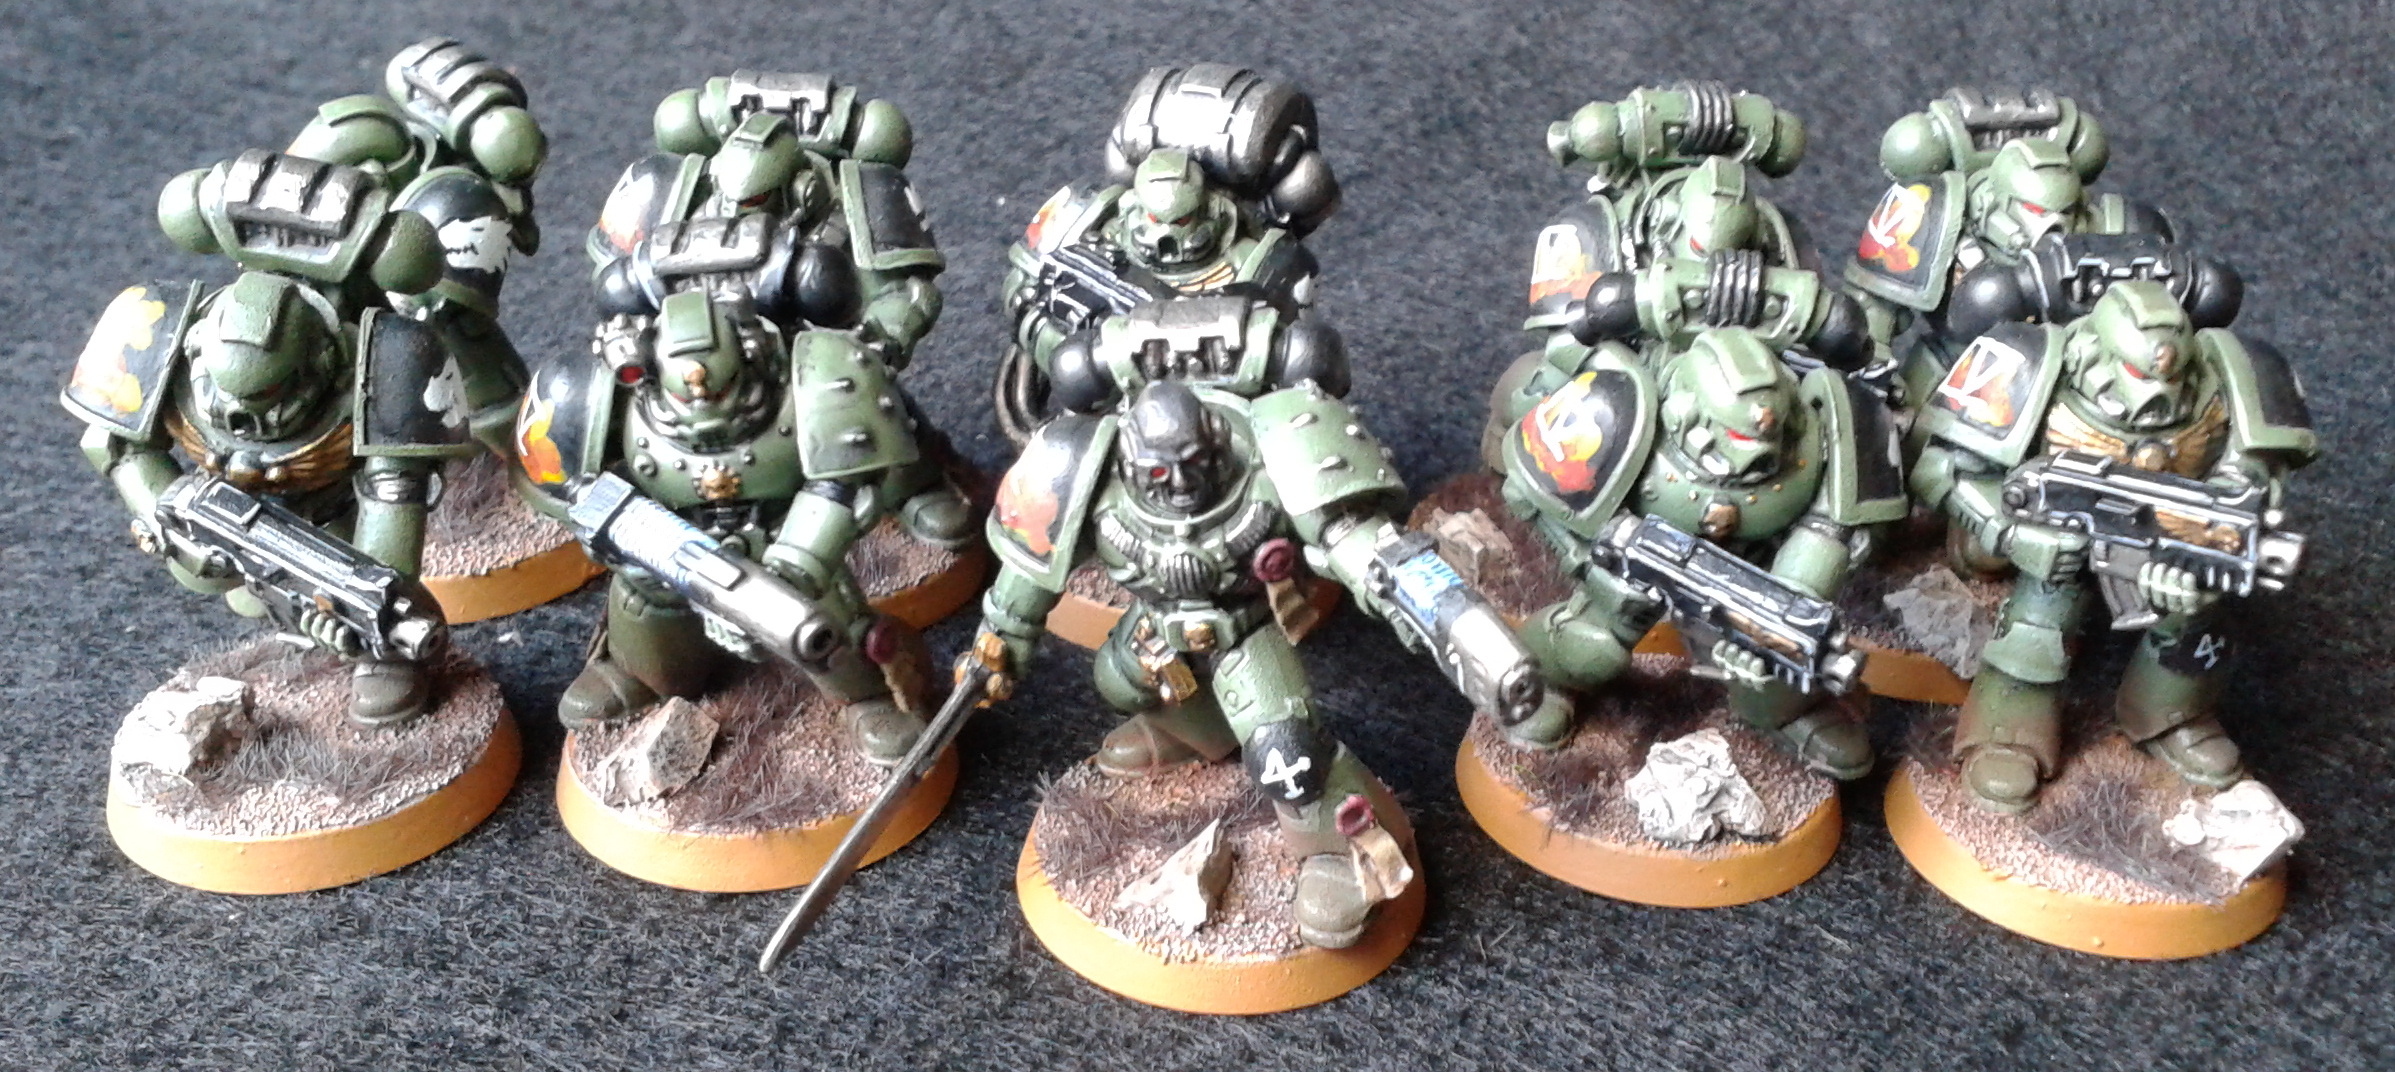
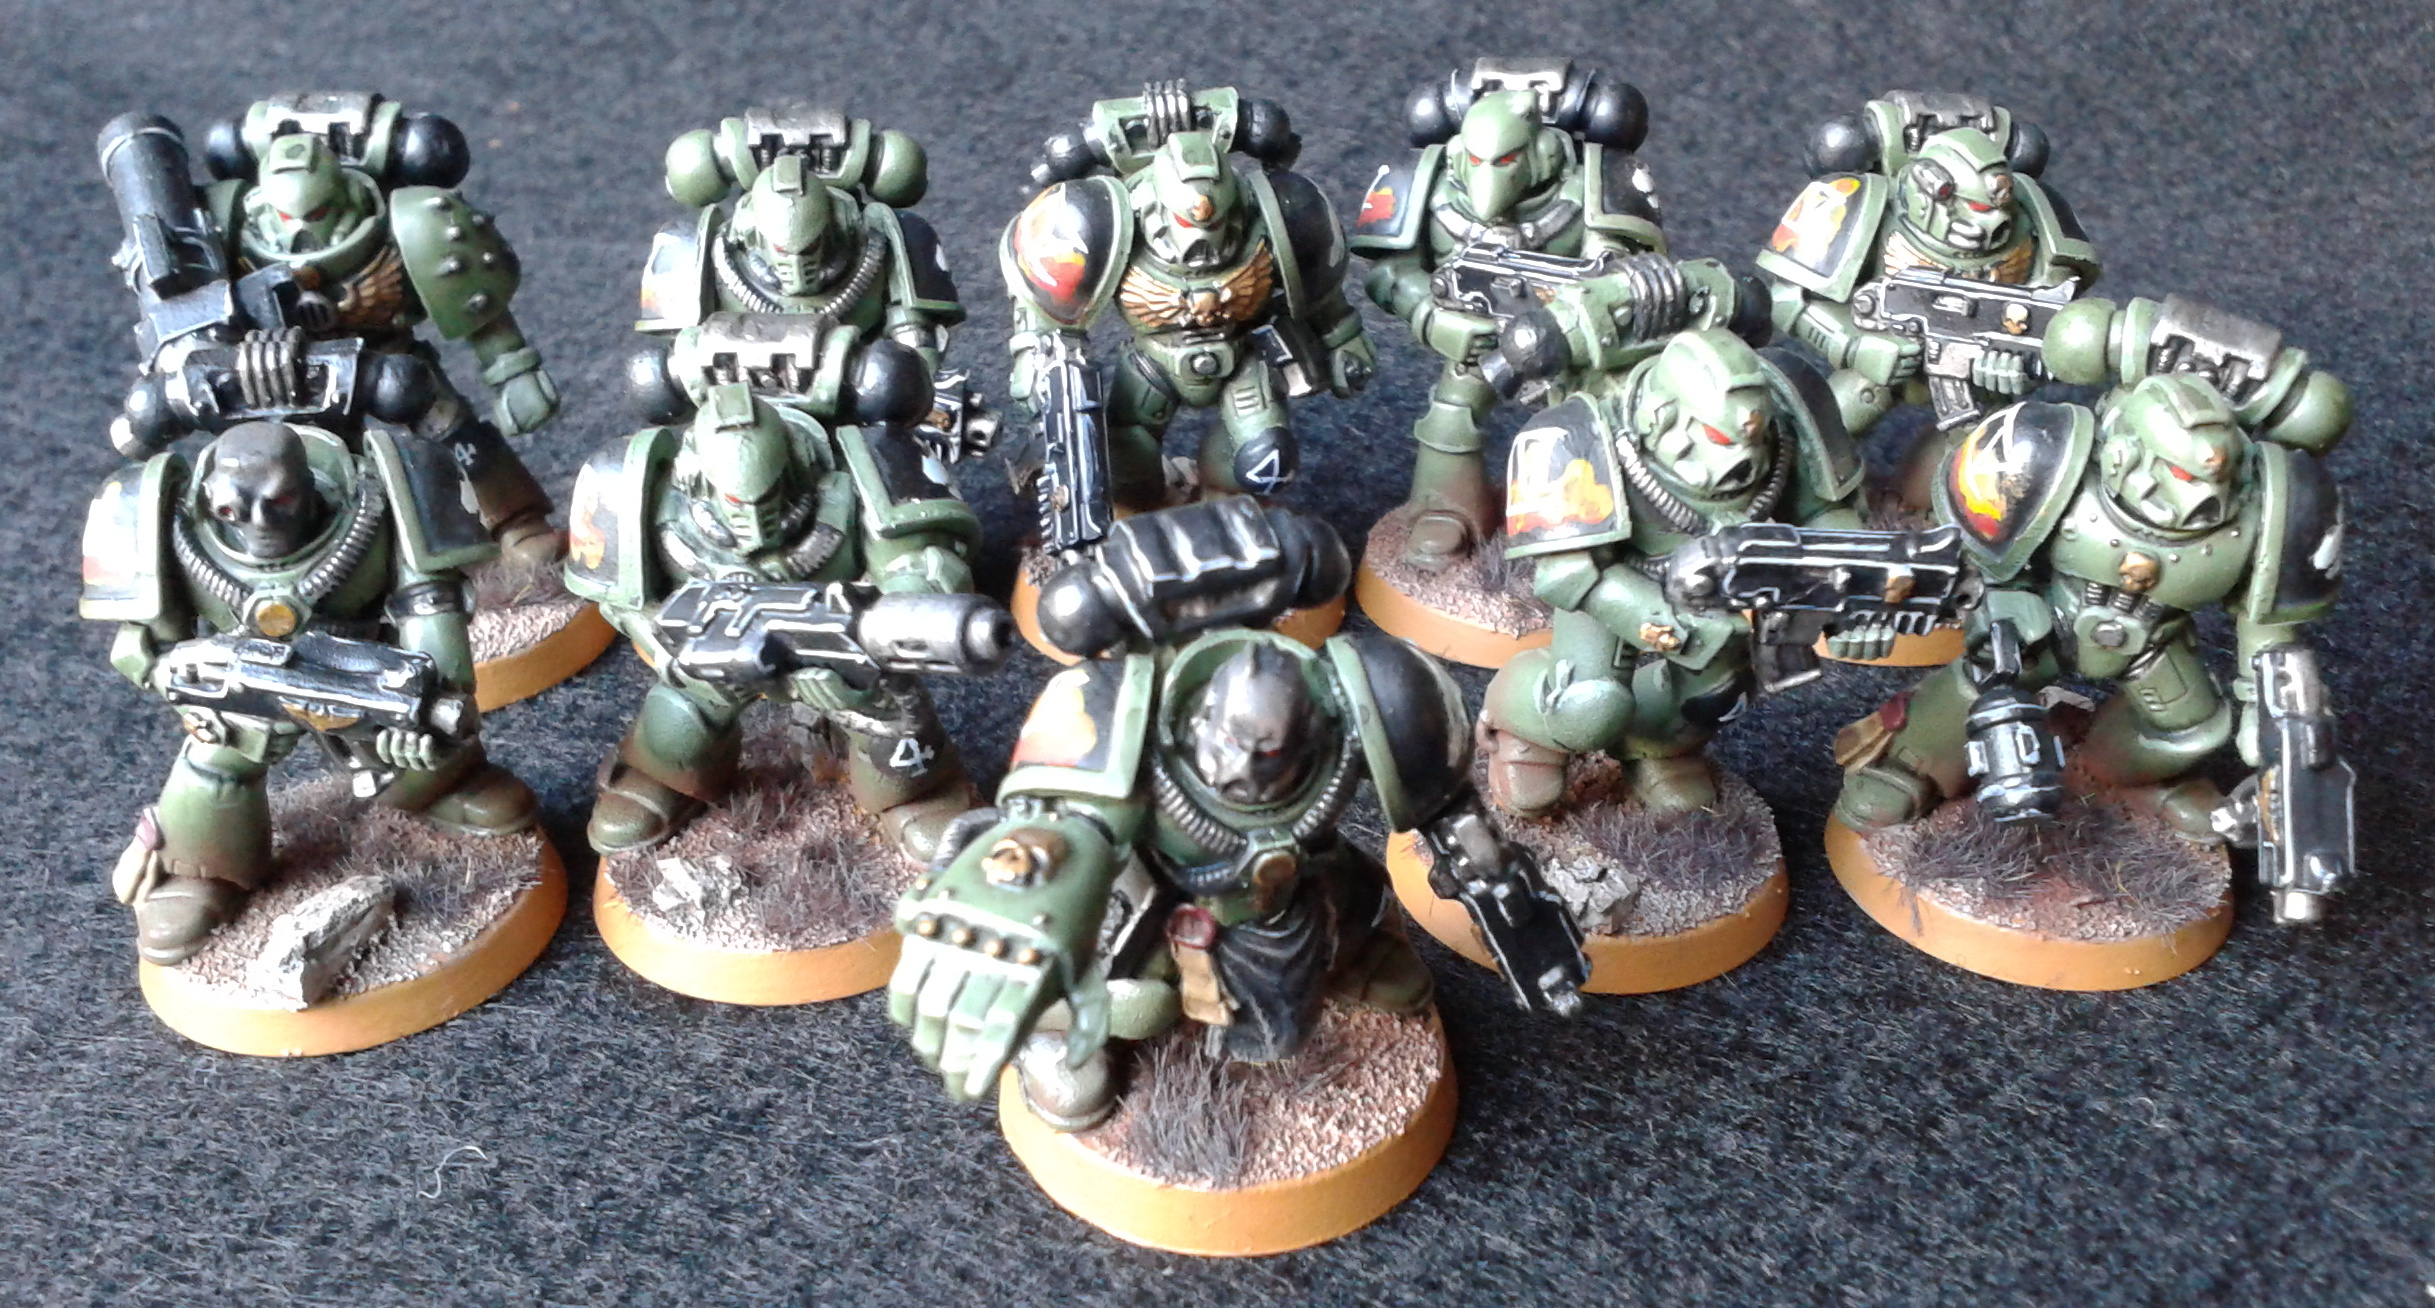
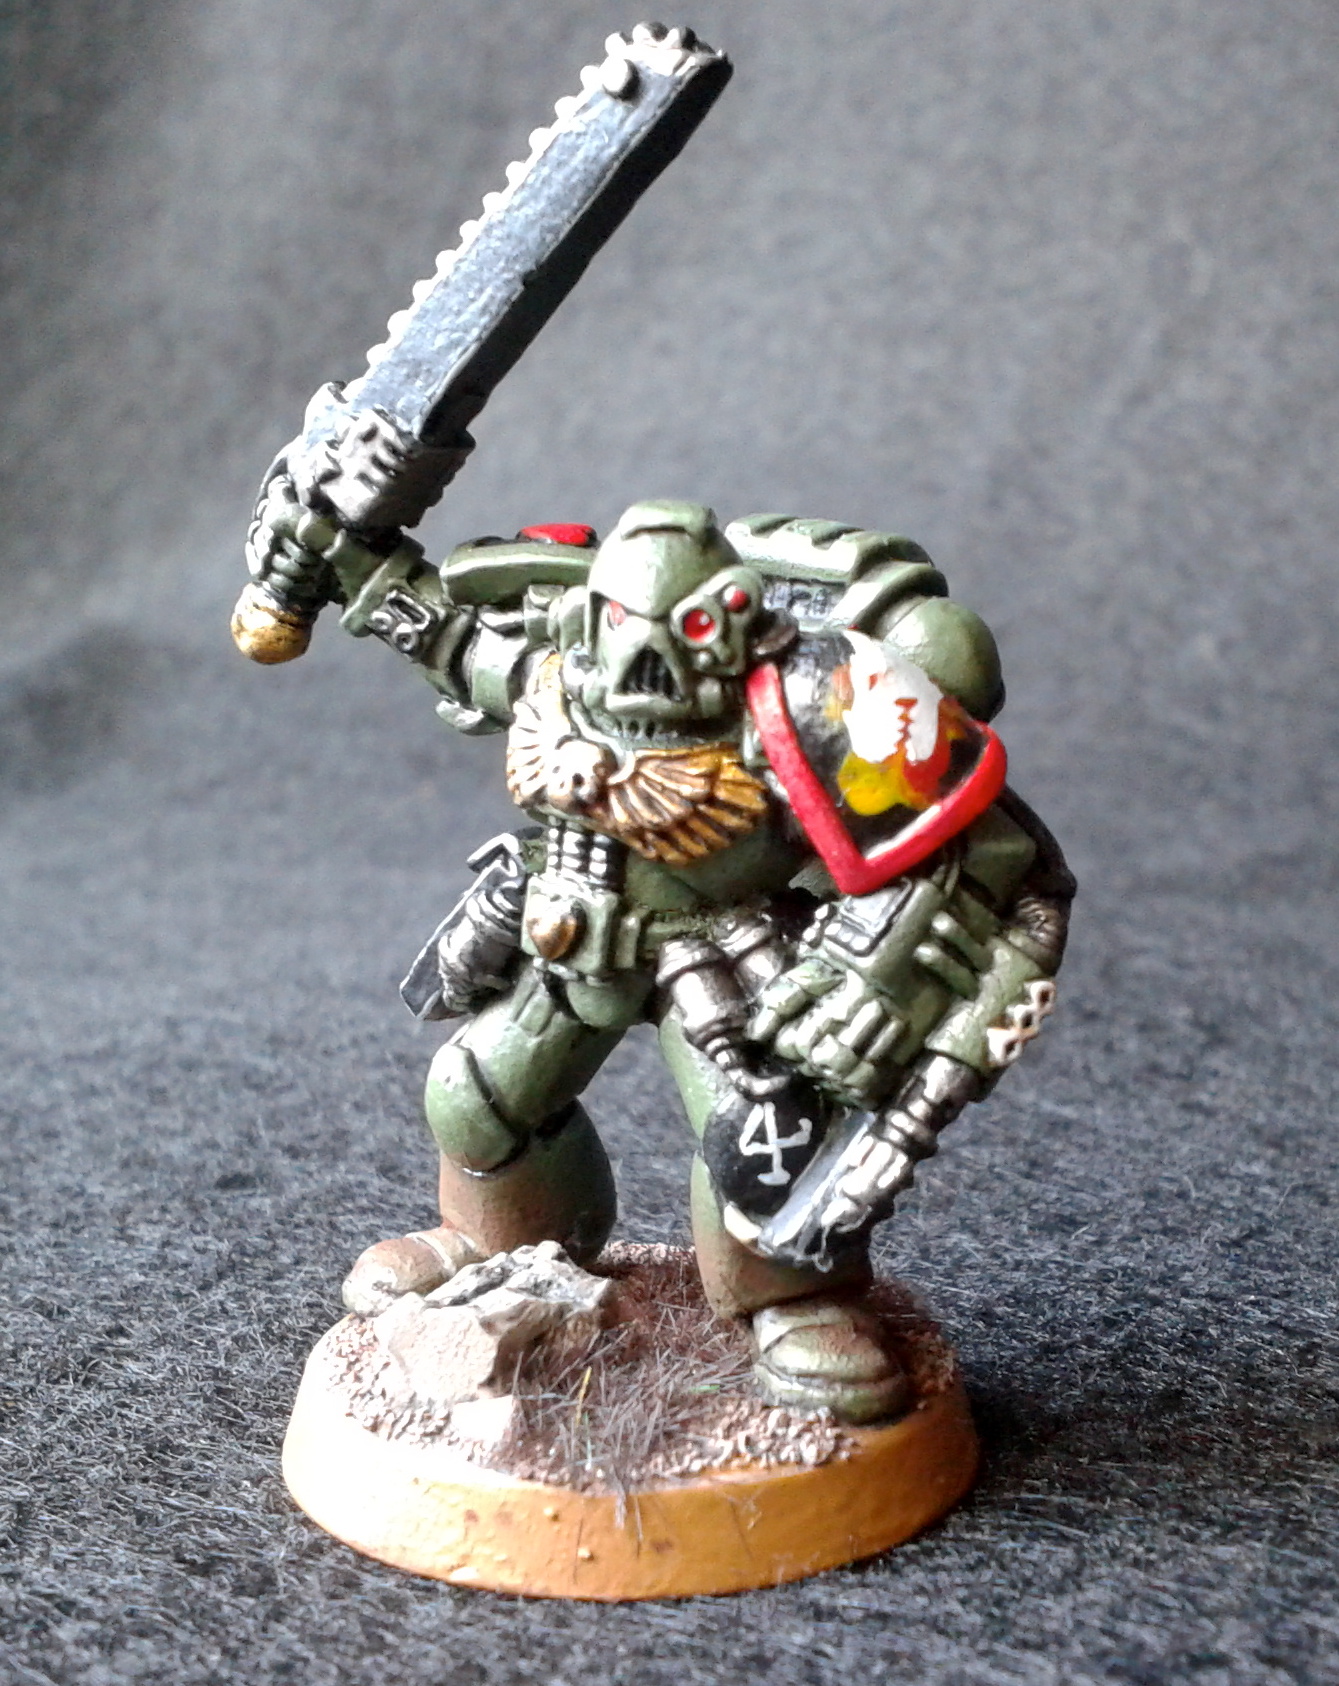
Salamanders Intercessors
I've finally finished my ten-man squad of Intercessors! The squad is set up so that I can split it into two five-man squads: one of the battle-brothers has a Forge World shoulder pad so he's easy to "upgrade" into a Sergeant.
Of course I've pre-ordered Adrax Agatone, so expect him to make an appearance on this blog in the next few months!
More pictures below the fold.
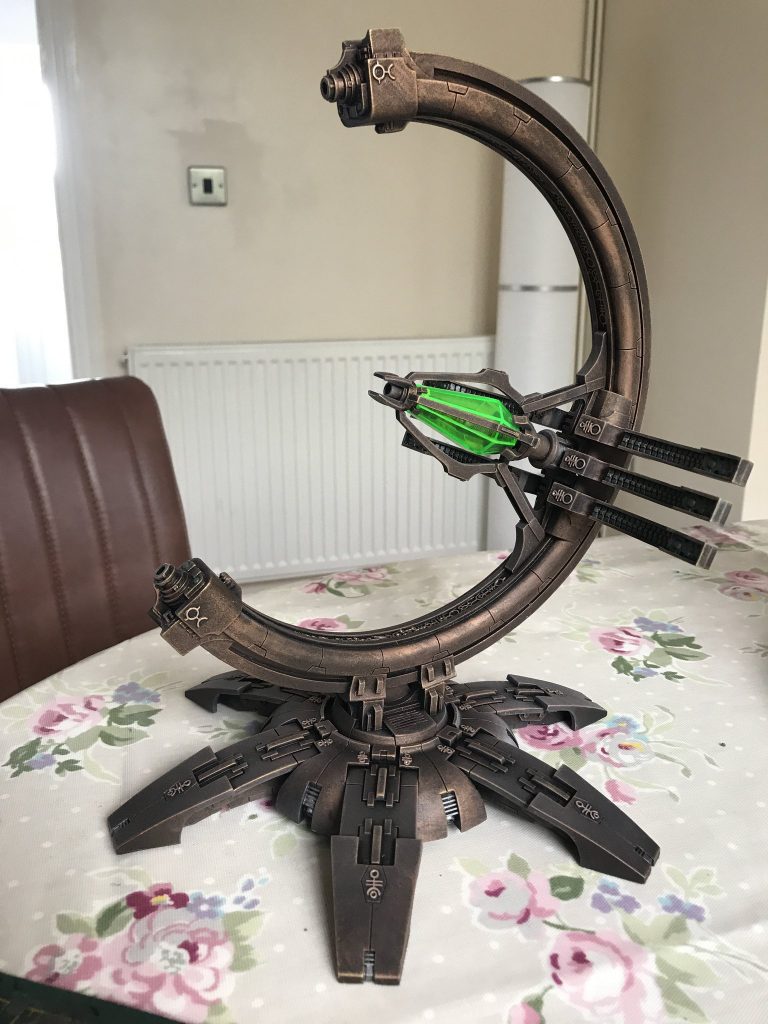
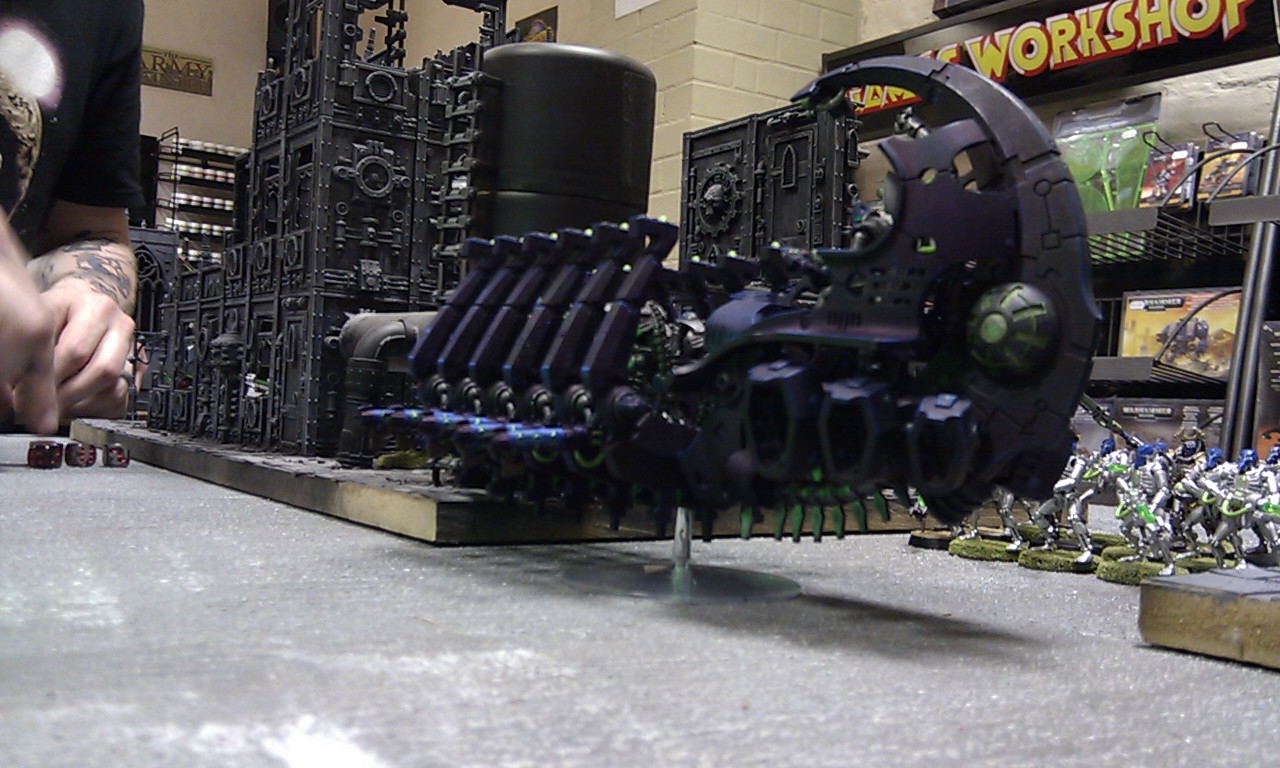
Necron Seraptek Heavy Construct
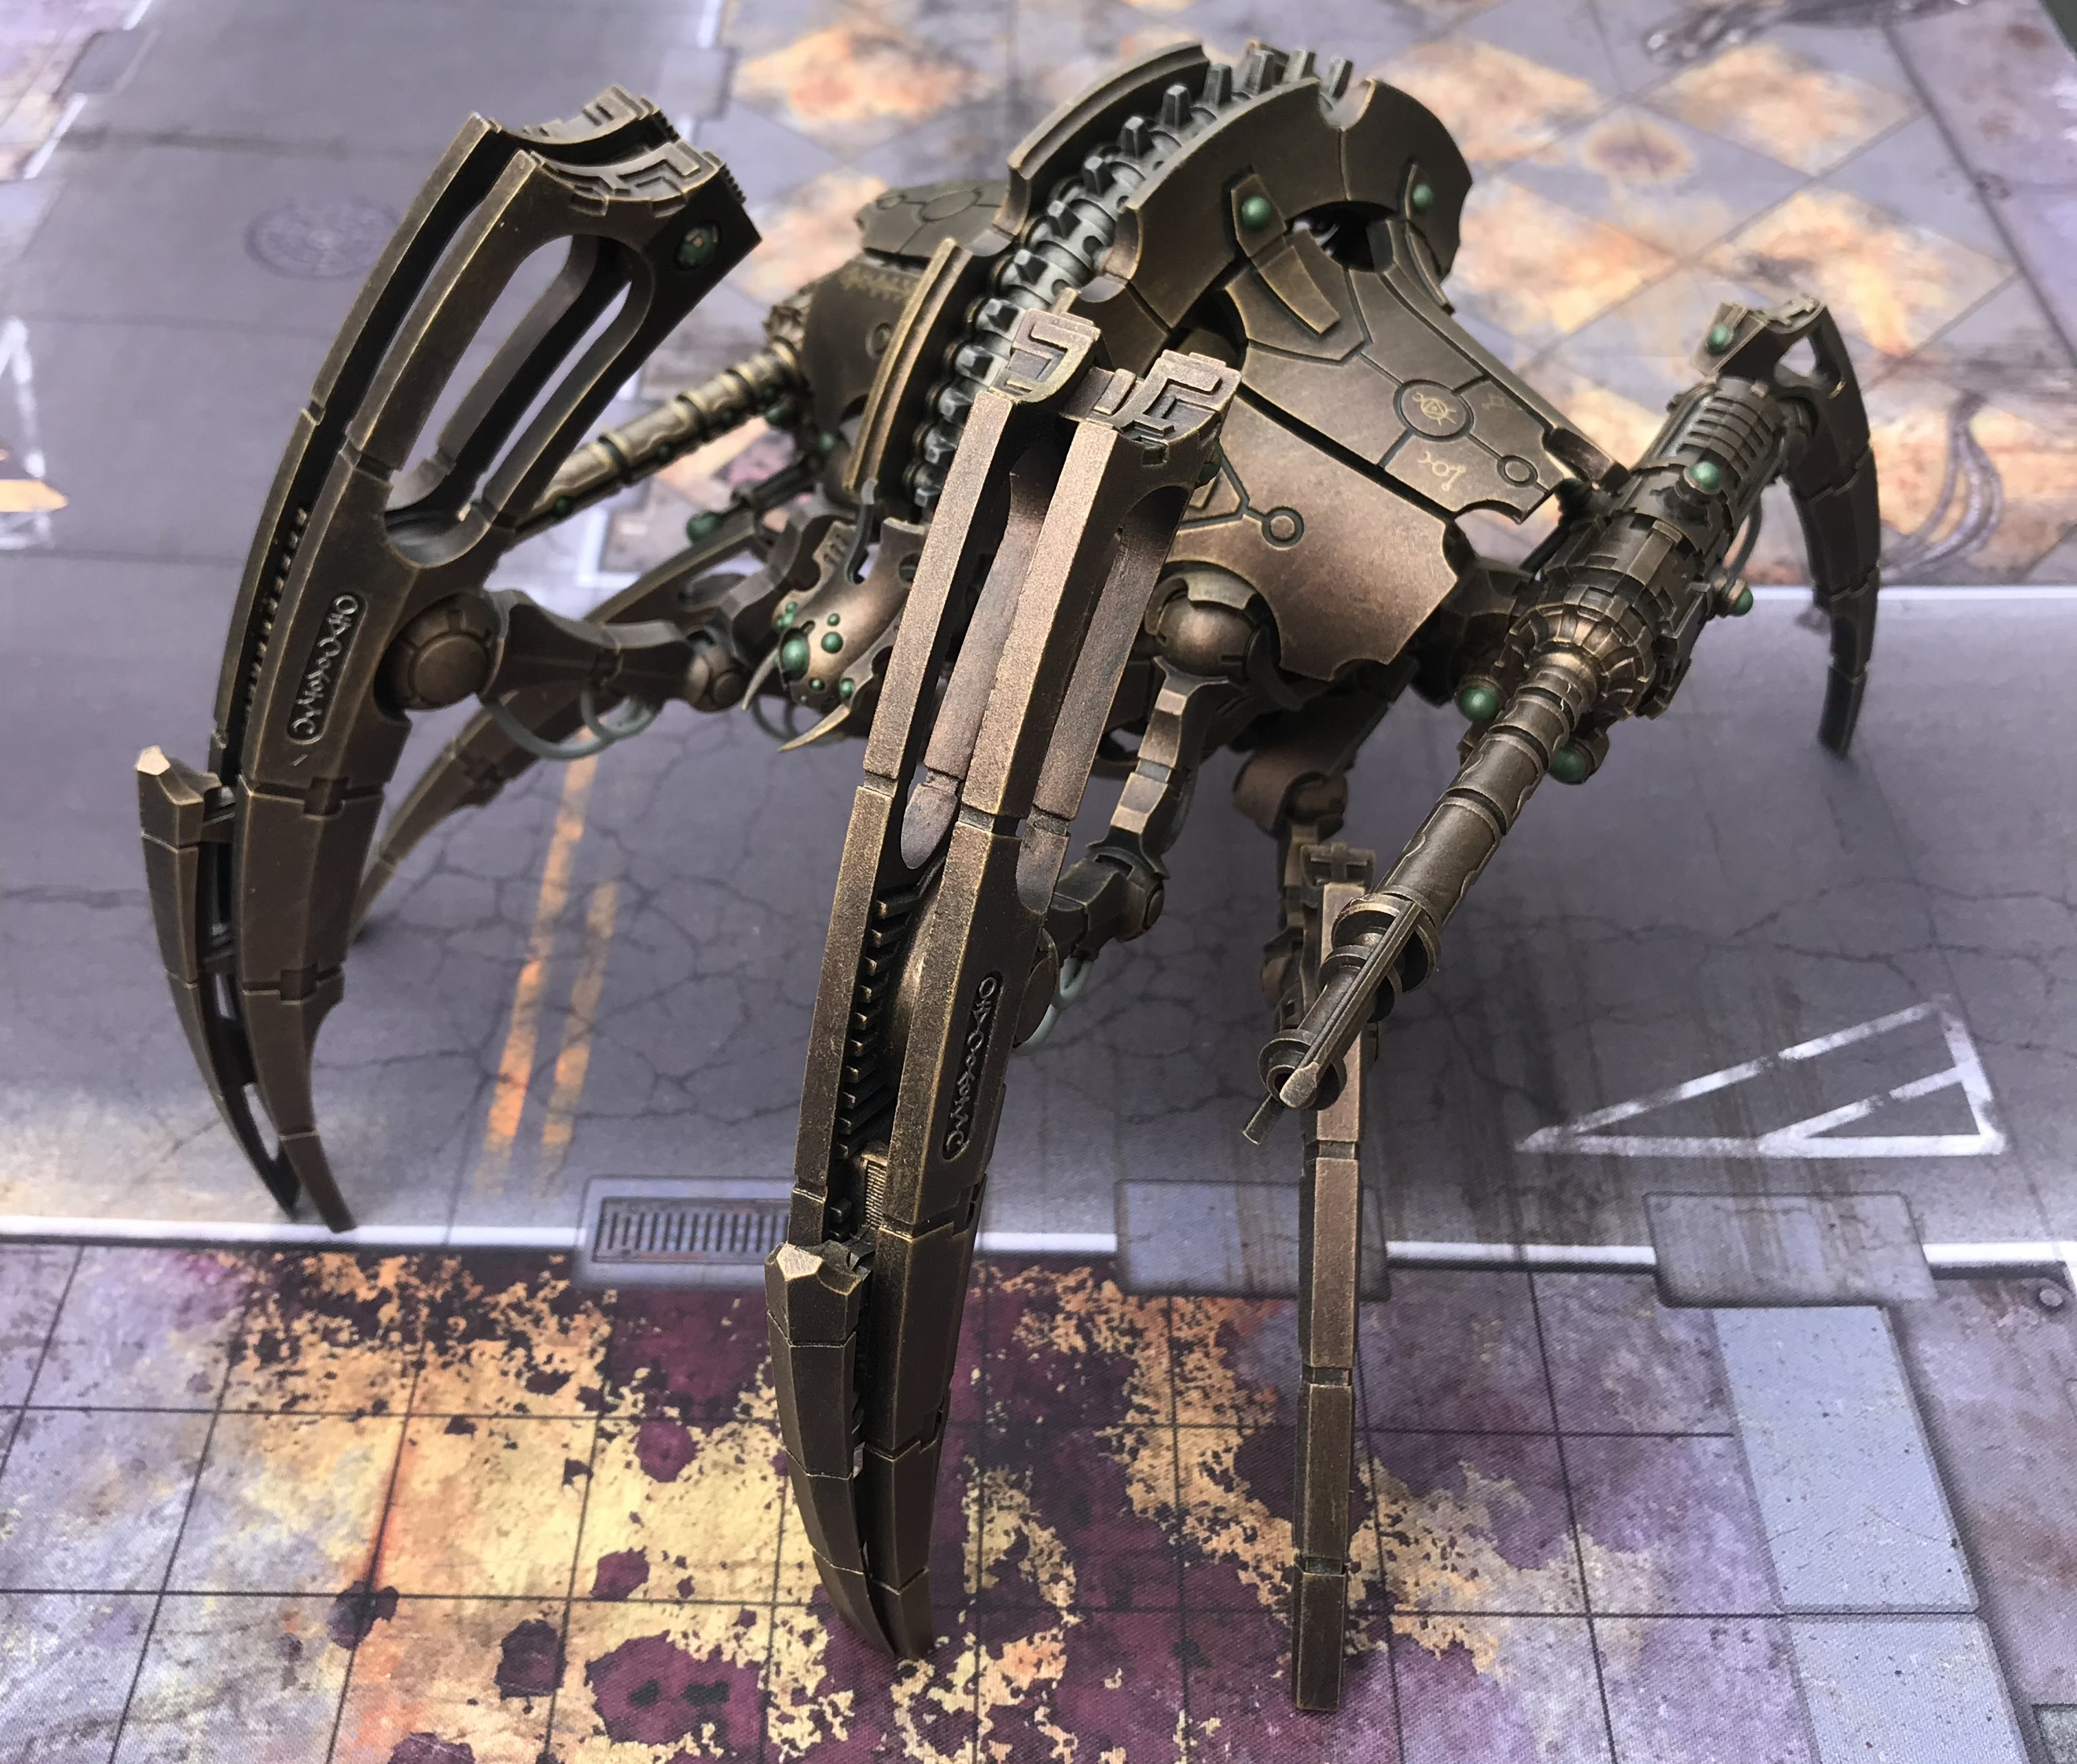
As soon as Forge World released this model I knew I wanted one! My amazing other half bought me one for Christmas, and I've just finished it.
It has the same basic colour scheme as my other large Necron models: I used a piece of firm sponge to stipple Warpstone Bronze over a black undercoat, and then drybrushed with Brass Scorpion, finished with a highlight of Vallejo brass. Simple but very effective!
More photos below the fold.
Salamanders Librarian
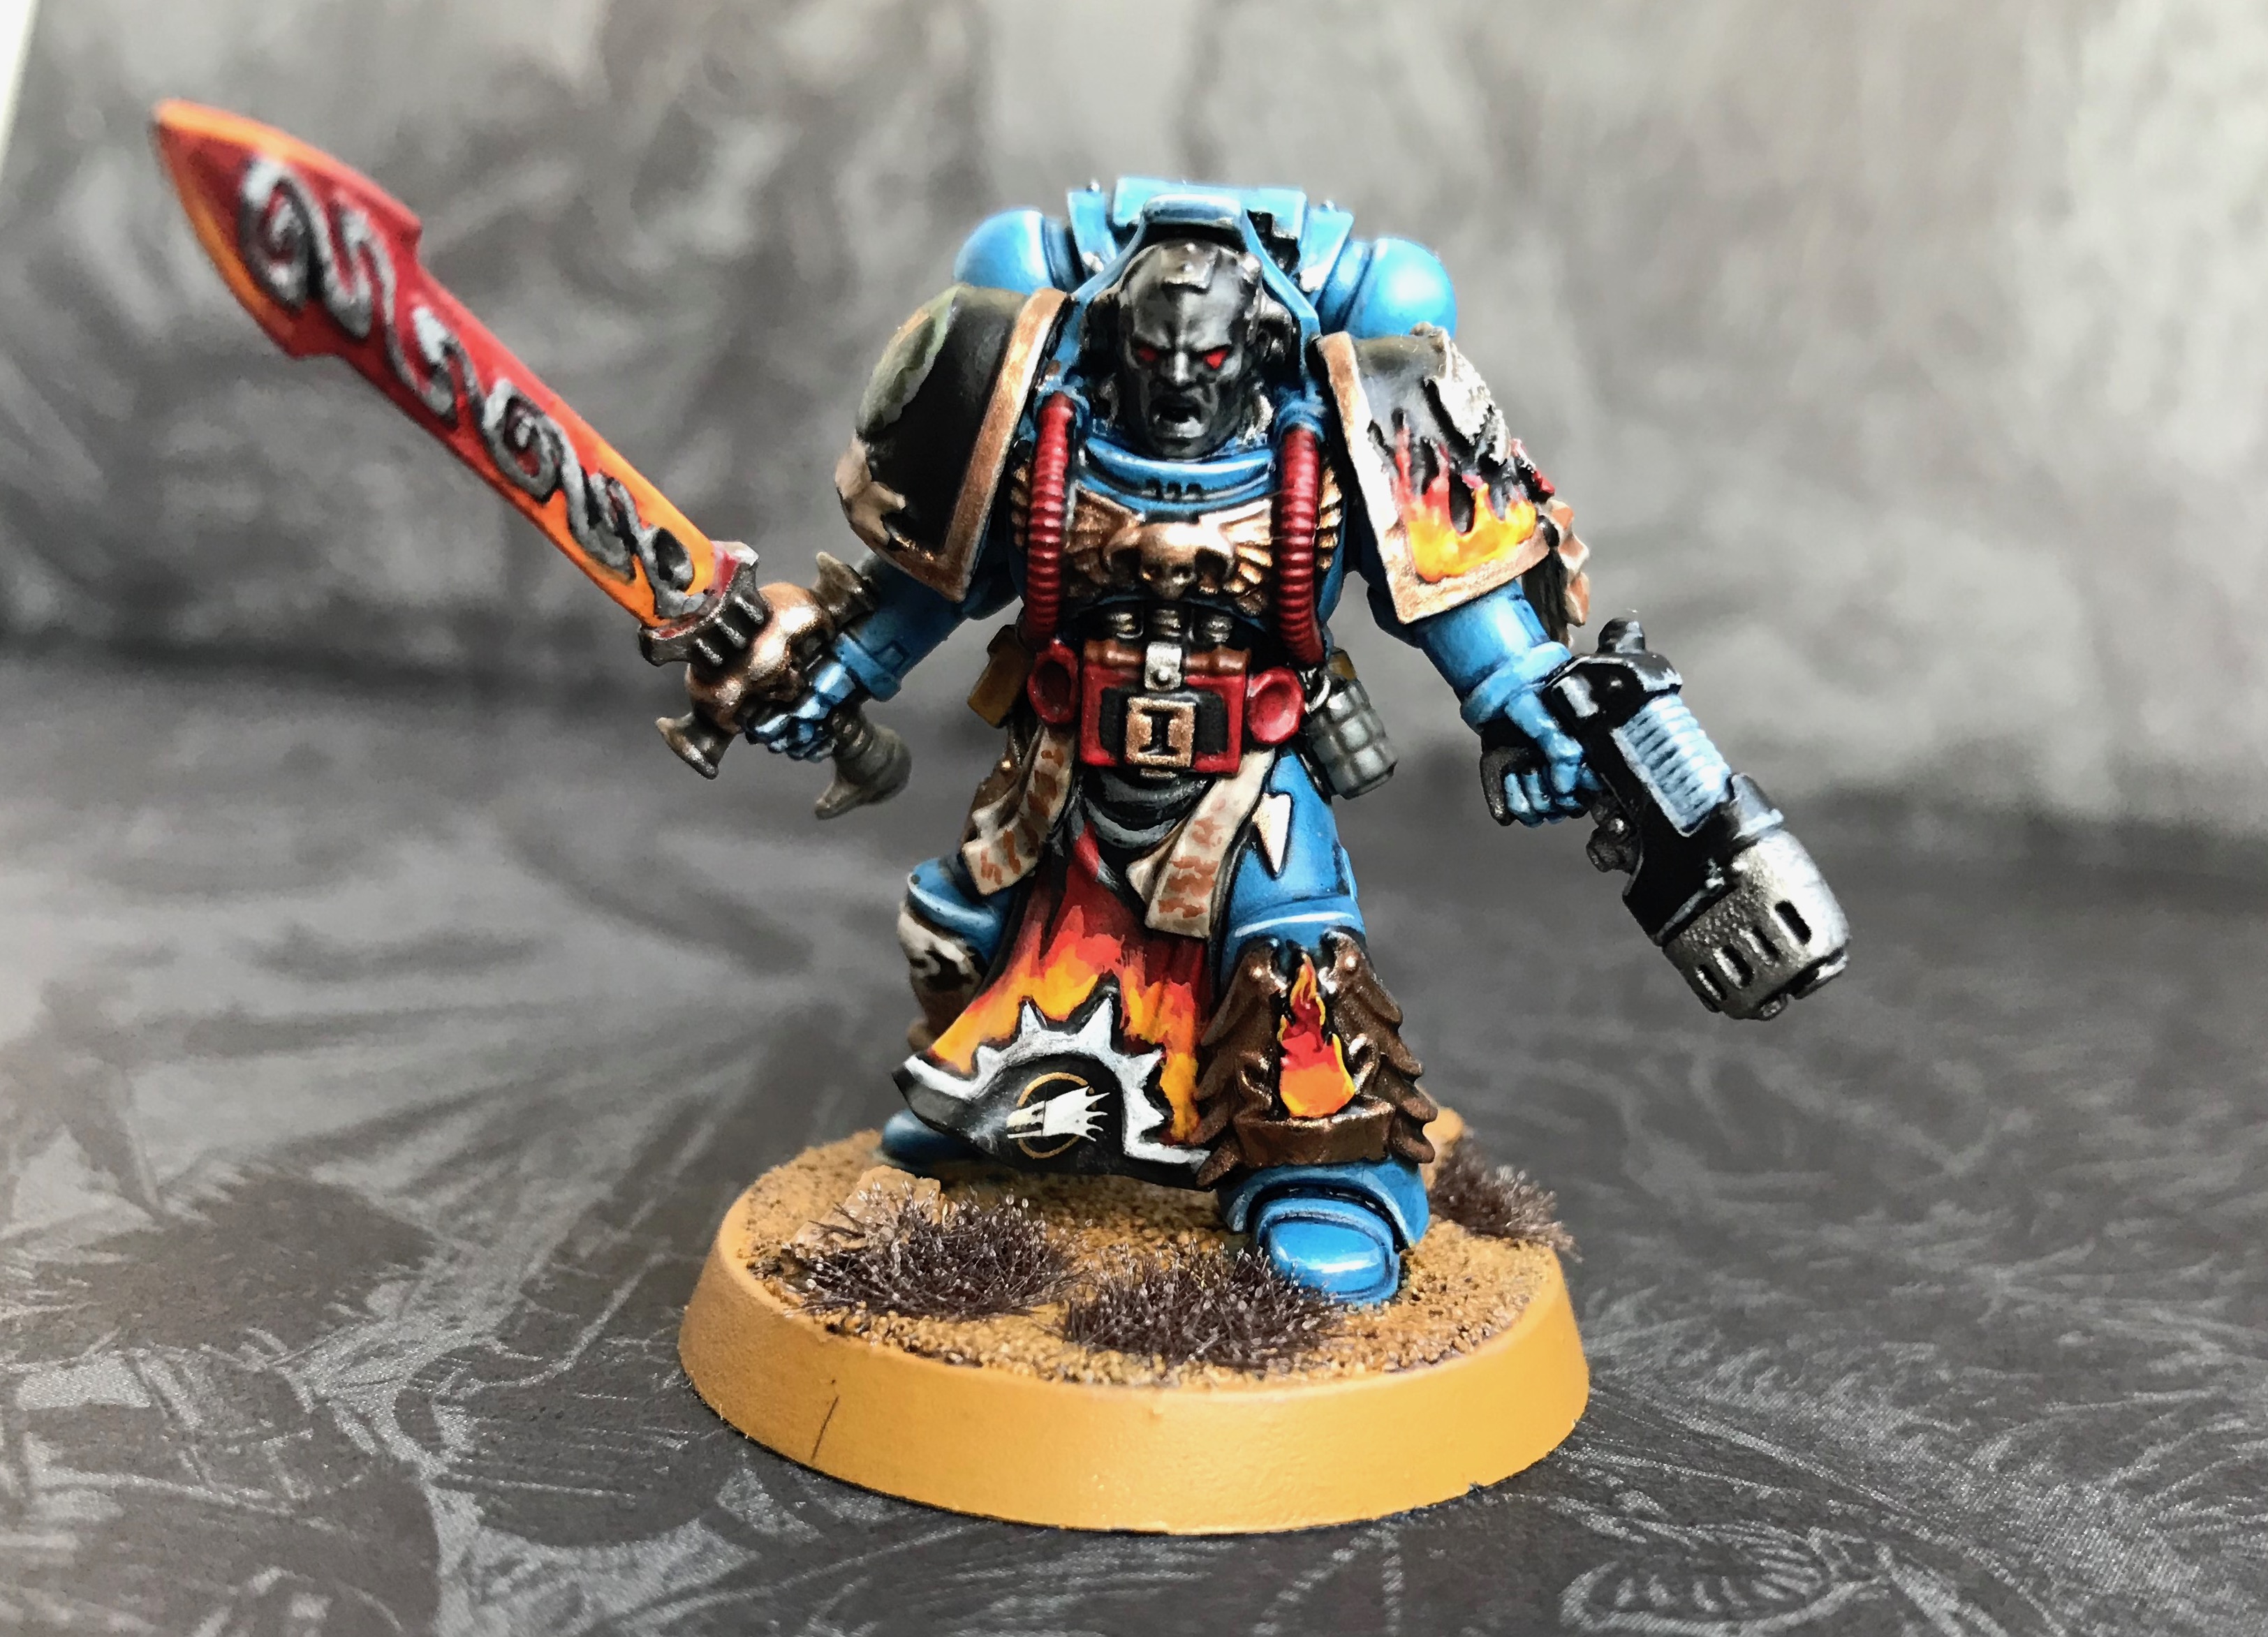
Over the Christmas and New Year break I thought it would be fun to focus on a single model, and this is the result. This Librarian for my Salamanders army is based on the model of Jensus Natorian of the Blood Ravens from Kill Team Cassius, with an alternate left arm and shoulder pads, and a bit of etched brass on the left greave.
More pictures below.
Salamanders Primaris Aggressors
This unit is a mix of normal Aggressor models and the "easy-to-build" models. This means I can have a larger unit with no duplicated poses.
Not my best work but decent enough for the tabletop.
More pictures below the fold.
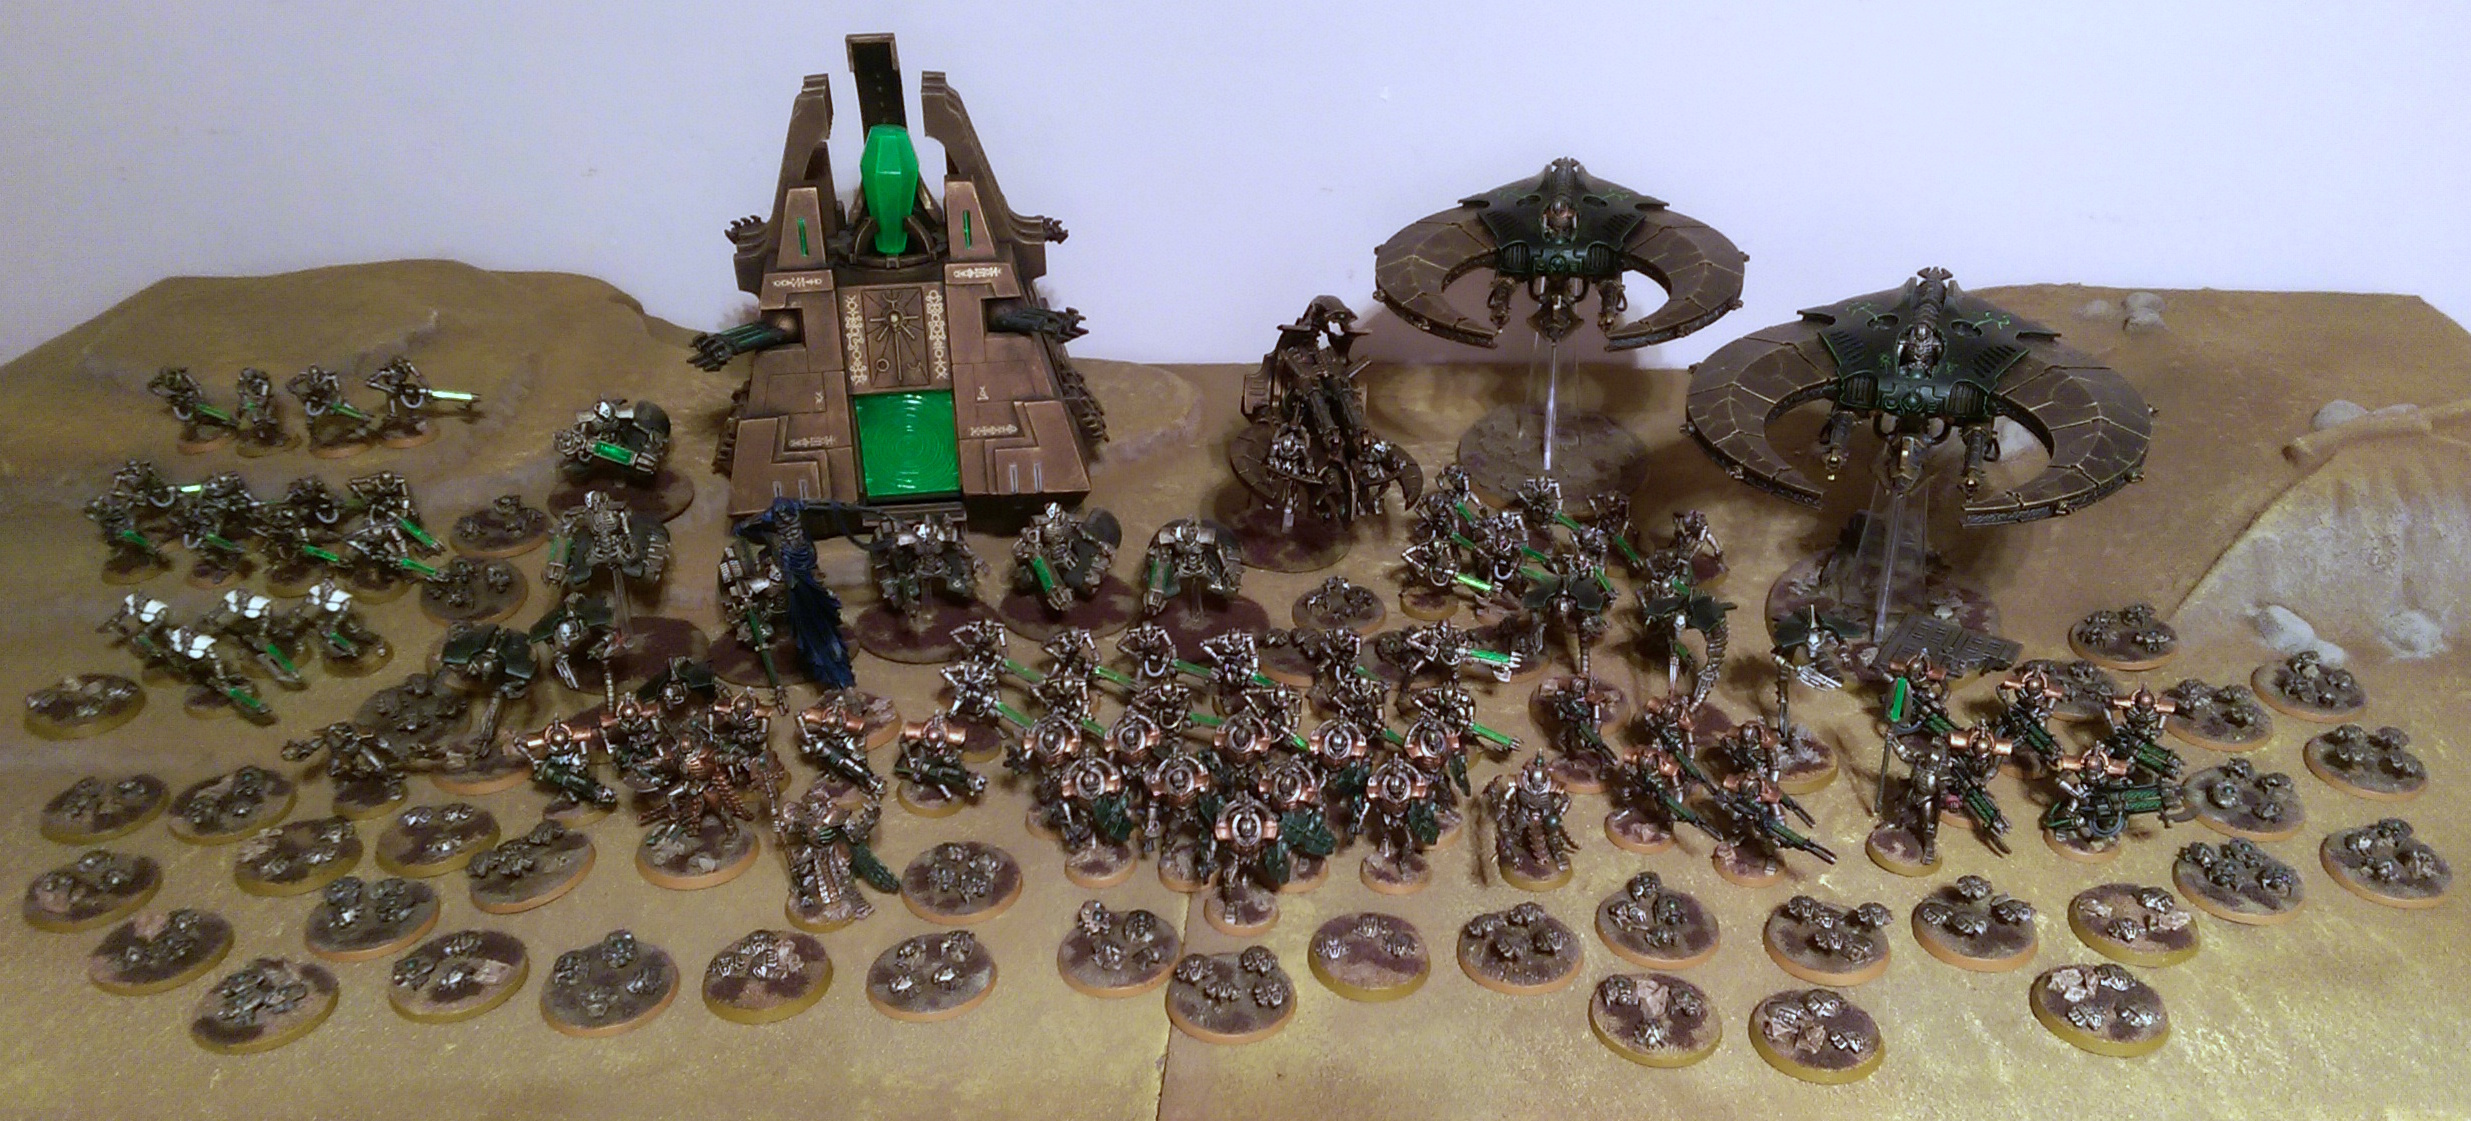
The Sons of the Forge

Last night I thought it would be fun to lay out my entire Warhammer 40,0000 Salamanders army (at least, all of it that's painted). I did a quick tot-up and it turns out that I have over 4,000 points worth which is a lot more than I would have guessed!
Another nice surprise is how consistent the colour scheme is between the first model and the last, despite there being a six-year gap between them. My painting skills have definitely improved in that time but the old and new models both work perfectly well next to each other on the table.
I still need to paint (or finish painting):
- Two three-man Aggressor squads
- A five-man Sternguard Veteran squad
- A five-man Terminator squad
- A five-man Scout Sniper Squad
- A Librarian (converted from the model in the Deathwatch Overkill game)
- A ten-man Primaris Intercessor squad
I also have ten Mark III tactical Marines and ten Tartaros-pattern Terminators, but I am not sure if I am going to put those into my Salamanders or my Horus Heresy Word Bearers.
The rest of the pictures are below the fold.
Salamanders Primaris Redemptor Dreadnought
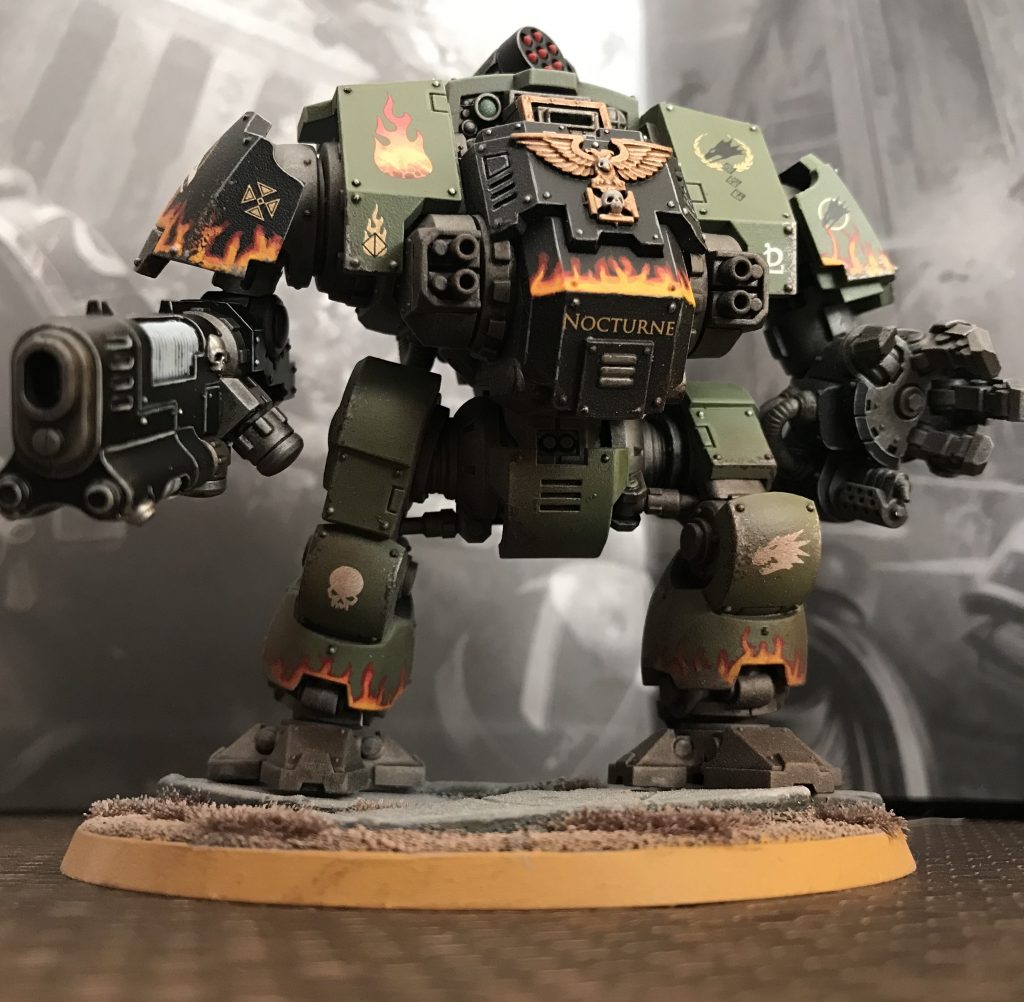
My love affair with all things Primaris continues! Just like the Hellblasters and the Astraeus, the Redemptor Dreadnought is both an awesome model and also really easy and fun to paint: all the green parts were painted separately from the dreadnought's superstructure, so the whole process was relatively quick and easy (albeit spread out over several months since I no longer have a permanent hobby space).
The flames on the armour plates were painted using Duncan's technique for Salamanders flame heraldry, and I am very happy with how it's turned out! I may be going back to some of my older models and adding it to them (especially the shoulder pads on my tactical and assault marines).
The right arm weapon is magnetised so I can swap the plasma incinerator (which is the obvious choice when fielding Vulkan He'stan, since you get a re-roll to avoid the mortal wound on a roll of 1 when supercharging) with the gatling cannon, if appropriate.
More pictures below the fold.
Salamanders Primaris Hellblasters and Lieutenant
Here are the first Primaris marines to join my Salamanders: a squad of Hellblasters and a Lieutenant from the Dark Imperium boxset.

I will happily admit that I love the Primaris marines. They look awesome and are so much easier to paint (for a middle-aged man with poor eyesight like me). I will be adding more in the near future!
Salamanders Chaplain Xavier
From Lexicanum:
Xavier was a Chaplain in the Salamanders Chapter of Space Marines. He is regarded as the greatest Chaplain the Salamanders have ever known.
A proud upholder of the Salamander's Promethean Cult, Xavier is said to have epitomised the Chapter's ideals more completely than any other Marine in their history. Dedicated to encouraging his fellows in feats of endurance and fortitude, it is said that when Xavier led them, the Salamanders never fell back before an enemy. As a sign of this dedication, he was entrusted with the keeping of "Vulkan's Sigil", a relic believed to have been carried by the Primarch Vulkan. He is also famed for having slain a particularly ancient and monstrous salamander with his bare hands.
Games Workshop re-released this model last year through their "Made To Order" service, and since it's the only other Salamanders-specific model that GW ever made (apart from Vulkan He'stan), obviously I had to pick it up.
More pictures below.
Salamanders Astraeus Super-Heavy Tank
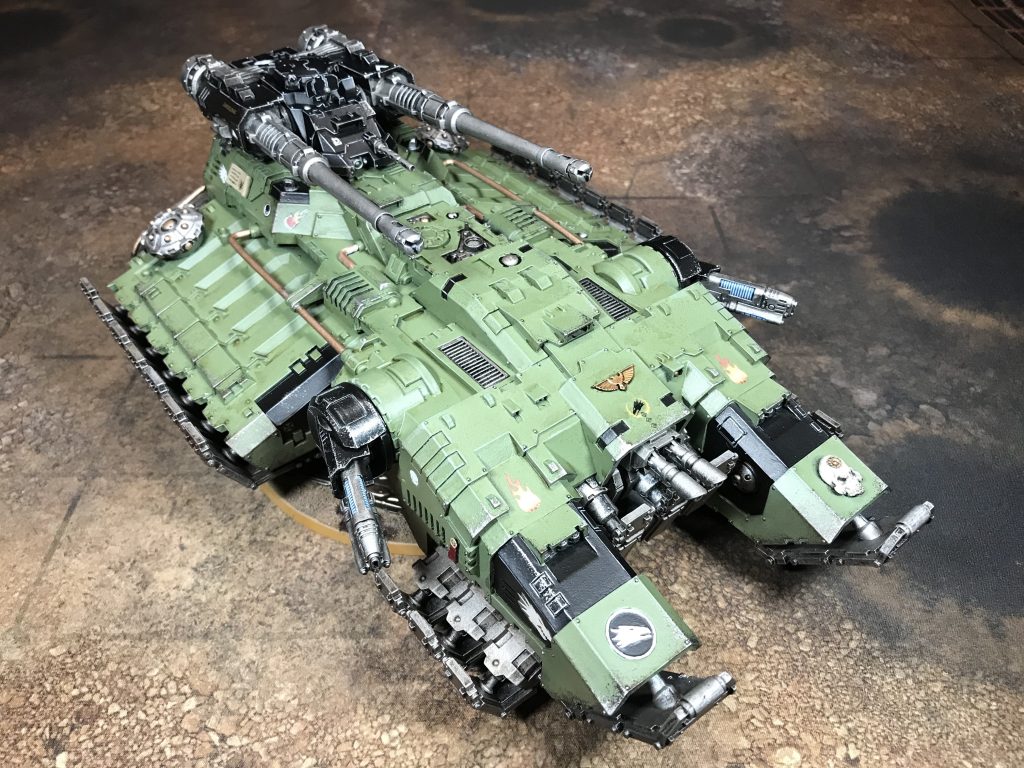
I am not normally a fan of grav-tanks, and when I saw the Astraeus Super-Heavy Tank, I wasn't immediately taken by it. But over time I've come to really love the design so I decided that I wanted one for my Salamanders army, and I treated myself to one for Christmas.
Compared to the other Forge World models I've built and painted, this one was a breeze to assemble and needed very little work to get it ready for painting. The only pain point is the huge number of grav skids that you have to paint separately and then glue on.
More pics below the fold.
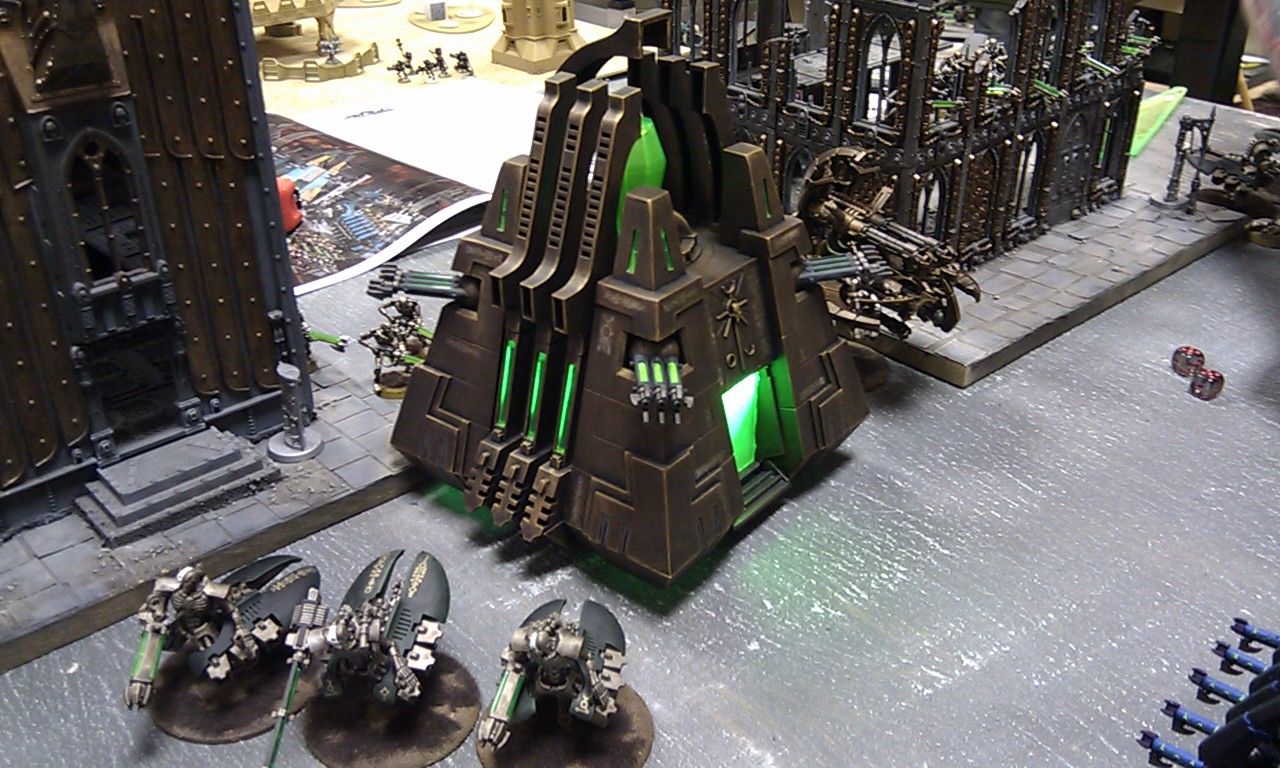
Clearing the backlog #3: Necron Pylon
My birthday treat to myself last year was this, a Necron Pylon from Forge World. It was a fun challenge to get the paint job to match that of my other 40K Necron models, some of which are now over 5 years old, using a different palette of paints (since GW changed their paint range and I've started using a lot more paints from other manufacturers). But I'm very happy with how it turned out!
Vindicare Assassin
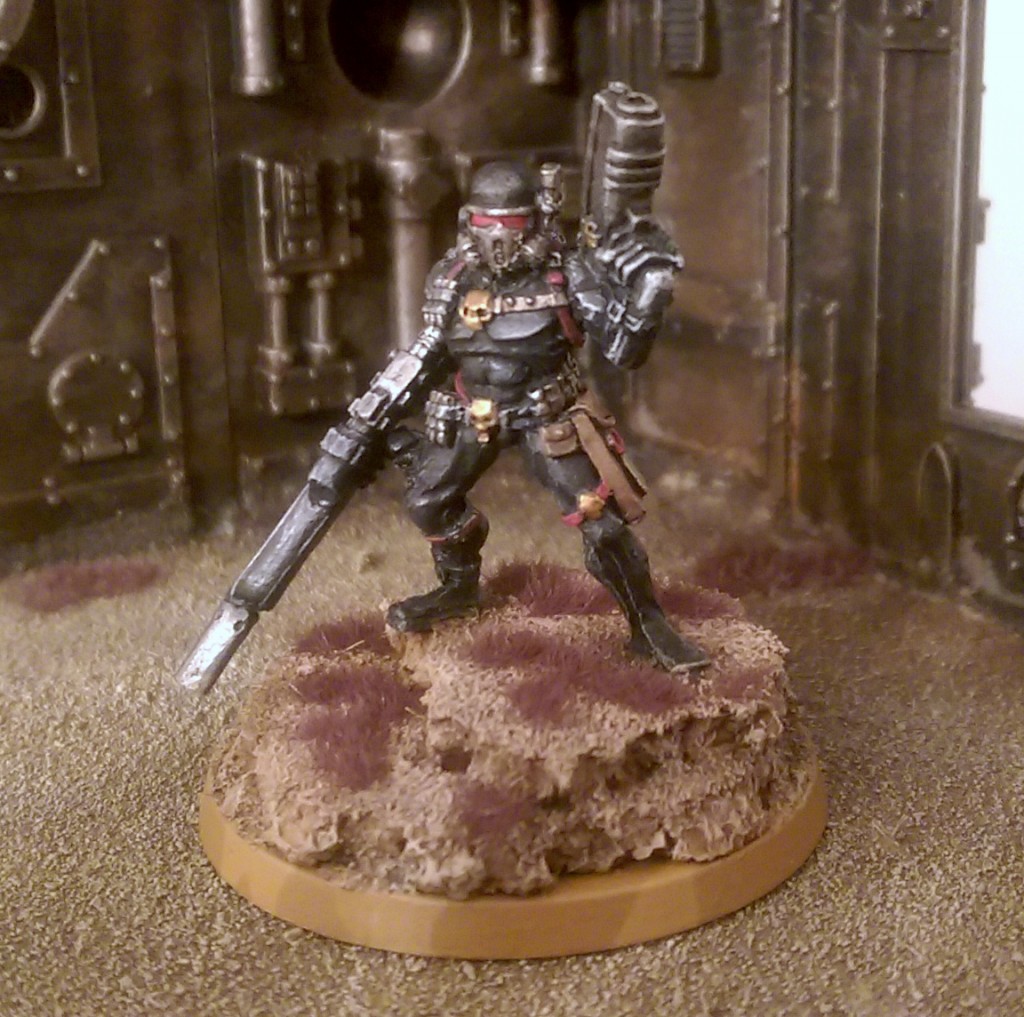
I Just finished this Vindicare Assassin, to be a sting in the tail of my Salamanders army, or for use in In the Emperor's Name.
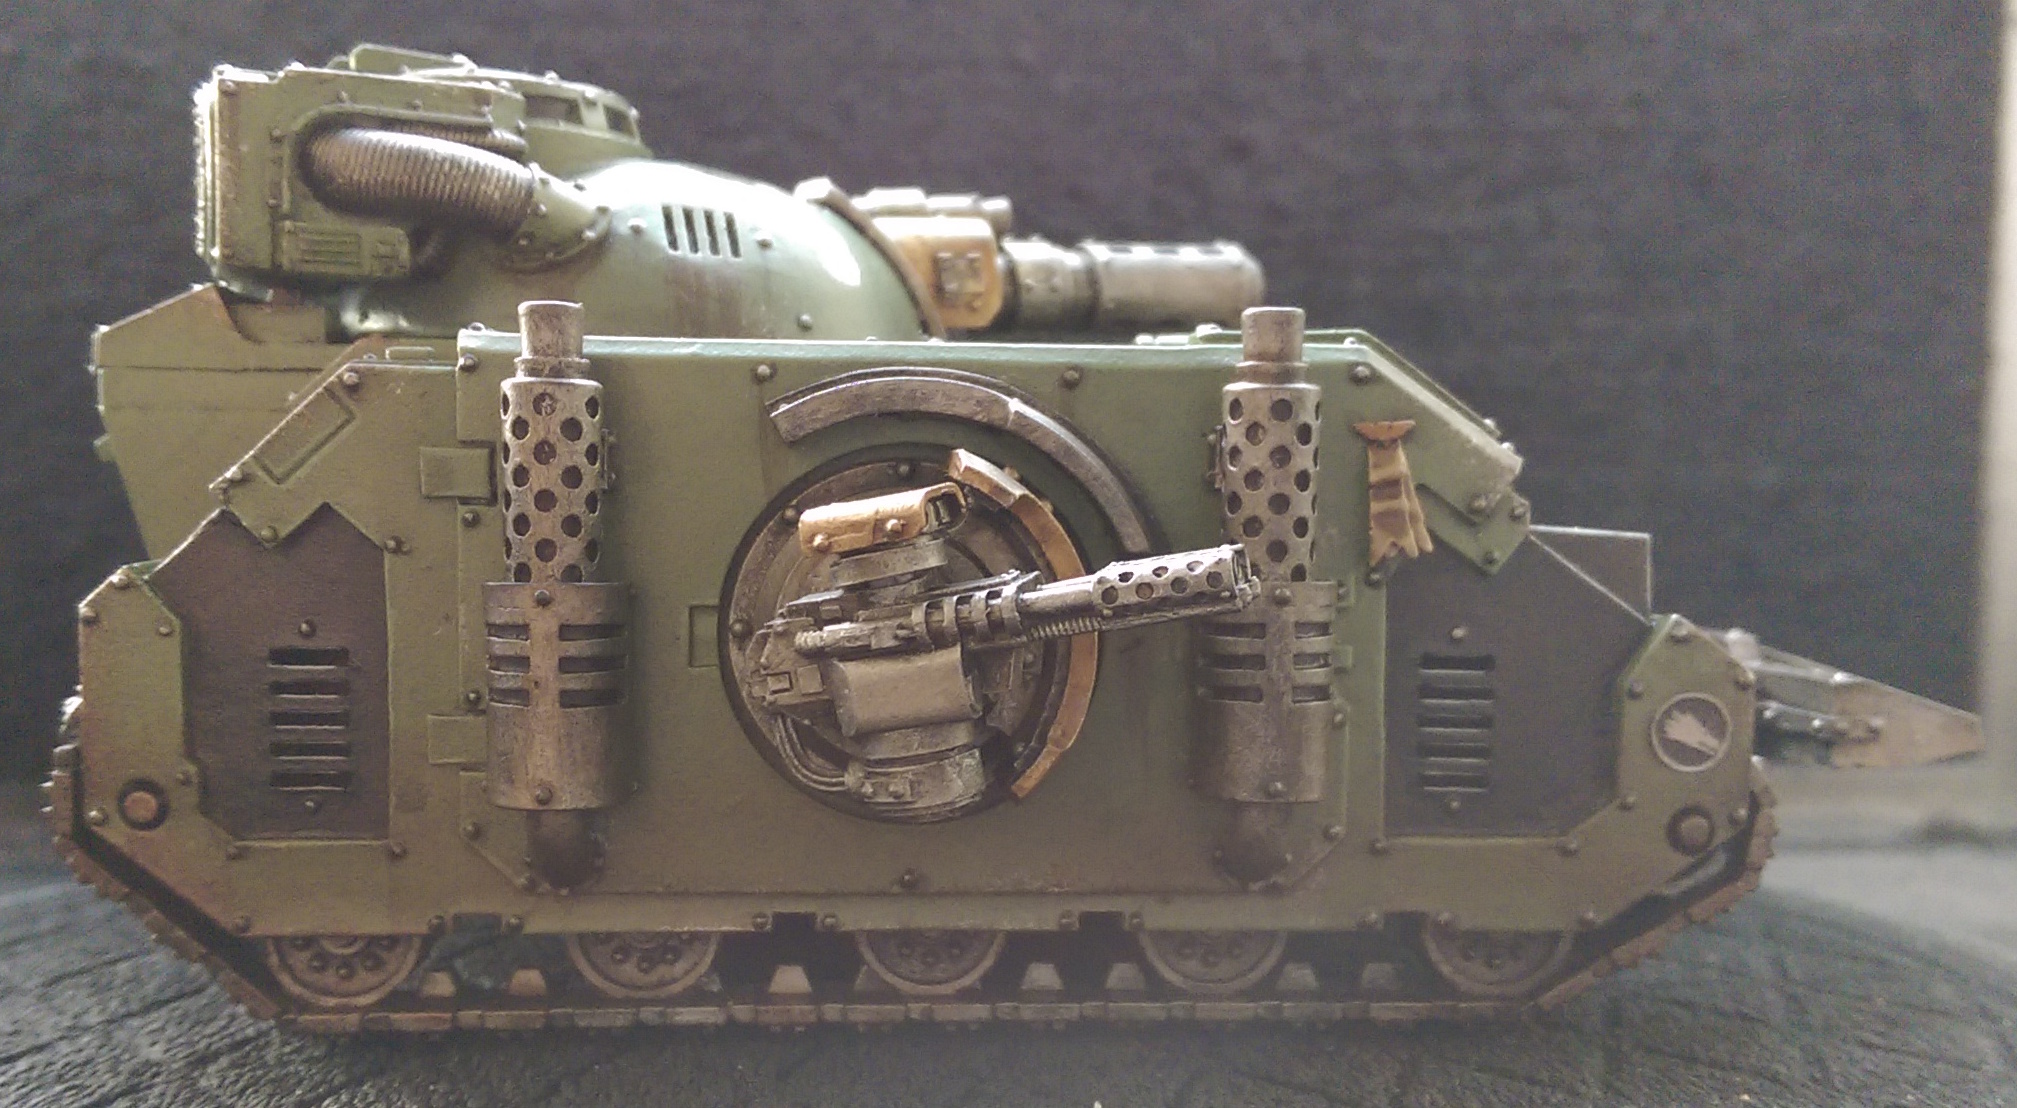
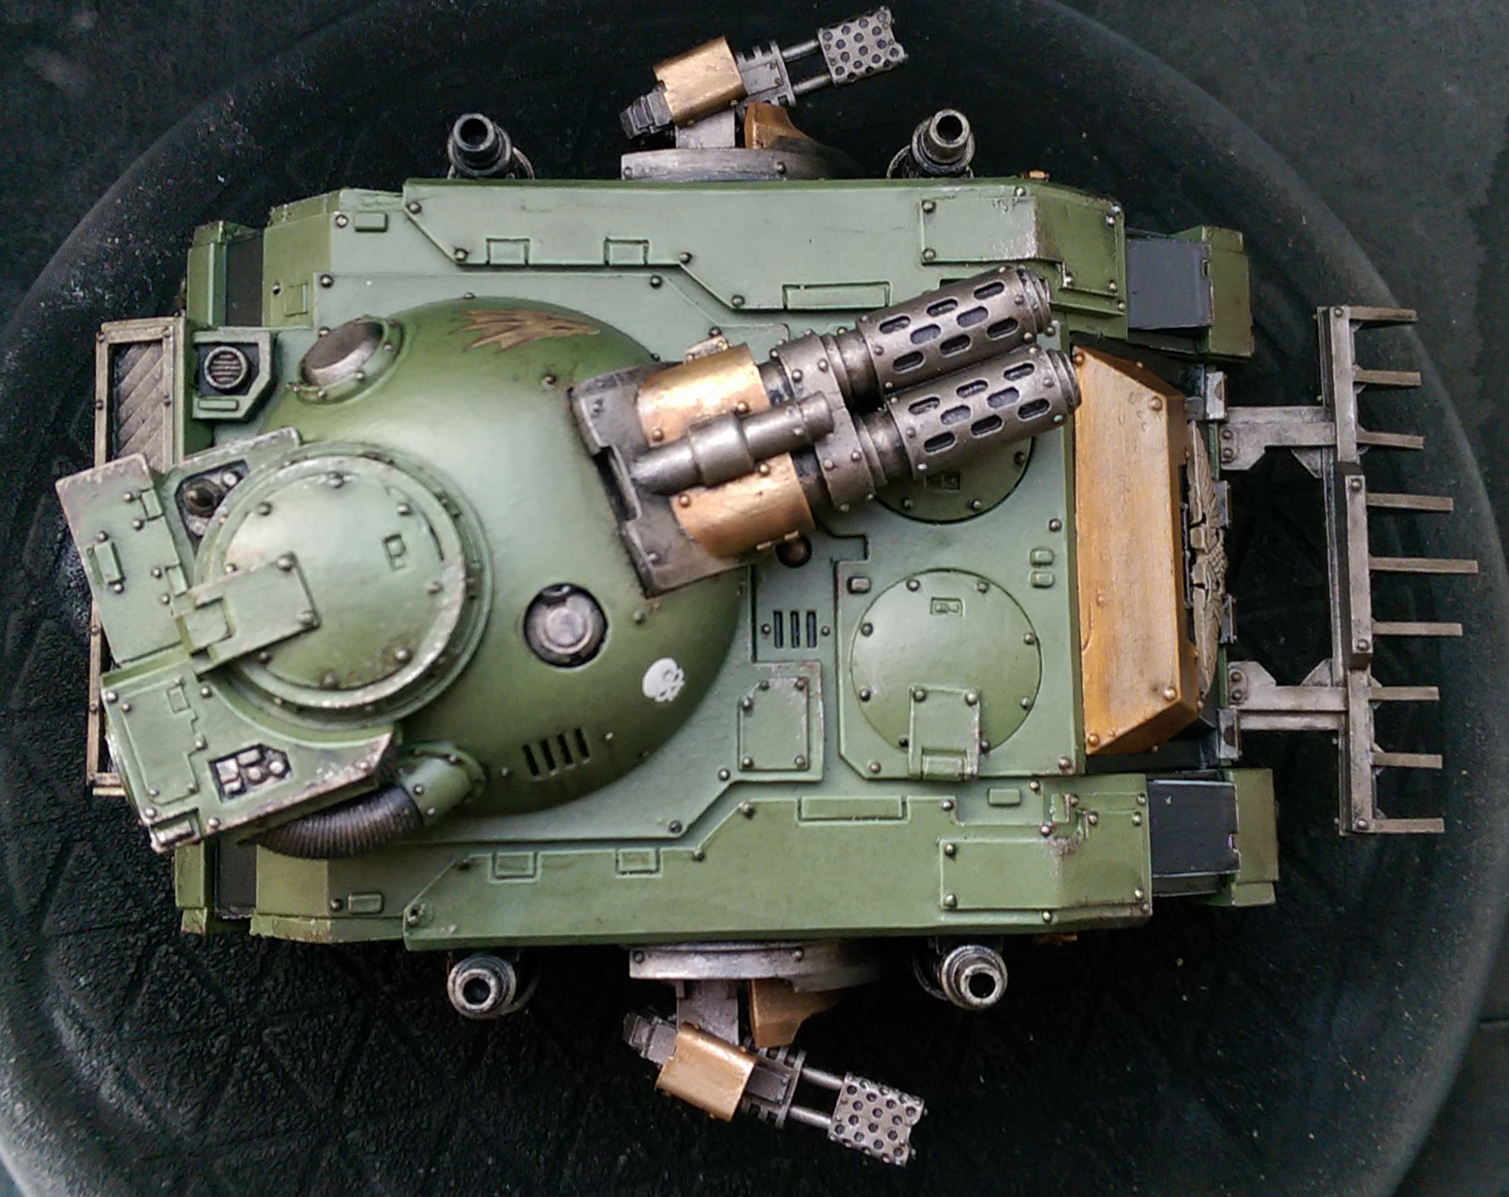
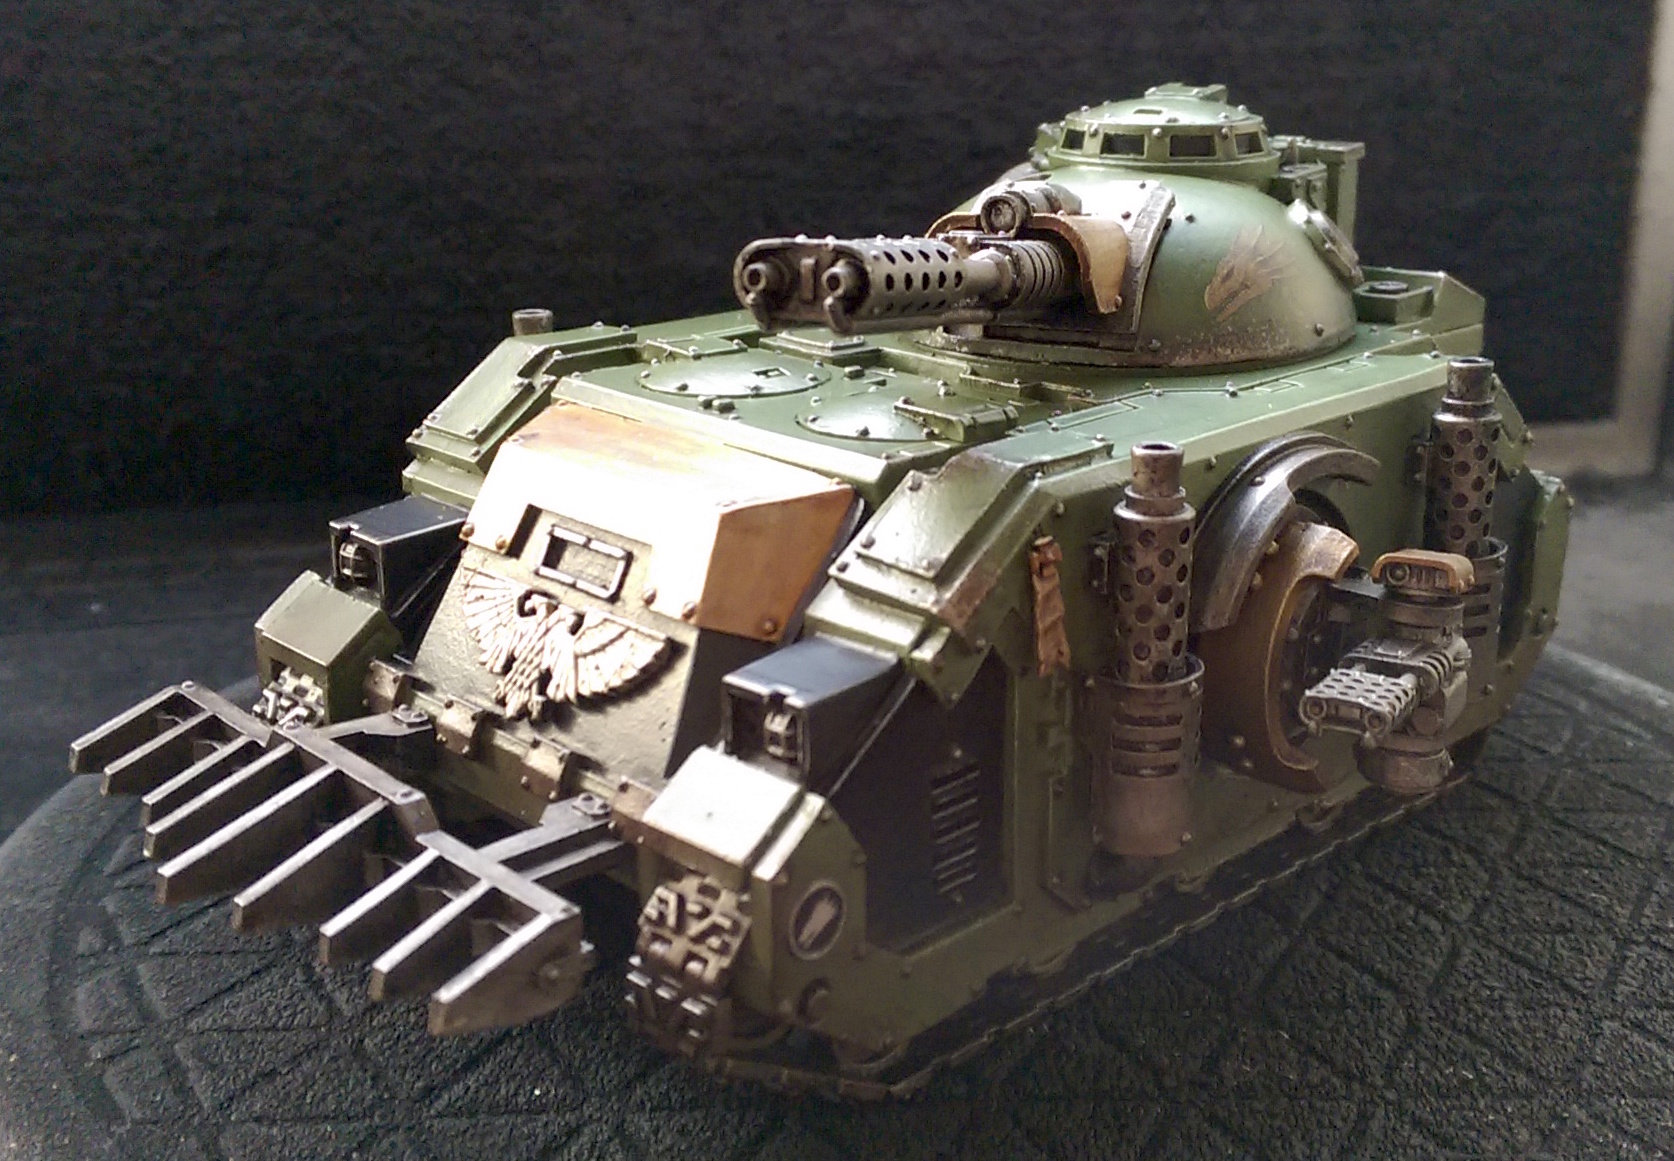
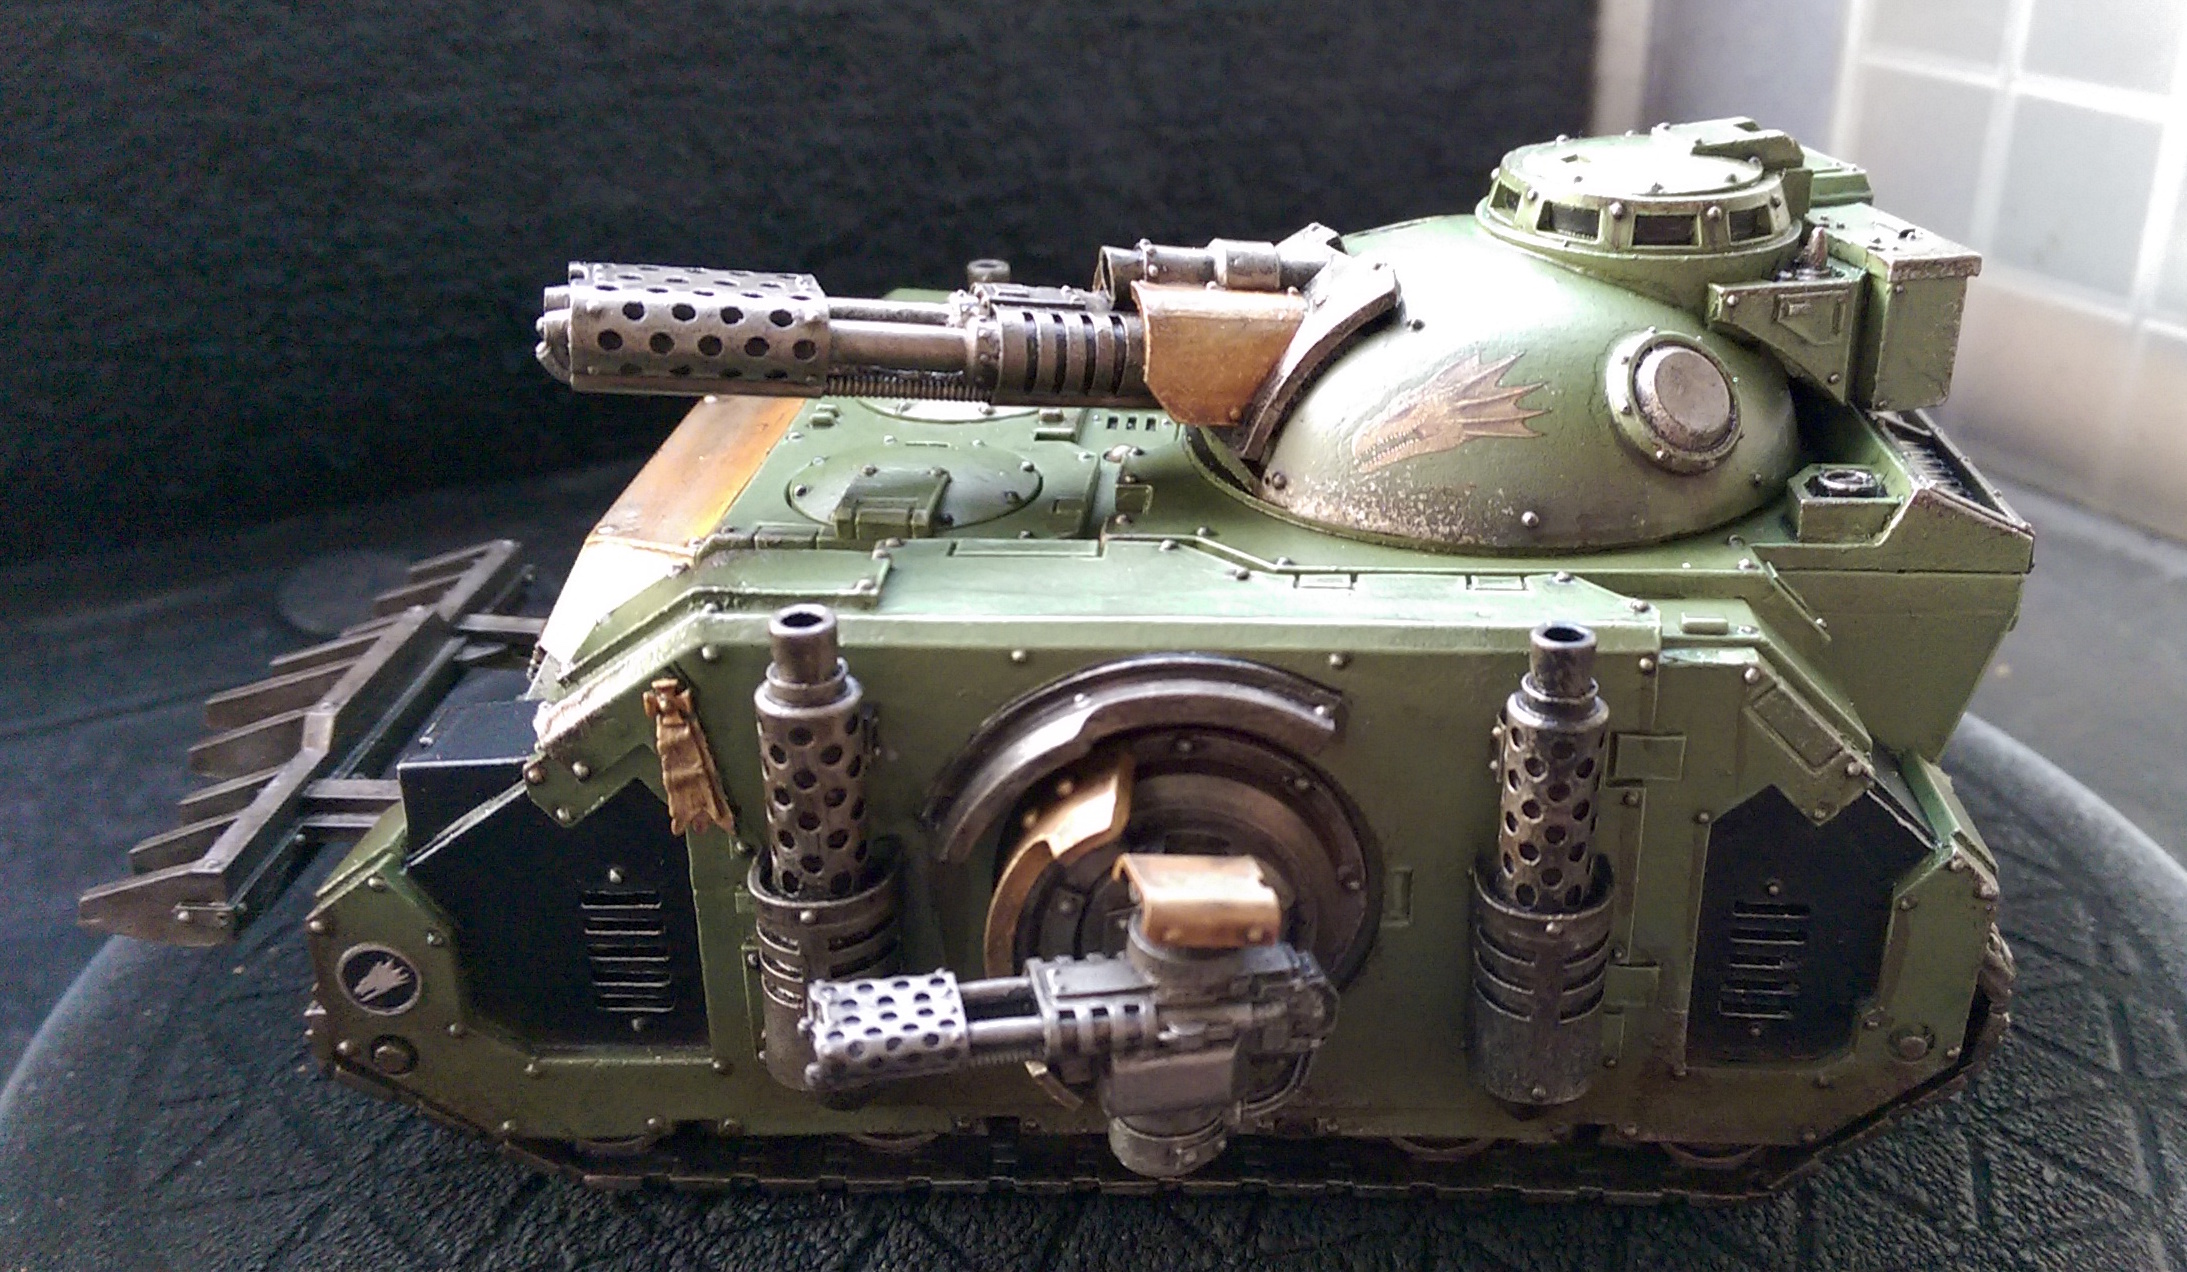
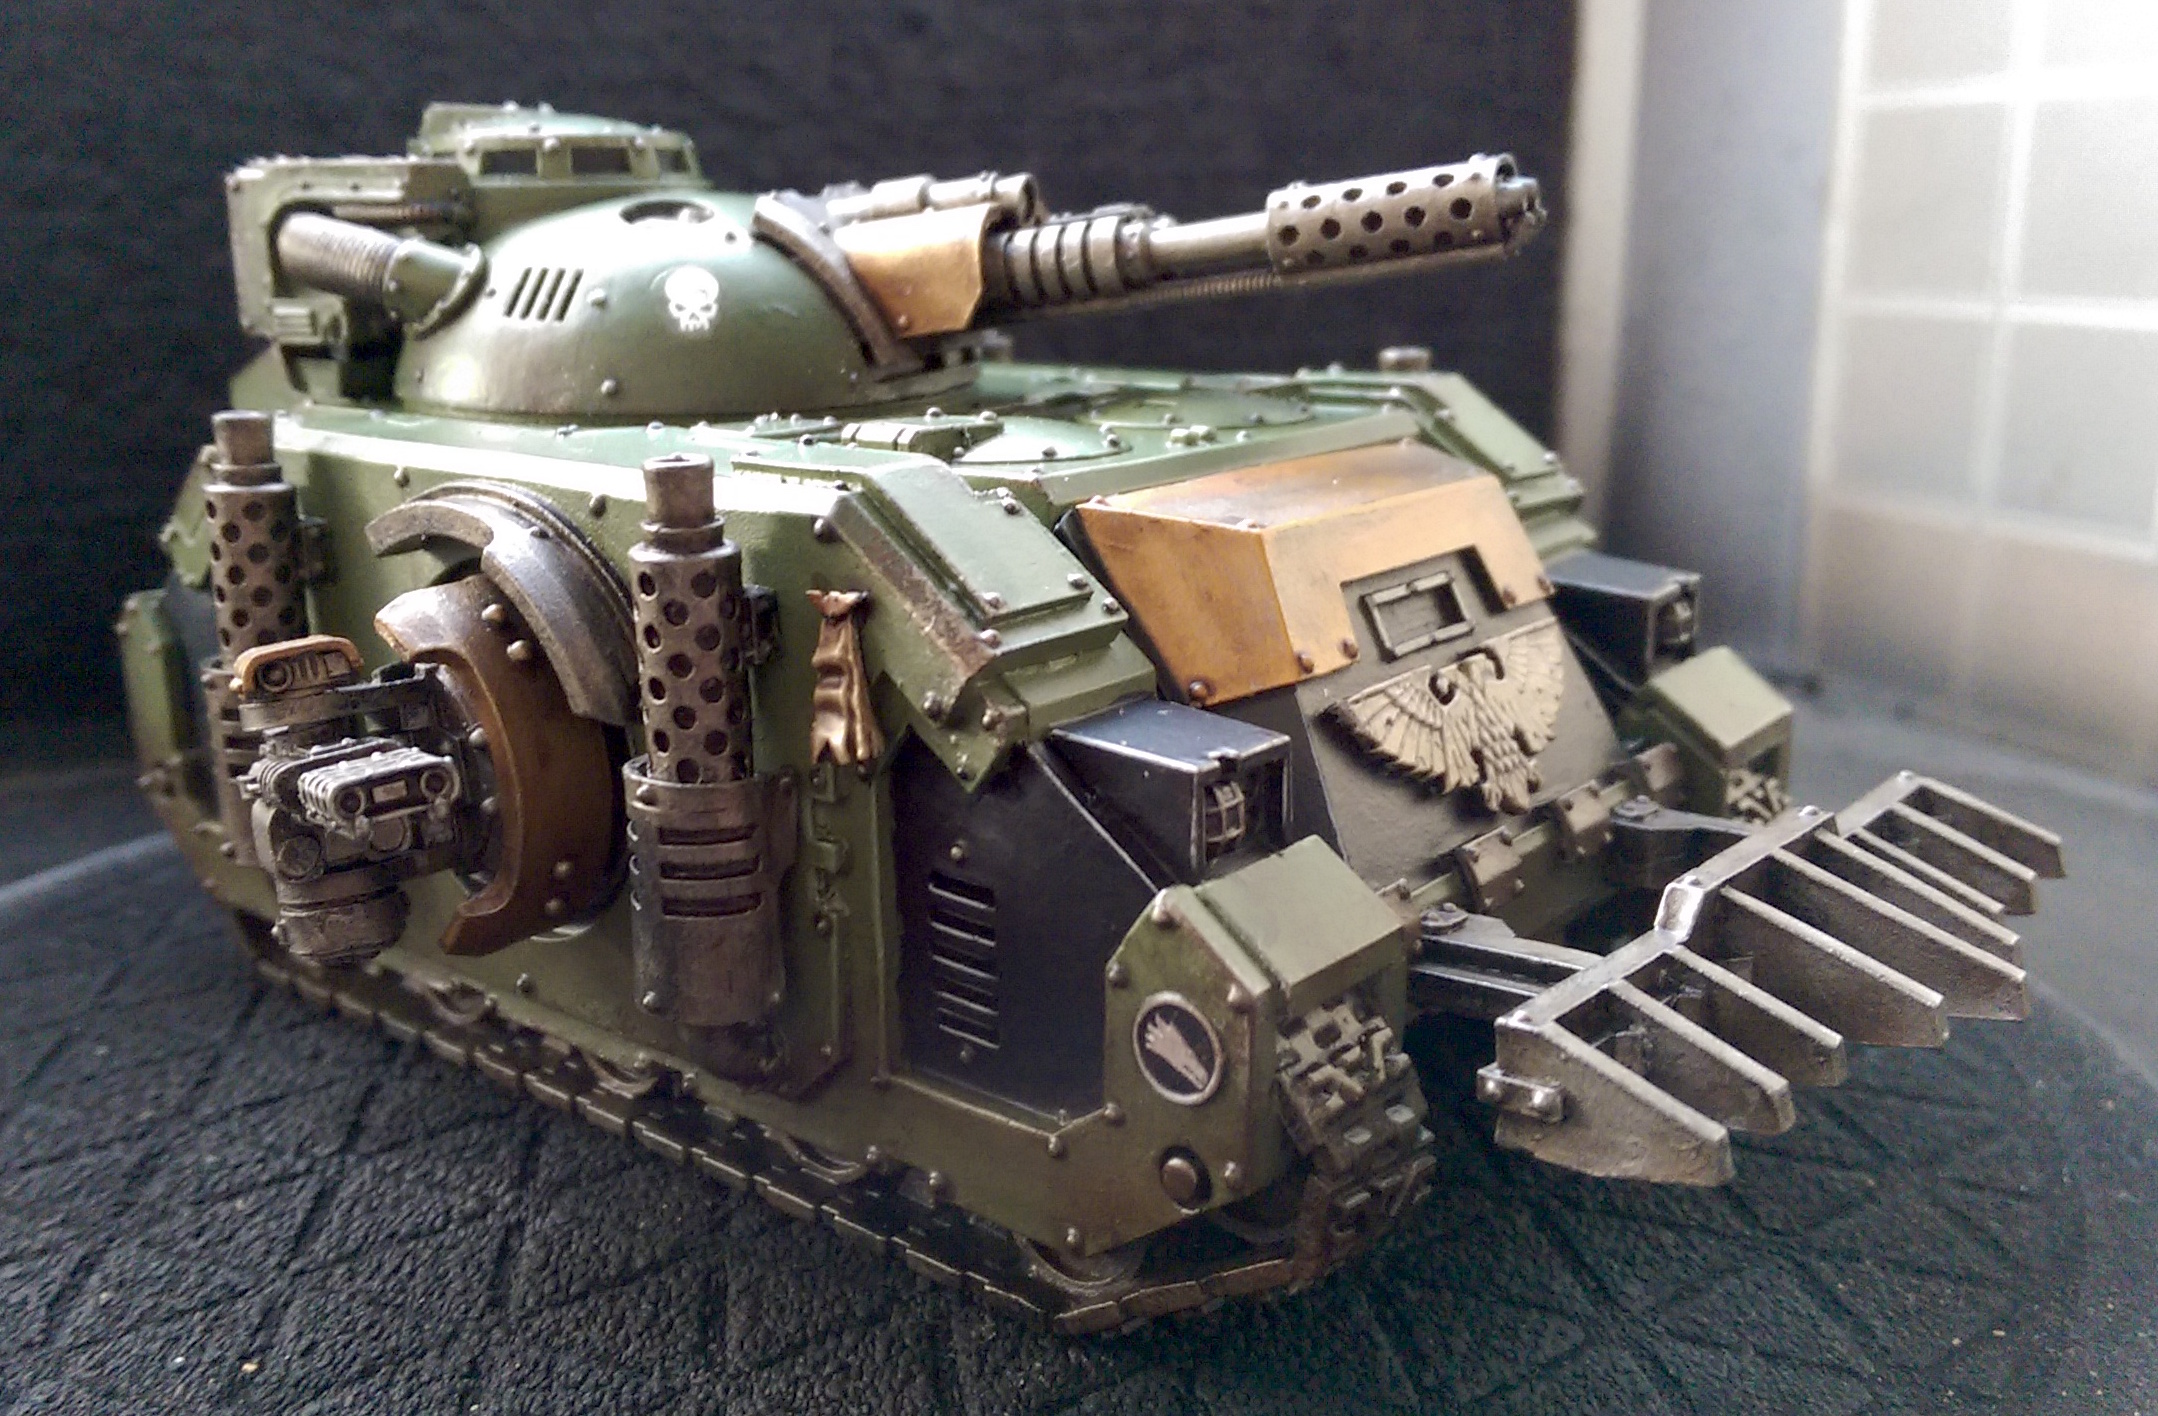
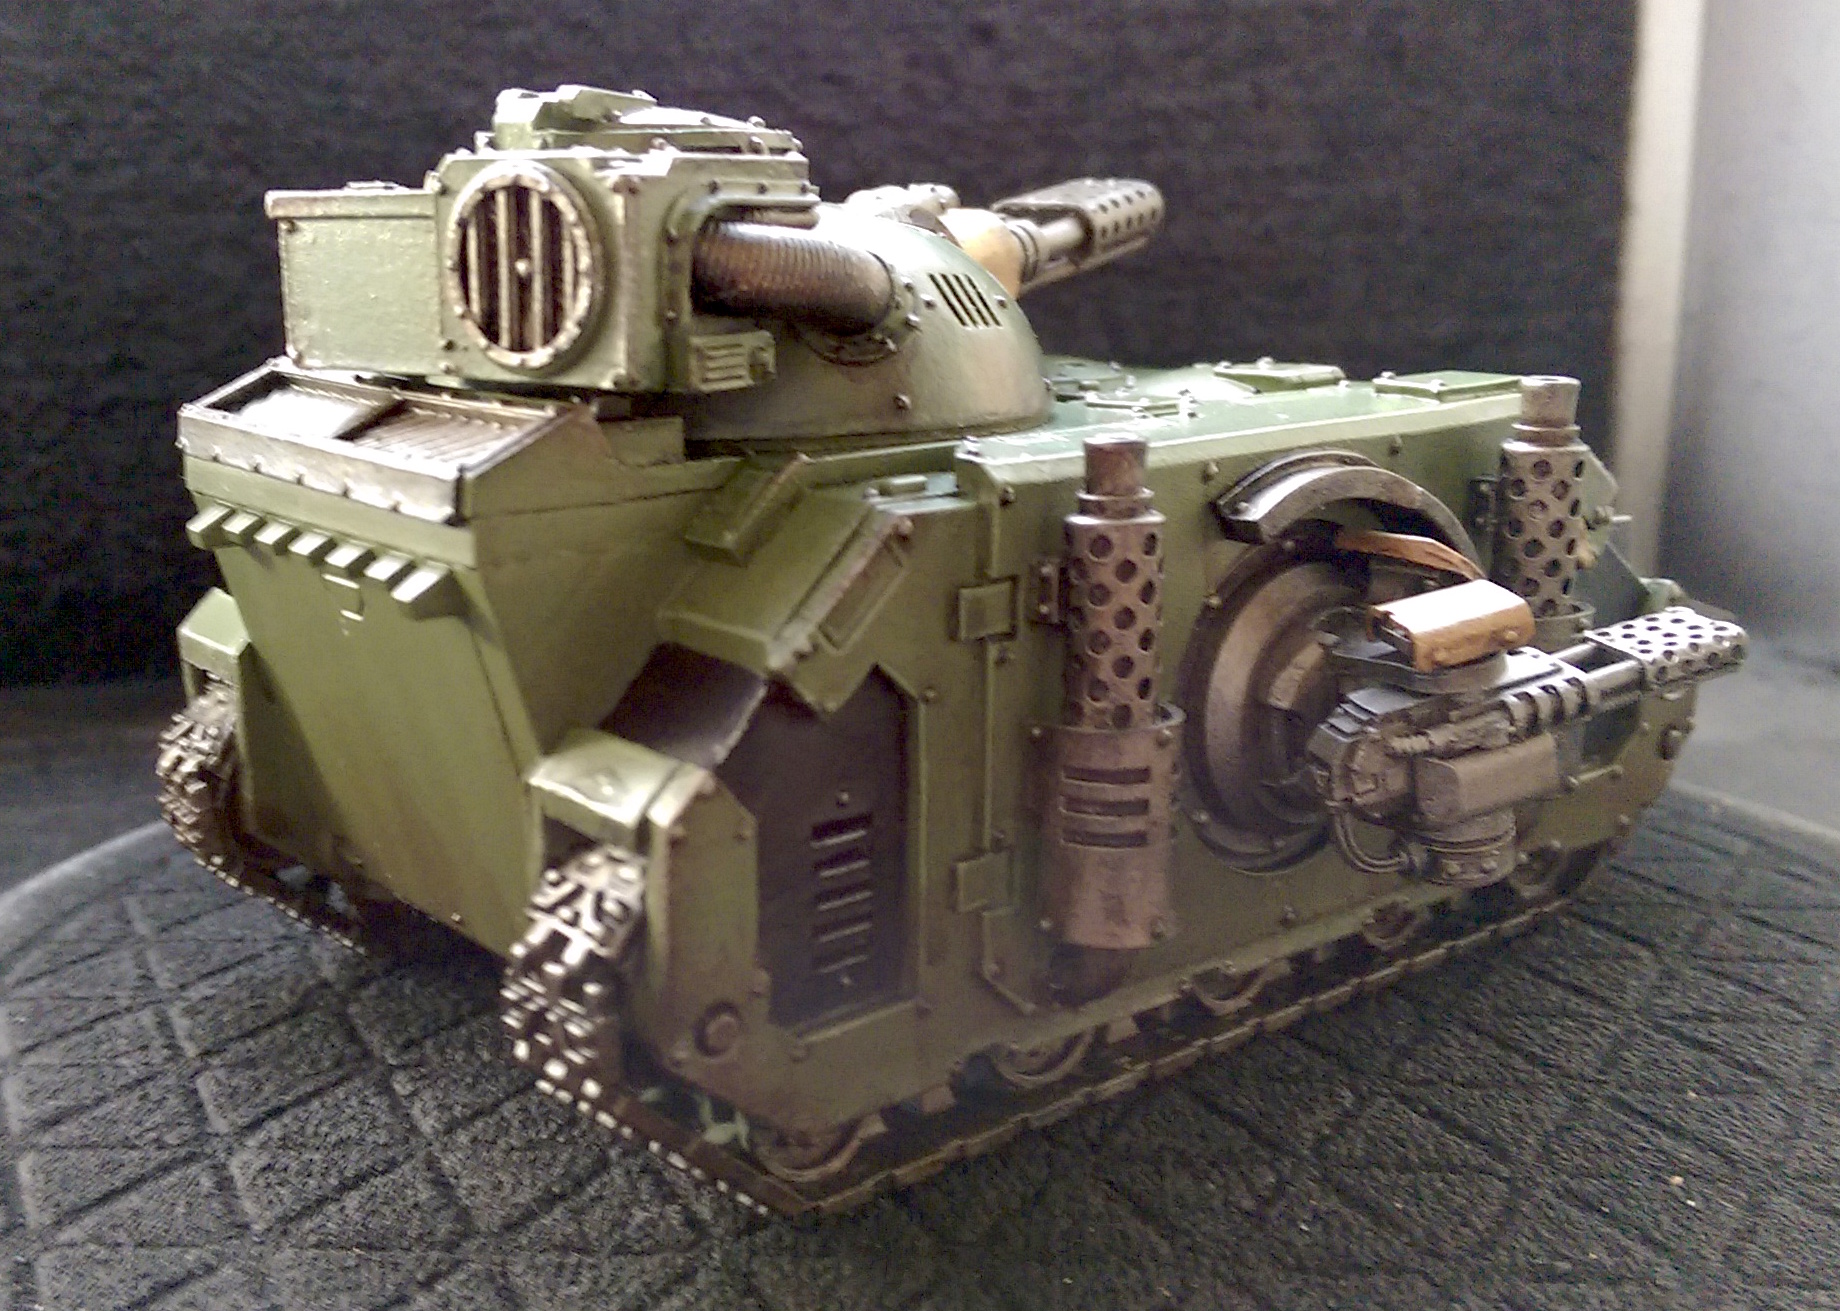
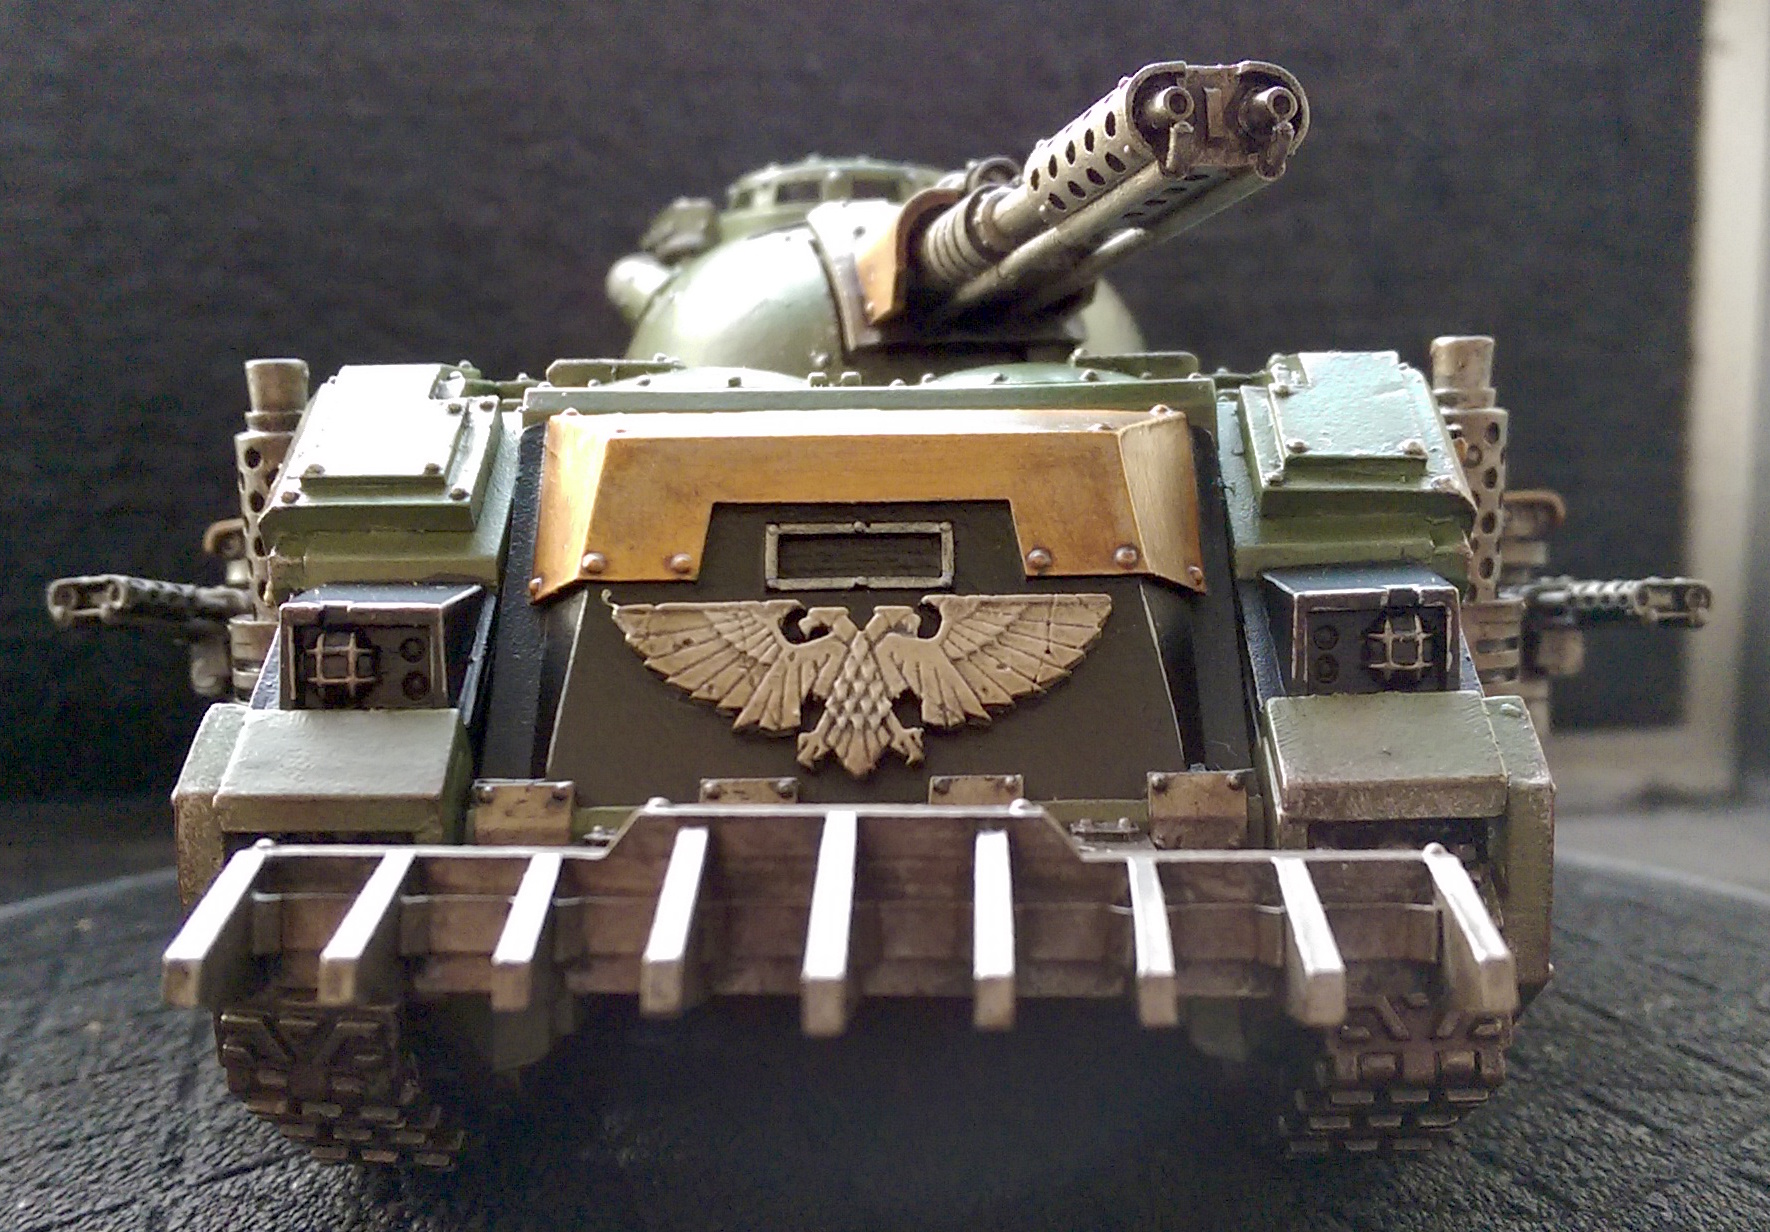
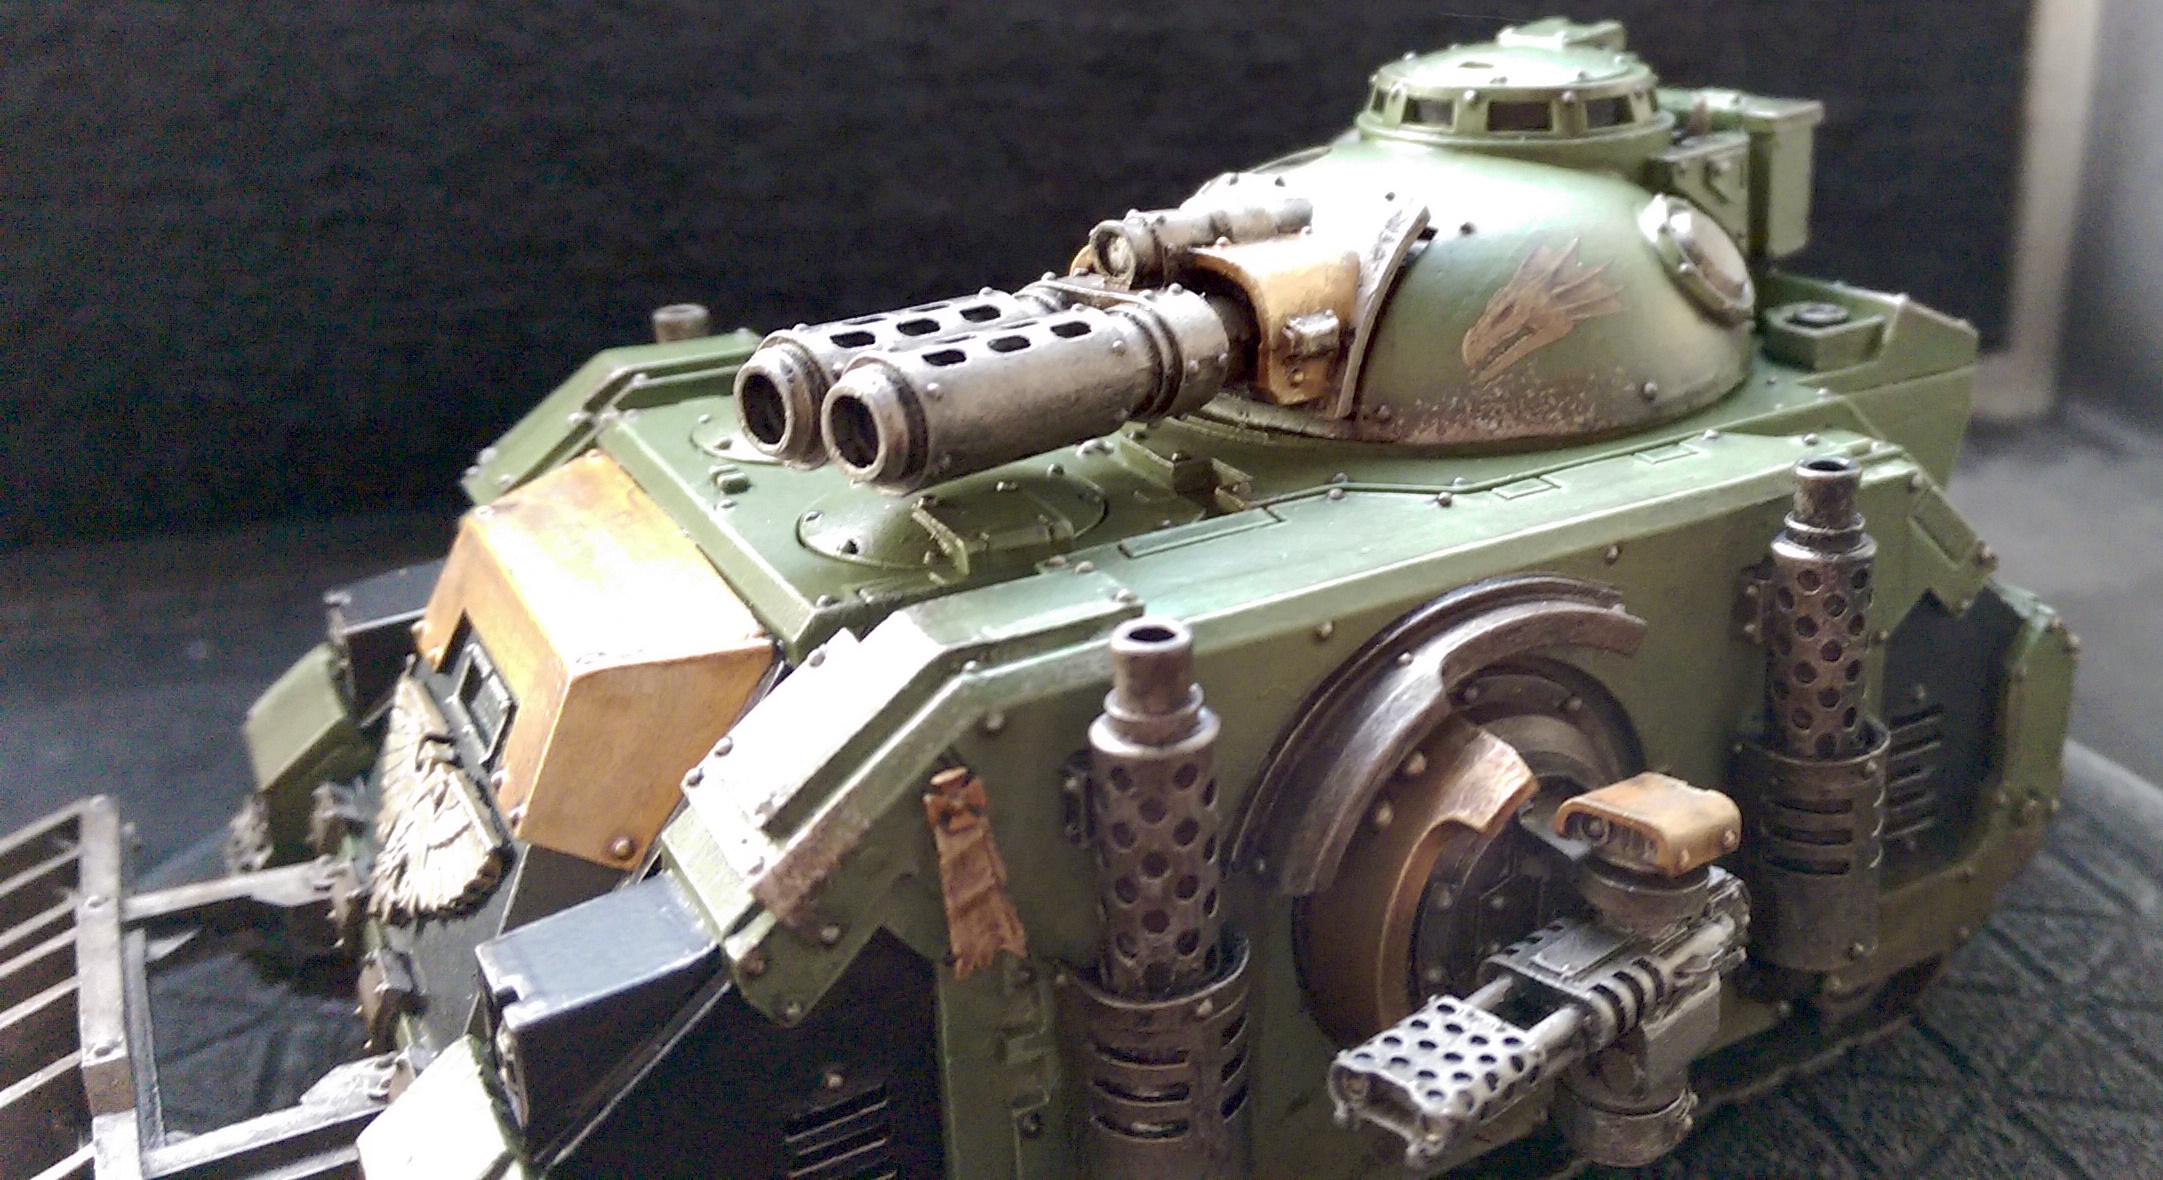
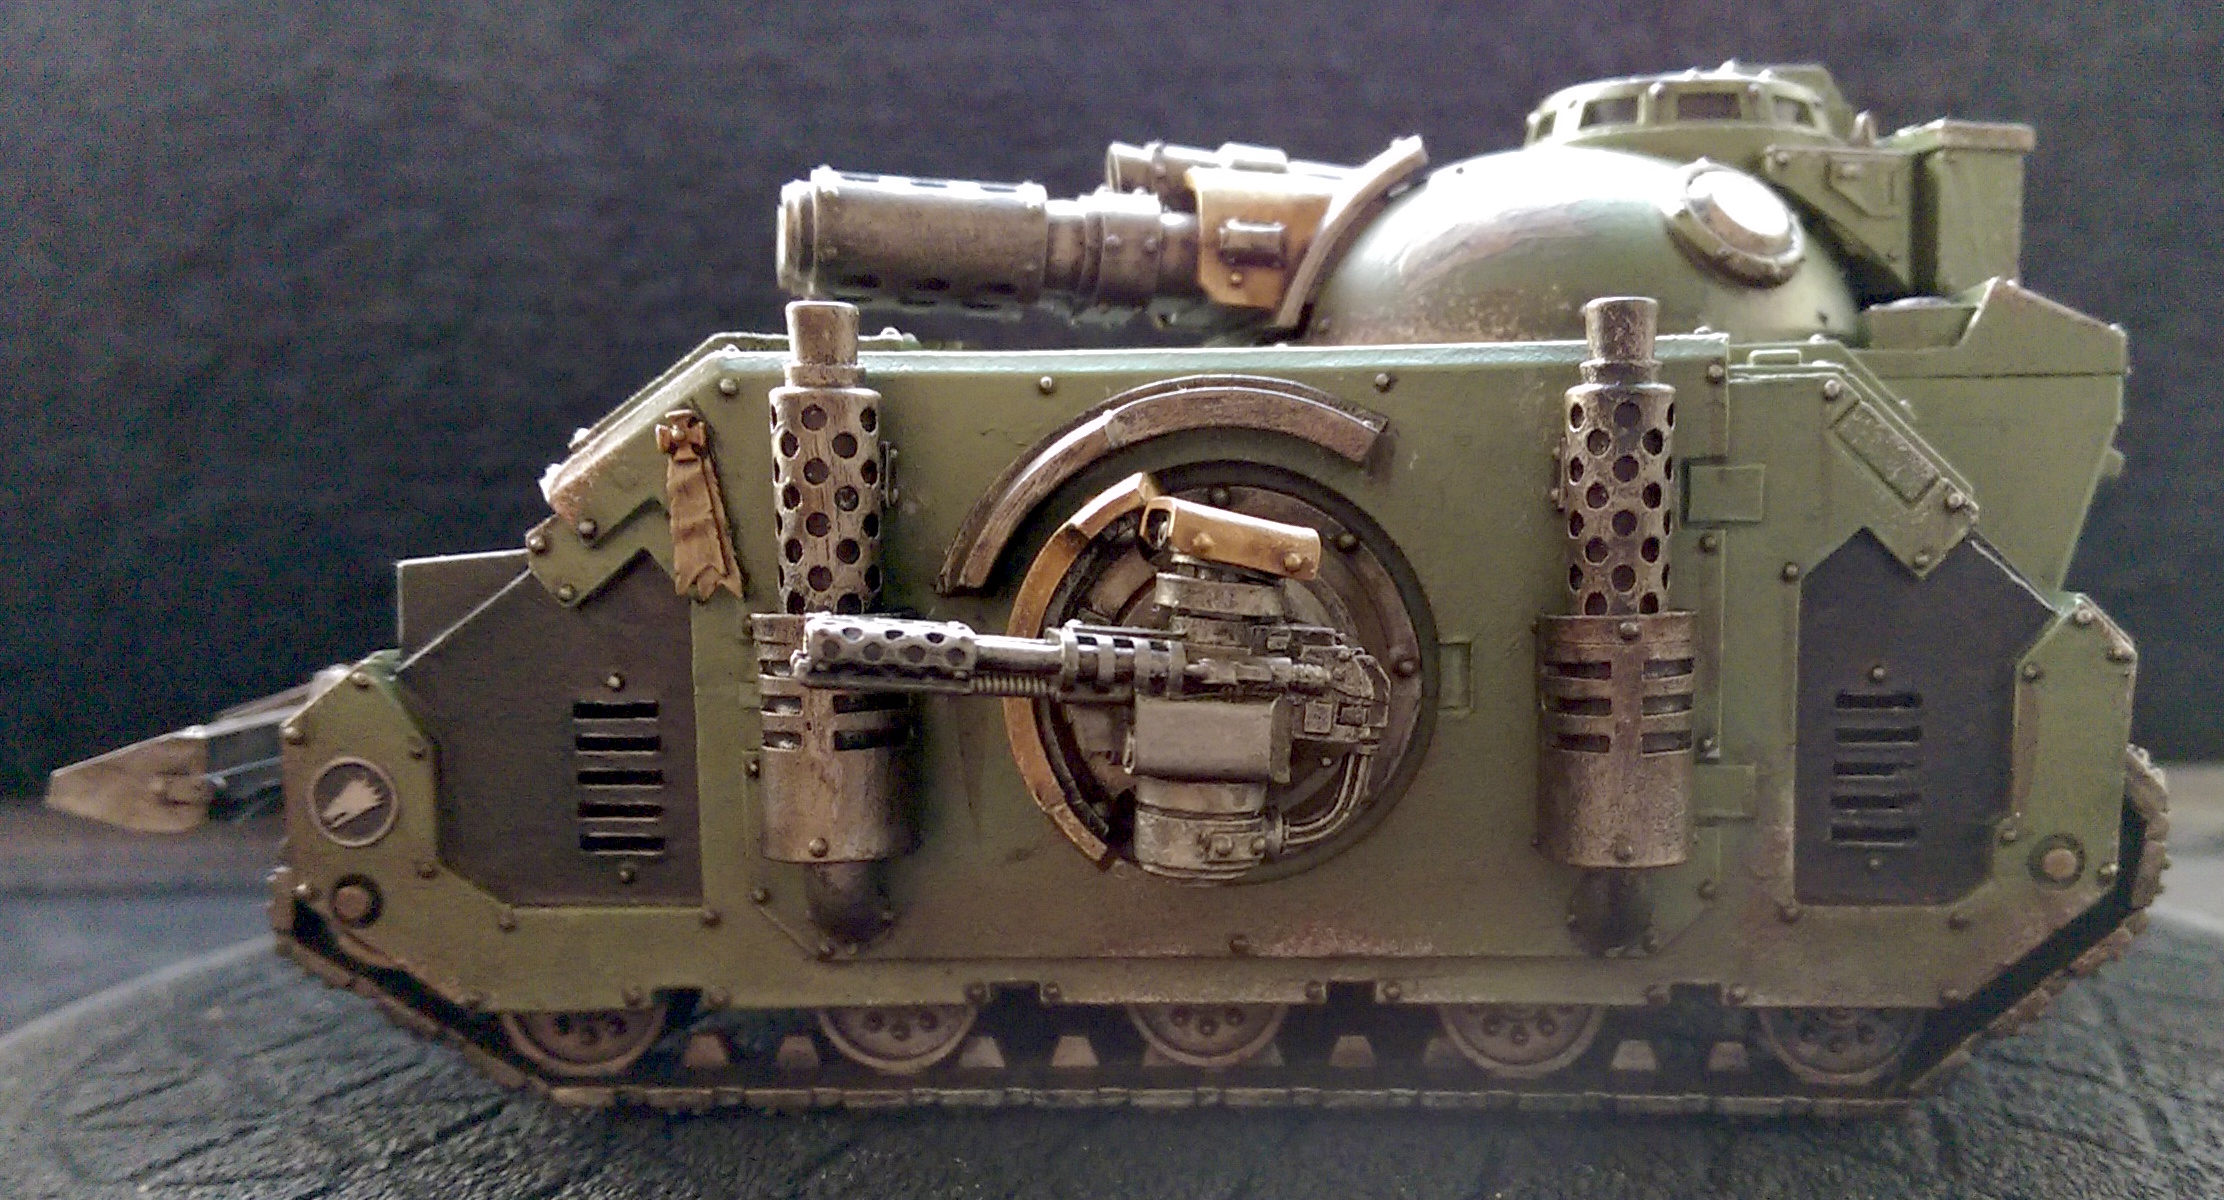
Salamanders Deimos Pattern Predator Infernus
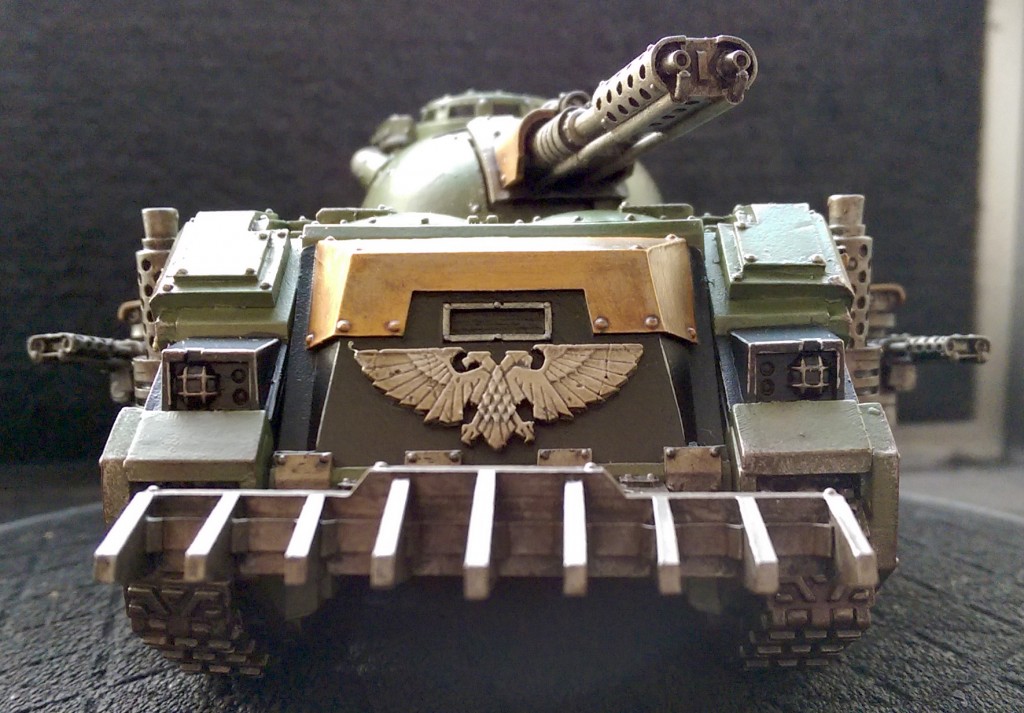
I am quite pleased to have finally (after 9 months) completed this model, as it's been a complete pain in the arse. The cast was fairly poor (bad enough that I could probably have got a replacement if I'd wanted) and I struggled with the paint job, thanks to my bad habit of assembling the model too much before painting (specifically, the exhaust pipes on the side) which meant that I had to mask off and respray a few areas to cover up the places where I'd got paint where it should not have been.
I magnetised all the weapons, so I can swap the Flamestorm Cannon for a Magna-Melta, and maybe also change the sponsons if I pick up some alternatives at a bits site or elswhere. I've also made some plastic doors that fit into the sponson and turret sockets, so I could even use it as a Rhino or Razorback if I wanted.
More pictures below.
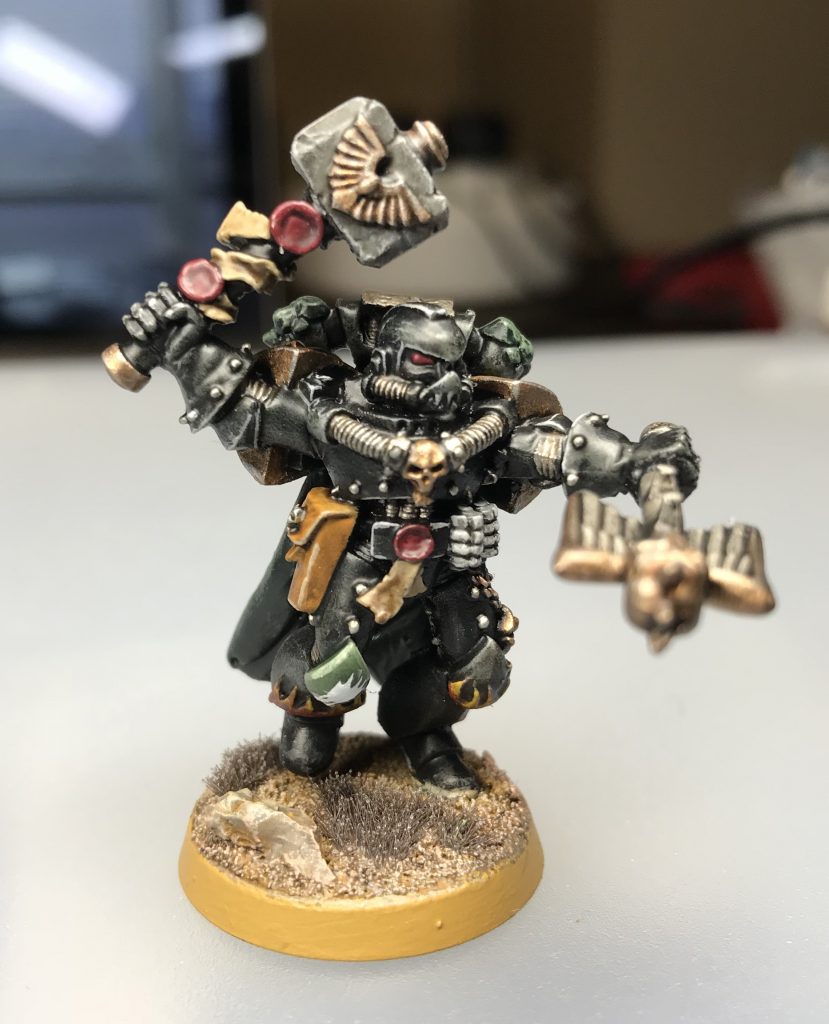
Kavan Bor'seth, Chapter Master of the Salamanders, Regent of Nocturne (M35)
Kavan Bor'seth was Chapter Master of the Salamanders during the 36th Millenium. After a distinguished career as a Sergeant in the 3rd company, he was elevated to the ranks of the Firedrakes, ultimately rising to lead the First Company and assume the mantle of Regent of Nocturne. He was presumed killed after many years of service, when his strike cruiser Sentinel of Hesiod was lost in the Warp en route to the Diadin sector.
Bor'seth wore a legendary suit of Artificer armour dating back to the Great Crusade. The suit was the subject of many legends: some say that it was wrought by Vulkan himself for one of his favoured commanders, others say that it was claimed as a trophy from the decapitated corpse of a traitor legionary during the Scouring. Alas, due to the loss of the Sentinel, this relic of the chapter is now lost forever, taking its secrets with it. The suit's backpack includes an integrated auspex and teleport homer - technology once common during the Great Crusade but since lost to the Imperium.
Bor'seth's preferred armament was a finely-wrought Thunder Hammer (with a similar pedigree to the armour he was clad in) and a regulation combi-melta, a weapon he grew fond of during his time in the Sternguard squads of the Firedrakes.
As soon as I saw it, I realised the conversion possibilities of Armillus Dynat (from the the Horus Heresy Character Series) and decided that I wanted to give it a go. The scale-pattern of the Heresy-era Alpha Legion works just as well as drake-scale in my opinion. And given how distinctive (and expensive) the model was, he couldn't just be a veteran sergeant or company captain, so I decided to write a biography for him and place him far enough back in history as to avoid any conflicts with canon.
More pictures below.

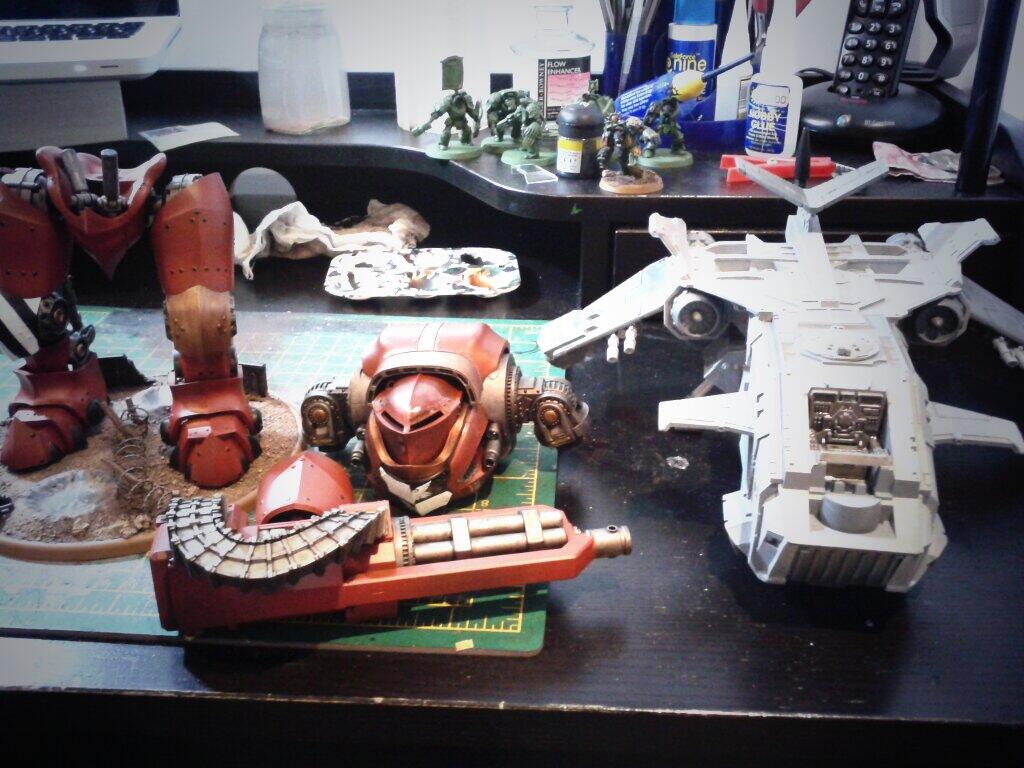
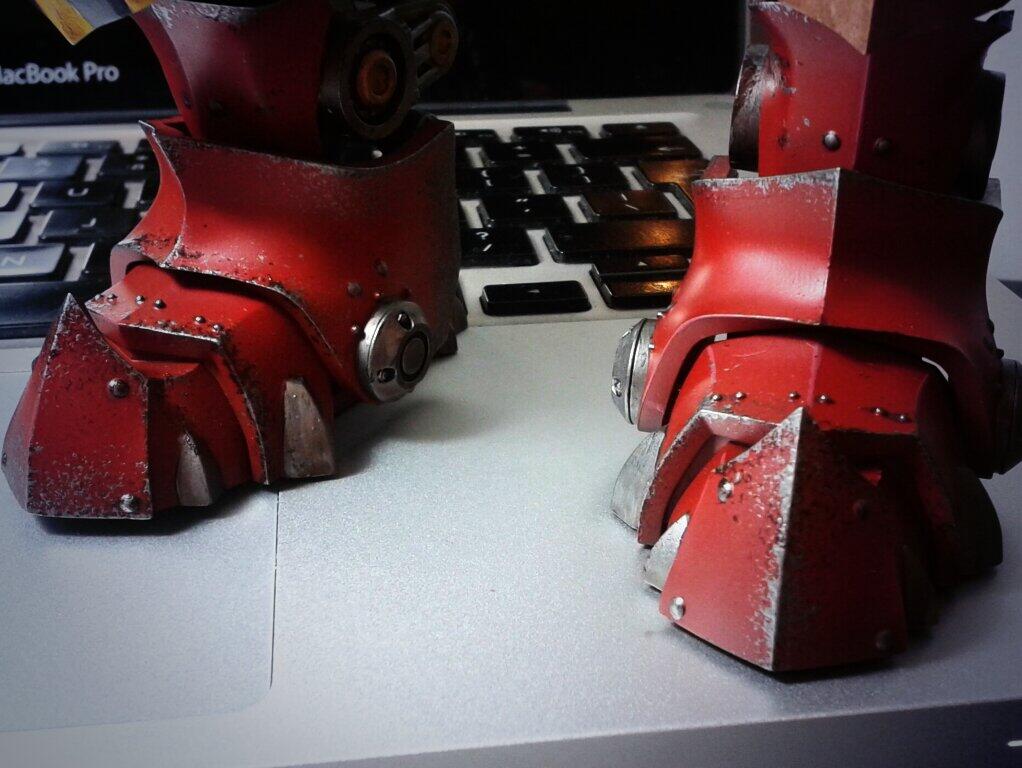
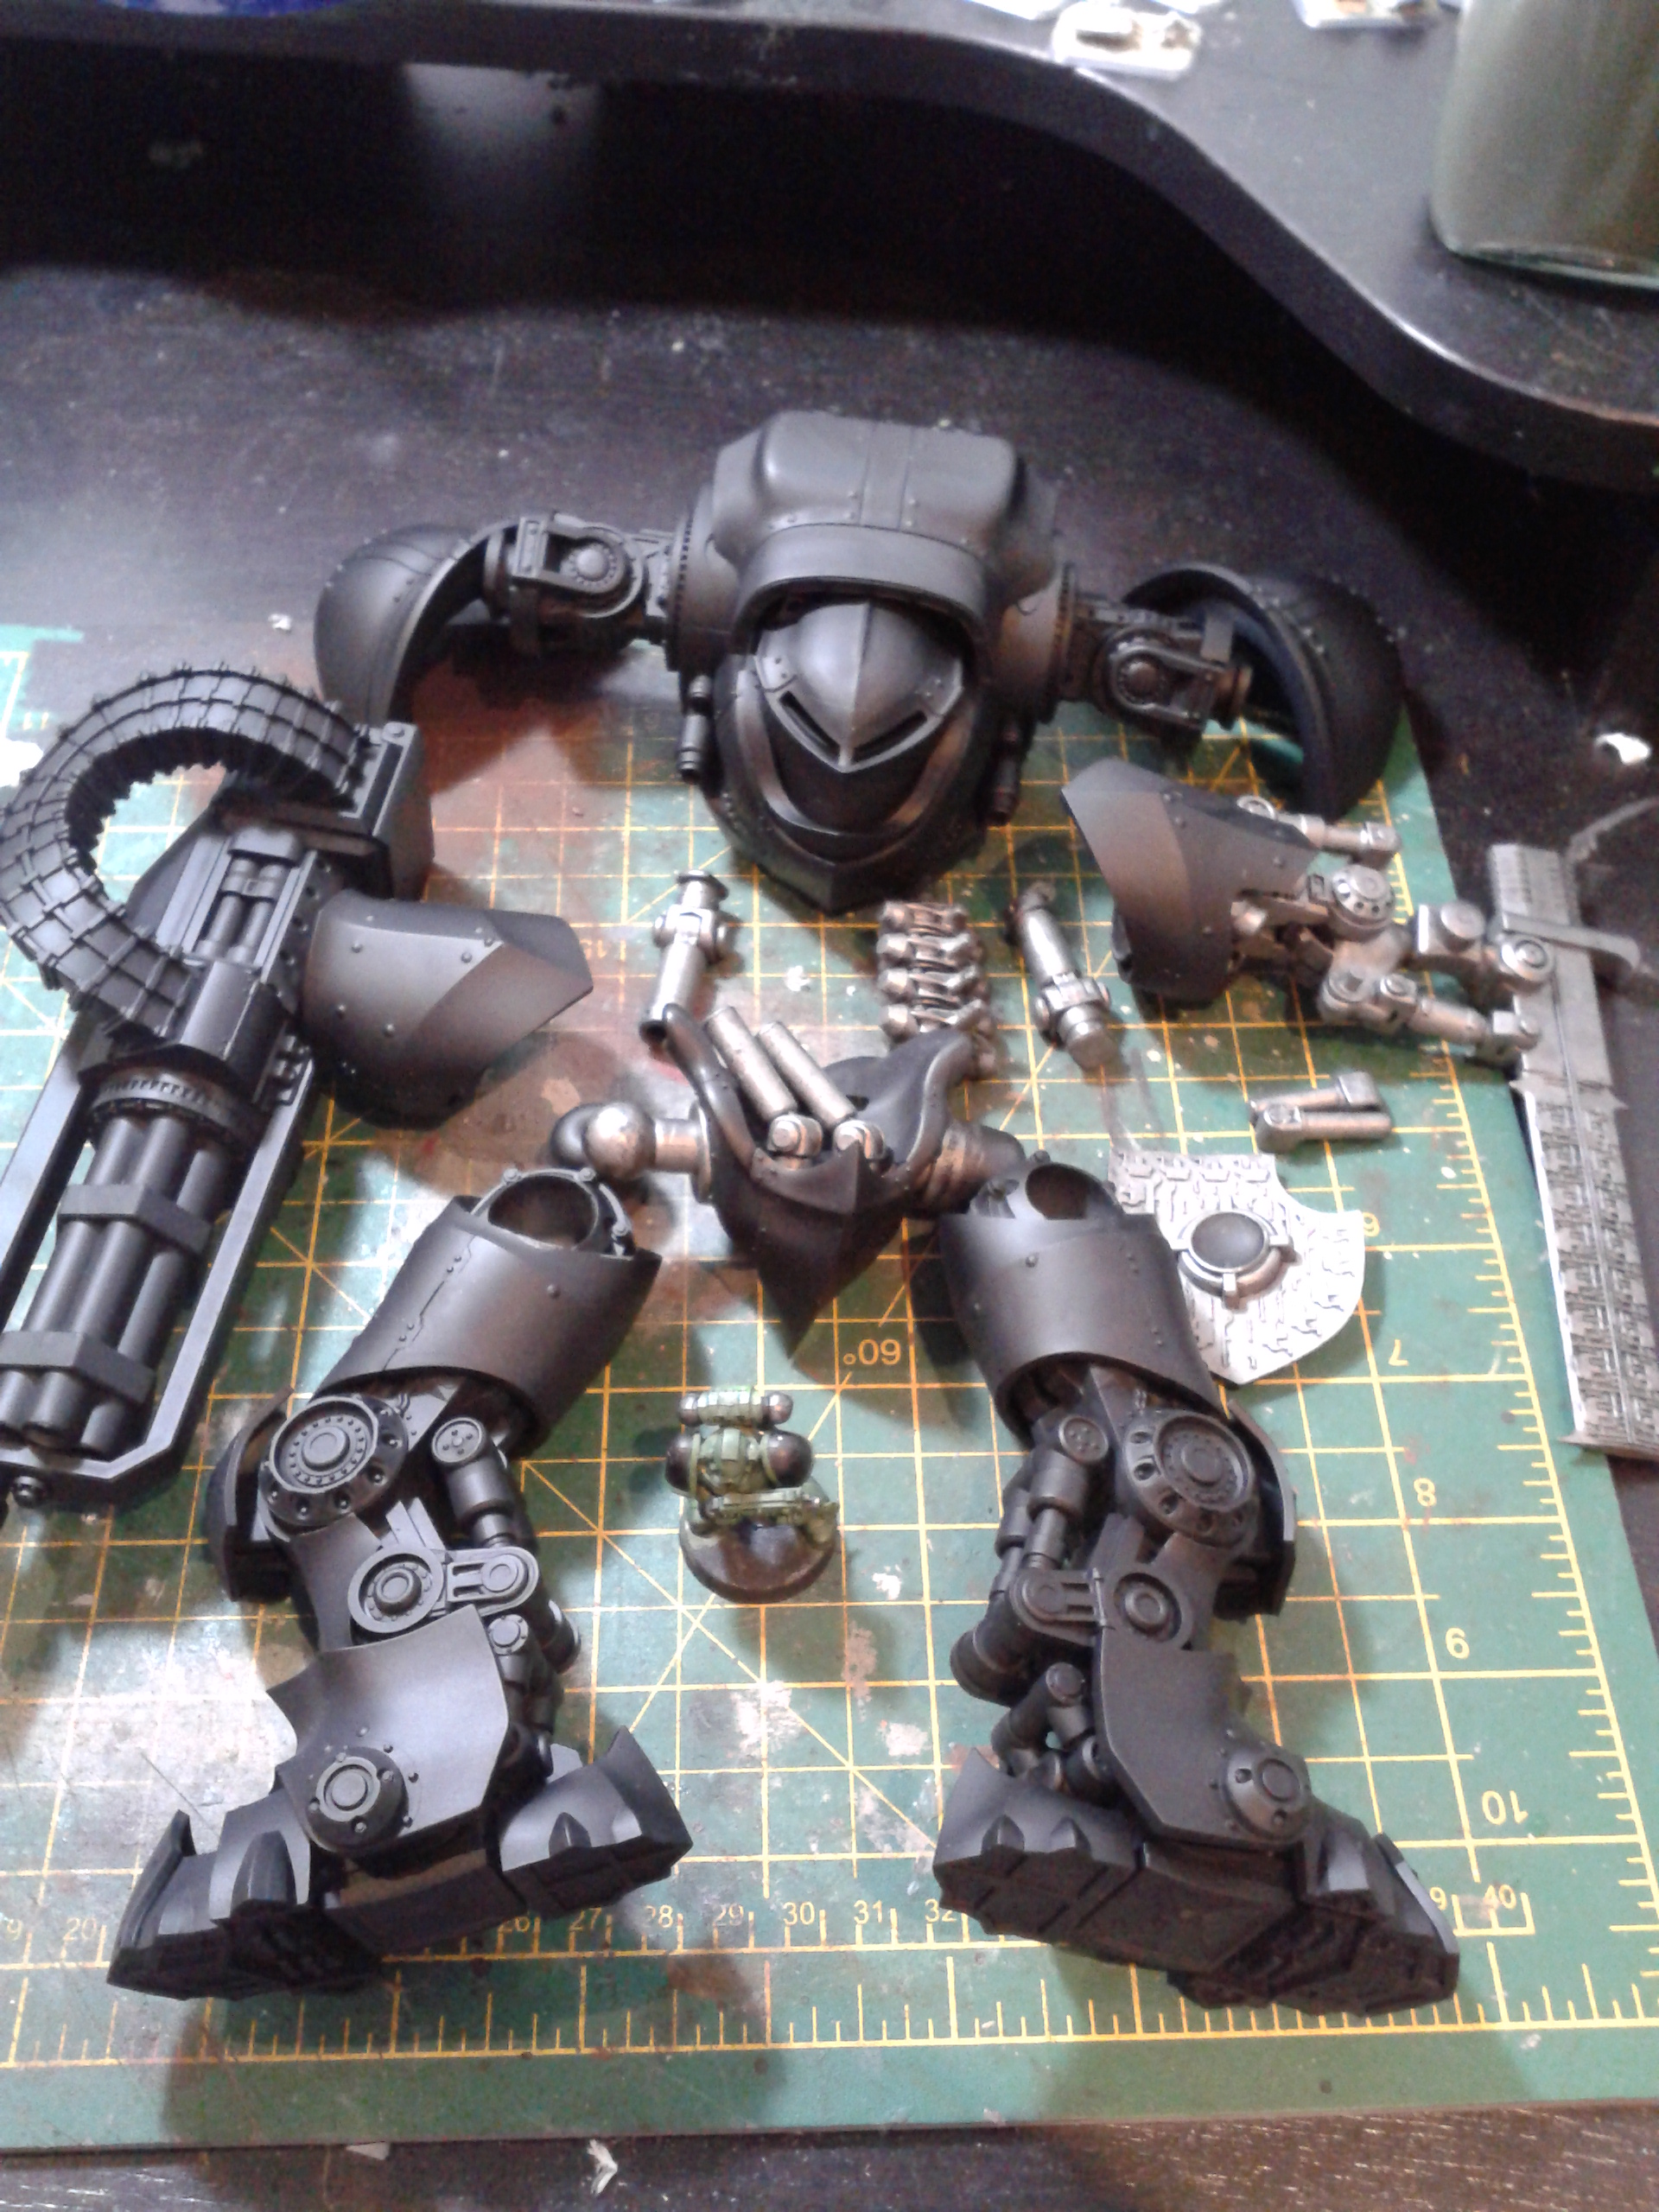
Bray'arth Ashmantle, Venerable Dreadnought of the Salamanders
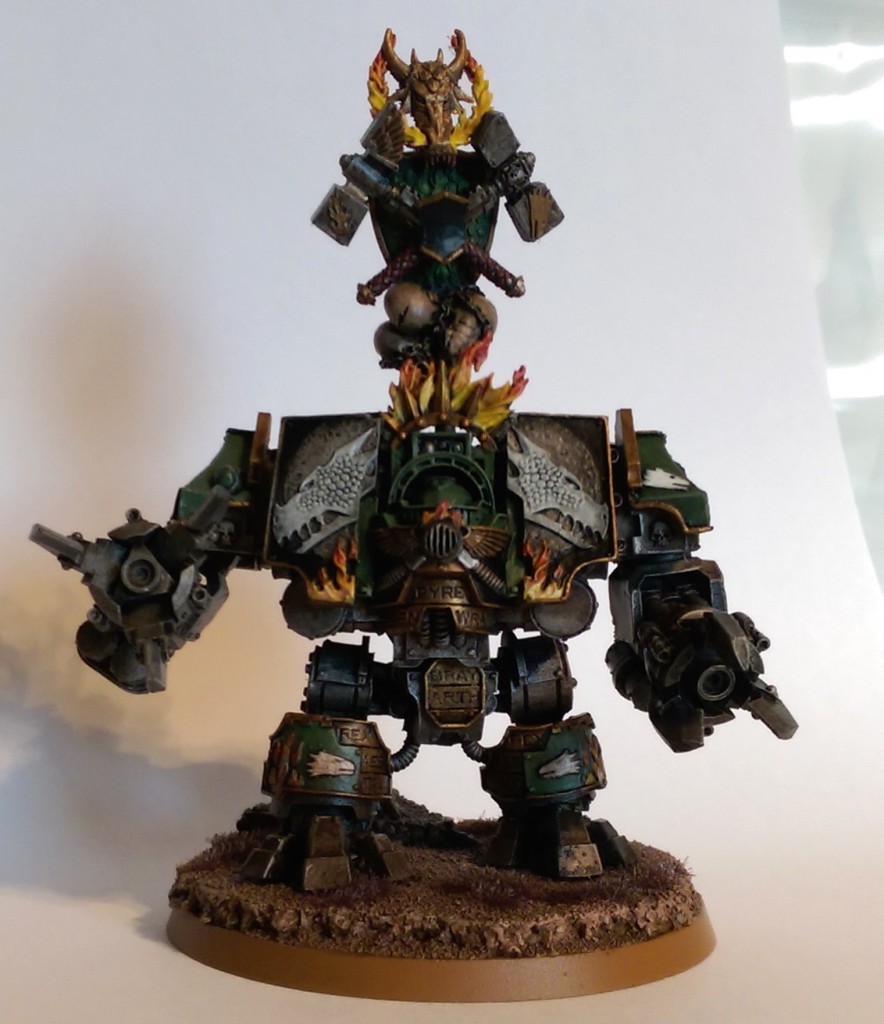
It's kind of silly that it's taken me more than four years to paint this model, but I'm so glad that I finally did! Soon after I bought it, I primed it using Army Painter Army Green, the same as all the other models, but I quickly realised that it was a mistake and that I should have primed it black instead; and it's taken me this long to get round to stripping it and re-priming it using the airbrush.
Bray'arth is a great centerpiece model and counts as an HQ choice for Salamanders army. I've designed my Salamanders army around Vulkan He'stan in that I have a lot of meltas, but there's no reason why I can't take both models as long as the points limit allows.
More pictures below.
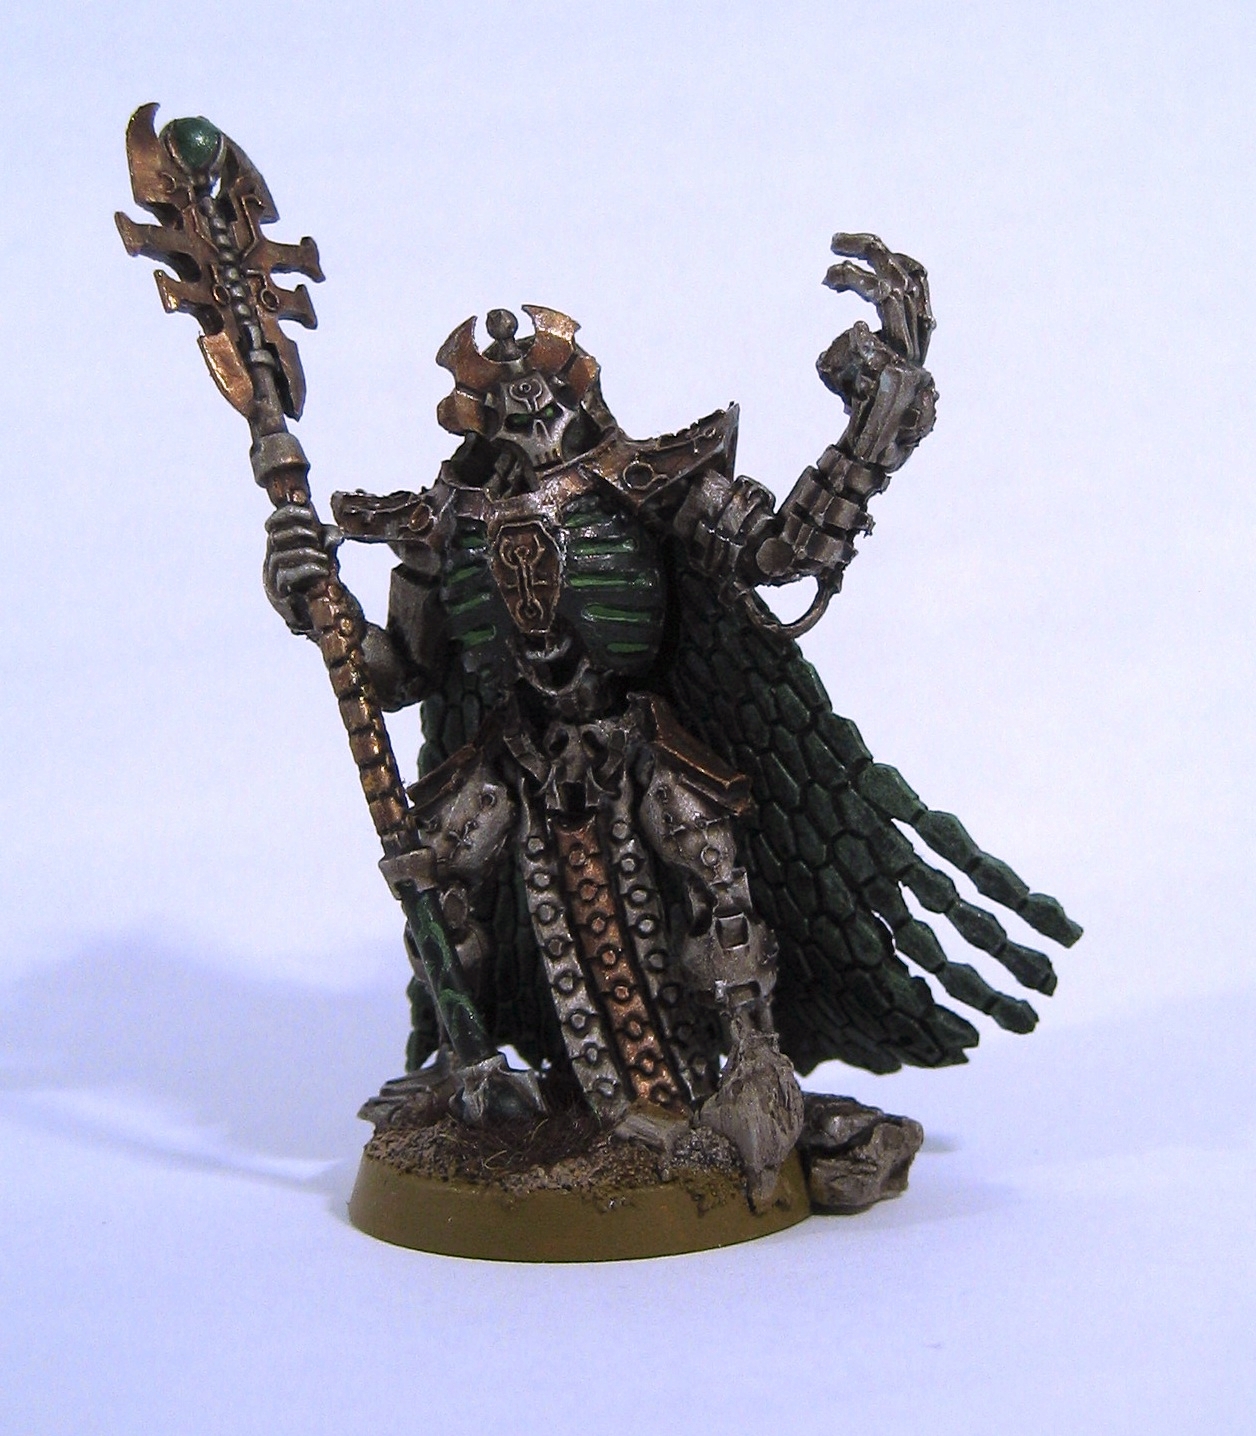
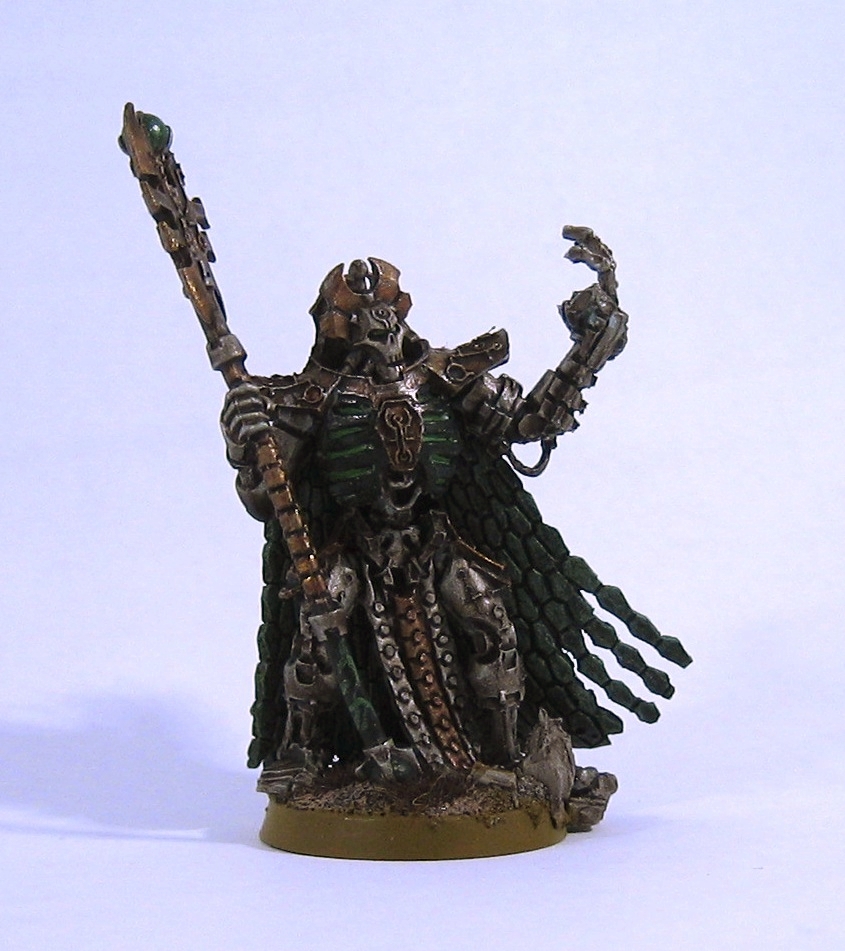
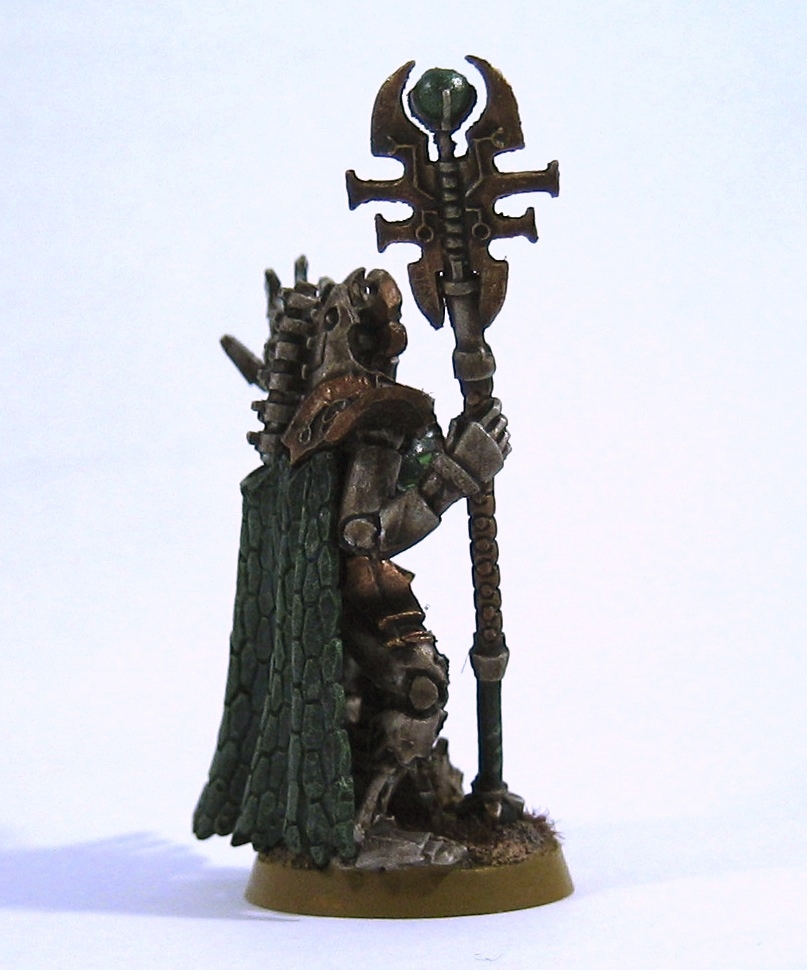
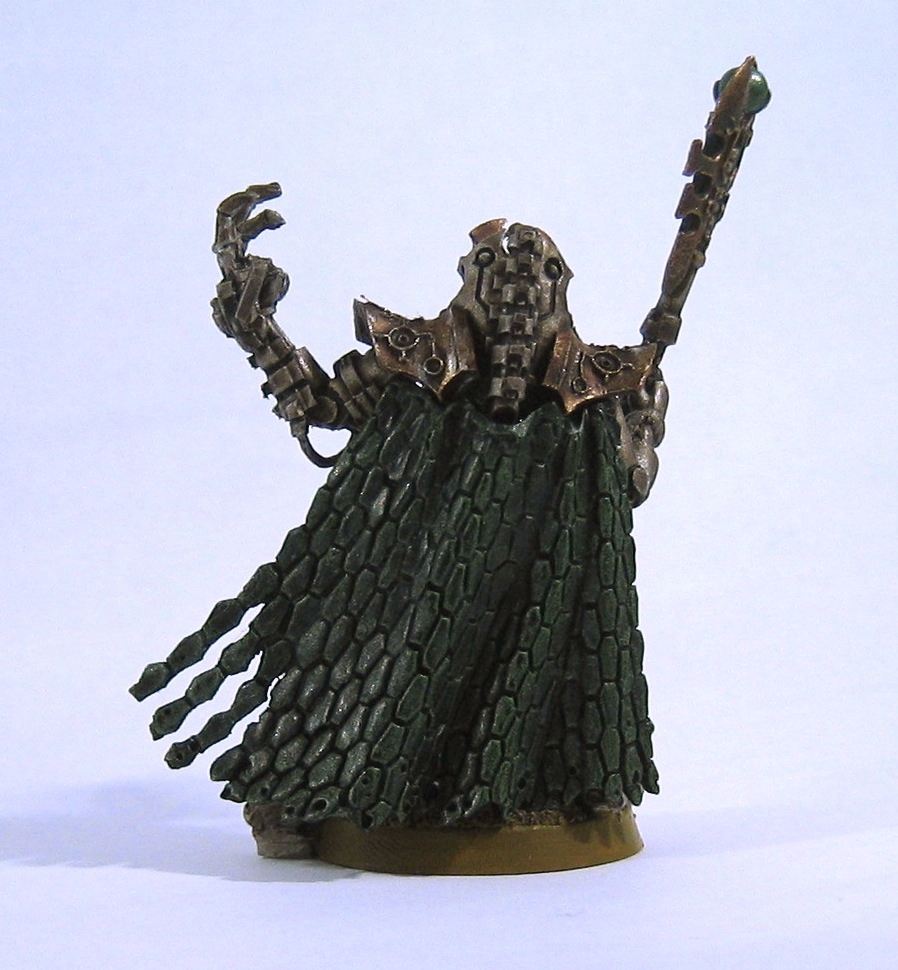
Classic Necron Lords

Here is a pair of classic metal Necron lords. I picked them up in a bag-o-bits that I bought from vidpui on Twitter, as a result I've customised them a little bit.
I'm rather pleased with how the cloaks turned out; although the effect doesn't really come over in the photos. I drybrushed them with a sequence of greys of various shades, then mixed a glaze using the ancient blue ink I used on the C'tan shard with some Vallejo Model Air yellow and painted it over the grey. I then highlighted the raised areas with a bright, slightly metallic green.
More pics below the fold.


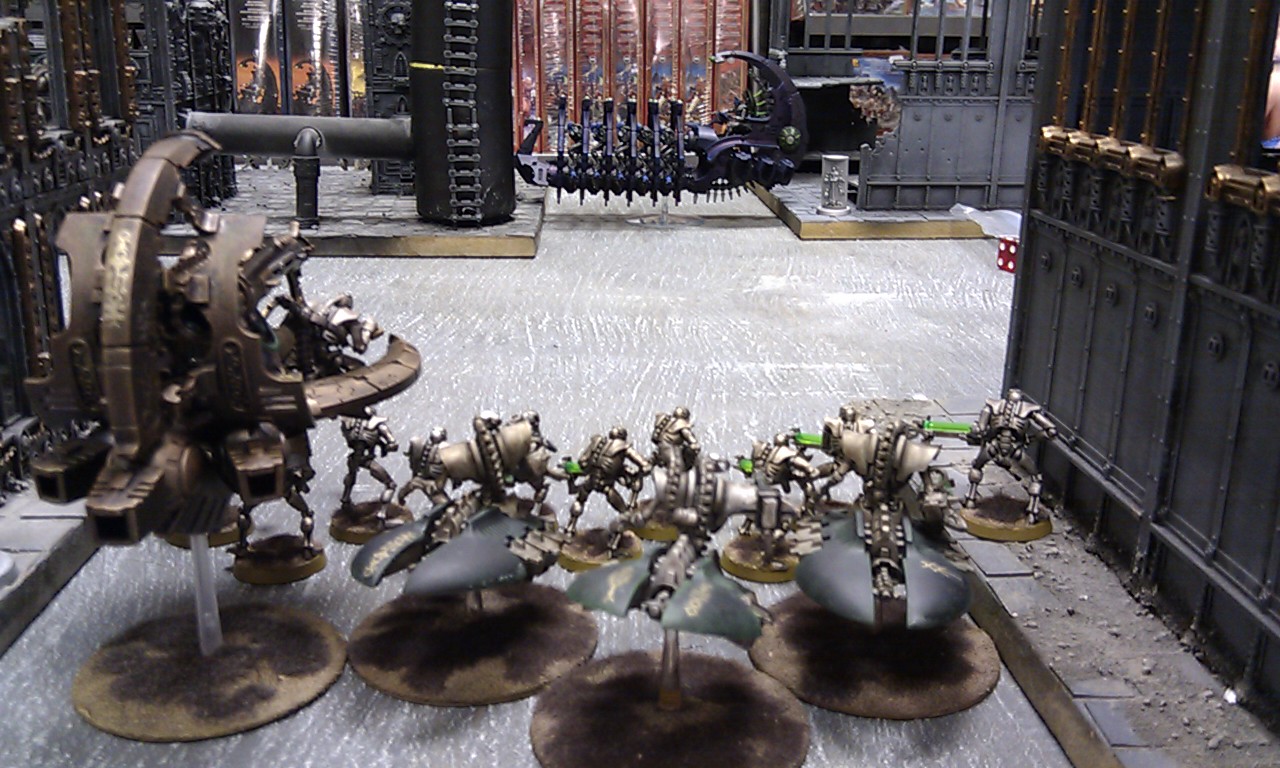
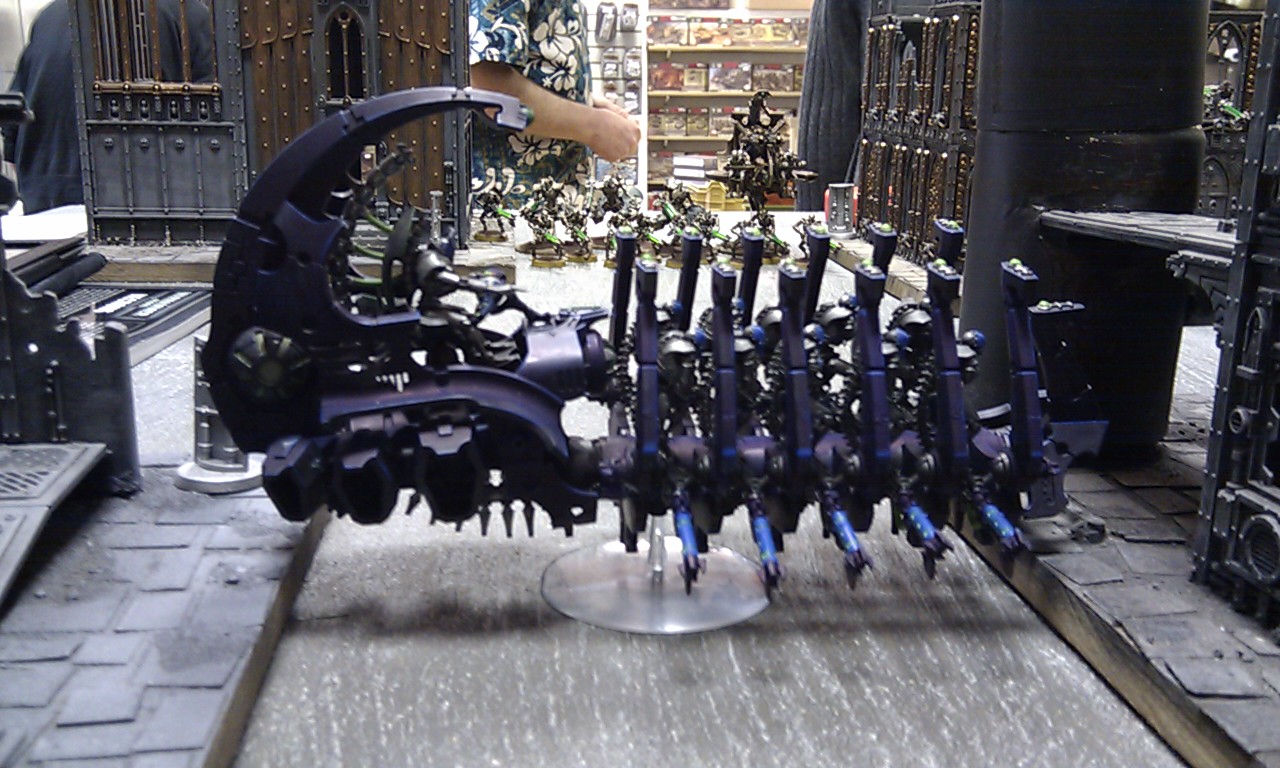
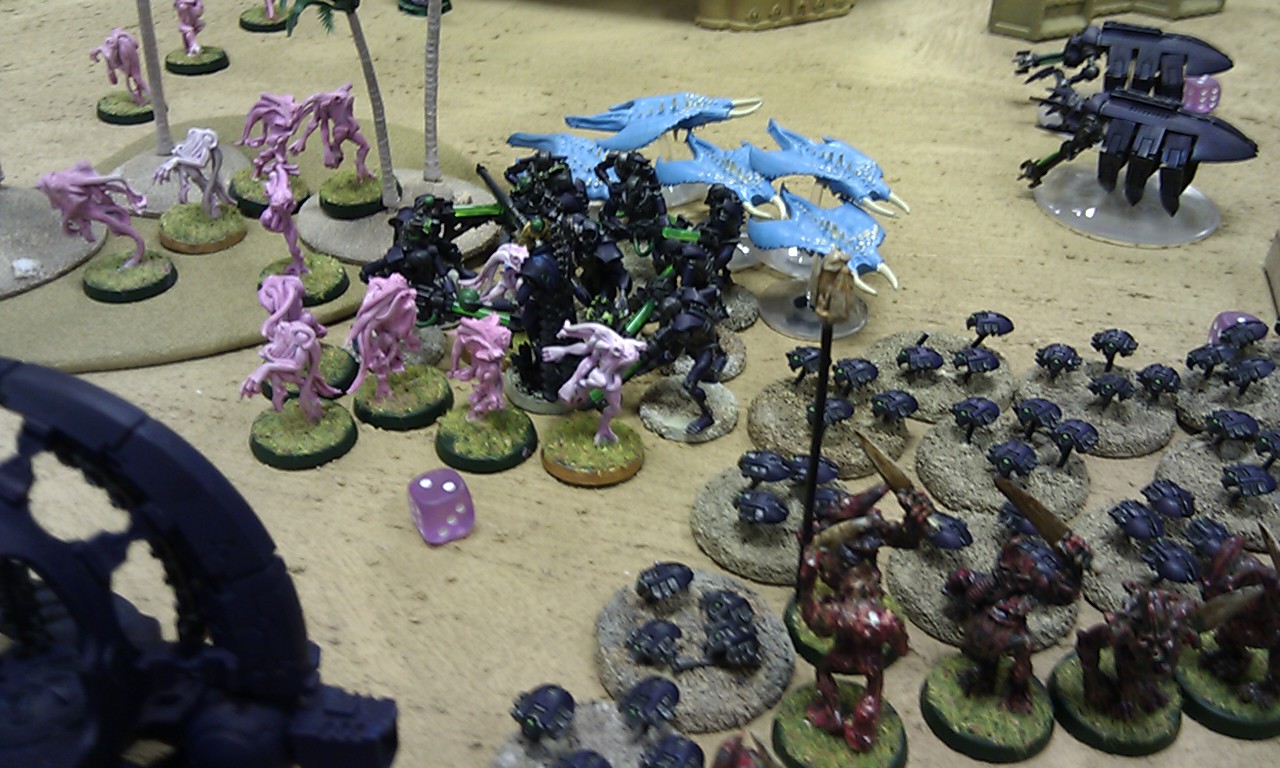
My Completed Warhammer 40,000 Necron Army
Here is my Necron army (all 4,000 points of it), completed after nearly six years (I started it in late 2009).
Obviously, no army is ever really finished. I expect that I will probably buy and paint new pieces as the whim takes me, but I now have enough stuff that I can have a few options when playing at 1,500 points and higher (rather than simply taking everything I own).
More pictures below the fold.
Puppets War Missile Turrets
The Mark II Missile Turret from Puppets War does a pretty good job of turning a Rhino/Razorback into a Whirlwind. The design would work quite well on Deimos-pattern Rhinos.
More pictures below.
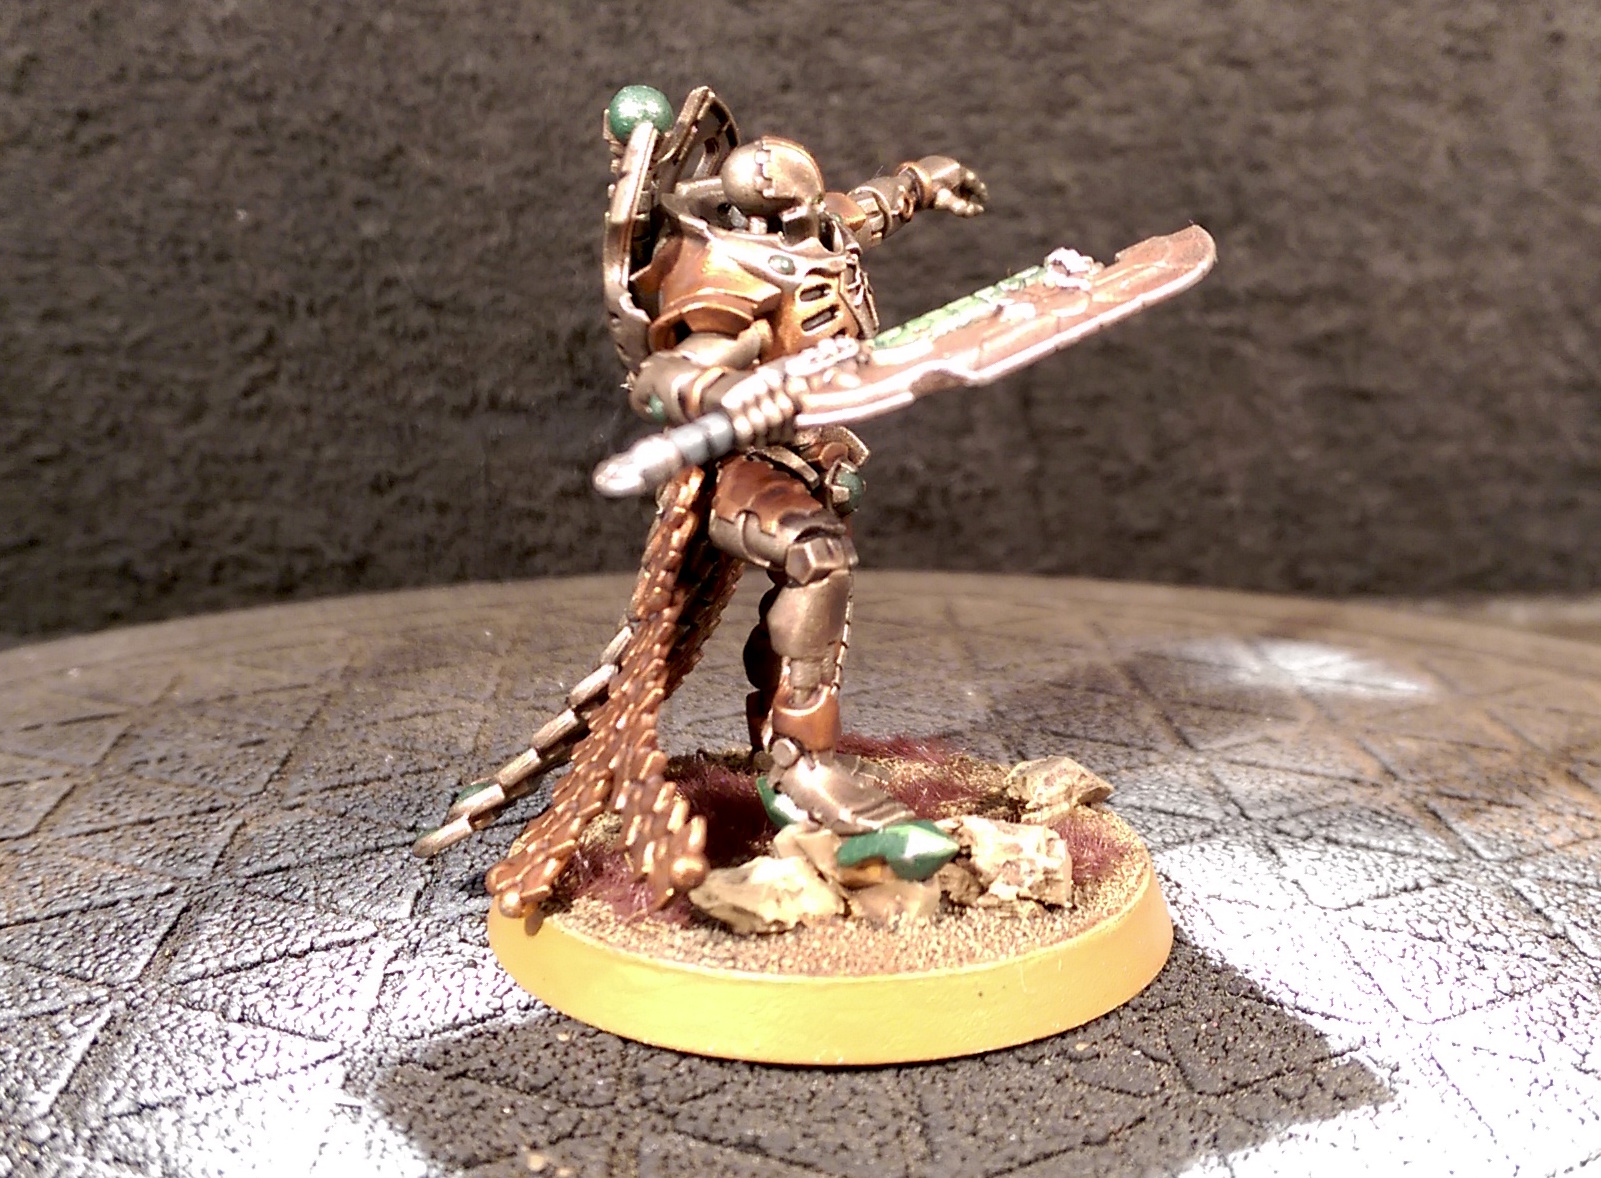
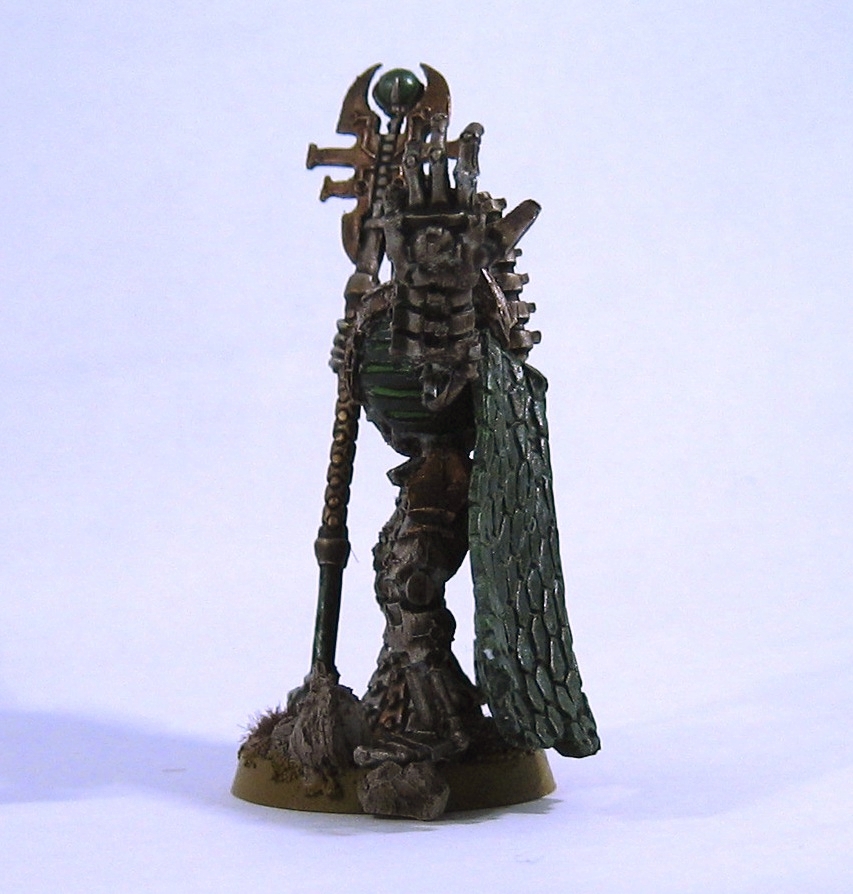
Necron Overlord

Here is my version of the new Necron Overlord released with the new codex. The new rules allow you to equip your Overlord with any wargear you like so I took a couple of bits from my bits box to make him unique.
He's on a 40mm base which I think works quite well for characters. I'm tempted to rebase some of my other characters on the same size base so that he doesn't stick out. He got the same basic paint job as all the other models in the army.
It occurred to me that his pose is somewhat reminiscent of Usain Bolt's signature pose, what do you think?

More pictures below.


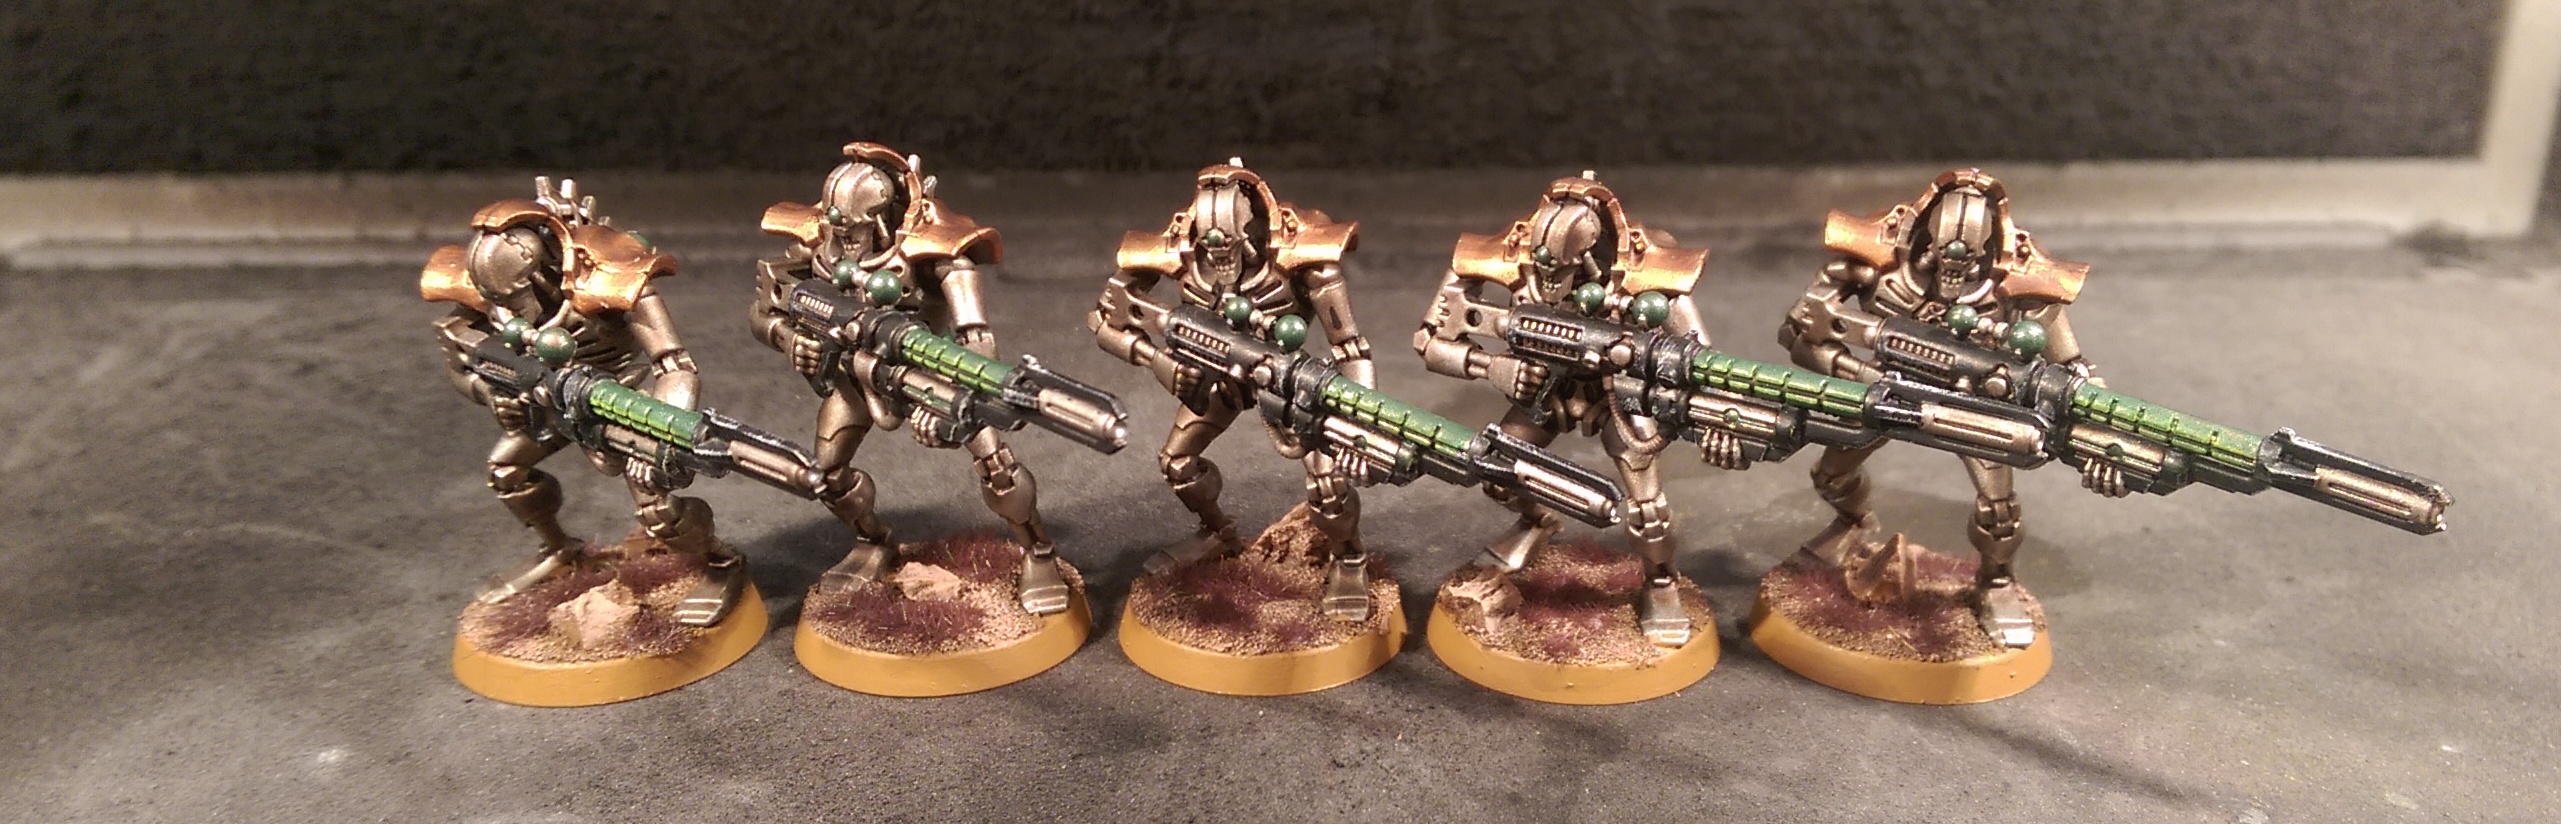
Necron Immortals

Nothing especially unusual about these guys. I already have a unit of Immortals with Tesla Carbines so I chose to give these guys Gauss Blasters for diversity purposes.
The Army Painter Chainmail spray went on a bit too thick in places — I've been spoiled by my airbrush — and a couple of the models have distinctly featureless faces. I decided against repainting for the simple reason that although I'm a big fan of Necrons, my aim with this wave of reinforcements is to get the army into a usable state, rather than produce a work of art.
More to follow...
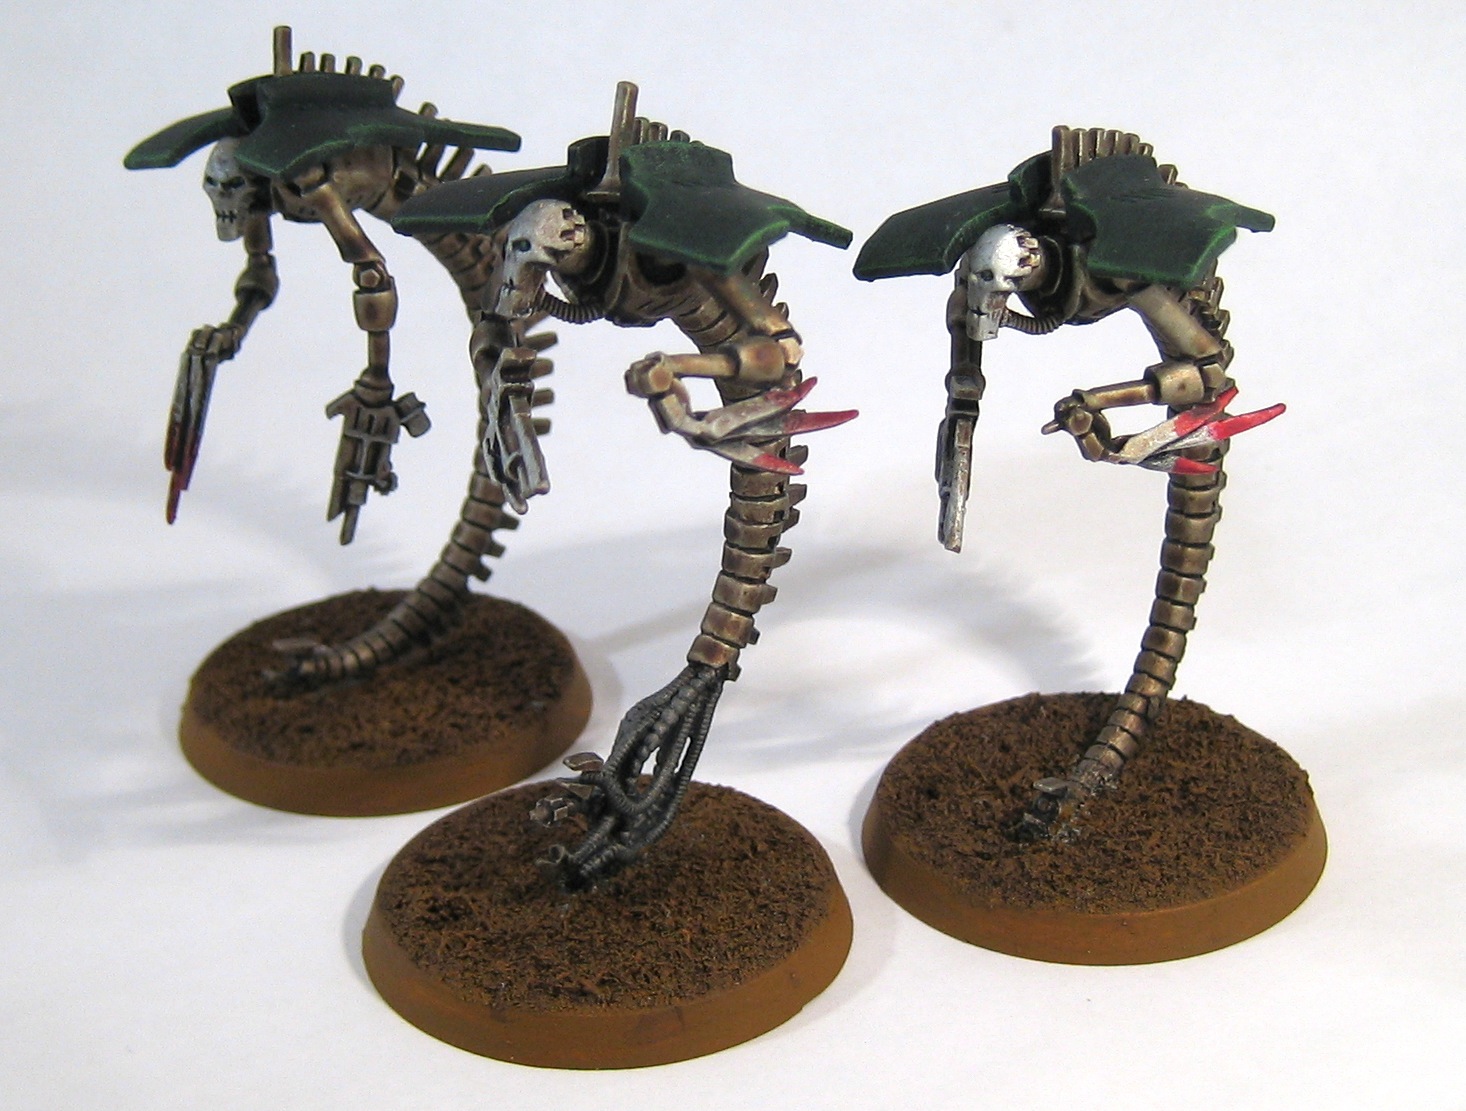
Necron Deathmarks and Old-School Wraiths

I've just finished these models, the next wave of reinforcements for my 40K Necron army.
It's been an interesting experience to paint models to match the colour scheme I developed more than five years ago; getting the green hue on the shoulder blades of the wraiths to match the original models was quite challenging. My ability as a miniature painter has improved a bit in the years since I started my Necron army, and it's interesting to compare "before" and "after", and realise what I would do differently if I were to start again now.
Anyway, these are done now, but I still have a few more models to go: some Immortals (with Gauss Blasters), Triarch Praetorians (with Particle Casters and Voidblades), a Doom/Night Scythe, and a dozen bases of scarabs. Stay tuned!
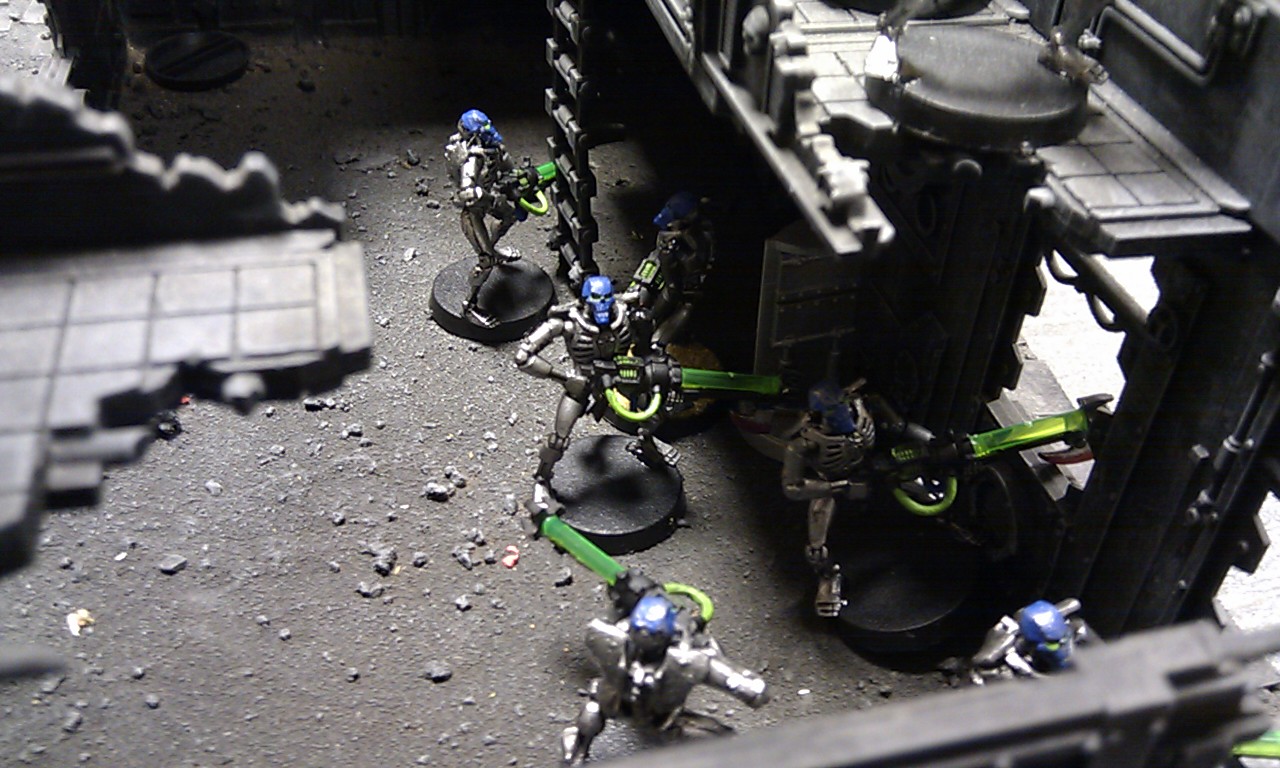
C'tan Shard of the Nightbringer
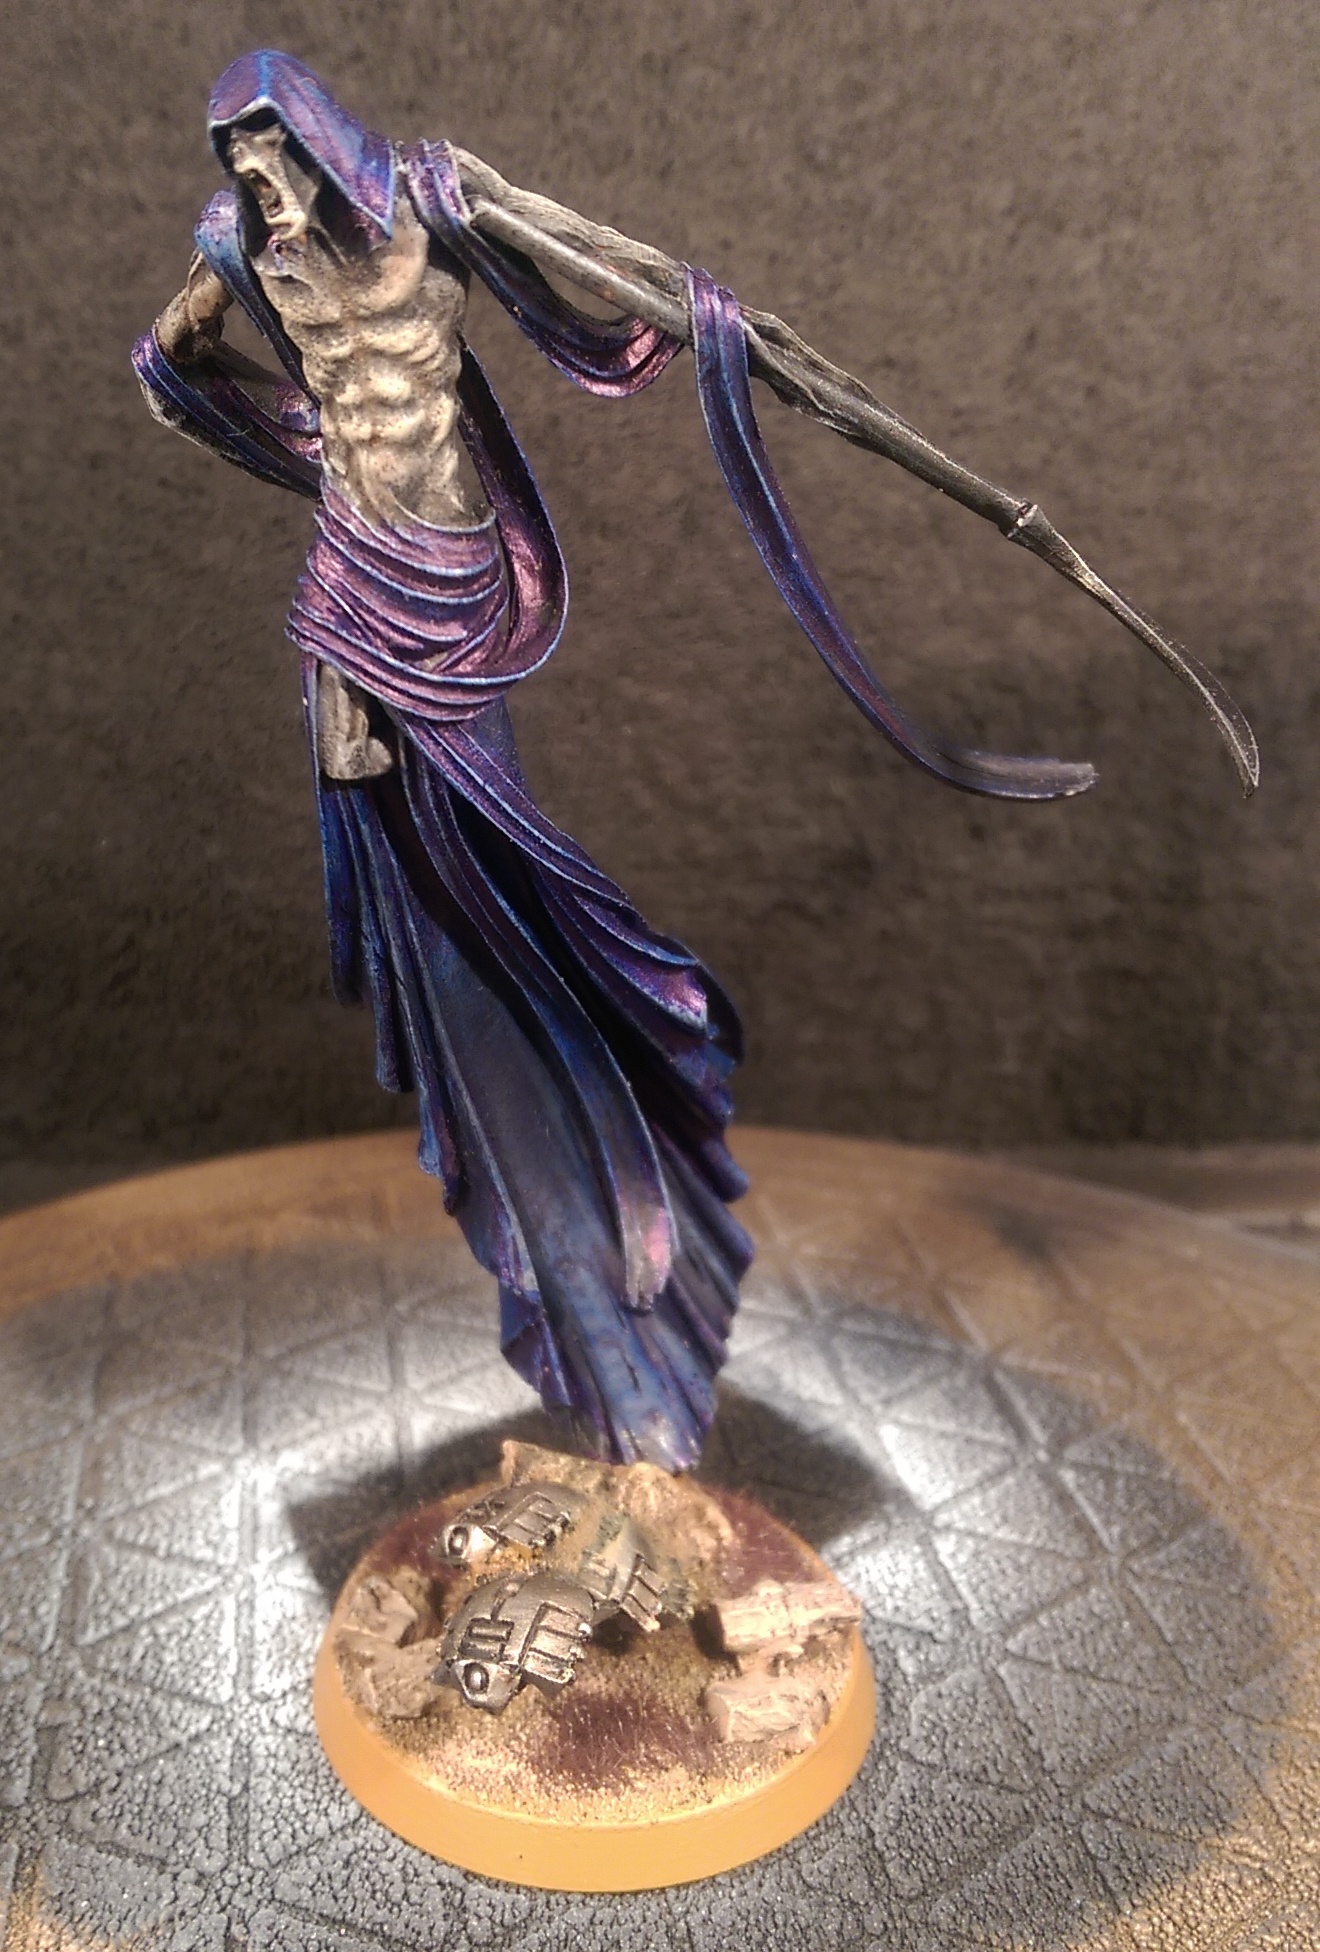
Here is the first finished model from the wave of reinforcements to my Necron army. I'm fairly pleased with the opalescent effect I accidentally achieved on the robes (which is the result of using an ancient Citadel ink over black drybrushed with grey), but the drybrushing on the torso could be better.
More photos after the jump...
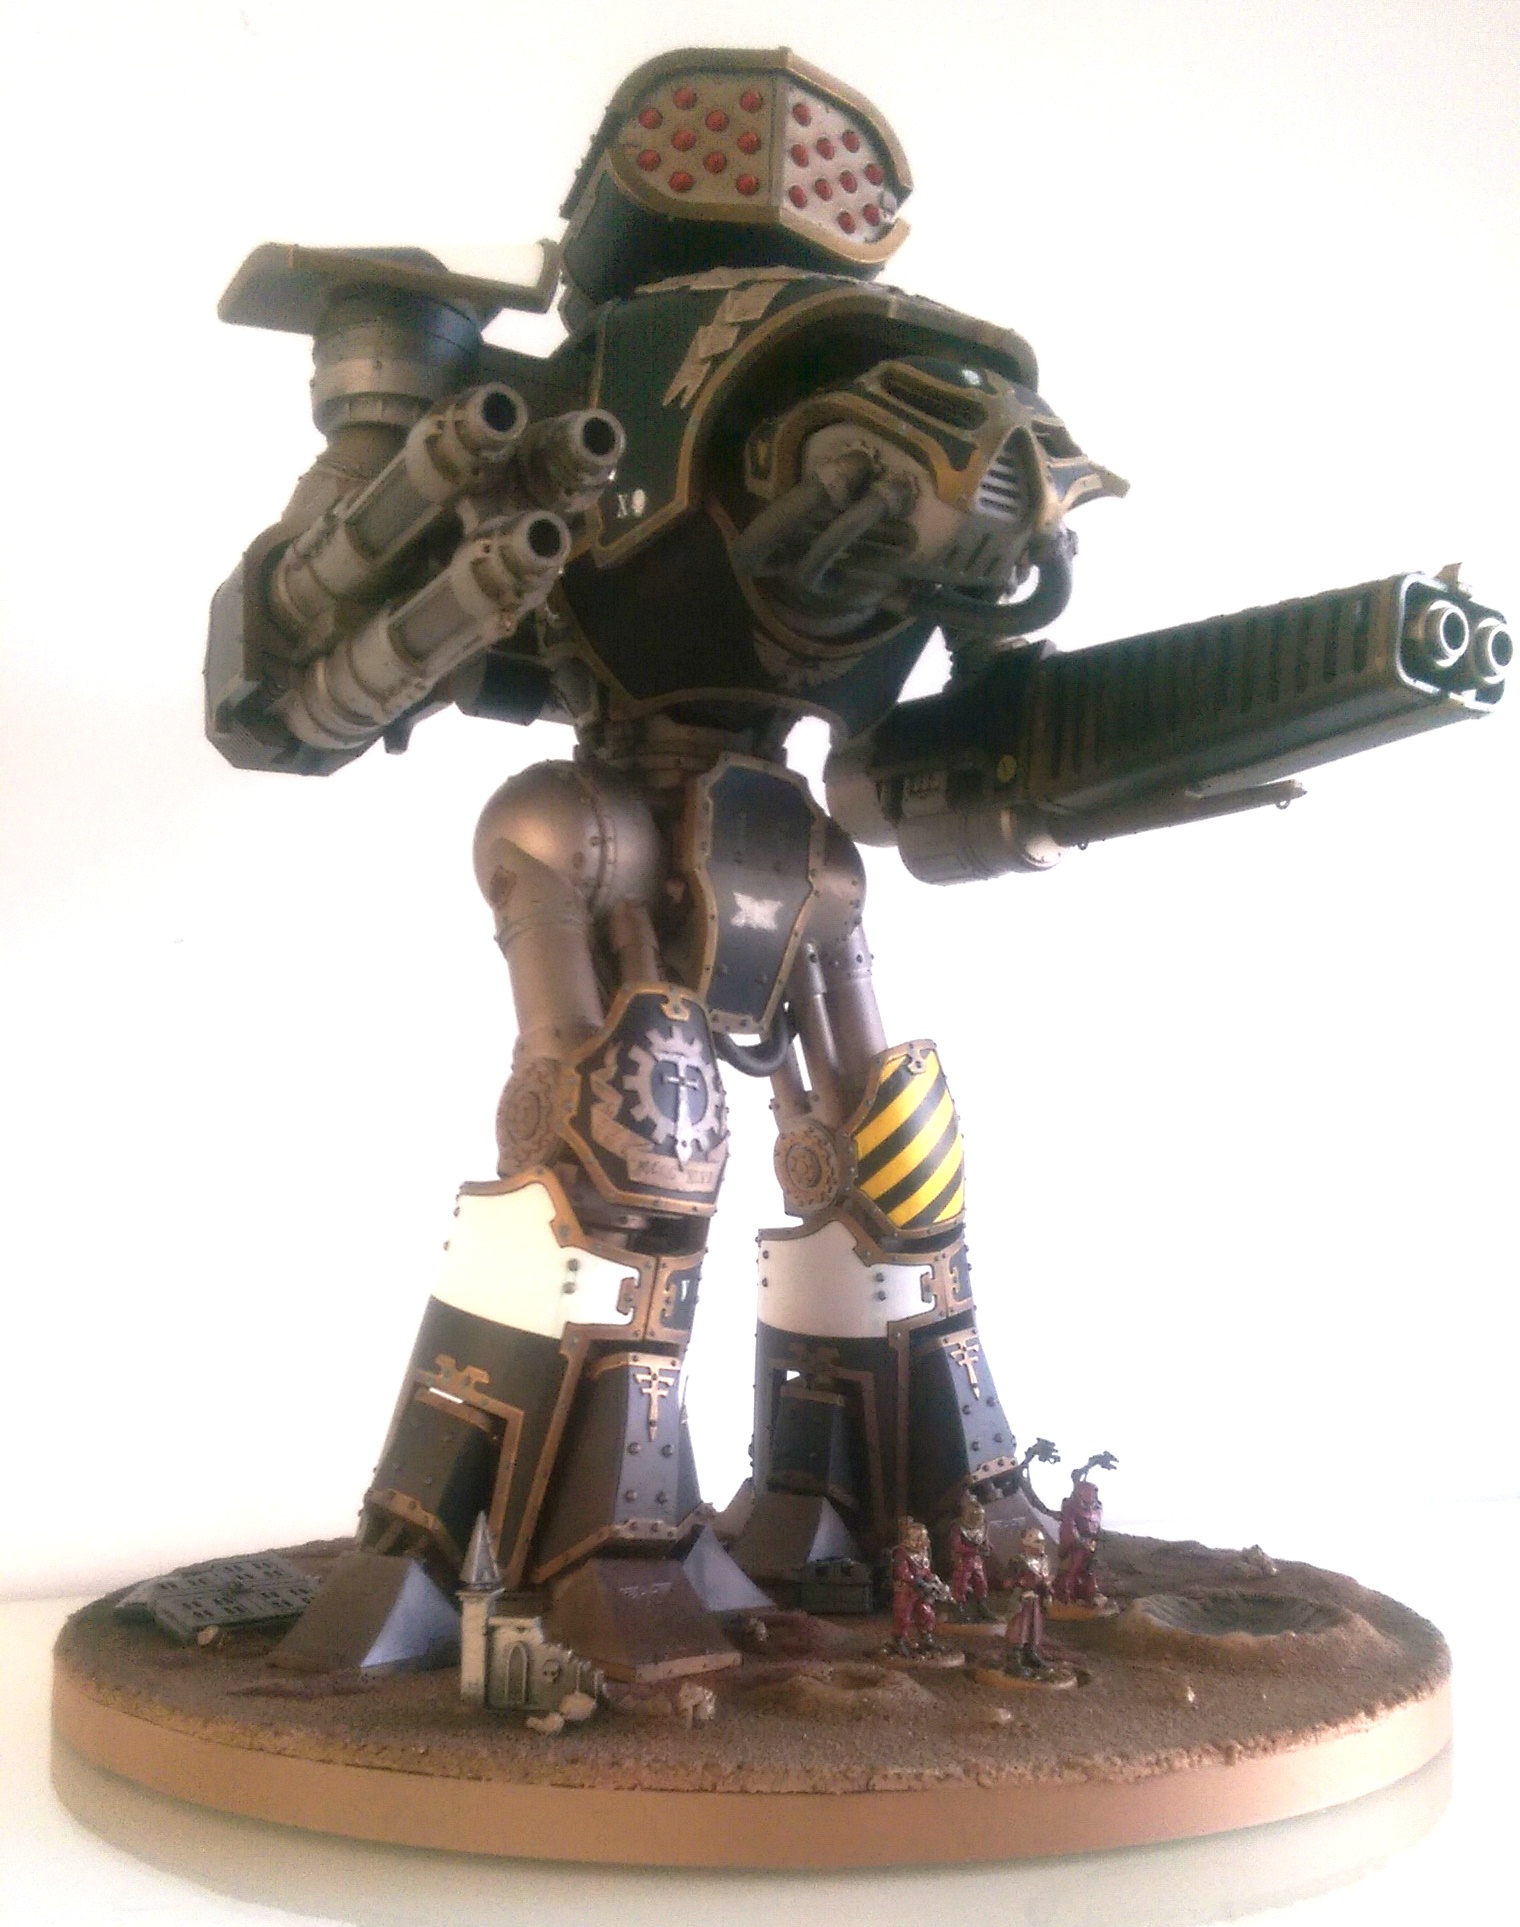
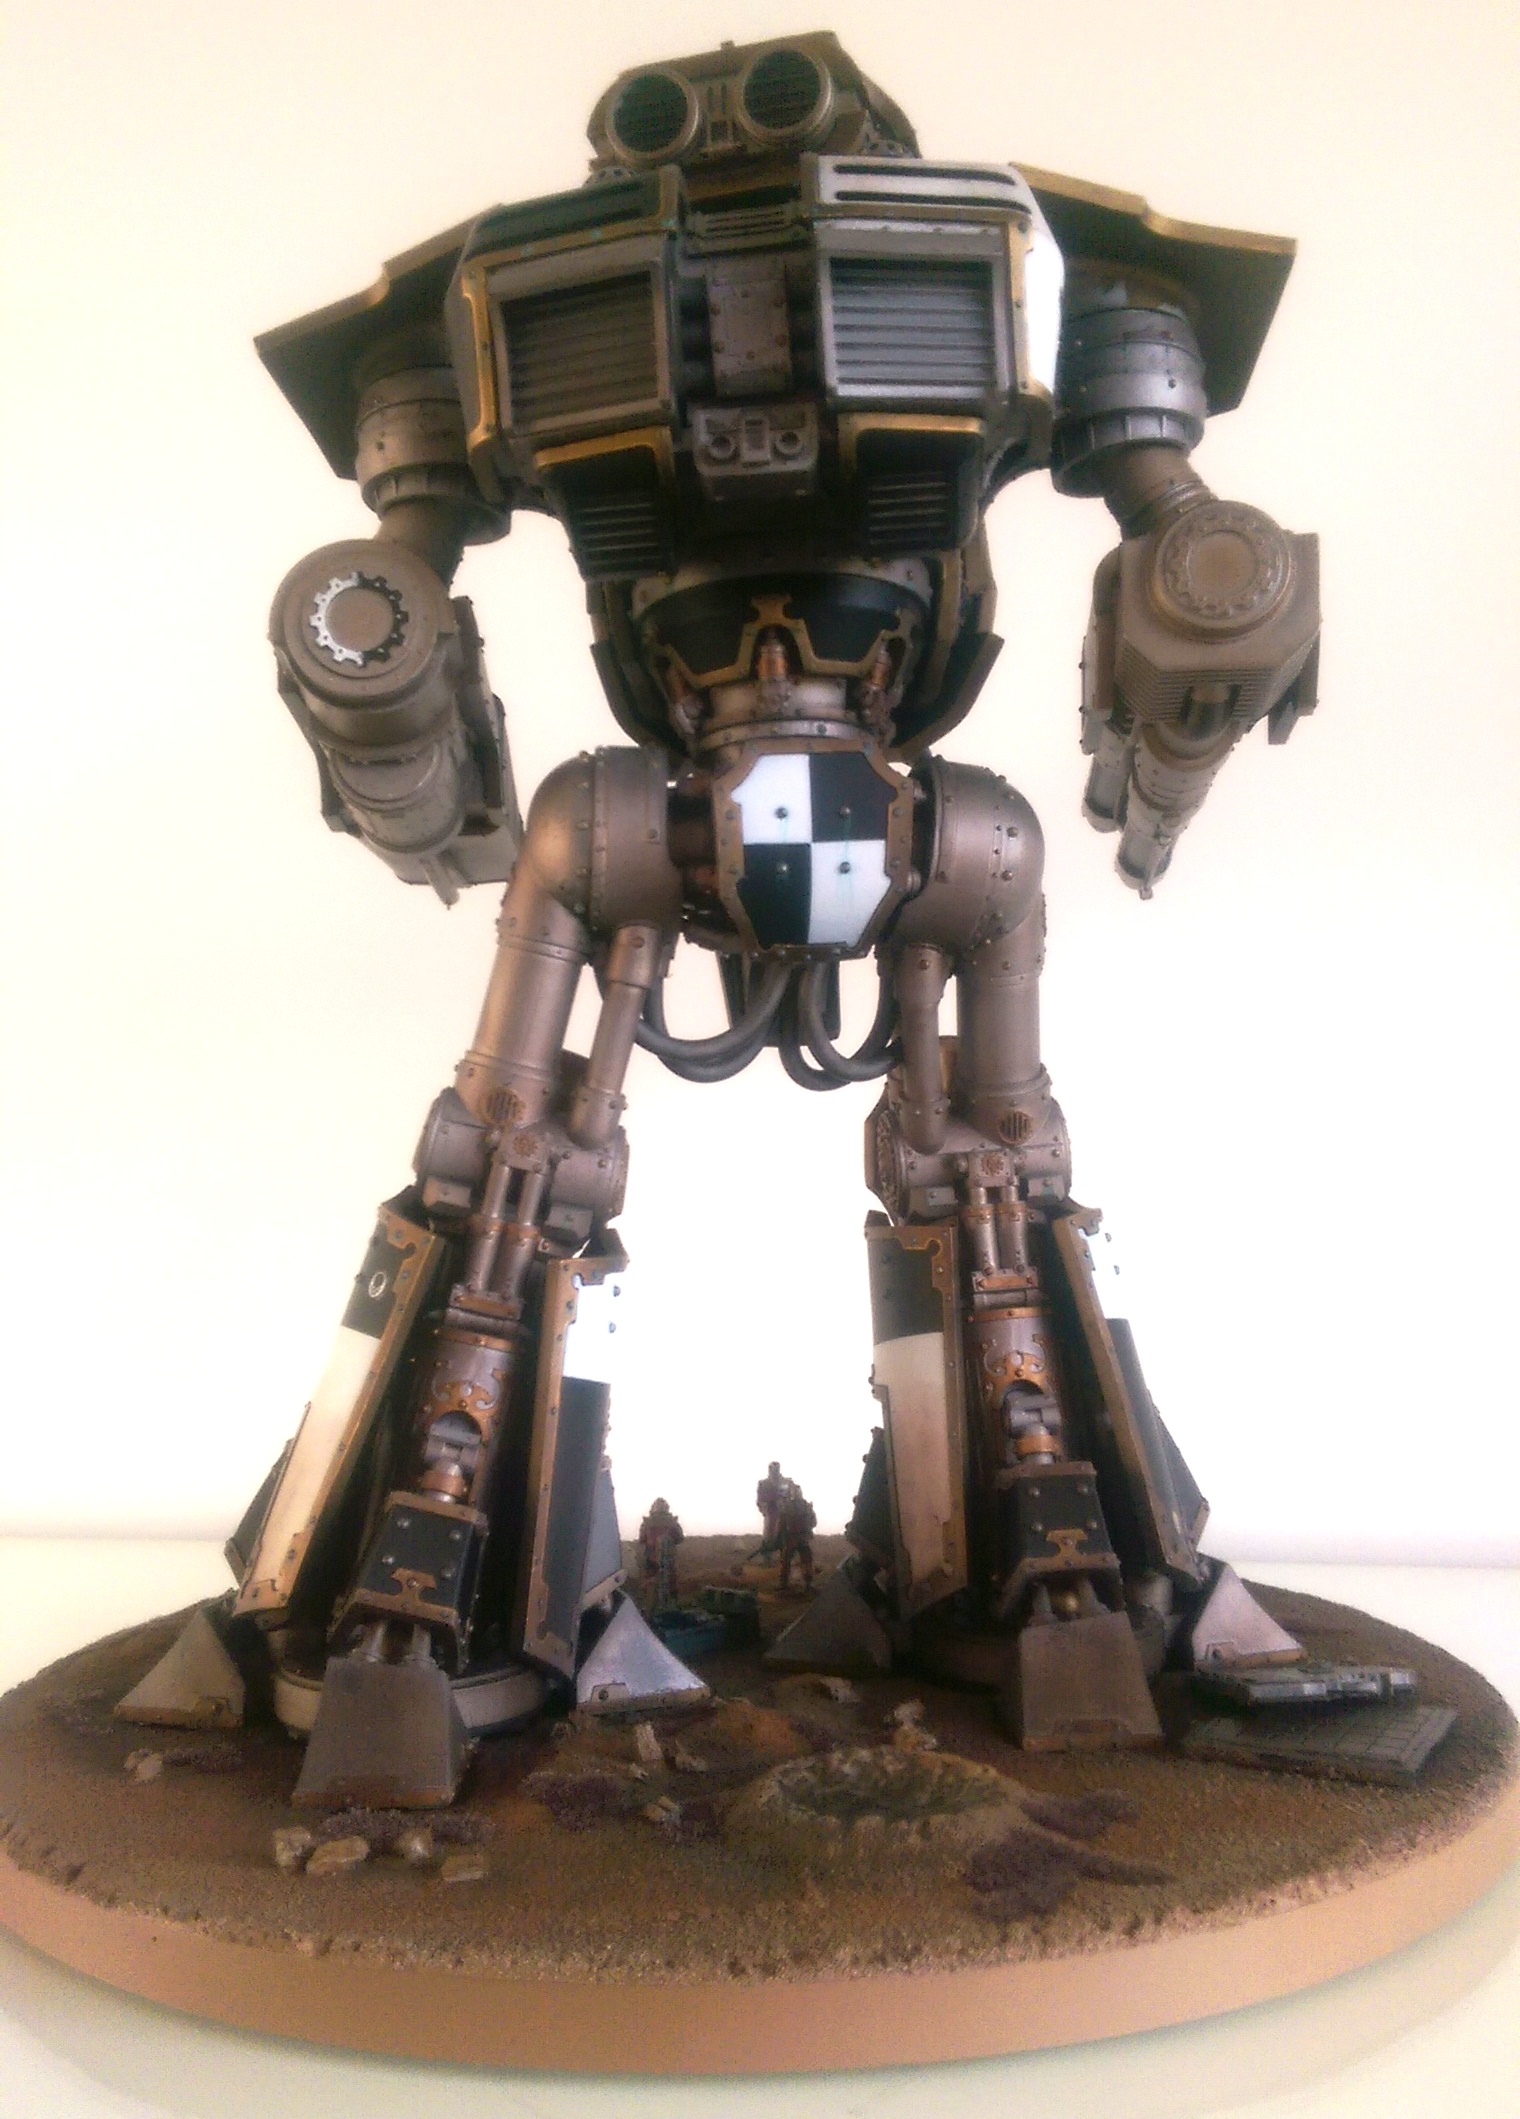
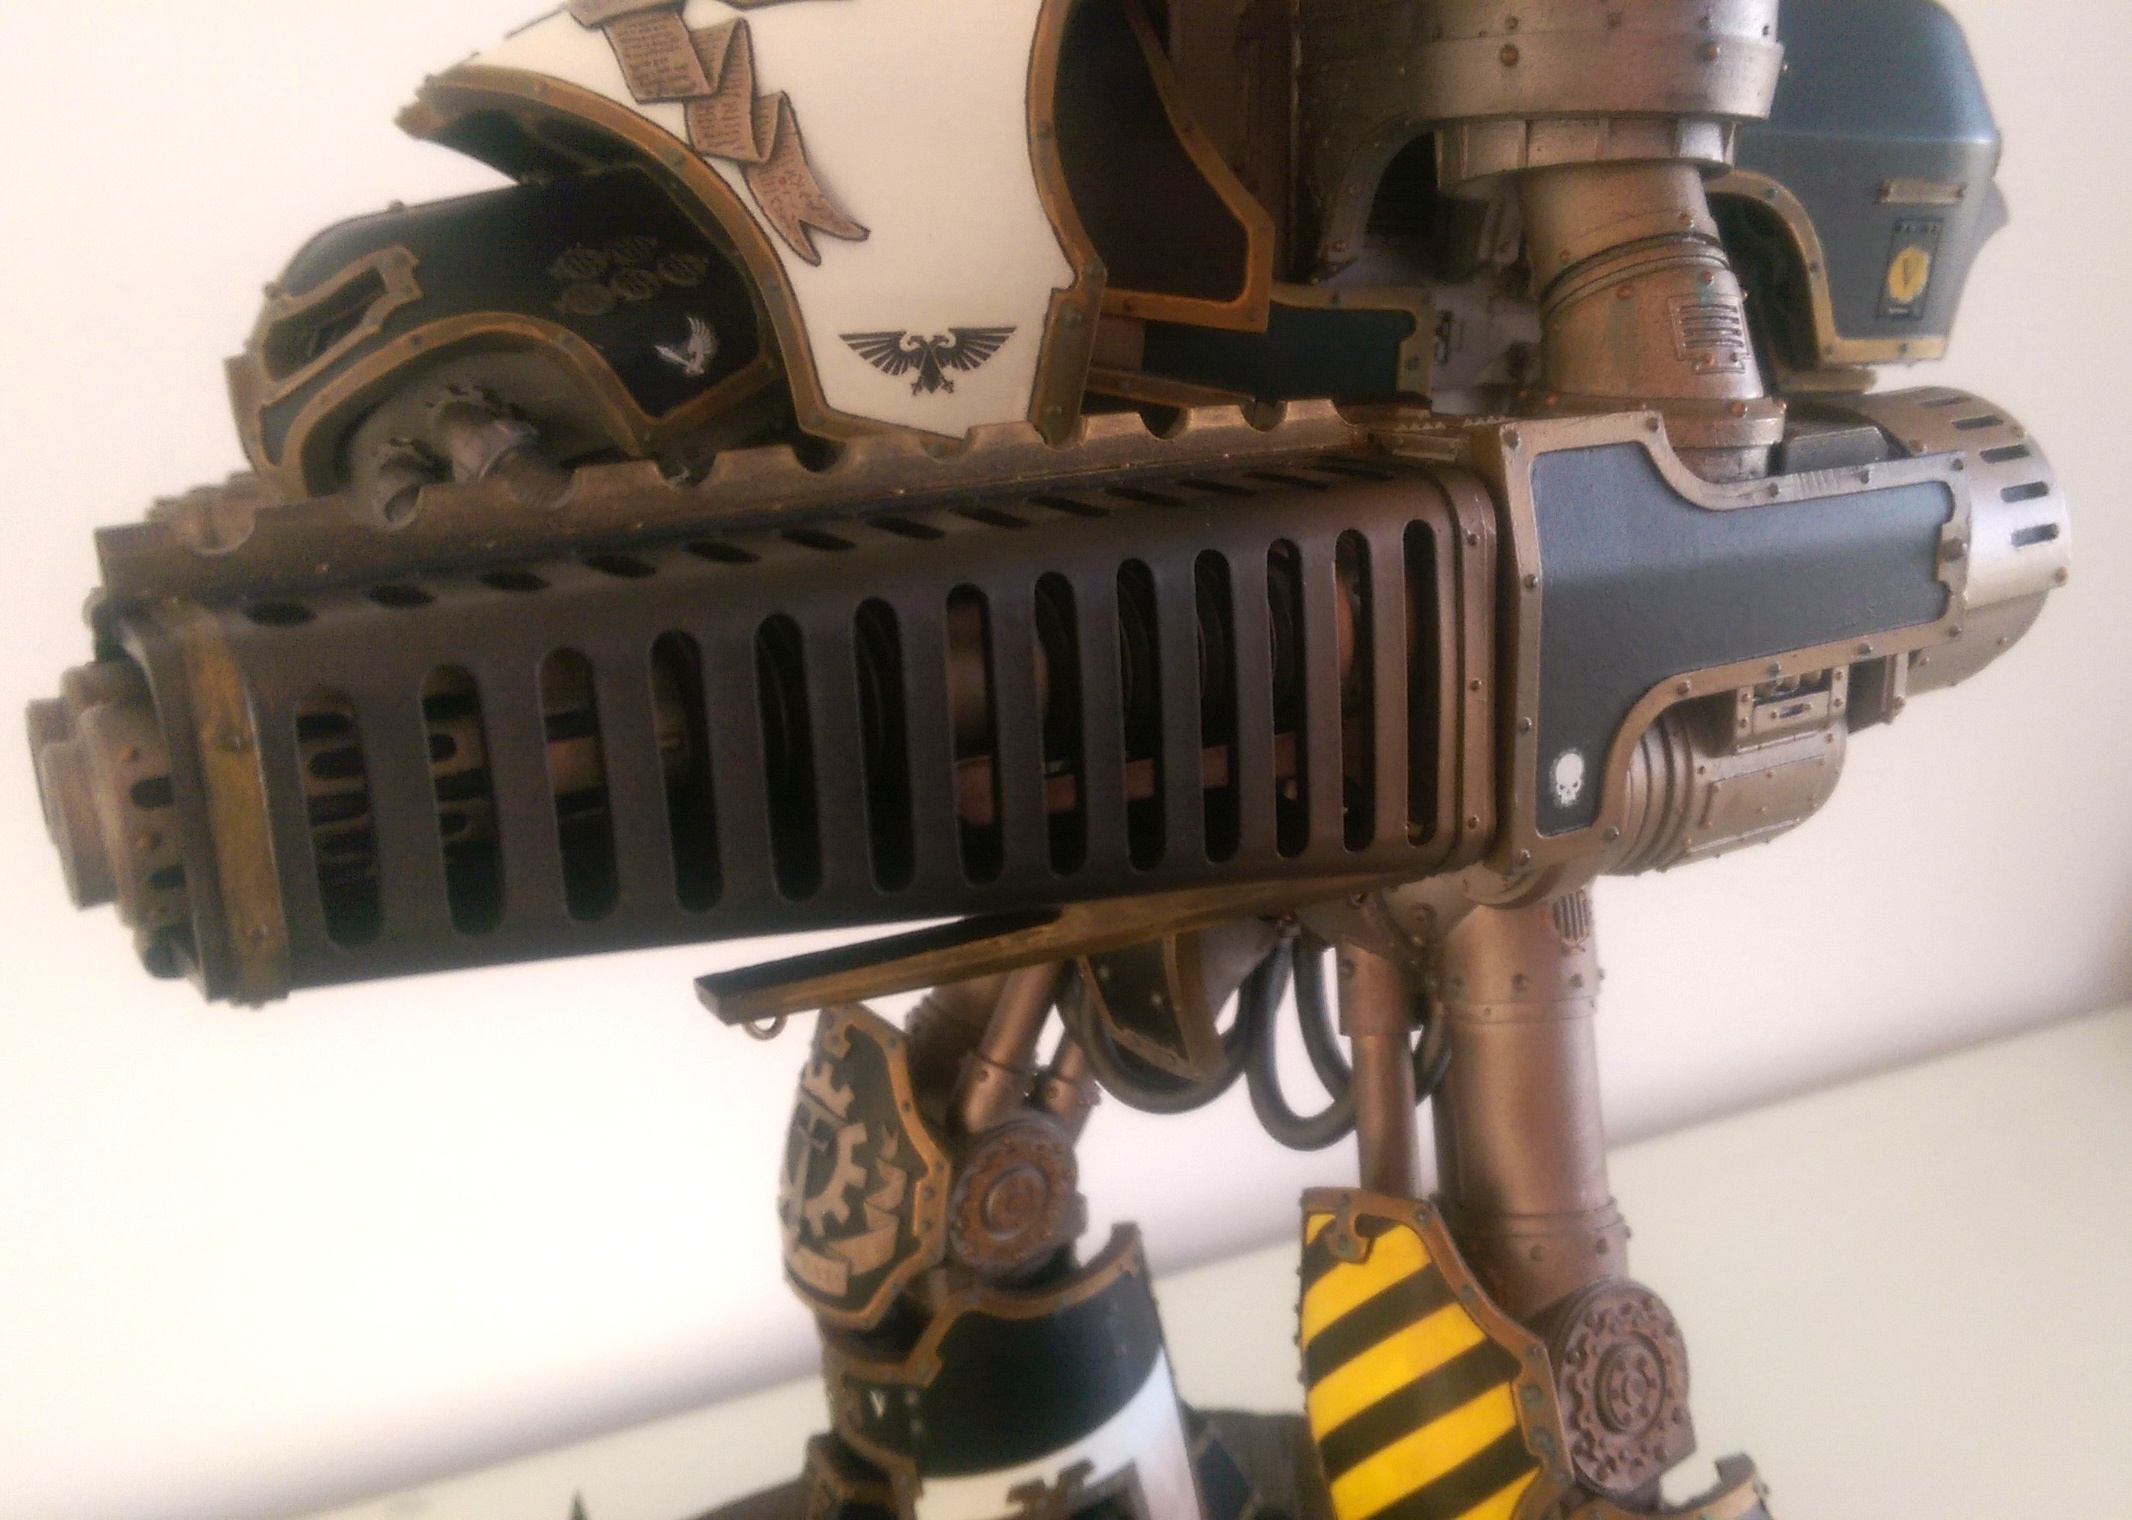
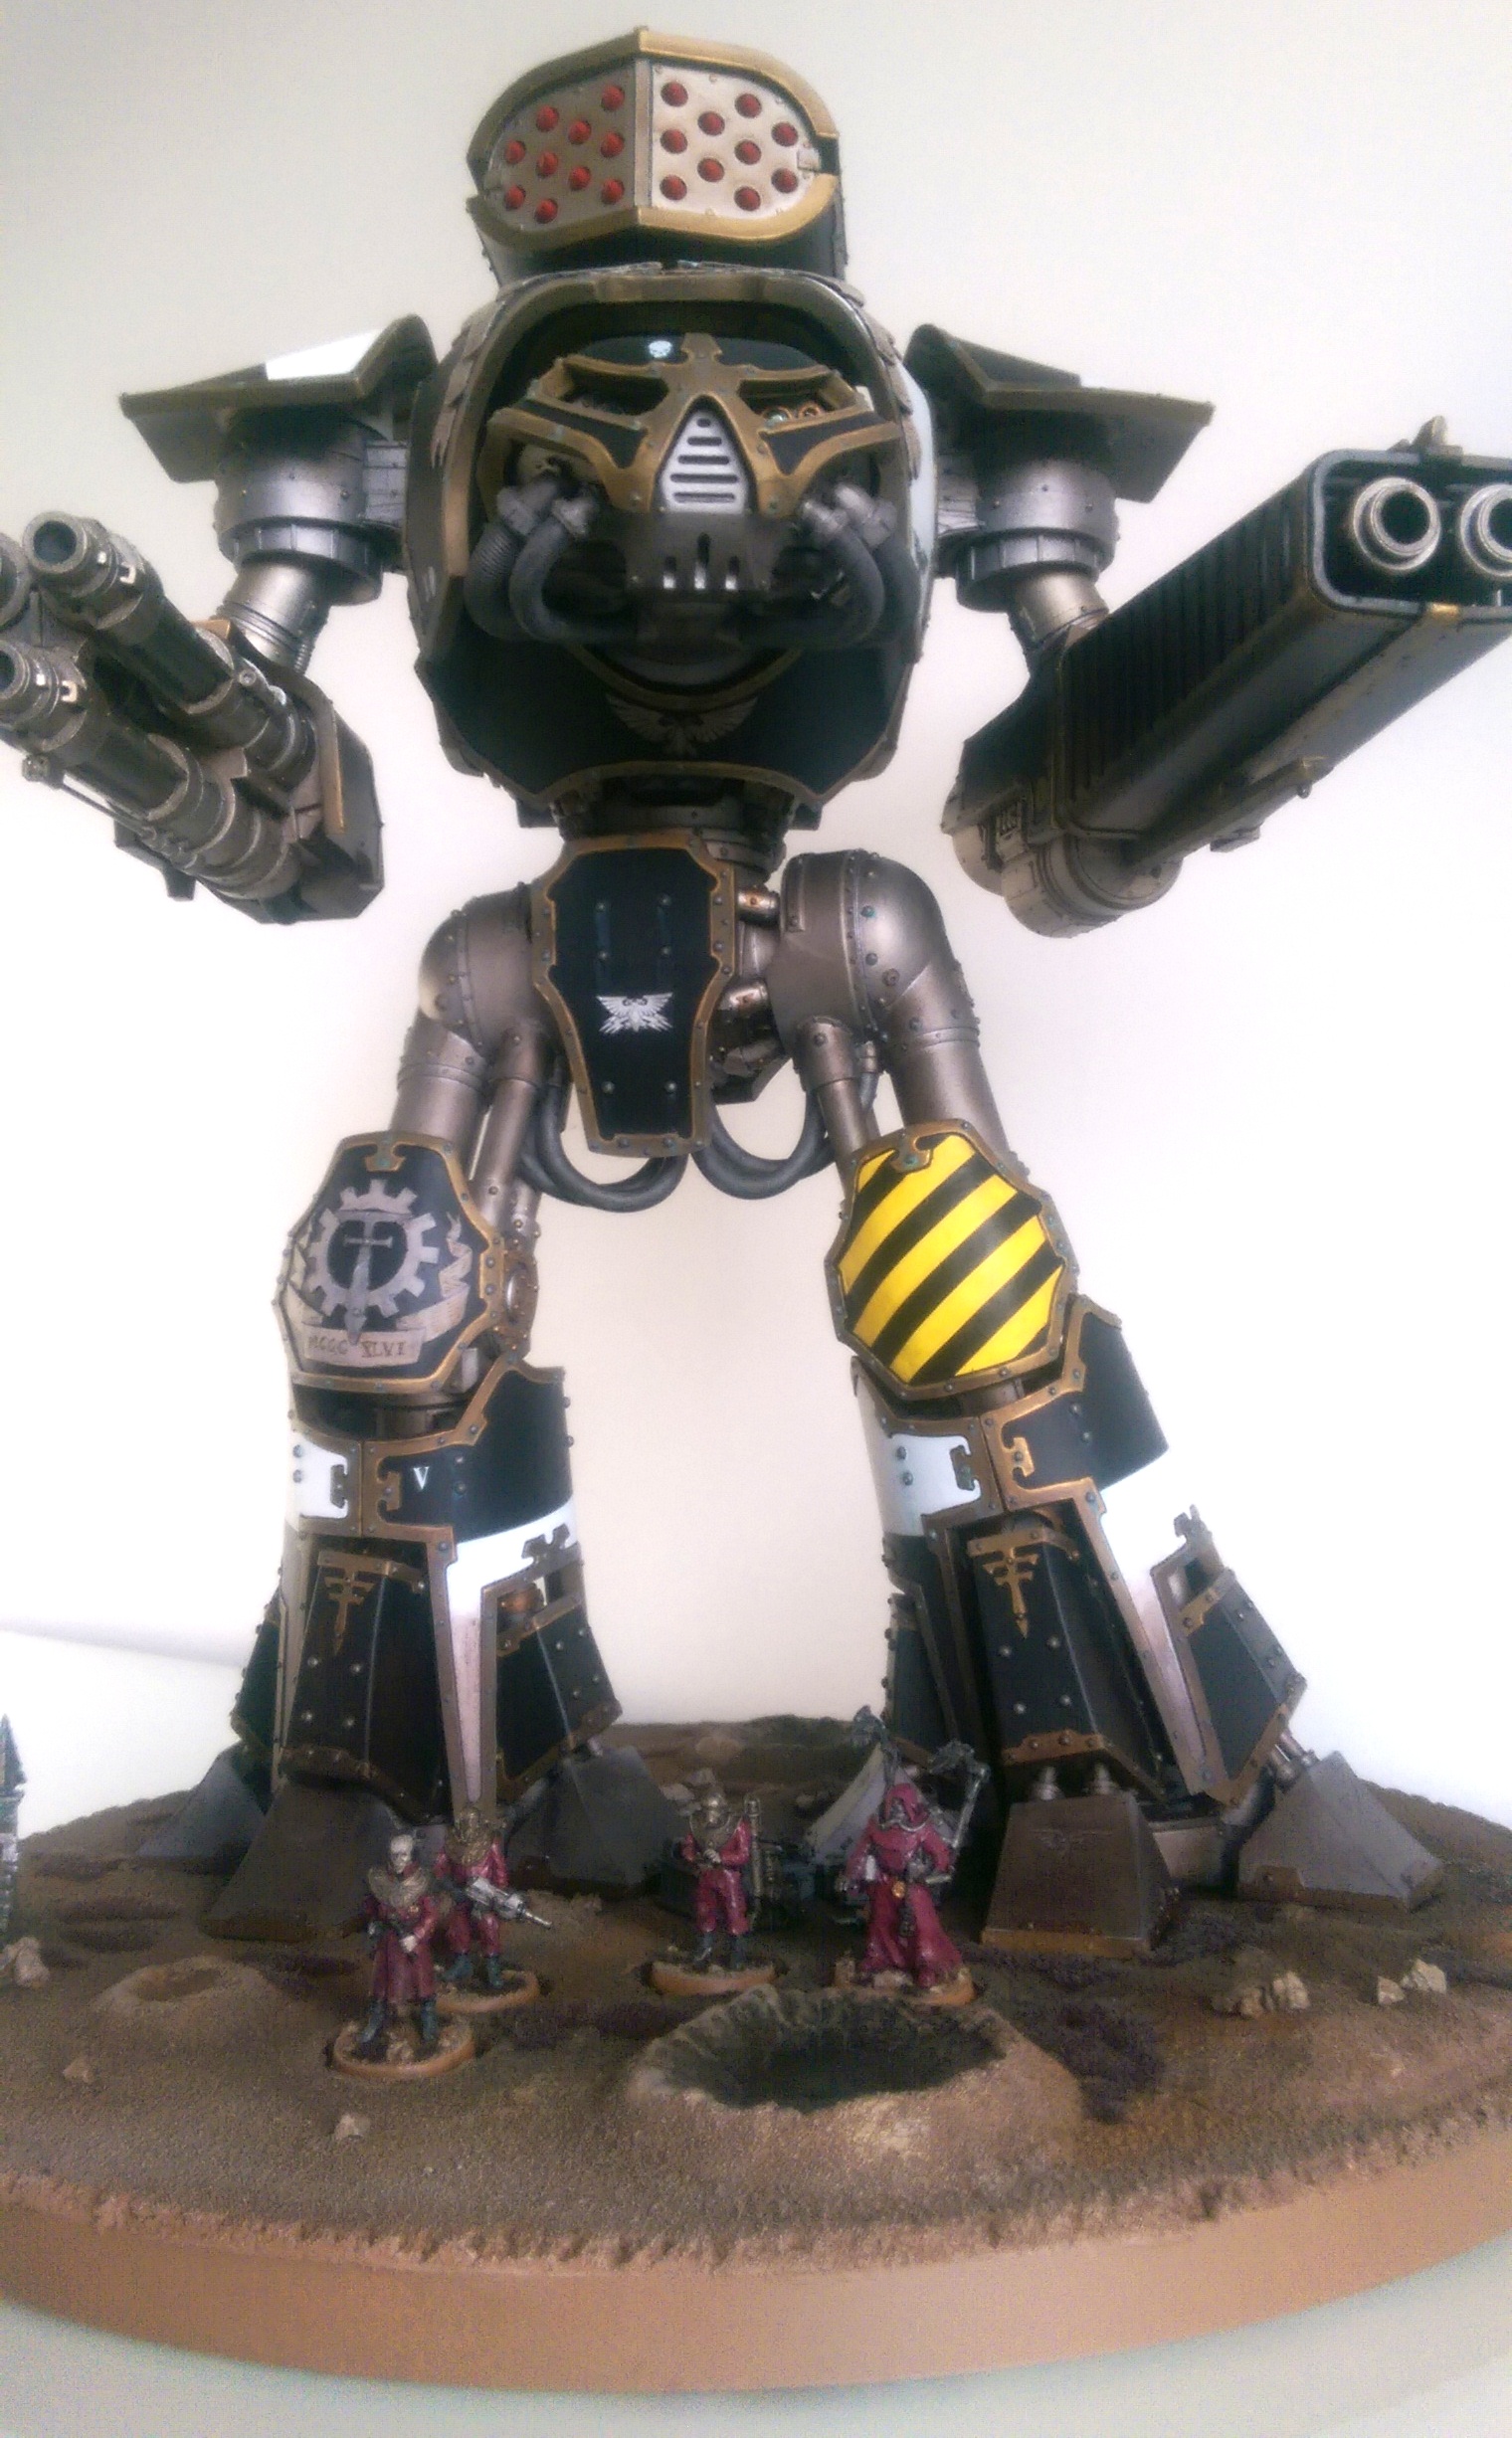
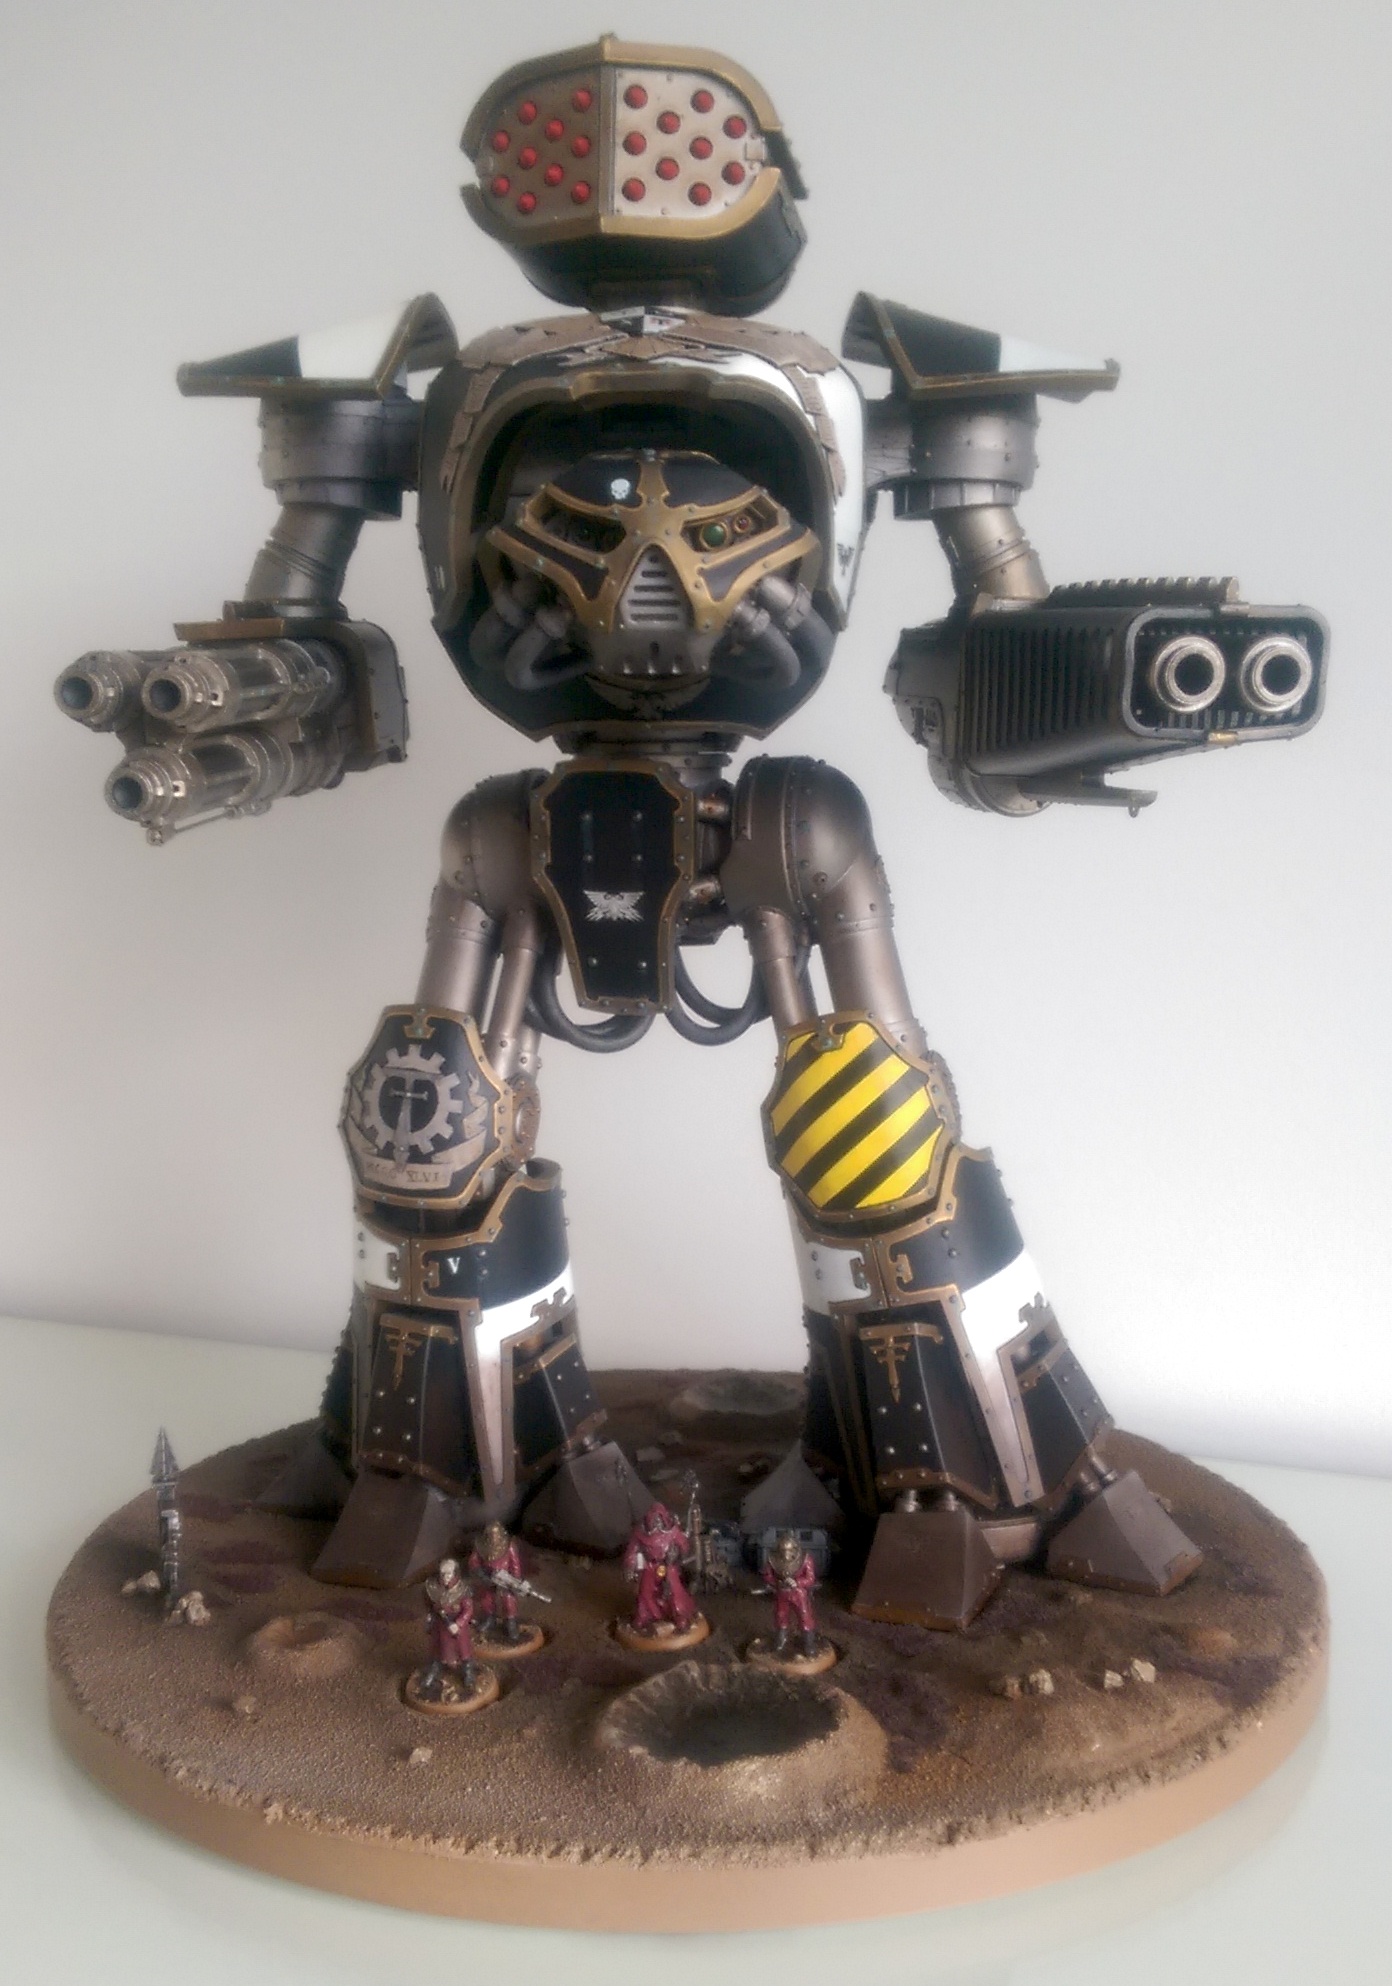
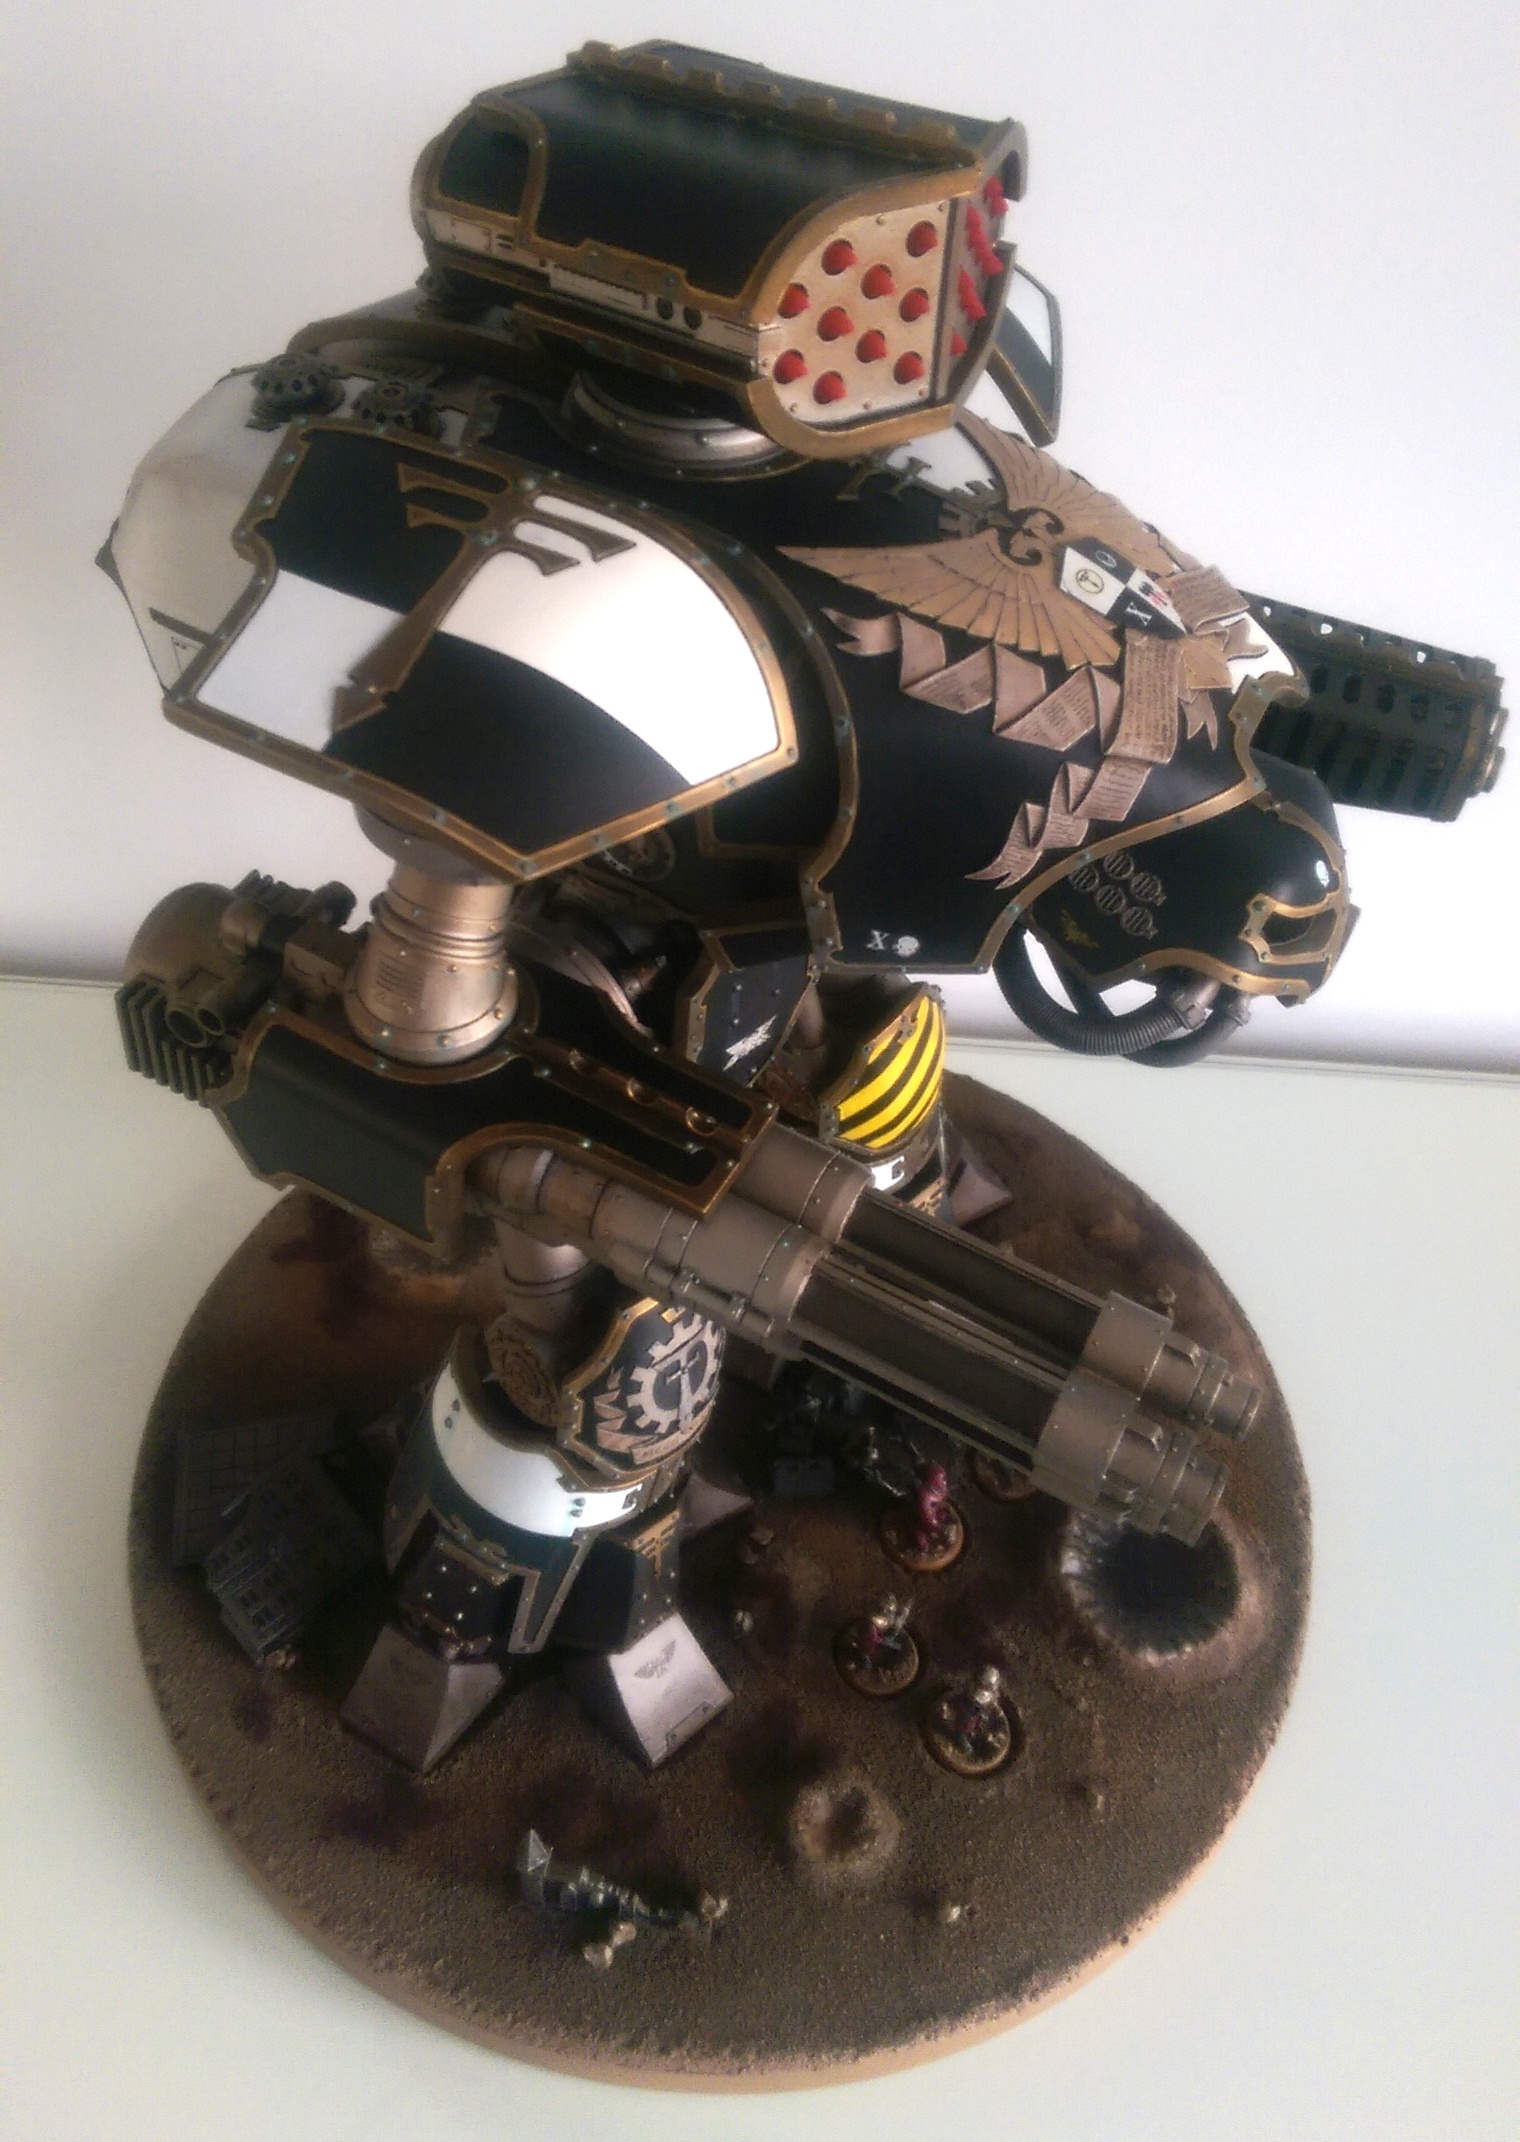
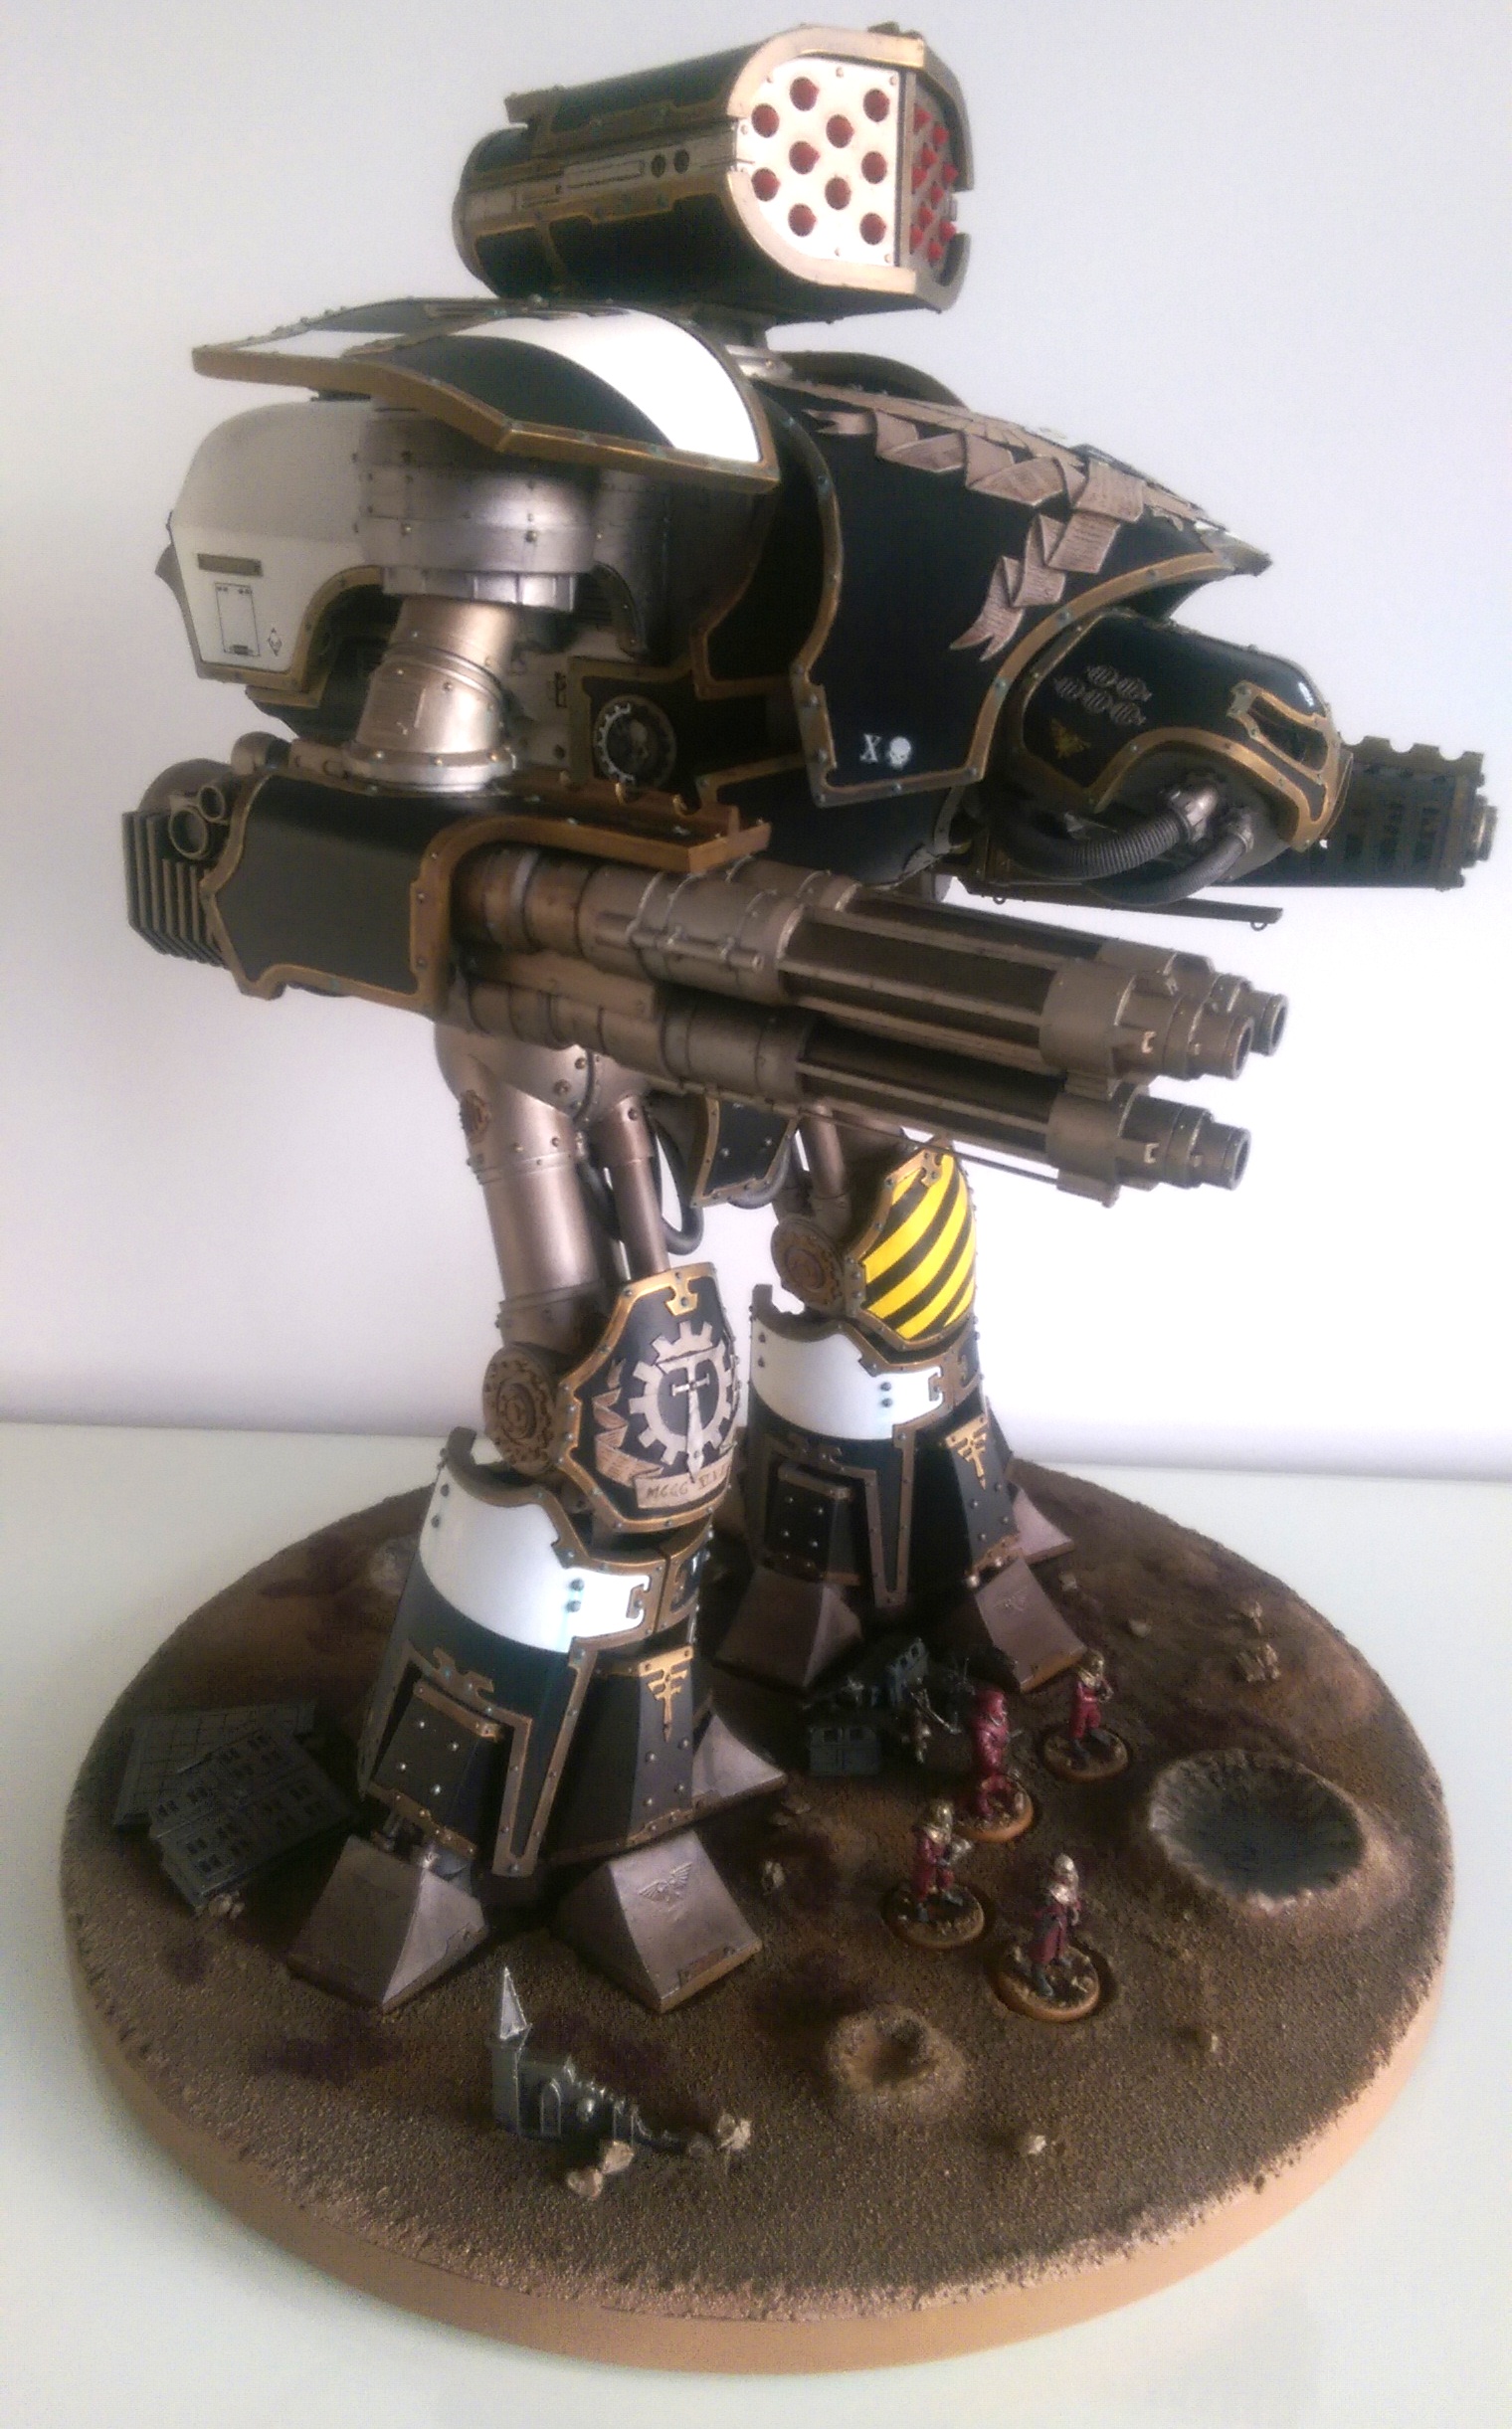
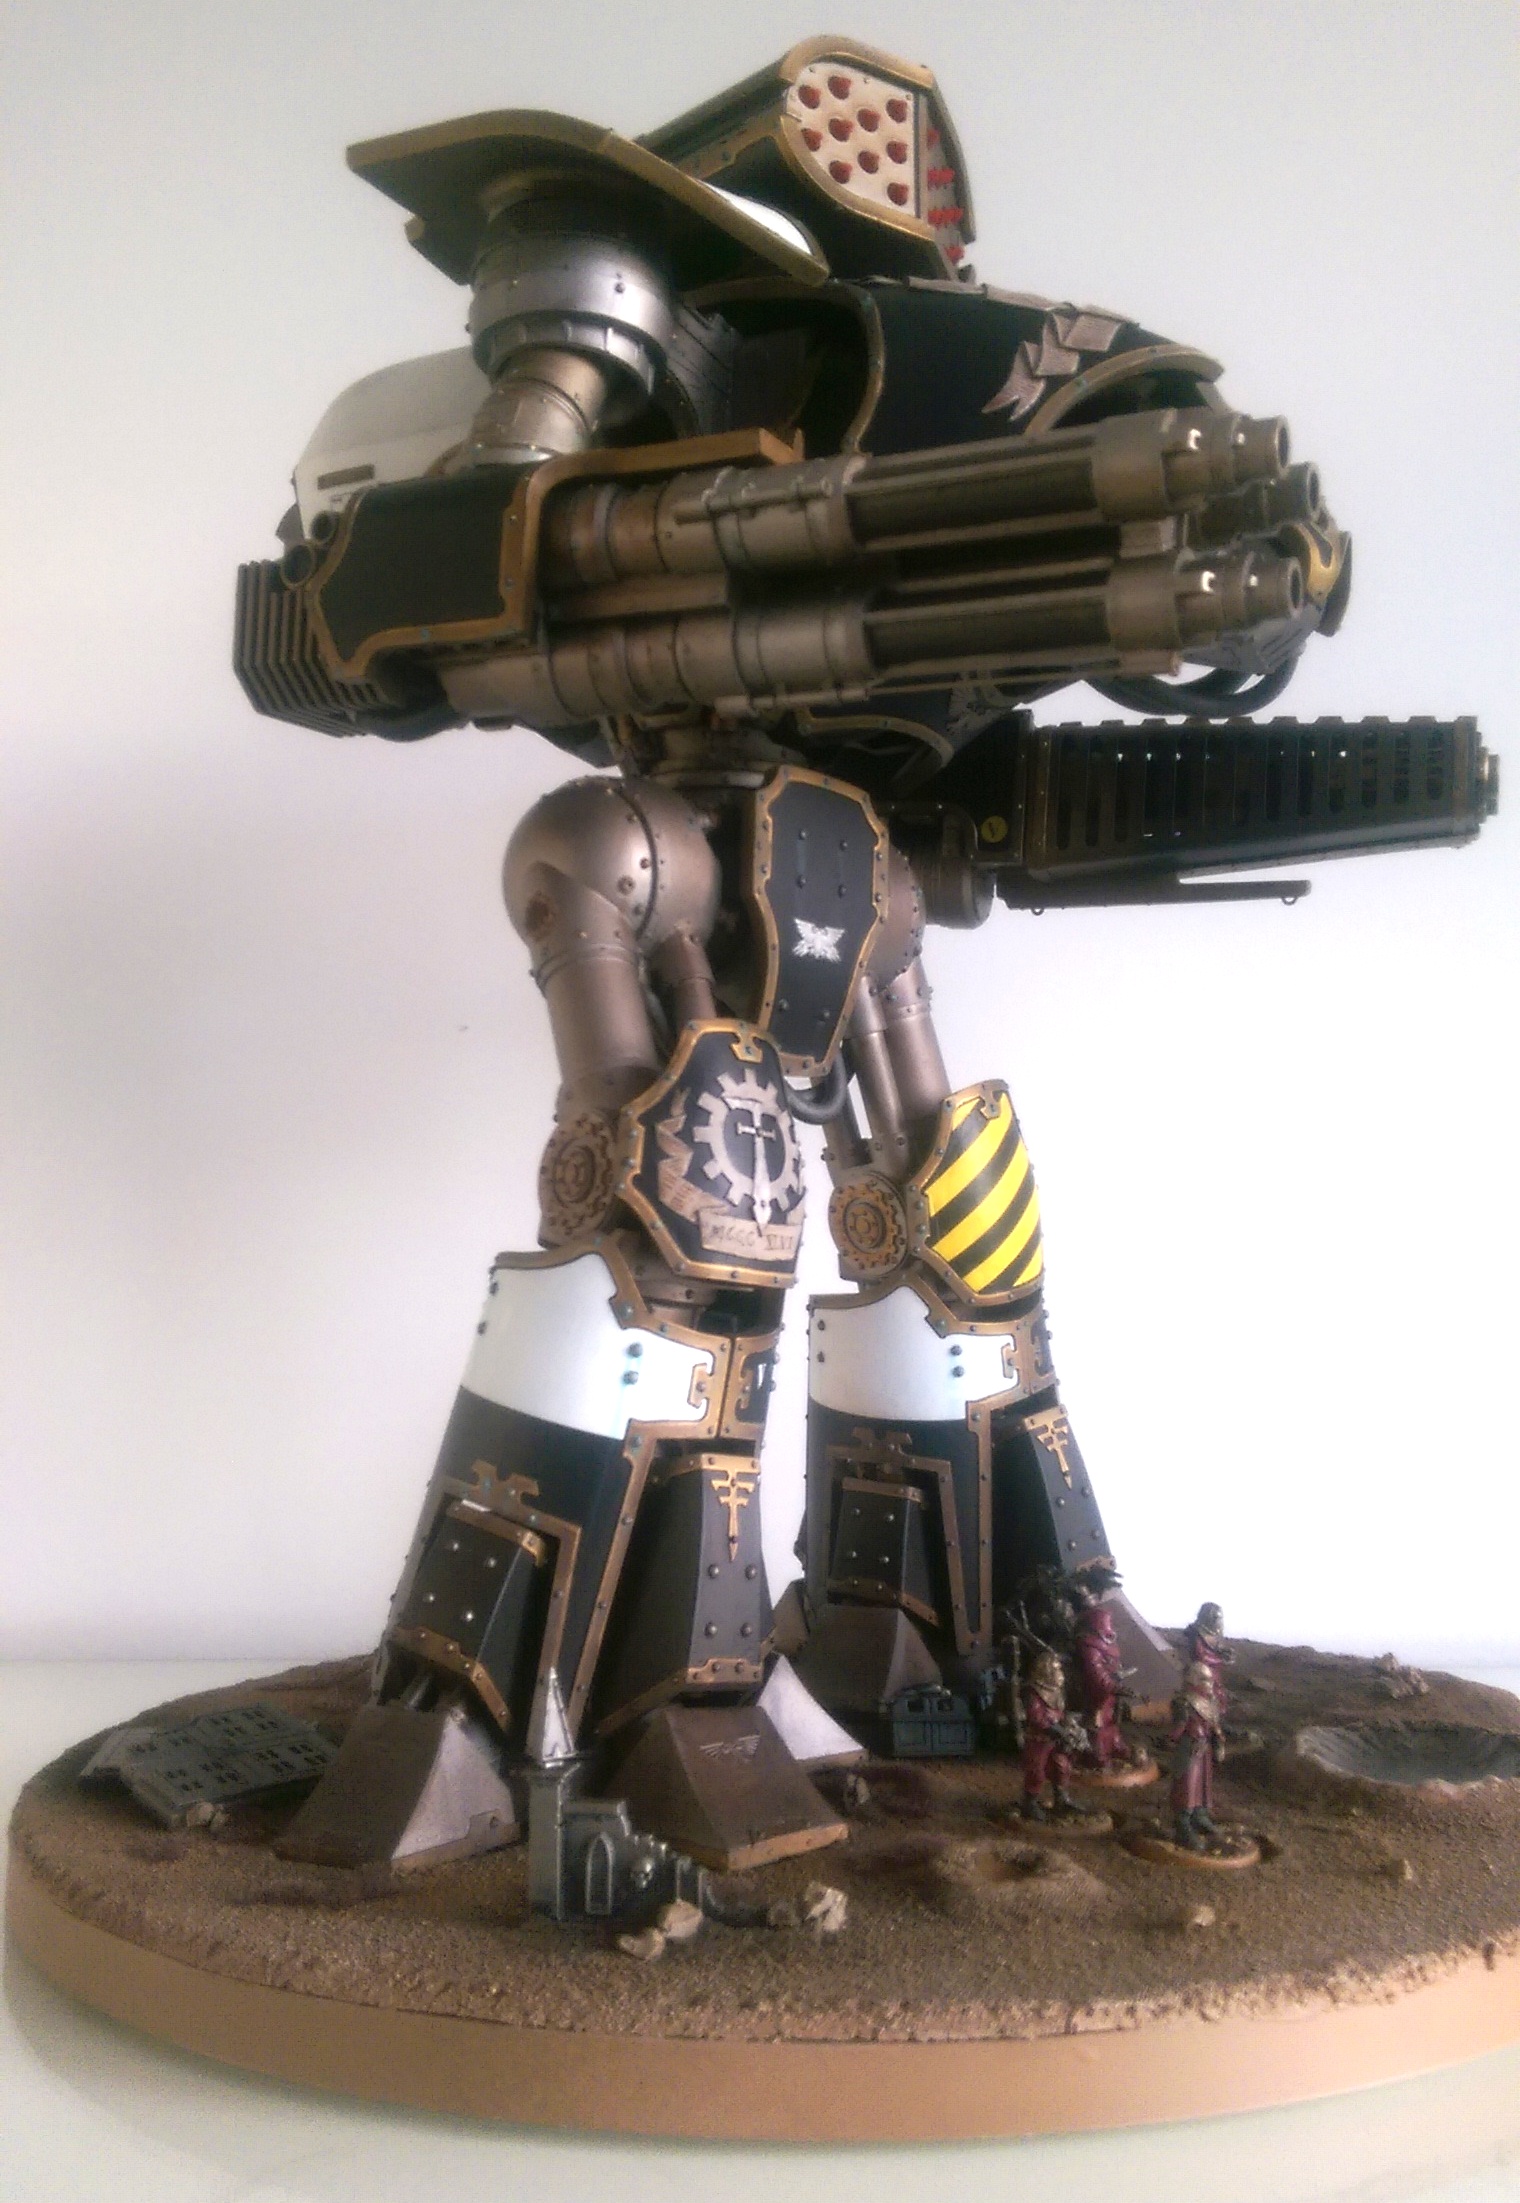
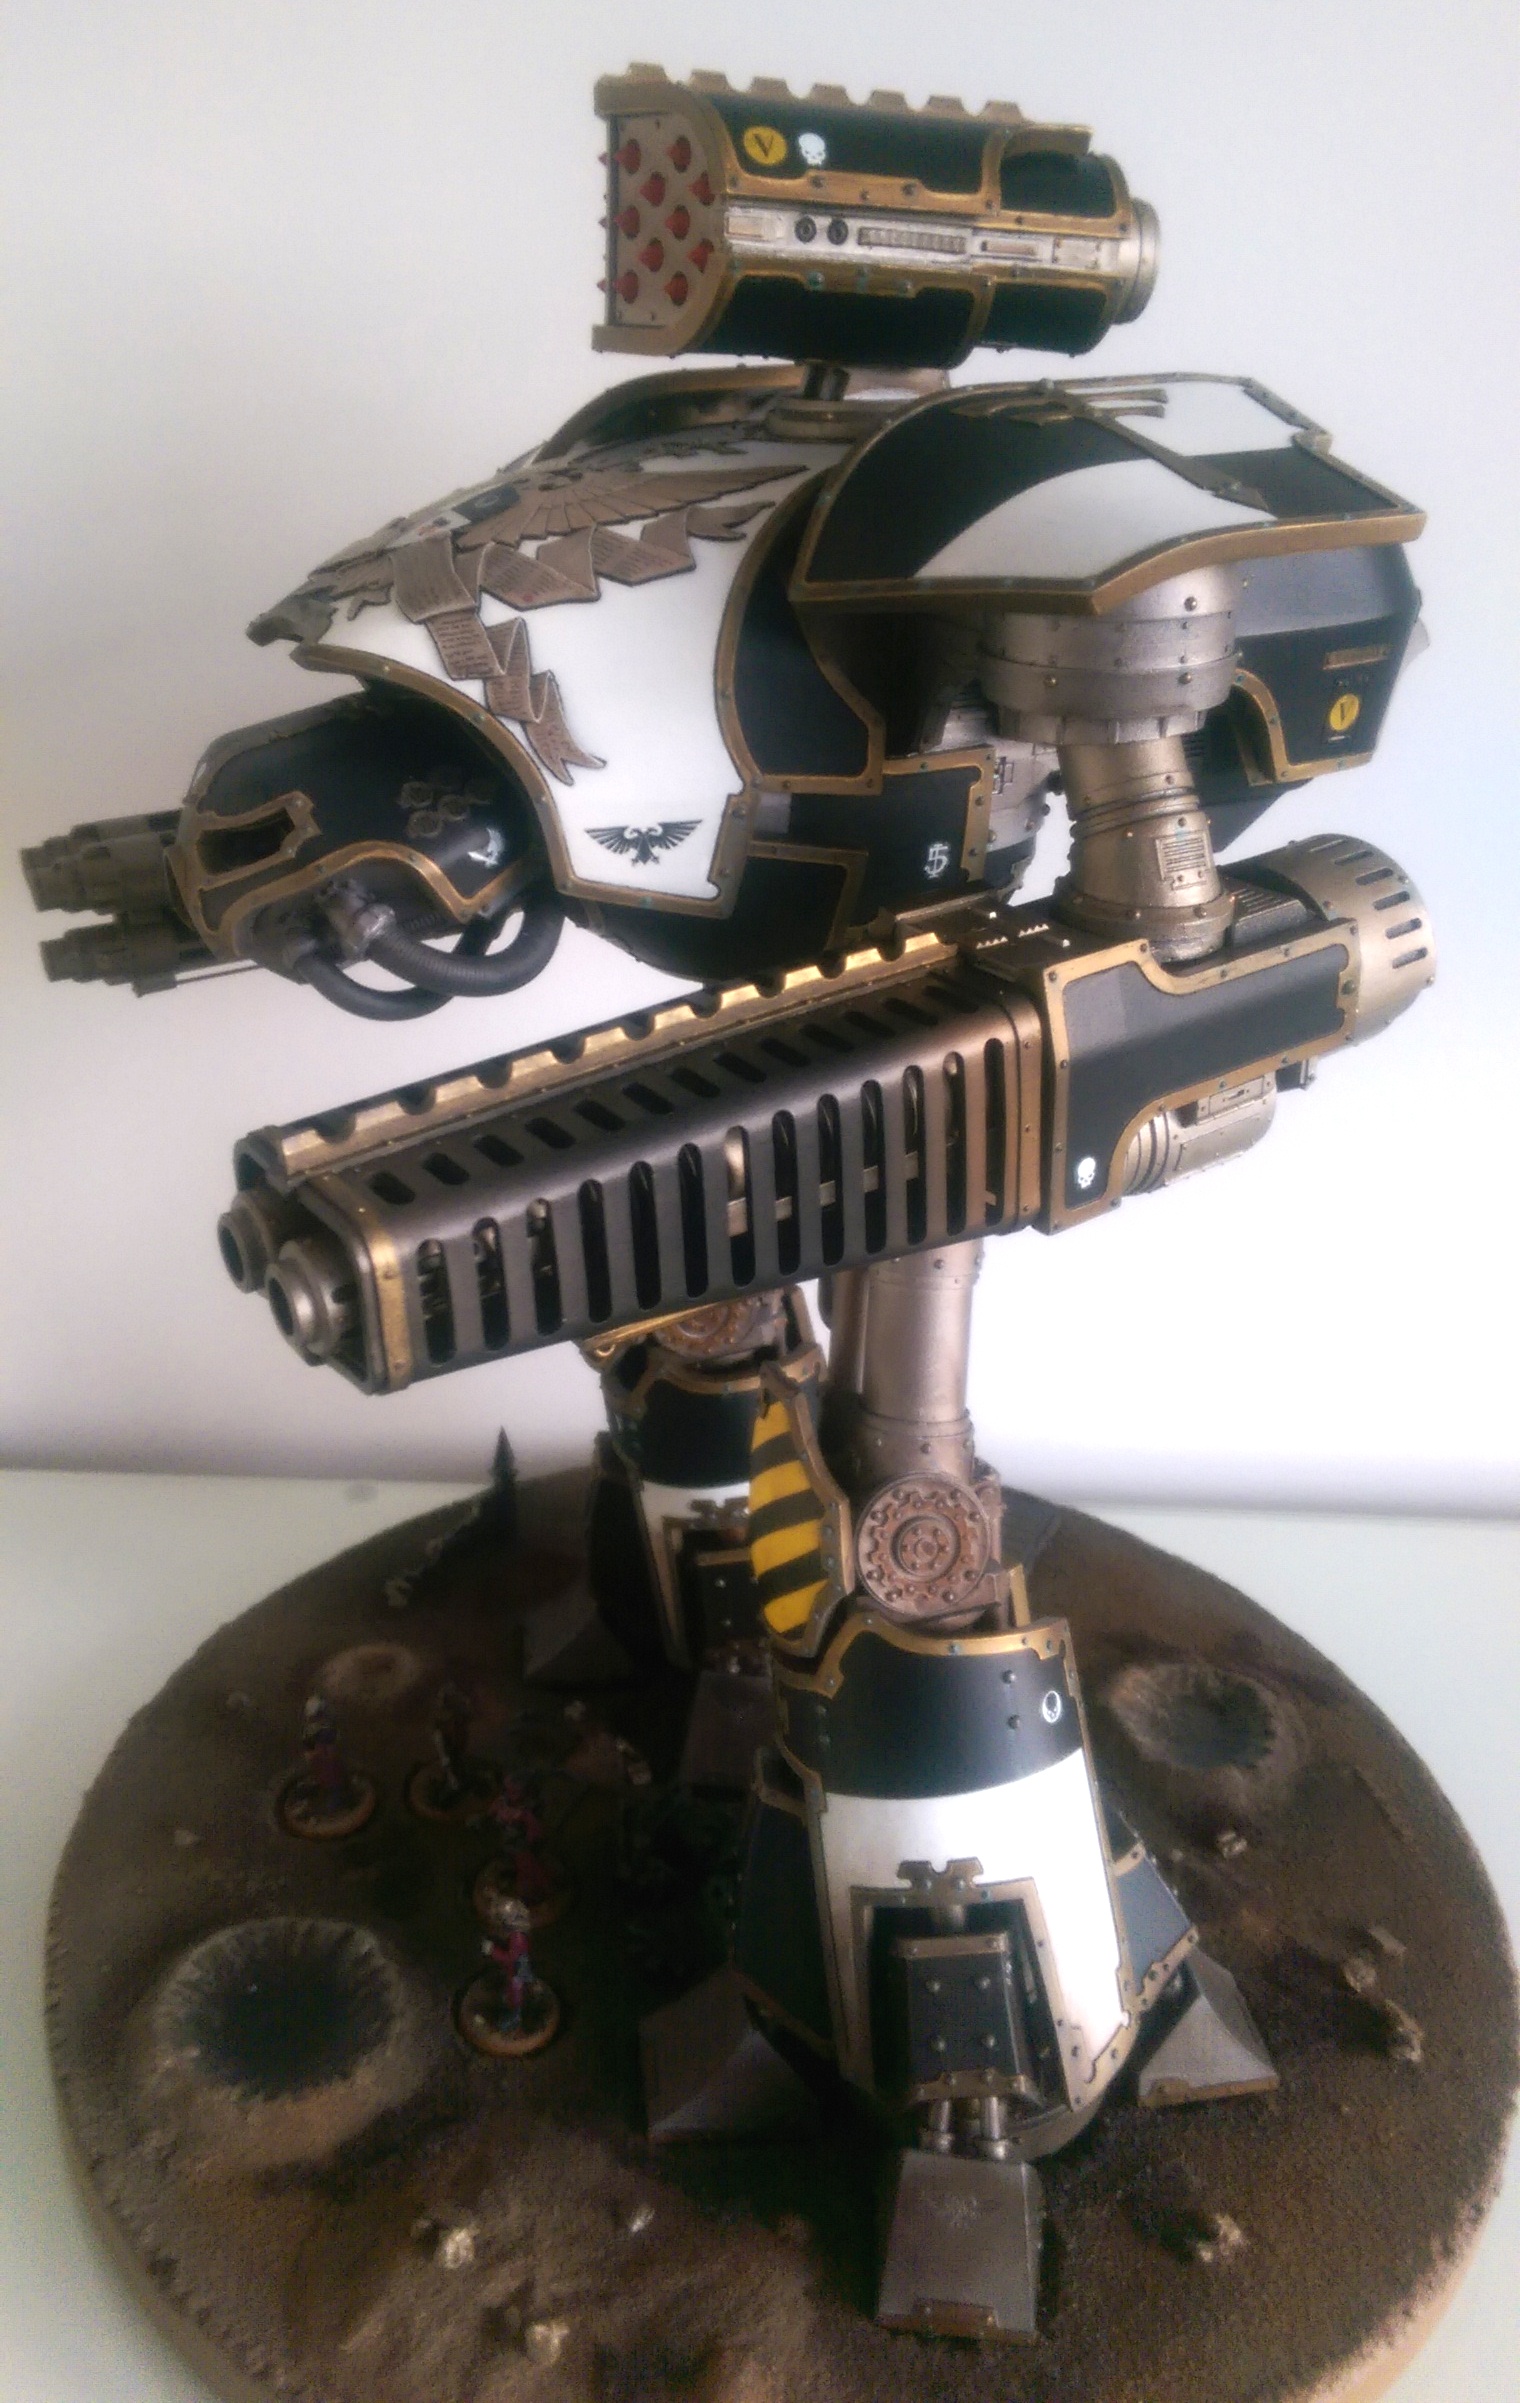
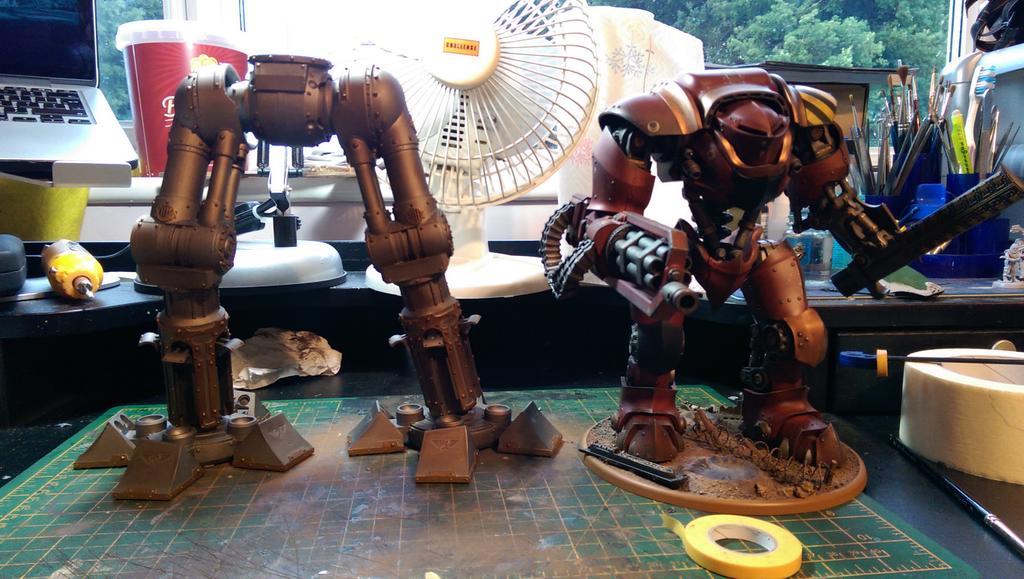
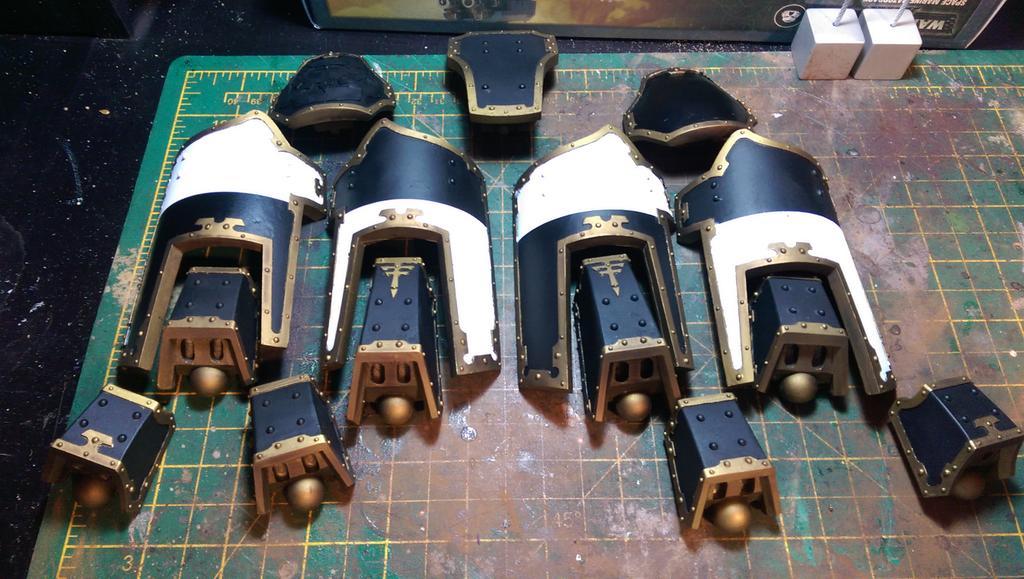
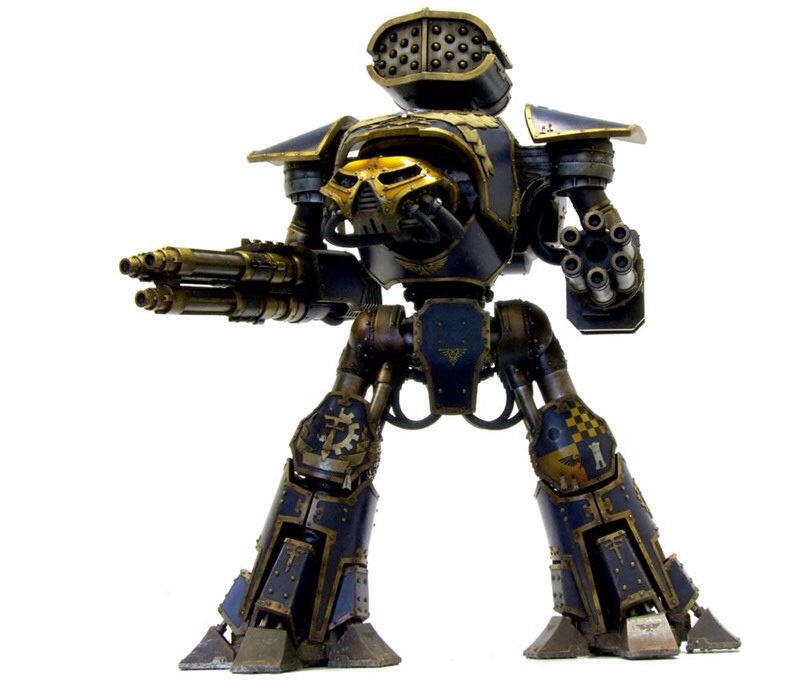
Reaver Round-up
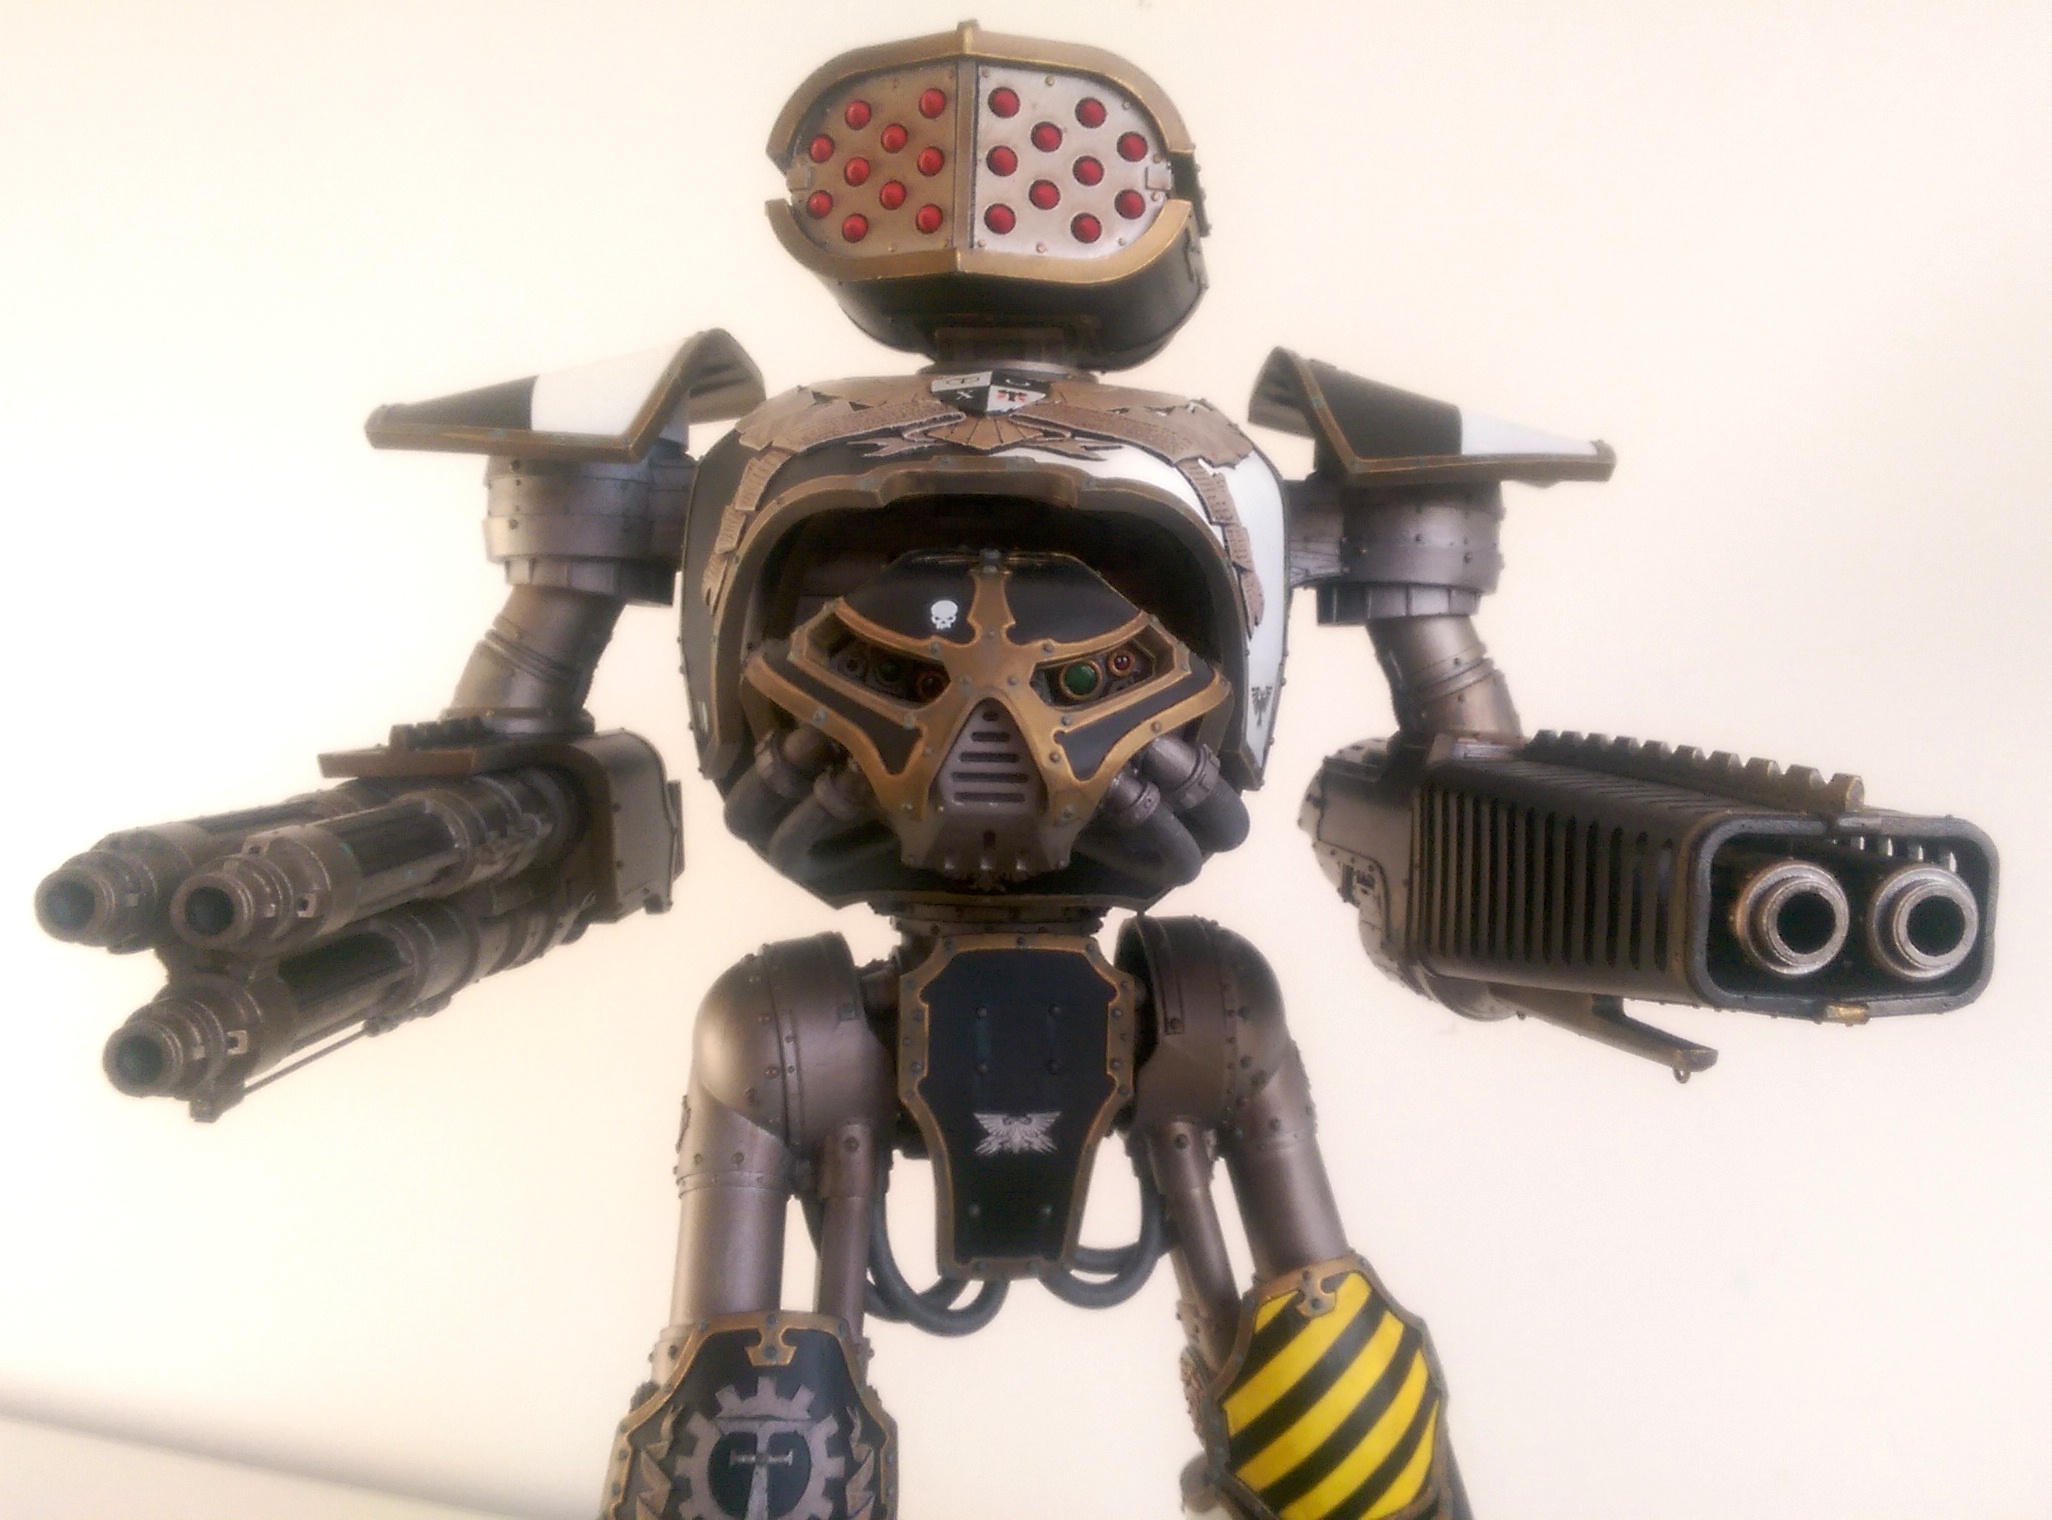 I started working on the Reaver in May, and finally finished it at the beginning of December. That's six months!
I am generally very happy with how it's turned out. There were a few glitches along the way but as is the case with any hobby project, those problems that did come up were fixable.
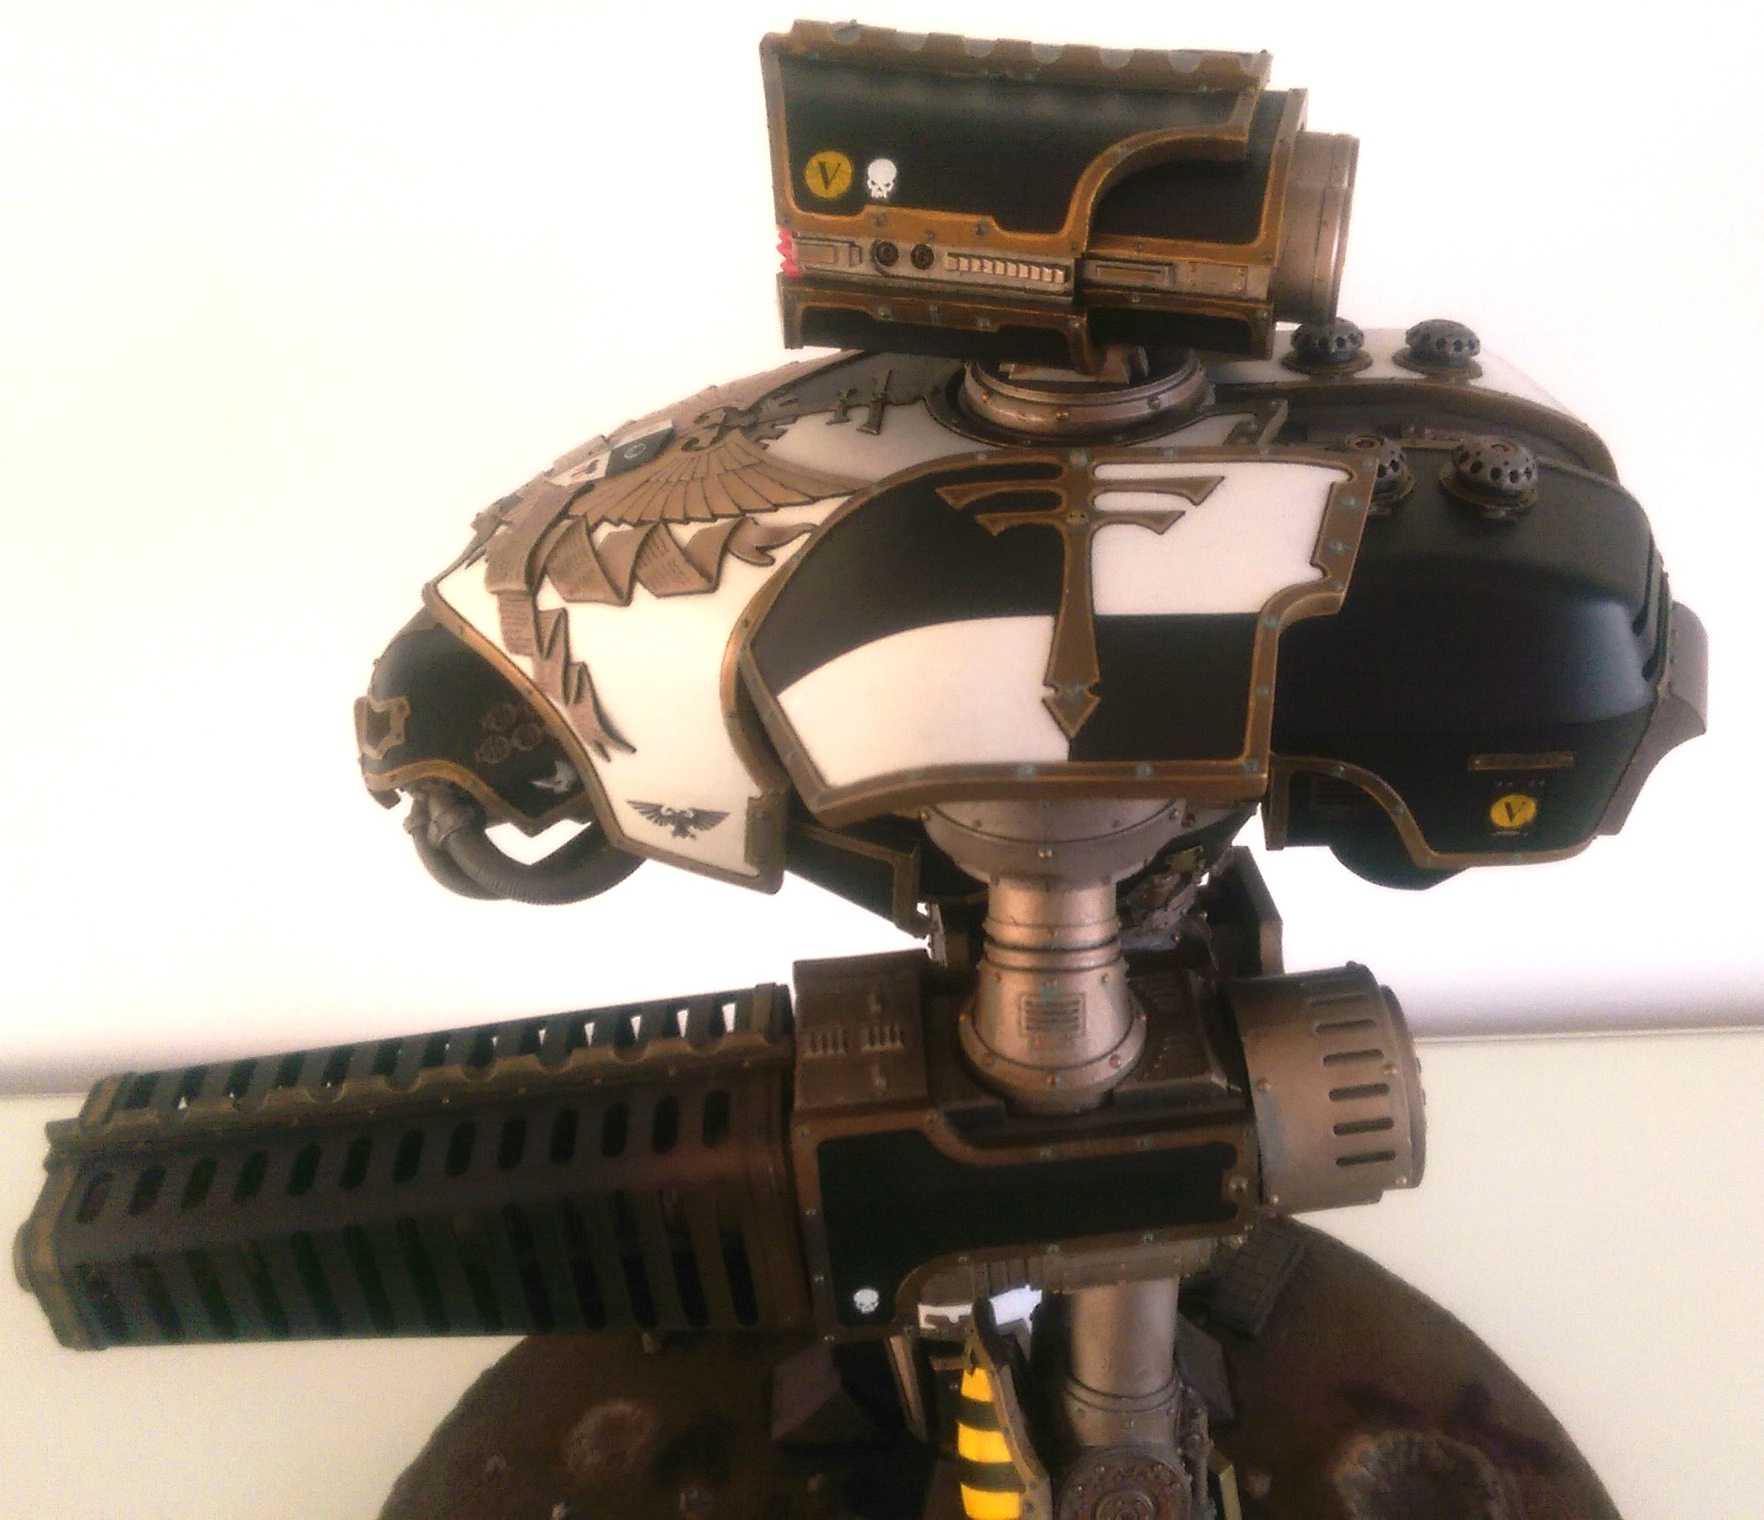
The paint scheme is, of course, the same one I have been painting my Epic titans for 25 years. Here's a quick run-down of how it was achieved:
- Prime with Vallejo black primer (via airbrush)
- Mask off armour plates leaving edge banding exposed
- Airbrush Vallejo Model Air Brass on banding
- Wash with Army Painter Soft Tone through the airbrush
- Remove masking and remask to expose quartered sections
- Spray with Citadel Skull White spray
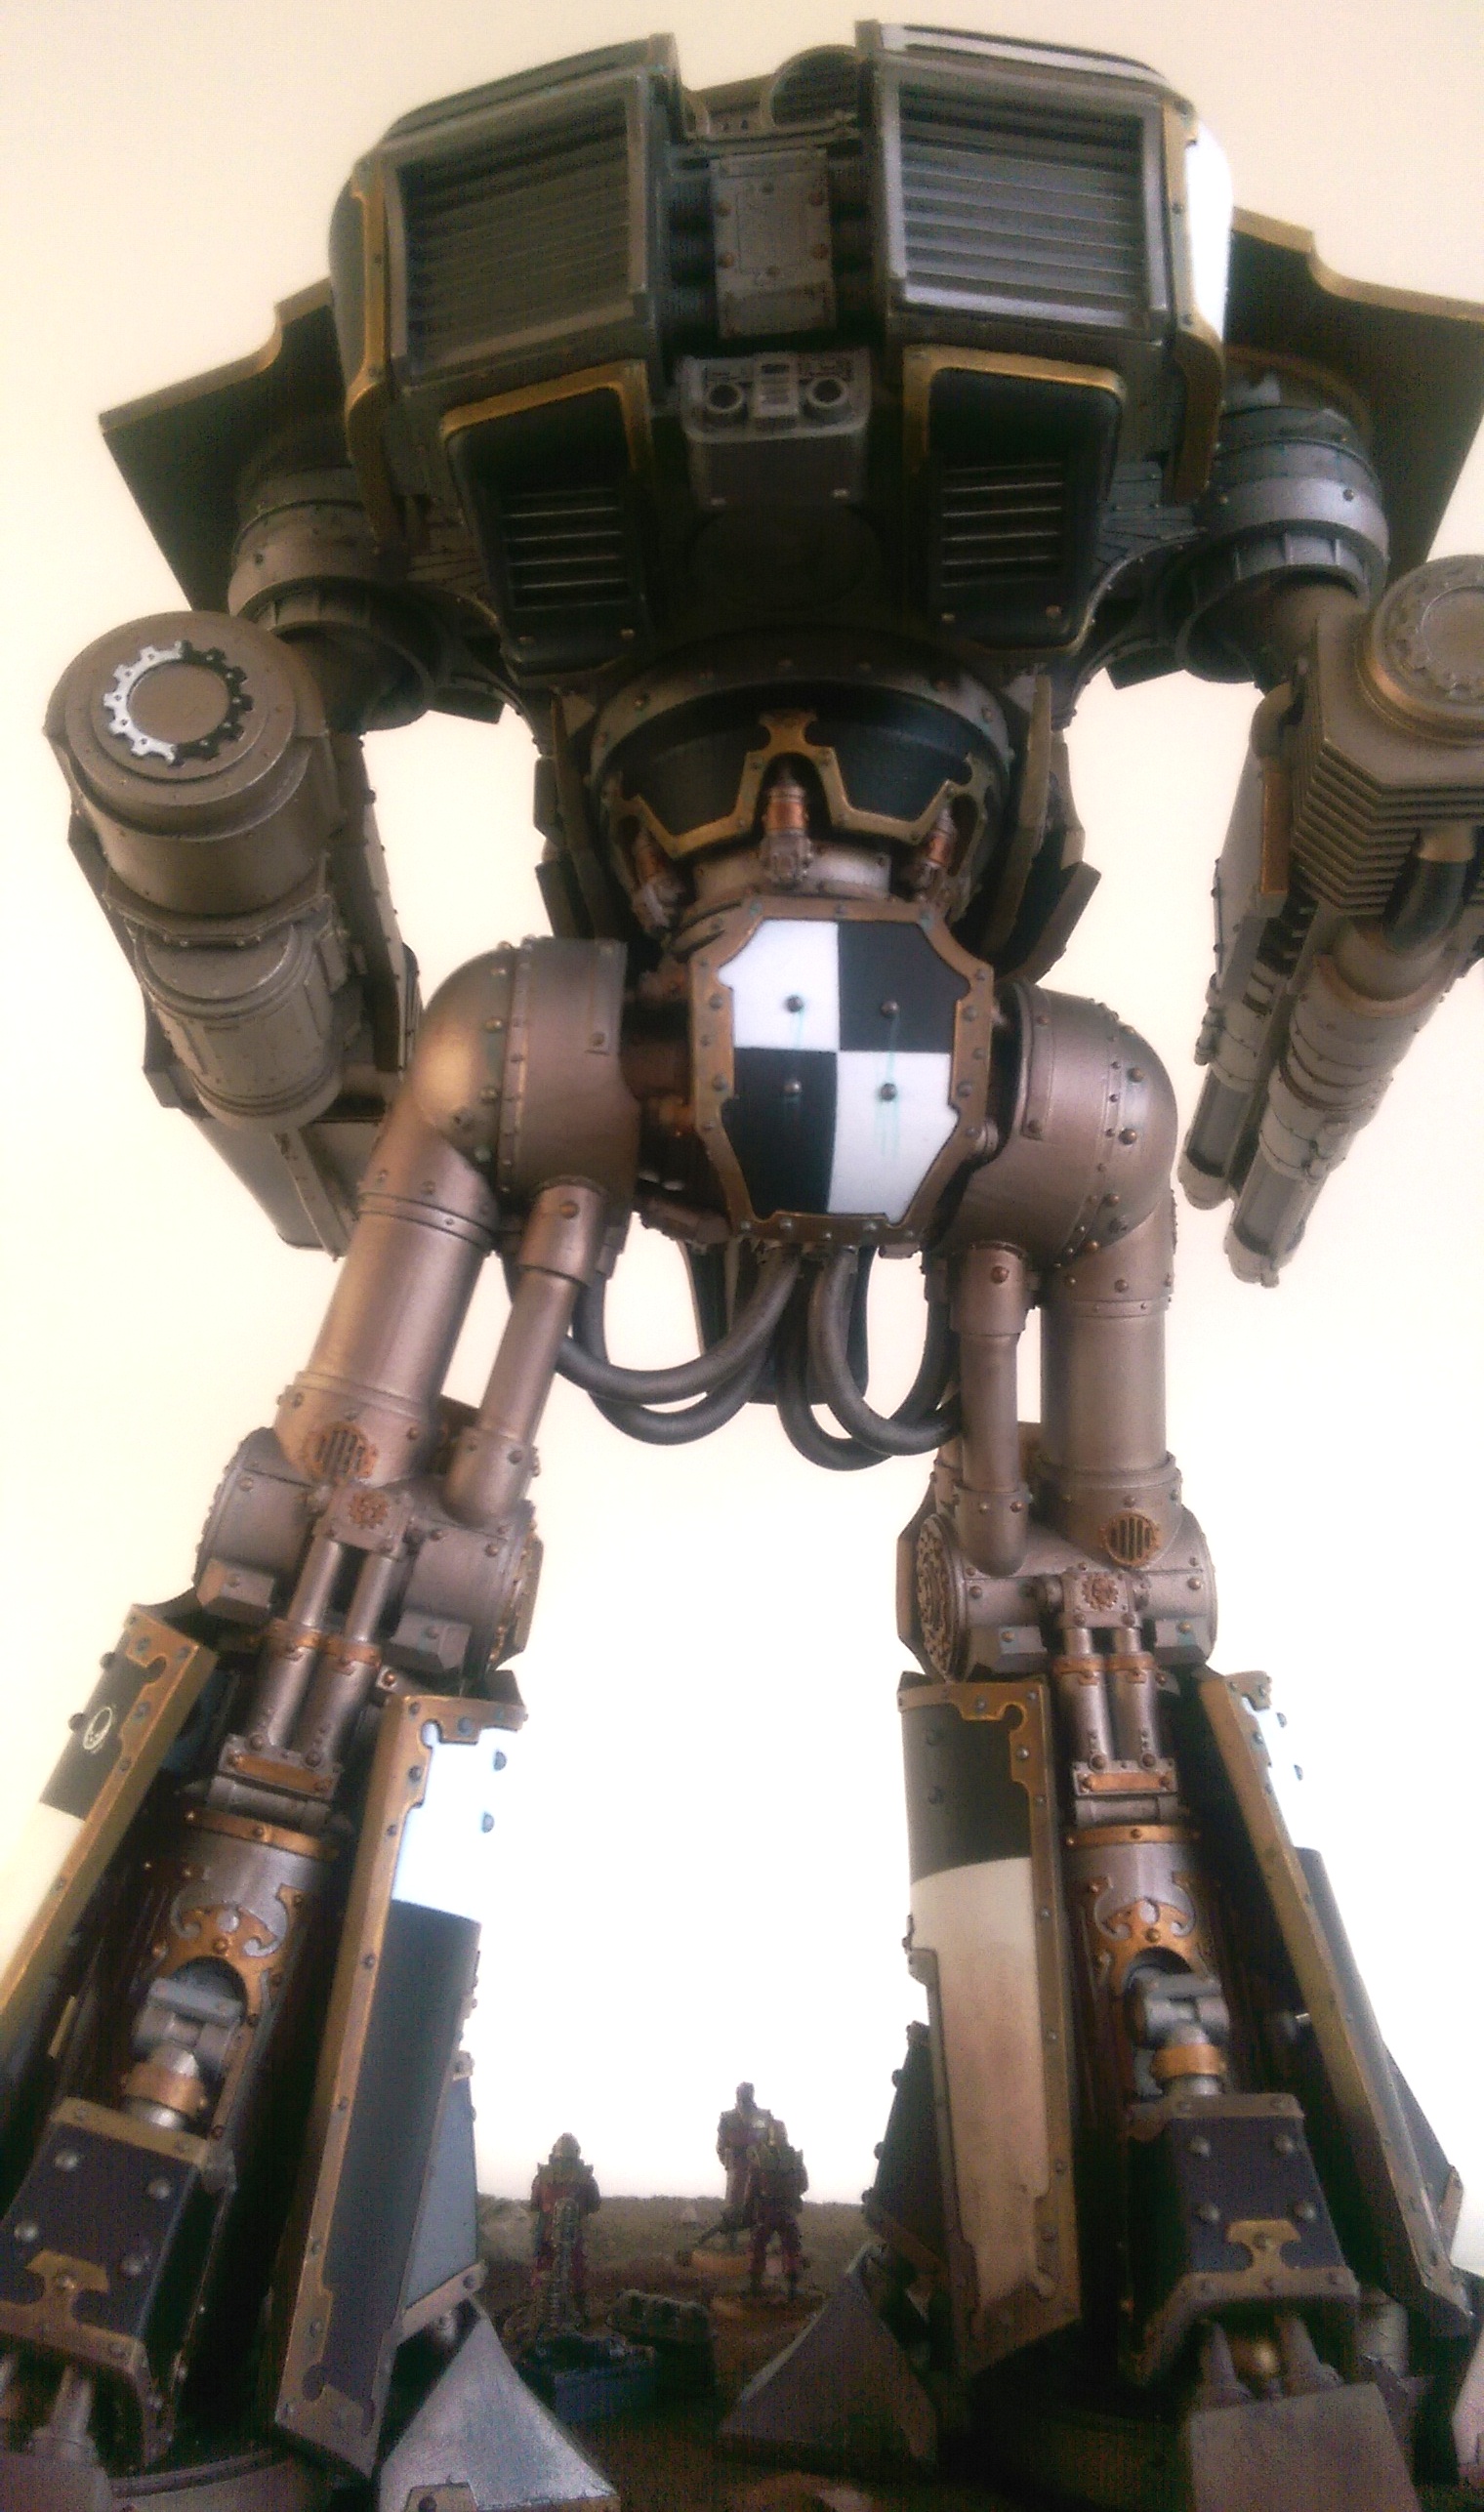
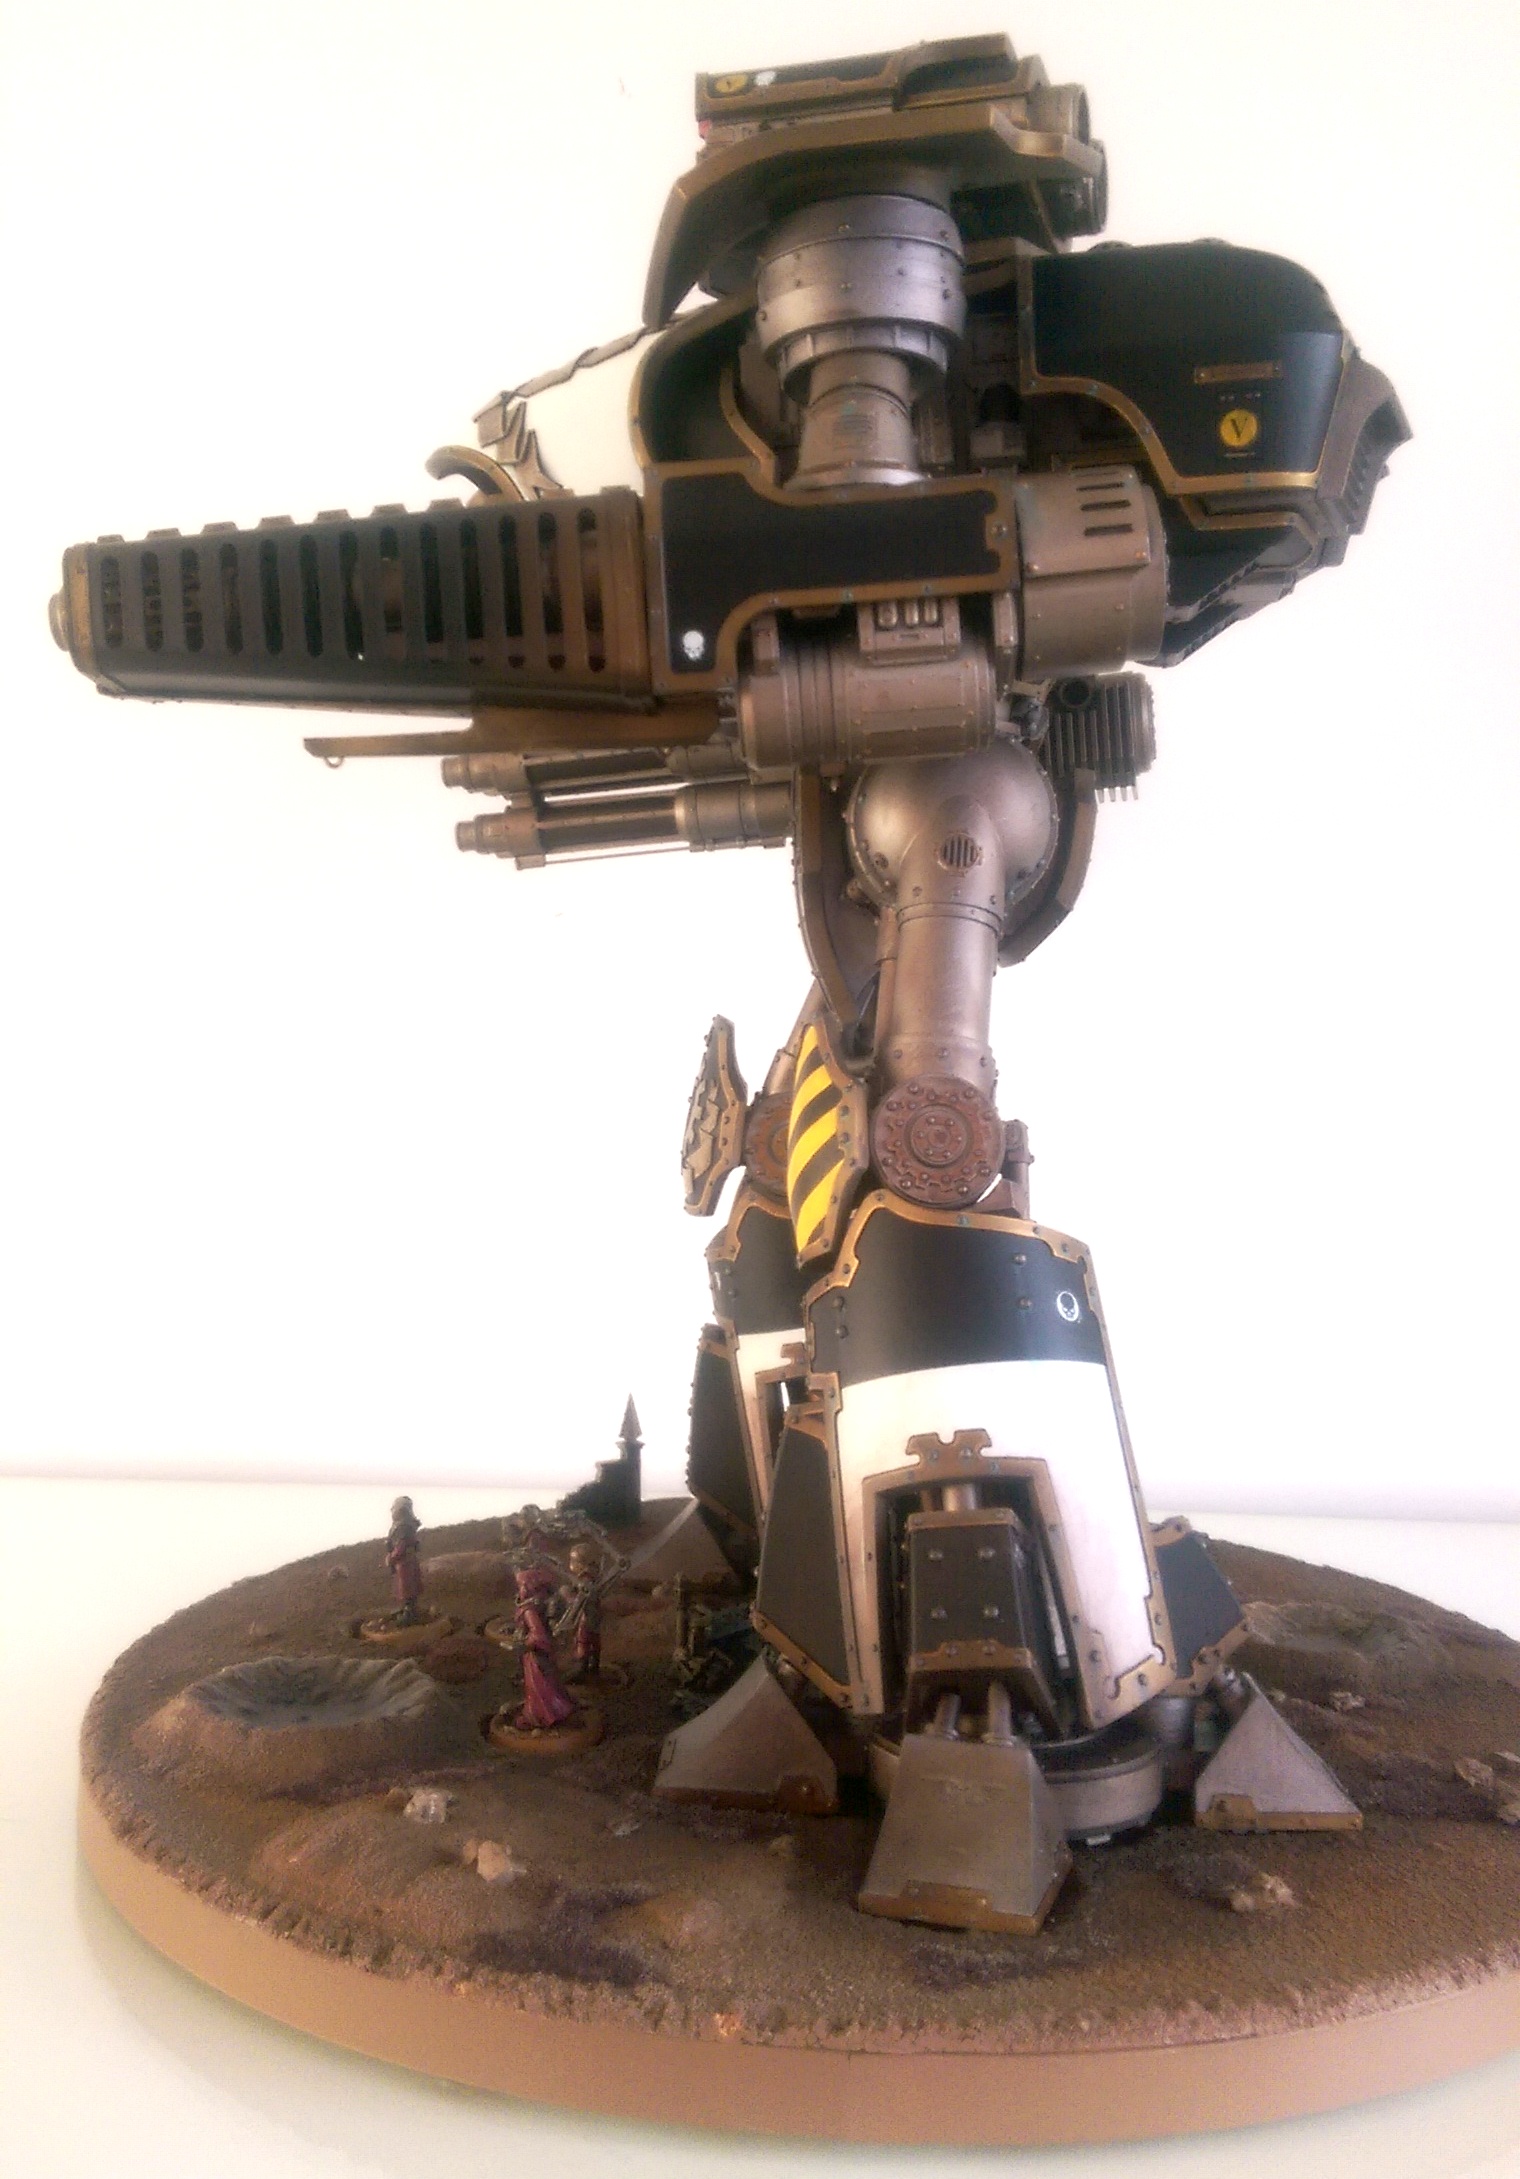
The exposed metal of the superstructure was primed black as above then sprayed with Army Painter's Chain Mail, then washed with Strong Tone through the airbrush. Weathering was achieved using Citadel's Nihilakh Oxide, Typhus Corrosion and Forge World weathering powders.
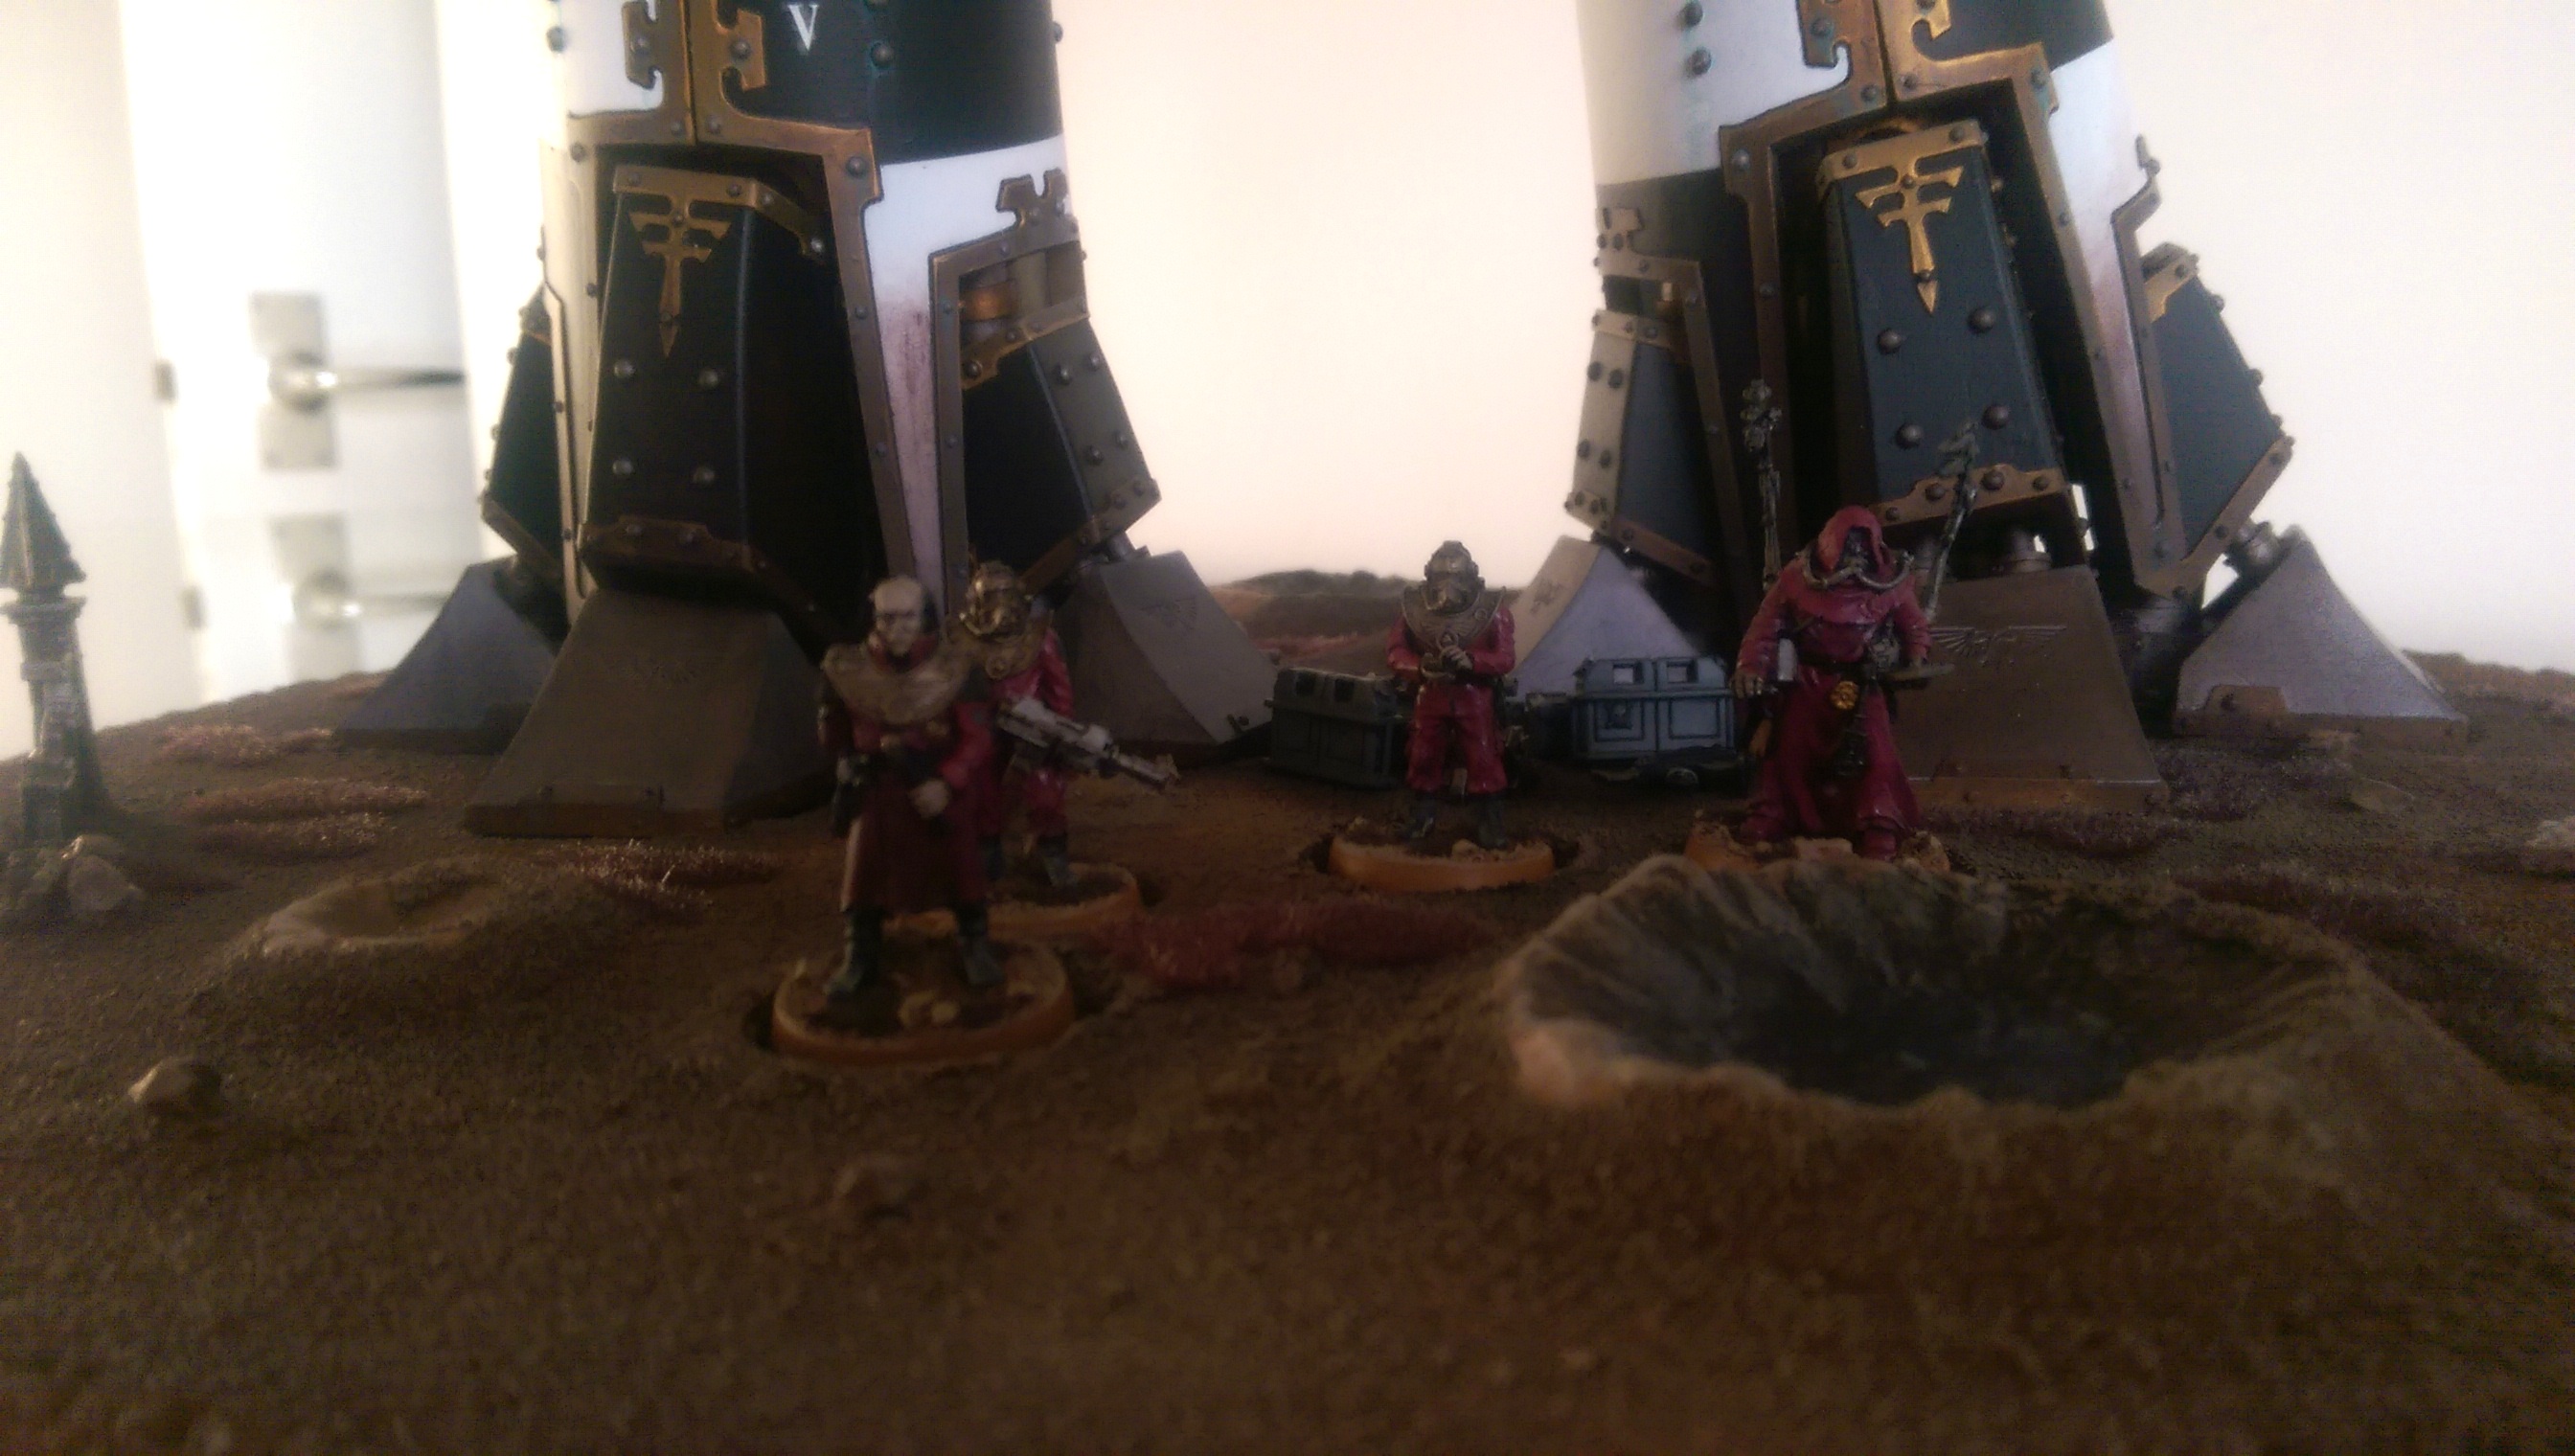
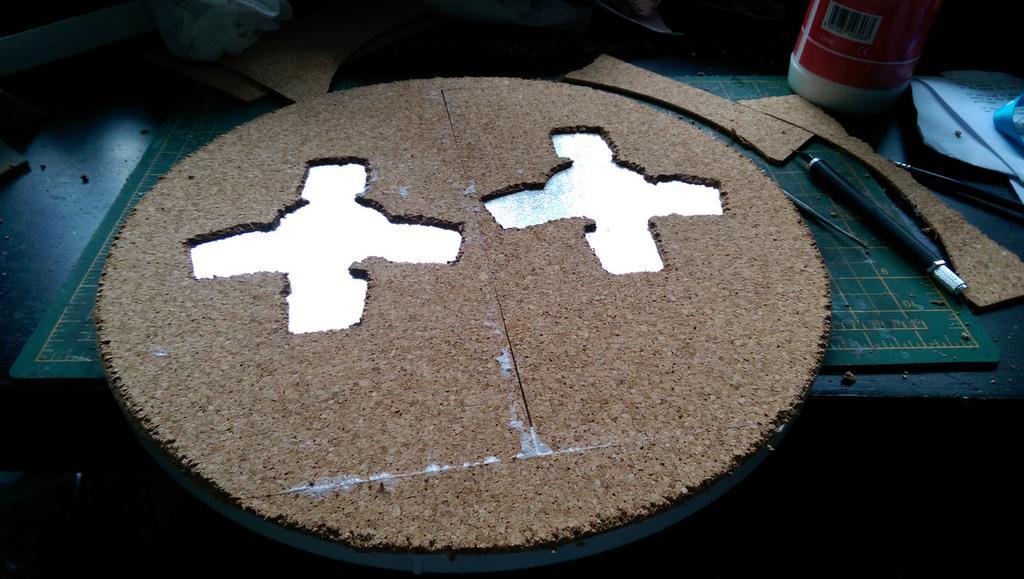
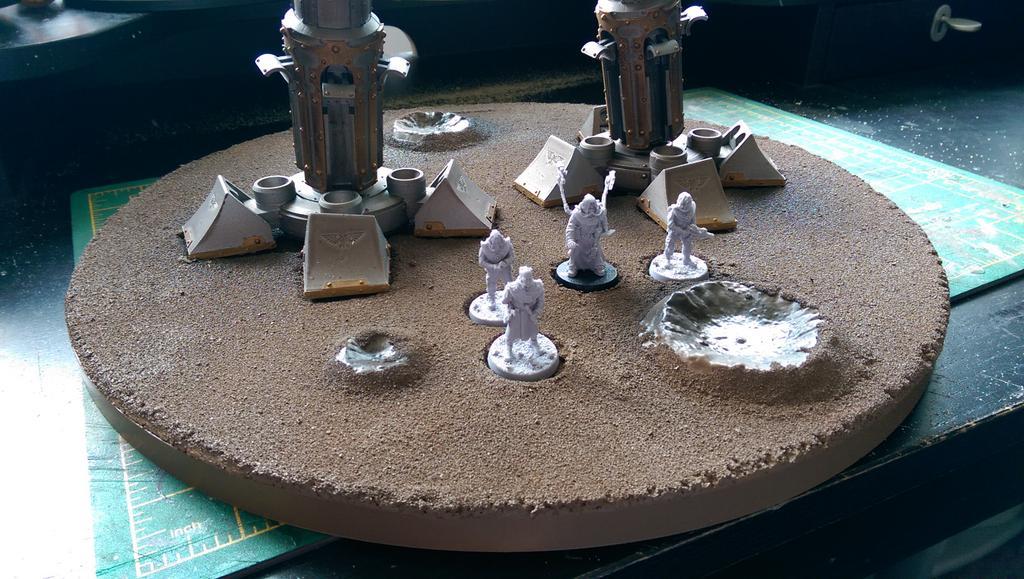
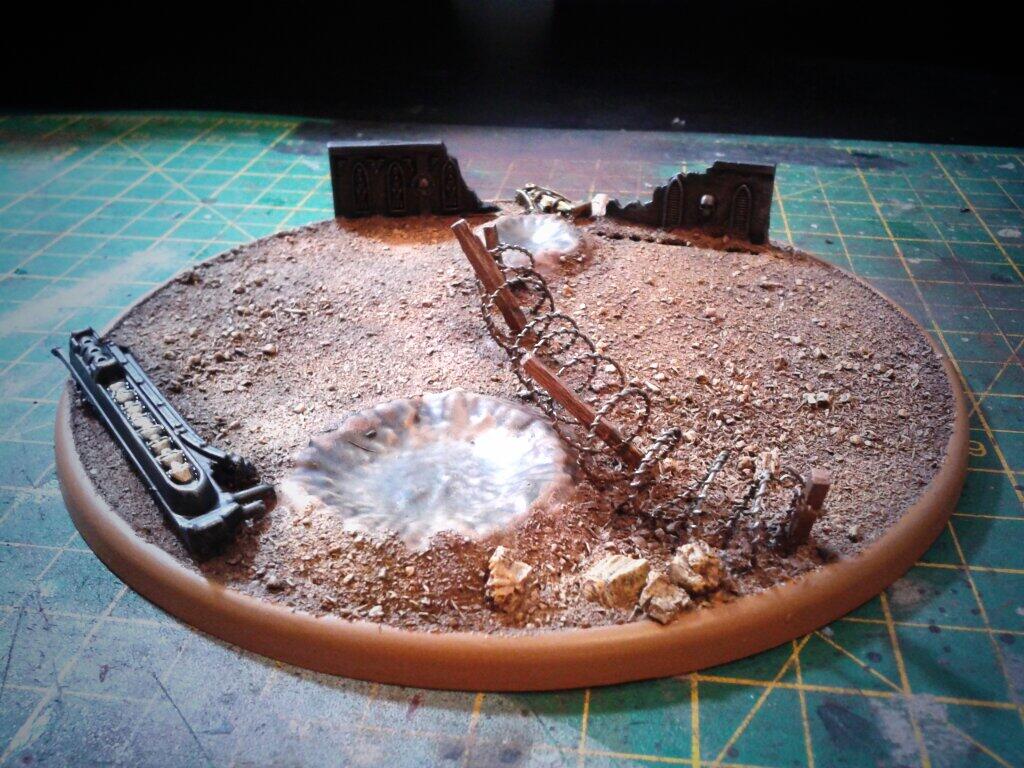
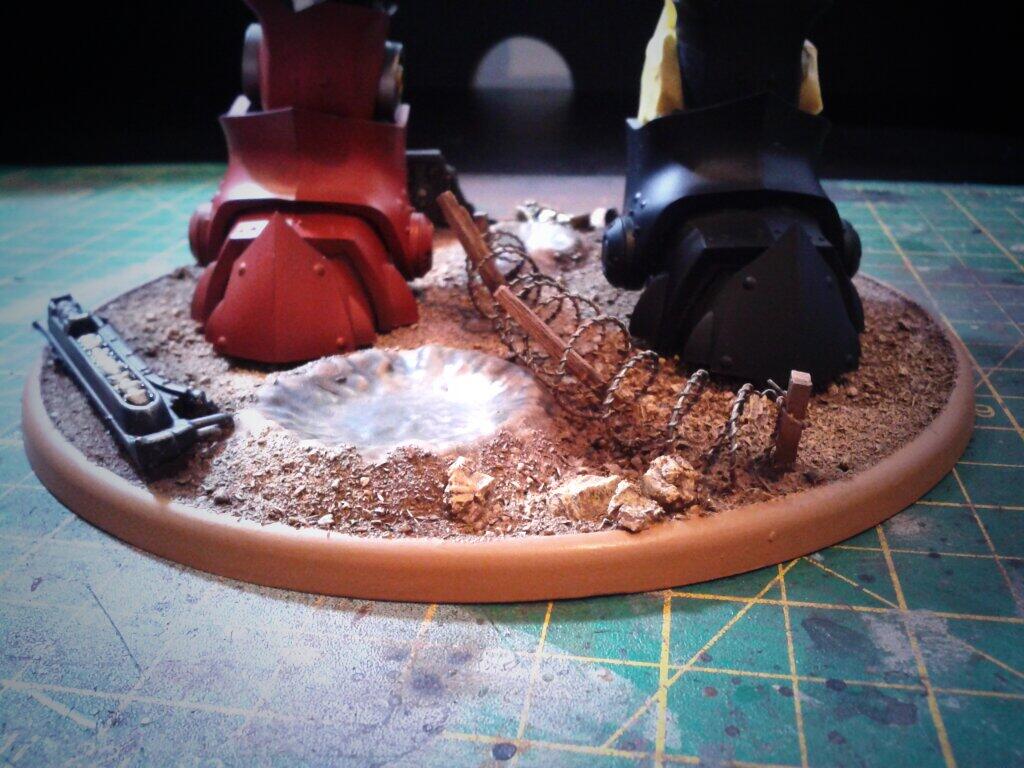
The base is a simple cake base with a belt of plasticard around the outside. It's supposed to match the basing scheme I've used for my Salamander and Necron armies and the Leviathan. There is a layer of cork on top of the base to allow me to create depressions into which the titan's feet can be placed (to create the effect of the ground sinking beneath its feet). I added some crushed up aluminium foil and some craters from Amera Plastic Mouldings to add relief. I then painted with PVA and applied sand. once dried, I sprayed the base with a mix of Army Painter leather and Plasti-kote sprays, drybrushed with a few GW paints and then added static grass (GW's Dead Grass).
Overall, I'd say this project is pretty straightforward, requiring a lot of technique but not much skill: for example, knowing how to pin the leg joints in the most effective way. Since the model was painted almost entirely using the airbrush, the amount of masking required was pretty exhausting and very boring indeed!


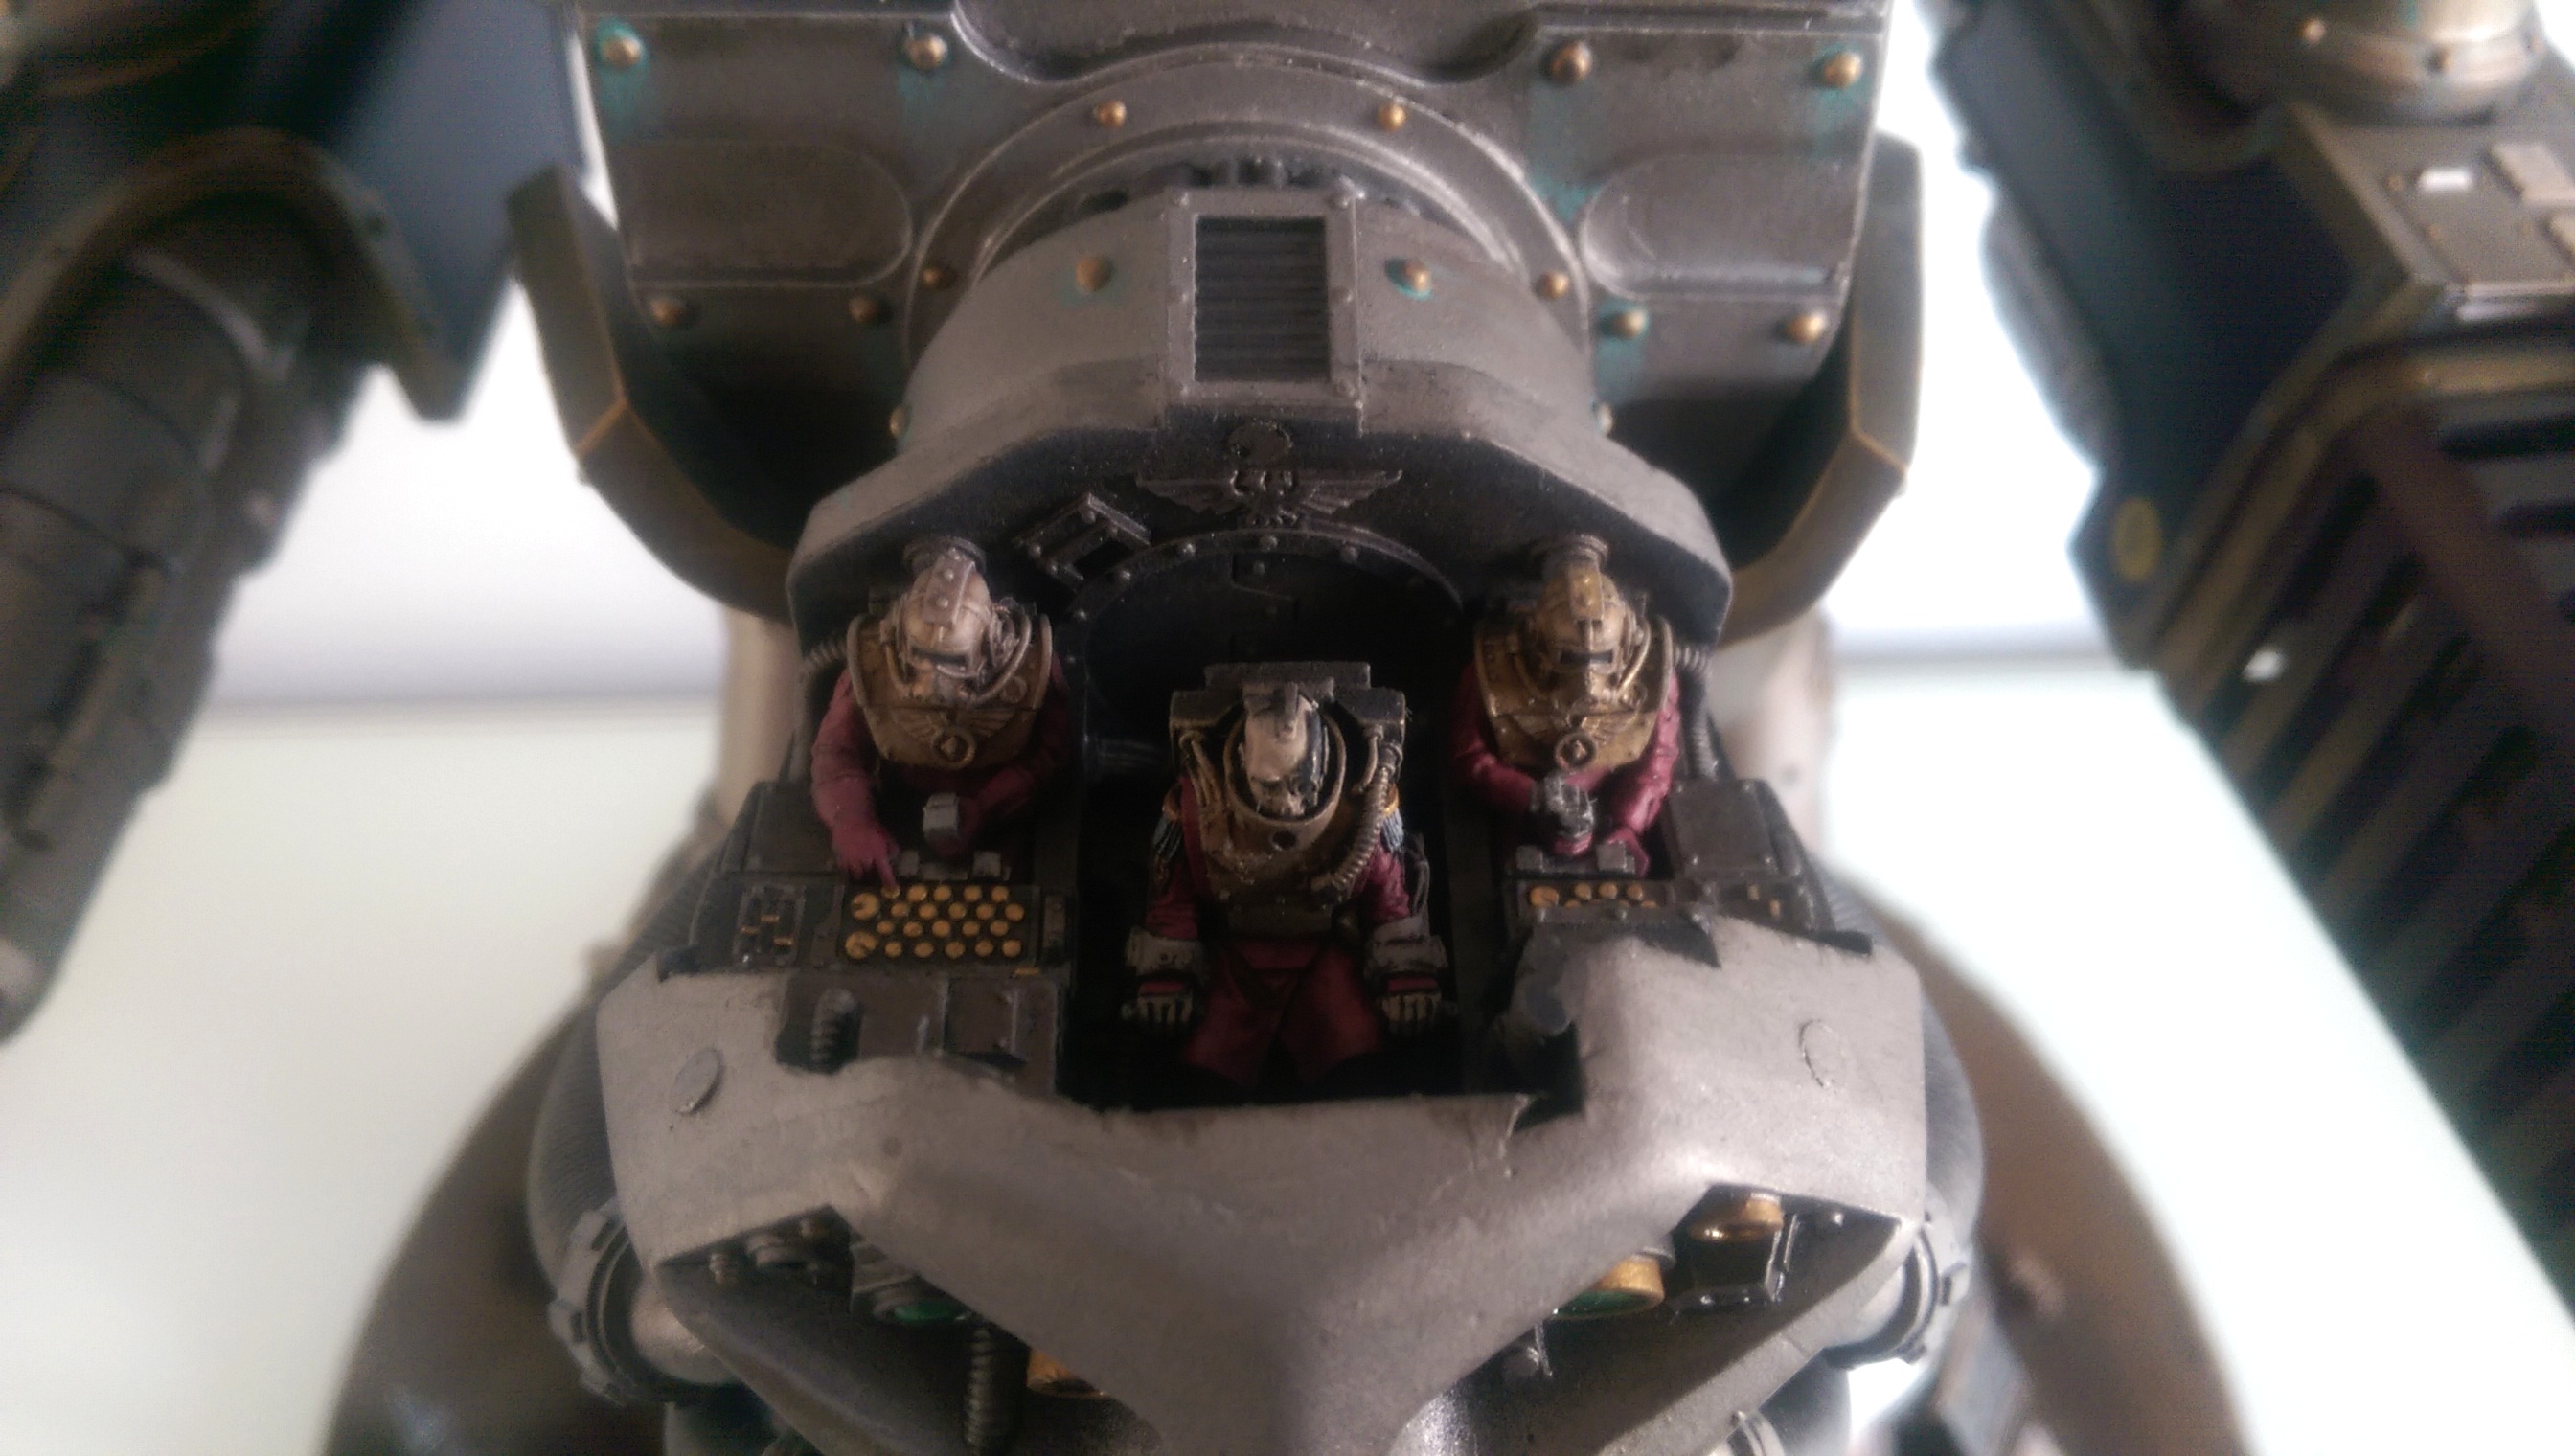


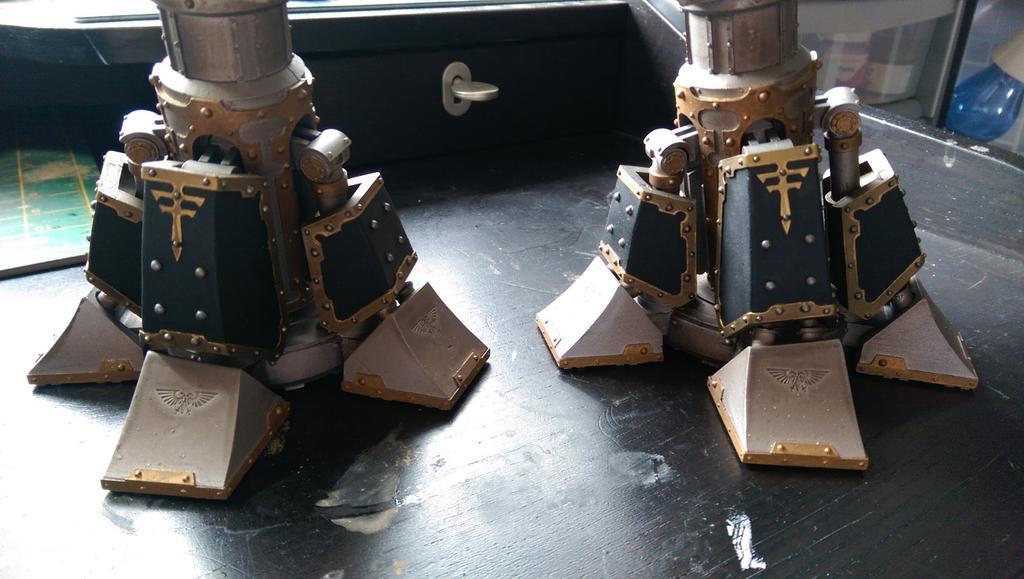
Reaver Update #6: Invictus Ferrum
Adeptus Mechanicus Collegia Titanica
Legio Pantera <Black Panthers>
Battle Group ΔVII <Delta-Seven>
Omega Crusis Maniple 533
"Invictus Ferrum" <Invincible Iron>
Mars Pattern Reaver class Battle Titan
Chassis Serial #MCCCXLVI
Currently on operations on Severus Ultis, Vastus Sector
The Reaver is done! Check out the rest of the photos on my Facebook page. I will post them here (along with a post-mortem of the build and paint) in a few days.

Reaver Update #5

The Reaver is 98% done. Apart from this teaser, I'm not going to post any photos until it's 100%. I still have a few problems to fix and a couple of parts still to paint, and the whole issue of banners remains unanswered.
There have been a few ups and downs but I'm pretty pleased with how it's turned out, more or less.
Stay tuned for the big reveal!
Reaver Update #4
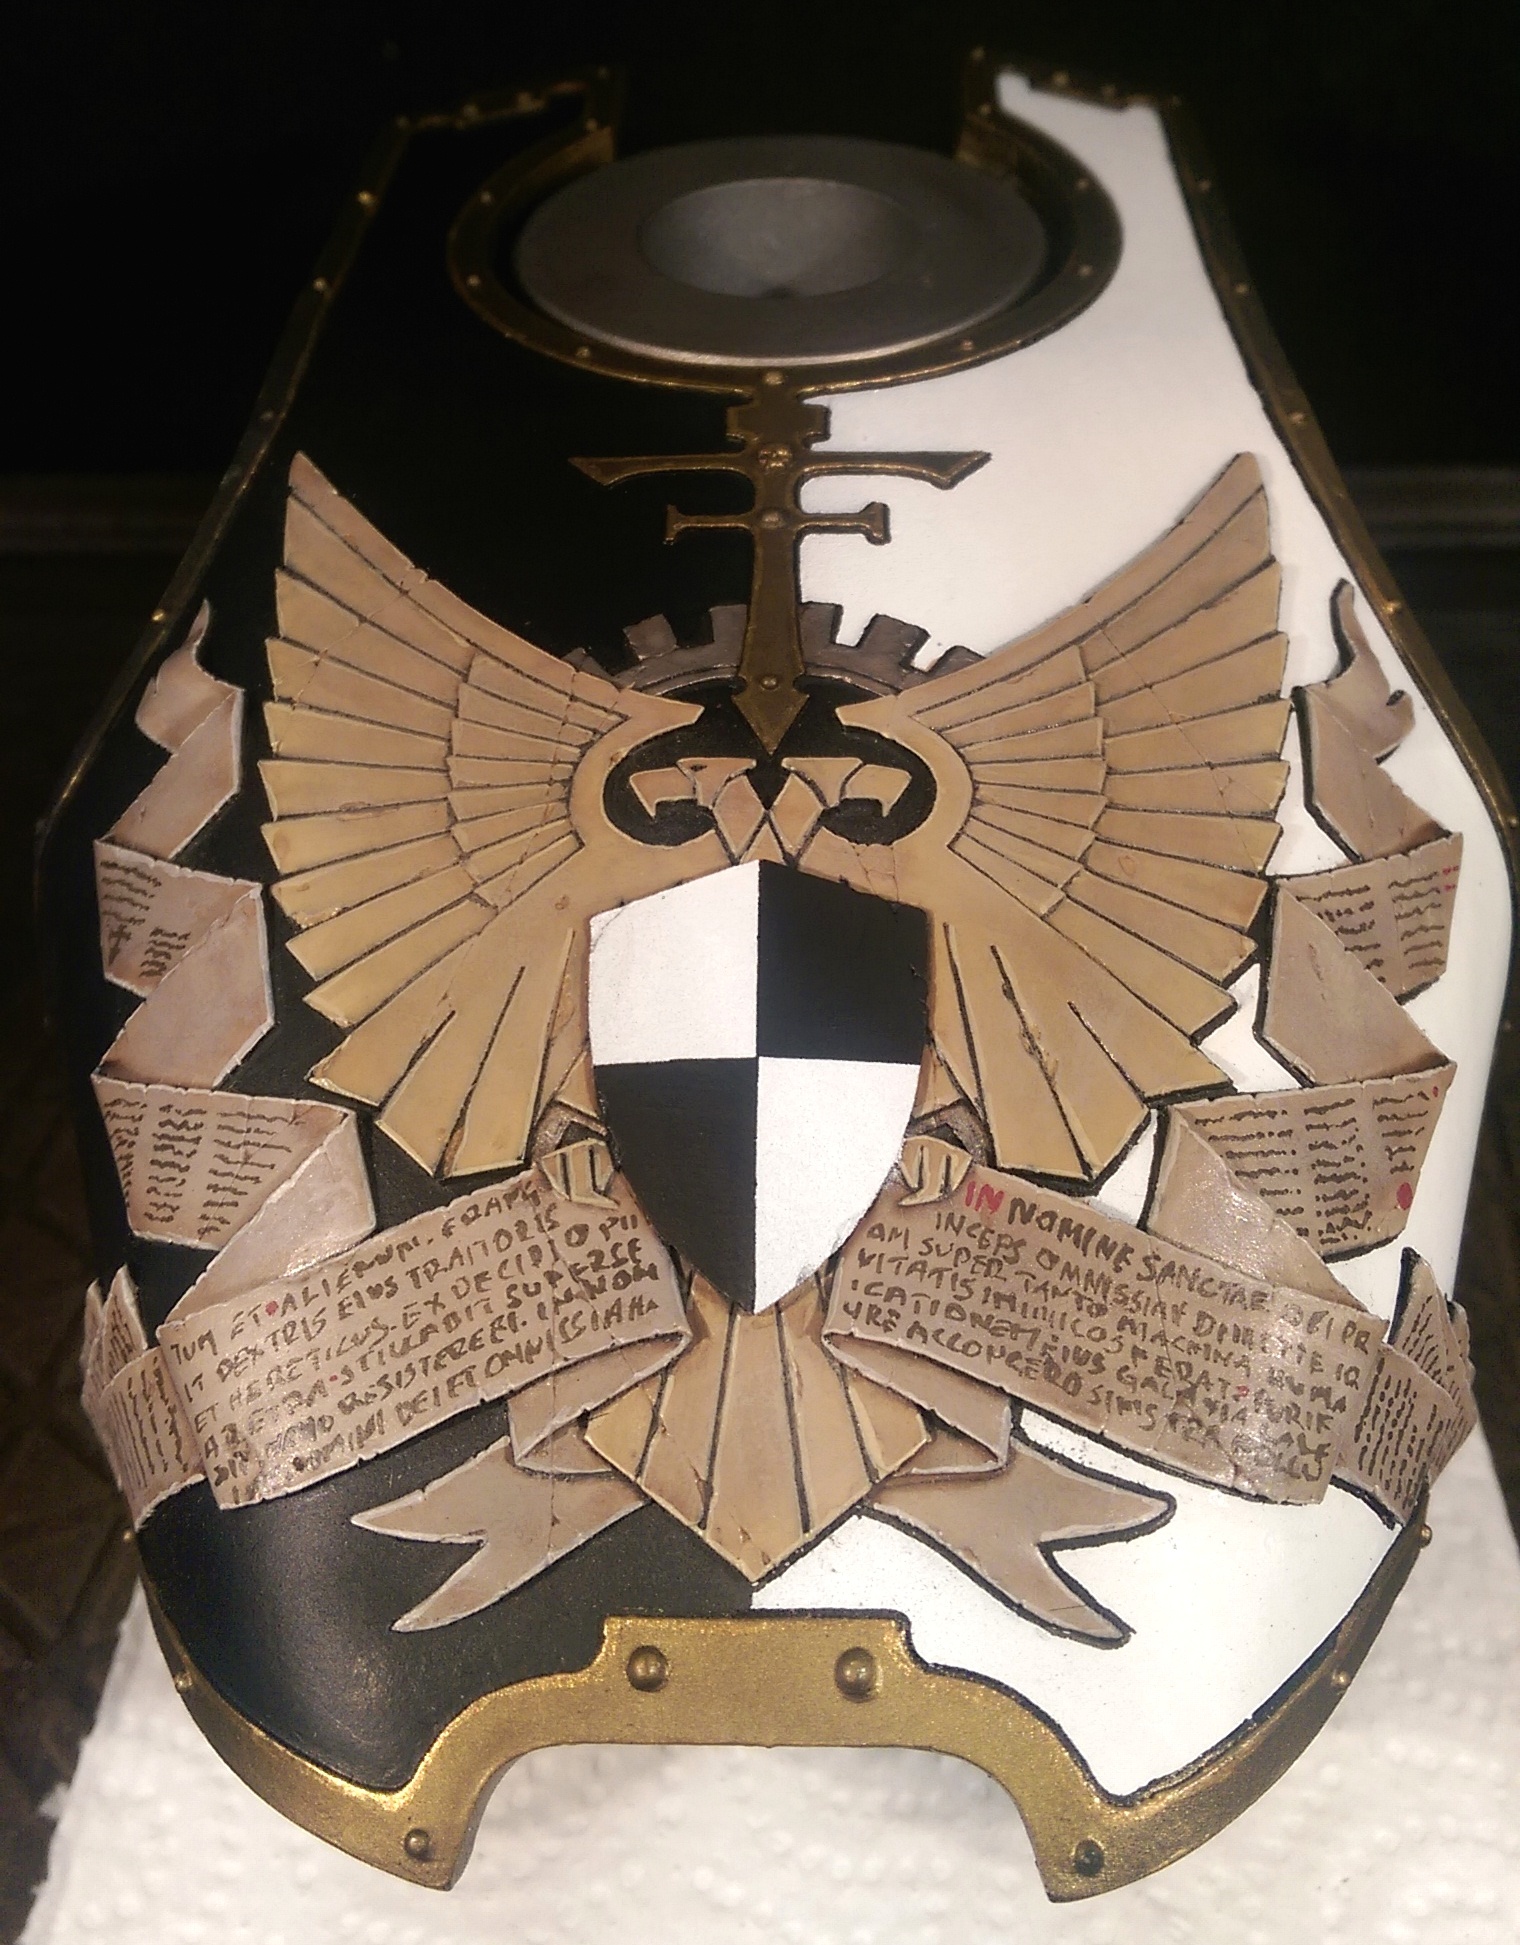
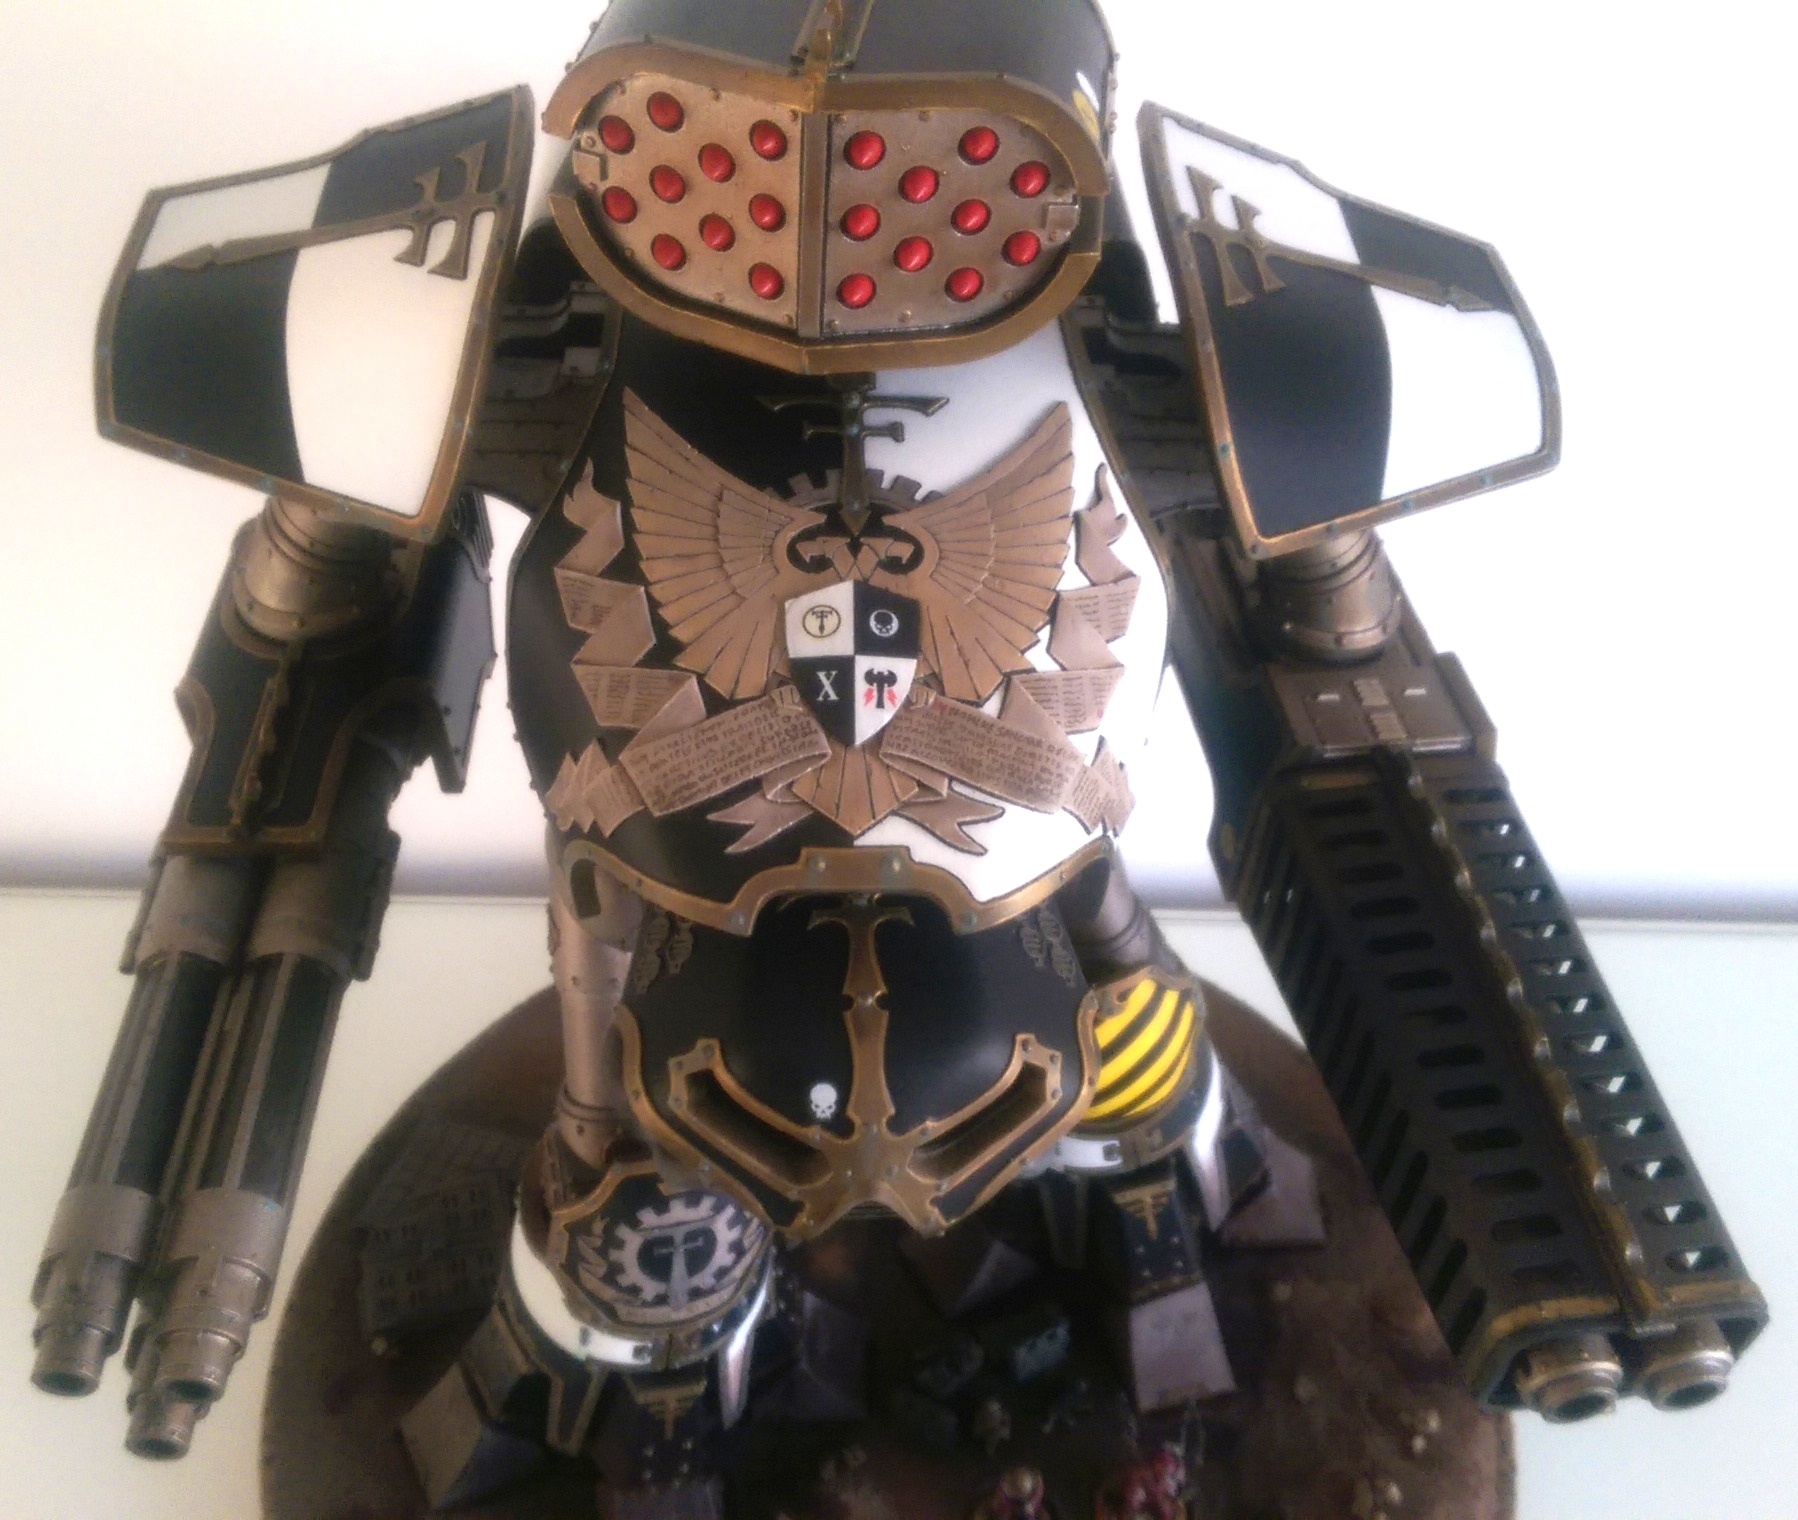
The text on the scrollwork is Latin cooked up by Google Translate from the following:
IN THE NAME OF THE GOD EMPEROR AND THE HOLY OMNISSIAH, LET THIS MIGHTY
ENGINE OF WAR BRING FORTH ITS WRATH UPON THE ENEMIES OF MANKIND. LET ITS
LEFT HAND BRING FORTH FURIOUS HEAT TO CLEANSE THE GALAXY OF THE UNCLEAN
AND THE ALIEN. LET ITS RIGHT HAND SMASH THE TRAITOR AND THE HERETIC. LET
IT RAIN DOWN DESTRUCTION FROM THE QUIVER UPON ITS BACK. LET NONE STAND
BEFORE IT. IN THE NAME OF THE GOD EMPEROR AND THE HOLY OMNISSIAH!
which apparently translates to:
IN NOMINE SANCTAE DEI ET PRINCEPS OMNISSIAH DIMITTE IRAM SUPER TANTO
MACHINA HUMANITATIS INIMICOS FERAT. PURIFICATIONEM EIUS GALAXIA CALUERE
ACCONGERO SINISTRA POLLUTUM ET ALIENUM. FRANGIT DEXTRIS EIUS TRADITOR ET
HAERETICUS. DE EXCIDIO PHARETRA STILLABIT SUPER SE SIT. NEMO RESISTERE
EI. IN NOMINE DOMINI DEI AD CAESAREM OMNISSIAH ET SANCTA
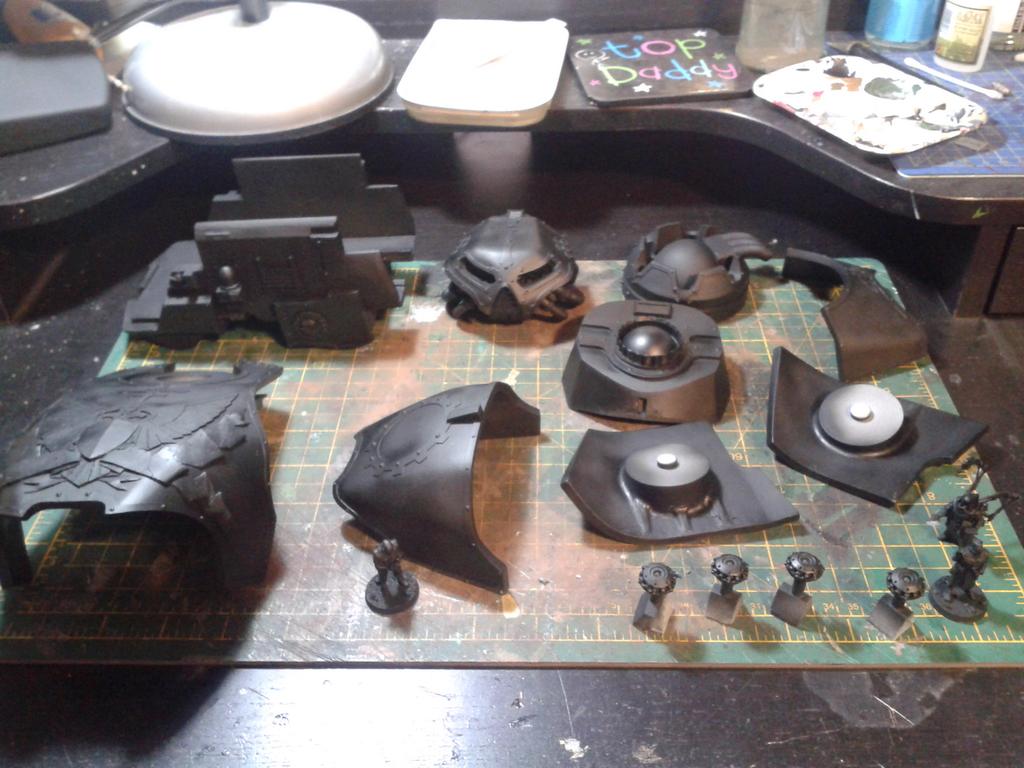
Reaver Update #3


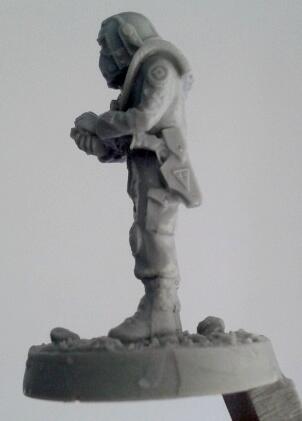
Reaver Update #2
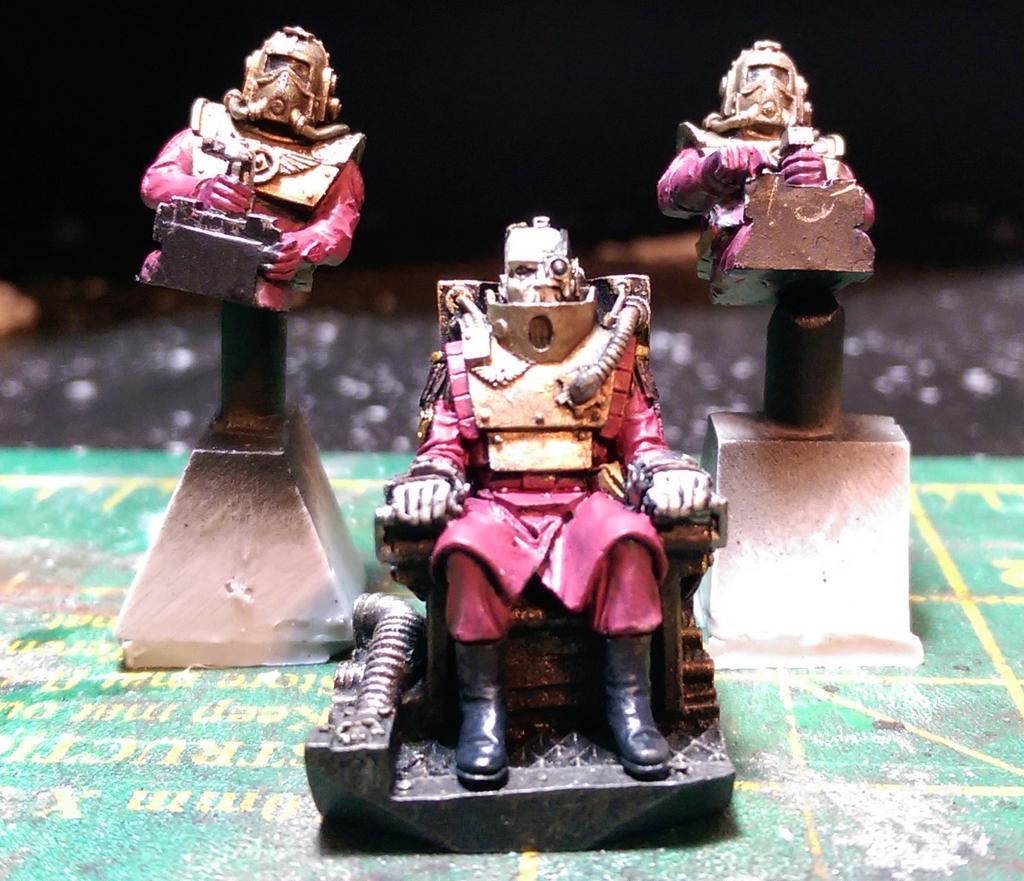
Here's one of the titan crew on foot, He came out of the blister with a little lean, which needed fixing:

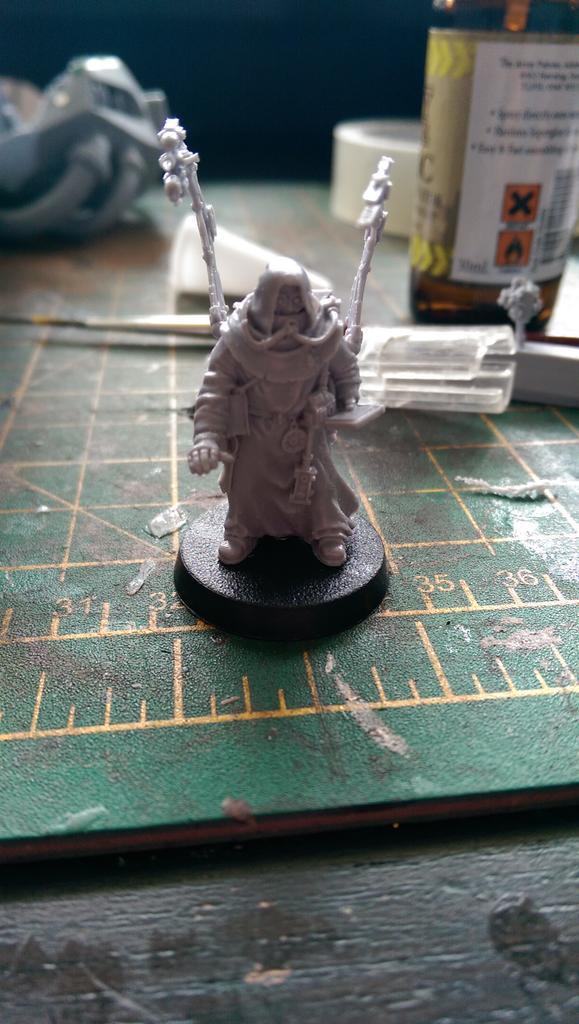
Here's the Tech-Priest, who I magnetised so he can go inside the titan's torso, or on his own base:
Here's the assembled legs, compared to the Leviathan:
Completion of the legs and armour (everything is still in pieces as I still need to do varnishing and priming):
Miscellaneous photos:


The Reaver Titan Hype Cycle
 The consulting firm Gartner is famous for its eponymous Hype cycle which tracks the development of new technology.
I've come to realise the my project to build and paint a Reaver titan also fits onto this graph. This time last week, I was definitely in the Trough of Disillusionment, as my frustration with the complexity of the leg assemblies (pistons! So many pistons!) overcame my enthusiasm.
Now, however, I have started working on the torso, head and weapons, I feel like my determination to get the bloody thing finished so I can get on with other things is reasserting itself, and I'm approaching the Plateau of Productivity, at which point, the Reaver will probably end up being finished fairly quickly.
Here's hoping the hype cycle holds true this time!
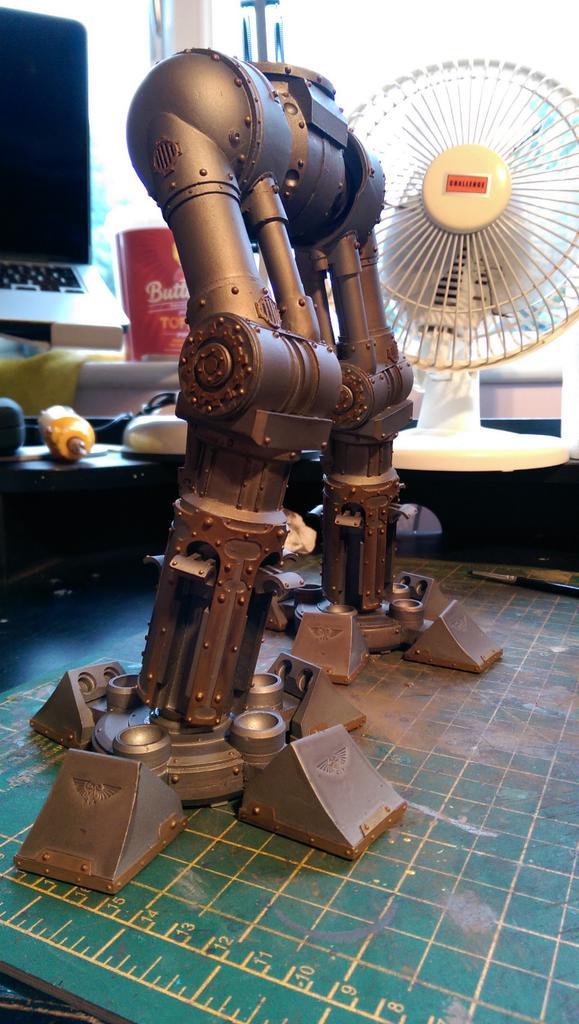
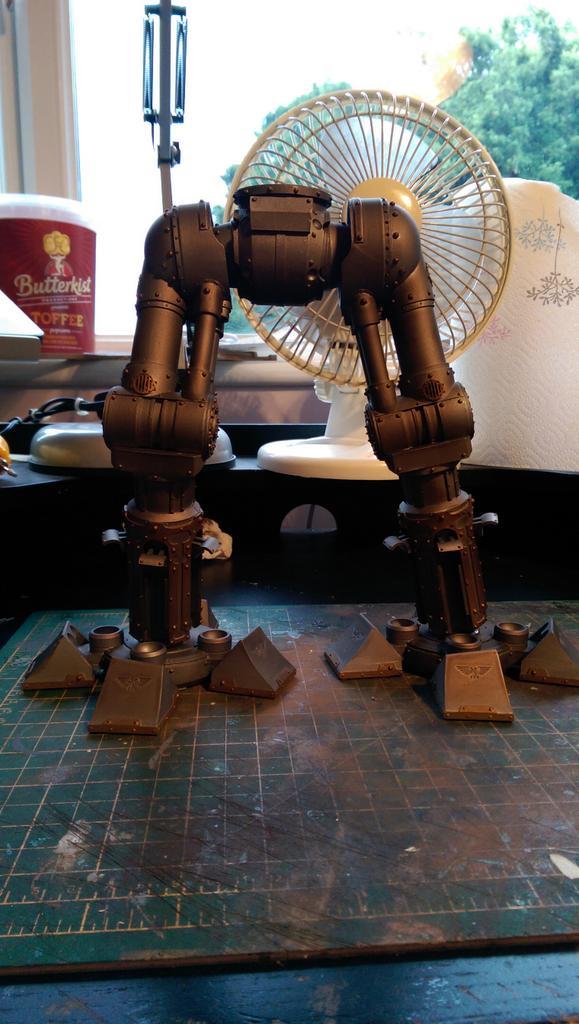
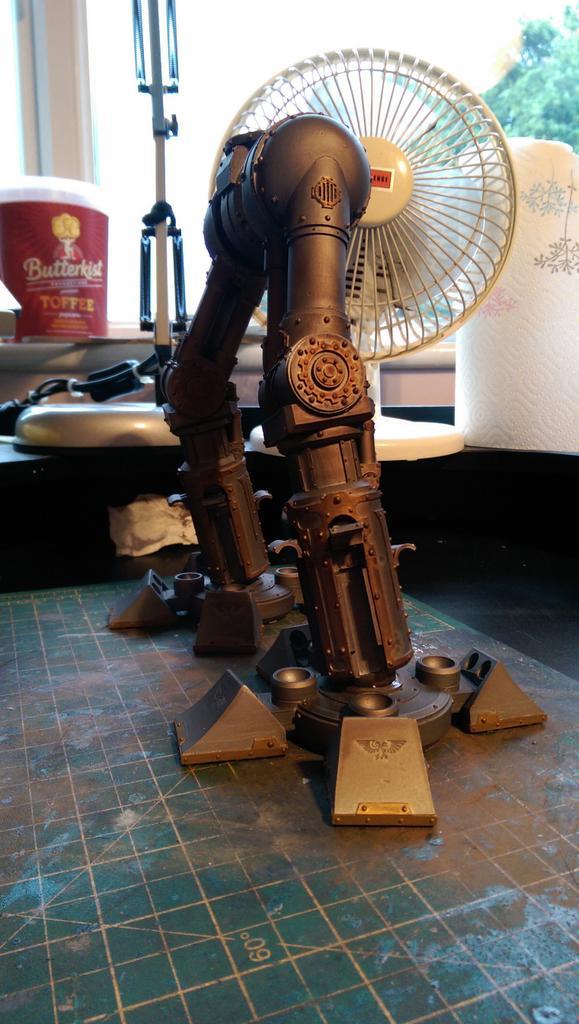
Reaver Update #1
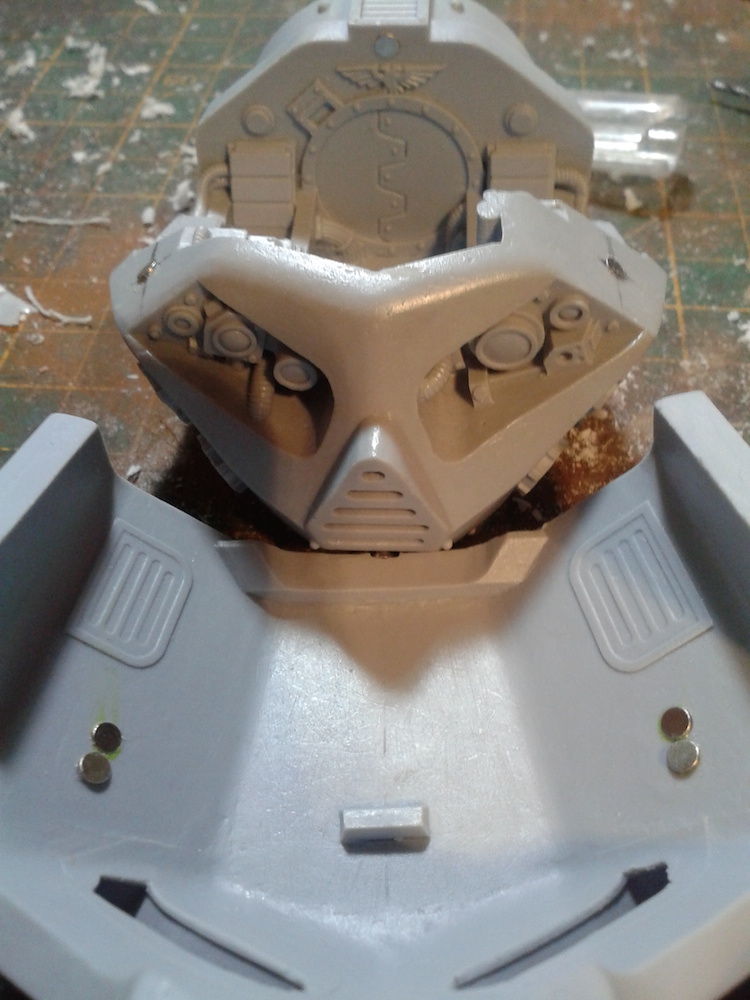
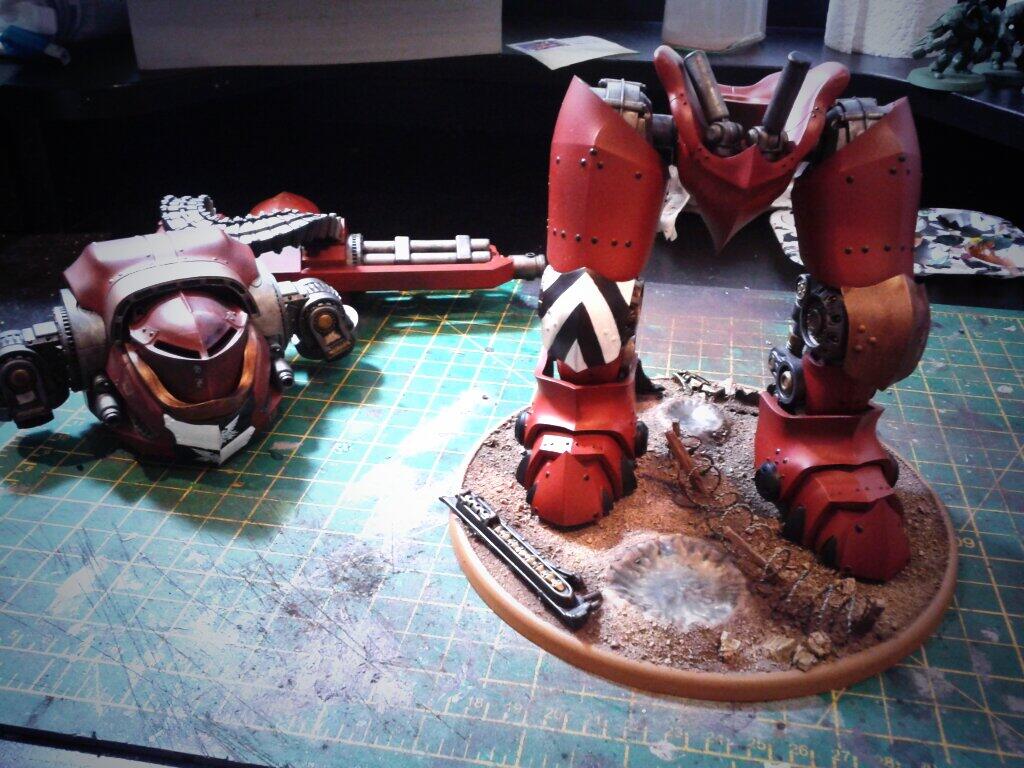
As with the Leviathan, the legs are definitely the trickiest part of the model, and you need to take a lot of time testing out positioning. The general procedure is: measure twice, then measure again, then check on the Internet to see if anyone else has done it the same way, then measure again, then cut!
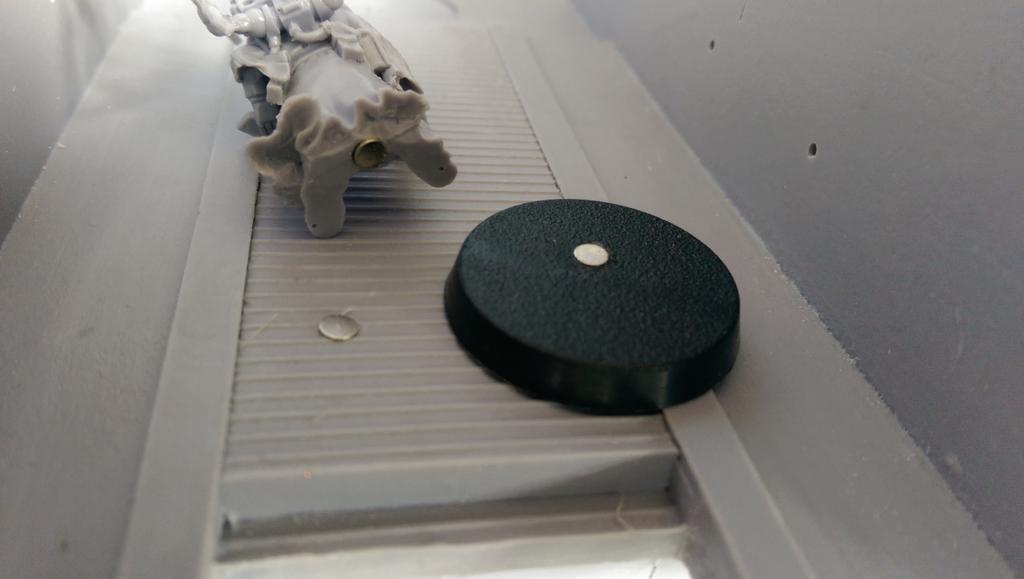
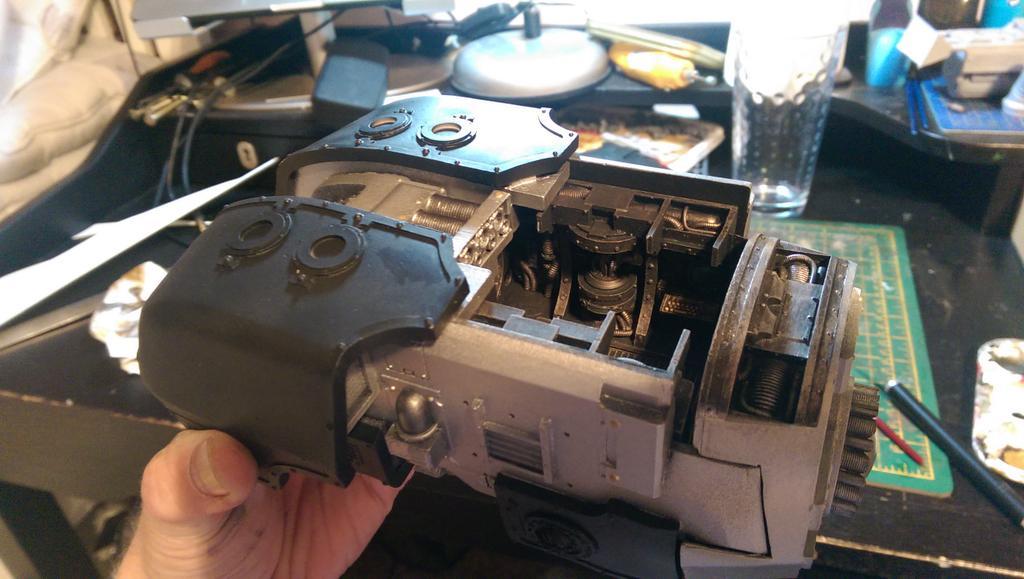
One innovation that I haven't seen anyone else write about is the magnetisation of the "helmet", or the roof of the Titan's head. I did this by drilling holes in the appropriate places (you'll notice that I had to do this a couple of times before i got it right) and inserting 3mm magnets that I bought from Gladius Game Arts.
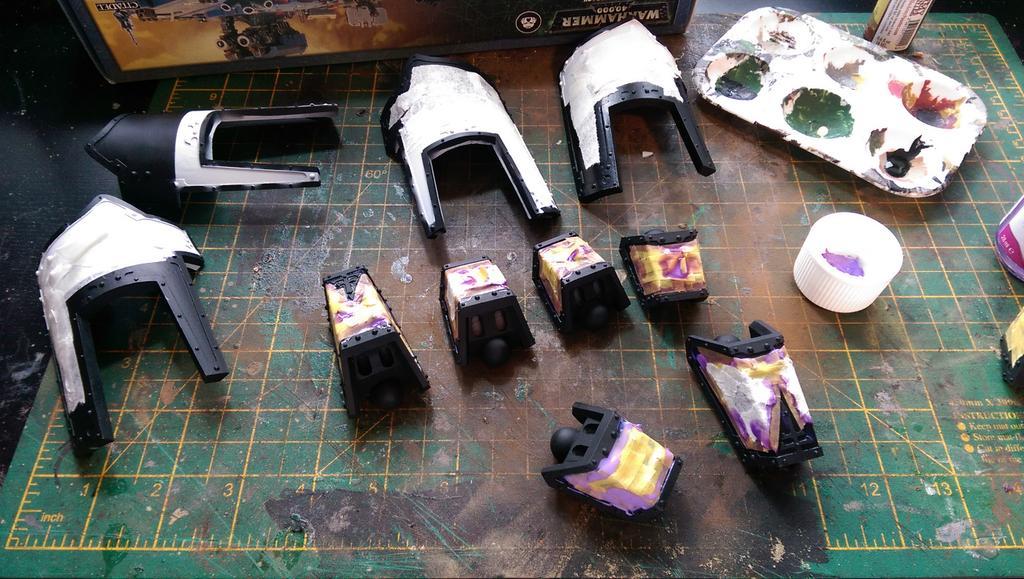
Most of the leg and pelvis of the Titan has now been primed black, and the superstructure will then be sprayed using Army Painter chain mail. I tried a variety of white metal Vallejo model air paints but decided that none of them looked right over a black primer.
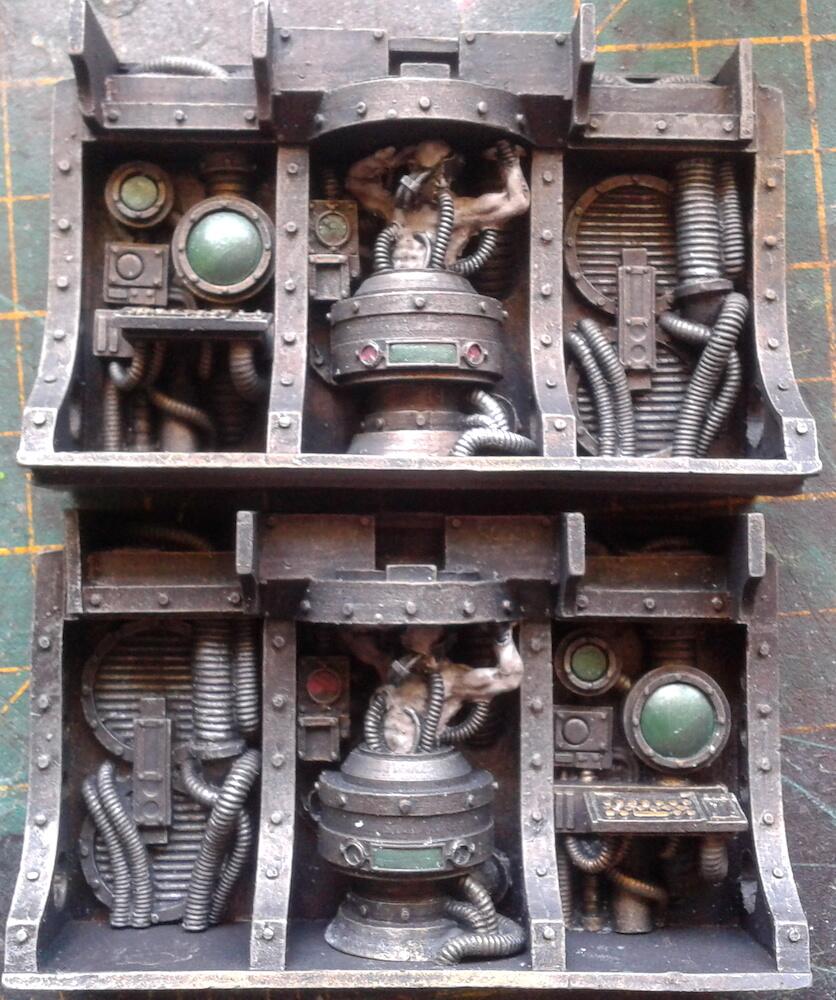
I've finished some of the interior parts: here are the wall panels that will sit inside the Titan's body:
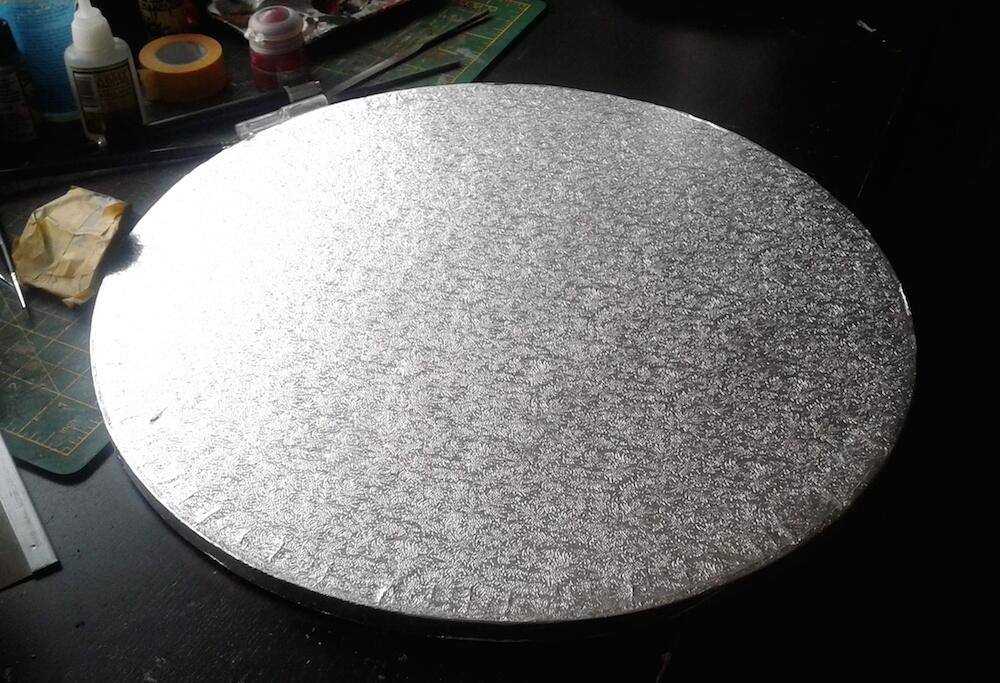
I also have plans to give the Titan a base, although it would probably be fairly impractical to use it for gaming, so it's probably just going to be for display purposes. I found a 36cm-diameter cake base which looks like it will do the trick:
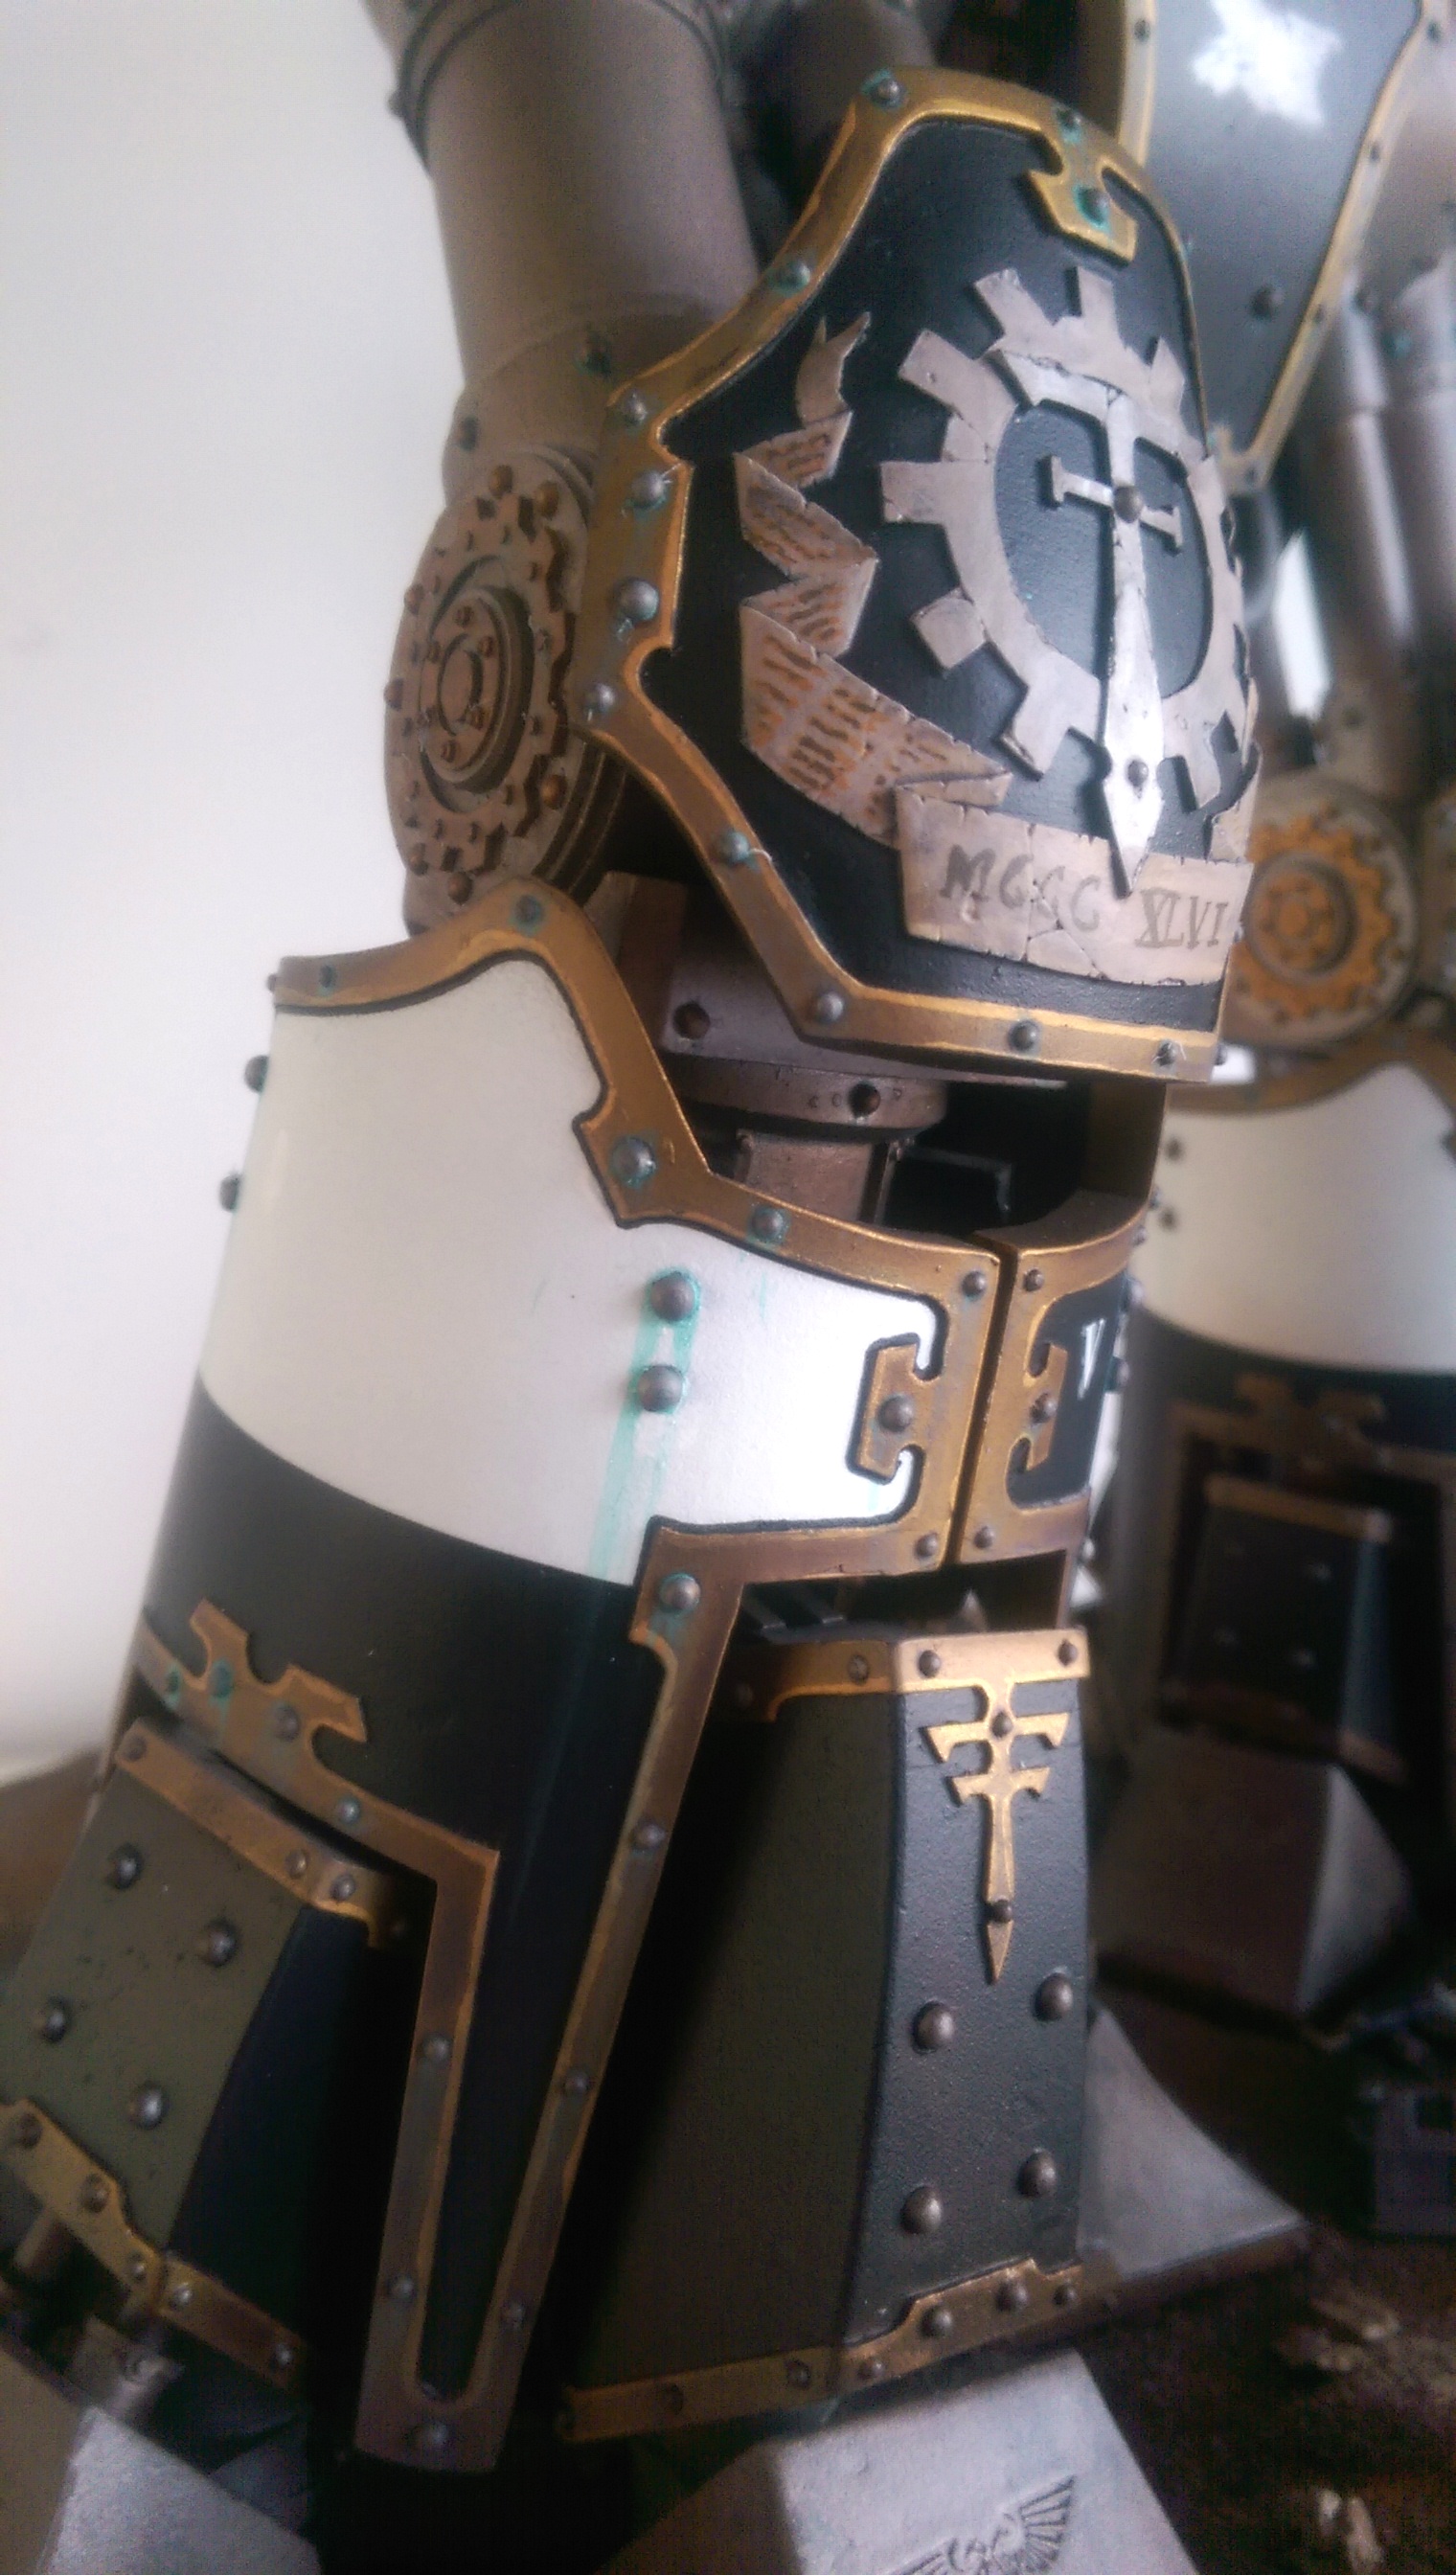
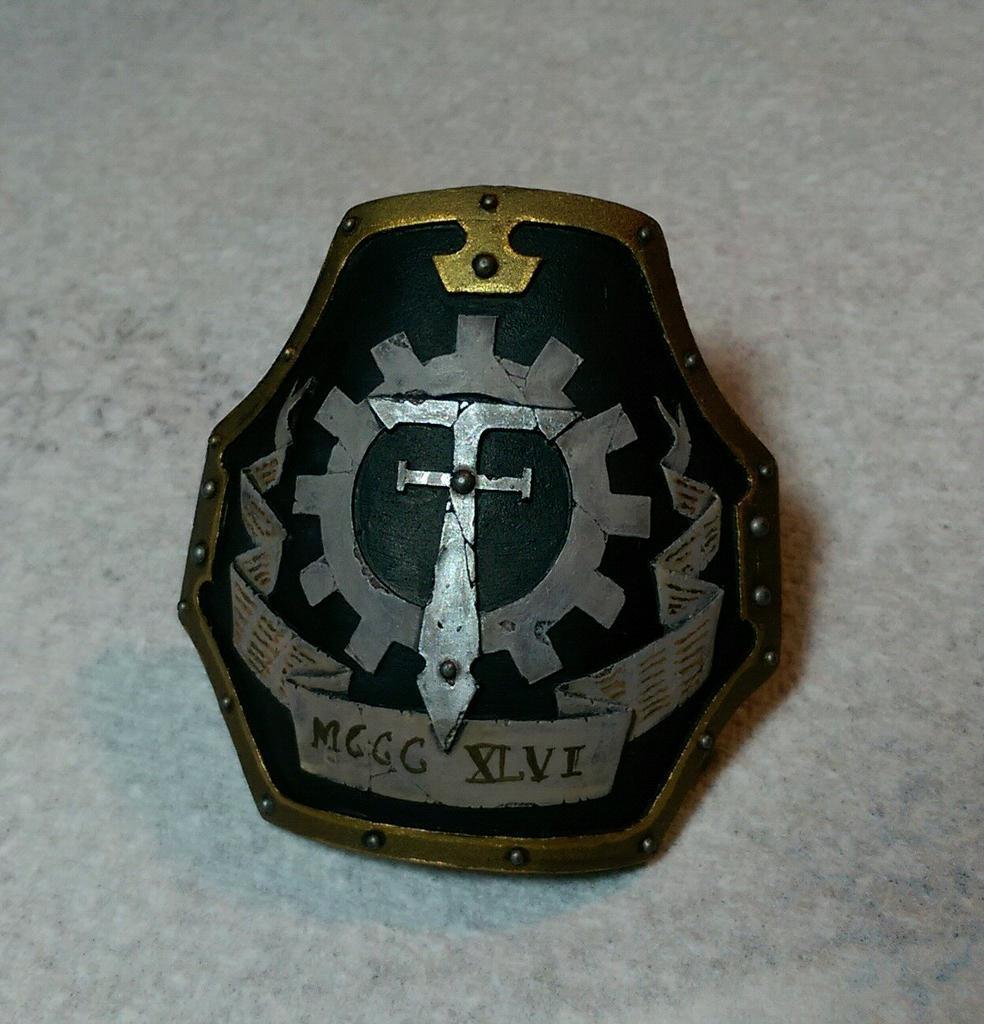
As I should probably have expected, I've made a few mistakes along the way, the most annoying of which was the realisation that I'd glued this plasticard logo onto the knee pad upside-down!
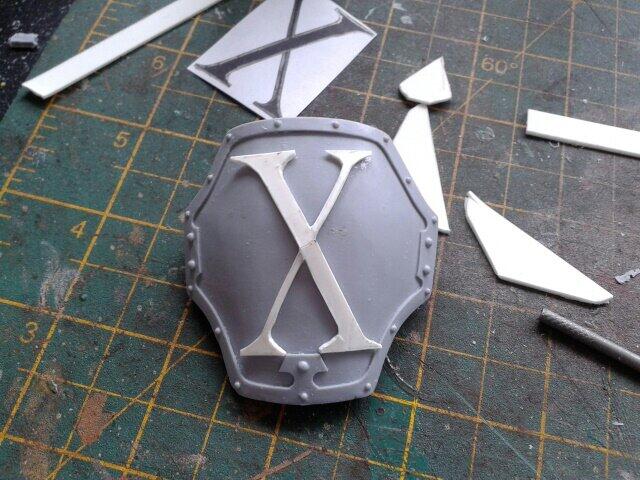
In the process of removing it I caused a fair bit of damage to the surface of the knee pad which I then made worse through clumsy application of a rotary tool. So exactly how I fix that will be the subject of a future post.
More to follow!
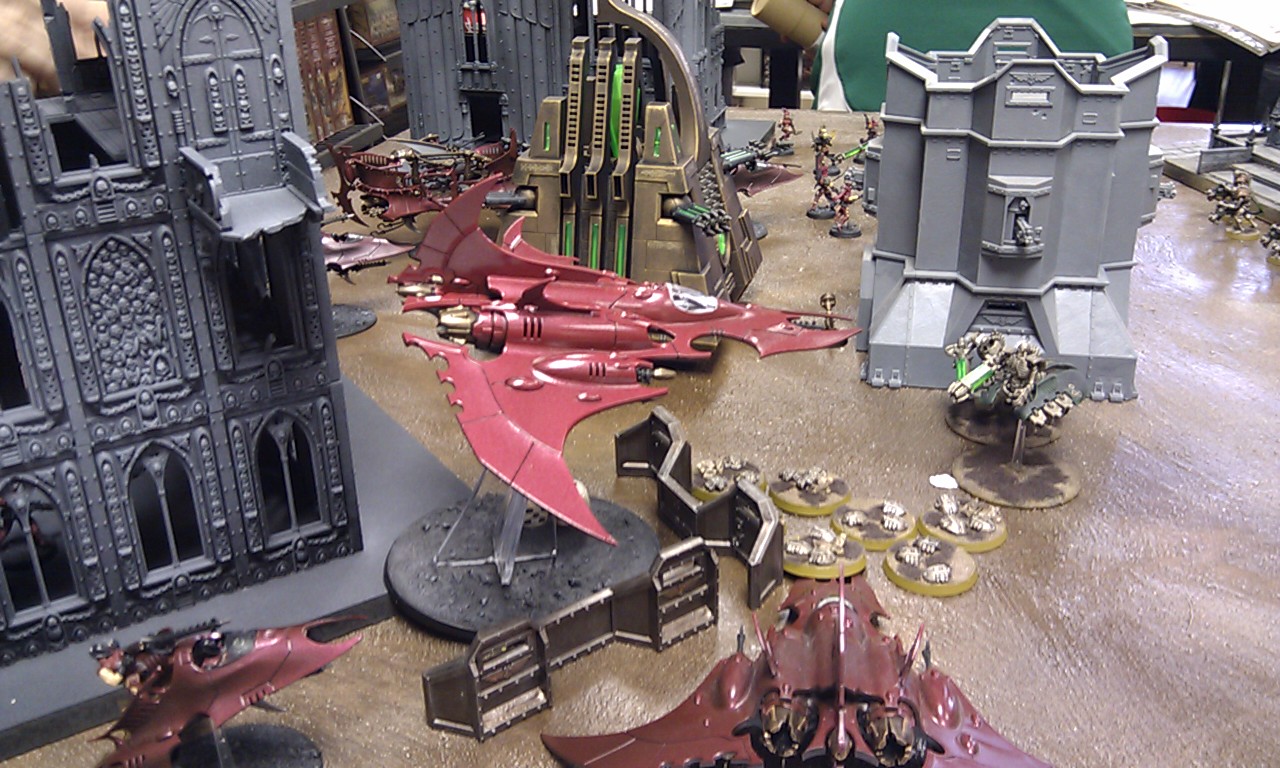
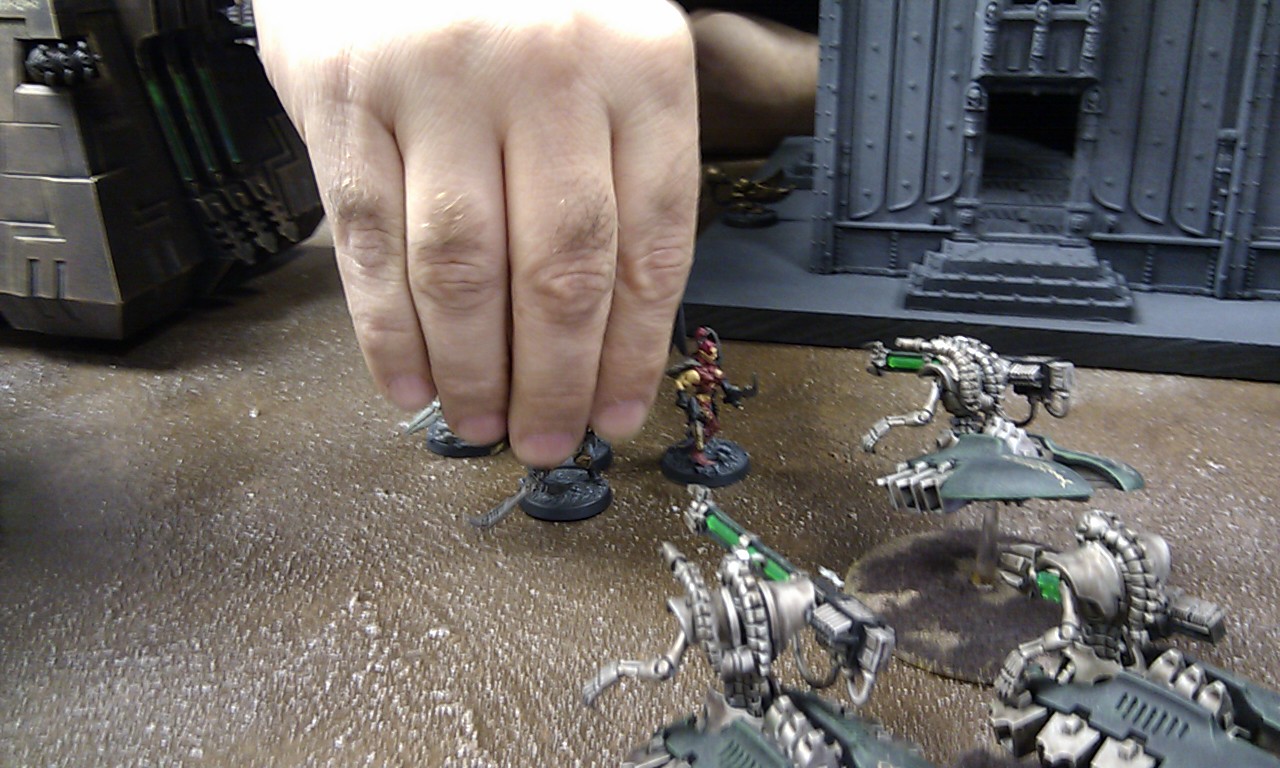
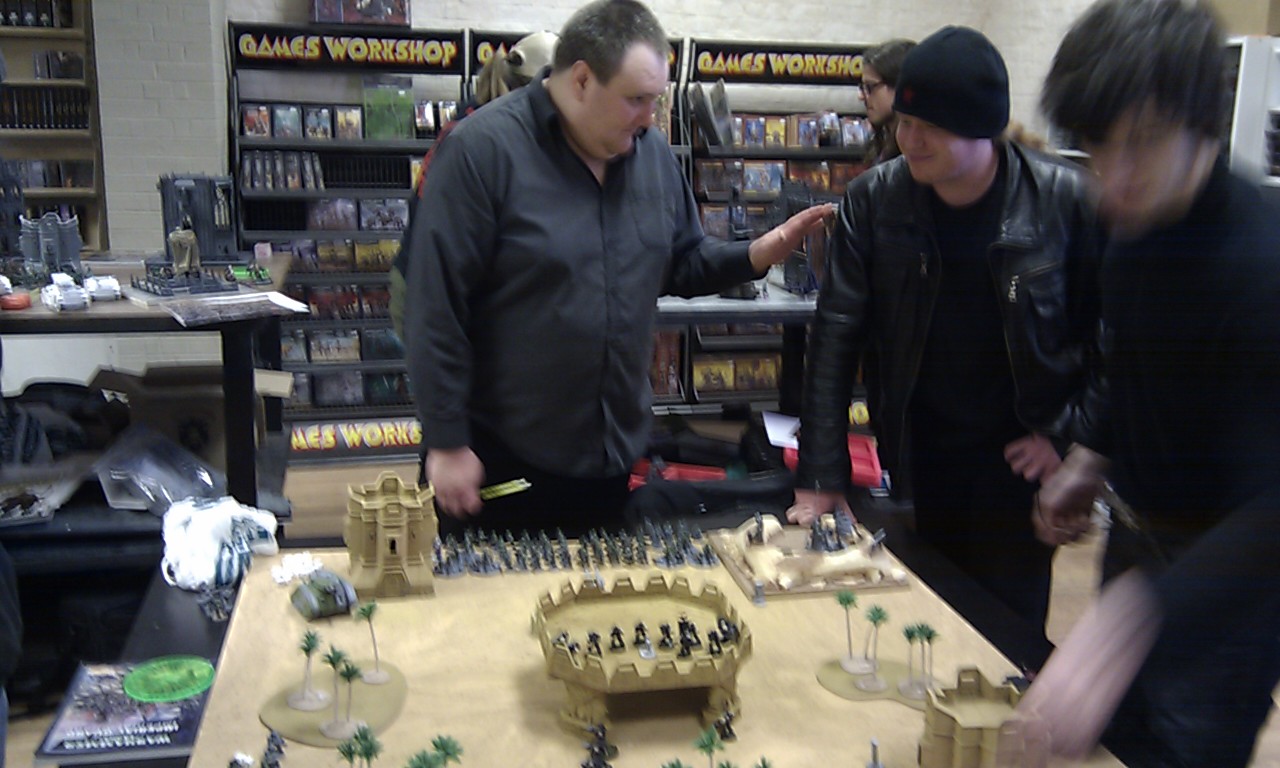
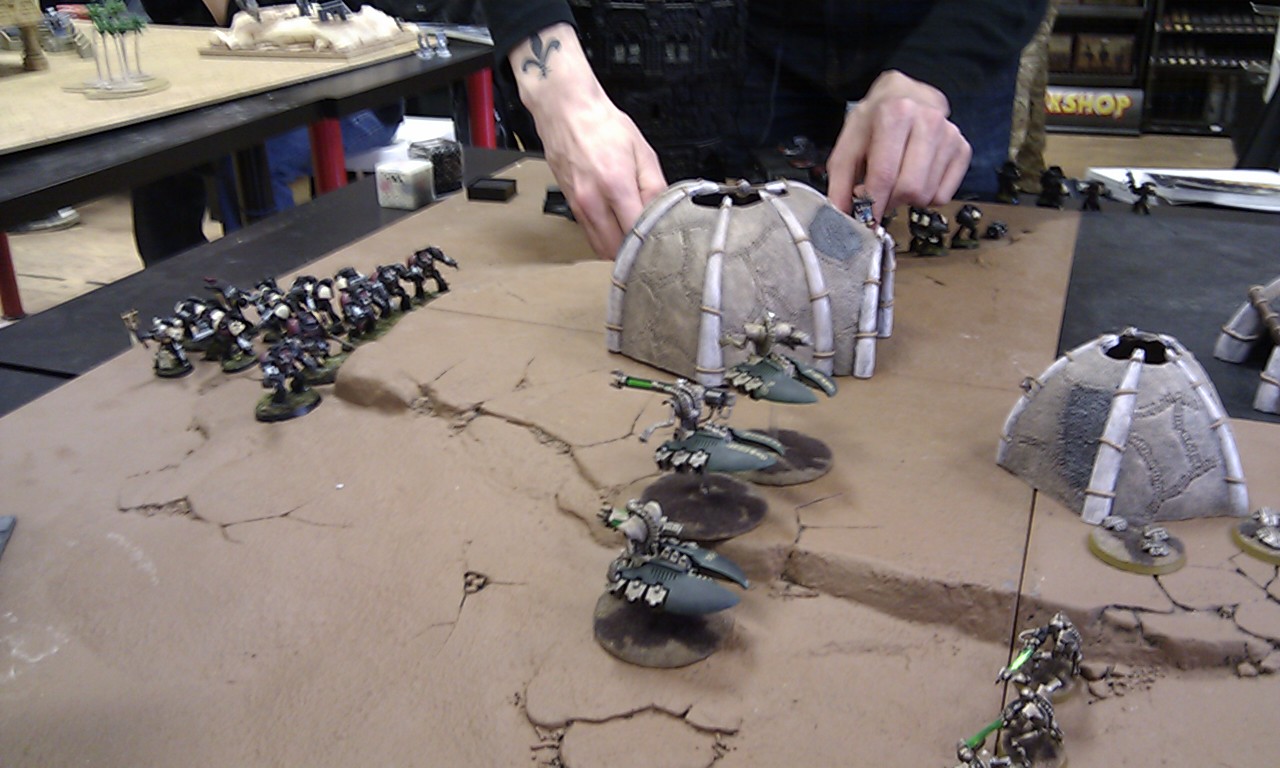
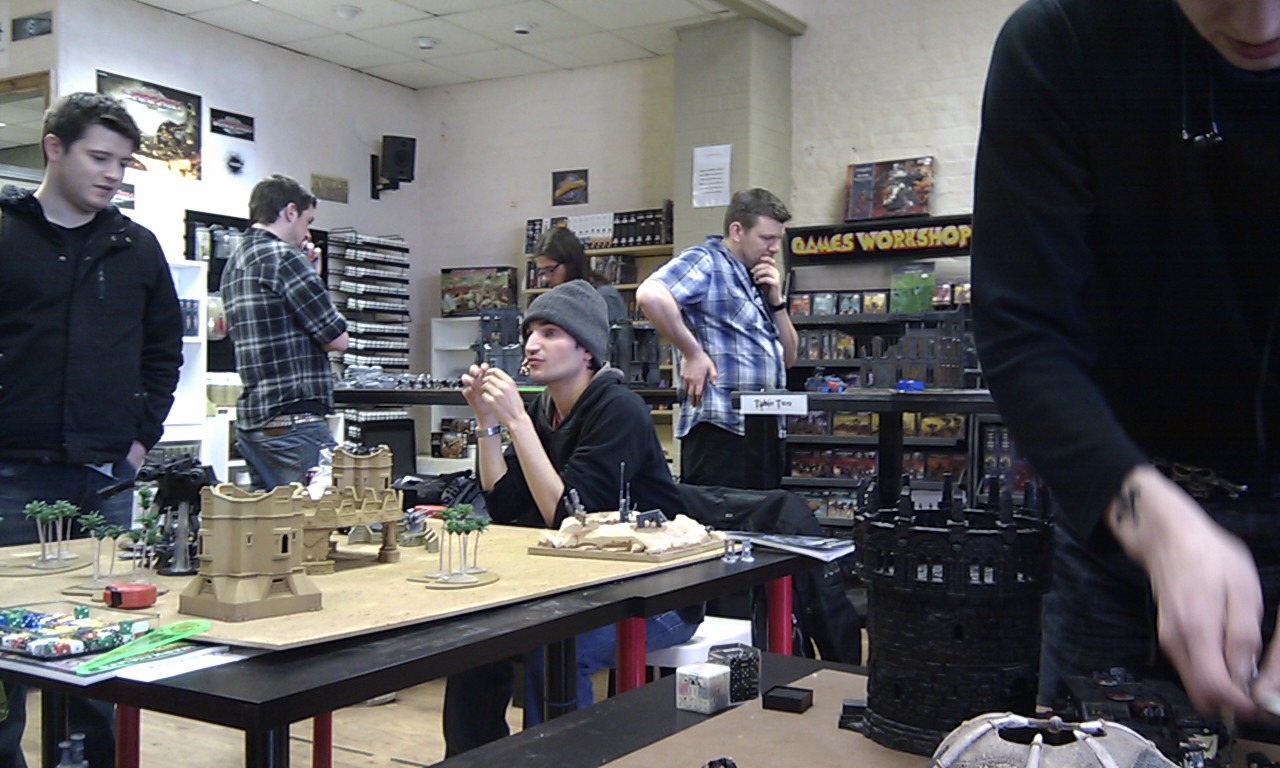
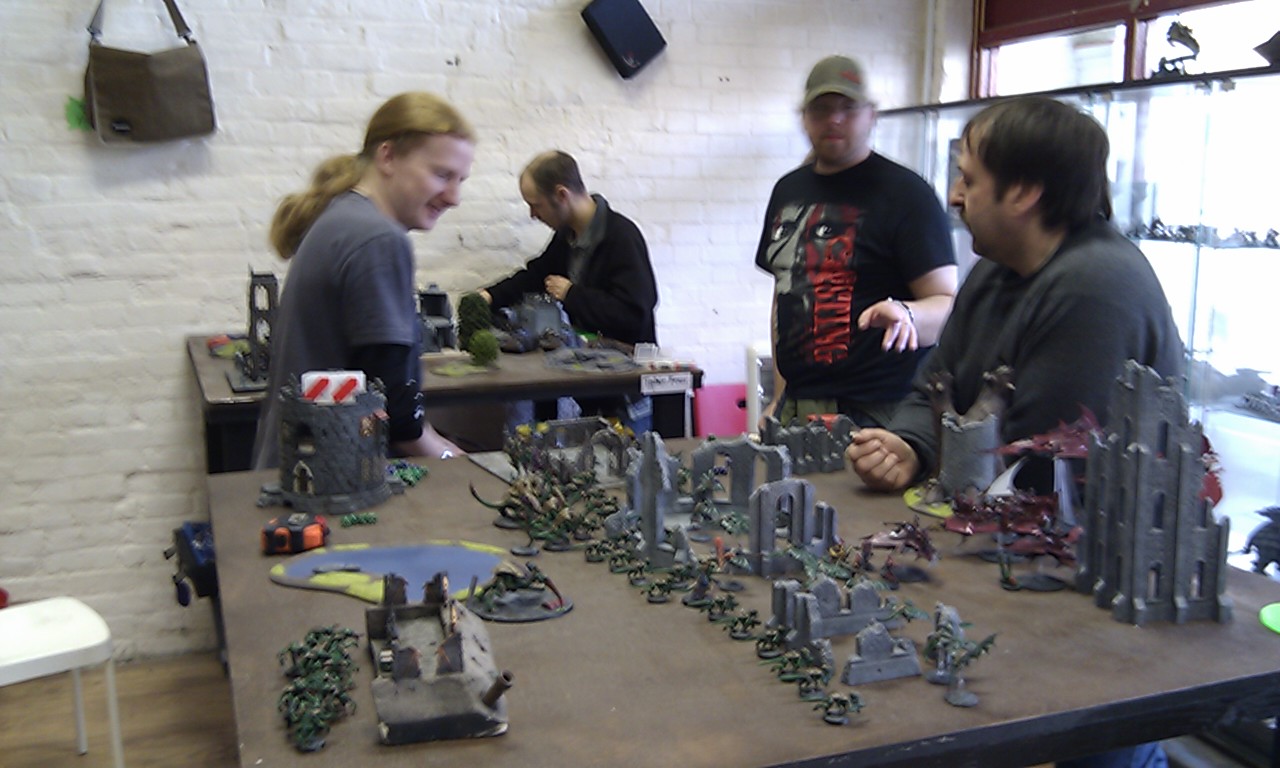
Warhammer 40,000 Cities of Death Terrain
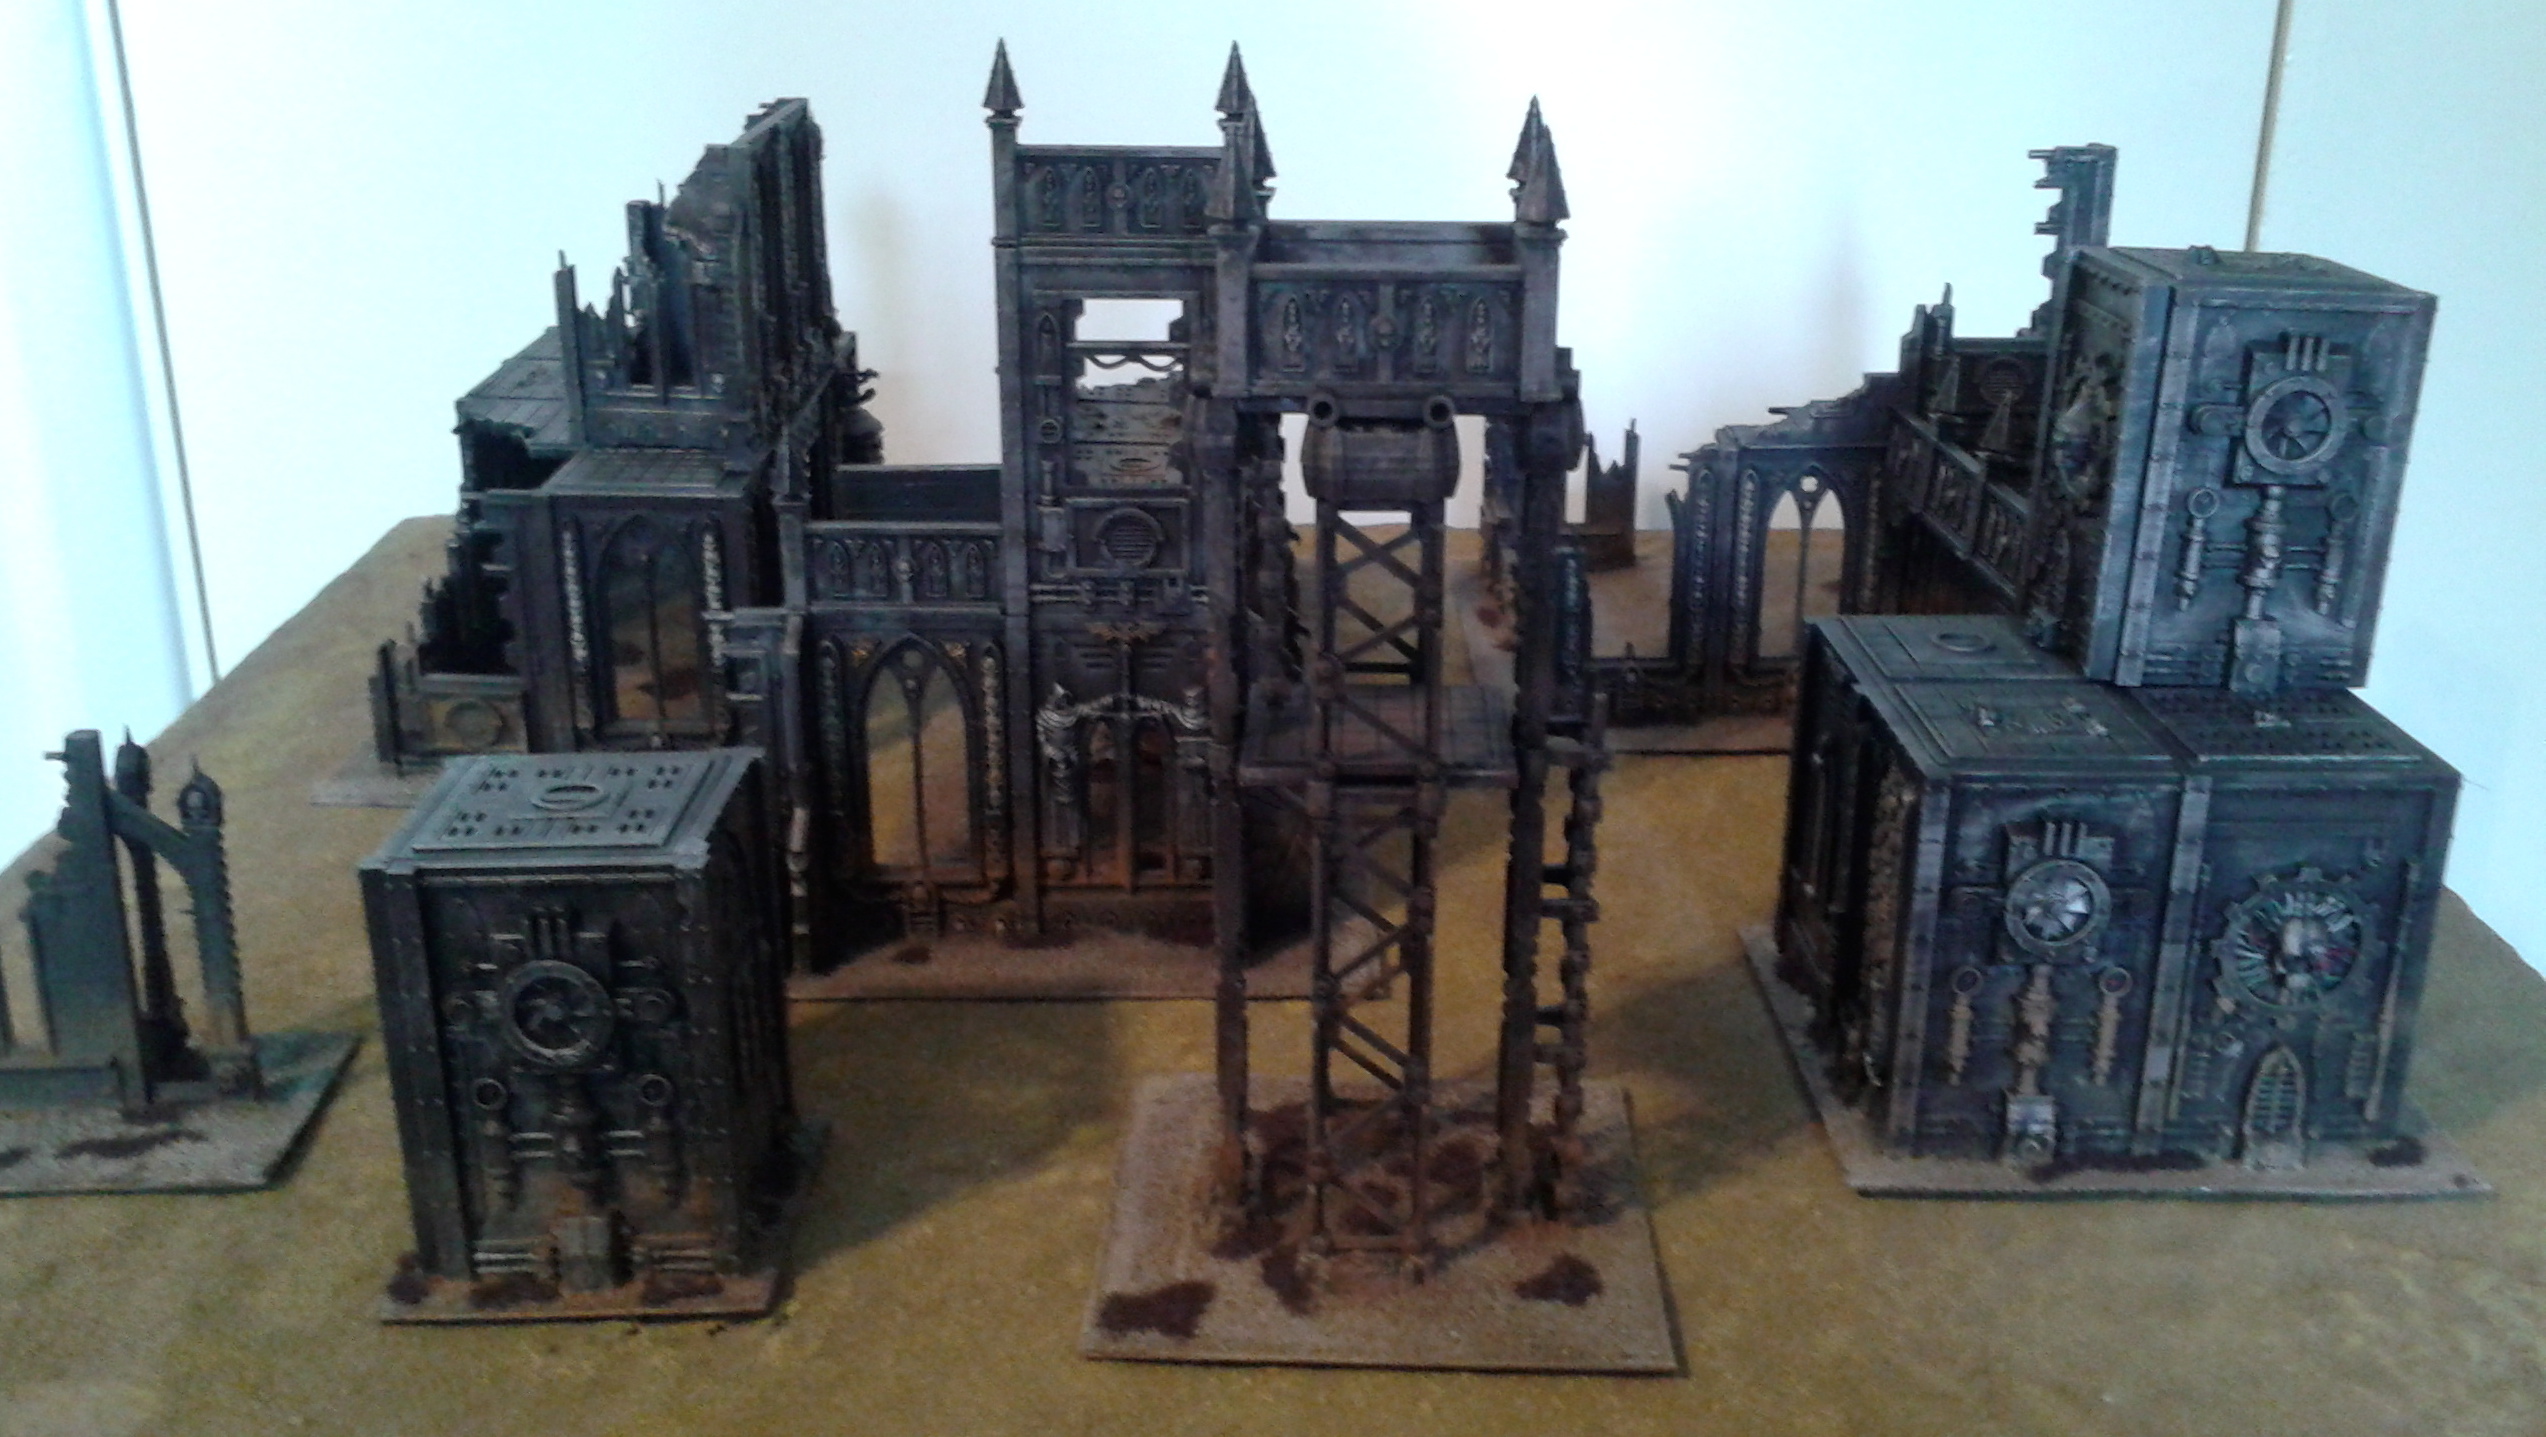
I bought some terrain for Warhammer 40K a few years ago, but never bothered to make it usable on the tabletop until recently, because I had No Mans Land on my doorstep: if I wanted a game I had access to the gaming tables and their vast array of terrain.
Unfortunately, NML is no more, but now that I've moved house I now have a dining room (with a big dining table) to play games on, so in advance of a four-way game a couple of weeks ago, I decided to refresh my modular gaming boards (which I'll blog about soon) and paint the terrain pieces that I'd assembled all those years ago.
The paint scheme is very simple: after a black undercoat, the walls were drybrushed with Tin Bitz and then Army Painter, Gunmetal, then washed with Army Painter Strong Tone wash shot through my airbrush. Then I applied some Forge World Light Earth weathering powder at the base of the walls. The plasticard bases were covered in PVA glue and acquarium sand, then sprayed with Army Painter Leather and then drybrushed.
More pictures below.
Salamanders Storm Eagle "Vulkan's Wrath"
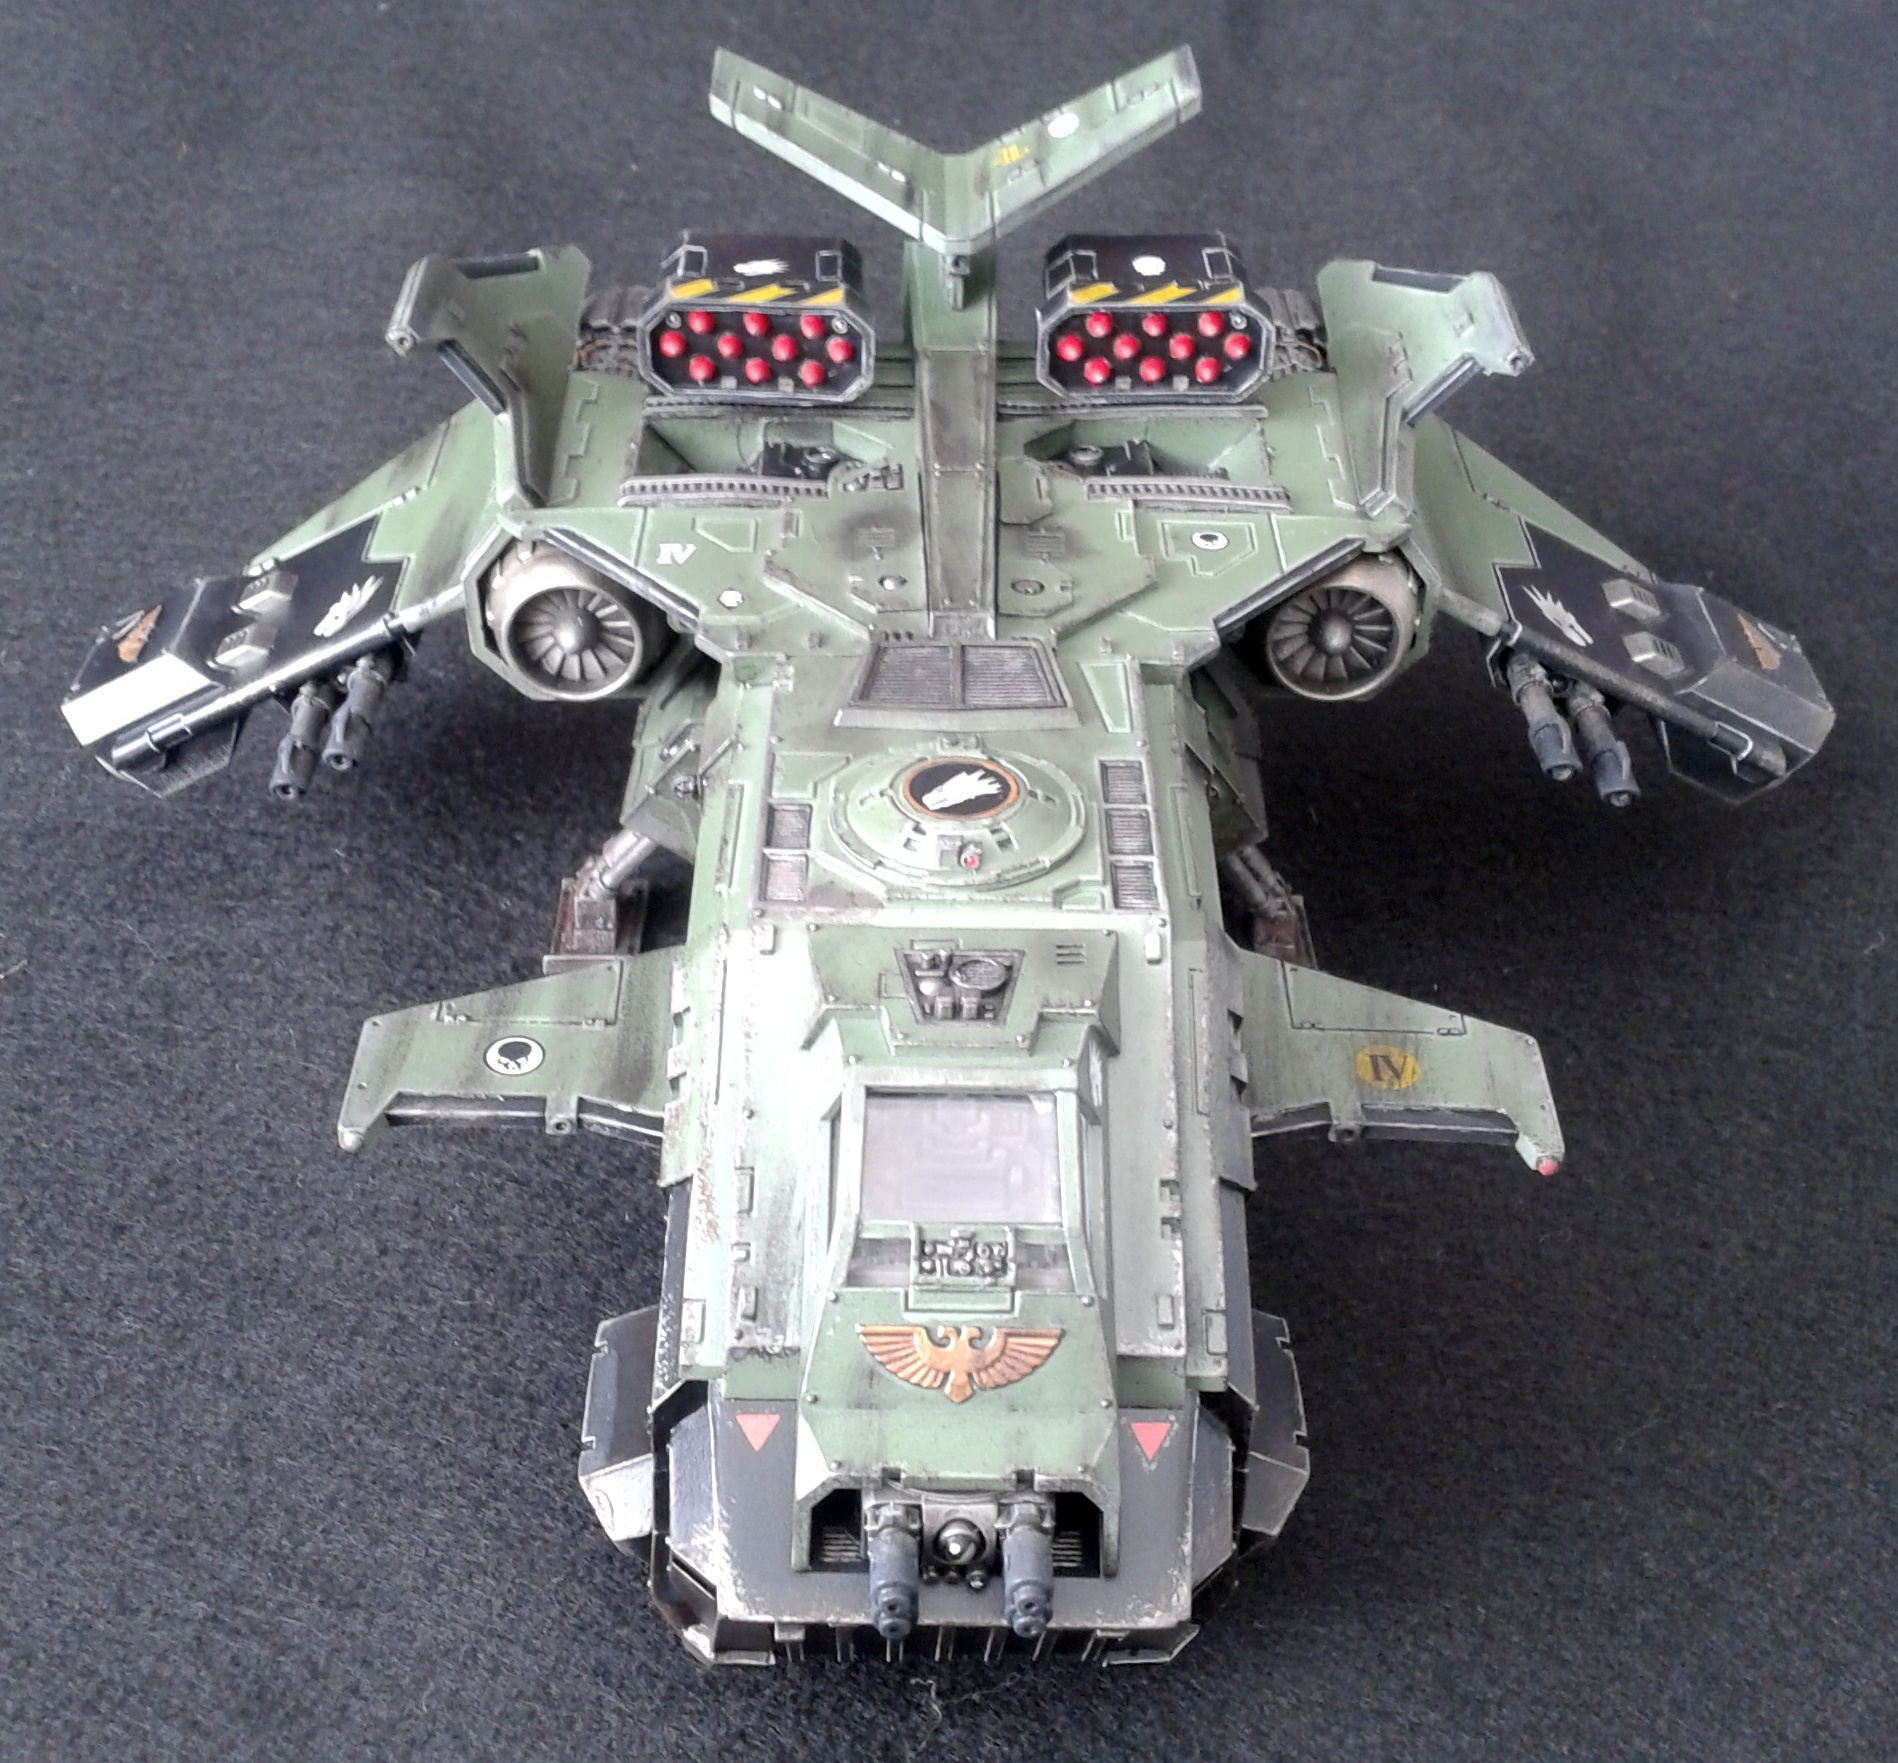
This is the Salamanders Storm Eagle Vulkan's Wrath, the personal transport of Captain Dac'tyr, Lord of the Burning Skies and Captain of the 4th Company.
As is common among Salamanders vehicles, Vulkan's Wrath has been modified by its master, who added a stabiliser wing with forward-facing flaps to function as an air-brake: this allows Vulkan's Wrath to rapidly decelerate after a high-speed orbital insertion.
More pictures below.
Vulkan He'stan, Forgefather of the Salamanders
![[Redacted by the Inquisition, click at your peril!]](/wp-content/uploads/2014/04/2014-04-14-09.06.34.jpg)
This model is a real bugger to paint and he's not turned out anywhere near as good as I'd have liked. It's the first model that I actually wish I had in Finecast instead of metal. The quality of the cast is actually fairly poor, and all the spiky bits and sharp edges are a recipe for having the paint chip off, and to try to prevent that, I've had to overload on varnish. Plus, I made the mistake of assembling him before painting, meaning that it was much harder to get into all the nooks and crannies.
Anyway, he's done now, and while he's not as good as I've liked him to be, at least he's tabletop standard.
More pics below.
![[Redacted by the Inquisition]](/wp-content/uploads/2014/04/2014-04-14-09.05.45.jpg)
![[Redacted by the Inquisition]](/wp-content/uploads/2014/04/2014-04-14-09.05.51.jpg)
![[Redacted by the Inquisition]](/wp-content/uploads/2014/04/2014-04-14-09.05.58.jpg)
![[Redacted by the Inquisition]](/wp-content/uploads/2014/04/2014-04-14-09.06.03.jpg)
![[Redacted by the Inquisition]](/wp-content/uploads/2014/04/2014-04-14-09.06.10.jpg)
![[Redacted by the Inquisition]](/wp-content/uploads/2014/04/2014-04-14-09.06.17.jpg)
![[Redacted by the Inquisition]](/wp-content/uploads/2014/04/2014-04-14-09.06.23.jpg)
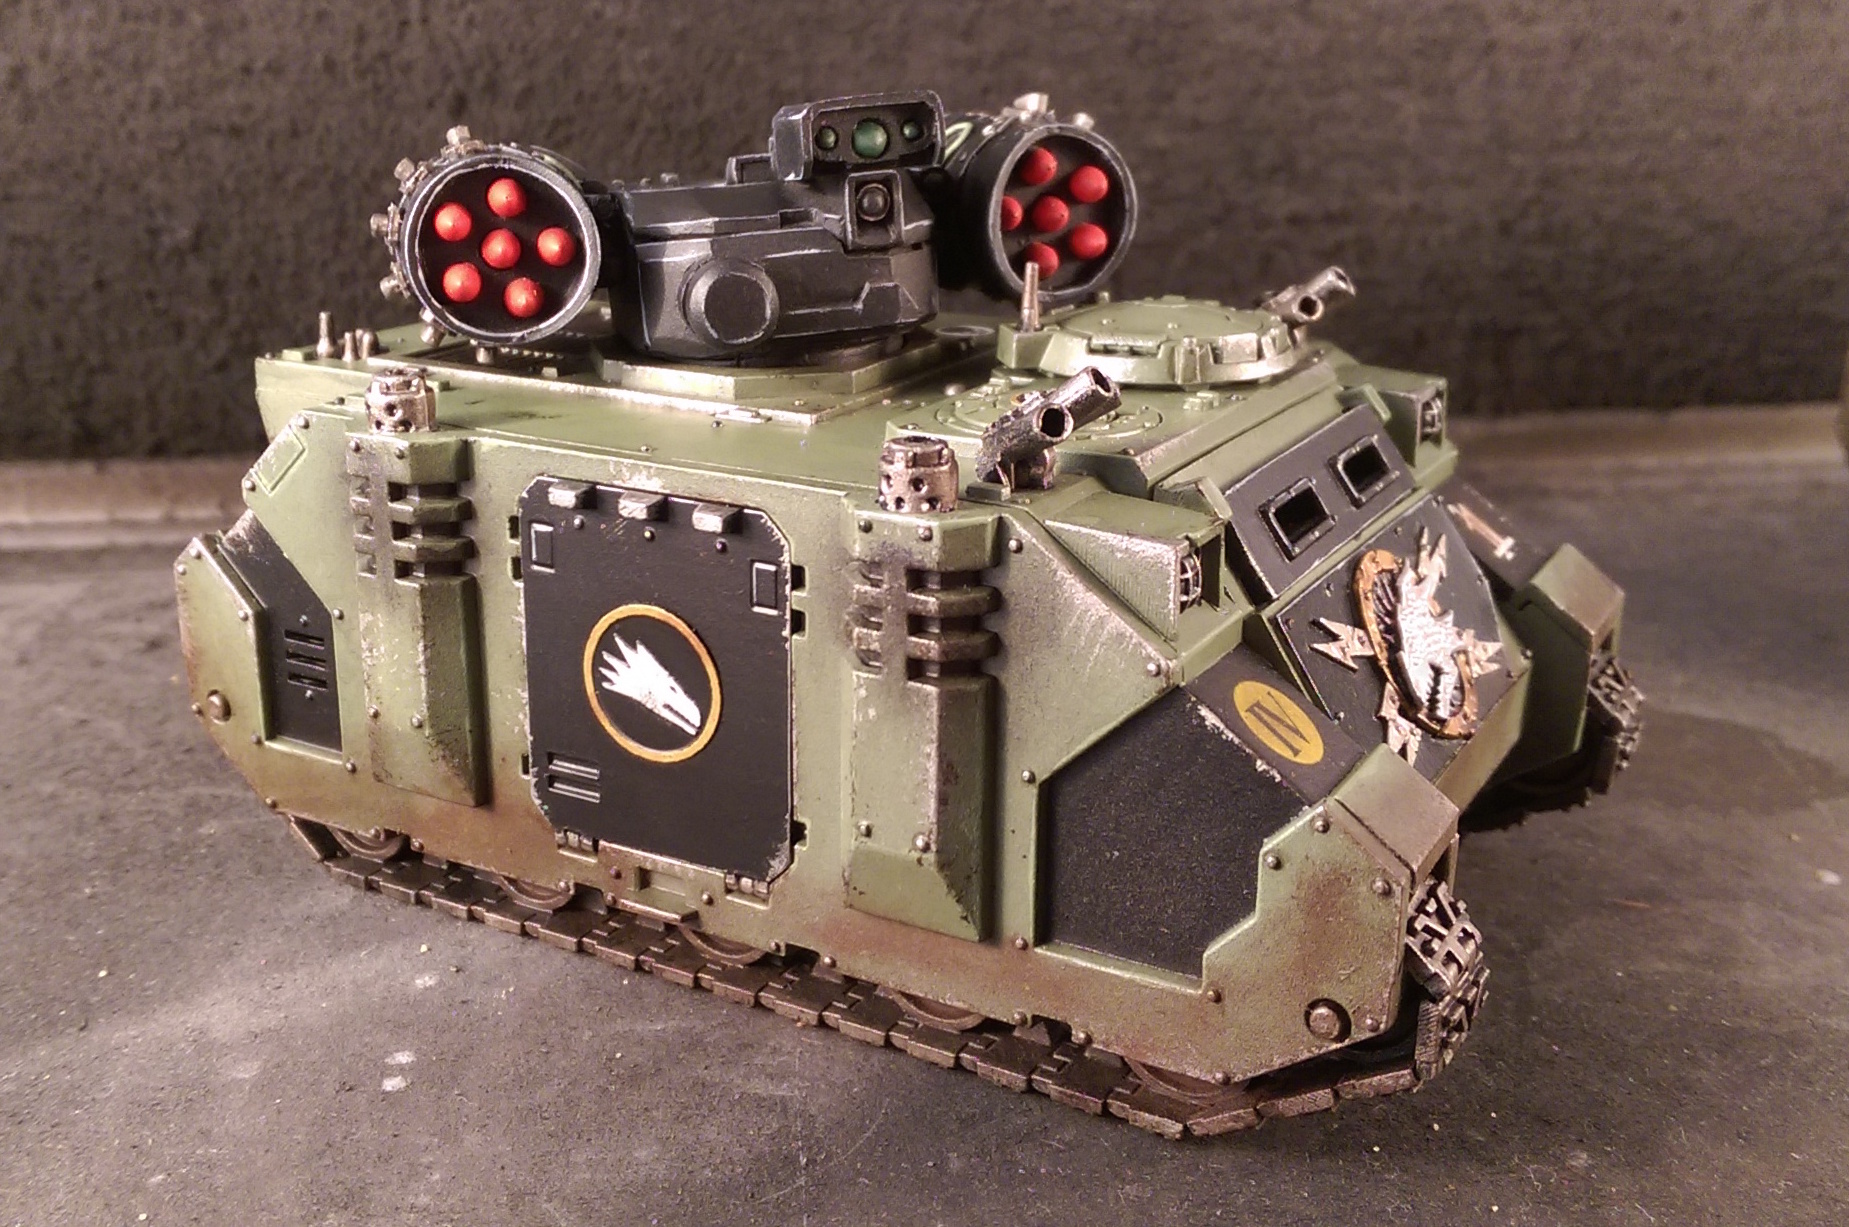
Salamanders Rhinos/Razorbacks


Here is a pair of Rhinos which can be converted into Razorbacks. When played as Razorbacks they use kitbashed weapons: a twin-linked Heavy Flamer (ideal for Salamanders) and a twin-linked Assault Cannon.
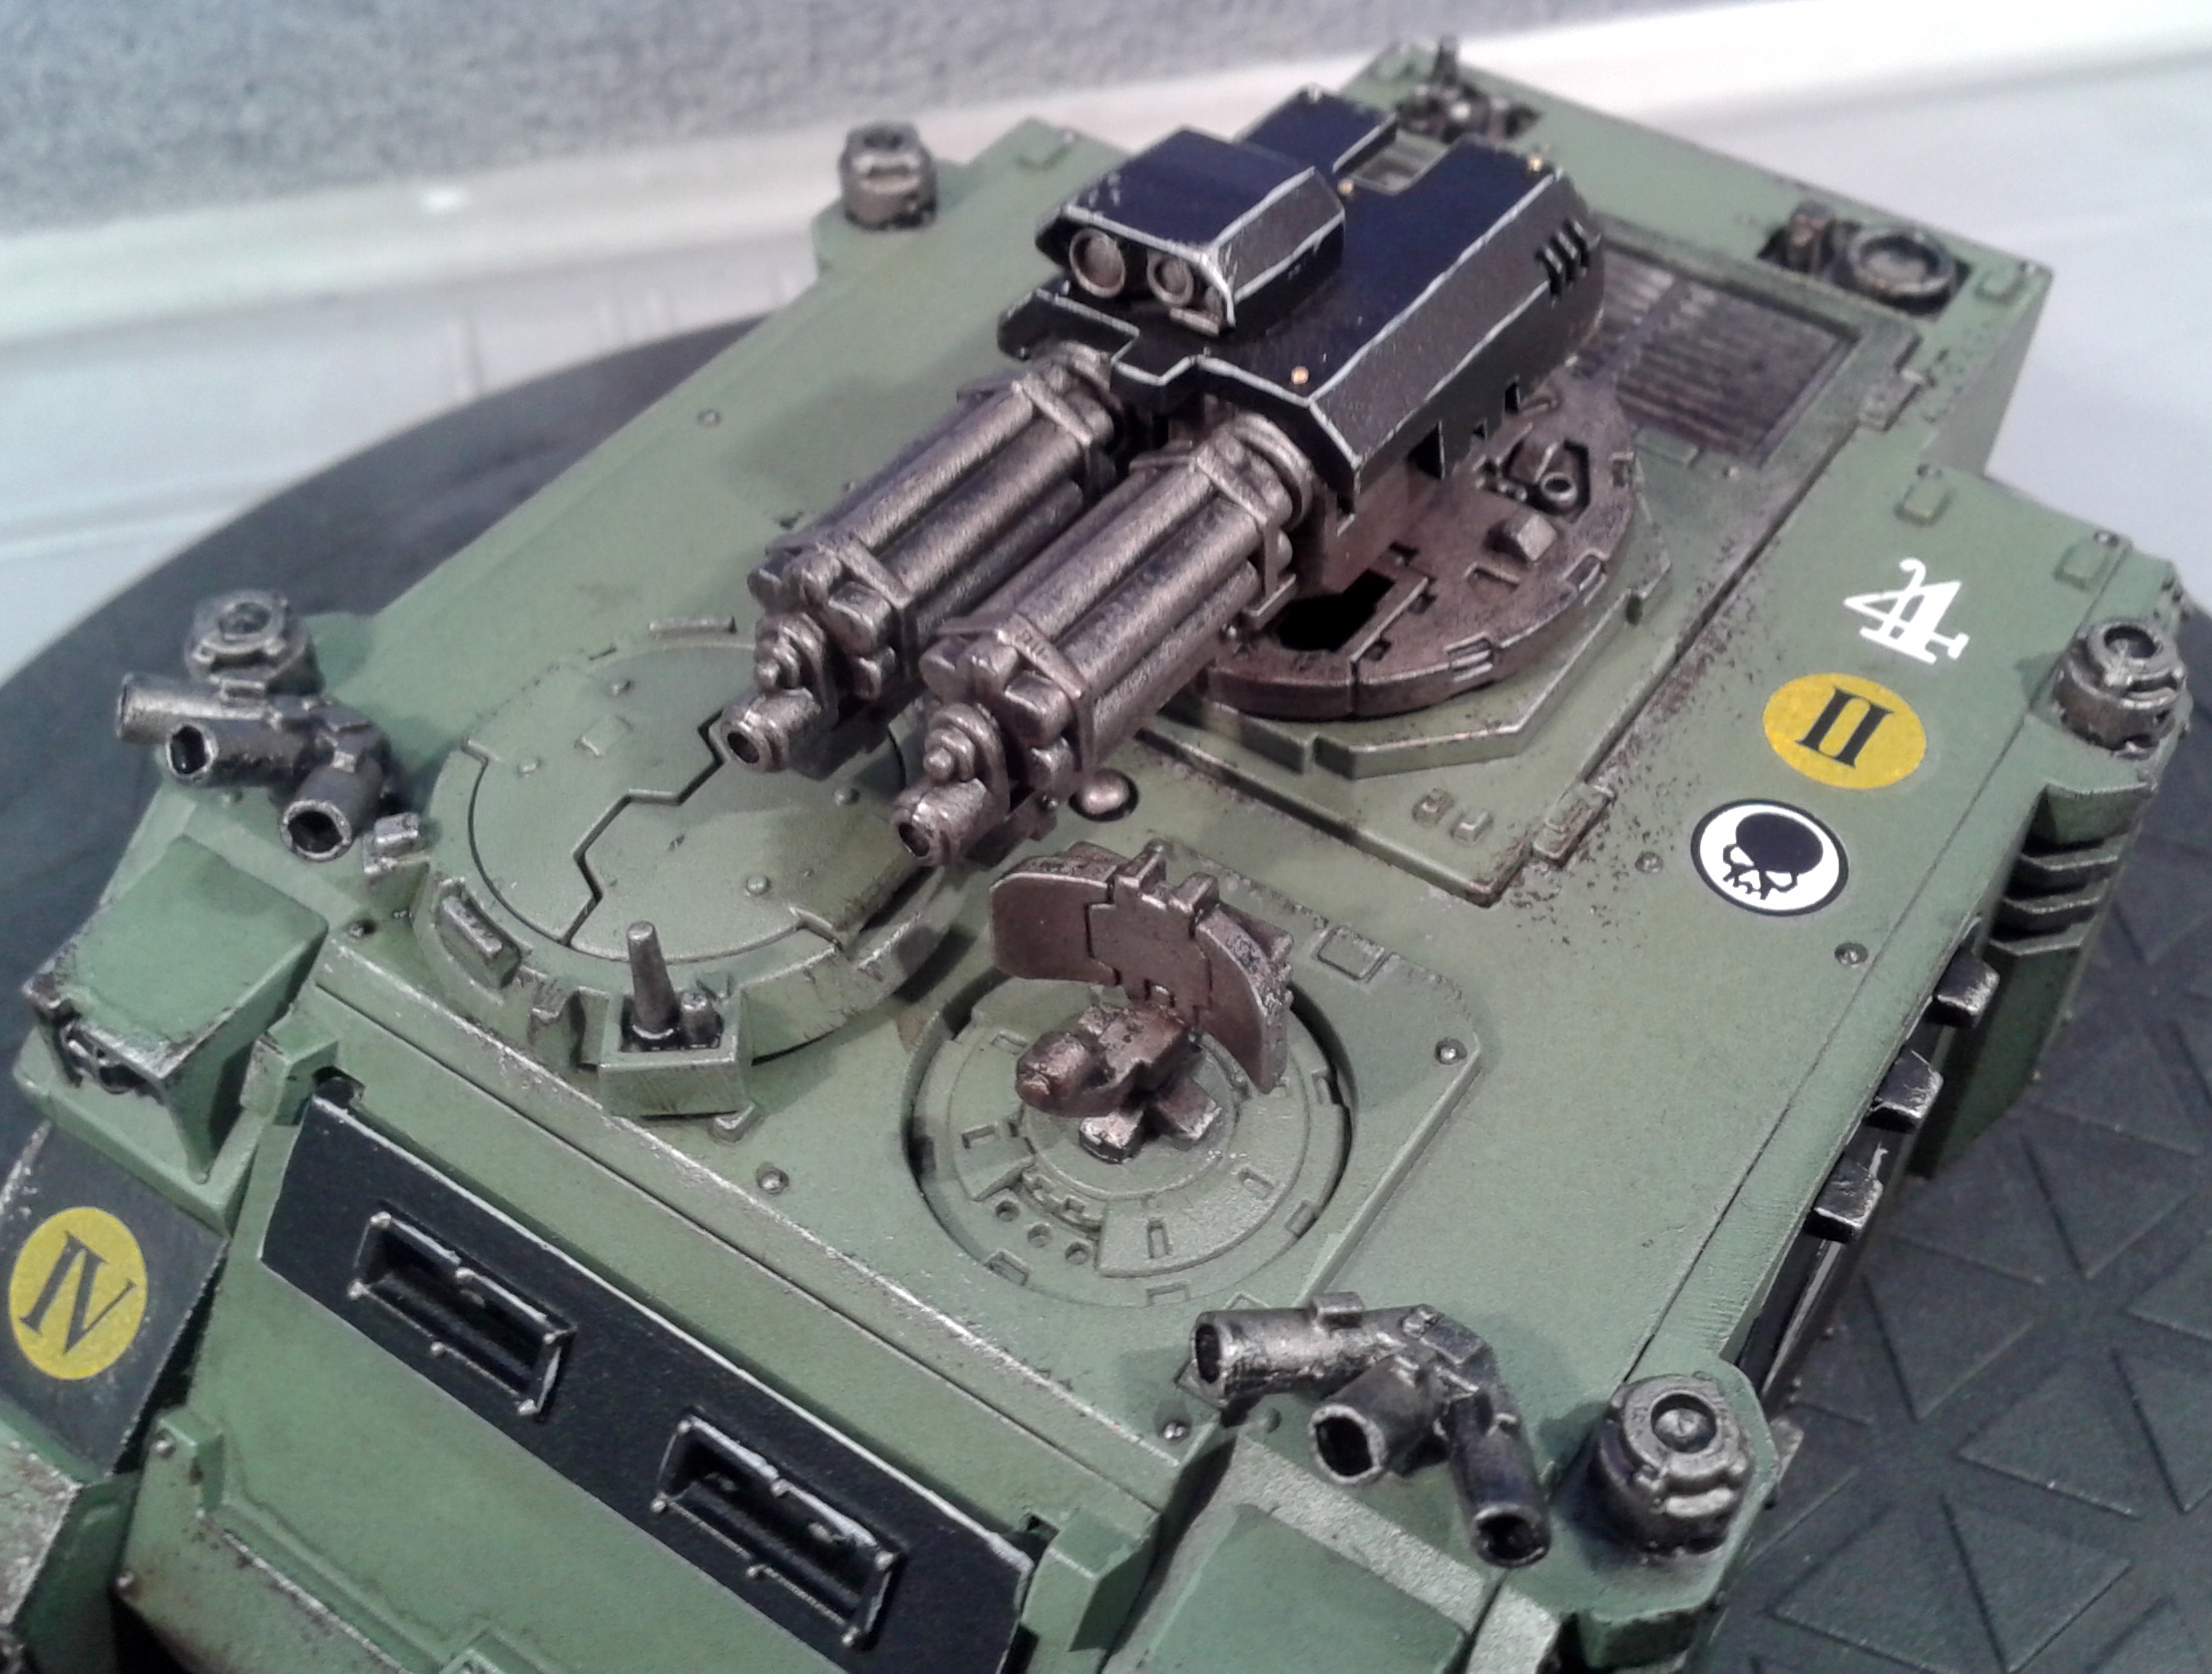
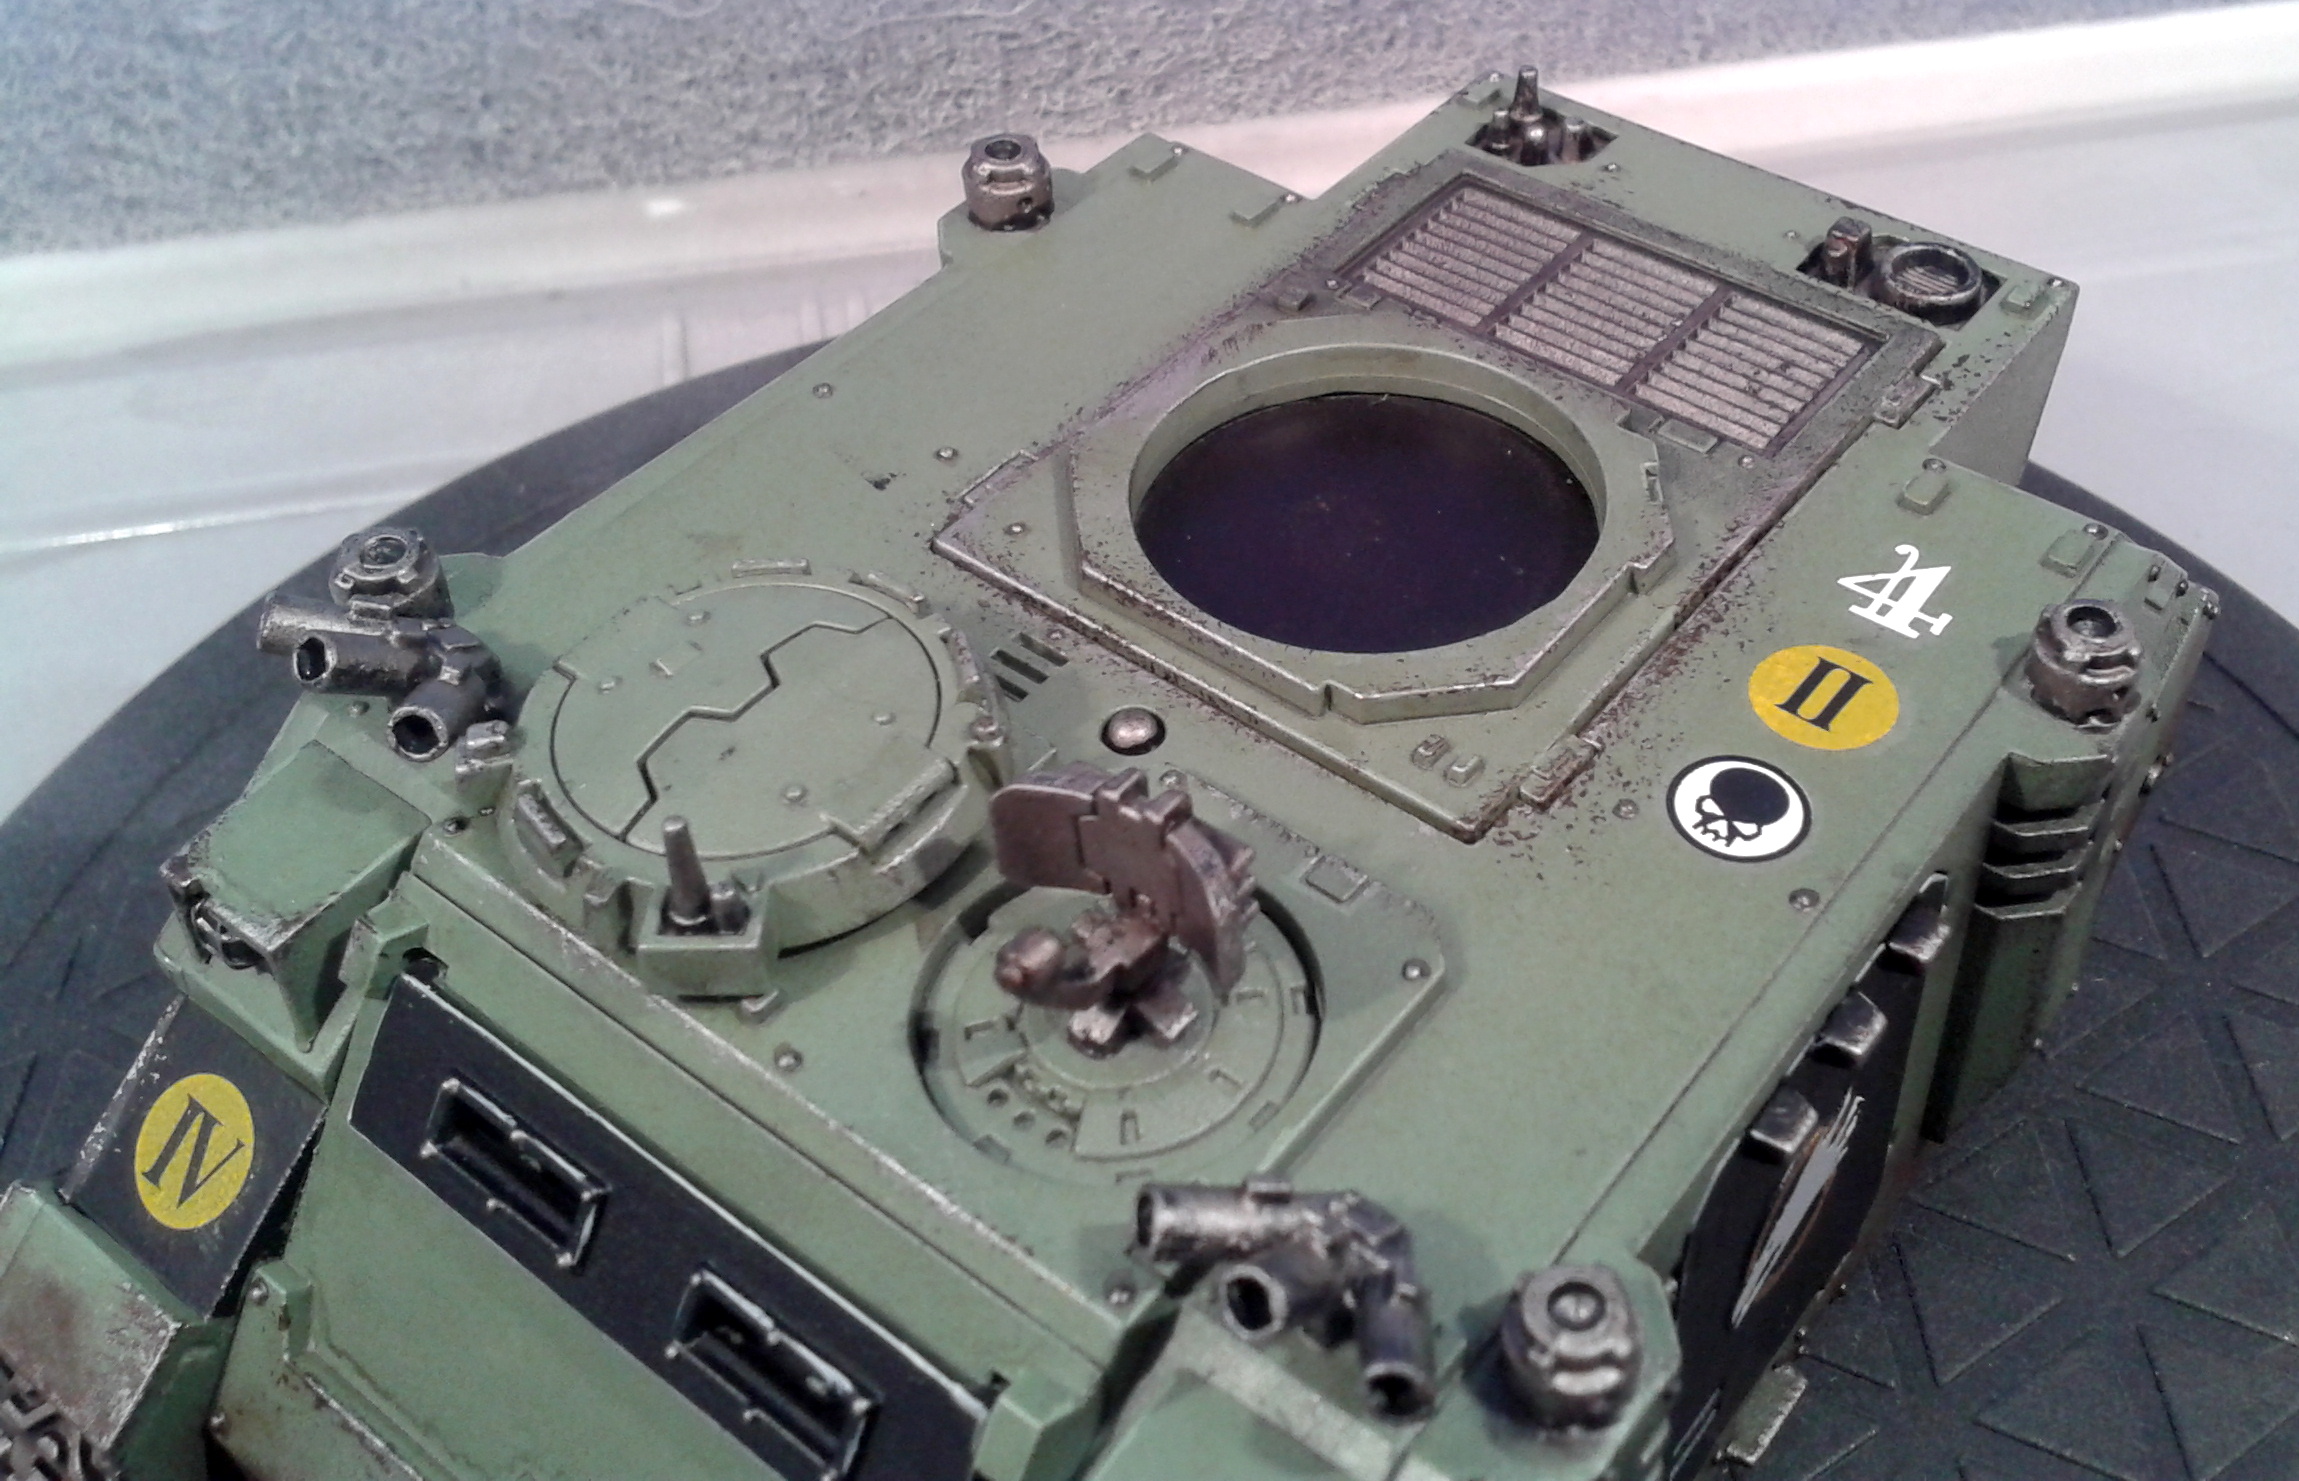
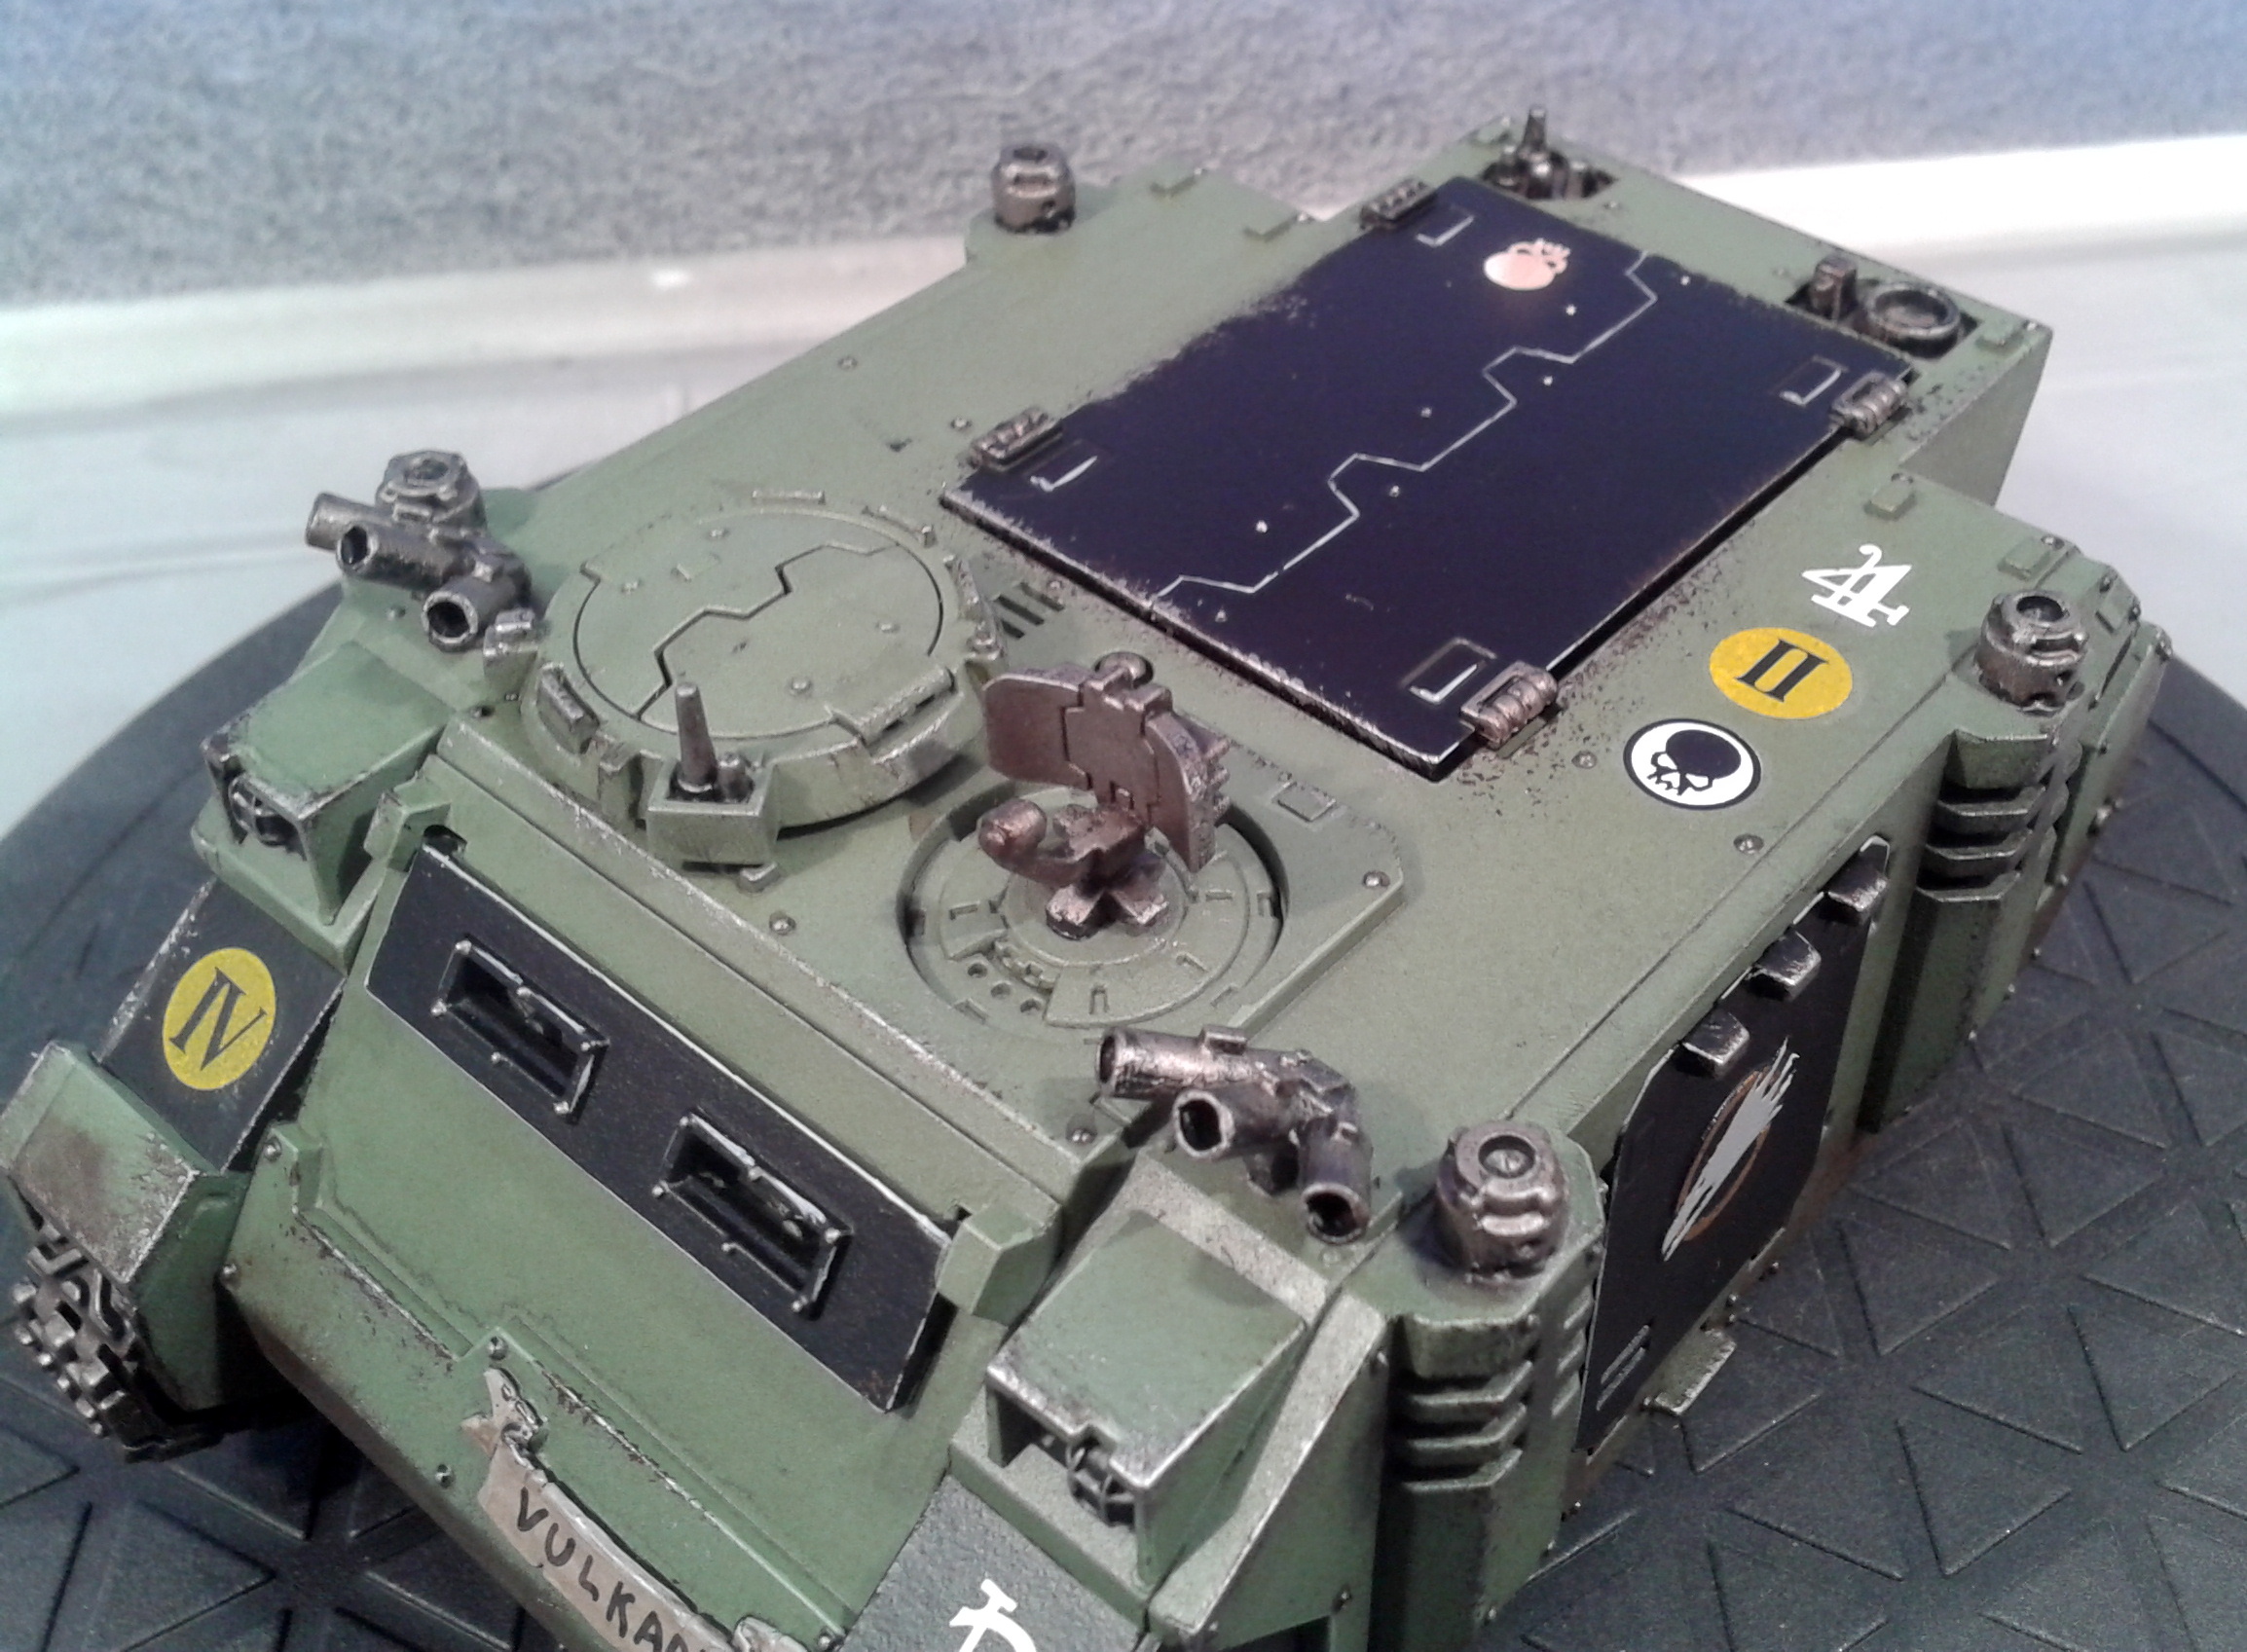
The side doors on Number 1 are magnetised: I'm planning on kitbashing some sponsons and a turret so that it can be converted into a Predator.
More pictures below!
A Brief History of Imperial Knights
Hmmmm so this is the big boy for a new Imperial Guard release? Color me interested... pic.twitter.com/kztVOV9qNY
— Kevin (@d6_hobbyist) February 13, 2014
It looks like Knights are about to return to Warhammer 40,000 in 28mm scale. Before they become the new hotness, I thought it might be fun to run through their history.
Salamanders Tactical Squad #2
Here's the second Tactical Squad. As with the first squad, the models have a mix of modern Mark VII, Rogue Trader-era plastic accessories, and Mark V armour from Forge World.
Salamanders Tactical Squad #1
Here's the first Tactical squad. As you will notice, the Marines that form this squad are equipped with a variety of different types of armour: I mixed in some old Rogue Trader-era plastic components as well as some Mark V bits from Forge World.
Salamanders Assault Squad

I wasn't planning on building an Assault squad for my Salamanders army. I bought a box of Assault marines because I wanted to mix the legs and torsos into the Tactical squads to make them a bit more distinctive.
But I had some spare bodies — Rogue Trader-era metal Mark VII marines — so I thought I'd try fitting the modern arms and jump packs on to them to see how they'd turn out. The end result is pretty good I think. The Sergeant is a modern plastic miniature who's carrying a Chapterhouse Studios thunder hammer and storm shield.
Salamanders Apothecary
Here is an Apothecary for my Salamanders army. The model is a 1990s era(?) 3rd or 4th edition that's still available in Finecast: I picked this one up, in metal, for £2 at a local wargaming store.
He was painted along with two Tactical squads and an Assault squad: I painted them all in a production line rather than one at a time, and have therefore managed to 26 models in the same time that it previously would have taken to paint two Terminators.
I'll be posting pictures of the Tactical and Assault squads soon: keep 'em peeled!
Salamanders Tactical Test Model

Here's the first completed model from the two Tactical Squads I'm working on for my Salamanders army. He was painted in basically the same way as the Firedrakes: Army Painter Army Green basecoat, washed with a mix of Thraka Green and Devlan Mud, edge highlighted with AP Army Green, and so on.
There are a couple of points to note:
- Despite several attempts, using both Revell Decalsoft and Microsol, to apply the Games Workshop Salamanders logo to the shoulder pad, I couldn't get the transfer to apply smoothly without wrinkles. I blame this on the crappy quality of GW's transfers. Therefore I've had painted the logo, which looks pretty crappy, but hopefully my freehanding skills will improve as I've got another 24 to do!
- Realising that a simple green and black colour scheme would look boring, I painted a flame effect on the other shoulder, which seems to work quite well.
More pictures below.
MCCCXLVI
Mine is the 1,346th Reaver Titan to roll of the Forge World production line, so I'm going to be using MCCCXLVI as part of the decoration of the model.
Now, if you excuse me, I have a lot of resin to wash and several pages of instructions to read...
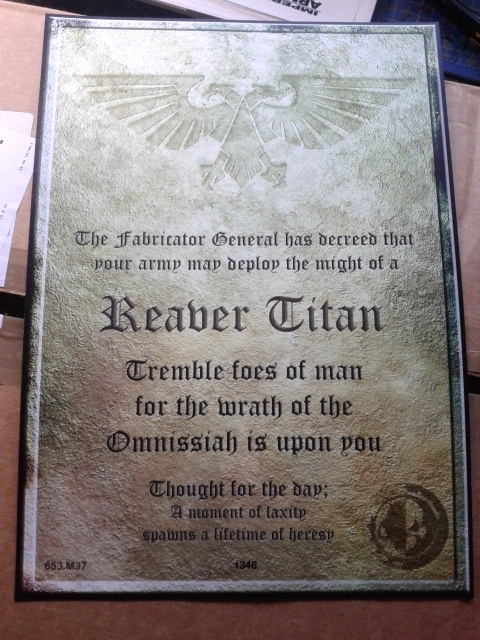
Finally...
After the success of last year's Leviathan I finally decided that I had the painting and modelling skills to take on the ultimate hobby project: a Forge World Reaver titan. I have bought the body only for now: I'll pick up the weapons when I've finished the body. And of course, I'll be blogging my progress. I plan on painting it in the same colour scheme as my Epic Titans, but obviously the level of detail will be far higher. I'm very excited!
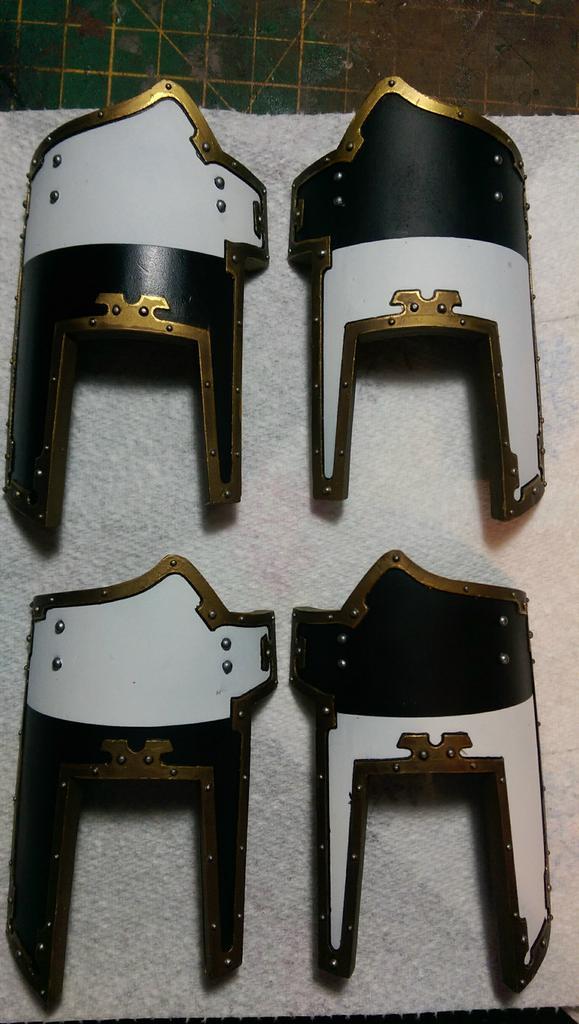
Salamanders Terminator Assault Squad

I've finally finished the second of three Terminator squads in my Salamanders army. The first took about a year, painting one model at a time. I chastised myself for not using a "production line" which would have saved me a lot of time.
So of course, the second squad, which I used a production line for, still took about the same amount of time, thanks to the disruptions of a new baby, moving house and prevarication (due to the amount of work required).
I think I'll leave the last squad of Terminators until later. I now have two ten-man tactical squads and a five-man assault squad to do. I think these will actually be easier as although there are more models, there are fewer details.
More pictures below the fold.
Leviathan Crusader Completed

OK, so maybe not actually completed, because I still have the knee pad, chest and sword shield to do, but as you can see, everything else is done.
As predicted, final assembly was a real pain. Things got a bit messy with the epoxy resin and I managed to break one of the hydraulic rams that attach the torso to the hips. Fortunately it's holding together pretty well, although I suspect that it will need some repair work in the future.
Click through for more pictures.
Leviathan Update 3
The paint scheme has progressed somewhat, with the addition of edge highlighting, use of weathering powders to add texture, and some very effective "chipping" achieved by using a piece of sponge to apply Tin Bitz followed by Boltgun Metal, washed with Devlan Mud.
The only stumbling blocks have been the shield pieces on the front of the torso and one of the knee pads. I made the mistake of hand-painting the quartering and chevrons and the final finish is pretty terrible. I am going to look into how I can fix this, and it may delay the completion of the model.
Here are some photos I posted on Twitter over the last couple of weeks, in case you haven't seen them:
The finished base.
Test fit of the legs on the base.
Torso test fit.
Size comparison with the Stormeagle (my next big project).
Close-up shot of the chipping on the legs.
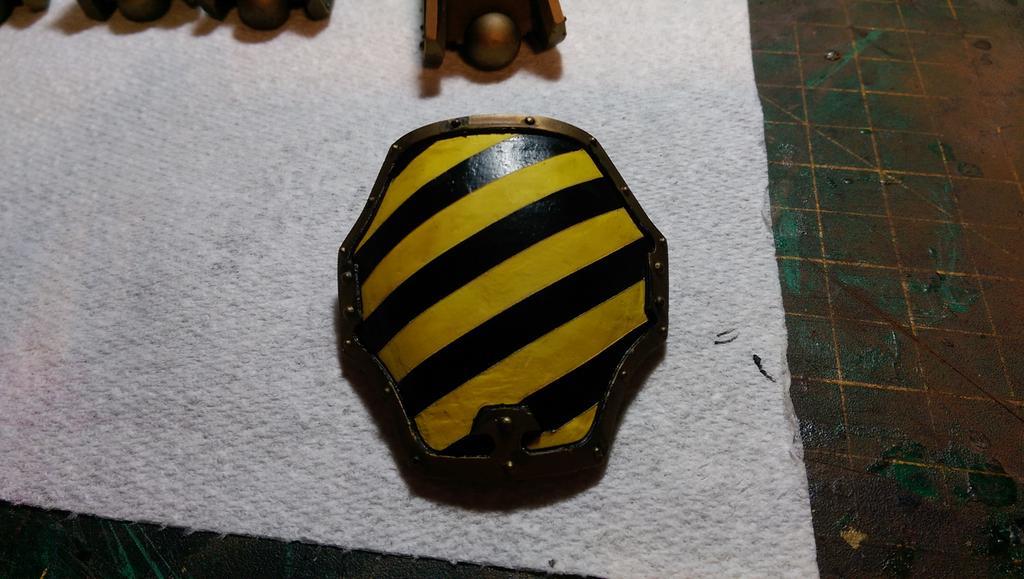
Leviathan Update 2
Over the weekend I finished one of the shoulder pads - like my Epic knights, the Leviathan will have Mechanicus-style hazard stripes on its left shoulder. Unlike the Epic knights, I've managed to do a pretty decent job of them!
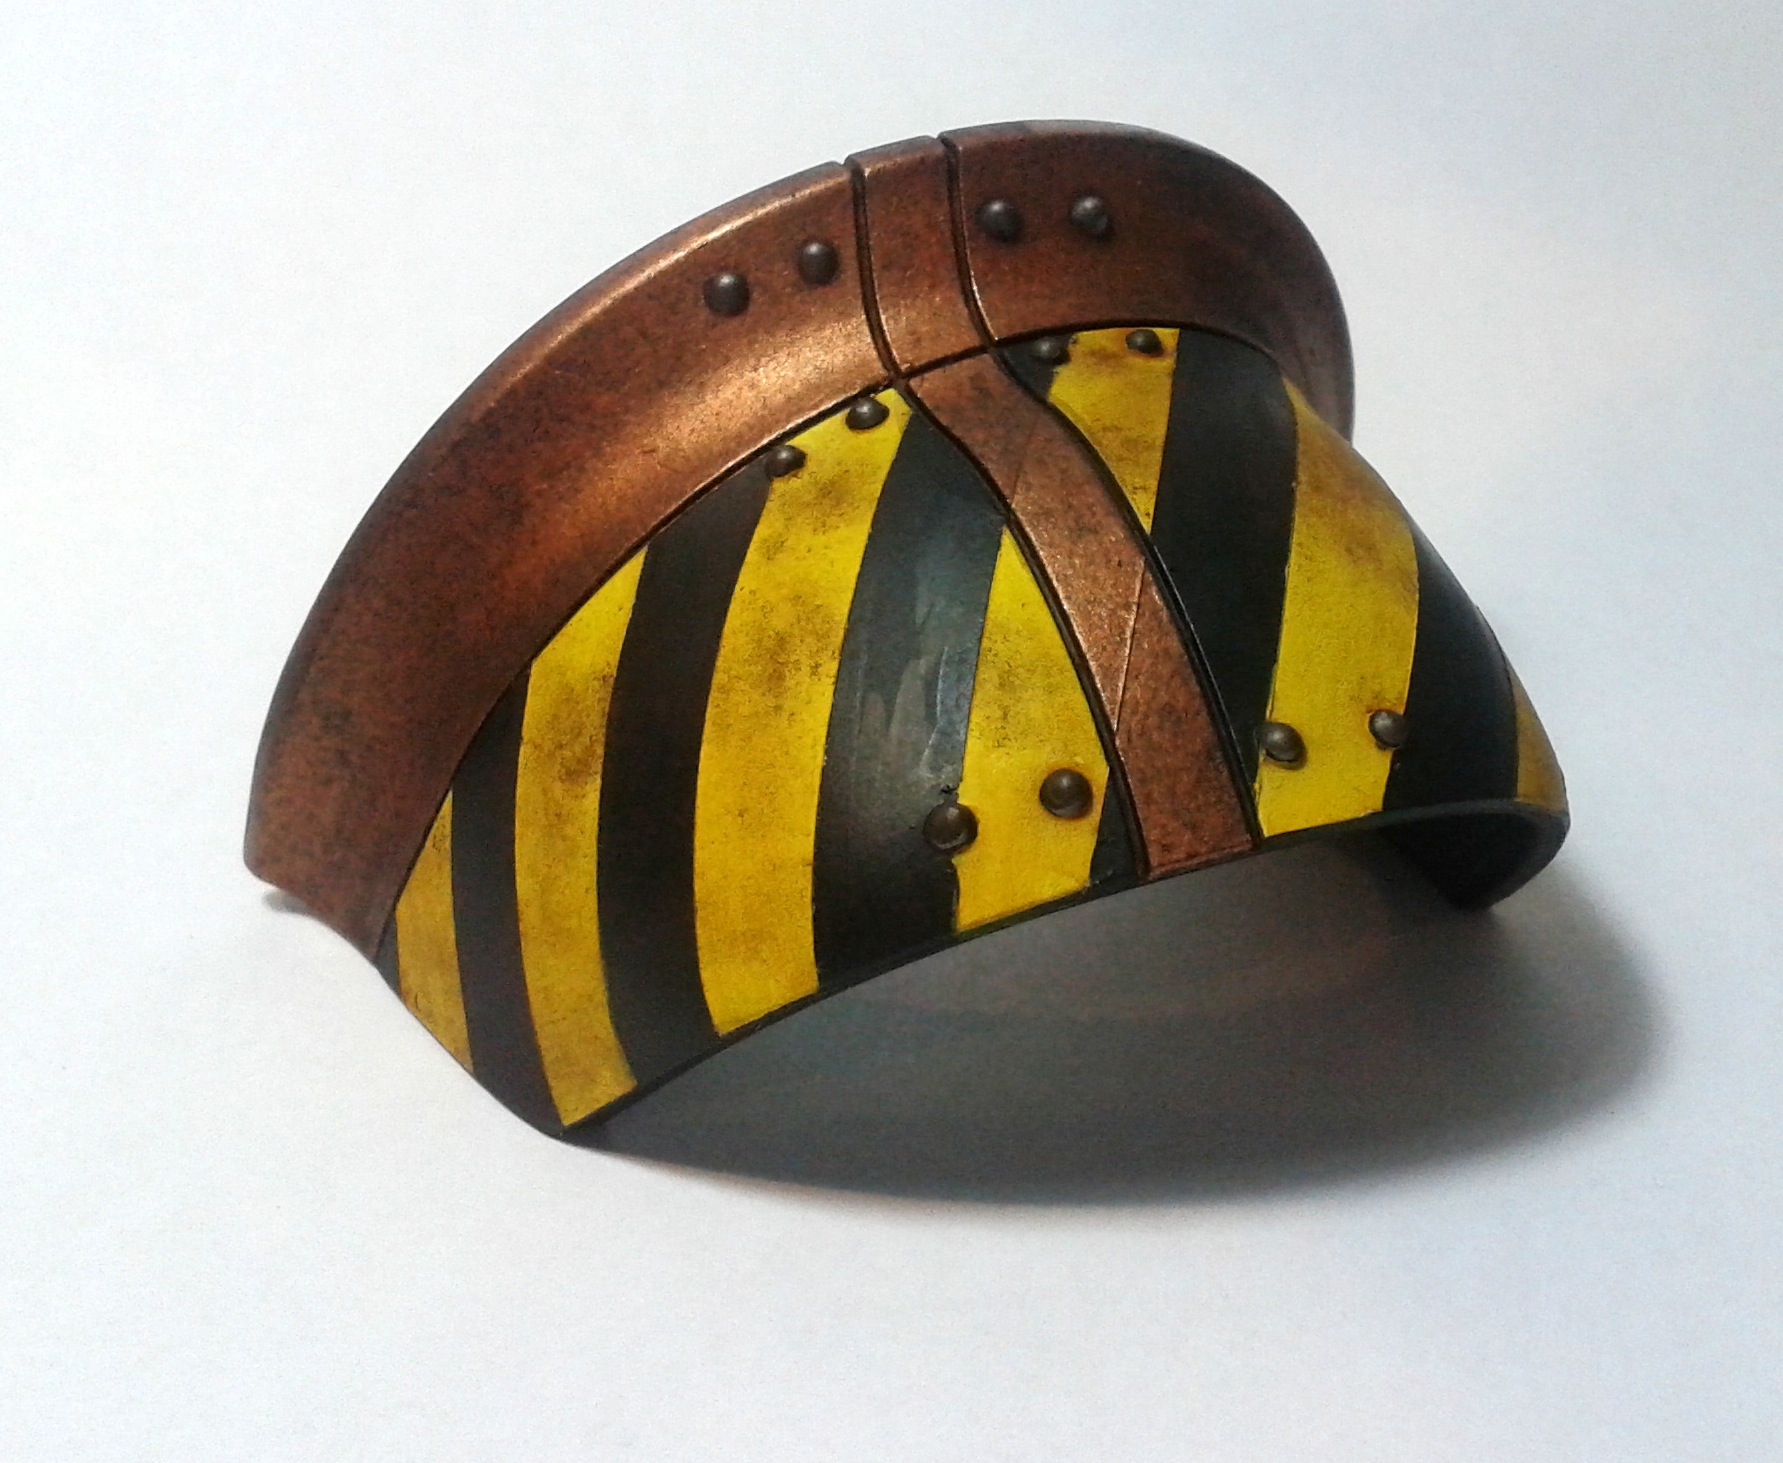
I used 6mm Tamiya masking tape to create the chevrons - if you stick a piece on, and then stick another piece right next to it, then you can stick a third piece next to the second, then remove the second piece to get nice parallel lines. I then sprayed white over a black basecoat, painted yellow other that (mixed with flow enhancer to remove bubbles and brush marks), and finally a sepia wash.
I also added a light weathering to make the yellow a little less dayglo.
There was just enough light after dinner this evening to allow me to break out my airbrush and have a go with the other shoulder. I decided to use this as a guinea pig to try out a colour mix using Vallejo Model Air paints (the first time I've used them). The picture below shows the result. This colour is 3 parts Fire Red and 1 part metallic Turn Signal Red, over a black undercoat.

I am pleased with the final result and I'm now going to use it on the rest of the model.
Once the paint is dry, I'll finish the bronze edging of the shoulder pad. This is done with two coats applied with a stipple brush over black undercoat, washed with Devlan Mud. I might also add weathering to add some depth to the colour.
Update: here's the finished shoulder pad:

Salamanders Land Raider Redeemer

Here is a Land Raider Redeemer for my Salamanders army. Normally, a Land Raider is the centrepiece for any Space Marine army, but in this case I actually painted it as a test model, in order to develop the painting technique before using it on the Stormeagle that's currently sitting in a box at my in-laws. The reasoning being that if it all went wrong, it would be a £50 model I was wrecking rather than a £100 model.
Fortunately, no such disaster occurred, although I did make a mistake when I tried to fix a pool of wash and ended up creating a nasty tide mark on the top of the model. This was fixed fairly easily, fortunately.
You can see that I've upgraded the model using Forge World resin pieces and etched brass. If you're creating an army with a rich visual style, such as the Salamanders, these are a bit of a must.
Now that I've successfully finished the Land Raider, I'm dying to get on to the Stormeagle! But you will see from my next post that there's another large model that's also taking up my attention...
Leviathan Update
The Leviathan Crusader is now mostly assembled, and I was able to get it base coated last night. I gave up on having dozens of sub-assemblies and have assembled most of it, it just means that there will be a few fiddly bits when doing the fine detail work.
Photos of the model on its own don't generally do it justice: this thing is big. Here you can see how the legs compare to a normal AoBR Marine:
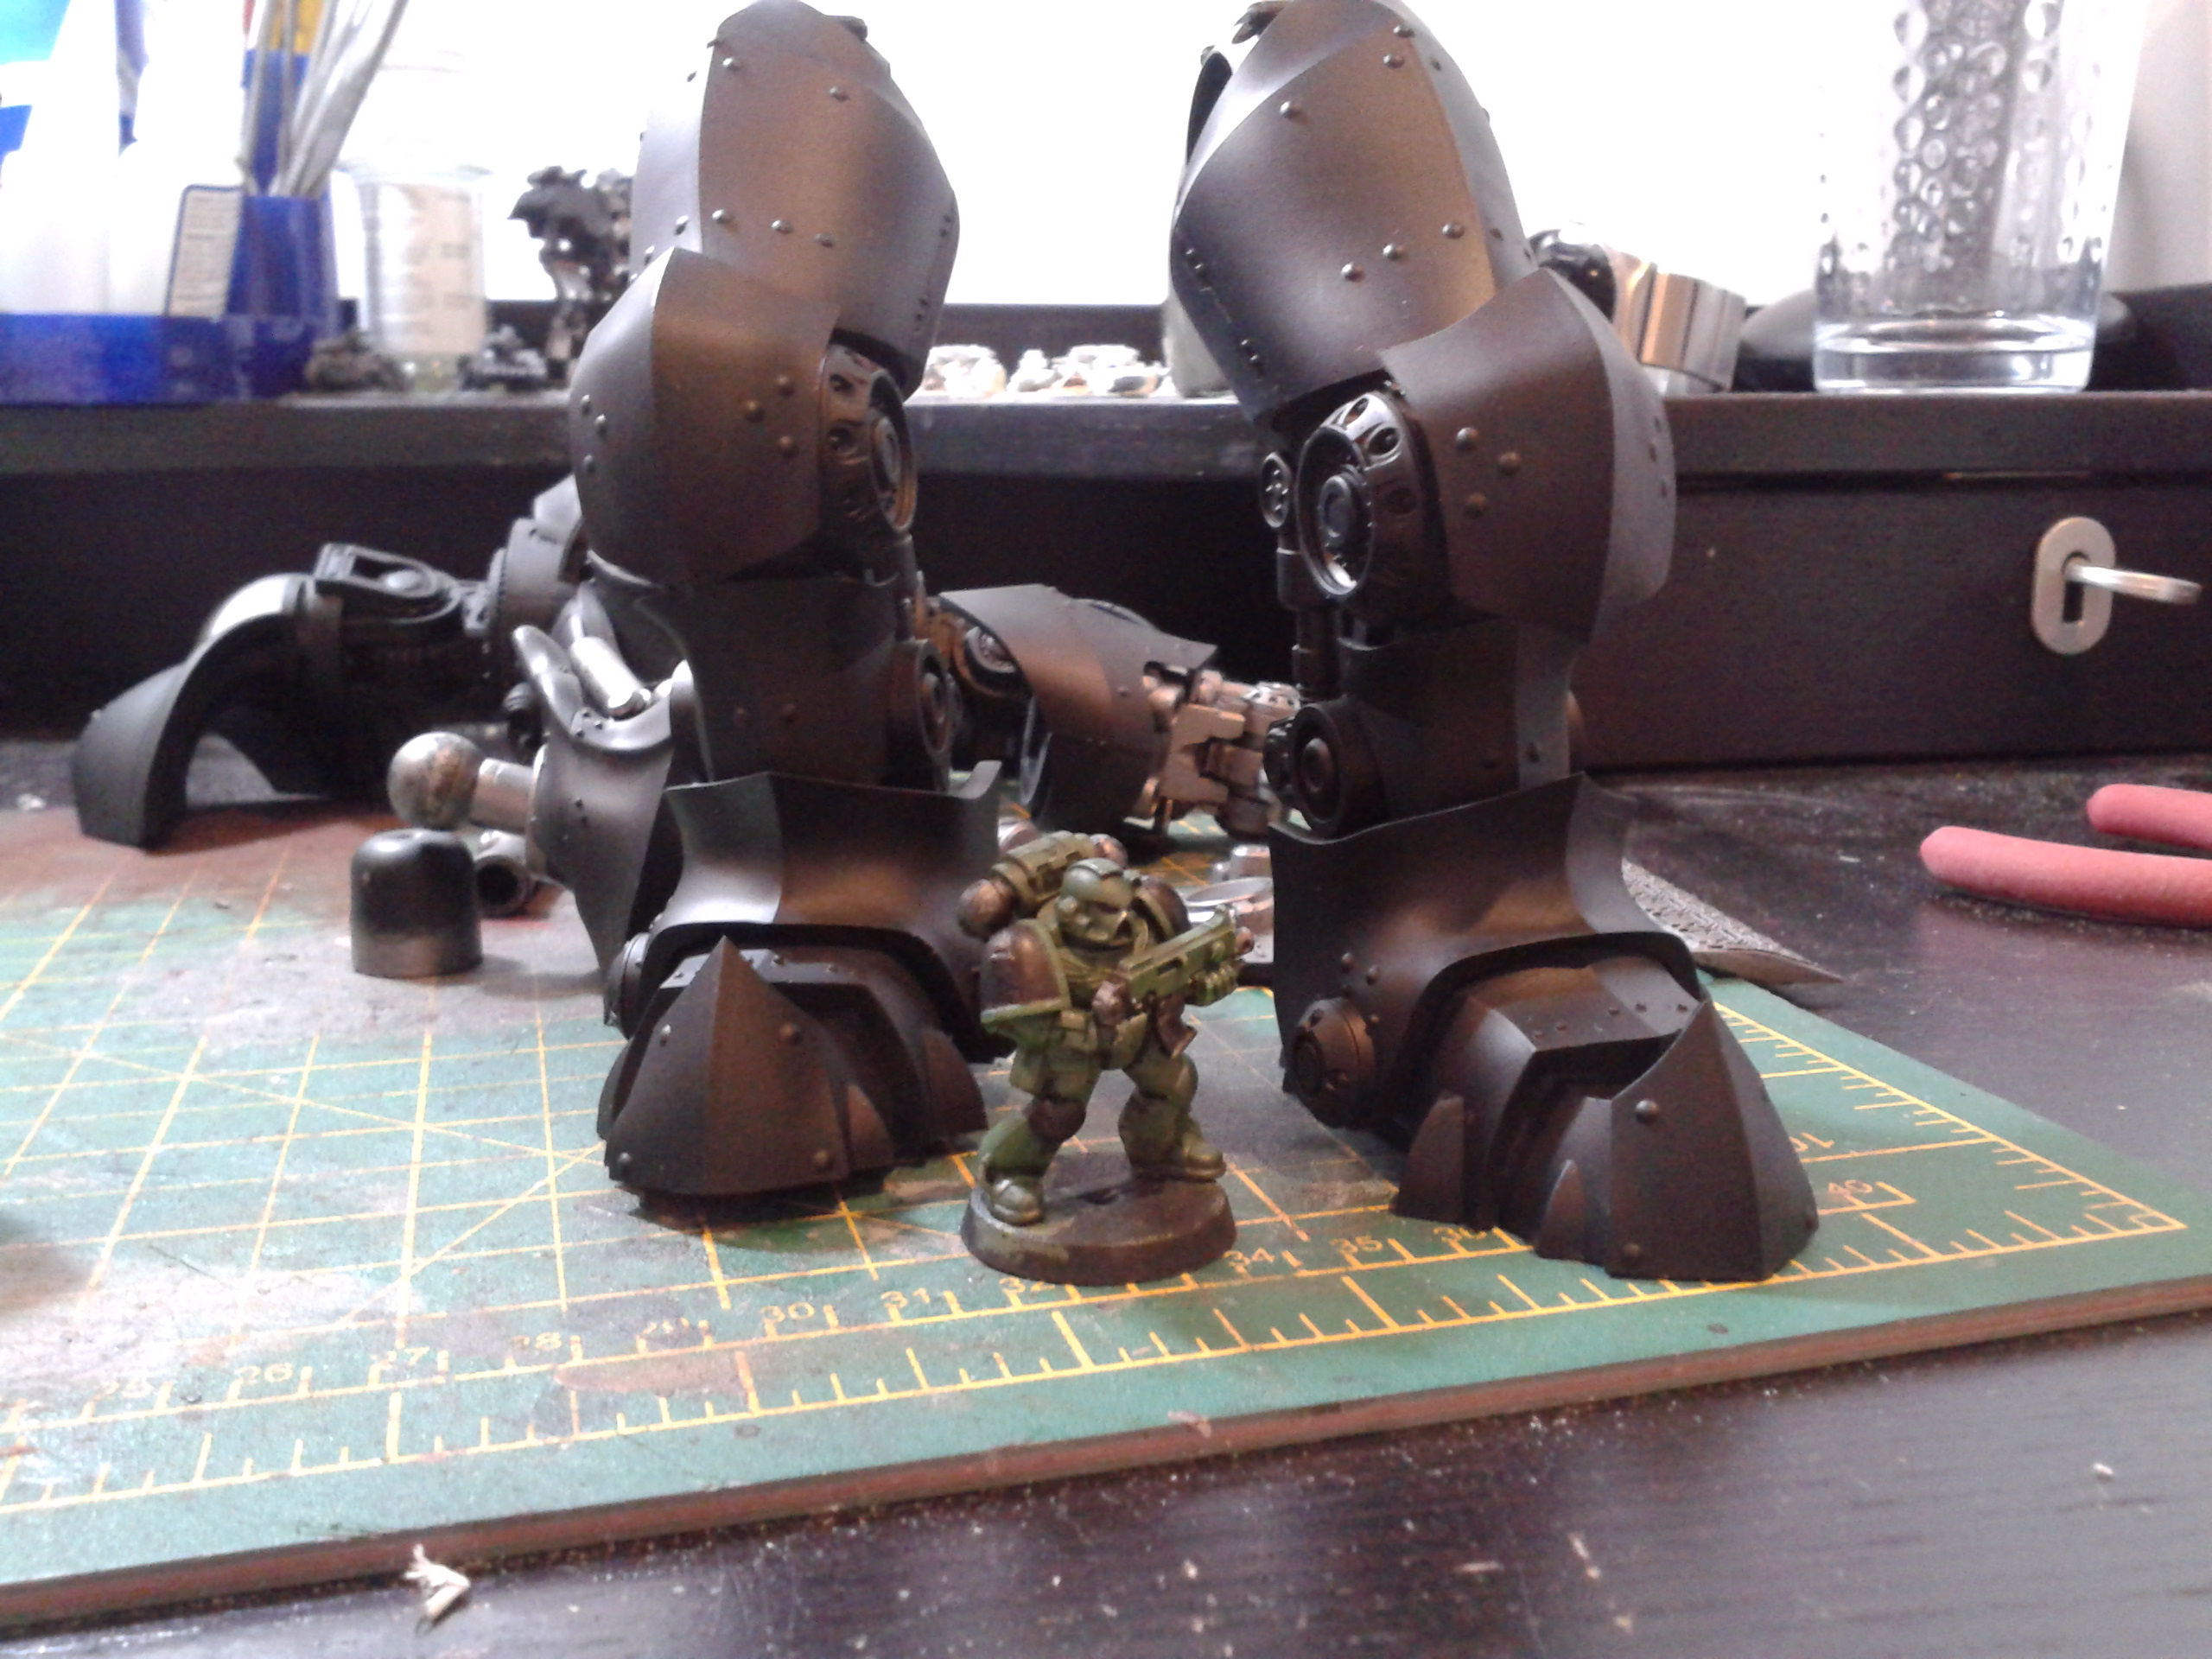
And a Land Raider:

Unboxing the Dreamforge Games Leviathan Crusader
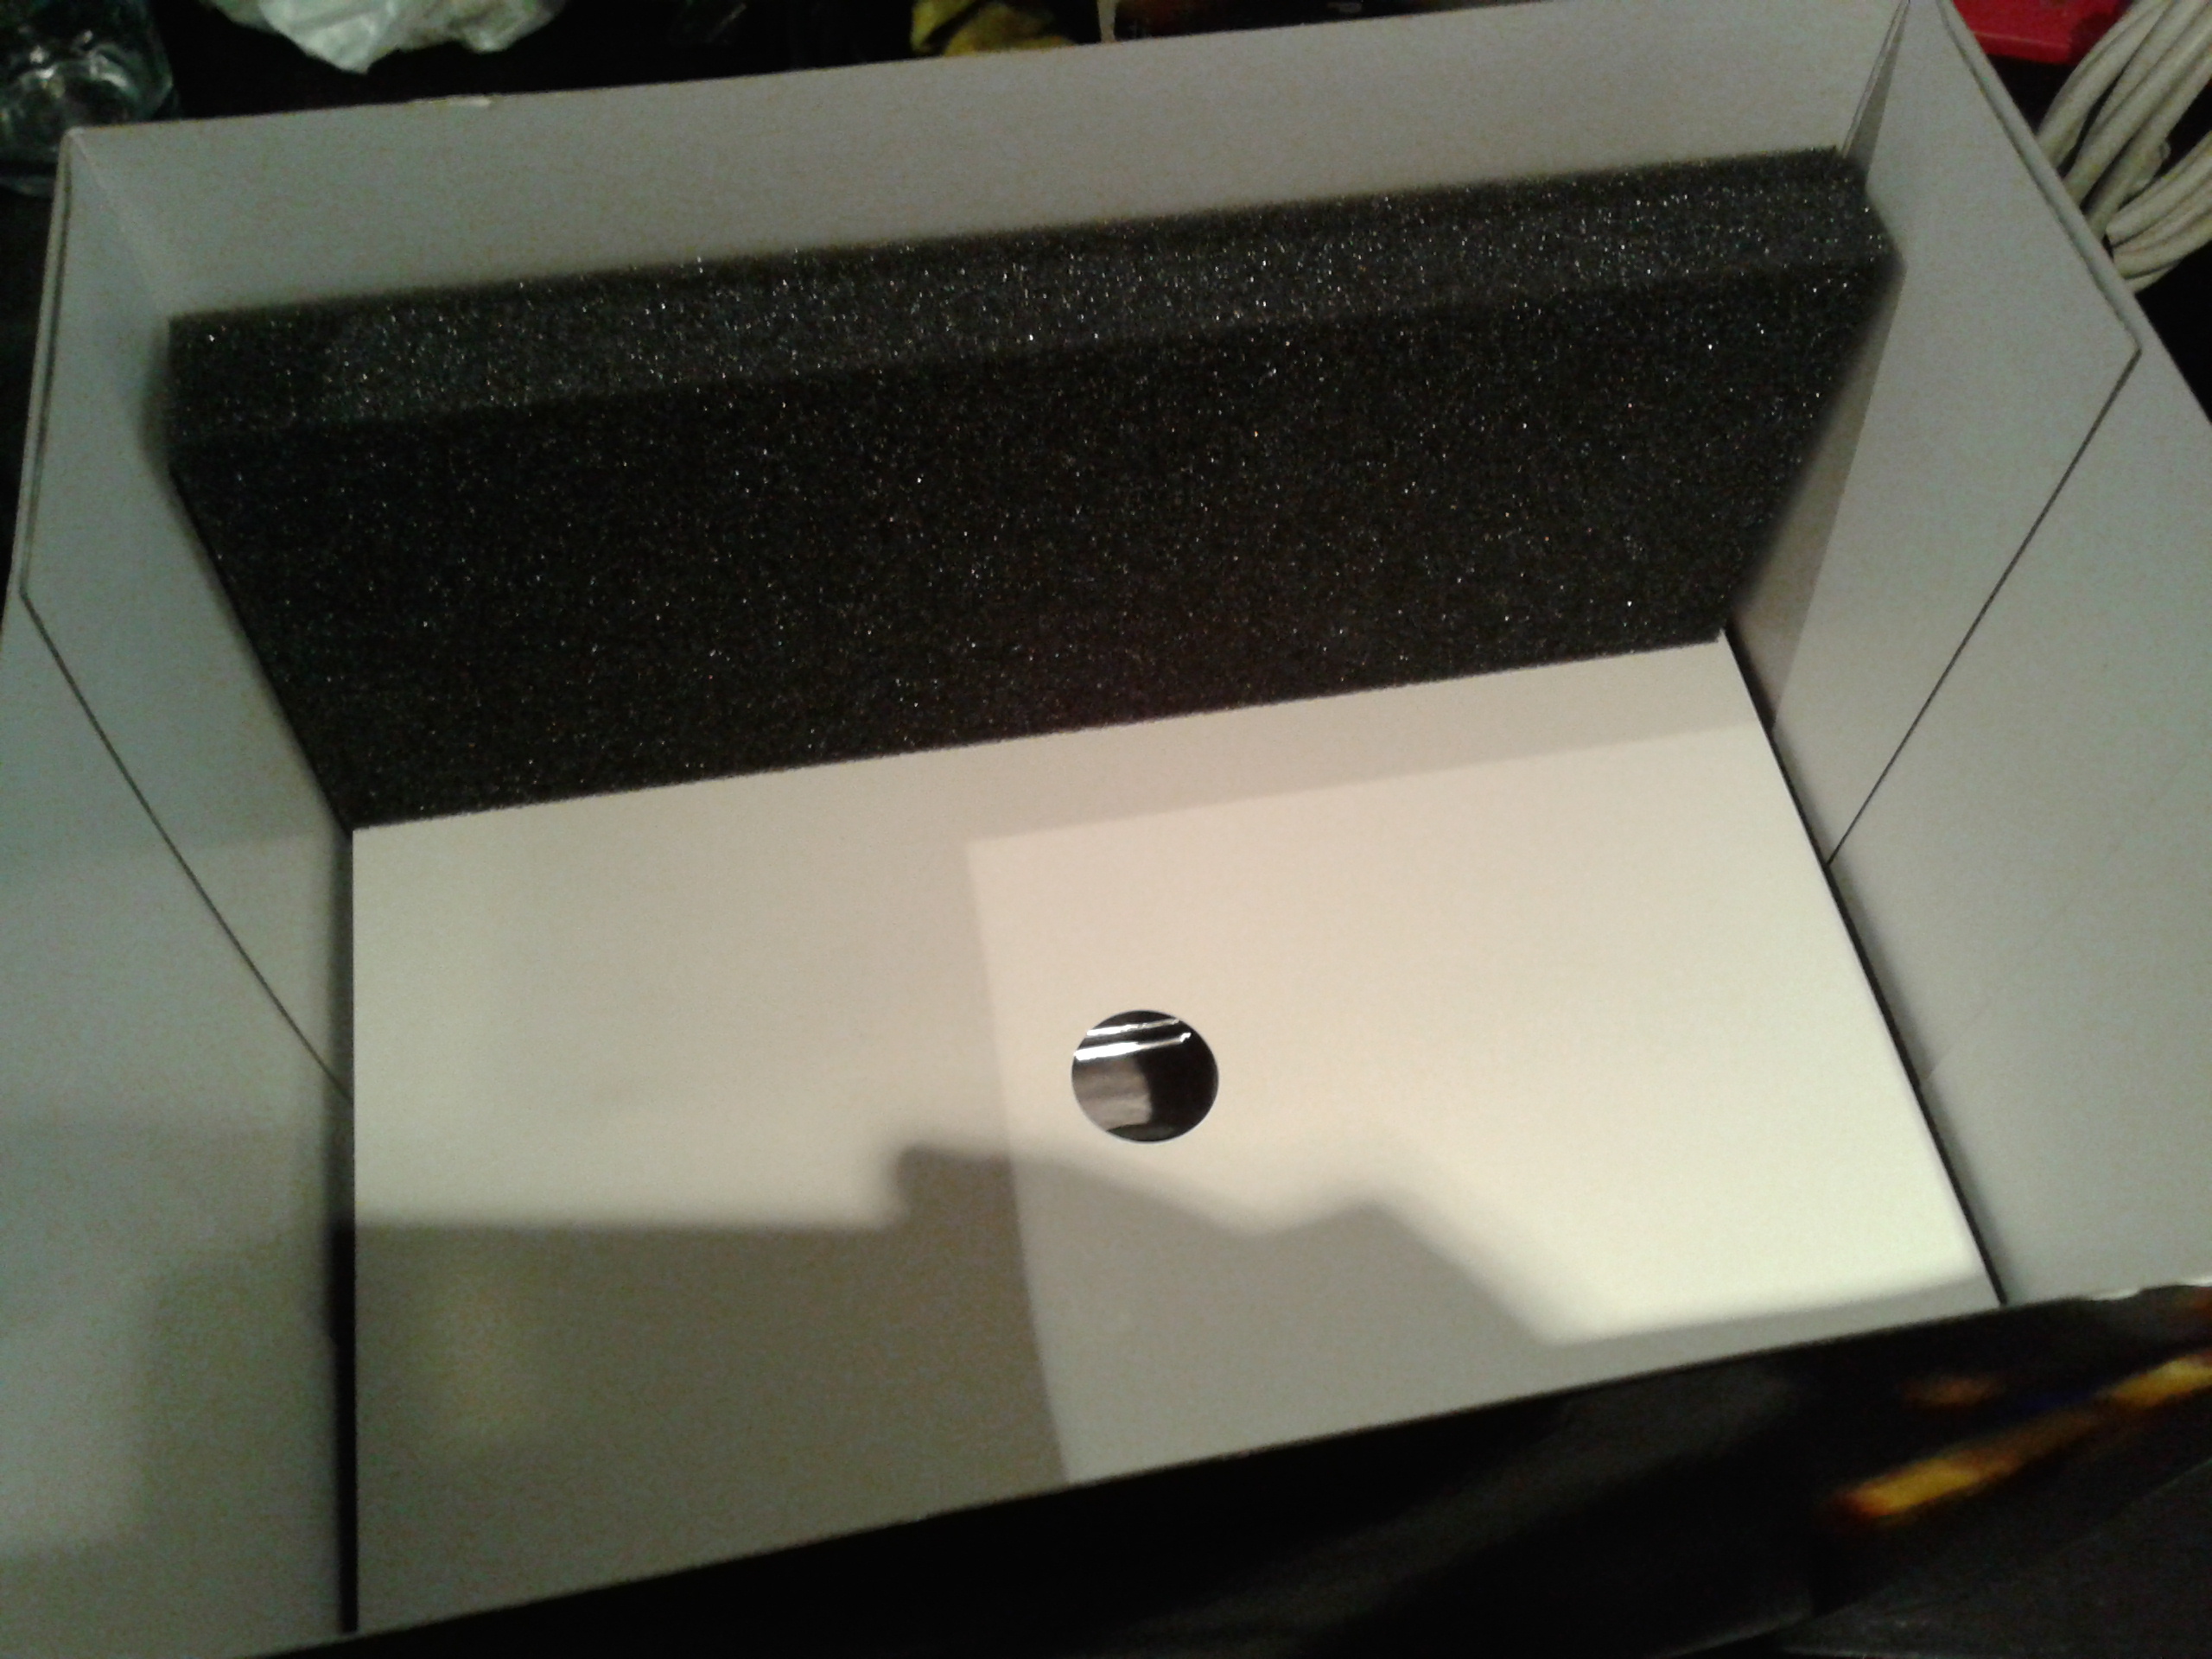
This is a big kit - the box is about the size of a couple of shoe boxes, and it's full of plastic sprues. I thought I'd take some pictures of the unboxing, because apart from the coolness of the model itself, I'm also rather impressed about how neatly it's all been fitted into the box. The sprues are designed to stack on top of each other, and the empty space is filled with foam, which means that the parts of the model are very well protected in transit.
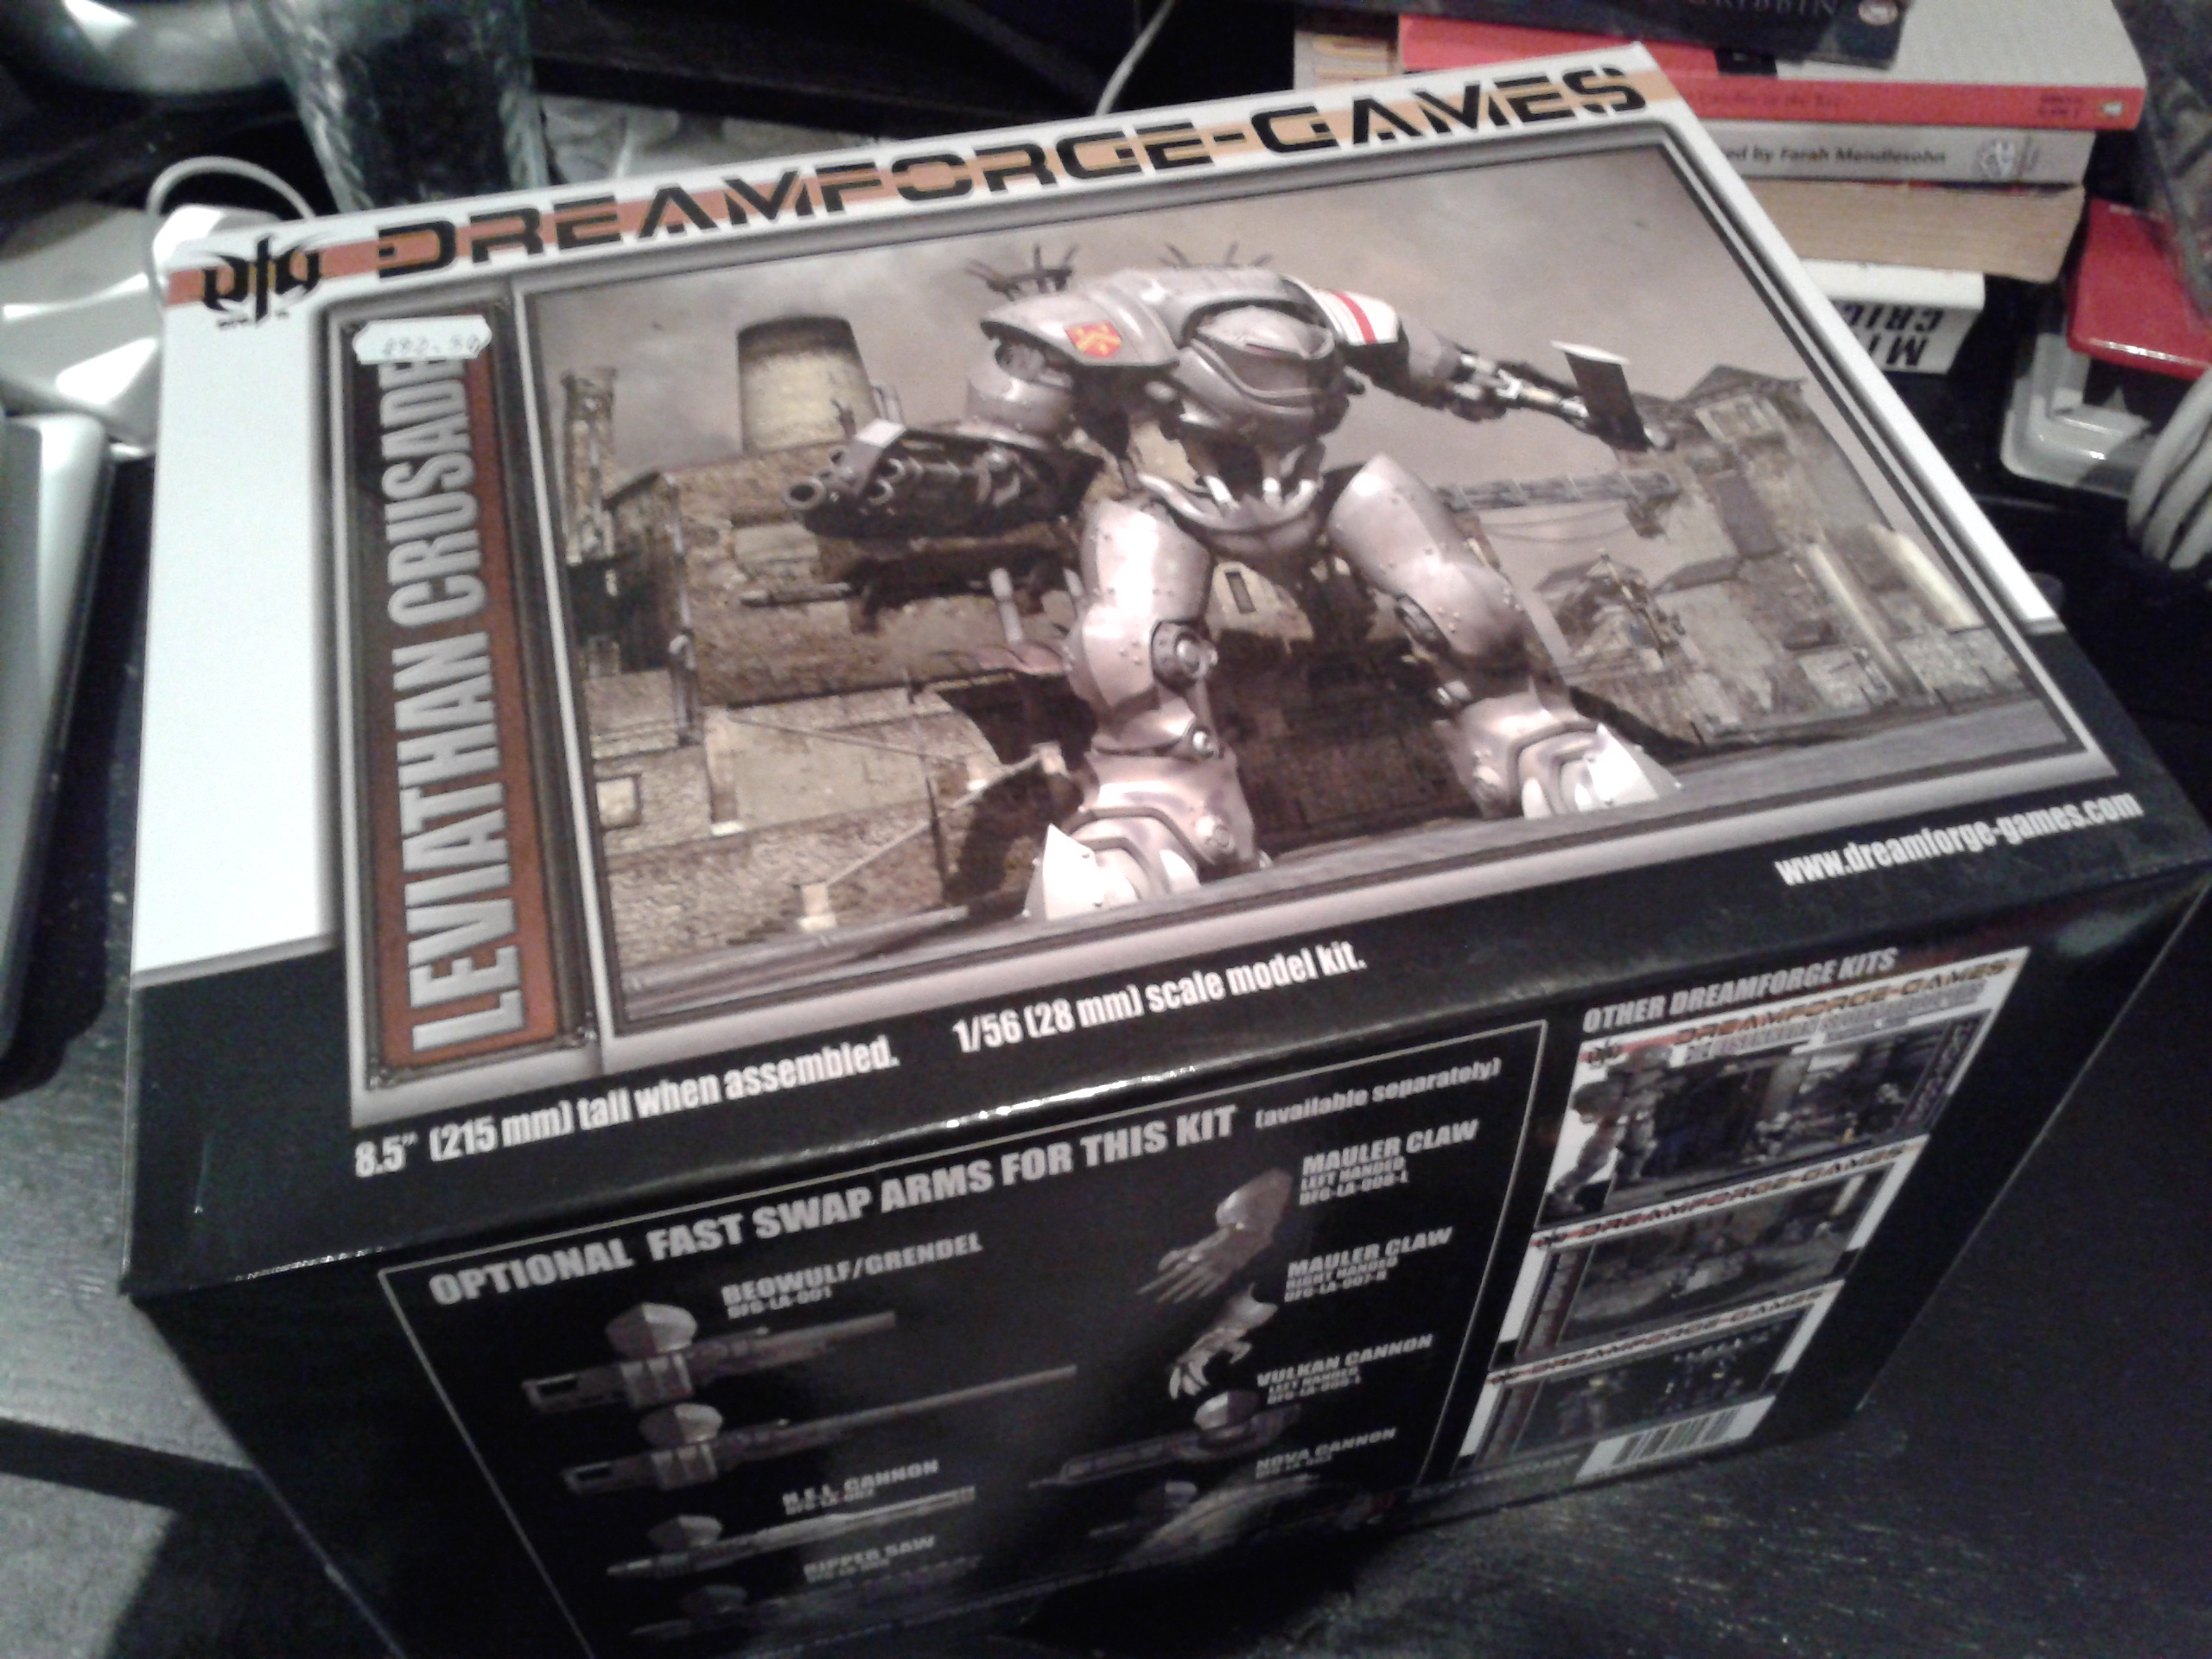


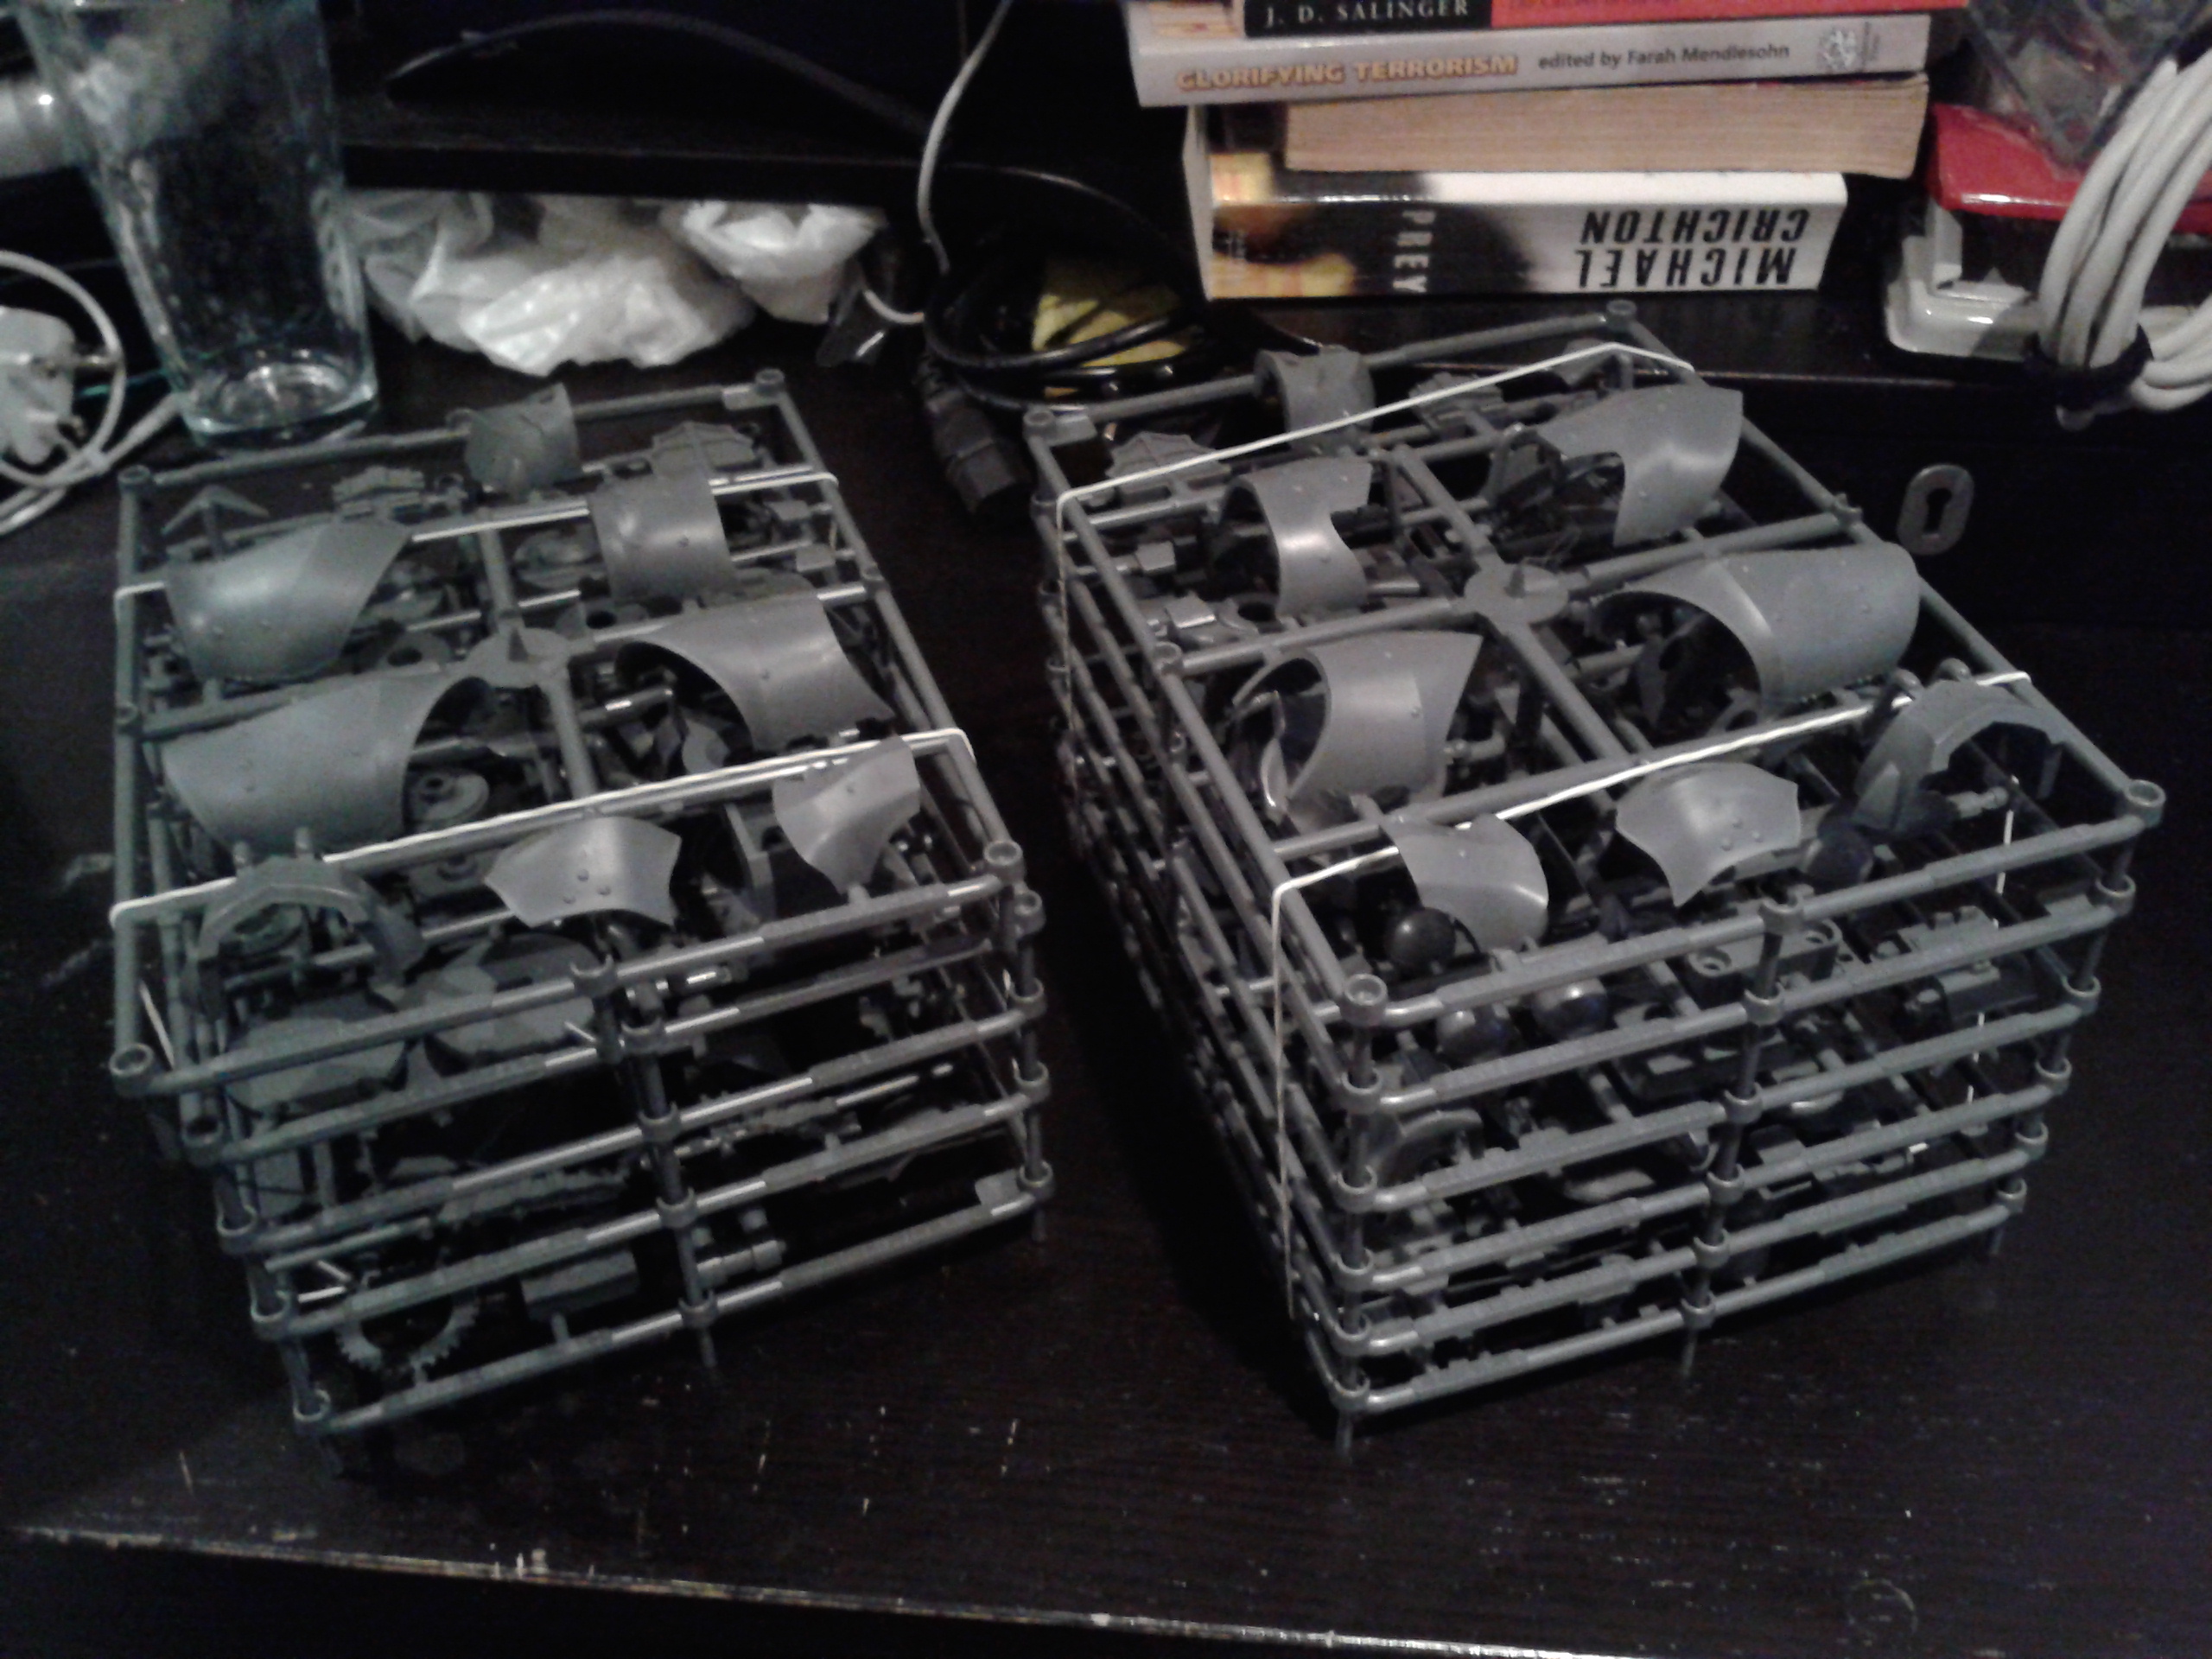
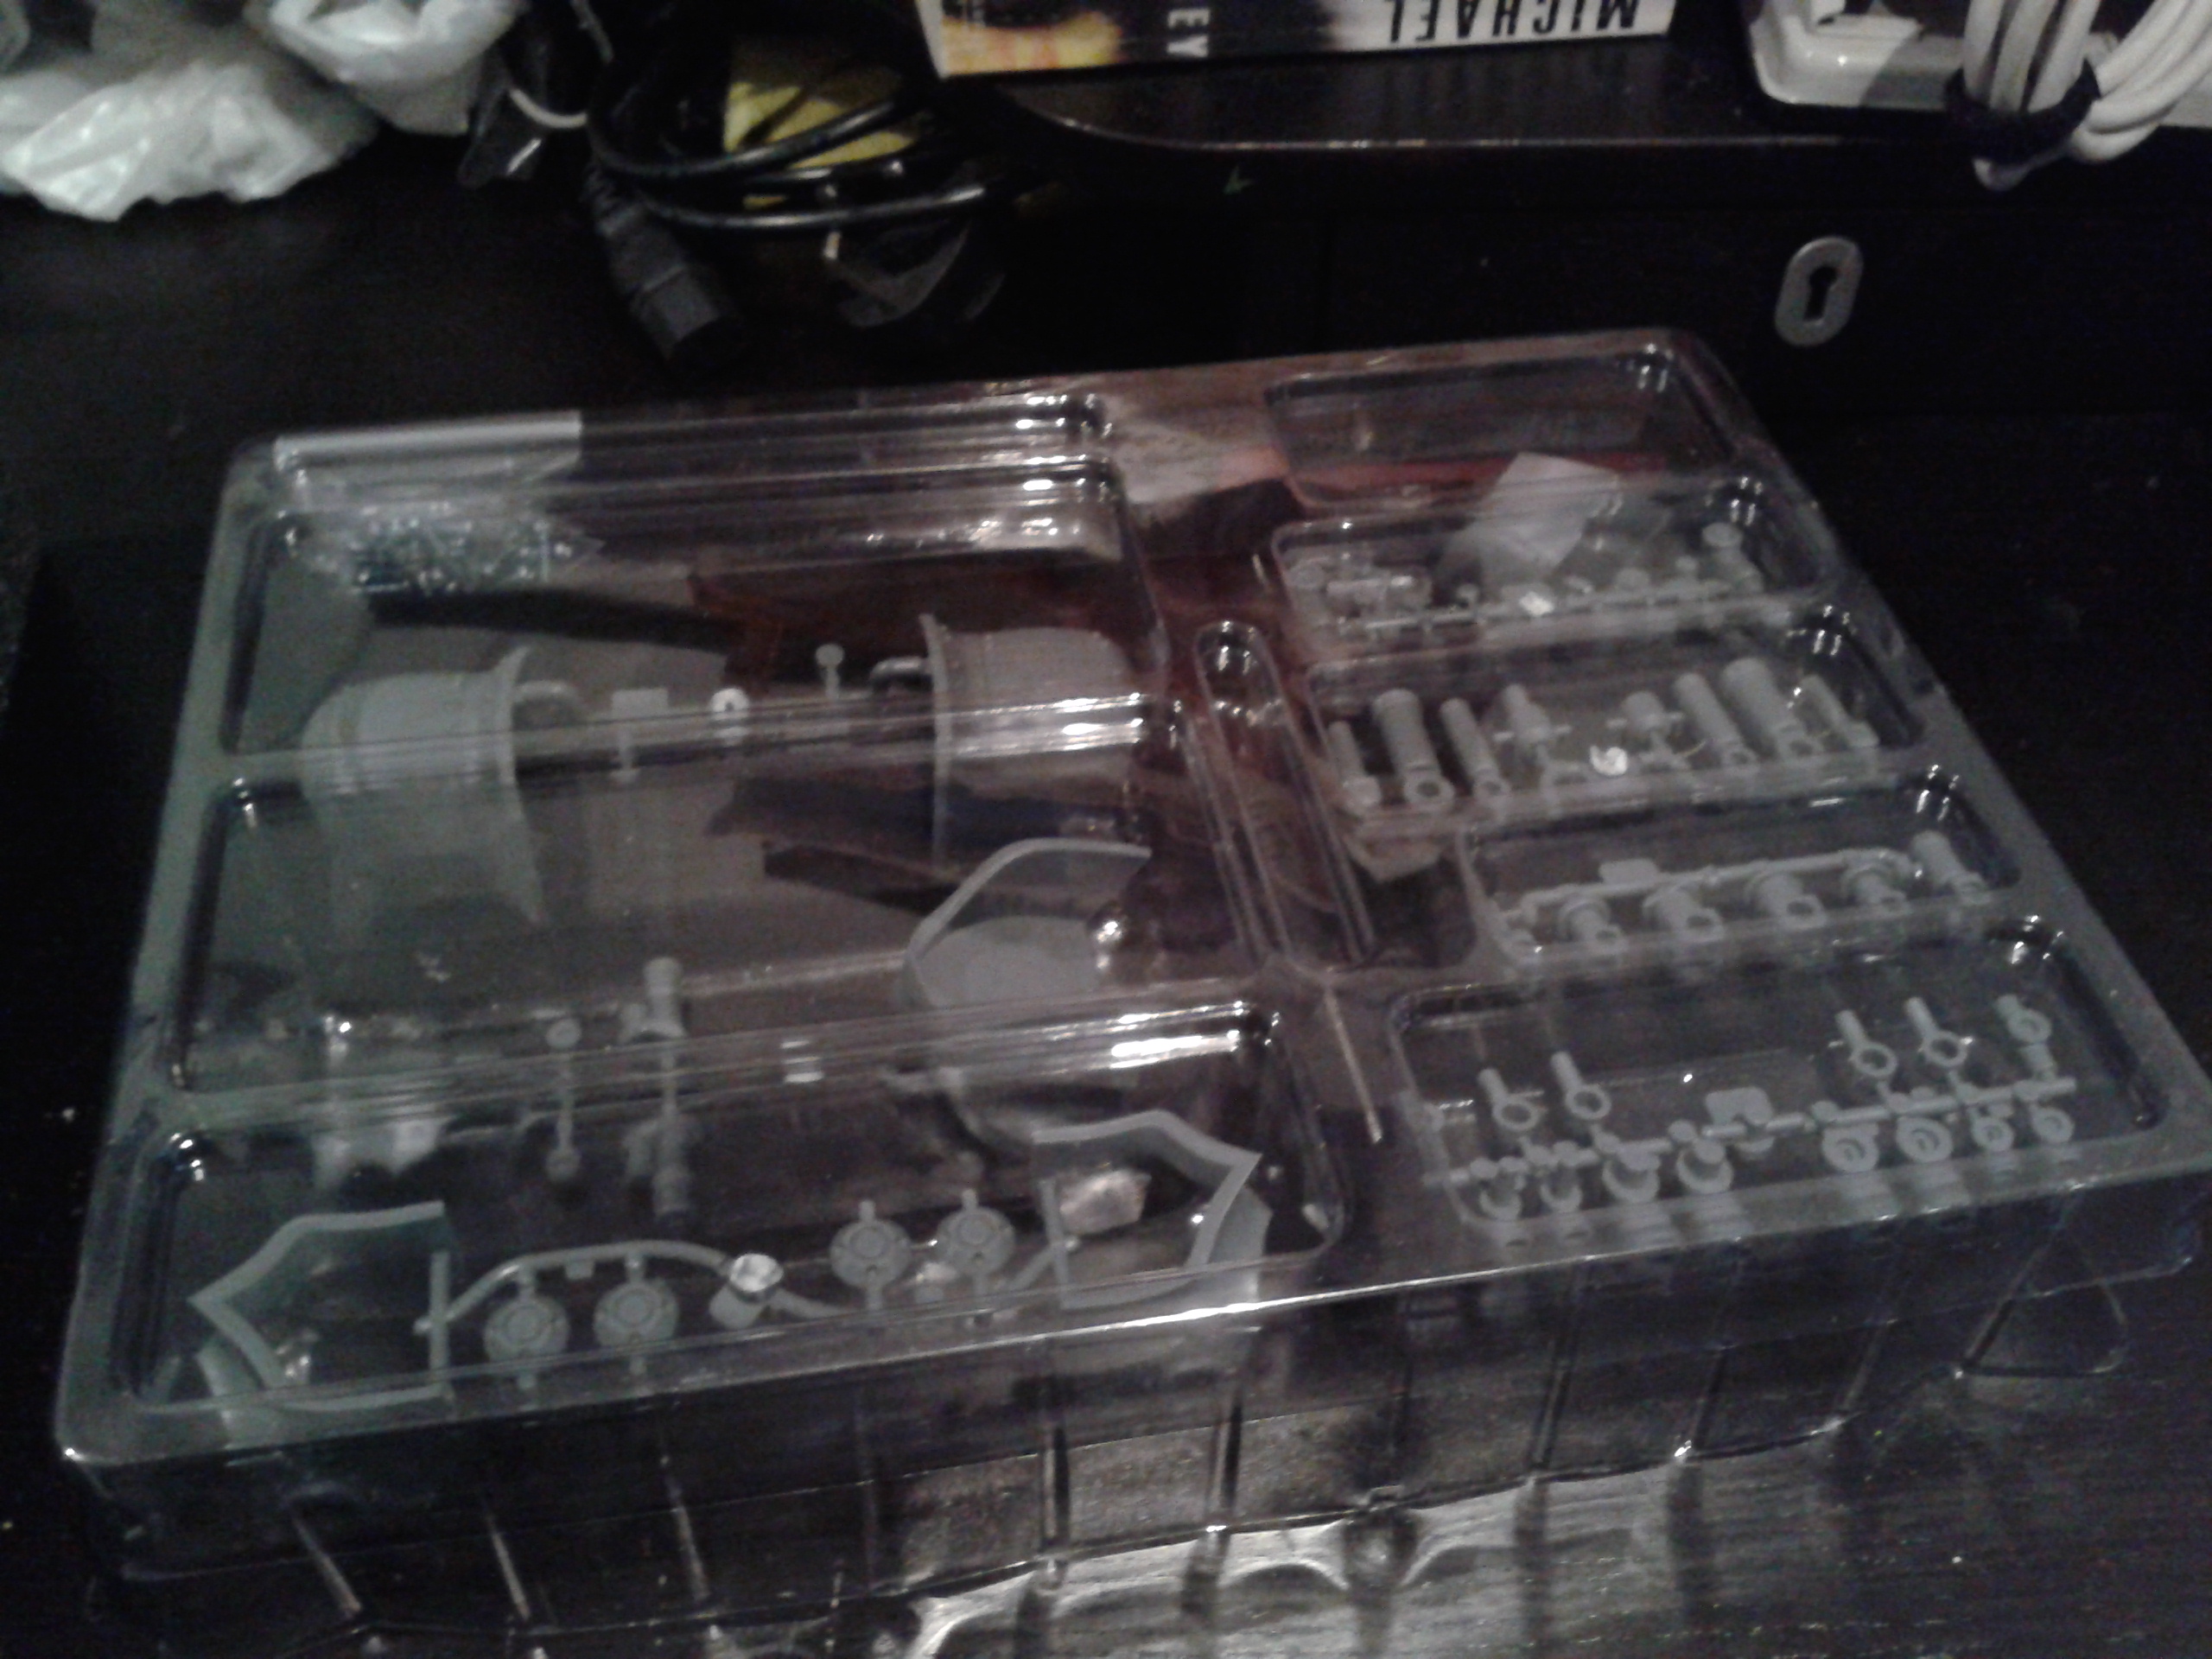
The kit is relatively simple (I've built much more complex kits, and its sheer size means that there aren't any especially small and fiddly bits) but it looks like there will be dozens of sub-assemblies that will need to be painted before they can be put together, so this is going to take quite a while to complete. My plan is to paint it (and use it on the table) as a Knight Paladin in the same colour scheme as my Epic knights. Fortunately there are (unofficial) rules from Bell of Lost Souls.
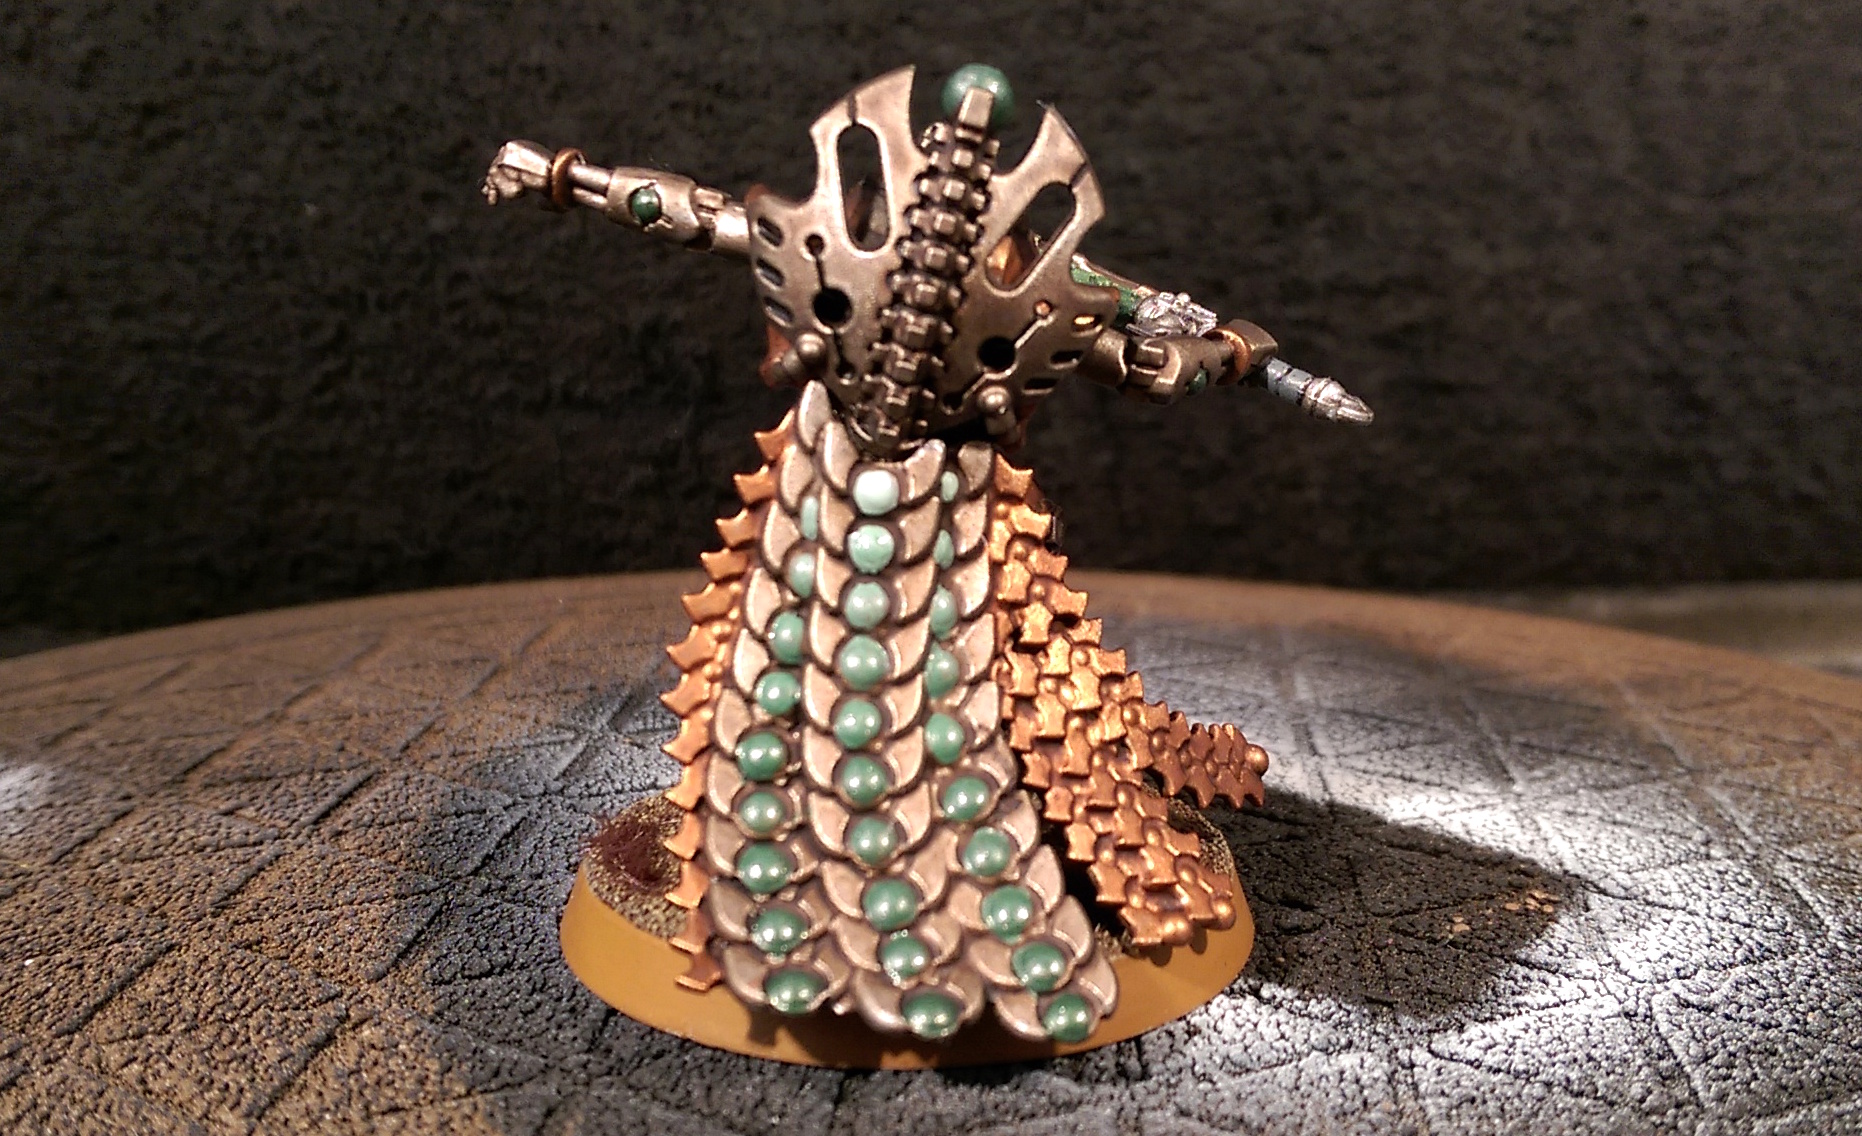
Necron Cryptek
I just finished this Necron Cryptek. Because, y'know, Veil of Darkness is just too much fun not to use in my Necron army.
Paint scheme as per all my other necrons.
Salamanders Firedrakes Sergeant
Here, finally, is the Sergeant for my first squad of Firedrakes Terminators. This chap has taken quite a while since it features two of my weak spots: faces and banners. My reluctance to get stuck in and actually have a go at painting them meant that this miniature spent several months on my "to do" list.
I am planning on having a stern word with myself as it's taken me nearly a year to paint six terminators (this squad and a chaplain). This is because I broke one of my own cardinal rules, which is always use an assembly line. If you want to get an army finished, you divide your labour and do the same thing to every model at the same time. This is something I intend to do with the next two squads which will be painted all together.
Here are some more pics of the finished squad.

Ian Watson on Warhammer 40,000

A recent discussion on Twitter got me thinking, as I occasionally do, about Ian Watson and his literary contribution to Warhammer 40,000.
Back in the old days, when GW was cheap, 40K was still relatively new, and the Black Library was still a decade away, GW published 40K "tie-in" novels by hiring established genre writers. Some used pseudonyms, but others didn't. Most notable amongst them are (in my opinion) Charlie Stross, who contributed a short story to the Deathwing anthology, and Ian Watson, who wrote a total of four novels in the 40K universe.
I don't think it's possible to underestimate how important these novels are for me, and also to 40K, for reasons I will now explain.
First, the fact that an author with the reputation and status that Ian Watson had (and still has), must have done a lot for 40K's credibility in the publishing scene. That Watson didn't use a nom de plume says an awful lot. That must have been quite helpful when the Black Library was being established.
Secondly, these novels went a long way towards establishing the mood, and general approach, that 40K was to take for the next two decades. They are a bridge between the frivolous and silly Rogue Trader era universe, and the full-on grimdark of contemporary 40K: with feet on both sides of the divide, the books somehow manage to be silly and serious at the same time, simultaneously light-hearted and sharply melancholy.
Finally, they are important to me personally, because they cemented my love for both 40K and for Ian Watson. I read Inquisitor. Then I read Space Marine. Then I read everything else he wrote that was still in print. When I got an internet connection in 1995, I started picking up out-of-print paperbacks.
About ten years ago, Ian did an interview with some Hungarian 40K fans about his books, and what drew him to the 40K setting. It remains one of the most cogent and concise explanations of how the 40K universe works. Here it is:
Of all the great contemporary British SF writers, the only person I admire as much as Ian Watson is Adam Roberts. So imagine my delight at seeing this detailed review of Inquisitor. 40K as seen from a "serious" literary perspective!
40K Background: The Vastus Sector

Like many wargamers, I enjoy the “fluff” of the imaginary worlds that I play games in, as well as the “crunch” of the rules and models. I’ve even taken to writing my own background material, to help bring my armies to life.
Forge World confirms Horus Heresy expansion for Warhammer 40,000
 Tonight's Forge World News Flash contained a link to a YouTube video which confirms that they will be doing a Horus Heresy expansion for Warhammer 40,000. Here's the video:
(Video Link)
This should be awesome!
Firedrakes: First Production Model

I am now painting two more models in a batch as I think that will also save time. Then I only have to paint the sergeant and I've finished the first squad, or one third of the final army.
Firedrakes Test Model

Here's the first of the Firedrakes Salamanders terminators. I'm pretty pleased with it overall, although there are a couple of issues: firstly, I decided to use the Army Painter spray as the base colour based on their "100% match" with their Warpaint paints: unfortunately this is not the case, which means that cleaning up mistakes is much trickier as I have to mix the right colour to match the base coat.
The second issue is entirely my fault: I left the model under a hot lamp too long which caused the model to warp. Fortunately I caught it before it got too bad, but I'm annoyed that the first model I painted for this army has such a visible and unfixable flaw which you can see in the photo below.

I used a couple of techniques that I haven't really used much before at this scale: I used line highlighting which is pretty standard for painting Space Marines (but I've never tried before) and I also used some of Forge World's weathering powders to weather the boots and greaves. I used two different powders (Light Earth and Dark Earth) layered one on top of the other to match the colour scheme of the base.
More pictures below.


Warhammer 40K 25th Anniversary Tournament at No Man's Land
I don't have time to give a full report but I'm pleased to say that I came 9th out of 14, with two losses, a draw and a win, against Dark Eldar, Space Wolves, codex marines and a rival Necron dynasty. Playing against Necrons was a lot of fun!
Check out the photos below and look out for the special spectator who came along! (I'm not talking about Ty the Wonder-Dog.)


Review: Puppets War Cyber Beetles (Canoptek Scarab proxies)
Seeing how I sacrificed most of my cache of scarabs to make Epic scale destroyers, I am pretty short of the beasties, so I decided to buy some. They just arrived today, so here's a picture of how they turned out:

The casting quality is pretty good, with only a small amount of flash or warpage (and where there is any, it's to the underside where it's not likely to be noticed). The detail is pretty good and the size in comparison to Games Workshop's scarabs is pretty good. So they're not a bad alternative to the official models.
Games Workshop should open source their rules development process
Yesterday evening, I noticed a flurry of gossip in the blogo- and twitter-sphere suggesting that rules for the rumoured 6th edition of Warhammer 40,000 had been leaked, and uploaded onto a file-sharing website (the file has since been removed).
All this cafuffle prompts the following question: so what?
How to make dragonscale with green stuff
Firedrakes, Part 1
Behold:

My Hobby Plans For 2012
I thought that it might be fun to post my plans for 2012, so I can look back next year and see how I did.
Citadel Finecast, First Impressions

Here's the first FineCast miniature that I've assembled and painted. I recently took my step-daughter and her friend to one of my local GW stores for one of their "hobby tutorial" sessions (which was actually great fun) and we each bought a miniature to paint after. The kids both got Huron Blackheart and I got this, Imhotek the Stormlord.
Overall, I'm not especially impressed with Finecast: of the three miniatures, mine was the only one that didn't have major gaps left by bubbles in the mould. Imhotek's staff was quite badly warped (although that's easy enough to fix), but the absurd number of injection sprues meant that getting the model off the frame was pretty risky, and I ended up breaking off his thumb, which I promptly lost, and had to replace with a piece of sprue. His foot also broke off and I had to reinforce it by adding some cork pieces to the base (which actually turned out quite well).
I was probably foolish in believing what I'd been told about being able to paint directly onto the resin: when the kids tried this with their miniatures, the paint refused to adhere and I had to give them a quick blast from a spray can to prime them.
Here's a few more pictures of the finished Overlord. I think I am going to avoid Finecast miniatures whenever possible, and stick to metal miniatures if I can: thankfully a lot of the stuff that's now Finecast only is still available on eBay.
I'm still pretty impressed by the new Necron stuff. I bought a box of Immortals/Deathmarks and these plastic minis are pretty fantastic.
WIP: Imperial Crusader For In The Emperor's Name

The miniature is a War Priest from Avatars of War. I've 40K'd it up a bit, by adding a Plasma Gun, Combat Knife, ammo pack and purity seal, all taken from the Space Marine accessories sprue. The head is from a Space Wolf marine. A bit of etched brass on the shoulder and on the sides of the warhammer finishes him off (note that the base is temporary).
More pictures below.


Illuminated Necron Monolith

This is what it looks like when you turn the lights down:

To build it, I pretty much followed the instructions in this article on Librarium Online. The only difference was my use of small pieces of paper, which I glued behind the green plastic rods to make the light more diffuse. Here's what they look like from the inside:

You can also see the big wads of Green Stuff I used to plug the holes around the Gauss turrets in each corner. Here's a couple of pictures of the lighting rig:


I bought the CCFL system from Scan.co.uk: the components cost me less than a tenner, which is pretty amazing. I am thinking about buying some more to use in some future terrain pieces.
After being sprayed black, I painted the outside of the Monolith in Tin Bitz using some home-made foam brushes of various shapes and sizes:

I then drybrushed Brazen Brass over the Tin Bitz using a large drybrush, and then picked out the edges in Shining Gold. I used Devlan Mud to add some weathering and dirt, especially to the parts that I'd given a coat of Boltgun Metal to add some contrast.
Side and rear shots:


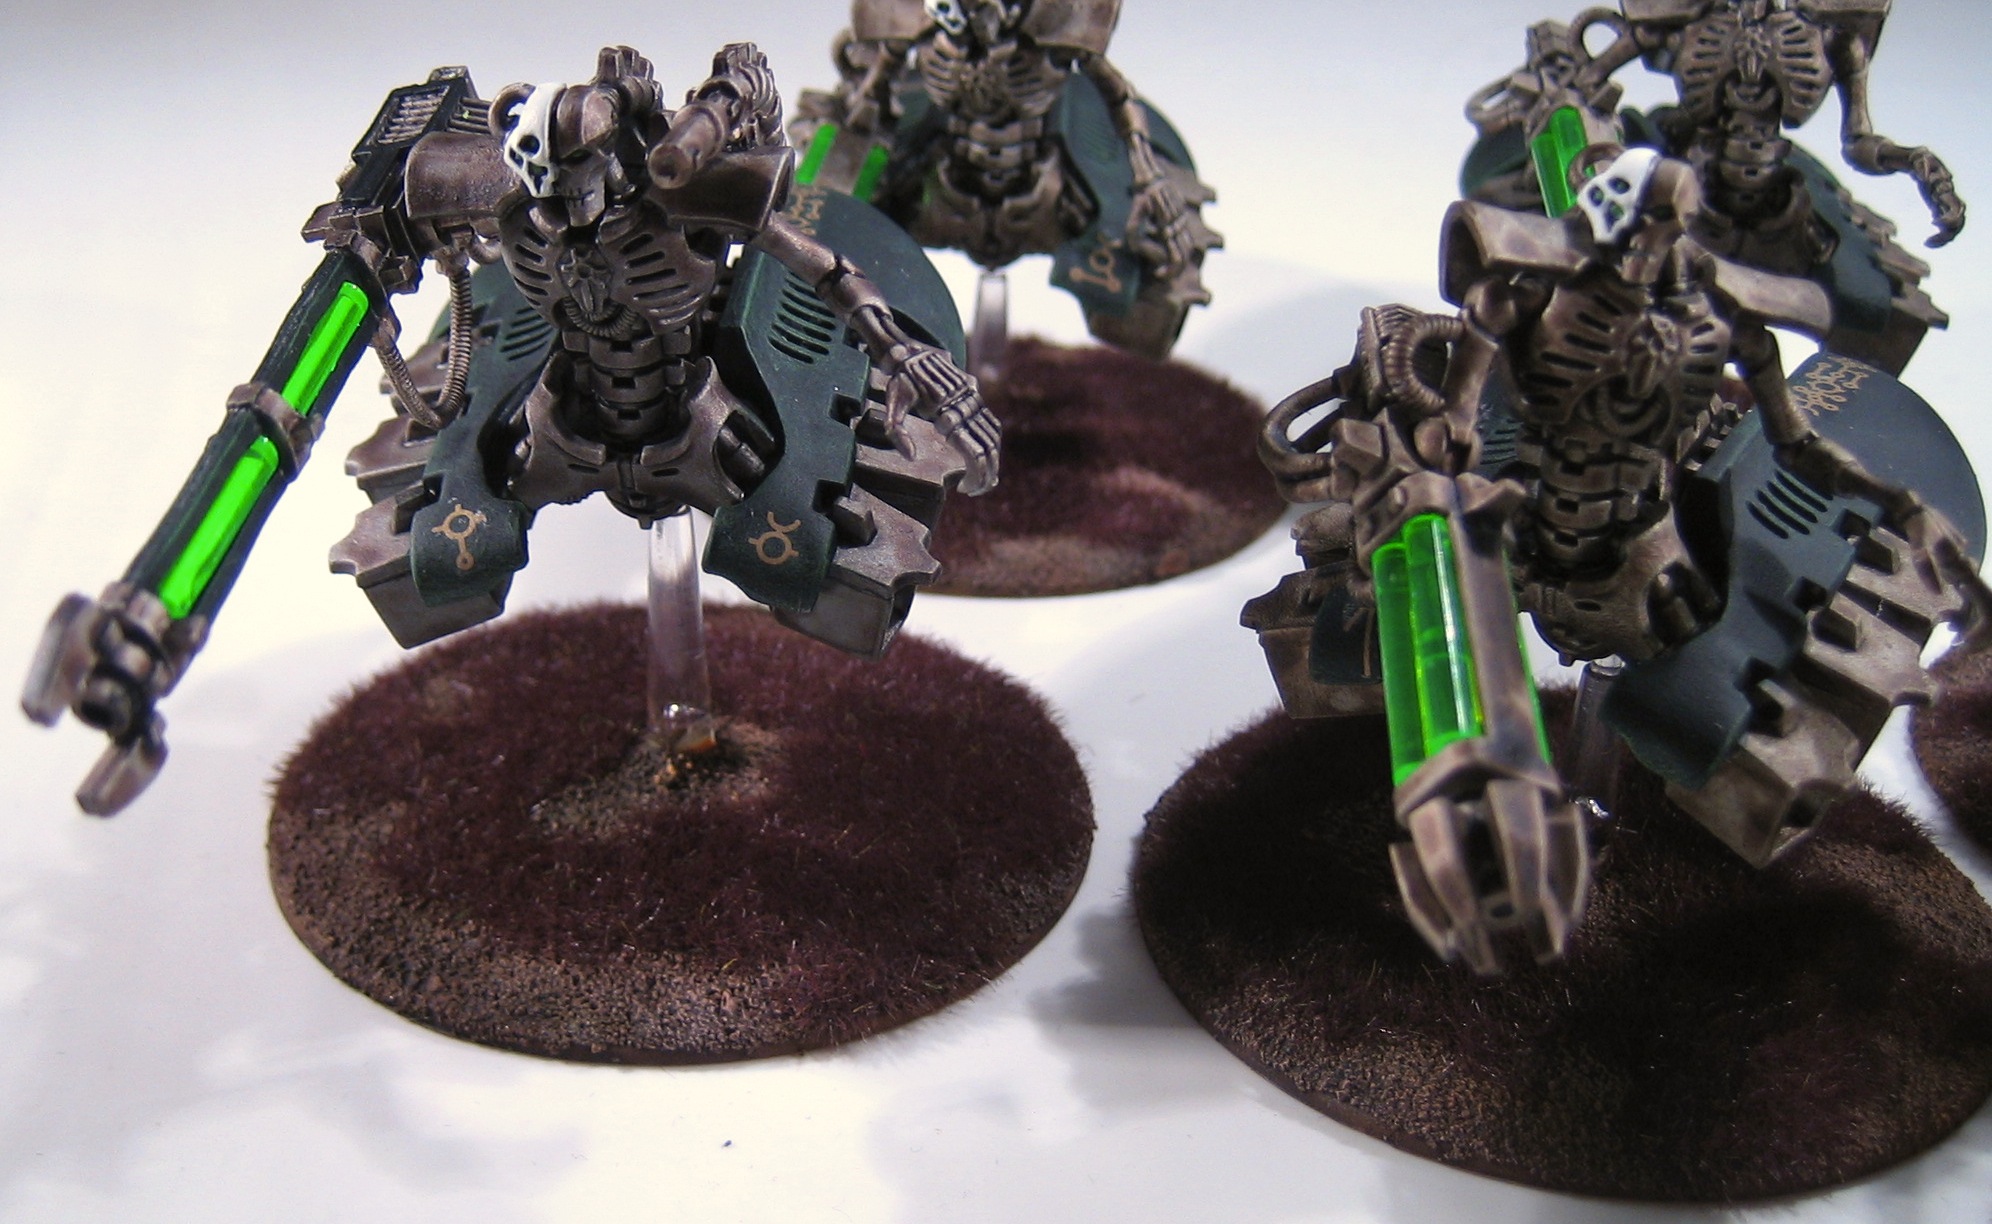
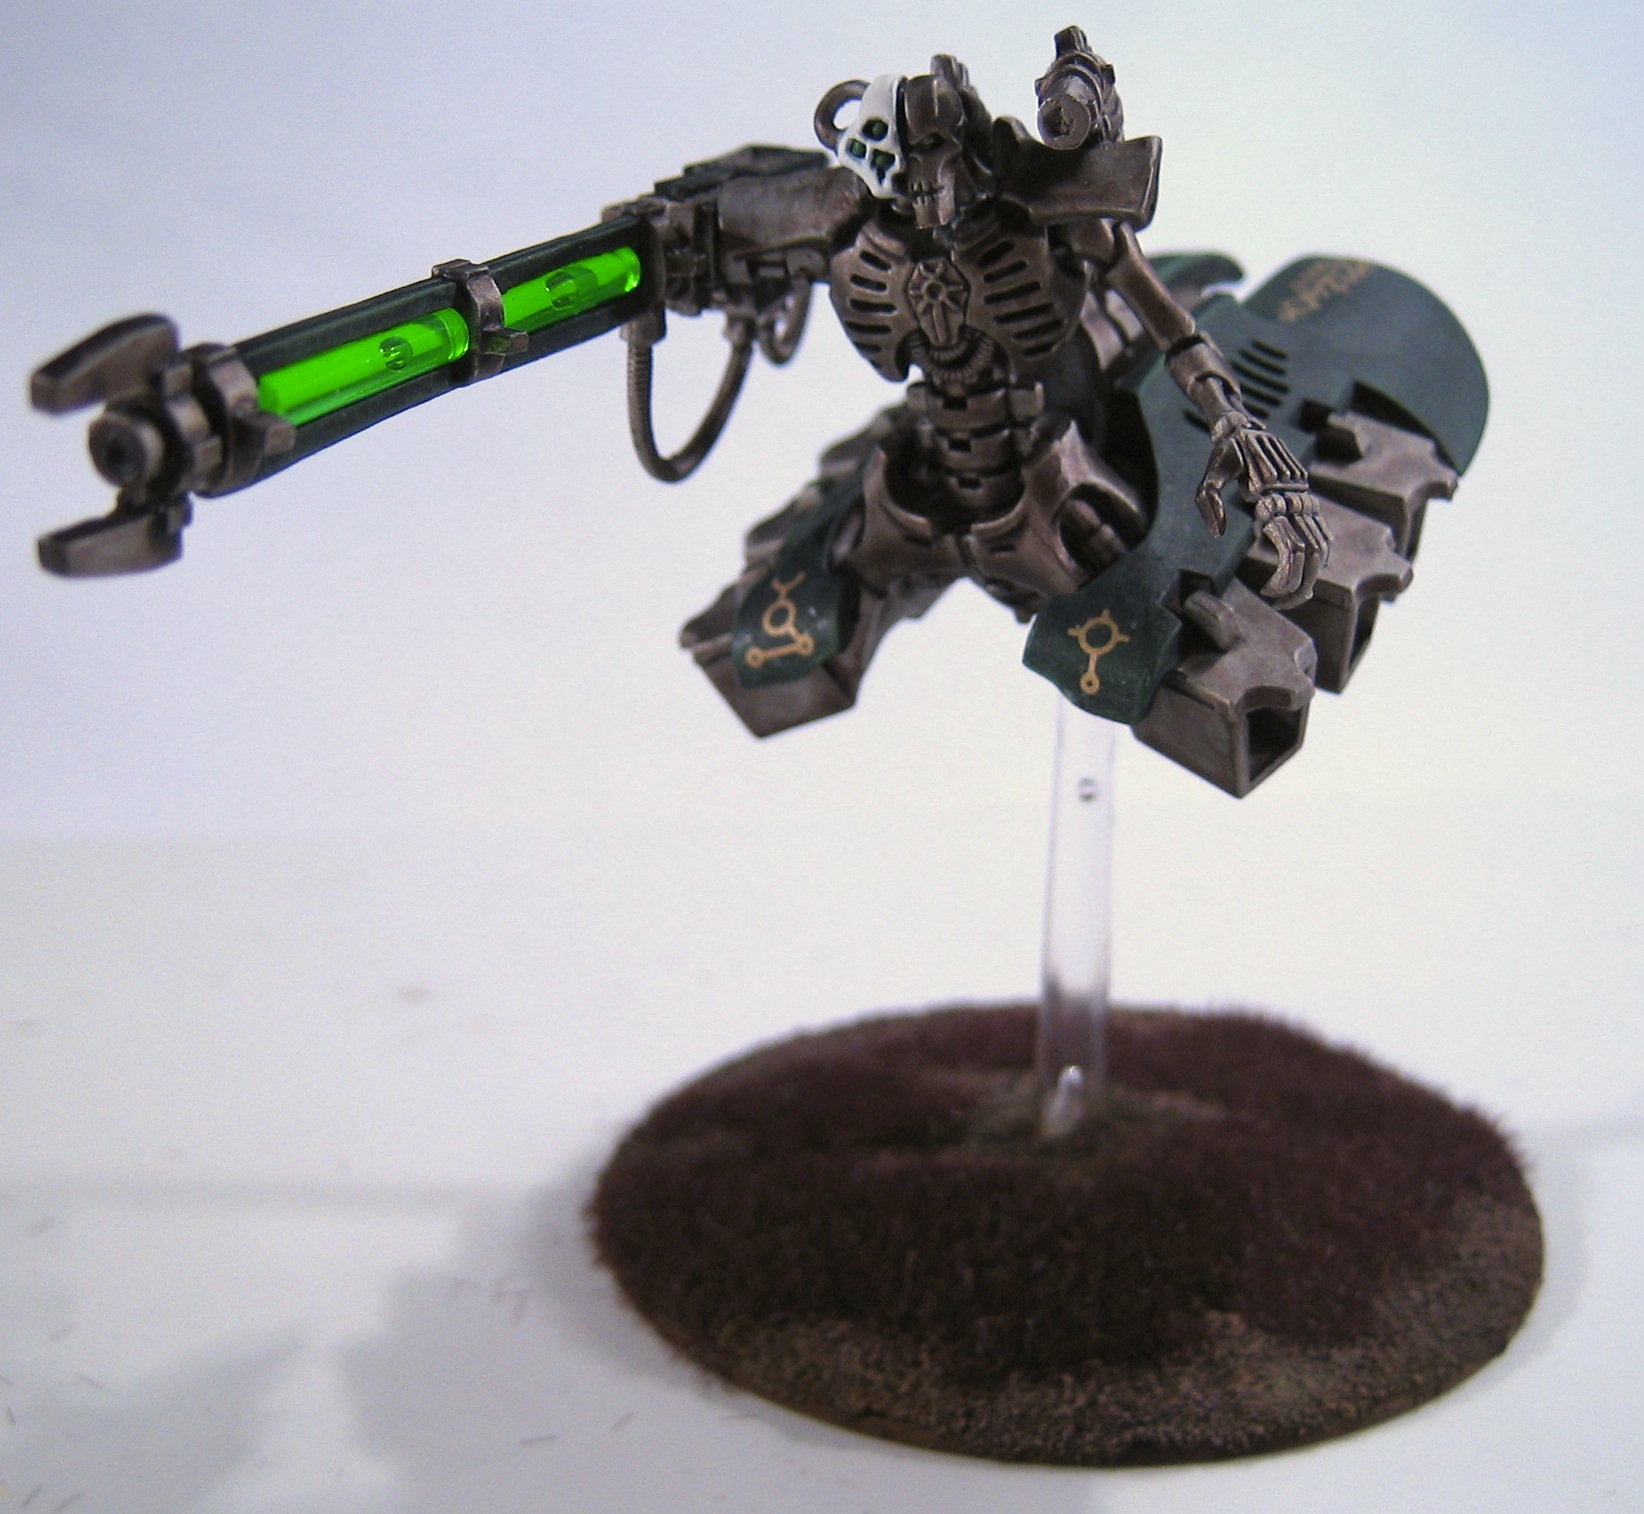
Necron Destroyers and Heavy Destroyers


Necron Warriors Finished

I've just finished the second phalanx of Necron Warriors for my 40K Army. This is the first set of models I've done with the new basing style, which you can see here:

The base texture is fine sand glued to the base with PVA. This is then painted with Snakebite Leather (as is the side of the base), and then washed with Devlan Mud. This is then drybrushed with Bronzed Flesh and Tallarn Flesh. Finally, I applied some of GW's Burnt Grass using a Noch applicator.
The first picture shows both phalanxes together, the first one is on the left. Here's a close-up:

I had to re-base these miniatures, using a razor saw to remove them from their old base. Here's the new phalanx:

These two phalanxes form the core of my Necron army, which is just about finished: all that's left is a couple of Heavy Destroyers that are nearly done, and then the centrepiece: my internally illuminated Monolith. More to follow!
Quick tip: future-proof your bases
I wanted to share a quick tip which might make your life easier in the future: I have decided to rebase all my 40K scale Necrons, as I wasn't happy with the appearance of the basing material I was using (a very coarse saw dust). I quickly realised that this would be a particularly tough challenge for my plastic Necron warriors.
I was a scale model maker before I was a war gamer, so for as long as I can remember, I've always used polystyrene cement (specifically Revell's professional liquid poly) for assembling plastic miniatures. As I understand it, a lot of miniature hobbyists use superglue instead, but using polystyrene cement welds the plastic parts together, meaning that you can shave and file the join down until it's invisible.
So naturally, when assembling my Necron warriors, I used liquid poly to glue them to their base. I've now realised that if I'd used superglue instead, it would have made the job of rebasing much easier.
So: always superglue plastic miniatures to their bases, even if their bases are also plastic! Here endeth the lesson.
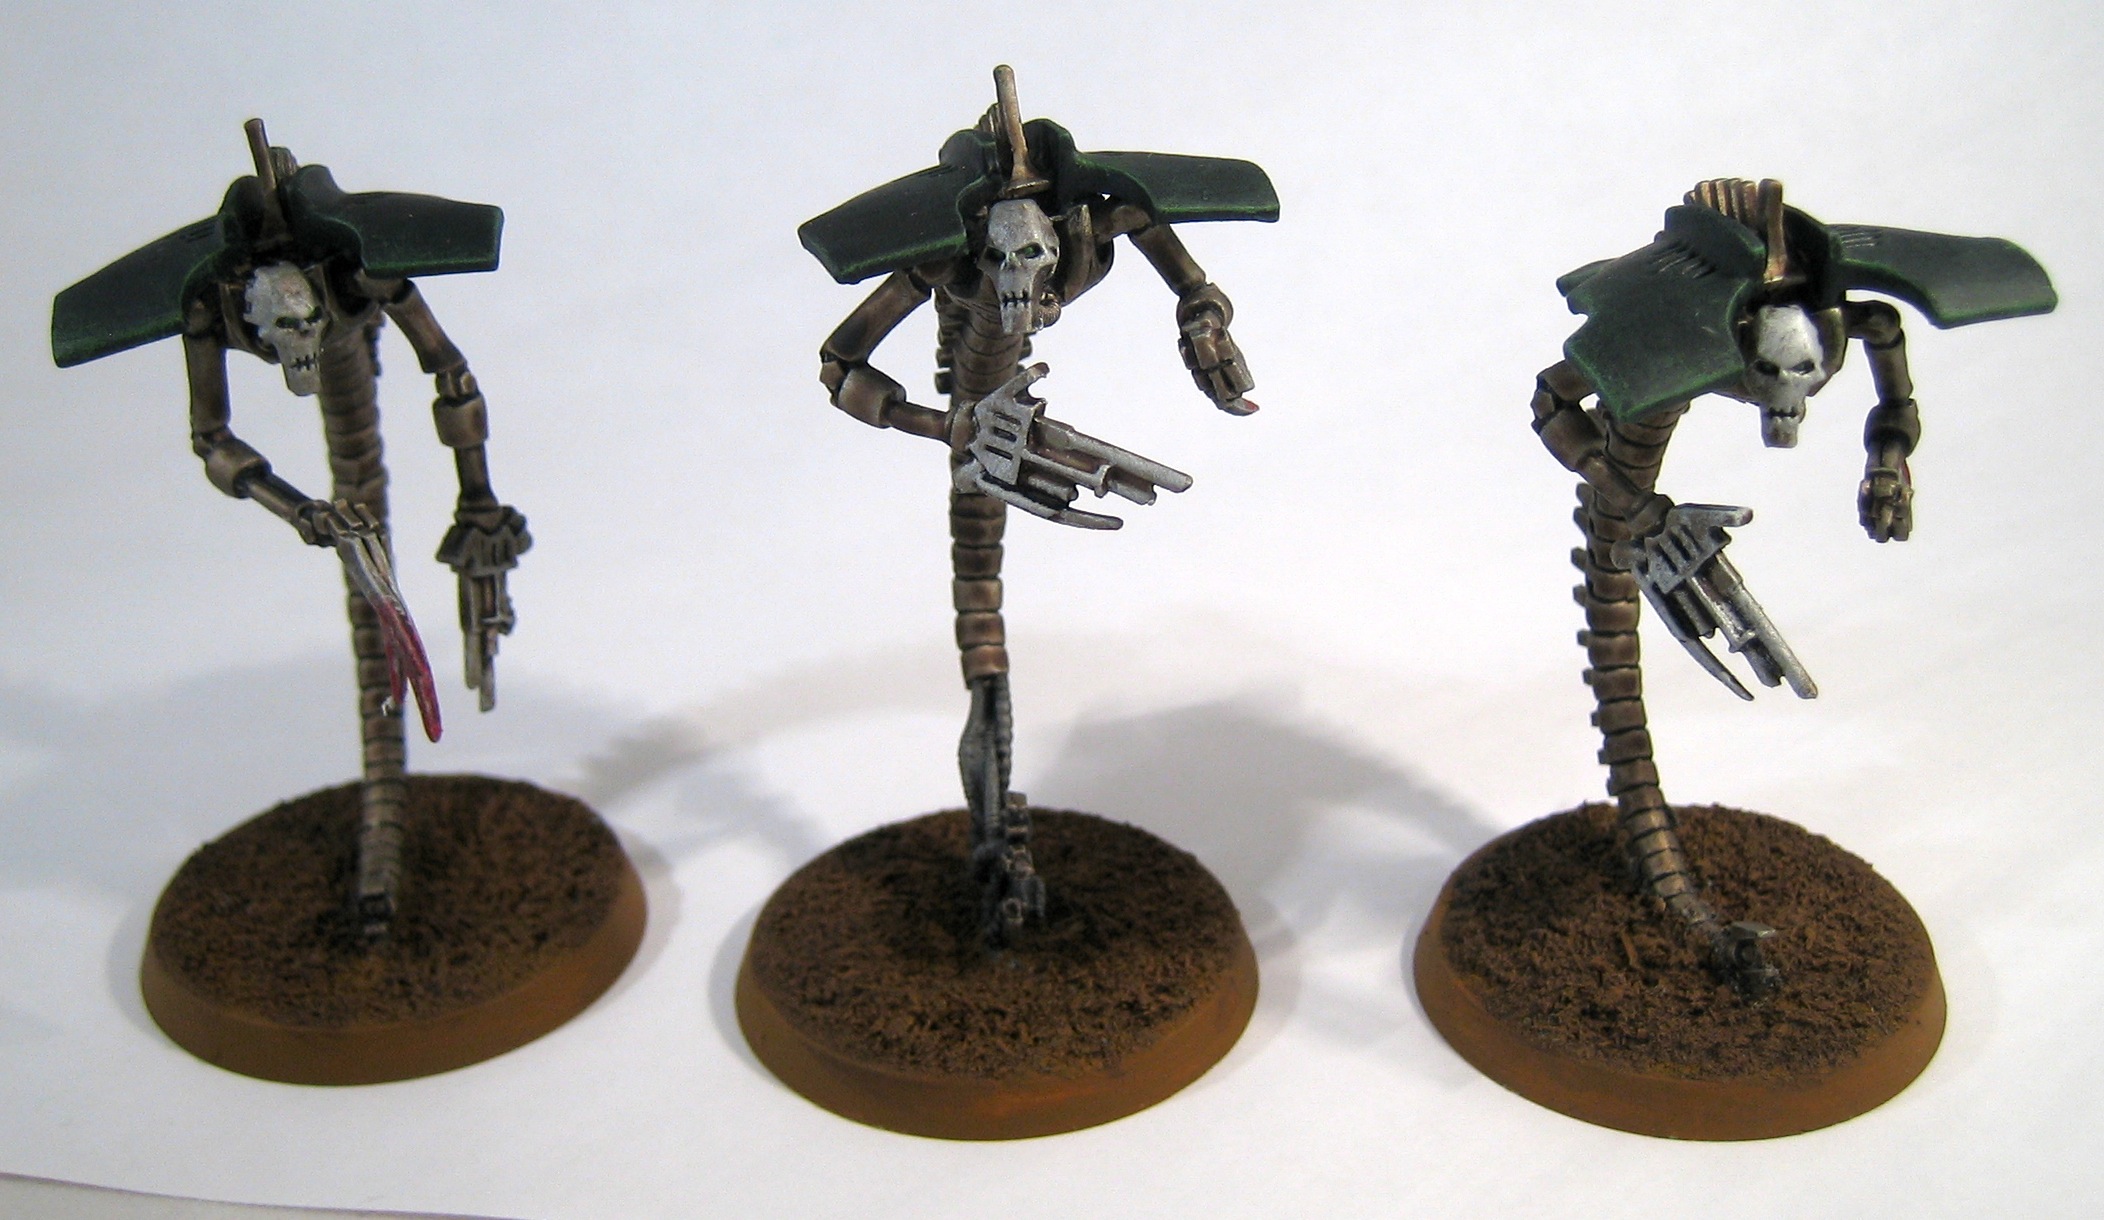
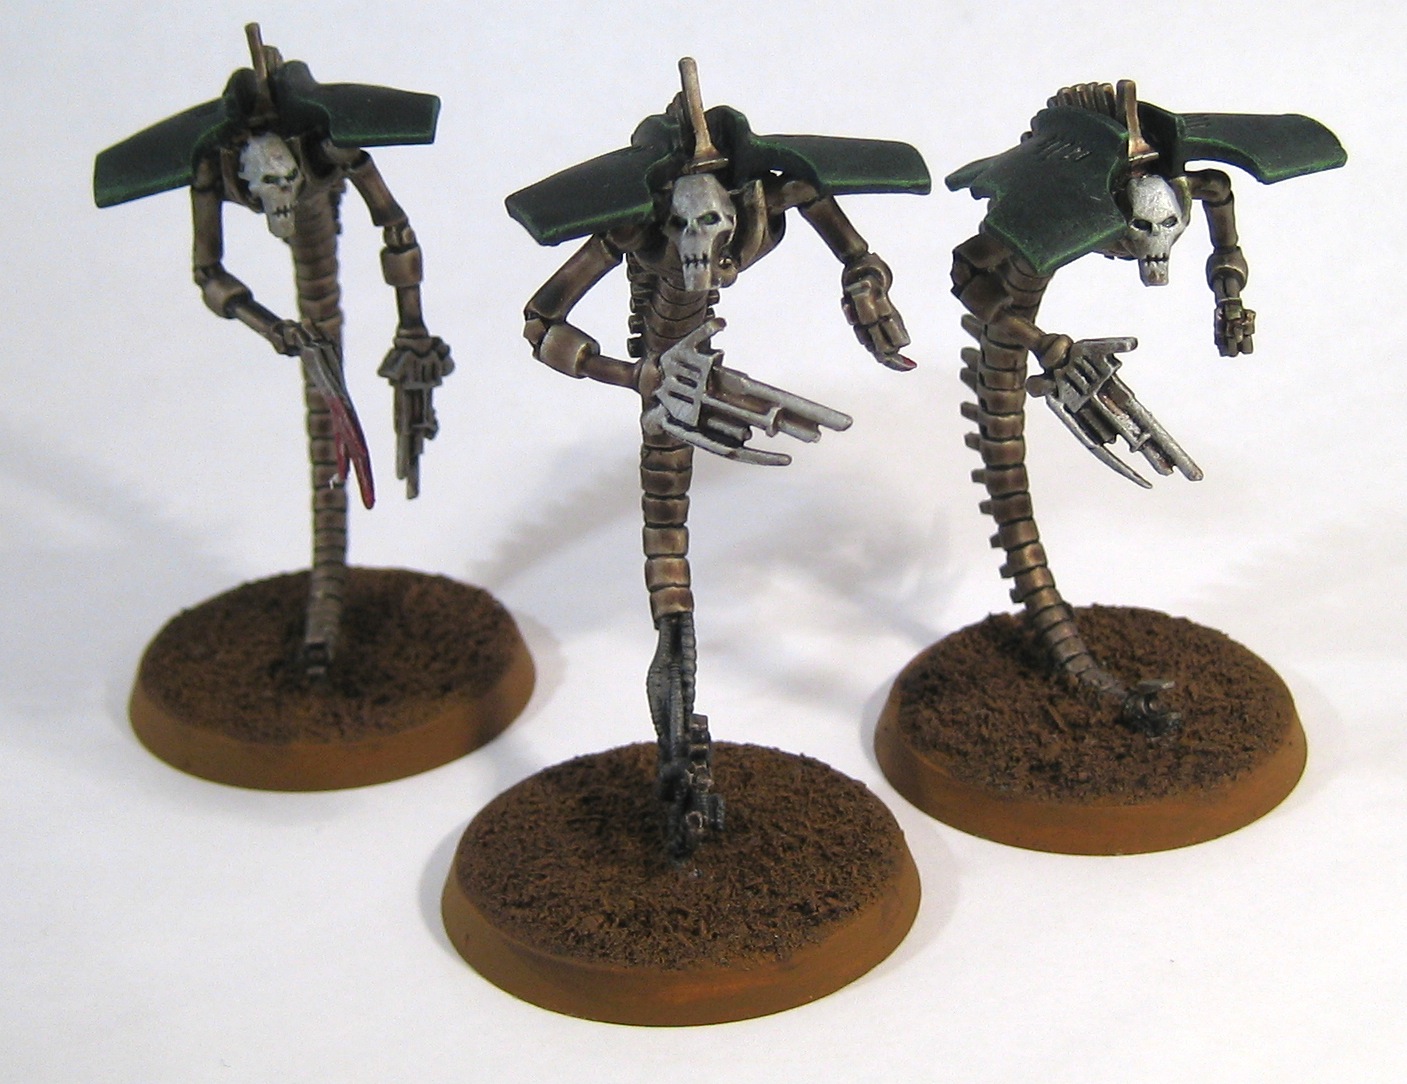
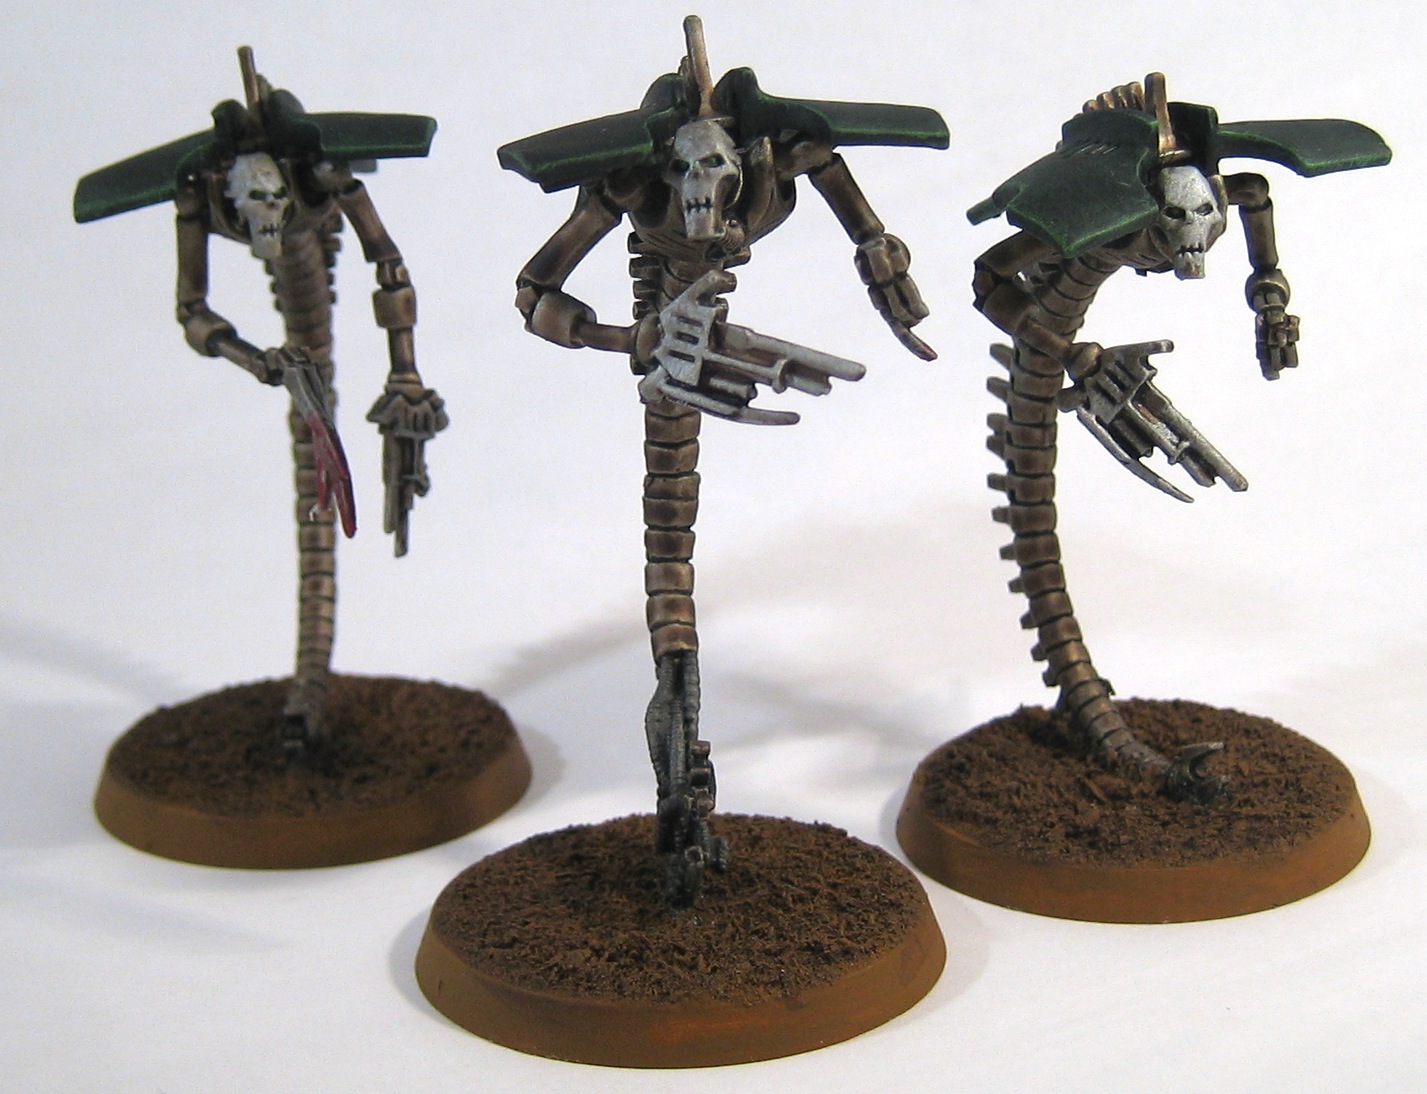
Necron Wraiths
I finished a squad of Necron Warriors and a Lord last year, but progress stalled due to problems with some Destroyers that were damaged by the Plasti-kote spray I was using. While painting my Epic army, I found that Army Painter chainmail spray gives a better finish, so now that the Epic army is pretty much finished, I'm ready to have another go at the 40K army. Here are some Wraiths I just finished:
Gale Force 9 "Battlefield In A Box" Green Crystals
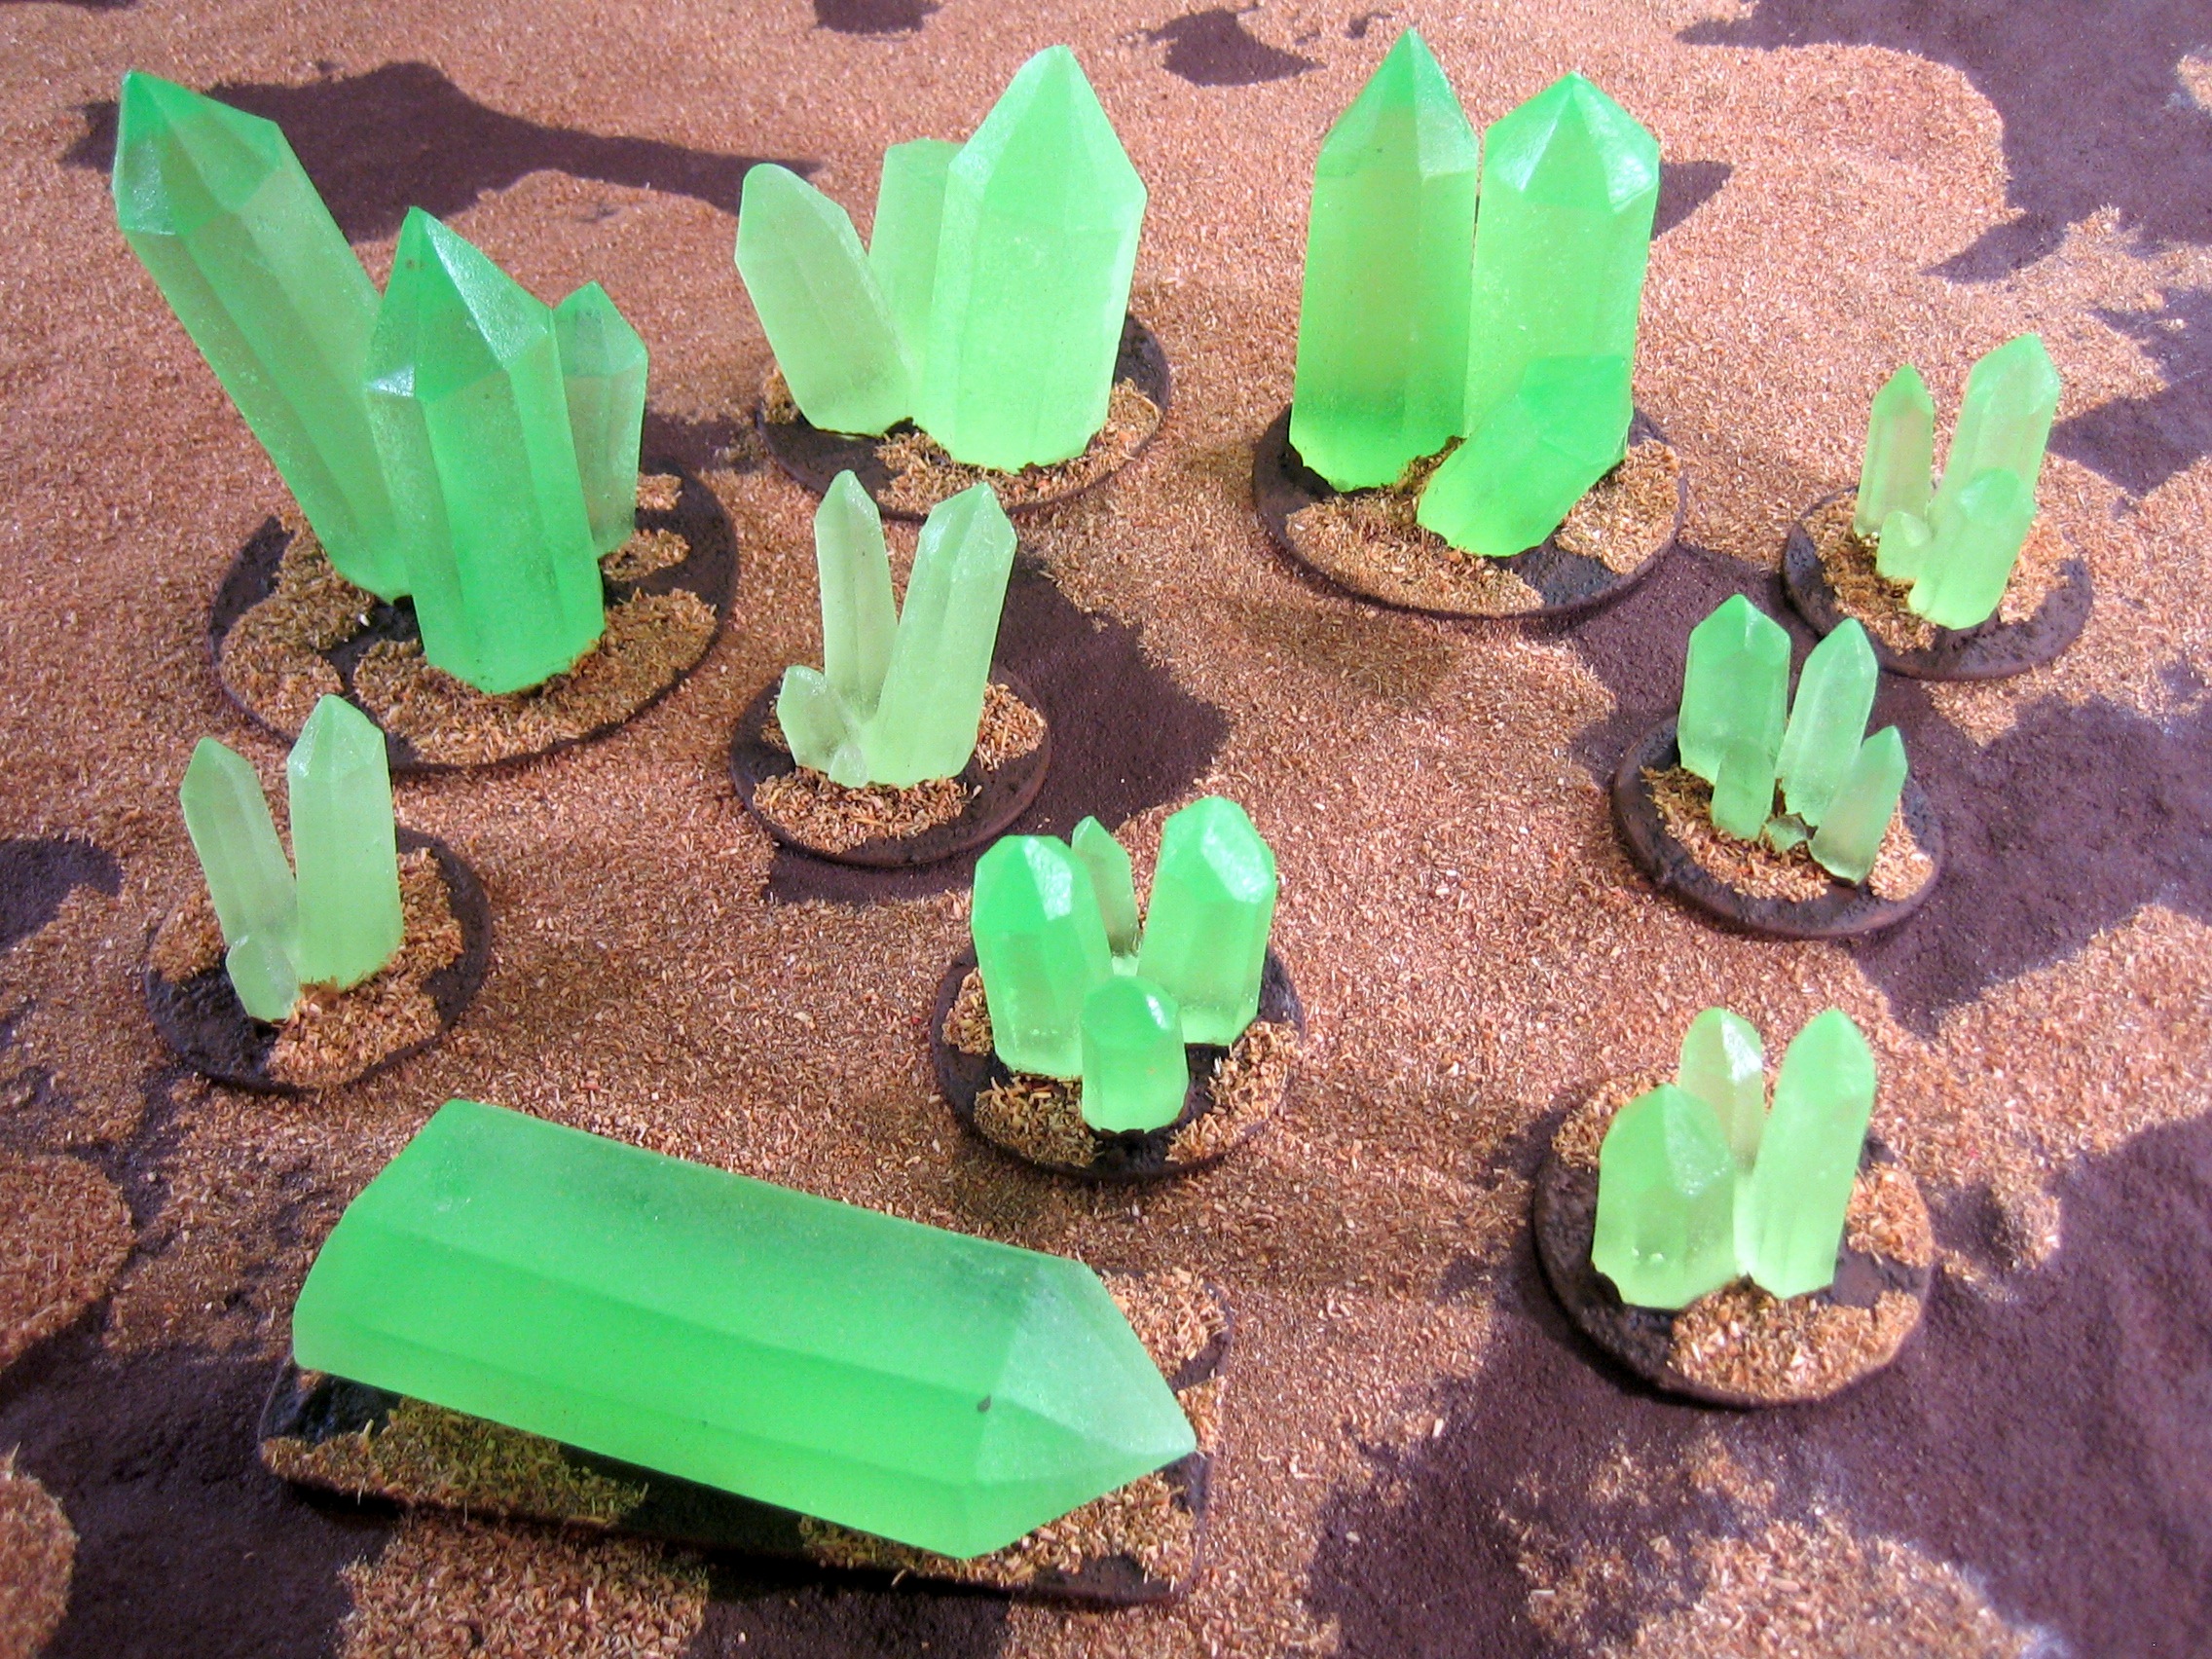
I found out about these terrain pieces from the Beasts of War, who have a series of excellent unboxing videos.
I realised that they are perfect for both 40k and Epic scale games. Unfortunately they're extremely hard to get hold of! It took me a while but I finally tracked down a box of them on the Marquee Models website (they're now out of stock on there as well).
I decided that I wanted to base them so that they'd be more stable on the gaming table. Taking my trusty compass cutter I made some based from 1mm plasticard and glued them on. All I needed to do then was apply some Basetex textured paint, some Devlan Mud, and then the same flock that I use to base my Epic necron models. Here's the result:
Drive Me Closer...
Blasts from the past!


Test Necron
I'm planning on building a Warhammer 40,000 Necron army. Earlier this year I bought a box of Necron warriors, but due to real life interrupting, have only just finished the first test model. Here it is:

Click to embiggen. I designed the painting process to optimise for speed: once prepped, the model was sprayed with silver spray paint bought from my local Hobbycraft store. The next stage was to give it a thorough wash with the Citadel Devlan Mud wash, however the finish of the silver spray meant that the wash didn't adhere, so it was given a coat of Purity Seal to give the wash something to stick to. A couple of washes were added, and the base painted with Snakebite Leather. Total time involved: about fifteen minutes!